
LIO-SAM跑KITTI数据集和自己数据集代码修改
一、编译并运行LIO-SAM
参考我的另一篇文章:
Ubuntu20.04下的编译与运行LIO-SAM【问题解决】
二、代码修改
因为liosam 要求输入的点云每个点都有ring 信息和相对时间time信息,目前的雷达驱动基本具备这些信息,但是早期的KITTI数据集不具备,所以代码要自己计算一下 ring和time。方法可以参考lego-loam中这部分内容,具体修改如下。
1、cloud_info.msg
添加
# 用于改写ring和time相关
float32 startOrientation
float32 endOrientation
float32 orientationDiff
2、imageProjection.cpp
ring部分:
1、把ring通道强制关闭
2、添加计算ring代码
if(false){
    rowIdn = laserCloudIn->points[i].ring;}else{
    verticalAngle =atan2(thisPoint.z,sqrt(thisPoint.x * thisPoint.x + thisPoint.y * thisPoint.y))*180/ M_PI;// 拿16、32、64线激光雷达为例if(N_SCAN ==16){
        rowIdn =int((verticalAngle +15)/2+0.5);if(rowIdn <0|| rowIdn >= N_SCAN){continue;}elseif(rowIdn % downsampleRate !=0){continue;}}elseif(N_SCAN ==32){
        rowIdn =int((verticalAngle +92.0/3.0)*3.0/4.0);if(rowIdn <0|| rowIdn >= N_SCAN){continue;}elseif(rowIdn % downsampleRate !=0){continue;}}elseif(N_SCAN ==64){if(verticalAngle >=-8.83){
            rowIdn =int((2- verticalAngle)*3.0+0.5);}else{
            rowIdn = N_SCAN /2+int((-8.83- verticalAngle)*2.0+0.5);}// use [0 50]  > 50 remove outlies if(verticalAngle >2|| verticalAngle <-24.33|| rowIdn >50|| rowIdn <0){continue;}elseif(rowIdn % downsampleRate !=0){continue;}}else{printf("wrong scan number\n");ROS_BREAK();}}
time部分:
1、把time通道强制关闭
2、计算time并赋值
bool halfPassed =false;int cloudNum = laserCloudIn->points.size();// start and end orientation of this cloud
cloudInfo.startOrientation =-atan2(laserCloudIn->points[0].y, laserCloudIn->points[0].x);
cloudInfo.endOrientation   =-atan2(laserCloudIn->points[laserCloudIn->points.size()-1].y, laserCloudIn->points[laserCloudIn->points.size()-1].x)+2* M_PI;if(cloudInfo.endOrientation - cloudInfo.startOrientation >3* M_PI){
    cloudInfo.endOrientation -=2* M_PI;}elseif(cloudInfo.endOrientation - cloudInfo.startOrientation < M_PI){
    cloudInfo.endOrientation +=2* M_PI;}
cloudInfo.orientationDiff = cloudInfo.endOrientation - cloudInfo.startOrientation;
PointType point;for(int i =0; i < cloudNum;++i){
    point.x = laserCloudIn->points[i].x;
    point.y = laserCloudIn->points[i].y;
    point.z = laserCloudIn->points[i].z;float ori =-atan2(point.y, point.x);if(!halfPassed){if(ori < cloudInfo.startOrientation - M_PI /2){
            ori +=2* M_PI;}elseif(ori > cloudInfo.startOrientation + M_PI *3/2){
            ori -=2* M_PI;}if(ori - cloudInfo.startOrientation > M_PI){
            halfPassed =true;}}else{
        ori +=2* M_PI;if(ori < cloudInfo.endOrientation - M_PI *3/2){
            ori +=2* M_PI;}elseif(ori > cloudInfo.endOrientation + M_PI /2){
            ori -=2* M_PI;}}float relTime =(ori - cloudInfo.startOrientation)/ cloudInfo.orientationDiff;// 激光雷达10Hz,周期0.1
    laserCloudIn->points[i].time =0.1* relTime;}
需要修改好的,可以查看我的。
三、KITTI数据集准备
关于KITTI数据集,已有公开的kitti2bag工具,使用方法:参见我的另一个博客在Ubuntu20.04系统上将KITTI原始数据集转化为.bag形式。但是输出的bag文件liosam是不能正常跑的,位姿Z型突变,仔细了解一下发现这个bag的imu频率跟雷达一样,也就是很低频,无法满足代码需求。liosam作者提供了一个2011_09_30_drive_0028.bag在google drive,但可能无法快速下载。
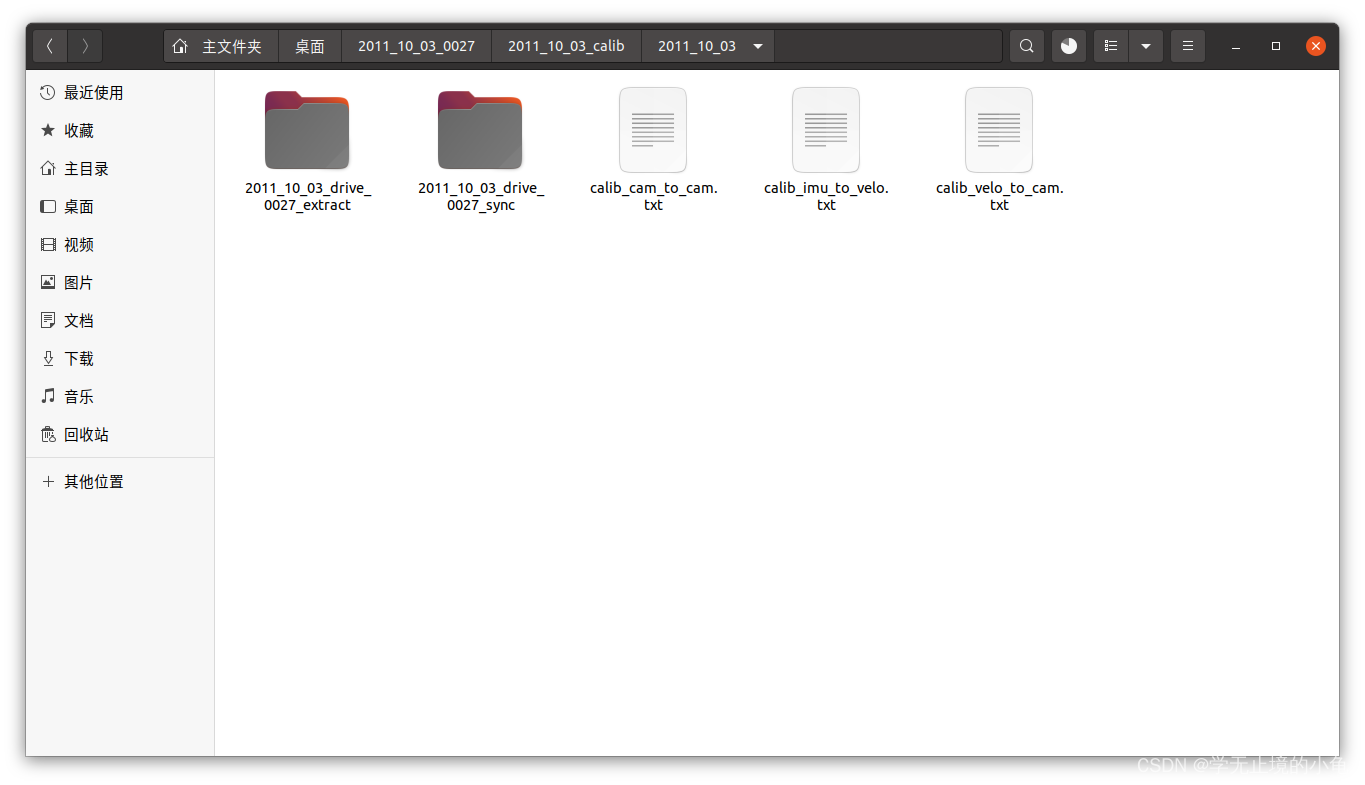
如果想自己制作bag,作者自己改了kitti2bag就在源码的文件夹下,你需要准备如下文件(文件位置需对应):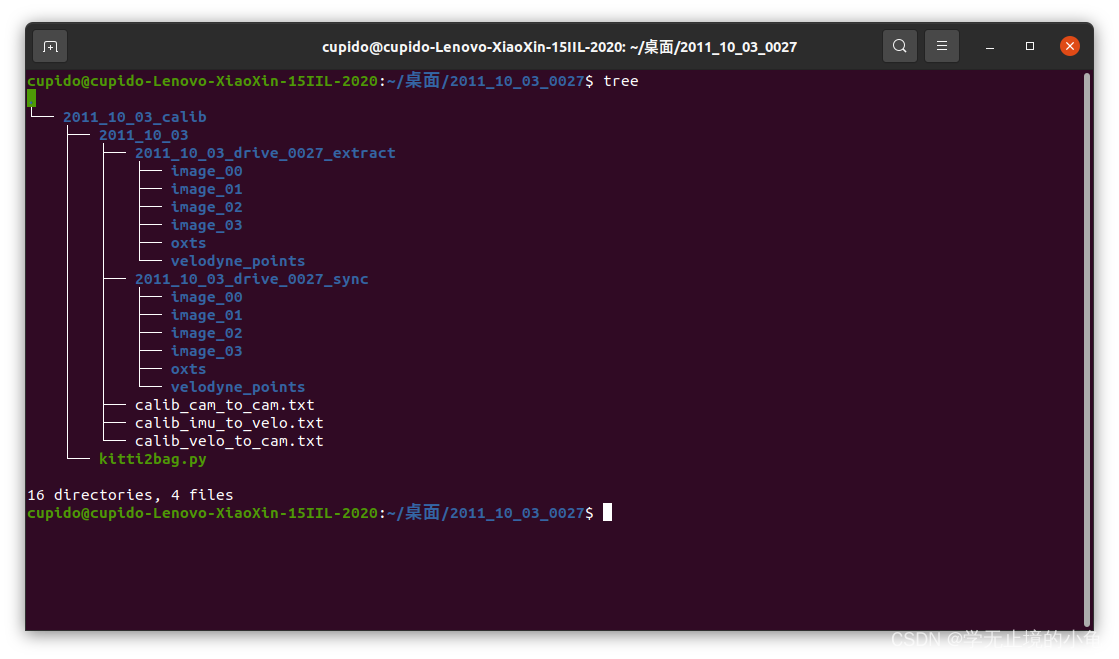
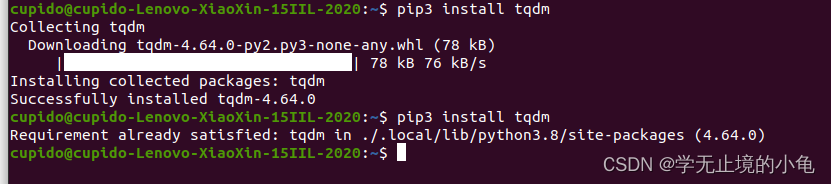
首先,在终端输入以下指令:
pip3 install tqdm
效果:
然后,在"2011_10_03"文件夹的上一级目录(即:此处的2011_10_03_calib文件下),打开终端,输入:
python3 kitti2bag.py -t 2011_10_03 -r 0027 raw_synced
注意自己的文件的文件名
效果如下: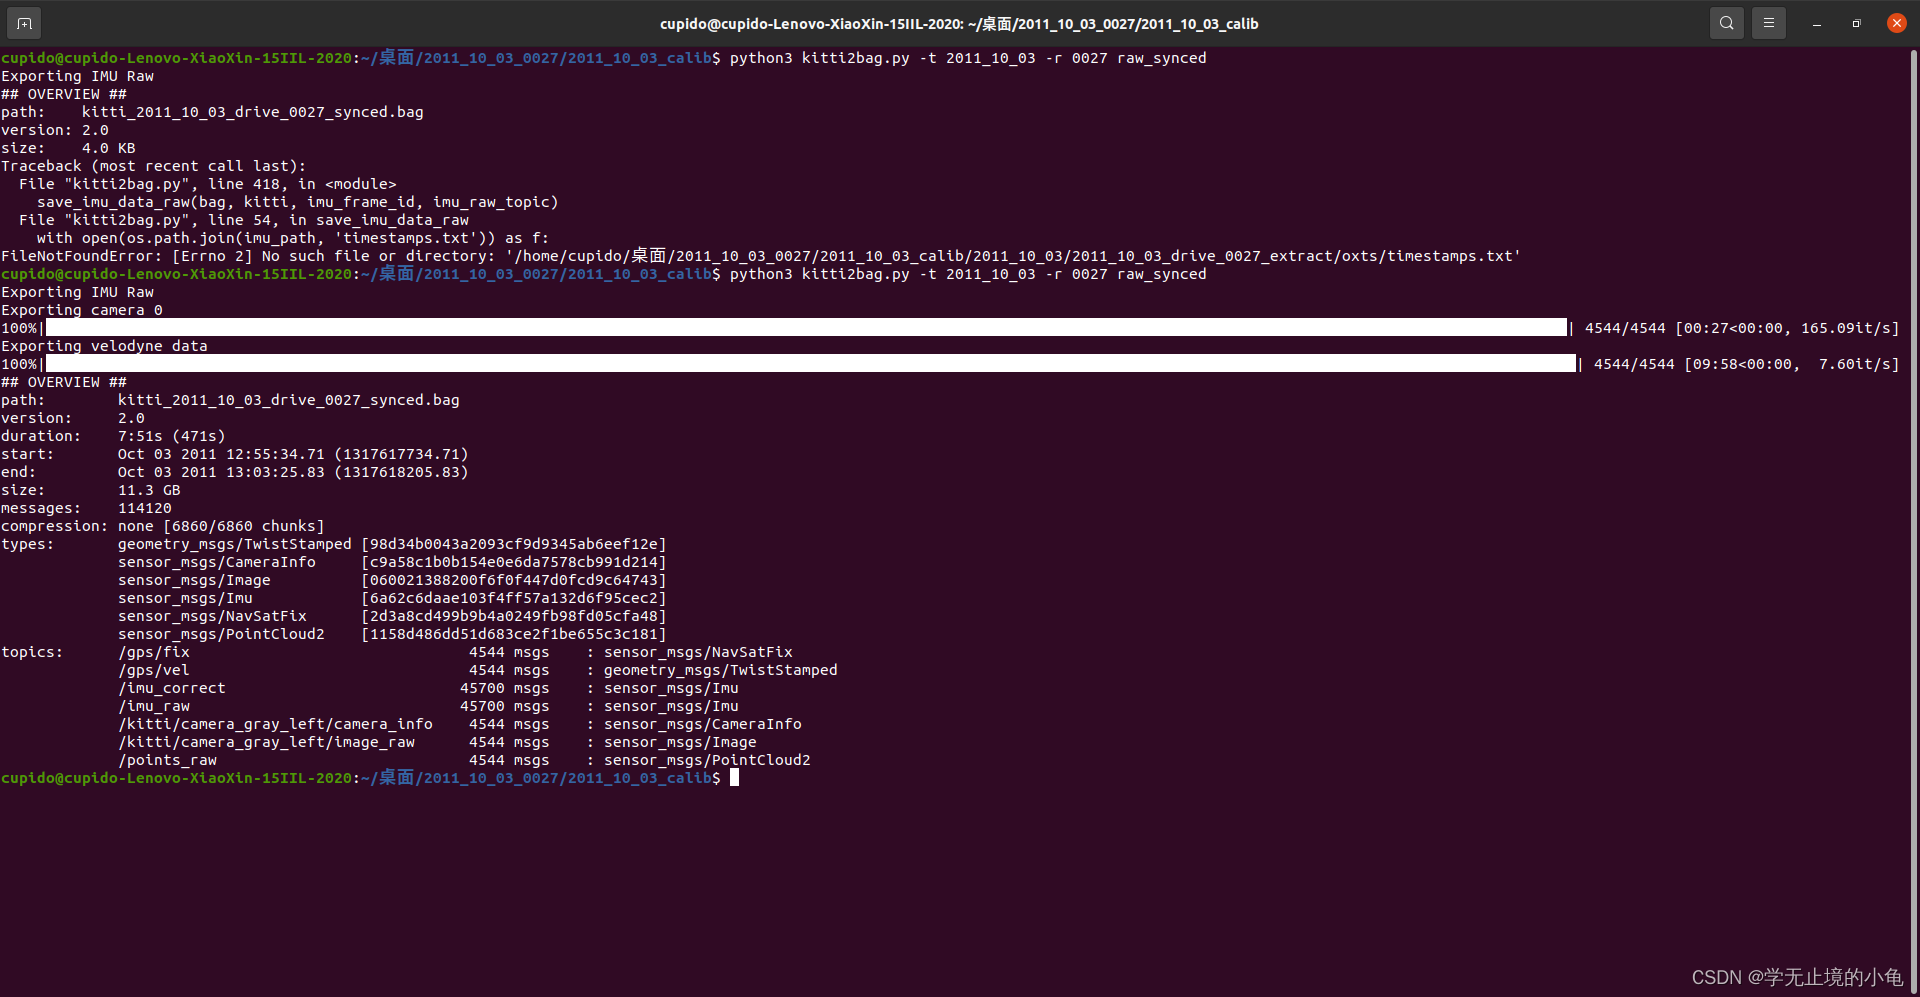
我第一次文件位置不对,导致无法生成bag文件
四、自己数据集准备
具体采集步骤在后续更新…
五、修改配置文件params.yaml
1、话题名修改
#Topics
  pointCloudTopic:"points_raw"               # Point cloud data
  imuTopic:"imu_raw"                         # IMU data
2、根据KITTI采集数据的实际传感器修改对应参数
#KITTI
  sensor: velodyne                            # lidar sensor type, either 'velodyne'or'ouster'
  N_SCAN:64                                  # number of lidar channel(i.e.,16,32,64,128)
  Horizon_SCAN:2083                          # lidar horizontal resolution(Velodyne:1800, Ouster:512,1024,2048)
  downsampleRate:1                           # default:1. Downsample your data if too many points. i.e.,16=64/4,16=16/1
  lidarMinRange:1.0                          # default:1.0, minimum lidar range to be used
  lidarMaxRange:1000.0                       # default:1000.0, maximum lidar range to be used
对照我的另一个博客:LeGO-LOAM跑KITTI数据集评估方法【代码改】
3、外参的修改
#kitti外参
  extrinsicTrans:[-8.086759e-01,3.195559e-01,-7.997231e-01]
  extrinsicRot:[9.999976e-01,7.553071e-04,-2.035826e-03,-7.854027e-04,9.998898e-01,-1.482298e-02,2.024406e-03,1.482454e-02,9.998881e-01]
  extrinsicRPY:[9.999976e-01,7.553071e-04,-2.035826e-03,-7.854027e-04,9.998898e-01,-1.482298e-02,2.024406e-03,1.482454e-02,9.998881e-01]
注意点:
1、配置文件(params.yaml)内的参数通过参数服务器传送进源程序,会覆盖掉头文件内(utility.h)的对应参数。
2、其中extrinsicRot表示imu -> lidar的坐标变换,用于旋转imu坐标系下的角速度和线加速度到lidar坐标系下,extrinsicRPY则用于旋转imu坐标系下的欧拉角(姿态信息)到lidar坐标下,由于lio-sam作者使用的imu的欧拉角旋转指向与lidar坐标系不一致,因此使用了两个不同的旋转矩阵,但是大部分的设备两个旋转应该是设置为相同的。
六、GPS信息的添加
待更新…
七、效果图
KITTI:
00的可能会飞,05以后的应该没问题
八、轨迹保存
找到输出位姿信息,通过以下代码,输出位姿信息(KITTI格式):
// 位姿输出到txt文档
std::ofstream pose1("/home/cupido/output-data/lio-sam/pose.txt", std::ios::app);
pose1.setf(std::ios::scientific, std::ios::floatfield);// pose1.precision(15);//save final trajectory in the left camera coordinate system.
Eigen::Matrix3d rotation_matrix;
rotation_matrix =Eigen::AngleAxisd(pose_in.yaw, Eigen::Vector3d::UnitZ())*Eigen::AngleAxisd(pose_in.pitch, Eigen::Vector3d::UnitY())*Eigen::AngleAxisd(pose_in.roll, Eigen::Vector3d::UnitX());
Eigen::Matrix<double,4,4> mylio_pose;
mylio_pose.topLeftCorner(3,3)= rotation_matrix;mylio_pose(0,3)= pose_in.x;mylio_pose(1,3)= pose_in.y;mylio_pose(2,3)= pose_in.z;
Eigen::Matrix<double,4,4> cali_paremeter;/*cali_paremeter << 4.276802385584e-04, -9.999672484946e-01, -8.084491683471e-03, -1.198459927713e-02,  //00-02
                   -7.210626507497e-03, 8.081198471645e-03, -9.999413164504e-01, -5.403984729748e-02,
                    9.999738645903e-01, 4.859485810390e-04, -7.206933692422e-03, -2.921968648686e-01,
                    0,                    0,                   0,                          1;*//*cali_paremeter << -1.857739385241e-03,-9.999659513510e-01, -8.039975204516e-03, -4.784029760483e-03,
                    -6.481465826011e-03, 8.051860151134e-03, -9.999466081774e-01, -7.337429464231e-02,
                     9.999773098287e-01, -1.805528627661e-03, -6.496203536139e-03, -3.339968064433e-01,     //04-10
                     0                    0,                   0,                          1;*/
cali_paremeter <<2.347736981471e-04,-9.999441545438e-01,-1.056347781105e-02,-2.796816941295e-03,1.044940741659e-02,1.056535364138e-02,-9.998895741176e-01,-7.510879138296e-02,9.999453885620e-01,1.243653783865e-04,1.045130299567e-02,-2.721327964059e-01,0,0,0,1;

Eigen::Matrix<double,4,4> myloam_pose_f;
myloam_pose_f = cali_paremeter * mylio_pose * cali_paremeter.inverse();

pose1 <<myloam_pose_f(0,0)<<" "<<myloam_pose_f(0,1)<<" "<<myloam_pose_f(0,2)<<" "<<myloam_pose_f(0,3)<<" "<<myloam_pose_f(1,0)<<" "<<myloam_pose_f(1,1)<<" "<<myloam_pose_f(1,2)<<" "<<myloam_pose_f(1,3)<<" "<<myloam_pose_f(2,0)<<" "<<myloam_pose_f(2,1)<<" "<<myloam_pose_f(2,2)<<" "<<myloam_pose_f(2,3)<< std::endl;

pose1.close();
欧拉角到四元素的转换除了用eigen,还可以参考大佬:四元数与欧拉角(Yaw、Pitch、Roll)的转换
补充tum格式的轨迹输出(拿ALOAM举例,LIO-SAM修改相关参数即可)
// 位姿输出到txt文档
std::ofstream pose1("/home/cupido/output-data/kitti/sequences/07/aloam.txt", std::ios::app);
pose1.setf(std::ios::scientific, std::ios::floatfield);
pose1.precision(15);//save final trajectory in the left camera coordinate system.
Eigen::Matrix3d rotation_matrix;
rotation_matrix = q_w_curr.toRotationMatrix();
Eigen::Matrix<double,4,4> myaloam_pose;
myaloam_pose.topLeftCorner(3,3)= rotation_matrix;myaloam_pose(0,3)= t_w_curr.x();myaloam_pose(1,3)= t_w_curr.y();myaloam_pose(2,3)= t_w_curr.z();
Eigen::Matrix<double,4,4> cali_paremeter;// cali_paremeter << 4.276802385584e-04, -9.999672484946e-01, -8.084491683471e-03, -1.198459927713e-02,  //00-02//                     -7.210626507497e-03, 8.081198471645e-03, -9.999413164504e-01, -5.403984729748e-02, //                   9.999738645903e-01, 4.859485810390e-04, -7.206933692422e-03, -2.921968648686e-01,//                   0,                    0,                   0,                          1;
cali_paremeter <<-1.857739385241e-03,-9.999659513510e-01,-8.039975204516e-03,-4.784029760483e-03,//04-10-6.481465826011e-03,8.051860151134e-03,-9.999466081774e-01,-7.337429464231e-02,9.999773098287e-01,-1.805528627661e-03,-6.496203536139e-03,-3.339968064433e-01,0,0,0,1;/*cali_paremeter << 2.347736981471e-04, -9.999441545438e-01, -1.056347781105e-02, -2.796816941295e-03,    // 03
                    1.044940741659e-02, 1.056535364138e-02, -9.998895741176e-01, -7.510879138296e-02,
                    9.999453885620e-01, 1.243653783865e-04, 1.045130299567e-02, -2.721327964059e-01,
                    0,                     0,                   0,                          1;*/

Eigen::Matrix<double,4,4> myloam_pose_f;
myloam_pose_f = cali_paremeter * myaloam_pose * cali_paremeter.inverse();

Eigen::Matrix3d temp;
temp = myloam_pose_f.topLeftCorner(3,3);
Eigen::Quaterniond quaternion(temp);// 获取当前更新的时间 这样与ground turth对比才更准确staticdouble timeStart = odometryBuf.front()-> header.stamp.toSec();// 相当于是第一帧的时间auto T1 = ros::Time().fromSec(timeStart);
pose1 << odomAftMapped.header.stamp - T1  <<" "<<myloam_pose_f(0,3)<<" "<<myloam_pose_f(1,3)<<" "<<myloam_pose_f(2,3)<<" "<< quaternion.x()<<" "<< quaternion.y()<<" "<< quaternion.z()<<" "<< quaternion.w()<< std::endl;

pose1.close();
注意点:
1、输出路径注意修改
2、评估轨迹精度的时候,输出轨迹若发现未和真值完全对齐(这里指的是,不考虑自己算法精度,单纯两轨迹对齐),可以在终端输入以下指令:
//(注意是-a,不是--align_origin)
evo_ape tum groundtruth.txt xxx.txt -a -p
九、点云地图保存(PCD)
追根溯源
:
1、注意到save_map.srv文件
float32 resolution
string destination
---bool success
2、进入到mapOptmization.cpp
相关代码:
// 订阅一个保存地图功能的服务
srvSaveMap  = nh.advertiseService("lio_sam/save_map",&mapOptimization::saveMapService,this);/**
 * 保存全局关键帧特征点集合
 */boolsaveMapService(lio_sam::save_mapRequest& req, lio_sam::save_mapResponse& res){
  string saveMapDirectory;

  cout <<"****************************************************"<< endl;
  cout <<"Saving map to pcd files ..."<< endl;// 如果是空,说明是程序结束后的自动保存,否则是中途调用ros的service发布的保存指令if(req.destination.empty()) saveMapDirectory = std::getenv("HOME")+ savePCDDirectory;else saveMapDirectory = std::getenv("HOME")+ req.destination;
  cout <<"Save destination: "<< saveMapDirectory << endl;// create directory and remove old files;// 删掉之前有可能保存过的地图int unused =system((std::string("exec rm -r ")+ saveMapDirectory).c_str());
  unused =system((std::string("mkdir -p ")+ saveMapDirectory).c_str());// save key frame transformations// 首先保存历史关键帧轨迹
  pcl::io::savePCDFileBinary(saveMapDirectory +"/trajectory.pcd",*cloudKeyPoses3D);
  pcl::io::savePCDFileBinary(saveMapDirectory +"/transformations.pcd",*cloudKeyPoses6D);// extract global point cloud map(提取历史关键帧角点、平面点集合)
  pcl::PointCloud<PointType>::Ptr globalCornerCloud(new pcl::PointCloud<PointType>());
  pcl::PointCloud<PointType>::Ptr globalCornerCloudDS(new pcl::PointCloud<PointType>());
  pcl::PointCloud<PointType>::Ptr globalSurfCloud(new pcl::PointCloud<PointType>());
  pcl::PointCloud<PointType>::Ptr globalSurfCloudDS(new pcl::PointCloud<PointType>());
  pcl::PointCloud<PointType>::Ptr globalMapCloud(new pcl::PointCloud<PointType>());// 遍历所有关键帧,将点云全部转移到世界坐标系下去for(int i =0; i <(int)cloudKeyPoses3D->size(); i++){*globalCornerCloud +=*transformPointCloud(cornerCloudKeyFrames[i],&cloudKeyPoses6D->points[i]);*globalSurfCloud   +=*transformPointCloud(surfCloudKeyFrames[i],&cloudKeyPoses6D->points[i]);// 类似进度条的功能
      cout <<"\r"<< std::flush <<"Processing feature cloud "<< i <<" of "<< cloudKeyPoses6D->size()<<" ...";}// 如果没有指定分辨率,就是直接保存if(req.resolution !=0){
    cout <<"\n\nSave resolution: "<< req.resolution << endl;// down-sample and save corner cloud// 使用指定分辨率降采样,分别保存角点地图和面点地图
    downSizeFilterCorner.setInputCloud(globalCornerCloud);
    downSizeFilterCorner.setLeafSize(req.resolution, req.resolution, req.resolution);
    downSizeFilterCorner.filter(*globalCornerCloudDS);
    pcl::io::savePCDFileBinary(saveMapDirectory +"/CornerMap.pcd",*globalCornerCloudDS);// down-sample and save surf cloud
    downSizeFilterSurf.setInputCloud(globalSurfCloud);
    downSizeFilterSurf.setLeafSize(req.resolution, req.resolution, req.resolution);
    downSizeFilterSurf.filter(*globalSurfCloudDS);
    pcl::io::savePCDFileBinary(saveMapDirectory +"/SurfMap.pcd",*globalSurfCloudDS);}else{// save corner cloud
    pcl::io::savePCDFileBinary(saveMapDirectory +"/CornerMap.pcd",*globalCornerCloud);// save surf cloud
    pcl::io::savePCDFileBinary(saveMapDirectory +"/SurfMap.pcd",*globalSurfCloud);}// save global point cloud map(保存到一起,全局关键帧特征点集合)*globalMapCloud +=*globalCornerCloud;*globalMapCloud +=*globalSurfCloud;// 保存全局地图int ret = pcl::io::savePCDFileBinary(saveMapDirectory +"/GlobalMap.pcd",*globalMapCloud);
  res.success = ret ==0;

  downSizeFilterCorner.setLeafSize(mappingCornerLeafSize, mappingCornerLeafSize, mappingCornerLeafSize);
  downSizeFilterSurf.setLeafSize(mappingSurfLeafSize, mappingSurfLeafSize, mappingSurfLeafSize);

  cout <<"****************************************************"<< endl;
  cout <<"Saving map to pcd files completed\n"<< endl;returntrue;}
std::thread visualizeMapThread(&mapOptimization::visualizeGlobalMapThread,&MO);// 可视化的线程(负责rviz相关可视化接口的发布)

visualizeMapThread.join();/**
     * 展示线程
     * 1、发布局部关键帧map的特征点云
     * 2、保存全局关键帧特征点集合
    */// 全局可视化线程voidvisualizeGlobalMapThread(){// 更新频率设置为0.2hz
        ros::Rate rate(0.2);while(ros::ok()){
            rate.sleep();// 发布局部关键帧map的特征点云publishGlobalMap();}// 当ros被杀死之后,执行保存地图功能if(savePCD ==false)return;

        lio_sam::save_mapRequest  req;
        lio_sam::save_mapResponse res;// 保存全局关键帧特征点集合if(!saveMapService(req, res)){
            cout <<"Fail to save map"<< endl;}}
这里注意到 if (savePCD == false)判断条件,转至配置文件params.yaml
3、最后在配置文件params.yaml修改参数
打开开关:
savePCD:true # https://github.com/TixiaoShan/LIO-SAM/issues/3
更改路径:
savePCDDirectory:"/output-data/lio-sam/PCD/" # in your home folder, starts and ends with "/". Warning: the code deletes "LOAM" folder then recreates it. See "mapOptimization"for implementation
对应路径和自身电脑的全局路径的关系如下: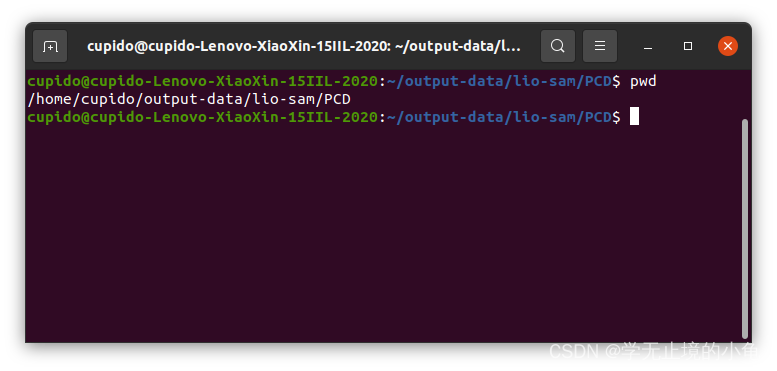
4、PCD效果展示
1、指令:
pcl_viewer xxx.pcd
2、效果图:
此节参考大佬:
1、lio-sam中点云地图保存
2、复现lio_sam激光slam算法创建点云地图
3、PCL保存LIO-SAM地图时报错[pcl::PCDWriter::writeBinary]
全文参考文献
1、ubuntu18运行编译LIO-SAM并用官网和自己的数据建图(修改汇总)
2、LIO-SAM运行自己数据包遇到的问题解决–SLAM不学无数术小问题
3、使用开源激光SLAM方案LIO-SAM运行KITTI数据集,如有用,请评论雷锋
4、LIO-SAM:配置环境、安装测试、适配⾃⼰采集数据集
5、SLAM学习笔记(十九)开源3D激光SLAM总结大全——Cartographer3D,LOAM,Lego-LOAM,LIO-SAM,LVI-SAM,Livox-LOAM的原理解析及区别
6、多传感器融合定位 第六章 惯性导航结算及误差模型
版权归原作者 学无止境的小龟 所有, 如有侵权,请联系我们删除。