
文章目录
1、简介
TTS(Text To Speech) 译为从文本到语音,TTS是人工智能AI的一个模组,是人机对话的一部分,即让机器能够说话。
TTS是语音合成技术应用的一种,首先采集语音波形,然后进行优化处理,最后存储在数据库中,合成语音是提取波形转换成自然语音输出。
2、Windows语音
2.1 简介
Windows 语音识别允许你单独通过语音控制电脑,而无需键盘或鼠标。 本文列出了可用于语音识别的命令。
2.2 安装
speech模块是一个封装层模块,用于调取Windows本地的语音合成服务。因此请确保你使用的OS是Windows并且有python调取Windows的API,pywin32。
pip install speech
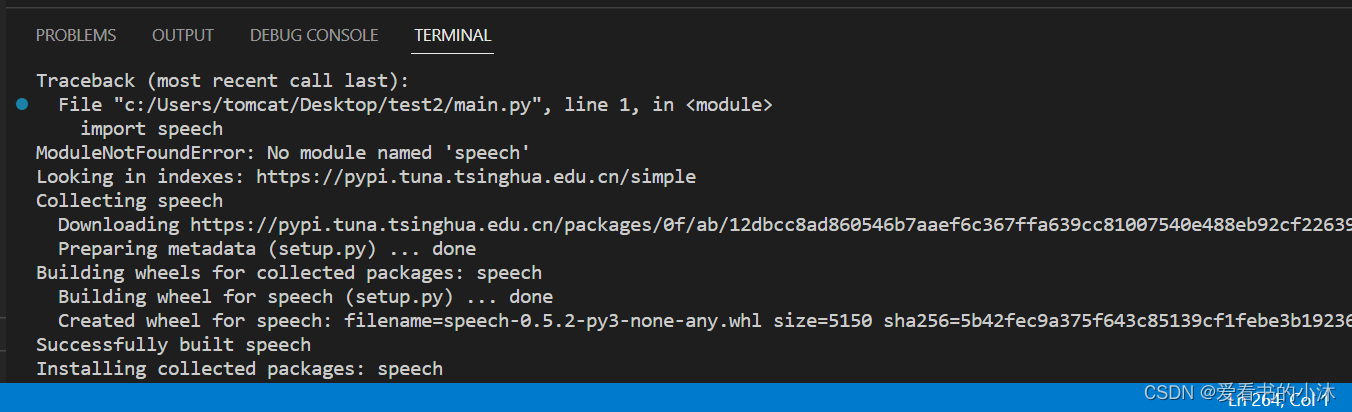
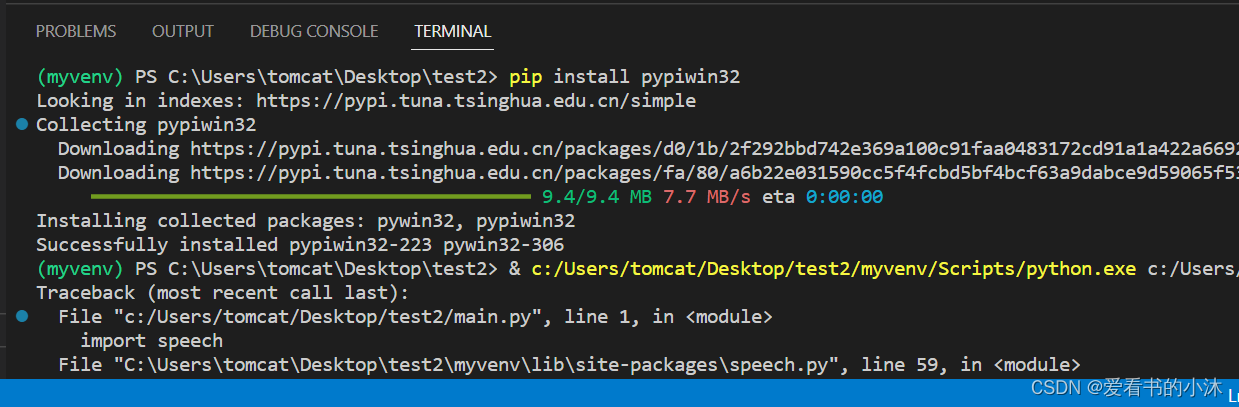
speech.py文件进行修改:print(prompt)、import _thread
pip install pypiwin32
2.3 代码
import speech

#自动体系
speech.say("要开始啦")#输入语音whileTrue:print(u"开始说话")
    say = speech.input()# 接收语音# speech.say("你说了" + say)  # 说话
    speech.say(say)# 说话
import speech

whileTrue:
    say = speech.input()# 接收语音
    speech.say("you said:"+say)#说话if say =="你好":
        speech.say("How are you?")elif say =="天气":
        speech.say("今天天气晴!")
3、pyttsx3
3.1 简介
https://pypi.org/project/pyttsx3/
适用于 Python 2 和 3 的文本转语音 (TTS) 库。无需互联网连接或延迟即可工作。支持多种TTS引擎,包括Sapi5、nsss、espeak等。
pyttsx3 是 Python 中的文本到语音转换库。与其他库不同,它可以离线工作,并且与 Python 2 和 3 兼容。

pyttsx3库 : 是Python中的文本到语音转换库, 它可以脱机工作
优点 : 可以脱机工作, 支持将语音直接朗读, 可调节音量和速度
缺点 : 初始只有英语(女)和中文(女)的语音包, 其他语言的语音包需要另外下载
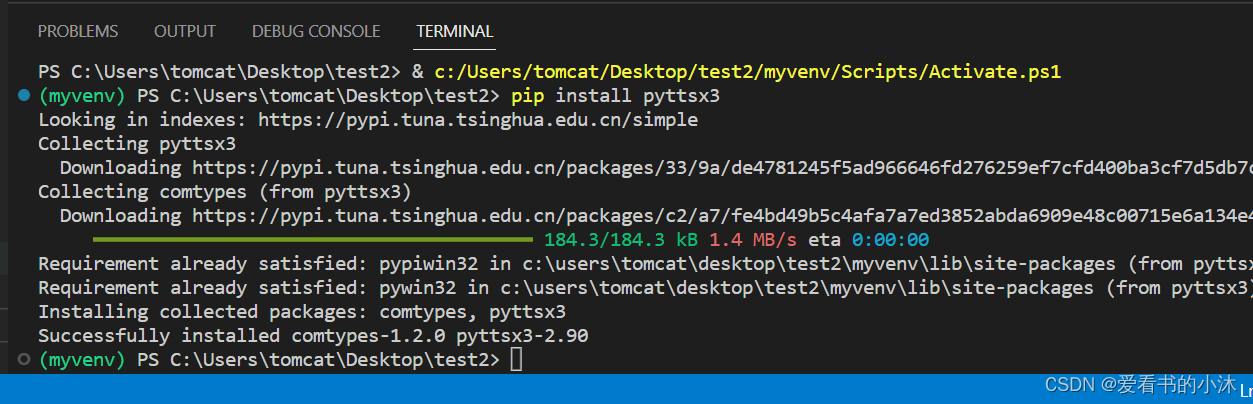
3.2 安装
pip install pyttsx3
3.3 代码
#coding=utf-8import pyttsx3
pyttsx3.speak("Hello World!")
pyttsx3.speak("持续推动我国经济实现质的有效提升和量的合理增长")
import pyttsx3
engine = pyttsx3.init()
engine.say("I will speak this text")
engine.runAndWait()
import pyttsx3
engine = pyttsx3.init()# object creation""" RATE"""
rate = engine.getProperty('rate')# getting details of current speaking rateprint(rate)#printing current voice rate
engine.setProperty('rate',125)# setting up new voice rate"""VOLUME"""
volume = engine.getProperty('volume')#getting to know current volume level (min=0 and max=1)print(volume)#printing current volume level
engine.setProperty('volume',1.0)# setting up volume level  between 0 and 1"""VOICE"""
voices = engine.getProperty('voices')#getting details of current voice#engine.setProperty('voice', voices[0].id)  #changing index, changes voices. o for male
engine.setProperty('voice', voices[1].id)#changing index, changes voices. 1 for female

engine.say("Hello World!")
engine.say('My current speaking rate is '+str(rate))
engine.runAndWait()
engine.stop()"""Saving Voice to a file"""# On linux make sure that 'espeak' and 'ffmpeg' are installed
engine.save_to_file('Hello World','test.mp3')
engine.runAndWait()
4、ggts
4.1 简介
https://pypi.org/project/gTTS/
gTTS(Google Text-to-Speech),一个 Python 库和 CLI 工具,用于与 Google 翻译文本转语音 API 交互。
gTTS(Google Text-to-Speech),一个 Python 库和 CLI 工具,用于与 Google Translate 的文本转语音 API 交互。 将语音数据写入文件、类似文件的对象 (bytestring) 以进行进一步的音频操作。
4.2 安装
pip install gTTS
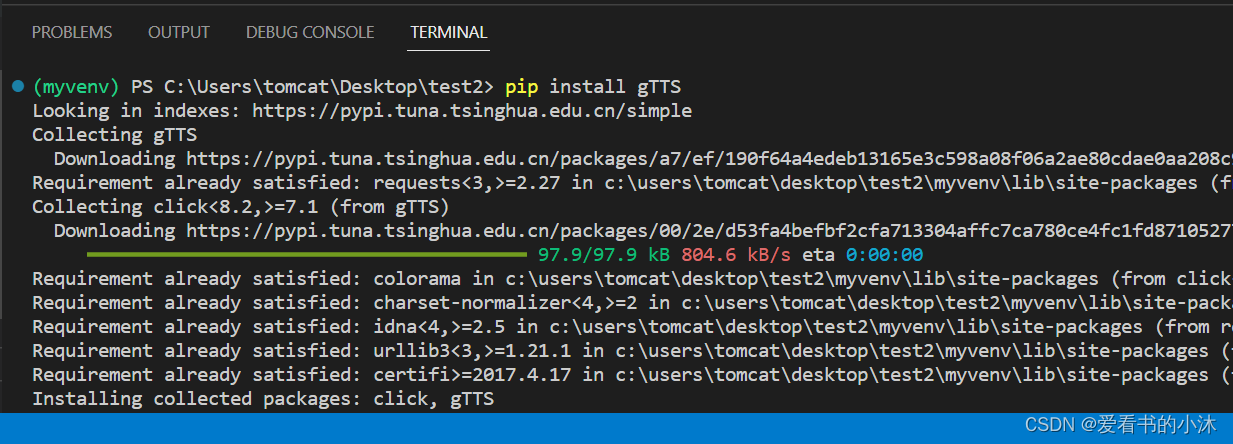
4.3 代码
gtts-cli 'hello'--output hello.mp3
或
from gtts import gTTS
tts = gTTS('hello')
tts.save('hello.mp3')
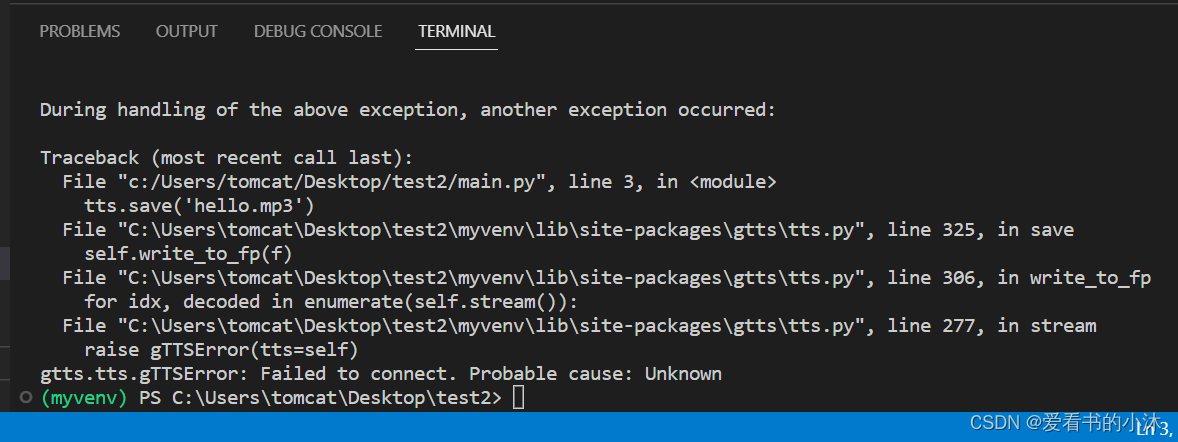
执行失败了。
5、SAPI
SAPI是微软Speech API , 是微软公司推出的语音接口,而从WINXP开始,系统上就已经有语音识别的功能了,可是用武之地相当之少,他并没有给出一些人性化的自定义方案,仅有的语音操控命令显得相当鸡胁。
操作window dll的库,它可以实现很多功能,十分强大。
import win32com.client
speaker = win32com.client.Dispatch("SAPI.SpVoice")
speaker.Speak("hello")
6、SpeechLib
comtypes依赖pyttsx3包。( comtypes Required-by: pyttsx3 )
安装:
pip install comtypes
代码:
from comtypes.client import CreateObject

engine = CreateObject('SAPI.SpVoice')
stream = CreateObject('SAPI.SpFileStream')from comtypes.gen import SpeechLib  # 导这个包必须放在 上面3行代码 后面,否则运行时会报错。

infile ='demo.txt'
outfile ='demo_audio.wav'

stream.Open(outfile, SpeechLib.SSFMCreateForWrite)
engine.AudioOutputStream = stream
# 读取文本内容
f =open(infile,'r', encoding='utf-8')
theText = f.read()
f.close()
engine.speak(theText)
stream.close()
7、百度AI
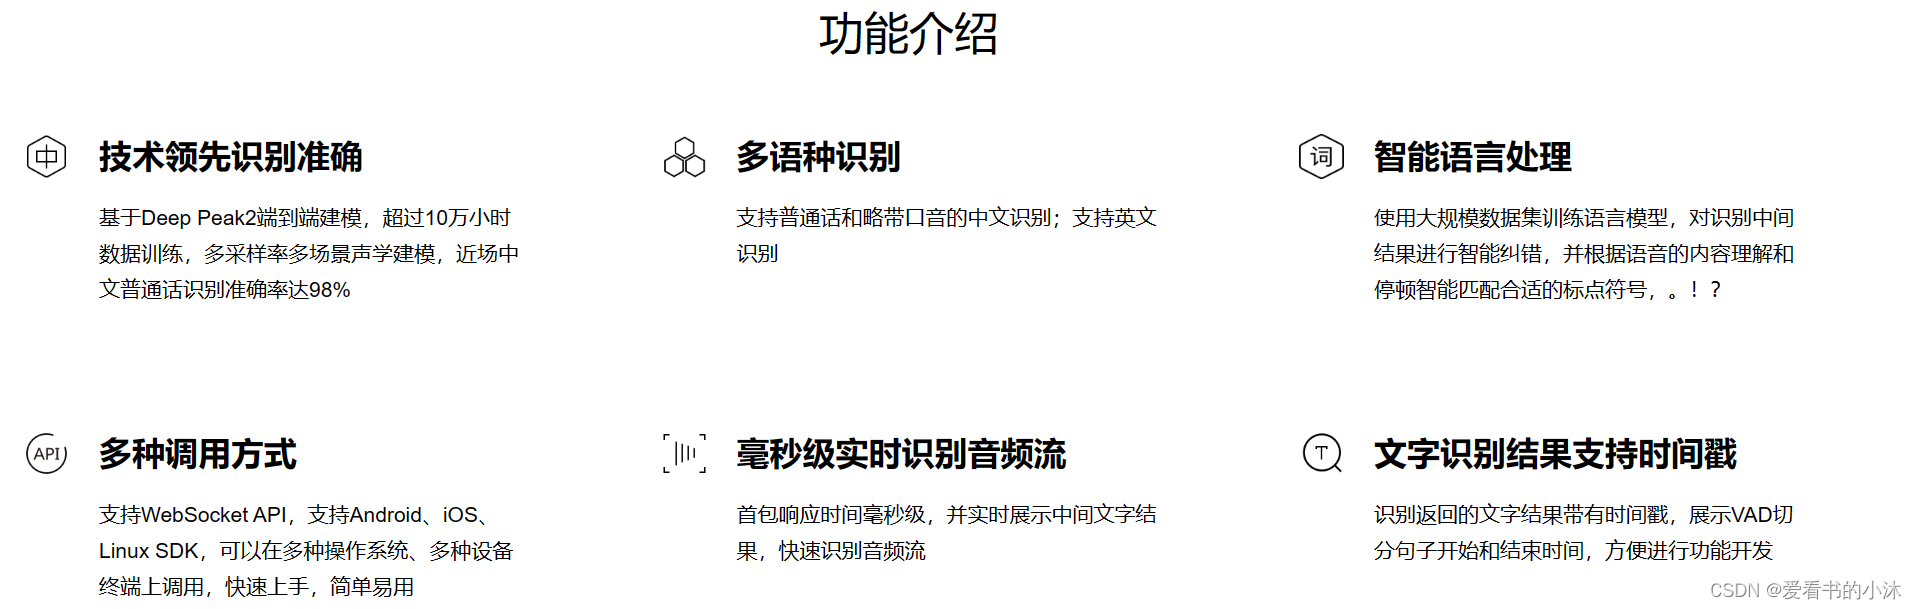
基于Deep Peak2的端到端建模,将音频流实时识别为文字,并返回每句话的开始和结束时间,适用于长句语音输入、音视频字幕、会议等场景.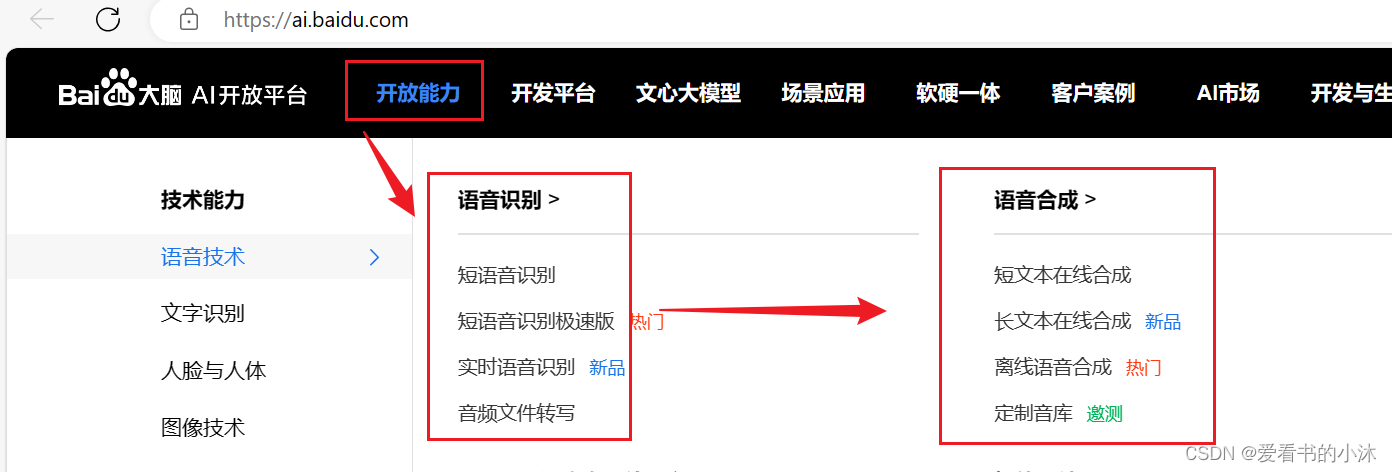
https://ai.baidu.com/sdk#asr
https://console.bce.baidu.com/ai/#/ai/speech/overview/resource/getFree
pip install baidu_aip
from aip import AipSpeech

#用上面提到的APP ID, API Key和Secret Key替换
APP_ID ='xxxx'
API_KEY ='xxxx'
SECRET_KEY ='xxxx'

client = AipSpeech(APP_ID, API_KEY, SECRET_KEY)

manual = r'百度你好! \
语音合成测试。'

if __name__ =='__main__':print('start voice process')#语速spd: 5, 语调pit: 5, 播音per: 1
    result  = client.synthesis(manual,'zh',1,{'vol':5,'per':1,})# 识别正确返回语音二进制 错误则返回dict 参照下面错误码ifnotisinstance(result,dict):withopen('audio.mp3','wb')as f:
            f.write(result)print('process end')
8、百度飞桨
pip install paddlepaddle -i https://mirror.baidu.com/pypi/simple
pip install paddlespeech -i https://pypi.tuna.tsinghua.edu.cn/simple

paddlespeech tts --input'人工智能体验'--output test.wav
paddlespeech asr --input test.wav
paddlespeech asr --lang zh --input test.wav
from paddlespeech.cli.asr.infer import ASRExecutor
asr = ASRExecutor()
result = asr(audio_file="test.wav")print(result)
结语
如果您觉得该方法或代码有一点点用处,可以给作者点个赞,或打赏杯咖啡;
╮( ̄▽ ̄)╭
如果您感觉方法或代码不咋地
//(ㄒoㄒ)//
,就在评论处留言,作者继续改进;
o_O???
如果您需要相关功能的代码定制化开发,可以留言私信作者;
(✿◡‿◡)
感谢各位大佬童鞋们的支持!
( ´ ▽´ )ノ ( ´ ▽´)っ!!!
版权归原作者 爱看书的小沐 所有, 如有侵权,请联系我们删除。