
1.下载 ffmpeg,挑一个自己电脑系统的版本,下载,如我win64:
地址:
Releases · BtbN/FFmpeg-Builds · GitHub
下载压缩包zip,到·本地
解压安装,其实无需安装,只需把对应的目录下的bin,
编辑环境变量的path,添加到环境变量即可!!!
不能科学的同学,可以到网盘地址,下载压缩包zip
链接:https://pan.baidu.com/s/1yBQBs-pUKOpUPeIJpPsURA?pwd=6543
提取码:6543
2.下载whisper:
查看模型的地址: https://github.com/openai/whisper/blob/main/whisper/__init__.py
查看初始化文件: __init__,内含各个模型的地址,就省得取hugging-face里下载了...
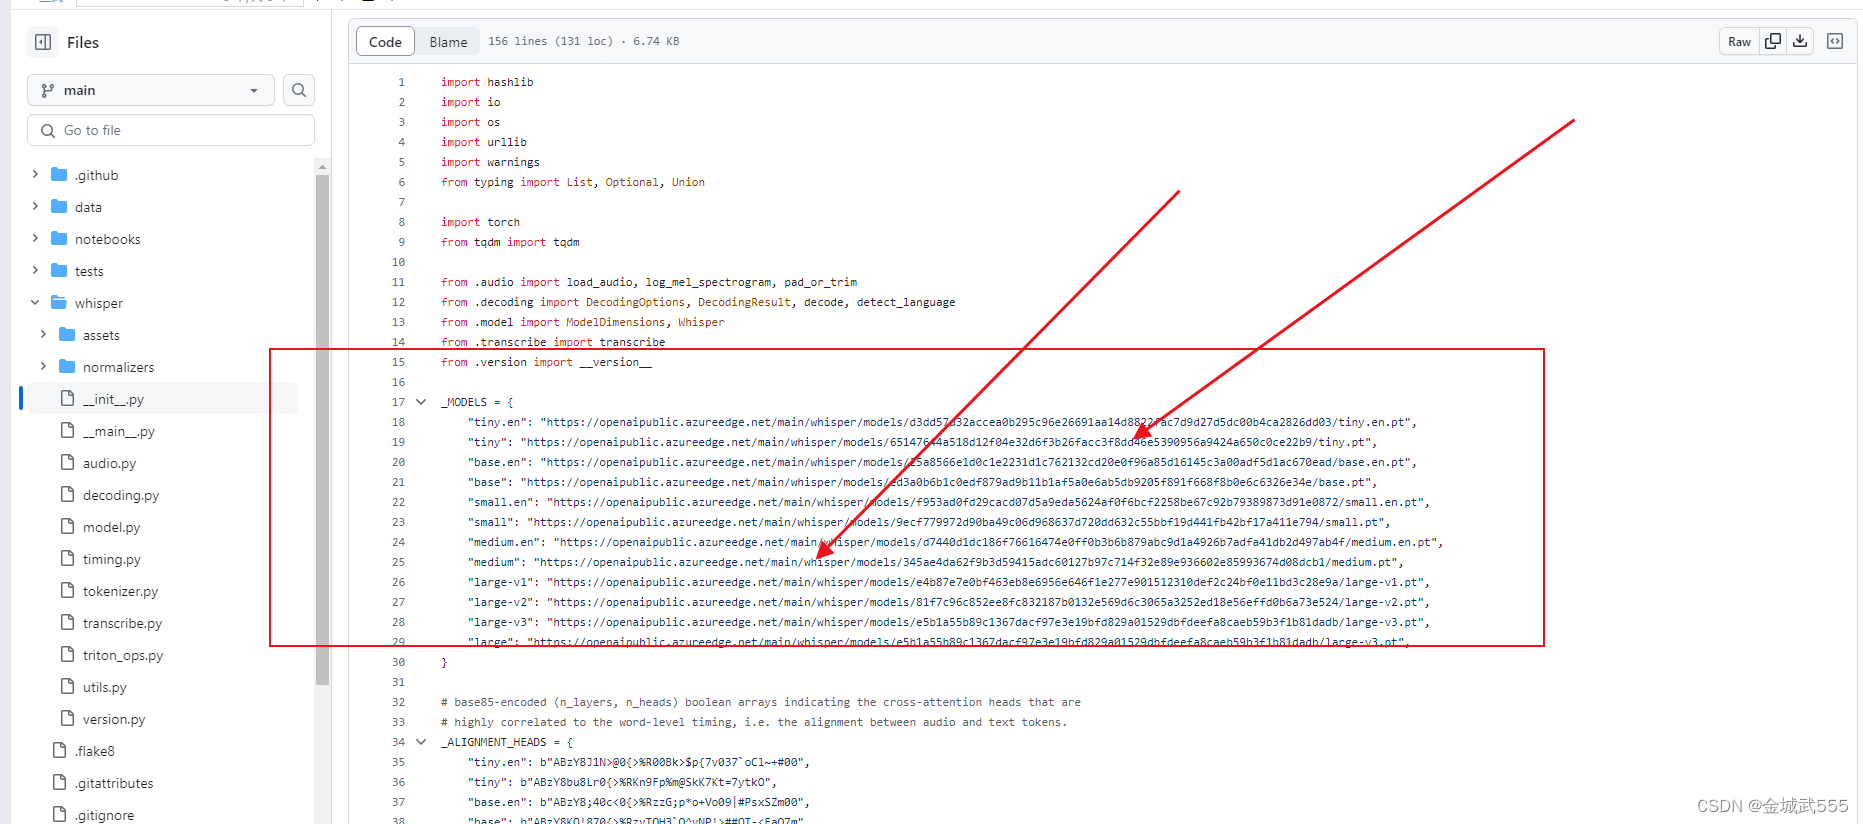
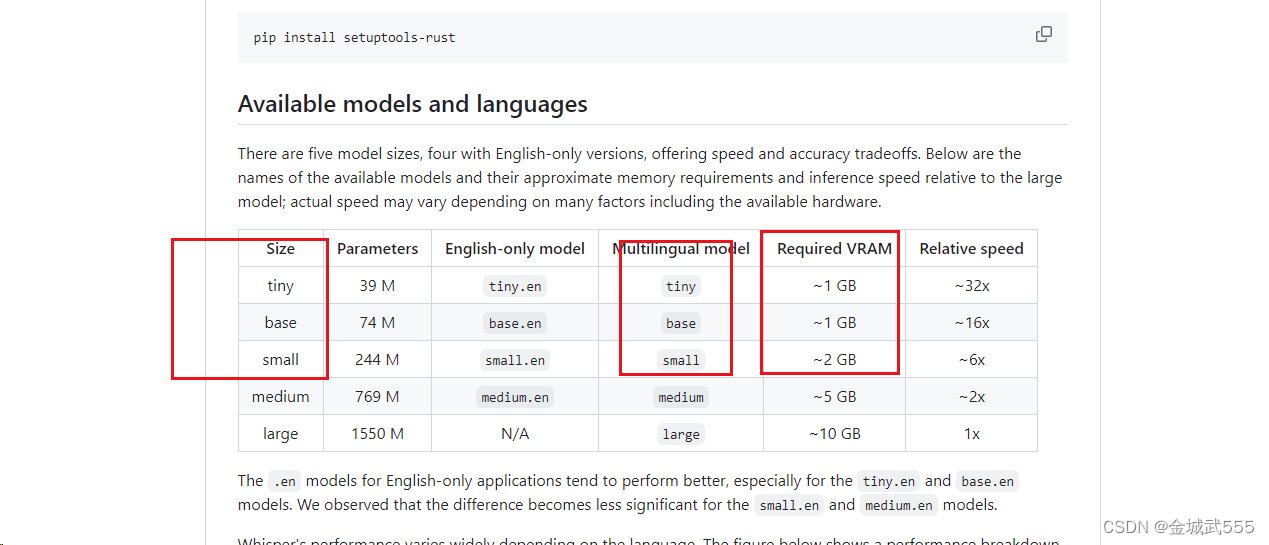
例如,依次从小到大...配置要求如下:
地址:::
"tiny"最小化模型: "https://openaipublic.azureedge.net/main/whisper/models/65147644a518d12f04e32d6f3b26facc3f8dd46e5390956a9424a650c0ce22b9/tiny.pt",
"base"基础款模型: "https://openaipublic.azureedge.net/main/whisper/models/ed3a0b6b1c0edf879ad9b11b1af5a0e6ab5db9205f891f668f8b0e6c6326e34e/base.pt",
"small"小型化模型: "https://openaipublic.azureedge.net/main/whisper/models/9ecf779972d90ba49c06d968637d720dd632c55bbf19d441fb42bf17a411e794/small.pt",
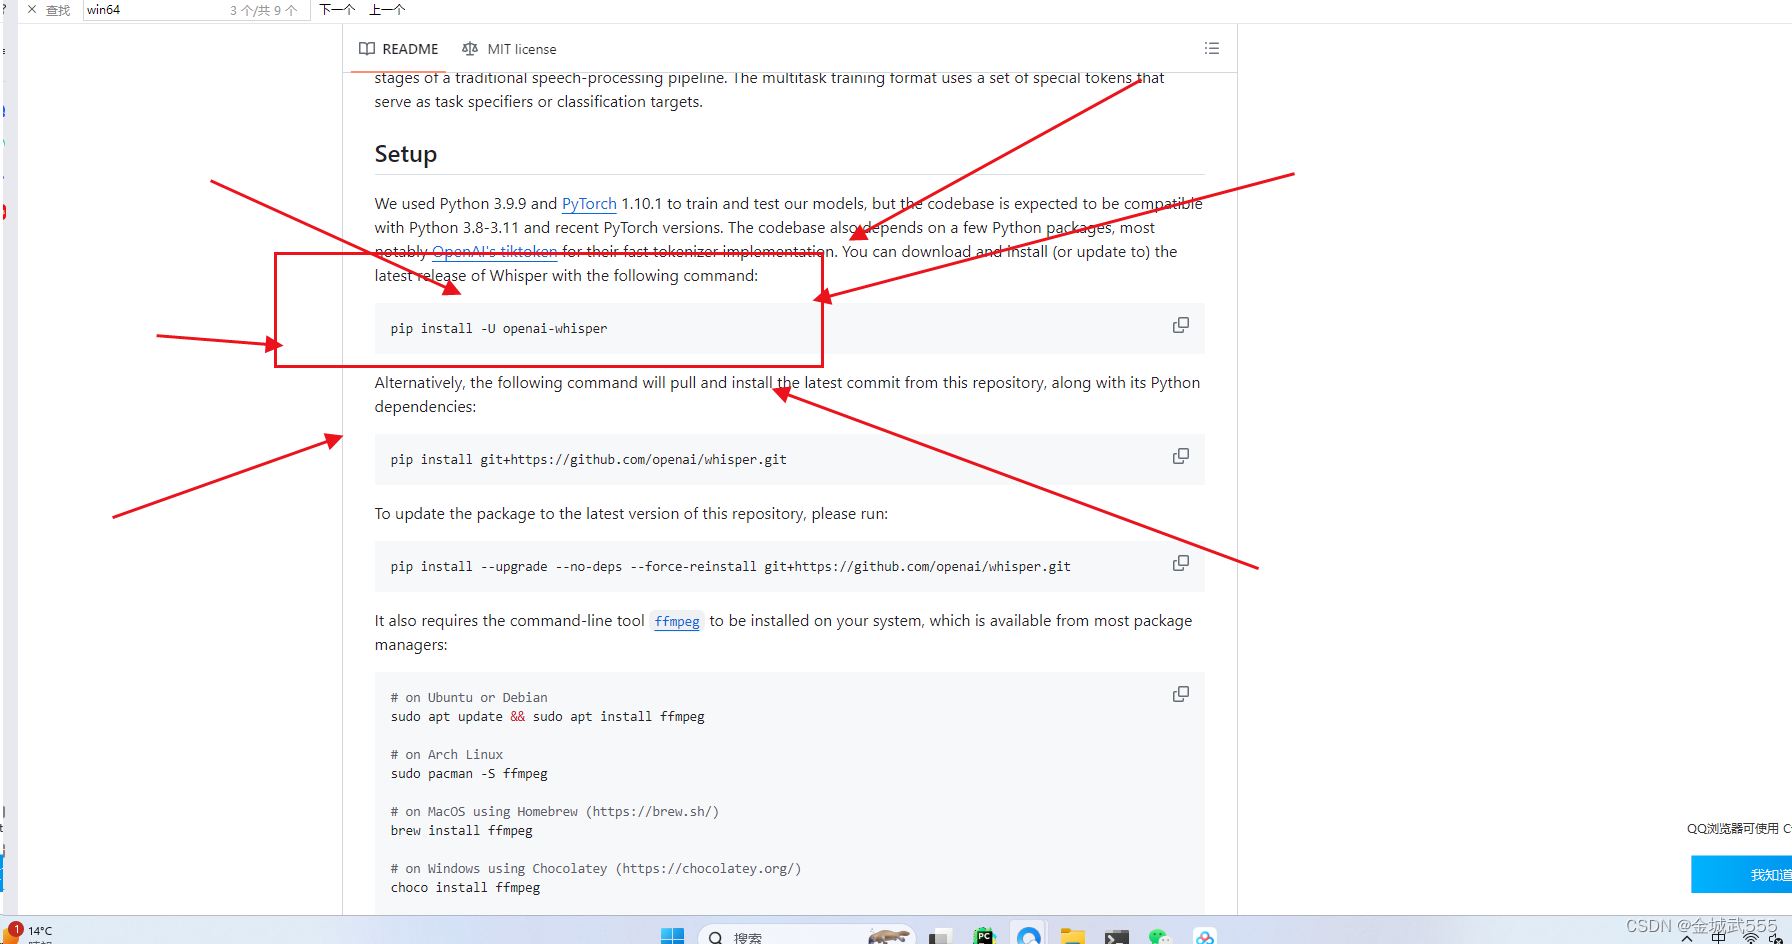
3.根据 tree/main分支下,进行环境的配置::
地址:
GitHub - openai/whisper: Robust Speech Recognition via Large-Scale Weak Supervision
下滑到底下,即可看到
安装好后,直接是cpu版本的pytorch,如若需要gpu版本,可自行安装....
pip uninstall torch,再 pip install 自己gpu版本的torch即可!!!...
4.运用命令:
whisper test.mp3 --model small --model_dir D:\qbroDownload\whisper-model --language Chinese
whisper 音频文件
--model 模型规格
--model_dir 模型路径
--language 语言选择/可不选....提前选好可加速..
产生报错:::
transcribe.py:115: UserWarning: FP16 is not supported on CPU; using FP32 instead
5.详情代码::
可作为参考....
import whisper
# 有下载到本地,直接加载 base.pt也可以,不然会直接网络下载
model = whisper.load_model('base')

# 1.传入音频、fp16-cpu版本,gpu版本可以忽略,语言可选项...默认繁体字,用base模型,输出简体字...
result = model.transcribe('./op.wav',fp16=False,language='Chinese')
print(result['text'])

# 2.传入视频也可以...
result1 = model.result = model.transcribe('./video.mp4',fp16=False,language='Chinese')
print(result1['text'])
版权归原作者 杰尼龟消防员 所有, 如有侵权,请联系我们删除。