
目录
1. load_image_file 加载图像
- 输出图像是 RGB 格式(opencv中是 BGR 格式)
- 图像类型是 ndarray
import face_recognition

image = face_recognition.load_image_file("image.jpeg")# 读取图像print(image.shape)# (3073, 2048, 3)print(type(image))# <class 'numpy.ndarray'>
2. face_locations 定位图中所有人脸
函数作用:识别出图像中所有人脸,并以列表的形式返回人脸的位置信息
函数输出:输出一个列表,形如: [(411, 956, 540, 827), (283, 605, 390, 497)]
- 列表中包含两个tuple (411, 956, 540, 827) 和 (283, 605, 390, 497) ,表示识别出了两个人脸
- 每个 tuple 中的4个数字表示这个人脸的位置信息,分别为 [top, right, bottm,left] , 代表框住人脸的矩形中左上角位置坐标 (left, top)和右下角的位置坐标(right, bottom)
import face_recognition
import cv2

image = face_recognition.load_image_file("image.jpeg")# 读取图像
face_locations = face_recognition.face_locations(image)# 获取人脸位置print(face_locations)
输出:
[(990,1347,1311,1026),(491,1133,812,812),(1895,1152,2163,884)]
检测到的第一个人脸位置坐标(990, 1347, 1311, 1026),对应如下
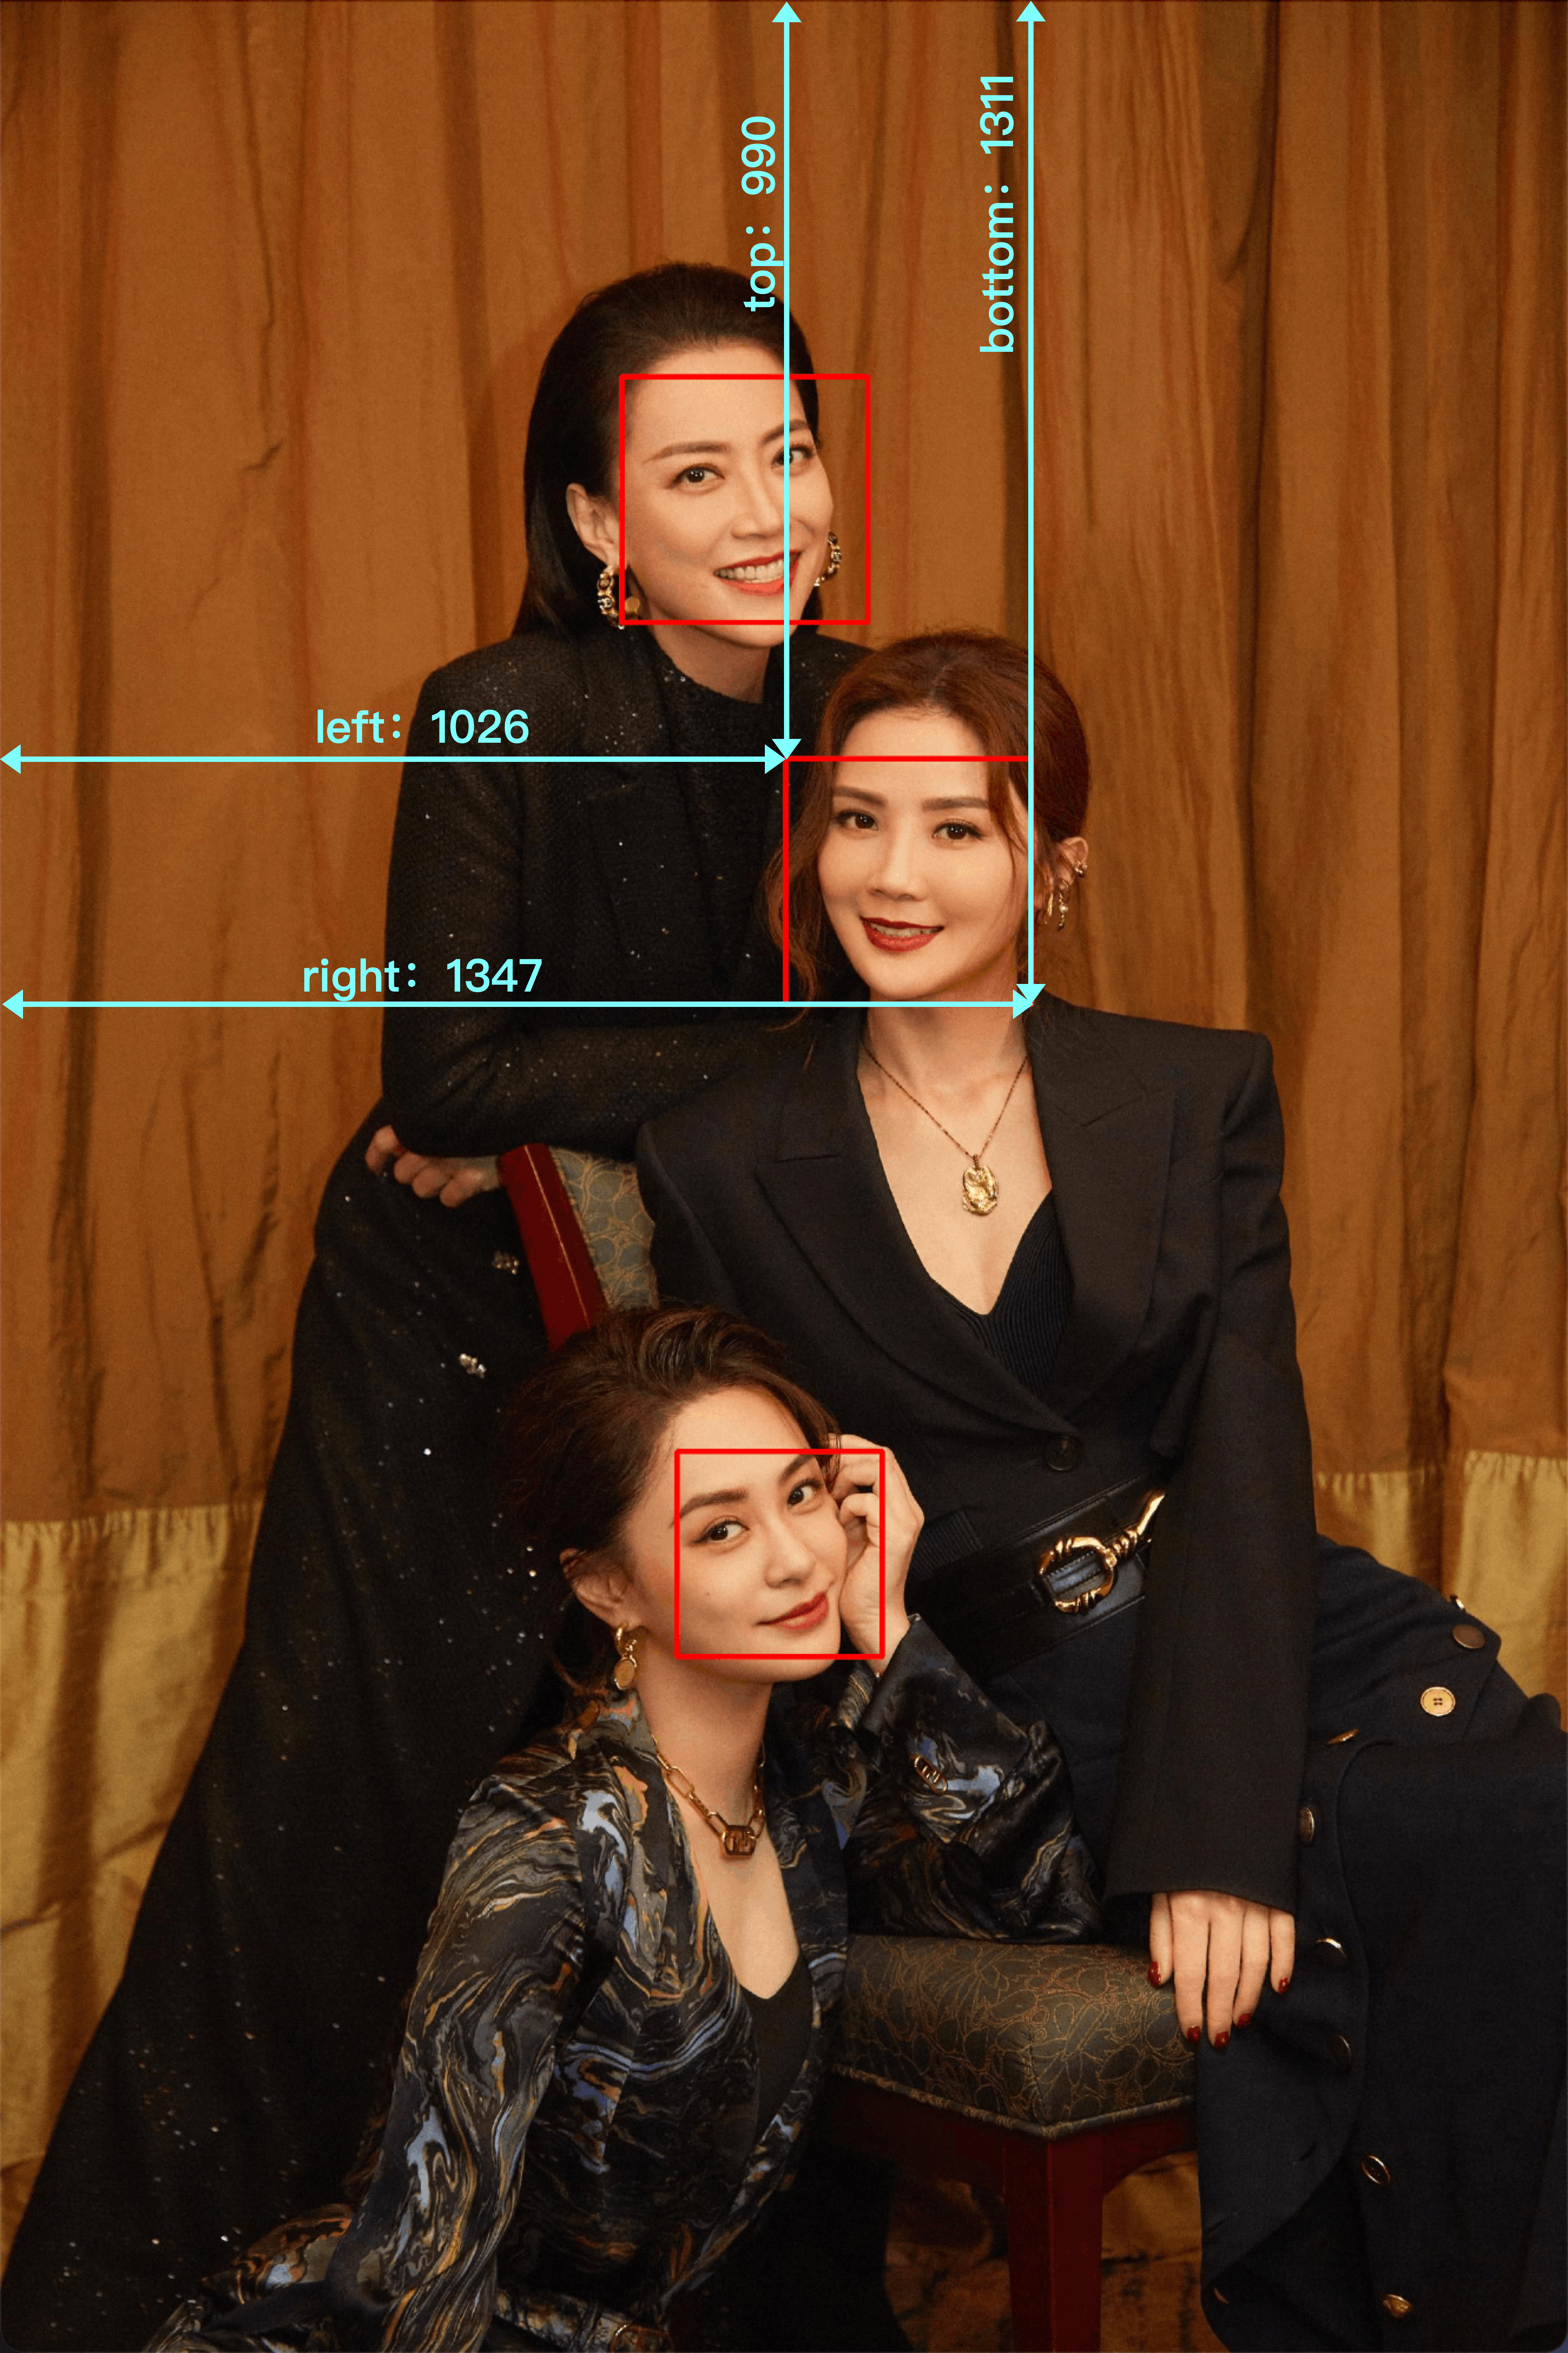
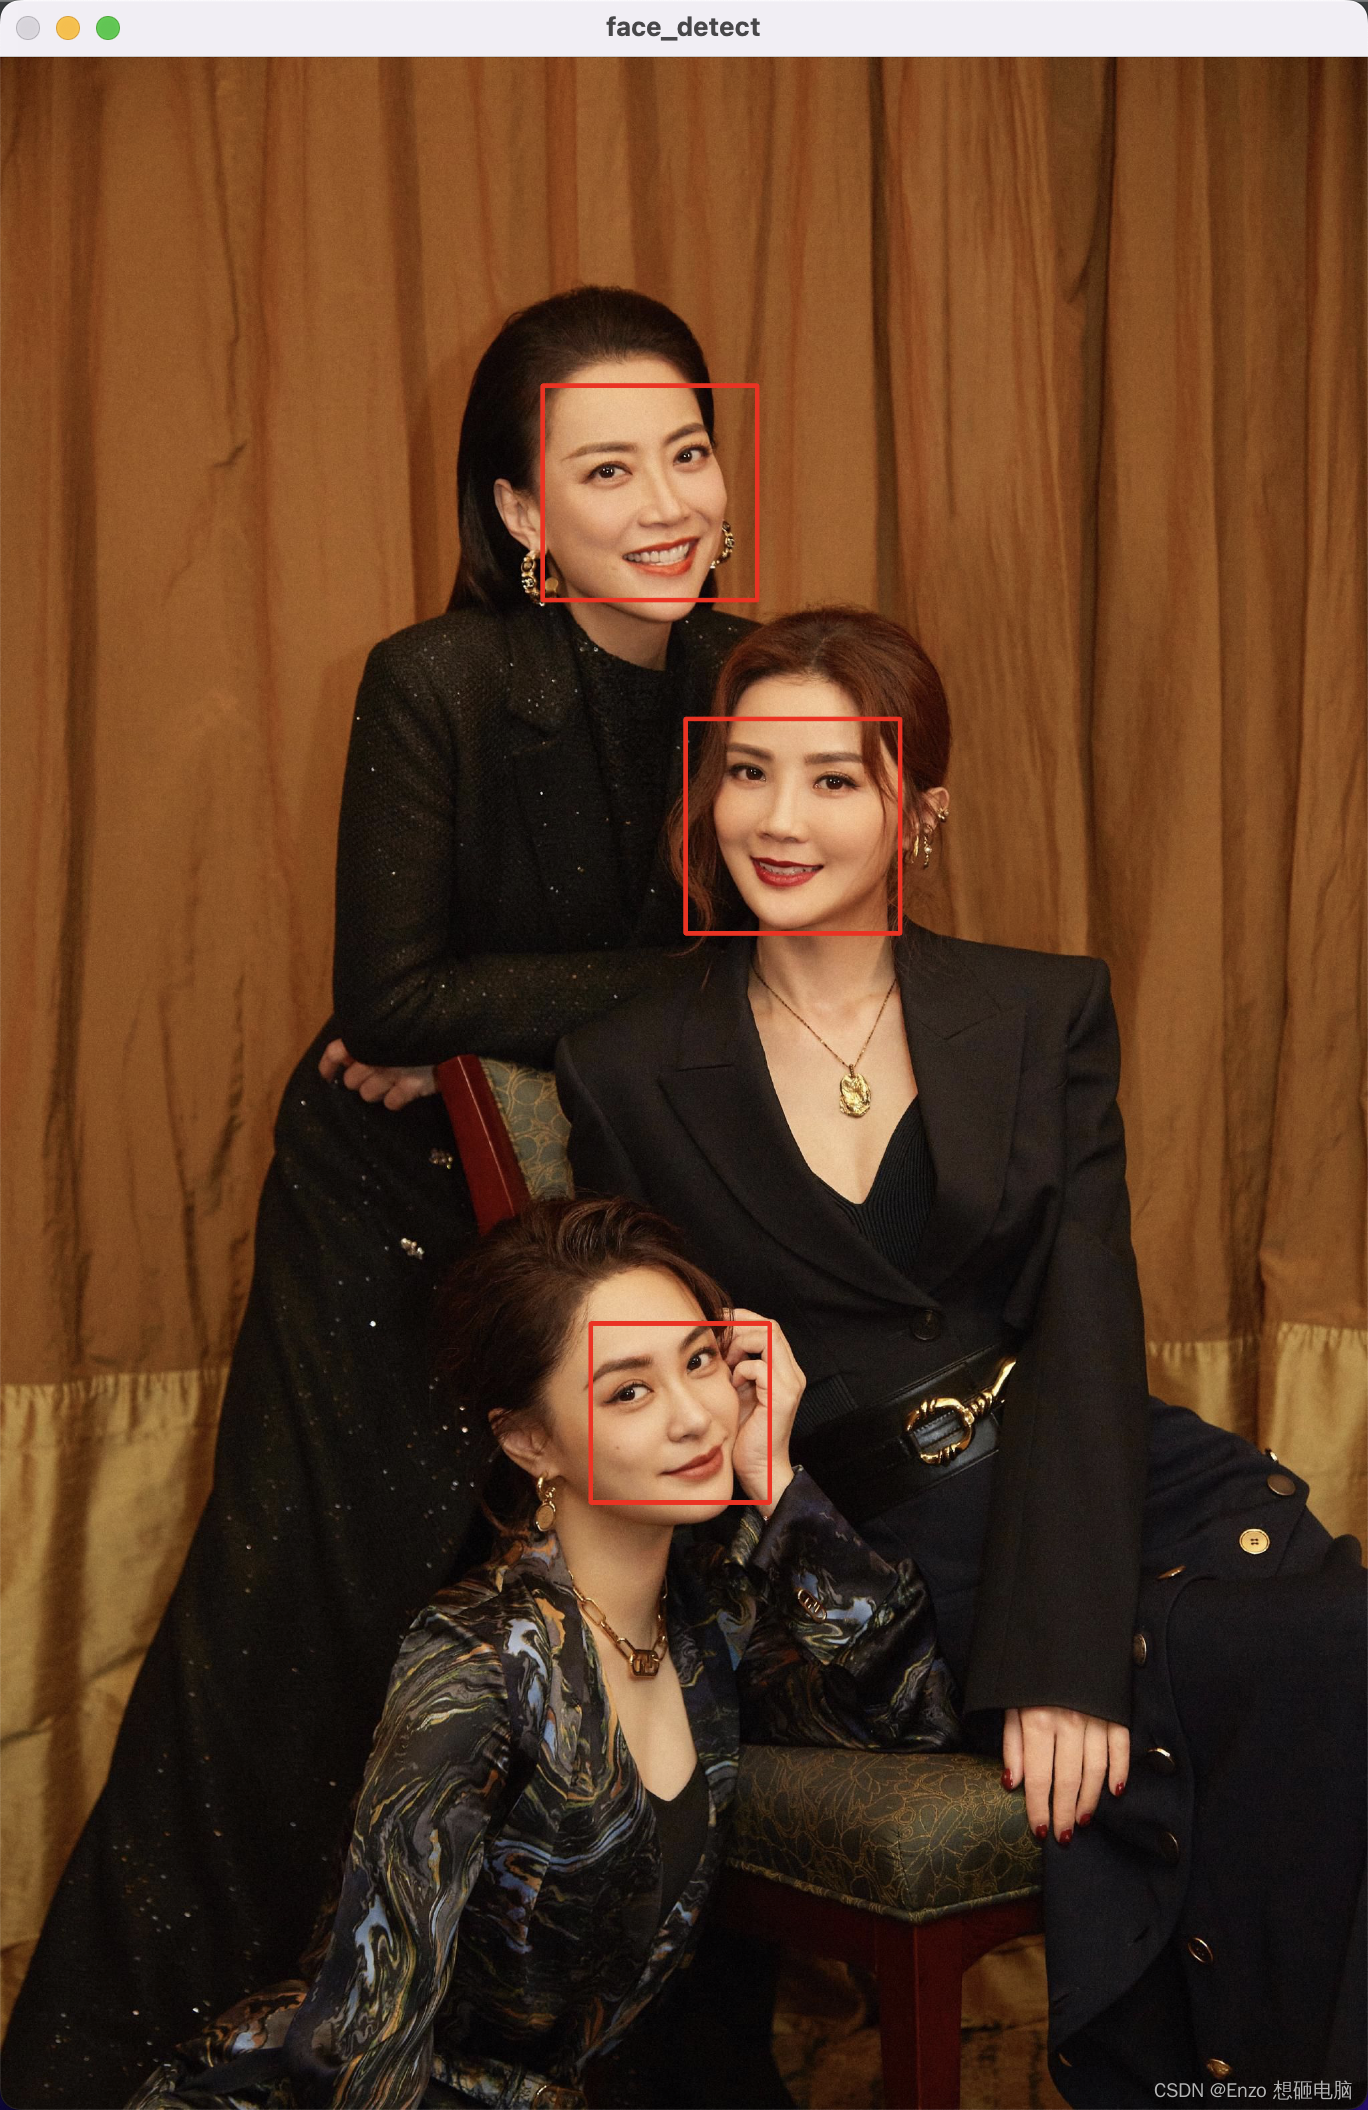
(1)在原图像中框出人脸
import face_recognition
import cv2

image = face_recognition.load_image_file("image.jpeg")# 读取图像
face_locations = face_recognition.face_locations(image)# 获取人脸位置print(face_locations)# ---------------------------------------------------
img = cv2.cvtColor(image, cv2.COLOR_RGB2BGR)for p in face_locations:print(p)
    face_detect = cv2.rectangle(img,(p[3], p[0]),(p[1], p[2]),(0,0,255),5)

cv2.imshow('face_detect'.format(), face_detect)
cv2.waitKey()
cv2.destroyAllWindows()
(2)剪切出人脸
import face_recognition
import cv2

image = face_recognition.load_image_file("image.jpeg")# 读取图像
face_locations = face_recognition.face_locations(image)# 获取人脸位置print(face_locations)# [(411, 956, 540, 827), (283, 605, 390, 497)]

img = cv2.cvtColor(image, cv2.COLOR_RGB2BGR)for i, p inenumerate(face_locations):
    face_detect = img[p[0]:p[2], p[3]:p[1]]
    cv2.imshow('face_detect_{}'.format(i), face_detect)

cv2.waitKey()
cv2.destroyAllWindows()

3. face_landmarks 识别人脸关键点
- 函数作用:识别出 9种人脸关键点信息 ,包括眼睛、鼻子、嘴巴和下巴等
- 返回值:是个list,列表长度表示有几个人的面部信息;list 中的项是字典,每个字典的key表示面部特征的名字,值为这个面部特征的位置信息(是一个列表); 特征点包括: - nose_bridge- right_eyebrow- right_eye- chine- left_eyebrow- bottom_lip- nose_tip- top_lip- left_eye
import face_recognition
import cv2
import numpy as np

image = face_recognition.load_image_file("image.jpeg")# 读取图像
face_landmarks_list = face_recognition.face_landmarks(image)# 获取人脸位置

img = cv2.cvtColor(image, cv2.COLOR_RGB2BGR)for face_landmarks in face_landmarks_list:
    facial_features =['left_eye','right_eye','nose_tip','top_lip','bottom_lip']# 在图像中画出每个人的眼睛, 鼻子, 嘴巴!for facial_feature in facial_features:
        points = np.array(face_landmarks[facial_feature])
        cv2.polylines(img,[points],False,(0,0,255),2)

cv2.imshow('facial_feature', img)
cv2.waitKey()
cv2.destroyAllWindows()

本文转载自: https://blog.csdn.net/weixin_37804469/article/details/126795943
版权归原作者 Enzo 想砸电脑 所有, 如有侵权,请联系我们删除。
版权归原作者 Enzo 想砸电脑 所有, 如有侵权,请联系我们删除。