
Numpy 实现单层感知机对情感文本多分类
一、 实验题目
在给定文本数据集完成文本情感分类训练,在测试集完成测试,计算准确率
文本的特征可以使用TF或TF-IDF (可以使用sklearn库提取特征)设计合适的网络结构,选择合适的损失函数利用训练集完成网络训练,并在测试集上计算准确率。
训练集:train.txt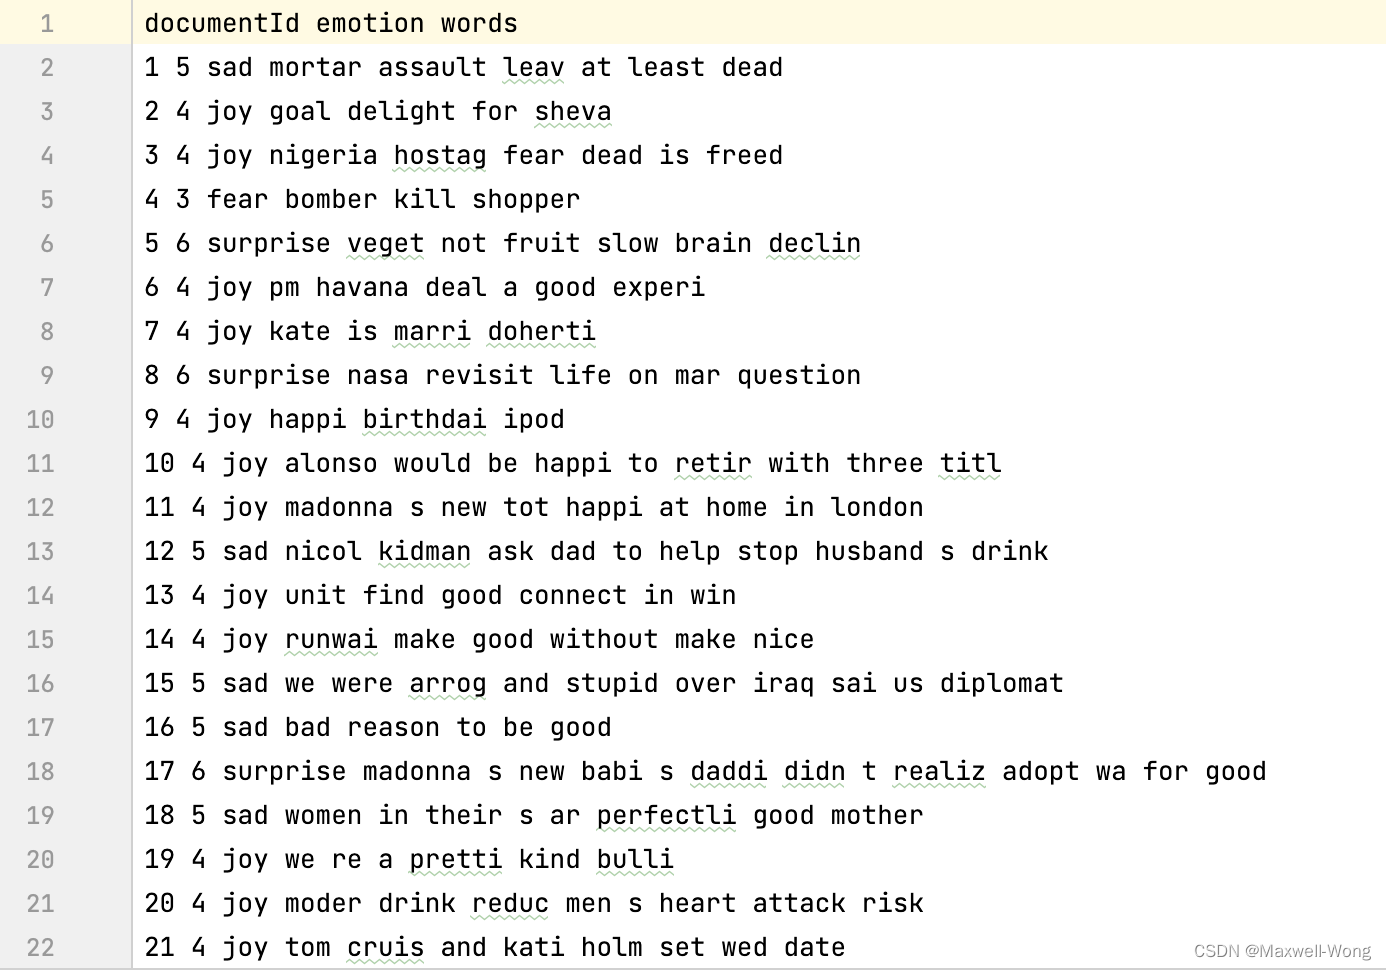
测试集: test.txt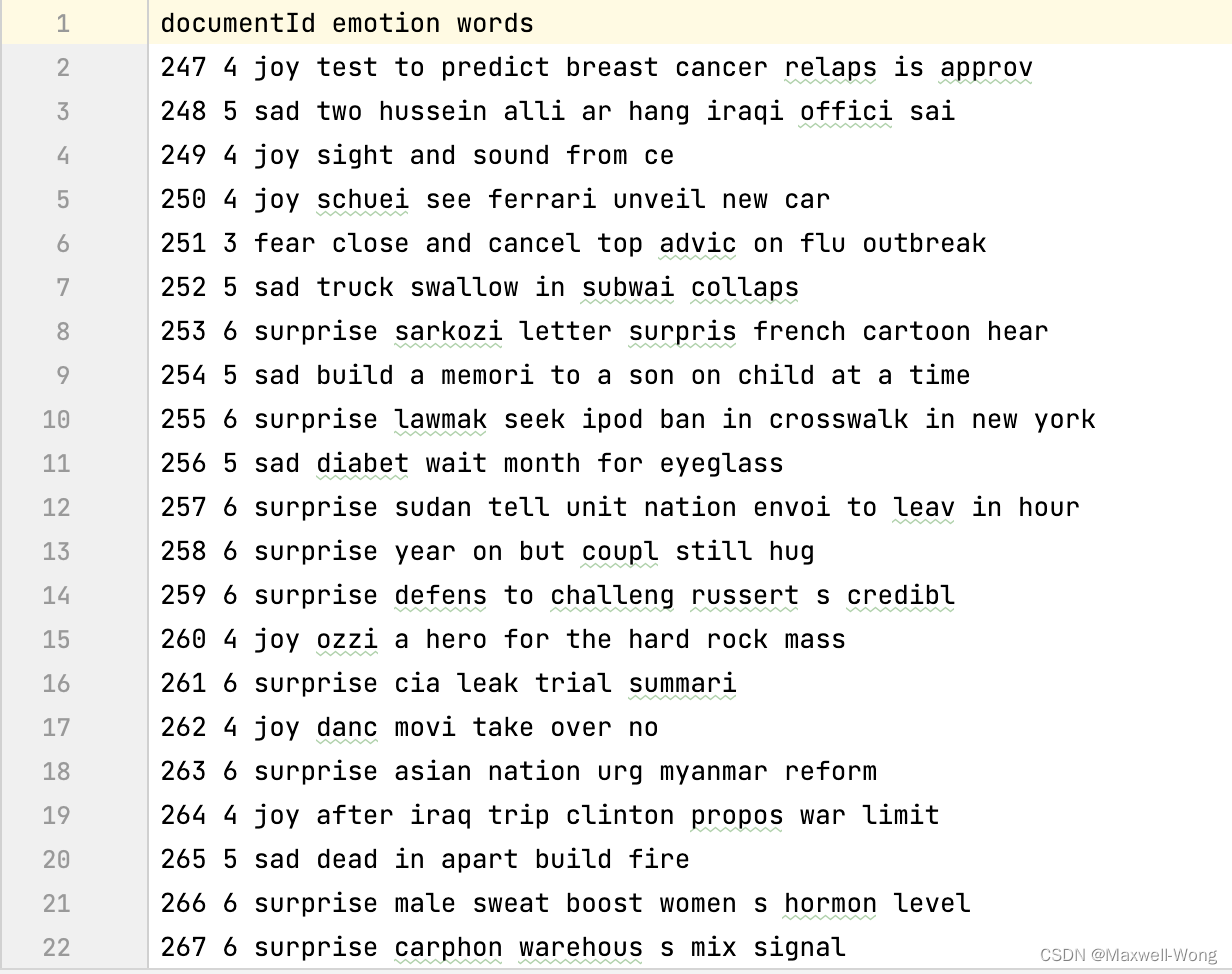
二、 实验内容
1. 假定网络为单层感知机,且没有激活层,没有偏置,此时,网络输出为y=XW
2.设置损失函数为L_MSE,并随机初始化网络参数W
3.当满足终止条件时,终止优化,否则继续
4.计算网络输出y=XW,以及损失
L
M
S
E
=
1
/
N
(
X
W
−
Y
)
T
(
X
W
−
Y
)
L_{MSE}=1/N(XW−Y)^T (XW−Y)
LMSE=1/N(XW−Y)T(XW−Y)
**5.求导可得
∂
L
M
S
E
/
∂
W
=
1
/
N
X
T
(
X
W
−
Y
)
∂L_{MSE}/∂W=1/N X^T(XW−Y)
∂LMSE/∂W=1/NXT(XW−Y)**
**6.根据
W
=
W
−
η
∂
L
M
S
E
/
∂
W
W=W−η∂L_{MSE}/∂W
W=W−η∂LMSE/∂W更新参数W**
7.跳转到3
三、关键代码
from sklearn.feature_extraction.text import TfidfVectorizer
import numpy as np
from sklearn.preprocessing import LabelBinarizer
import matplotlib.pyplot as plt
train_set_path ='train.txt'
test_set_path ='test.txt''''
---------------Basic Concept---------------
1. 单层感知机 (输入层+输出层), 输入层为每个文本的特征值、输出层经过sigmoid函数, 为各类的预测值
2. 输入、输出、权重三者的关系为: Y = XW, 其中,X是(train_size, feature_size)的矩阵, W是(feature_size, class_num)的矩阵
2.1. 需要注意的是, 由于输出经过了sigmoid函数, 因此值被限制在0~1之间, 而我们使用的标签是1~6的数, 所以要将它化成二进制码
3. 损失为L_MSE=1/N(XW−Y)^T(XW−Y) 对权重进行更新, 通过W = W - lr * ∂L_MSE/∂W, 其中∂L_MSE/∂W = 1/N X^T(XW−Y): [(feature_size, train_size) * (train_size, 6)]
3.1. 这里的Y是标签, 因为已经化成二进制值,所以每一个Yi是(1,6)的矩阵,如[0,0,0,1,0,0]表示标签4,
---------------END---------------
'''# hyper parameters
learning_rate =0.6
num_epochs =4000
num_classes =6
batch_size =100
epochs =[]
accur_train =[]
accur_test =[]# 激活函数defsigmoid(x):return1/(1+ np.exp(-x))defdsigmoid(x):return x *(1- x)defdata_process(path):'''
:param path: 数据集路径
:return: 文本、情感标签
'''
words =[]
data_set =[]
emotion =[]withopen(path,'r')as F:
line = F.readlines()for i inrange(1,len(line)):
emo =(int)(line[i].split()[1])# 情感标签
temp = line[i].split()[3:]
out =' '.join(temp)
words.append(out)
emotion.append(emo)return words, emotion
deftf_idf_cal(text):'''
:param text: 待计算文本
:return: 特征名称和特征值矩阵
'''
tf_idf_vec = TfidfVectorizer()
tf_idf_matrix = tf_idf_vec.fit_transform(text)return tf_idf_vec.get_feature_names(), tf_idf_matrix.toarray()
words_train, emotion_train = data_process(train_set_path)
words_test, emotion_test = data_process(test_set_path)
train_feature_name, train_tf_idf = tf_idf_cal(words_train)
test_feature_name, test_tf_idf = tf_idf_cal(words_test)# 处理训练集,将测试集特征在训练集中未出现过的特征值赋值为0
aligned_train_set =[]
aligned_test_set = test_tf_idf
for k inrange(len(train_tf_idf)):
temp =[]for i inrange(len(test_feature_name)):
feature = test_feature_name[i]if feature in train_feature_name:
idx = train_feature_name.index(feature)
temp.append(train_tf_idf[k][idx])else:
temp.append(0)
aligned_train_set.append(temp)'''
方便查看:
---------------Basic Concept---------------
1. 单层感知机 (输入层+输出层), 输入层为每个文本的特征值、输出层经过sigmoid函数, 为各类的预测值
2. 输入、输出、权重三者的关系为: Y = XW, 其中,X是(train_size, feature_size)的矩阵, W是(feature_size, class_num)的矩阵
2.1. 需要注意的是, 由于输出经过了sigmoid函数, 因此值被限制在0~1之间, 而我们使用的标签是1~6的数, 所以要将它化成二进制码
3. 损失为L_MSE=1/N(XW−Y)^T (XW−Y): [(6,train_size) * (train_size, 6)] 对权重进行更新, 通过W = W - lr * ∂L_MSE/∂W, 其中∂L_MSE/∂W = 1/N X^T(XW−Y): [(feature_size, train_size) * (train_size, 6)]
3.1. 这里的Y是标签, 因为已经化成二进制值,所以每一个Yi是(1,6)的矩阵,如[0,0,0,1,0,0]表示标签4,
我们需要对Y进行扩展, 以便计算损失, 即将Y扩展成(train_size, 6)的矩阵,
---------------END---------------
'''defMSE(inputs, outputs, labels):# 这里的labels为(train_size, 6)的矩阵'''
:param inputs: 特征矩阵 (train_size, feature_size)
:param outputs: 网络输出 (train_size, num_class)
:param labels: 标签 (train_size, num_class)
:return: MES loss和它对W的偏导数
'''
n = outputs.shape[0]# train_size
mse_loss =0# 所有样本的mse loss之和
loss_mat =(outputs - labels)**2/ n # 矩阵(train_size, train_size)for loss in loss_mat:
mse_loss += loss.sum()
loss_partial_mat = np.dot(inputs.T,(outputs - labels))/ n # 矩阵(feature_size, num_class)return mse_loss, loss_partial_mat
'''
单层感知机
'''classPerceptron:def__init__(self, in_size, out_size):
self.in_size = in_size
self.out_size = out_size
self.weights = np.random.randn(in_size, out_size)# 随机化权重矩阵defforward(self, X):
out = np.dot(X, self.weights)
out = sigmoid(out)# sigmoid函数,输出值被限制到0和1之间return out
# 转换成numpy数组
aligned_train_set = np.array(aligned_train_set)
aligned_test_set = np.array(aligned_test_set)
emotion_train = np.array(emotion_train)
emotion_test = np.array(emotion_test)# 数值为1~6的情感标签转化成二进制
emotion_train_b = LabelBinarizer().fit_transform(emotion_train)
emotion_test_b = LabelBinarizer().fit_transform(emotion_test)# 数据集参数
total_step = train_size =len(aligned_train_set)
test_size =len(aligned_test_set)
feature_size =len(aligned_train_set[0])'''
Train the perceptron and Predict the label each batch
'''
perceptron = Perceptron(feature_size, num_classes)for epoch inrange(num_epochs):
out = perceptron.forward(aligned_train_set)
out_test = perceptron.forward(aligned_test_set)
mse_loss, loss_partial_mat = MSE(aligned_train_set, out, emotion_train_b)
perceptron.weights = perceptron.weights - learning_rate * loss_partial_mat
if epoch % batch_size ==0:
pre_label =[]for i inrange(out.shape[0]):
pre_label.append(np.argmax(out[i])+1)
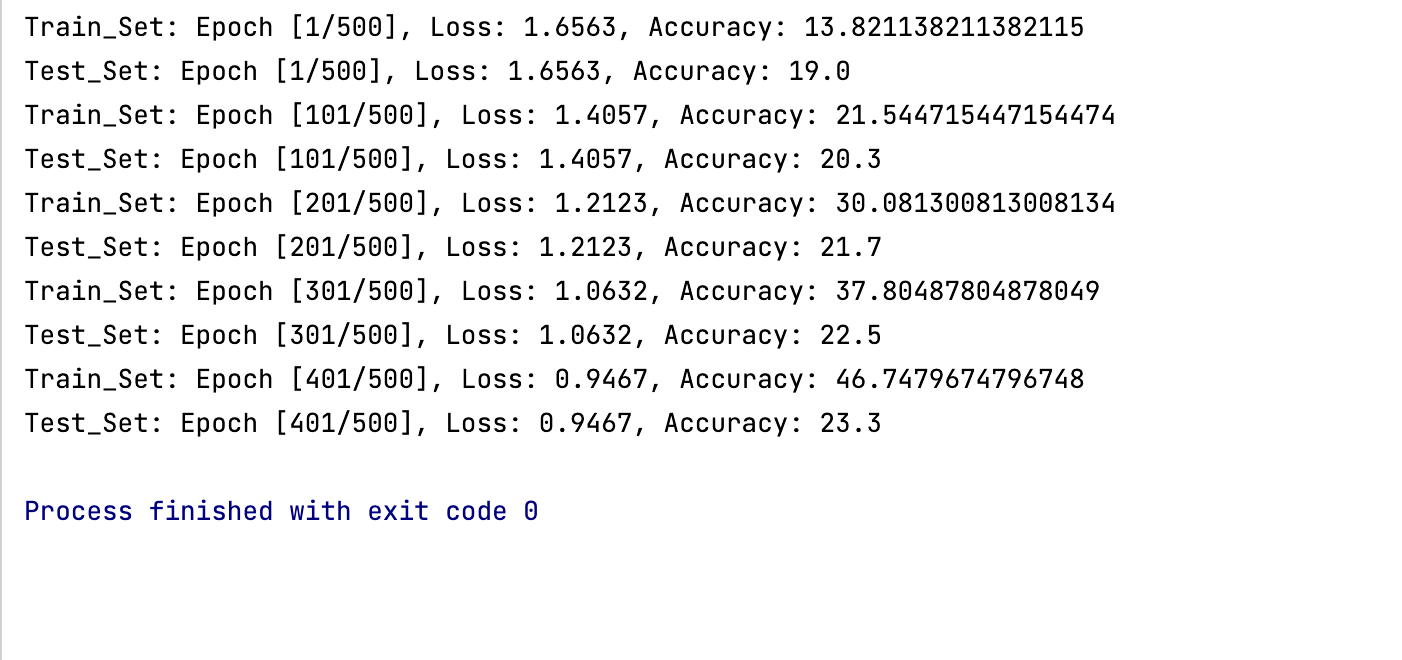
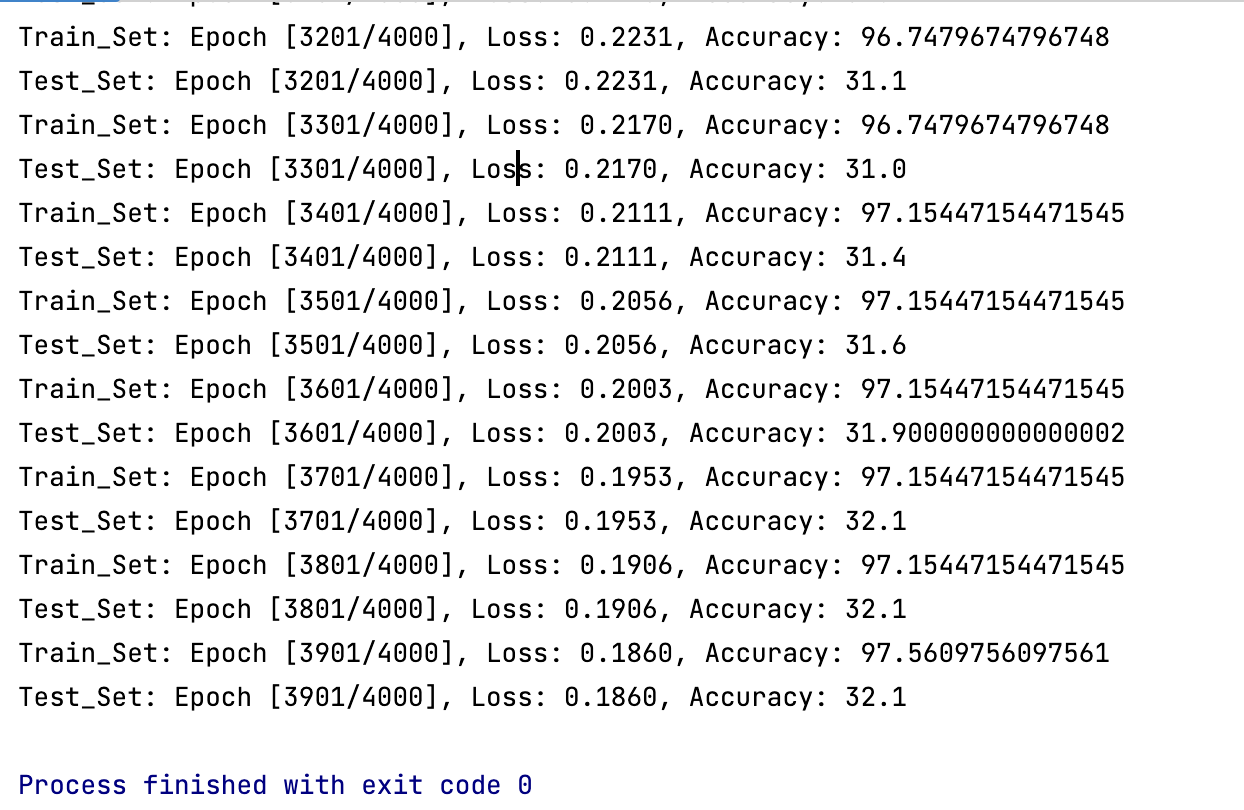
accuracy = np.mean(np.equal(pre_label, emotion_train))print('Train_Set: Epoch [{}/{}], Loss: {:.4f}, Accuracy: {}'.format(epoch +1, num_epochs, mse_loss,100* accuracy))
accur_train.append(100* accuracy)
pre_label =[]for i inrange(out_test.shape[0]):
pre_label.append(np.argmax(out_test[i])+1)
accuracy = np.mean(np.equal(pre_label, emotion_test))print('Test_Set: Epoch [{}/{}], Loss: {:.4f}, Accuracy: {}'.format(epoch +1, num_epochs, mse_loss,100* accuracy))
epochs.append(epoch)
accur_test.append(100* accuracy)
plt.ylim((0,100))
plt.xlabel("Epoch")
plt.ylabel("Accuracy")
plt.plot(epochs, accur_train, marker='o')
plt.plot(epochs, accur_test, marker='*')
plt.legend(['Train','test'])
plt.show()
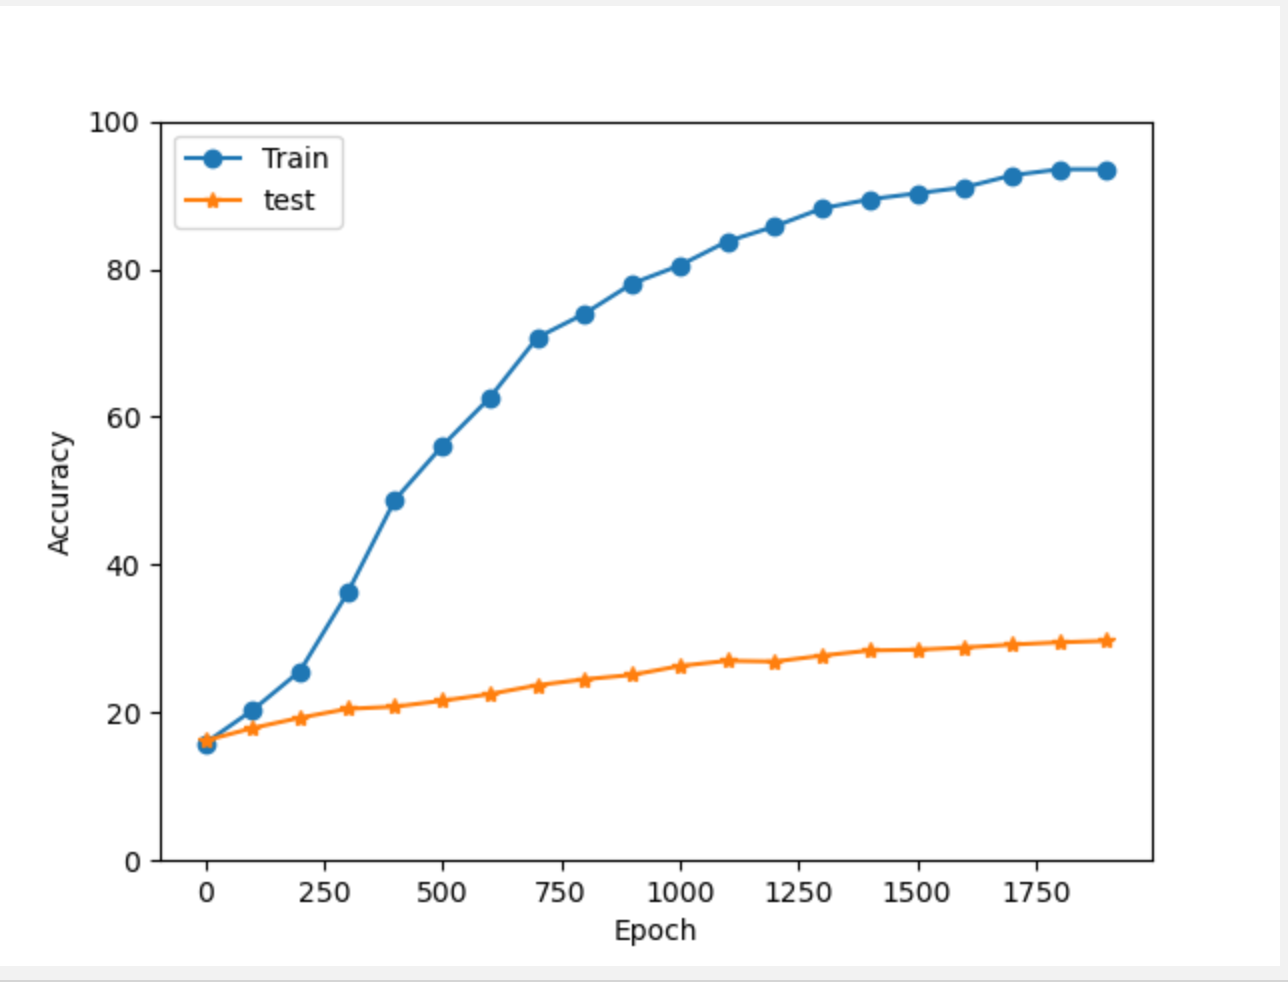
四、实验结果:
通过numpy矩阵进行运算速度还是很快的,基本在几秒内就能够算出结果。
(1) Epoch 500
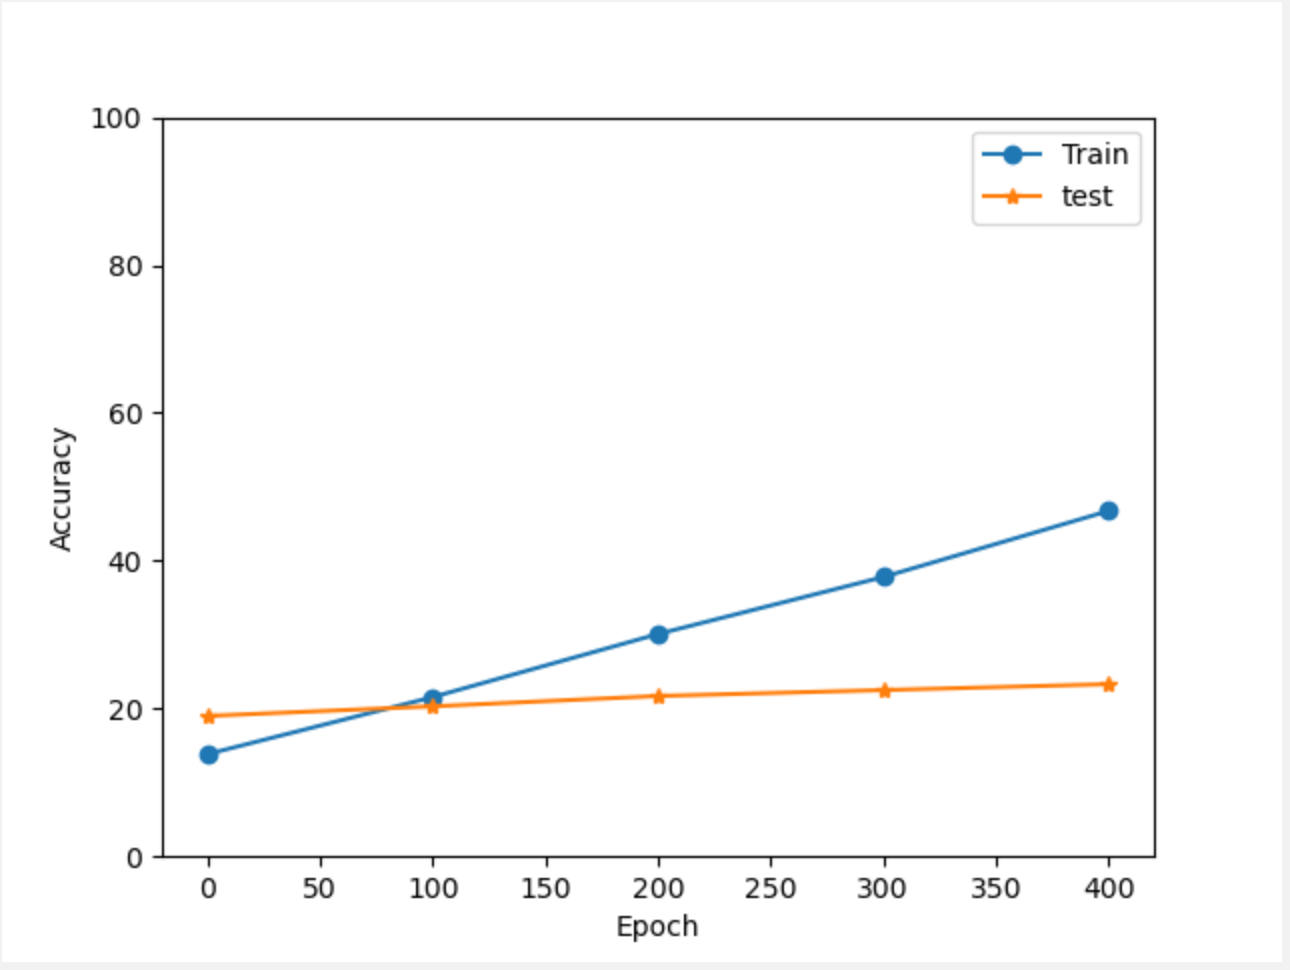
(2) Epoch 2000

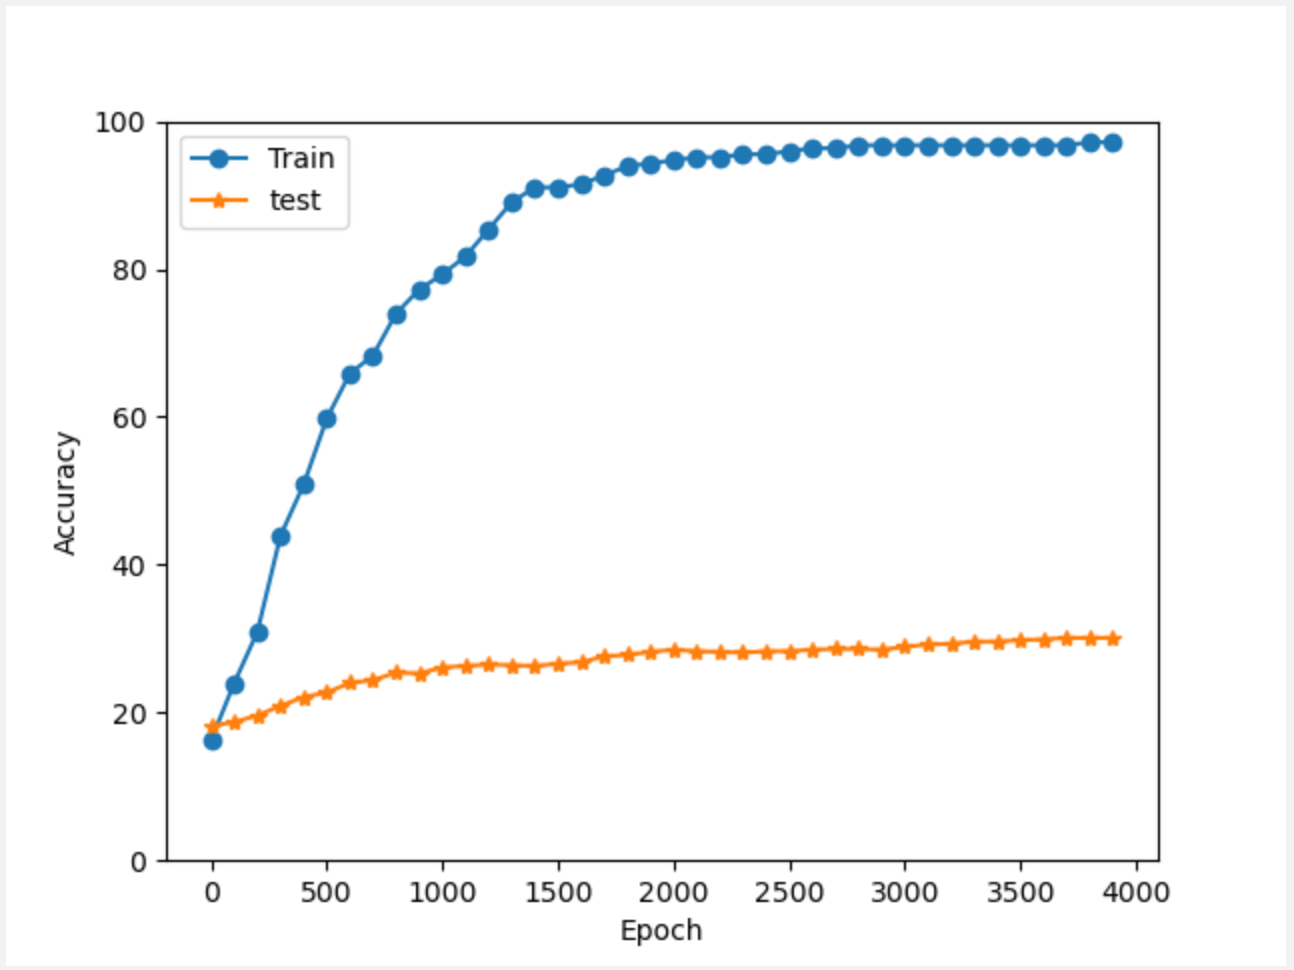
(3) Epoch 4000
本文转载自: https://blog.csdn.net/m0_52387305/article/details/124991519
版权归原作者 Maxwell-Wong 所有, 如有侵权,请联系我们删除。
版权归原作者 Maxwell-Wong 所有, 如有侵权,请联系我们删除。