前文简单提到模板匹配中的一种:NCC多角度模板匹配,博主结合实际的检测项目(已落地)发现其准确率和稳定性有待提升,特别是一些复杂背景的图形,又或是模板选取不当都会造成不理想的效果;同时也借鉴过基于梯度变化的匹配策略,但要说落实到实际项目上去总是差强人意(可能也是鄙人技术不够,哈哈);所以博主今天分享另外两种比较适用的匹配方式!
1). 当图像中存在完整且容易提取的外形轮廓时,shapematch形状匹配不失为一种简单快捷的方法,不需要额外去按照固定角度旋转图像来搜索图像,亦不需要担心模板图像旋转后的留白区域影响匹配得分,按照固定的模式来操作即可: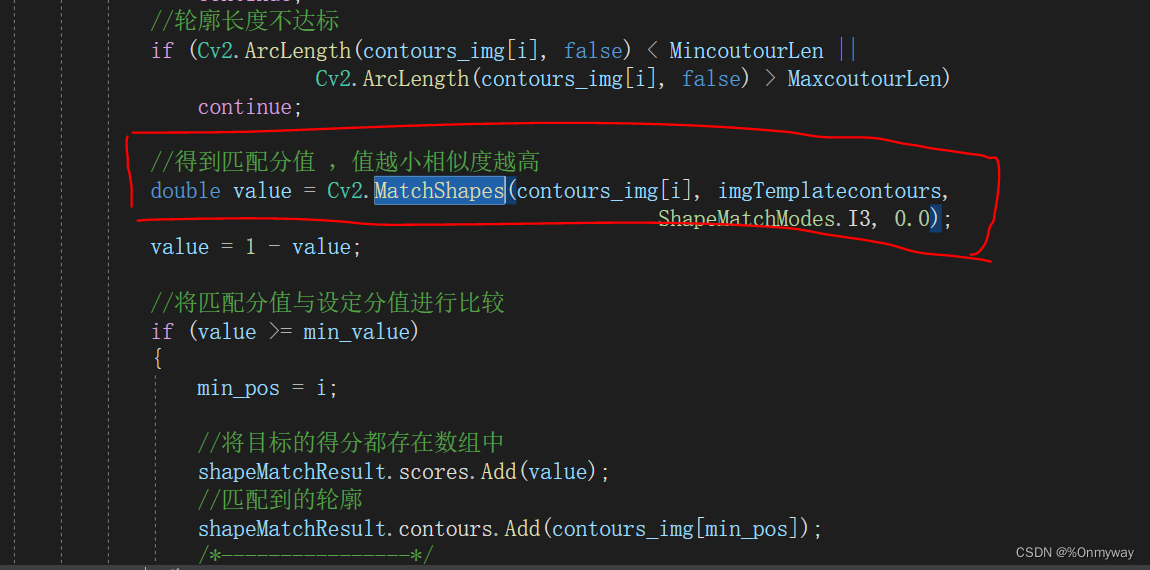
使用Opencv已有方法MatchShapes进行匹配即可,不过匹配后的重心和角度 需要做进一步处理,重心计算公式:
//获取重心点
Moments M = Cv2.Moments(bestcontour);
double cX = (M.M10 / M.M00);
double cY = (M.M01 / M.M00);
角度计算公式:
//-90~90度
//由于先验目标最小包围矩形是长方形
//因此最小包围矩形的中心和重心的向量夹角为旋转
RotatedRect rect_template = Cv2.MinAreaRect(imgTemplatecontours);
RotatedRect rect_search = Cv2.MinAreaRect(bestcontour);
//两个旋转矩阵是否同向
float sign = (rect_template.Size.Width - rect_template.Size.Height) *
                                  (rect_search.Size.Width - rect_search.Size.Height);
float angle=0;
if (sign > 0)
// 可以直接相减
    angle = rect_search.Angle - rect_template.Angle;
else
    angle = (90 + rect_search.Angle) - rect_template.Angle;

if (angle > 90)
    angle -= 180;
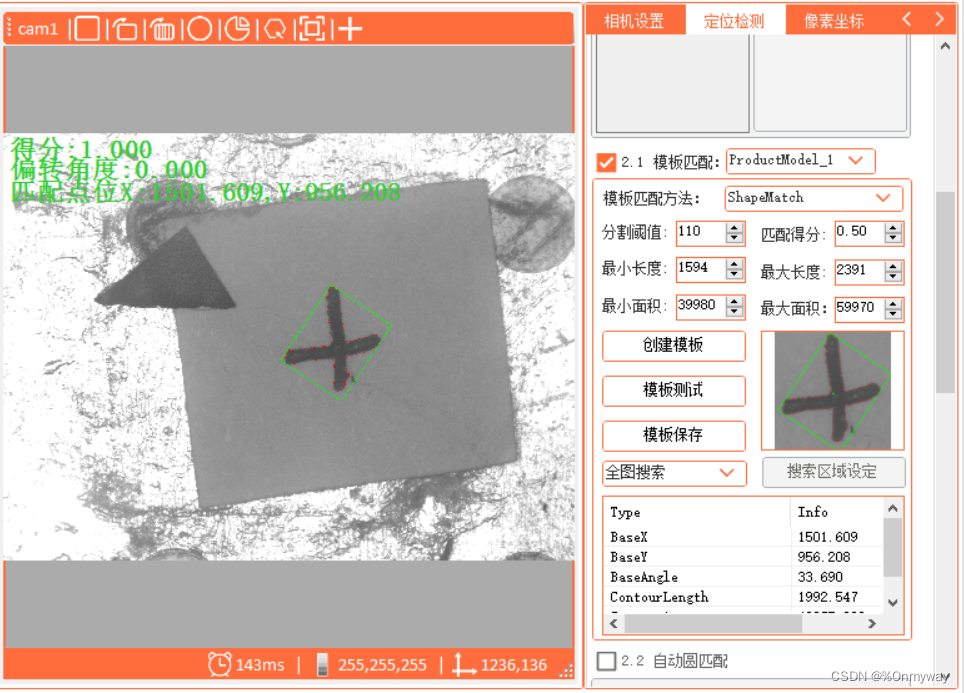
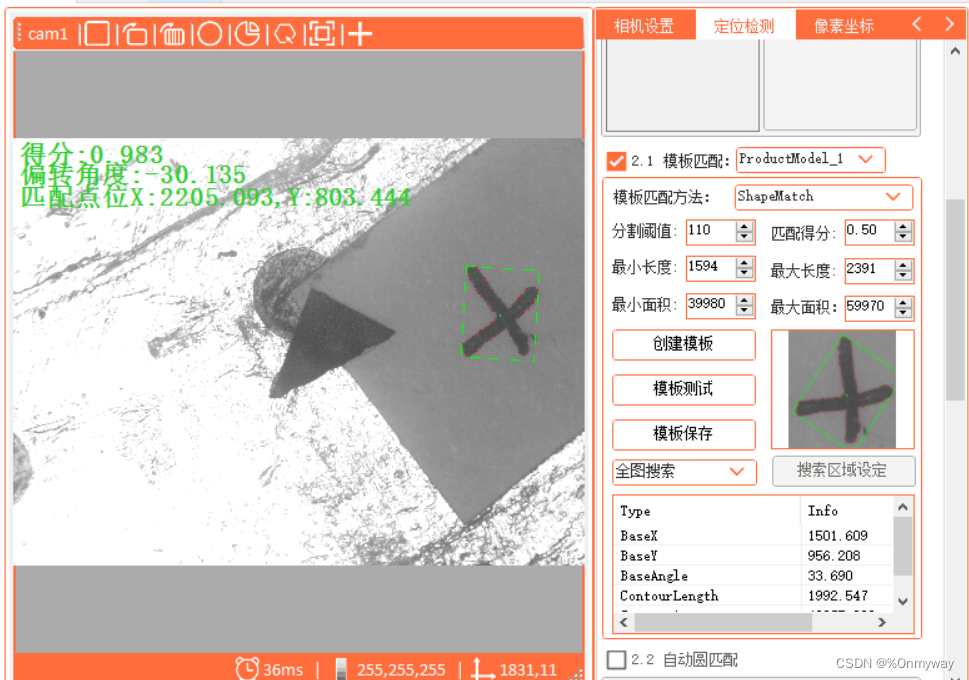
测试效果如下:
0度:
-30度:
50度:
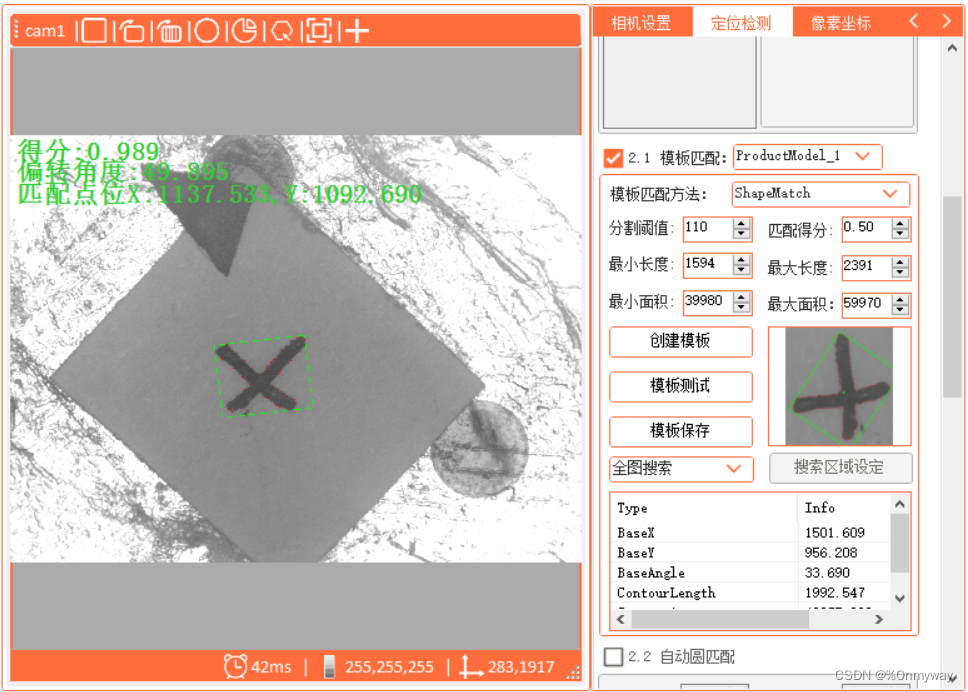
如同为shapematch形状匹配方式,测试时间约40毫秒左右,当然这个也会与图像大小与轮廓大小相关,不管也可以通过构建金字塔模型来加快搜索速度。
2). 下面来针对**NCC归一化模板匹配**做一下简单说明,NCC有几种不同的匹配模式,分别为:

关键的匹配方法如下:
   for (int i = 0; i <= (int)range / step; i++)
                    {

                        newtemplate = ImageRotate(model, start + step * i, ref rotatedRect, ref mask);
                        if (newtemplate.Width > src.Width || newtemplate.Height > src.Height)
                            continue;
                        Cv2.MatchTemplate(src, newtemplate, result, matchMode, mask);
                        Cv2.MinMaxLoc(result, out double minval, out double maxval, out CVPoint minloc, out CVPoint maxloc, new Mat());

                        if (double.IsInfinity(maxval))
                        {
                            Cv2.MatchTemplate(src, newtemplate, result, TemplateMatchModes.CCorrNormed, mask);
                            Cv2.MinMaxLoc(result, out minval, out maxval, out minloc, out maxloc, new Mat());

                        }
                        if (maxval > temp)
                        {
                            location = maxloc;
                            temp = maxval;
                            angle = start + step * i;
                            modelrrect = rotatedRect;
                        }
                    }
为了提高匹配速度,可使用金字塔下采样-》上采样来完成:
   //对模板图像和待检测图像分别进行图像金字塔下采样
            for (int i = 0; i < numLevels; i++)
            {
                Cv2.PyrDown(src, src, new Size(src.Cols / 2, src.Rows / 2));
                Cv2.PyrDown(model, model, new Size(model.Cols / 2, model.Rows / 2));
            }
            Rect cropRegion = new CVRect(0, 0, 0, 0);
                for (int j = numLevels - 1; j >= 0; j--)
                {

                    //为了提升速度,直接上采样到最底层
                    for (int i = 0; i < numLevels; i++)
                    {
                        Cv2.PyrUp(src, src, new Size(src.Cols * 2,
                                    src.Rows * 2));//下一层,放大2倍
                        Cv2.PyrUp(model, model, new Size(model.Cols * 2,
                             model.Rows * 2));//下一层,放大2倍
                    }

                    location.X *= (int)Math.Pow(2, numLevels);
                    location.Y *= (int)Math.Pow(2, numLevels);
                    modelrrect = new RotatedRect(new Point2f((float)(modelrrect.Center.X * Math.Pow(2, numLevels)),//下一层,放大2倍
                                 (float)(modelrrect.Center.Y * Math.Pow(2, numLevels))),
                                 new Size2f(modelrrect.Size.Width * Math.Pow(2, numLevels),
                                 modelrrect.Size.Height * Math.Pow(2, numLevels)), 0);

                    CVPoint cenP = new CVPoint(location.X + modelrrect.Center.X,
                                   location.Y + modelrrect.Center.Y);//投影到下一层的匹配点位中心

                    int startX = cenP.X - model.Width;
                    int startY = cenP.Y - model.Height;
                    int endX = cenP.X + model.Width;
                    int endY = cenP.Y + model.Height;
                    cropRegion = new CVRect(startX, startY, endX - startX, endY - startY);
                    cropRegion = cropRegion.Intersect(new CVRect(0, 0, src.Width, src.Height));
                    Mat newSrc = MatExtension.Crop_Mask_Mat(src, cropRegion);
                    //每下一层金字塔,角度间隔减少2倍
                    step = 2;
                    //角度开始和范围
                    range = 20;
                    start = angle - 10;
                    bool testFlag = false;
                    for (int k = 0; k <= (int)range / step; k++)
                    {

                        newtemplate = ImageRotate(model, start + step * k, ref rotatedRect, ref mask);
                        if (newtemplate.Width > newSrc.Width || newtemplate.Height > newSrc.Height)
                            continue;
                        Cv2.MatchTemplate(newSrc, newtemplate, result, TemplateMatchModes.CCoeffNormed, mask);
                        Cv2.MinMaxLoc(result, out double minval, out double maxval,
                                                    out CVPoint minloc, out CVPoint maxloc, new Mat());
                        if (double.IsInfinity(maxval))
                        {
                            Cv2.MatchTemplate(src, newtemplate, result, TemplateMatchModes.CCorrNormed, mask);
                            Cv2.MinMaxLoc(result, out minval, out maxval, out minloc, out maxloc, new Mat());

                        }
                        if (maxval > temp)
                        {
                            //局部坐标
                            location.X = maxloc.X;
                            location.Y = maxloc.Y;
                            temp = maxval;
                            angle = start + step * k;
                            //局部坐标
                            modelrrect = rotatedRect;
                            testFlag = true;
                        }
                    }
                    if (testFlag)
                    {
                        //局部坐标--》整体坐标
                        location.X += cropRegion.X;
                        location.Y += cropRegion.Y;
                    }

                }
为了提高匹配得分,当图片与模板都进行一定角度旋转后,会产生无效区域,影响匹配效果,此时我们需要创建掩膜图像.
 /// <summary>
        /// 图像旋转,并获旋转后的图像边界旋转矩形
        /// </summary>
        /// <param name="image"></param>
        /// <param name="angle"></param>
        /// <param name="imgBounding"></param>
        /// <returns></returns>
        public static Mat ImageRotate(Mat image, double angle,ref RotatedRect imgBounding,ref Mat maskMat)
        {
            Mat newImg = new Mat();
            Point2f pt = new Point2f((float)image.Cols / 2, (float)image.Rows / 2);
            Mat M = Cv2.GetRotationMatrix2D(pt, -angle, 1.0);
            var mIndex = M.GetGenericIndexer<double>();

            double cos = Math.Abs(mIndex[0, 0]);
            double sin = Math.Abs(mIndex[0, 1]);
            int nW = (int)((image.Height * sin) + (image.Width * cos));
            int nH = (int)((image.Height * cos) + (image.Width * sin));
            mIndex[0, 2] += (nW / 2) - pt.X;
            mIndex[1, 2] += (nH / 2) - pt.Y;

            Cv2.WarpAffine(image, newImg, M, new CVSize(nW, nH));
            //获取图像边界旋转矩形
            Rect rect = new CVRect(0, 0, image.Width, image.Height);
            Point2f[] srcPoint2Fs = new Point2f[4]
                {
                    new Point2f(rect.Left,rect.Top),
                     new Point2f (rect.Right,rect.Top),
                       new Point2f (rect.Right,rect.Bottom),
                          new Point2f (rect.Left,rect.Bottom)
                };

           Point2f[] boundaryPoints = new Point2f[4];
            var A = M.Get<double>(0, 0);
            var B = M.Get<double>(0, 1);
            var C = M.Get<double>(0, 2);    //Tx
            var D = M.Get<double>(1, 0);
            var E = M.Get<double>(1, 1);
            var F = M.Get<double>(1, 2);    //Ty

            for(int i=0;i<4;i++)
            {
                boundaryPoints[i].X = (float)((A * srcPoint2Fs[i].X) + (B * srcPoint2Fs[i].Y) + C);
                boundaryPoints[i].Y = (float)((D * srcPoint2Fs[i].X) + (E * srcPoint2Fs[i].Y) + F);
                if (boundaryPoints[i].X < 0)
                    boundaryPoints[i].X = 0;
                else if (boundaryPoints[i].X > nW)
                    boundaryPoints[i].X = nW;
                if (boundaryPoints[i].Y < 0)
                    boundaryPoints[i].Y = 0;
                else if (boundaryPoints[i].Y > nH)
                    boundaryPoints[i].Y = nH;
            }

            Point2f cenP = new Point2f((boundaryPoints[0].X + boundaryPoints[2].X) / 2,
                                         (boundaryPoints[0].Y + boundaryPoints[2].Y) / 2);
            double ang = angle;

            double width1=Math.Sqrt(Math.Pow(boundaryPoints[0].X- boundaryPoints[1].X ,2)+
                Math.Pow(boundaryPoints[0].Y - boundaryPoints[1].Y,2));
            double width2 = Math.Sqrt(Math.Pow(boundaryPoints[0].X - boundaryPoints[3].X, 2) +
                Math.Pow(boundaryPoints[0].Y - boundaryPoints[3].Y, 2));

            //double width = width1 > width2 ? width1 : width2;

            //double height = width1 > width2 ? width2 : width1;

            imgBounding = new RotatedRect(cenP, new Size2f(width1, width2), (float)ang);

            Mat mask = new Mat(newImg.Size(), MatType.CV_8UC3, Scalar.Black);
            mask.DrawRotatedRect(imgBounding, Scalar.White, 1);
            Cv2.FloodFill(mask, new CVPoint(imgBounding.Center.X, imgBounding.Center.Y), Scalar.White);
         //   mask.ConvertTo(mask, MatType.CV_8UC1);
            //mask.CopyTo(maskMat);
            //掩膜复制给maskMat
            Cv2.CvtColor(mask, maskMat, ColorConversionCodes.BGR2GRAY);

            Mat _maskRoI = new Mat();
            Cv2.CvtColor(mask, _maskRoI, ColorConversionCodes.BGR2GRAY);
            Mat buf = new Mat();

            //# 黑白反转
            Cv2.BitwiseNot(_maskRoI, buf);
            Mat dst = new Mat();
            Cv2.BitwiseAnd(newImg, newImg, dst, _maskRoI);
            //Mat dst2 = new Mat();
            //Cv2.BitwiseOr(buf, dst, dst2);
            return dst;

        }
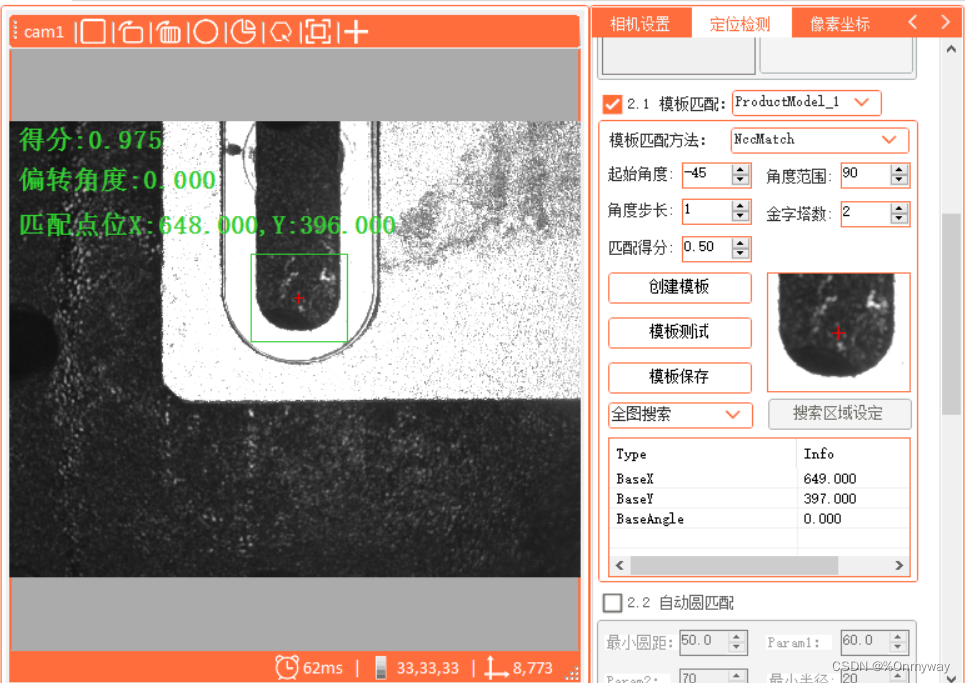
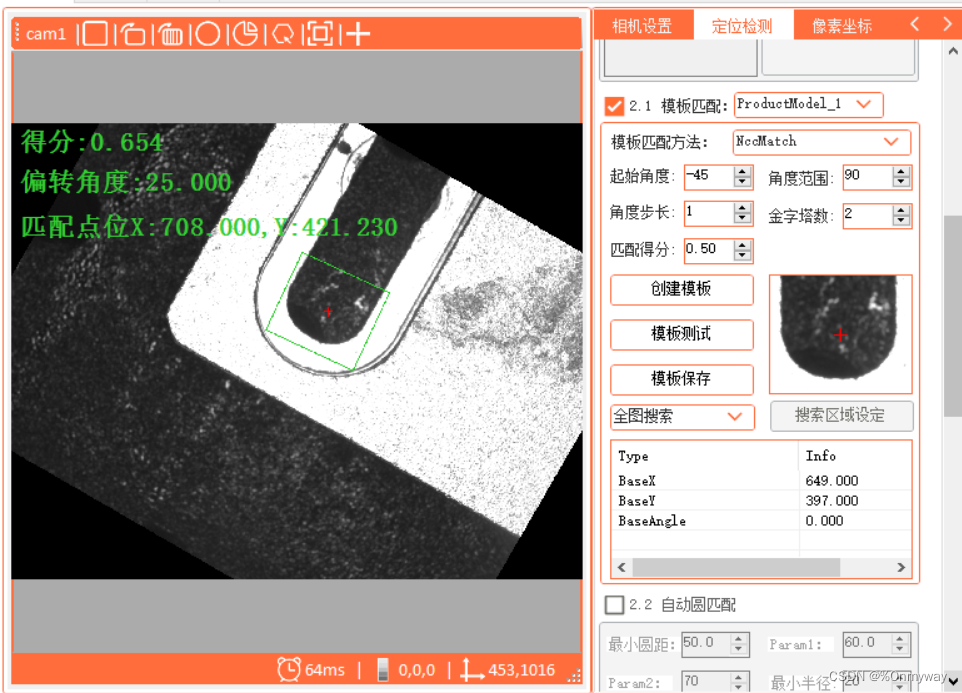
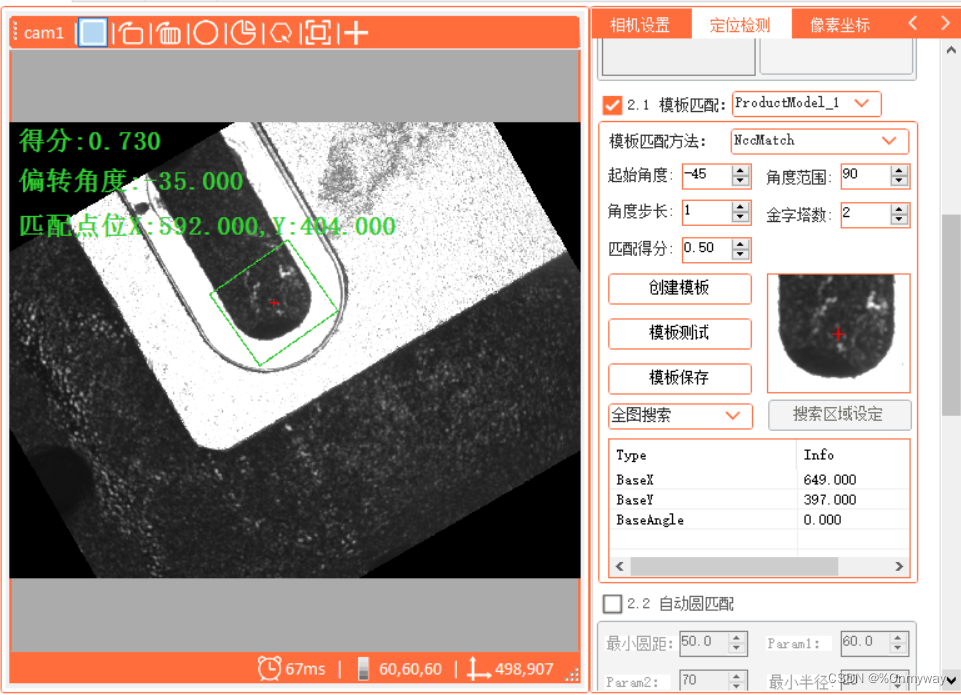
这个时候准备工作就完成的差不多,当然关于匹配精度(亚像素处理)这个地方就不做说明了,参考前文即可。测试的效果图如下:
0度:
25度:
-35度:
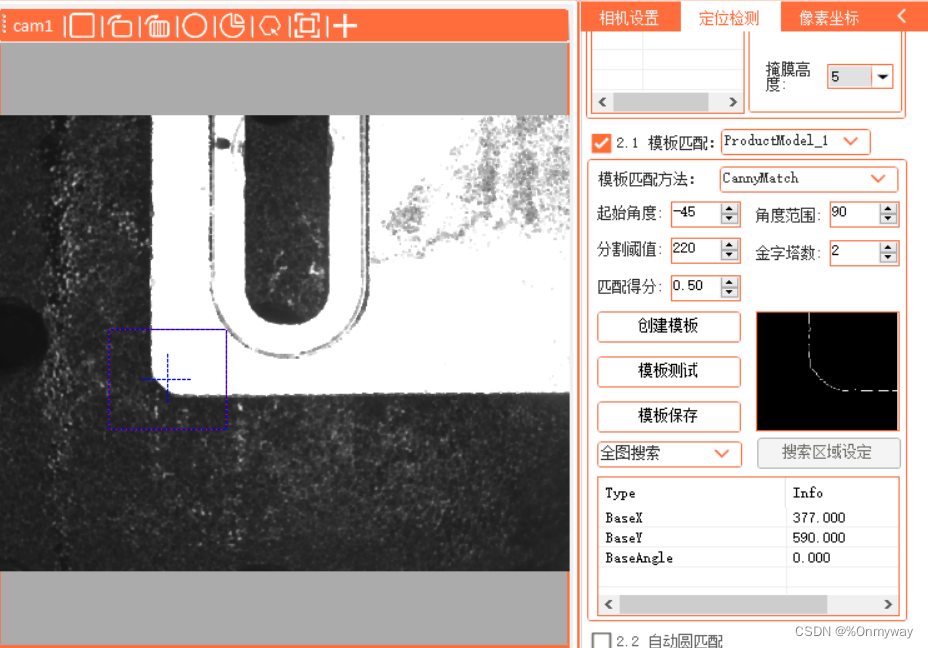
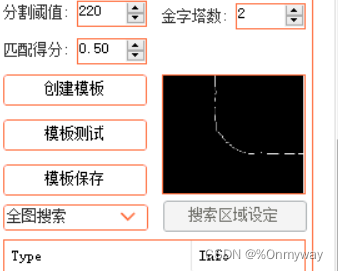
3). 在NCC模式的基础上,同是结合shapematch,衍生出另外一种匹配方式:canny模板匹配,大家可以理解为先创捷canny图模板,然后再使用MatchTemplate方法,同时加入金字塔搜索策略。
创建Canny模板:
  /// <summary>
        /// 创建Canny模板图像
        /// </summary>
        /// <param name="src"></param>
        /// <param name="RegionaRect"></param>
        /// <param name="thresh"></param>
        /// <param name="temCannyMat"></param>
        /// <returns></returns>
        public Mat CreateTemplateCanny(Mat src,Rect RegionaRect,double thresh,ref Mat temCannyMat,
            ref double modelX, ref double modelY)
        {
            Mat ModelMat = MatExtension.Crop_Mask_Mat(src, RegionaRect);
            Mat Morphological = Morphological_Proces.MorphologyEx(ModelMat, MorphShapes.Rect,
                       new OpenCvSharp.Size(3, 3), MorphTypes.Open);
            Mat binMat = new Mat();
            Cv2.Threshold(Morphological, binMat, thresh, 255, ThresholdTypes.Binary);

            temCannyMat = EdgeTool.Canny(binMat, 50, 240);

            Mat dst = ModelMat.CvtColor(ColorConversionCodes.GRAY2BGR);
            CVPoint cenP = new CVPoint(RegionaRect.Width / 2,
             RegionaRect.Height / 2);
            modelX = RegionaRect.X + RegionaRect.Width / 2;
            modelY = RegionaRect.Y + RegionaRect.Height / 2;
            Console.WriteLine(string.Format("模板中心点位:x:{0},y:{1}", RegionaRect.X + RegionaRect.Width / 2,
                  RegionaRect.Y + RegionaRect.Height / 2));
            dst.drawCross(cenP, Scalar.Red, 20, 2);
            return dst;
        }
模板图:
测试效果图如下:
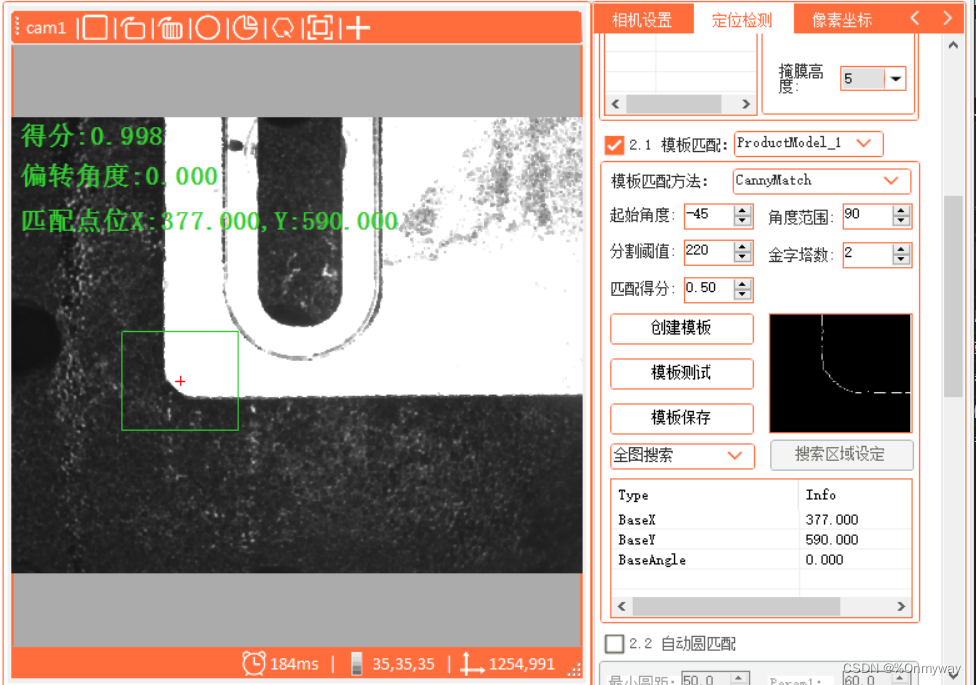
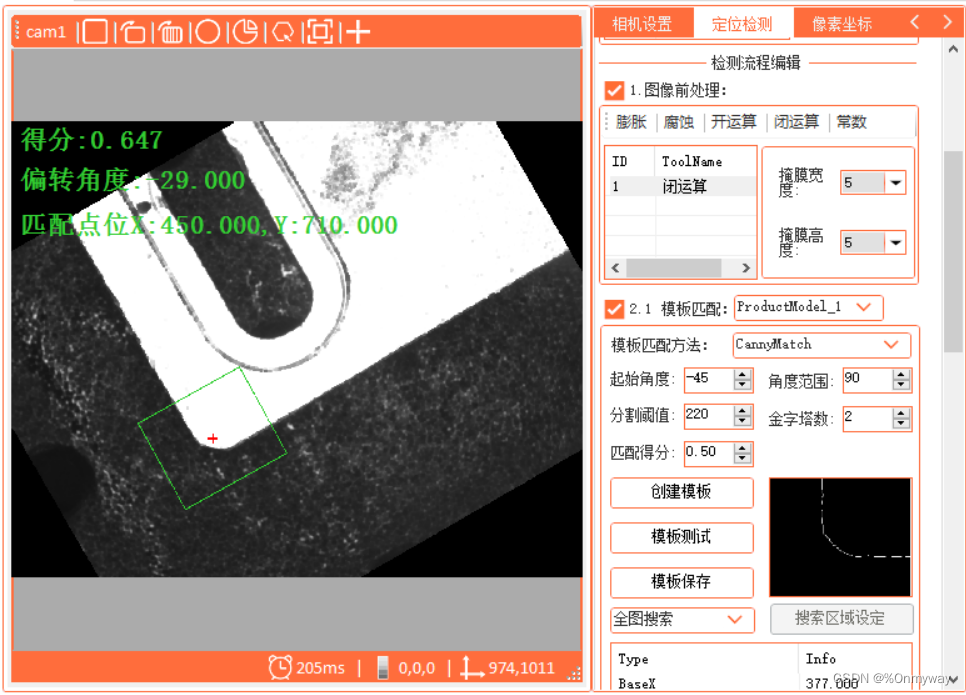
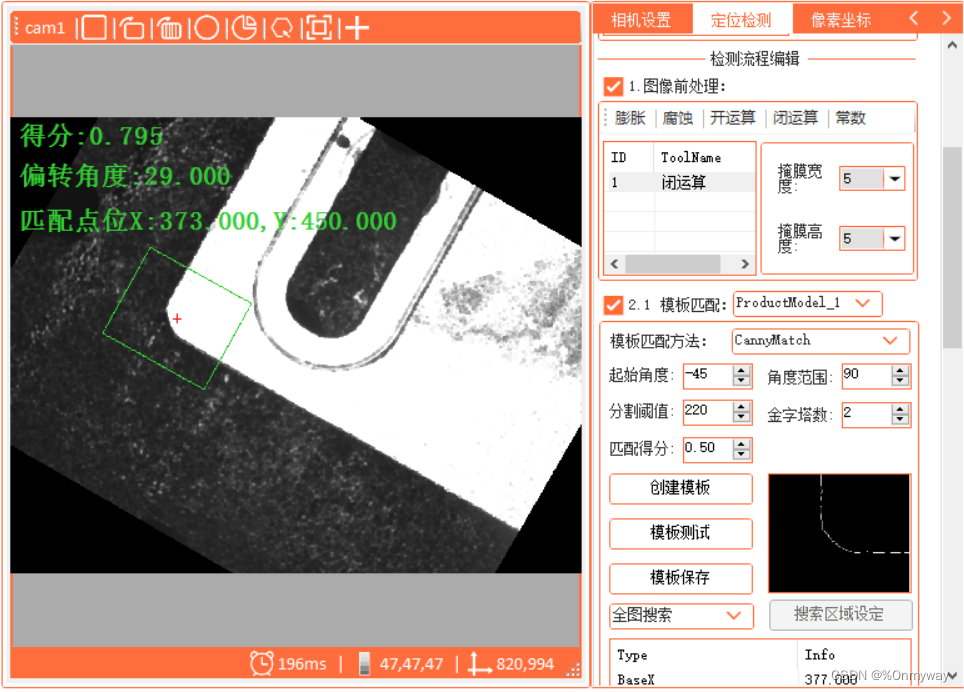
4)通过以上三种对比可发现,它们各有优缺点,shapematch形状匹配强调物体外形的完整性,操作简单,不需要额外构建掩膜和角步循环;NCC不需要选取这个物体来制作模板,只需要前景与背景有一定的区分即可,但是整体匹配效果一般,一些复杂的环境下可能会得不到想要的效果;Canny模板匹配结合了前面2中的部分优点,既可选取物体的局部特征,同时又有NCC匹配方法和策略;大家可以结合实际的项目,选取合适的方法达到最优的效果即可;当然网络上还有一些学术上更优更稳定的方法,如:基于梯度变化的模板匹配,大家也可以尝试一下,反正博主能力有限测试的时候没有达到想要的效果,特别是一些复杂的图像和尺寸较大的图像,测试的结果差强人意,同时实际的项目对于效率的要求也比较高,我们也不可能舍近求远,选择相对合适的即可。同时期待有共同兴趣的大佬们一起来探索发现和指正,大家共同进步。
PS:知识无国界,分享让大家都快乐!
版权归原作者 %Onmyway 所有, 如有侵权,请联系我们删除。