
实习的时候在公司做的项目的一部分----可能会有丢丢缺陷,但是能跑,记录一下。
一、科大讯飞的讯飞开放平台——讯飞开放平台-以语音交互为核心的人工智能开放平台
这里用的是语音听写(流式)的API和机器翻译的API。语音听写支持多种语言,但是听写下来就是该种语言的文字,比如中文听写下来就是中文、日文听写下来就是日文,没有自动翻译的功能,所以我把这个API和机器翻译的连用,这样输入小语种的语言,输出的就可以是指定的语言(一般英文或中文)方便后续的处理,比如文字转命令,或者可以当个语音翻译器来用。
1、首先配置环境:python(我用的3.9)以及pycharm(社区版就足够了)、pyaudio、portaudio、keyboard、chardet、websocket-client==0.57.0、pycparser==2.19、six==1.12.0、websocket==0.2.1,ffmpeg-python(一定是这个包,有一点不一样都不行、会报错!!!)
2、需要在讯飞平台注册后的服务接口认证信息:APPID、APISecret、APIKey这三个码有用。得到这些后去官网开通相应的功能,小语种需逐个开通才能使用,有免费额度,足够了。注意中英文和小语种识别的URL不同!!语音每次识别不超过1分钟,机器翻译的字符每次不超过5000个,足够了。
3、录音。
调用pyaudio录制音频供语音识别。
import keyboard
import pyaudio, wave
def record(filename):
p = pyaudio.PyAudio()
FORMAT = pyaudio.paInt16
CHANNELS = 1
RATE = 16000
CHUNK = 1024
stream = p.open(rate=RATE,
format=FORMAT,
channels=CHANNELS,
input=True,
frames_per_buffer=CHUNK)
frames = []
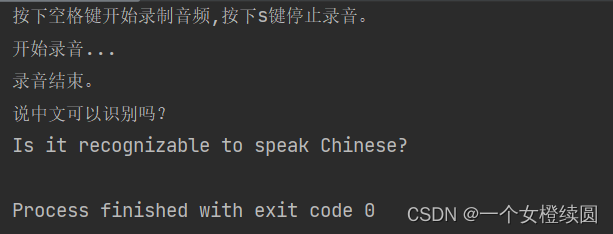
print("按下空格键开始录制音频,按下s键停止录音。")
recording = False
while True:
# key = keyboard.read_key()
if keyboard.is_pressed(' '):
if not recording:
recording = True
print("开始录音...")
if keyboard.is_pressed('s') and recording:
recording = False
print("录音结束。")
break
if recording:
data = stream.read(CHUNK)
frames.append(data)
else:
pass
if not stream.is_active():
print('录音意外停止!')
break
else:
pass
wf = wave.open(filename, 'wb')
wf.setframerate(RATE)
wf.setnchannels(CHANNELS)
wf.setsampwidth(p.get_sample_size(FORMAT))
wf.writeframes(b''.join(frames))
stream.stop_stream() # 可能不需要这部操作仅close可解决
stream.close()
wf.close()
p.terminate() # 仅在程序退出时使用,完全关闭pyaudio
4、语音听写
相关API参数——语音听写(流式版)WebAPI 文档 | 讯飞开放平台文档中心
可以在官网控制台添加热词,增大该词识别的准确率。在上面链接下载python语言的demo,然后填写相关API参数即可。
官方提供的代码
GitHub - TencentCloud/tencentcloud-speech-sdk-python
主函数
# 音频转文字部分的测试文件
from ifly.record_voice import record
from ifly.ifly_a2t import audio_to_text, clear_text

file = 'user_voice.wav'            # 语音录制,识别文件
# 录音转文字
record(file)               # 录制音频
txt_str = audio_to_text(file)  # 语音识别
print(txt_str)                 # 打印识别结果
其中record即前面的录音函数, audio_to_text函数是上面语音听写官方下载的文件里自带的。
5、机器翻译
相关API参数——机器翻译(新) API 文档 | 讯飞开放平台文档中心
同样下载python语言的demo。
from datetime import datetime
from wsgiref.handlers import format_date_time
from time import mktime
import hashlib
import base64
import hmac
from urllib.parse import urlencode
import json
import requests

'''
1.机器翻译2.0,请填写在讯飞开放平台-控制台-对应能力页面获取的APPID、APISecret、APIKey。
 2.目前仅支持中文与其他语种的互译,不包含中文的两个语种之间不能直接翻译。
 3.翻译文本不能超过5000个字符,即汉语不超过15000个字节,英文不超过5000个字节。
 4.此接口调用返回时长上有优化、通过个性化术语资源使用可以做到词语个性化翻译、后面会支持更多的翻译语种。
'''
APPId = ""
APISecret = ""
APIKey = ""
# 术语资源唯一标识,请根据控制台定义的RES_ID替换具体值,如不需术语可以不用传递此参数
RES_ID = "its_en_cn_word"
# 翻译原文本内容
TEXT = "科大讯飞"

class AssembleHeaderException(Exception):
    def __init__(self, msg):
        self.message = msg

class Url:
    def __init__(self, host, path, schema):
        self.host = host
        self.path = path
        self.schema = schema
        pass

# calculate sha256 and encode to base64
def sha256base64(data):
    sha256 = hashlib.sha256()
    sha256.update(data)
    digest = base64.b64encode(sha256.digest()).decode(encoding='utf-8')
    return digest

def parse_url(requset_url):
    stidx = requset_url.index("://")
    host = requset_url[stidx + 3:]
    schema = requset_url[:stidx + 3]
    edidx = host.index("/")
    if edidx <= 0:
        raise AssembleHeaderException("invalid request url:" + requset_url)
    path = host[edidx:]
    host = host[:edidx]
    u = Url(host, path, schema)
    return u

# build websocket auth request url
def assemble_ws_auth_url(requset_url, method="POST", api_key="", api_secret=""):
    u = parse_url(requset_url)
    host = u.host
    path = u.path
    now = datetime.now()
    date = format_date_time(mktime(now.timetuple()))
    # print(date)
    # date = "Thu, 12 Dec 2019 01:57:27 GMT"
    signature_origin = "host: {}\ndate: {}\n{} {} HTTP/1.1".format(host, date, method, path)
    # print(signature_origin)
    signature_sha = hmac.new(api_secret.encode('utf-8'), signature_origin.encode('utf-8'),
                             digestmod=hashlib.sha256).digest()
    signature_sha = base64.b64encode(signature_sha).decode(encoding='utf-8')
    authorization_origin = "api_key=\"%s\", algorithm=\"%s\", headers=\"%s\", signature=\"%s\"" % (
        api_key, "hmac-sha256", "host date request-line", signature_sha)
    authorization = base64.b64encode(authorization_origin.encode('utf-8')).decode(encoding='utf-8')
    # print(authorization_origin)
    values = {
        "host": host,
        "date": date,
        "authorization": authorization
    }

    return requset_url + "?" + urlencode(values)

url = 'https://itrans.xf-yun.com/v1/its'

body = {
    "header": {
        "app_id": APPId,
        "status": 3,
        "res_id": RES_ID
    },
    "parameter": {
        "its": {
            "from": "cn",
            "to": "en",
            "result": {}
        }
    },
    "payload": {
        "input_data": {
            "encoding": "utf8",
            "status": 3,
            "text": base64.b64encode(TEXT.encode("utf-8")).decode('utf-8')
        }
    }
}

request_url = assemble_ws_auth_url(url, "POST", APIKey, APISecret)

headers = {'content-type': "application/json", 'host': 'itrans.xf-yun.com', 'app_id': APPId}
# print(request_url)
response = requests.post(request_url, data=json.dumps(body), headers=headers)
# print(headers)
# print(response)
# print(response.content)
tempResult = json.loads(response.content.decode())
print('text字段Base64解码后=>' + base64.b64decode(tempResult['payload']['result']['text']).decode())
以上这段代码是官方提供的demo,把相关ID信息填写进去,与语音听写连用时注意,将TEXT内容换成语音识别生成的txt_str,还有需要注意语音听写的语言要和机器翻译的源语言是同一种语言,但是这里要注意一下两个API的语言参数不一样,比如在语音听写当中的英文表示为en_us,而机器翻译中是en。
识别效果
二、腾讯AI开放平台——腾讯 AI 开放平台
依旧是以上的思路,用语音识别API+机器翻译API
1、配置环境
pip install --upgrade tencentcloud-sdk-python
先这样下载吧,后续运行代码有版本不匹配再根据提示卸载再下载不冲突的版本即可。
2、依旧是去平台注册并开通相应的功能、略。
3、录音用上面讯飞用的那个代码就行、略。
4、语音识别
相关API及参数语音识别 实时语音识别(websocket)-实时语音识别相关接口-API 中心-腾讯云
官网提供的python代码下载地址GitHub - TencentCloud/tencentcloud-speech-sdk-python
5、机器翻译
文本翻译相关API及参数机器翻译 文本翻译-API接口-API 中心-腾讯云
from tencentcloud.common import credential#这里需要安装腾讯翻译sdk
from tencentcloud.common.profile.client_profile import ClientProfile
from tencentcloud.common.profile.http_profile import HttpProfile
from tencentcloud.common.exception.tencent_cloud_sdk_exception import TencentCloudSDKException
from tencentcloud.tmt.v20180321 import tmt_client, models

    try:
        cred = credential.Credential("xxxxxxxx", "yyyyyyy")#"xxxx"改为SecretId,"yyyyy"改为SecretKey
        httpProfile = HttpProfile()
        httpProfile.endpoint = "tmt.tencentcloudapi.com"

        clientProfile = ClientProfile()
        clientProfile.httpProfile = httpProfile
        client = tmt_client.TmtClient(cred, "ap-beijing", clientProfile)

        req = models.TextTranslateRequest()
        req.SourceText = 'hello'#要翻译的语句
        req.Source ='en'#源语言类型
        req.Target ='ch'#目标语言类型
        req.ProjectId = 0

        resp = client.TextTranslate(req)
        data=json.loads(resp.to_json_string())
        print(data['TargetText'])


    except TencentCloudSDKException as err:
        print(err)
将两者连接起来的桥梁呢,就是text,语音识别的输出文本是机器翻译的源文本。还有要使两者的语言是一种语言别忘了,就酱。
三、基于百度智能云
1、配置相关环境
相关软件配置:python(测试时的版本为3.9)、pycharm(社区版就足够了)以及annaconda3
依赖包:websocket、keyboard、pyaudio
2、在官网百度智能云-云智一体深入产业注册账号并开通相应功能
3、代码
相关API参数:实时语音翻译 - 机器翻译 - 文档
需要在代码中填写注册的服务接口认证信息、源语言及目标语言。同样调用设备麦克风进行录音,将生成的语音文件供语音翻译识别并翻译。百度智能云可以直接调用语音翻译(直接一个接口实现语音识别以及文本翻译的功能)接口,不必像以上两个平台一样对两个API的参数进行转换。
四、基于阿里云
1、配置相关环境
相关软件配置:python(测试时的版本为3.9)、pycharm(社区版就足够了)以及annaconda3
依赖包:在终端运行pip install setuptools 、
          下载Python SDK alibabacloud-nls-python-sdk-1.0.0.zip、

         进入SDK根目录使用如下命令安装SDK依赖:python -m pip install -r requirements.txt 、

         安装SDK: python -m pip install .
2、在官网阿里云登录 - 欢迎登录阿里云,安全稳定的云计算服务平台注册账号并开通相应功能
3、相关API参数
语音识别:实时语音识别接口说明_智能语音交互-阿里云帮助中心
文本翻译:文本翻译_机器翻译-阿里云帮助中心
版权归原作者 一个女橙续圆 所有, 如有侵权,请联系我们删除。