伪彩色处理(pseudocoloring)是指根据一定准则给灰度值赋予彩色值的处理。宏观来说就是将黑白图像转化为彩色图像,或者是将单色图像变换成给定彩色分布的图像。由于人眼对彩色的分辨能力远远高于对灰度的分辨能力,所以将灰度图像转化成彩色表示,就可以提高对图像细节的辨别力。因此,伪彩色处理的主要目的是提高人眼对图像的细节分辨能力,以达到图像增强的目的。
强度分层
强度分层也叫灰度分层或灰度分割。将灰度图像按照灰度范围划分为不同的层级,然后给每个层级赋予不同颜色,从而增强不同层级的对比度。强度分层技术将灰度图转换为伪彩色图像,而且伪彩色图像颜色种类数目与强度分层数目一致。
令f(x,y)表示位于空间位置(x,y)处像素的灰度值,[0,L]表示灰度值范围,0代表黑色,L代表白色。假定分割值l1,l2,l3....(0<l1<l2.....<L),将图像灰度划分为M+1个区间V1,V2....VM+1。灰度值到彩色的映射关系为
,
,其中
是第k个灰度区间
有关的颜色。
from skimage import color, io
from matplotlib import pyplot as plt
import numpy as np

img = io.imread('a.jpg')
grayimg = color.rgb2gray(img)  # 转换为灰度图
plt.figure()
plt.imshow(grayimg, cmap='gray')
plt.axis('off')
plt.show()
rows, cols = grayimg.shape
labels = np.zeros([rows, cols])
for i in range(rows):
    for j in range(cols):
        if (grayimg[i, j] < 0.4):
            labels[i, j] = 1
        elif (grayimg[i, j] < 0.8):
            labels[i, j] = 2
        else:
            labels[i, j] = 3
psdimg = color.label2rgb(labels)  # 不同灰度区间采用不同颜色
plt.figure
plt.axis('off')
plt.imshow(psdimg)
plt.show()
灰度图:

强度分层图:
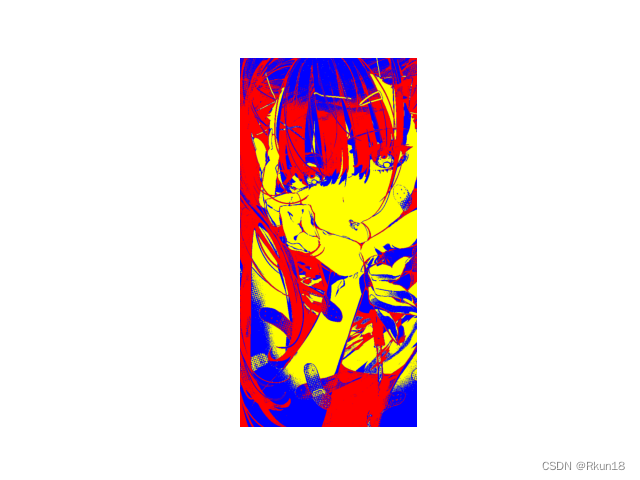
你也可以修改灰度区间来改变颜色。
灰度值到彩色变化
灰度值到彩色变换首先是对任何像素的灰度值进行三个独立的变换,然后将三个变换结果分别做为伪彩色图像的红,绿,蓝通道的亮度值。与强度分层技术相比,灰度值到彩色变换技术更通用。
表示位于空间(x,y)处的像素灰度值,
,
,
表示经过变换后不同通道的亮度值。合成RGB彩色图像在空间位置(x,y)处颜色
。
变换函数:
 
from matplotlib import pyplot as plt

# 定义灰度值到彩色变换
L = 255

def GetR(gray):
    if gray < L / 2:
        return 0
    elif gray > L / 4 * 3:
        return L
    else:
        return 4 * gray - 2 * L

def GetG(gray):
    if gray < L / 4:
        return 4 * gray
    elif gray > L / 4 * 3:
        return 4 * L - 4 * gray
    else:
        return L

def GetB(gray):
    if gray < L / 4:
        return L
    elif gray > L / 2:
        return 0
    else:
        return 2 * L - 4 * gray

# 设置字体格式
plt.rcParams['font.sans-serif'] = ['SimHei']
plt.rcParams['axes.unicode_minus'] = False
plt.rcParams['font.size'] = 15
x = [0, 64, 127, 191, 255]
# 绘制灰度图像到不同通道的映射关系
plt.figure()
R = []
for i in x:
    R.append(GetR(i))
plt.plot(x, R, 'r--', label='红色变换')
plt.legend(loc='best')

plt.figure()
G = []
for i in x:
    G.append(GetG(i))
plt.plot(x, G, 'g--', label='绿色变换')
plt.legend(loc='best')

plt.figure()
B = []
for i in x:
    B.append(GetB(i))
plt.plot(x, B, 'o--', markersize=5, label='蓝色变换')
plt.legend(loc='best')

# 绘制灰度图像到RGB映射关系
plt.figure()
plt.plot(x, R, 'r--')
plt.plot(x, G, 'g')
plt.plot(x, B, 'b')
plt.show()
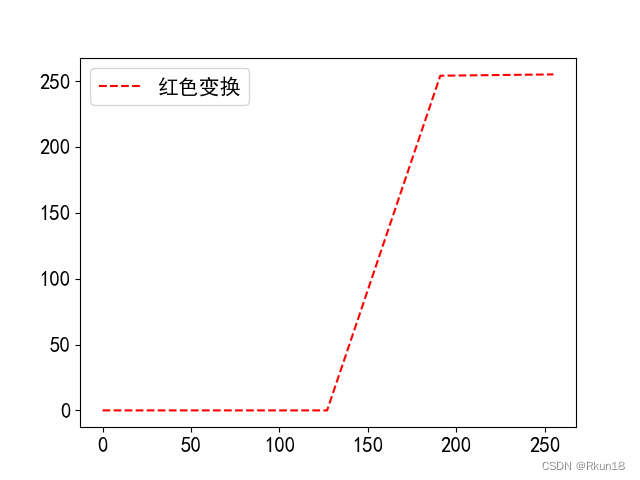
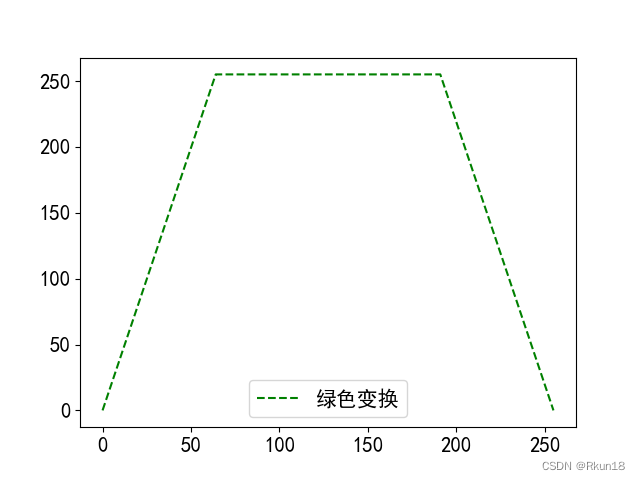

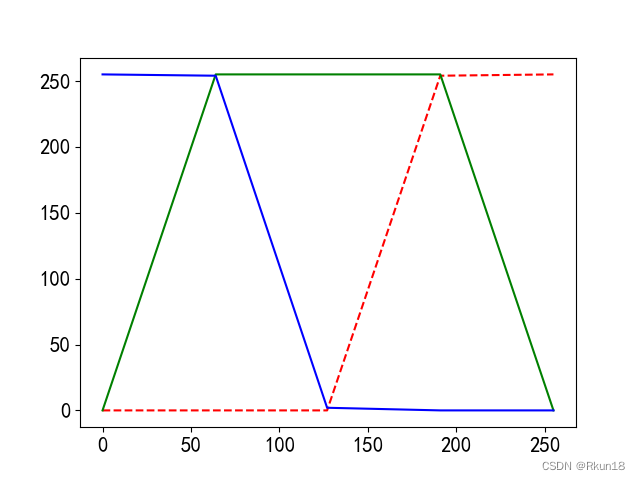
按照映射关系转换成为彩色图像:
from matplotlib import pyplot as plt
from skimage import io, color
import numpy as np

# 定义灰度值到彩色变换
L = 255

def GetR(gray):
    if gray < L / 2:
        return 0
    elif gray > L / 4 * 3:
        return L
    else:
        return 4 * gray - 2 * L

def GetG(gray):
    if gray < L / 4:
        return 4 * gray
    elif gray > L / 4 * 3:
        return 4 * L - 4 * gray
    else:
        return L

def GetB(gray):
    if gray < L / 4:
        return L
    elif gray > L / 2:
        return 0
    else:
        return 2 * L - 4 * gray

img=io.imread('G.jpg')
gray = color.rgb2gray(img)*255  # 彩色转换灰度图
color = np.zeros(img.shape, dtype='uint8')
for i in range(img.shape[0]):
    for j in range(img.shape[1]):
        r, g, b = GetR(gray[i, j]), GetG(gray[i, j]), GetB(gray[i, j])
        color[i, j, :] = (r, g, b)
        # 显示
plt.figure()
plt.axis('off')
plt.imshow(img)
plt.figure()
plt.axis('off')
plt.imshow(gray, cmap='gray')  # 显示灰度图
plt.figure()
plt.axis('off')
plt.imshow(color)  #显示伪彩色图像
plt.show()
原图:
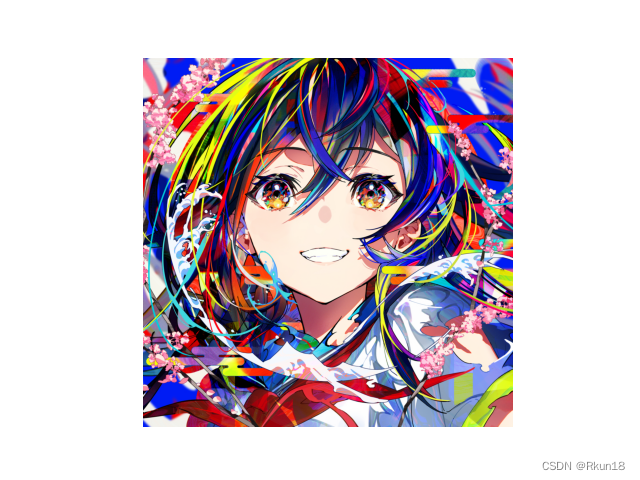
灰度图:
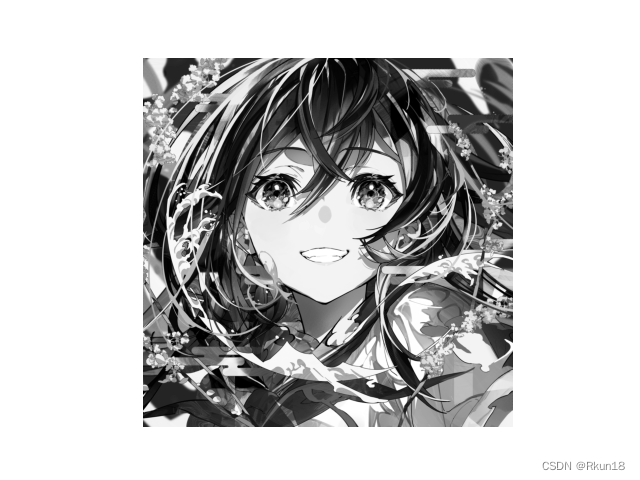
伪彩色图像:
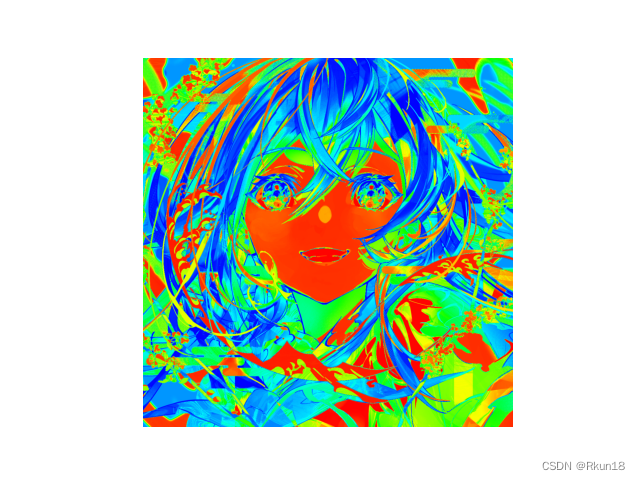
你可以自己使用自己的图片,如果使用自己的图片:读取时标明路径,一般我放在与程序同一路径下:

你也可以使用skimage.data库里自带的图片,例如:
from matplotlib import pyplot as plt
from skimage import data
img=data.astronaut()
plt.imshow(img)
plt.axis('off')
plt.show()

版权归原作者 Rkun18 所有, 如有侵权,请联系我们删除。