
YOLO v5结合热力图并可视化
- 目前学习方向: https://github.com/xiaoaleiBLUE
文章目录
总结及问题所在
- YOLO v5结合热力图并可视化,并在官方yolov5s.yaml进行操作,同时在yolov5s.yaml换成自己的数据类别,训练后也可以跑通热力图。但是问题2还没解决。
- 提供一些在自己修改的YOLO v5的网络上结合热力图可视化的一些思路,虽然自己修改后的网络热力图可视化代码跑通,但是相应文件夹的热力图的图片没有出来,目前还在探索,如果跑出来的小伙伴可以交流一下,分享一下问题所在。
- 提供了各层网络可视化特征图的思路。
一、YOLO v5结合热力图并可视化
1.1 在项目文件下添加main_gradcam.py文件
import os
import random
import time
import argparse
import numpy as np
from models.gradcam import YOLOV5GradCAM, YOLOV5GradCAMPP
from models.yolov5_object_detector import YOLOV5TorchObjectDetector
import cv2
# 数据集类别名
names =['person','bicycle','car','motorcycle','airplane','bus','train','truck','boat','traffic light','fire hydrant','stop sign','parking meter','bench','bird','cat','dog','horse','sheep','cow','elephant','bear','zebra','giraffe','backpack','umbrella','handbag','tie','suitcase','frisbee','skis','snowboard','sports ball','kite','baseball bat','baseball glove','skateboard','surfboard','tennis racket','bottle','wine glass','cup','fork','knife','spoon','bowl','banana','apple','sandwich','orange','broccoli','carrot','hot dog','pizza','donut','cake','chair','couch','potted plant','bed','dining table','toilet','tv','laptop','mouse','remote','keyboard','cell phone','microwave','oven','toaster','sink','refrigerator','book','clock','vase','scissors','teddy bear','hair drier','toothbrush']# class names# yolov5s网络中的三个detect层
target_layers =['model_17_cv3_act','model_20_cv3_act','model_23_cv3_act']# Arguments
parser = argparse.ArgumentParser()# yolov5 权重文件
parser.add_argument('--model-path',type=str, default="yolov5s.pt",help='Path to the model')# 需要可视化的图片
parser.add_argument('--img-path',type=str, default='data/images/bus.jpg',help='input image path')# 可视化输入文件路径
parser.add_argument('--output-dir',type=str, default='runs/result17',help='output dir')
parser.add_argument('--img-size',type=int, default=640,help="input image size")# target-layer
parser.add_argument('--target-layer',type=str, default='model_17_cv3_act',help='The layer hierarchical address to which gradcam will applied,'' the names should be separated by underline')
parser.add_argument('--method',type=str, default='gradcam',help='gradcam method')
parser.add_argument('--device',type=str, default='cuda',help='cuda or cpu')
parser.add_argument('--no_text_box', action='store_true',help='do not show label and box on the heatmap')
args = parser.parse_args()defget_res_img(bbox, mask, res_img):
mask = mask.squeeze(0).mul(255).add_(0.5).clamp_(0,255).permute(1,2,0).detach().cpu().numpy().astype(
np.uint8)
heatmap = cv2.applyColorMap(mask, cv2.COLORMAP_JET)# n_heatmat = (Box.fill_outer_box(heatmap, bbox) / 255).astype(np.float32)
n_heatmat =(heatmap /255).astype(np.float32)
res_img = res_img /255
res_img = cv2.add(res_img, n_heatmat)
res_img =(res_img / res_img.max())return res_img, n_heatmat
defplot_one_box(x, img, color=None, label=None, line_thickness=3):# this is a bug in cv2. It does not put box on a converted image from torch unless it's buffered and read again!
cv2.imwrite('temp.jpg',(img *255).astype(np.uint8))
img = cv2.imread('temp.jpg')# Plots one bounding box on image img
tl = line_thickness orround(0.002*(img.shape[0]+ img.shape[1])/2)+1# line/font thickness
color = color or[random.randint(0,255)for _ inrange(3)]
c1, c2 =(int(x[0]),int(x[1])),(int(x[2]),int(x[3]))
cv2.rectangle(img, c1, c2, color, thickness=tl, lineType=cv2.LINE_AA)if label:
tf =max(tl -1,1)# font thickness
t_size = cv2.getTextSize(label,0, fontScale=tl /3, thickness=tf)[0]
outside = c1[1]- t_size[1]-3>=0# label fits outside box up
c2 = c1[0]+ t_size[0], c1[1]- t_size[1]-3if outside else c1[1]+ t_size[1]+3
outsize_right = c2[0]- img.shape[:2][1]>0# label fits outside box right
c1 = c1[0]-(c2[0]- img.shape[:2][1])if outsize_right else c1[0], c1[1]
c2 = c2[0]-(c2[0]- img.shape[:2][1])if outsize_right else c2[0], c2[1]
cv2.rectangle(img, c1, c2, color,-1, cv2.LINE_AA)# filled
cv2.putText(img, label,(c1[0], c1[1]-2if outside else c2[1]-2),0, tl /3,[225,255,255], thickness=tf,
lineType=cv2.LINE_AA)return img
# 检测单个图片defmain(img_path):
colors =[[random.randint(0,255)for _ inrange(3)]for _ in names]
device = args.device
input_size =(args.img_size, args.img_size)# 读入图片
img = cv2.imread(img_path)# 读取图像格式:BGRprint('[INFO] Loading the model')# 实例化YOLOv5模型,得到检测结果
model = YOLOV5TorchObjectDetector(args.model_path, device, img_size=input_size, names=names)# img[..., ::-1]: BGR --> RGB# (480, 640, 3) --> (1, 3, 480, 640)
torch_img = model.preprocessing(img[...,::-1])
tic = time.time()# 遍历三层检测层for target_layer in target_layers:# 获取grad-cam方法if args.method =='gradcam':
saliency_method = YOLOV5GradCAM(model=model, layer_name=target_layer, img_size=input_size)elif args.method =='gradcampp':
saliency_method = YOLOV5GradCAMPP(model=model, layer_name=target_layer, img_size=input_size)
masks, logits,[boxes, _, class_names, conf]= saliency_method(torch_img)# 得到预测结果
result = torch_img.squeeze(0).mul(255).add_(0.5).clamp_(0,255).permute(1,2,0).detach().cpu().numpy()
result = result[...,::-1]# convert to bgr# 保存设置
imgae_name = os.path.basename(img_path)# 获取图片名
save_path =f'{args.output_dir}{imgae_name[:-4]}/{args.method}'ifnot os.path.exists(save_path):
os.makedirs(save_path)print(f'[INFO] Saving the final image at {save_path}')# 遍历每张图片中的每个目标for i, mask inenumerate(masks):# 遍历图片中的每个目标
res_img = result.copy()# 获取目标的位置和类别信息
bbox, cls_name = boxes[0][i], class_names[0][i]
label =f'{cls_name}{conf[0][i]}'# 类别+置信分数# 获取目标的热力图
res_img, heat_map = get_res_img(bbox, mask, res_img)
res_img = plot_one_box(bbox, res_img, label=label, color=colors[int(names.index(cls_name))],
line_thickness=3)# 缩放到原图片大小
res_img = cv2.resize(res_img, dsize=(img.shape[:-1][::-1]))
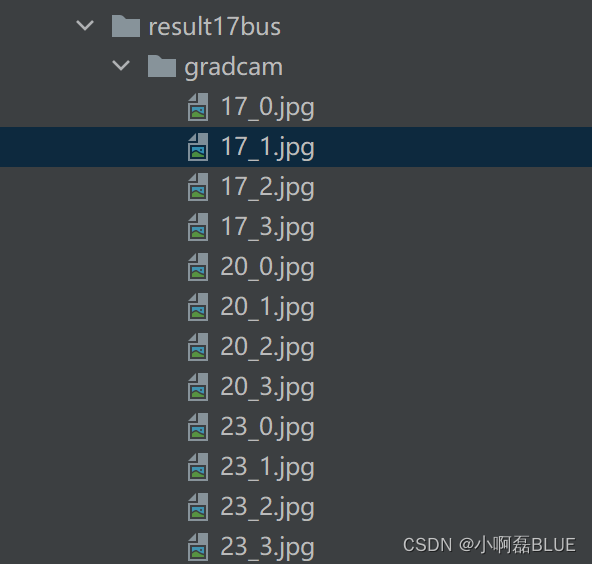
output_path =f'{save_path}/{target_layer[6:8]}_{i}.jpg'
cv2.imwrite(output_path, res_img)print(f'{target_layer[6:8]}_{i}.jpg done!!')print(f'Total time : {round(time.time()- tic,4)} s')if __name__ =='__main__':# 图片路径为文件夹if os.path.isdir(args.img_path):
img_list = os.listdir(args.img_path)print(img_list)for item in img_list:# 依次获取文件夹中的图片名,组合成图片的路径
main(os.path.join(args.img_path, item))# 单个图片else:
main(args.img_path)
1.1 models文件下添加gradcam.py文件
- 我们发现在import出错
- from models.gradcam import YOLOV5GradCAM, YOLOV5GradCAMPP 出错
- from models.yolov5_object_detector import YOLOV5TorchObjectDetector 出错
- gradcam.py文件代码如下
import time
import torch
import torch.nn.functional as F

deffind_yolo_layer(model, layer_name):"""Find yolov5 layer to calculate GradCAM and GradCAM++

    Args:
        model: yolov5 model.
        layer_name (str): the name of layer with its hierarchical information.

    Return:
        target_layer: found layer
    """
    hierarchy = layer_name.split('_')
    target_layer = model.model._modules[hierarchy[0]]for h in hierarchy[1:]:
        target_layer = target_layer._modules[h]return target_layer

classYOLOV5GradCAM:# 初始化,得到target_layer层def__init__(self, model, layer_name, img_size=(640,640)):
        self.model = model
        self.gradients =dict()
        self.activations =dict()defbackward_hook(module, grad_input, grad_output):
            self.gradients['value']= grad_output[0]returnNonedefforward_hook(module,input, output):
            self.activations['value']= output
            returnNone

        target_layer = find_yolo_layer(self.model, layer_name)# 获取forward过程中每层的输入和输出,用于对比hook是不是正确记录
        target_layer.register_forward_hook(forward_hook)
        target_layer.register_full_backward_hook(backward_hook)
        device ='cuda'ifnext(self.model.model.parameters()).is_cuda else'cpu'
        self.model(torch.zeros(1,3,*img_size, device=device))defforward(self, input_img, class_idx=True):"""
        Args:
            input_img: input image with shape of (1, 3, H, W)
        Return:
            mask: saliency map of the same spatial dimension with input
            logit: model output
            preds: The object predictions
        """
        saliency_maps =[]
        b, c, h, w = input_img.size()
        preds, logits = self.model(input_img)for logit, cls, cls_name inzip(logits[0], preds[1][0], preds[2][0]):if class_idx:
                score = logit[cls]else:
                score = logit.max()
            self.model.zero_grad()
            tic = time.time()# 获取梯度
            score.backward(retain_graph=True)print(f"[INFO] {cls_name}, model-backward took: ",round(time.time()- tic,4),'seconds')
            gradients = self.gradients['value']
            activations = self.activations['value']
            b, k, u, v = gradients.size()
            alpha = gradients.view(b, k,-1).mean(2)
            weights = alpha.view(b, k,1,1)
            saliency_map =(weights * activations).sum(1, keepdim=True)
            saliency_map = F.relu(saliency_map)
            saliency_map = F.interpolate(saliency_map, size=(h, w), mode='bilinear', align_corners=False)
            saliency_map_min, saliency_map_max = saliency_map.min(), saliency_map.max()
            saliency_map =(saliency_map - saliency_map_min).div(saliency_map_max - saliency_map_min).data
            saliency_maps.append(saliency_map)return saliency_maps, logits, preds

    def__call__(self, input_img):return self.forward(input_img)classYOLOV5GradCAMPP(YOLOV5GradCAM):def__init__(self, model, layer_name, img_size=(640,640)):super(YOLOV5GradCAMPP, self).__init__(model, layer_name, img_size)defforward(self, input_img, class_idx=True):
        saliency_maps =[]
        b, c, h, w = input_img.size()
        tic = time.time()
        preds, logits = self.model(input_img)print("[INFO] model-forward took: ",round(time.time()- tic,4),'seconds')for logit, cls, cls_name inzip(logits[0], preds[1][0], preds[2][0]):if class_idx:
                score = logit[cls]else:
                score = logit.max()
            self.model.zero_grad()
            tic = time.time()# 获取梯度
            score.backward(retain_graph=True)print(f"[INFO] {cls_name}, model-backward took: ",round(time.time()- tic,4),'seconds')
            gradients = self.gradients['value']# dS/dA
            activations = self.activations['value']# A
            b, k, u, v = gradients.size()

            alpha_num = gradients.pow(2)
            alpha_denom = gradients.pow(2).mul(2)+ \
                          activations.mul(gradients.pow(3)).view(b, k, u * v).sum(-1, keepdim=True).view(b, k,1,1)# torch.where(condition, x, y) condition是条件,满足条件就返回x,不满足就返回y
            alpha_denom = torch.where(alpha_denom !=0.0, alpha_denom, torch.ones_like(alpha_denom))
            alpha = alpha_num.div(alpha_denom +1e-7)

            positive_gradients = F.relu(score.exp()* gradients)# ReLU(dY/dA) == ReLU(exp(S)*dS/dA))
            weights =(alpha * positive_gradients).view(b, k, u * v).sum(-1).view(b, k,1,1)

            saliency_map =(weights * activations).sum(1, keepdim=True)
            saliency_map = F.relu(saliency_map)
            saliency_map = F.interpolate(saliency_map, size=(h, w), mode='bilinear', align_corners=False)
            saliency_map_min, saliency_map_max = saliency_map.min(), saliency_map.max()
            saliency_map =(saliency_map - saliency_map_min).div(saliency_map_max - saliency_map_min).data
            saliency_maps.append(saliency_map)return saliency_maps, logits, preds
1.2 models文件下添加yolov5_object_detector.py文件
- yolov5_object_detector.py文件代码如下
import numpy as np
import torch
from models.experimental import attempt_load
from utils.general import xywh2xyxy
from utils.dataloaders import letterbox
import cv2
import time
import torchvision
import torch.nn as nn
from utils.metrics import box_iou

classYOLOV5TorchObjectDetector(nn.Module):def__init__(self,
                 model_weight,
                 device,
                 img_size,
                 names=None,
                 mode='eval',
                 confidence=0.45,
                 iou_thresh=0.45,
                 agnostic_nms=False):super(YOLOV5TorchObjectDetector, self).__init__()
        self.device = device
        self.model =None
        self.img_size = img_size
        self.mode = mode
        self.confidence = confidence
        self.iou_thresh = iou_thresh
        self.agnostic = agnostic_nms
        self.model = attempt_load(model_weight, inplace=False, fuse=False)
        self.model.requires_grad_(True)
        self.model.to(device)if self.mode =='train':
            self.model.train()else:
            self.model.eval()# fetch the namesif names isNone:
            self.names =['your dataset classname']else:
            self.names = names

        # preventing cold start
        img = torch.zeros((1,3,*self.img_size), device=device)
        self.model(img)@staticmethoddefnon_max_suppression(prediction, logits, conf_thres=0.3, iou_thres=0.45, classes=None, agnostic=False,
                            multi_label=False, labels=(), max_det=300):"""Runs Non-Maximum Suppression (NMS) on inference and logits results

        Returns:
             list of detections, on (n,6) tensor per image [xyxy, conf, cls] and pruned input logits (n, number-classes)
        """

        nc = prediction.shape[2]-5# number of classes
        xc = prediction[...,4]> conf_thres  # candidates# Checksassert0<= conf_thres <=1,f'Invalid Confidence threshold {conf_thres}, valid values are between 0.0 and 1.0'assert0<= iou_thres <=1,f'Invalid IoU {iou_thres}, valid values are between 0.0 and 1.0'# Settings
        min_wh, max_wh =2,4096# (pixels) minimum and maximum box width and height
        max_nms =30000# maximum number of boxes into torchvision.ops.nms()
        time_limit =10.0# seconds to quit after
        redundant =True# require redundant detections
        multi_label &= nc >1# multiple labels per box (adds 0.5ms/img)
        merge =False# use merge-NMS

        t = time.time()
        output =[torch.zeros((0,6), device=prediction.device)]* prediction.shape[0]
        logits_output =[torch.zeros((0, nc), device=logits.device)]* logits.shape[0]# logits_output = [torch.zeros((0, 80), device=logits.device)] * logits.shape[0]for xi,(x, log_)inenumerate(zip(prediction, logits)):# image index, image inference# Apply constraints# x[((x[..., 2:4] < min_wh) | (x[..., 2:4] > max_wh)).any(1), 4] = 0  # width-height
            x = x[xc[xi]]# confidence
            log_ = log_[xc[xi]]# Cat apriori labels if autolabellingif labels andlen(labels[xi]):
                l = labels[xi]
                v = torch.zeros((len(l), nc +5), device=x.device)
                v[:,:4]= l[:,1:5]# box
                v[:,4]=1.0# conf
                v[range(len(l)), l[:,0].long()+5]=1.0# cls
                x = torch.cat((x, v),0)# If none remain process next imageifnot x.shape[0]:continue# Compute conf
            x[:,5:]*= x[:,4:5]# conf = obj_conf * cls_conf# Box (center x, center y, width, height) to (x1, y1, x2, y2)
            box = xywh2xyxy(x[:,:4])# Detections matrix nx6 (xyxy, conf, cls)if multi_label:
                i, j =(x[:,5:]> conf_thres).nonzero(as_tuple=False).T
                x = torch.cat((box[i], x[i, j +5,None], j[:,None].float()),1)else:# best class only
                conf, j = x[:,5:].max(1, keepdim=True)
                x = torch.cat((box, conf, j.float()),1)[conf.view(-1)> conf_thres]
                log_ = log_[conf.view(-1)> conf_thres]# Filter by classif classes isnotNone:
                x = x[(x[:,5:6]== torch.tensor(classes, device=x.device)).any(1)]# Check shape
            n = x.shape[0]# number of boxesifnot n:# no boxescontinueelif n > max_nms:# excess boxes
                x = x[x[:,4].argsort(descending=True)[:max_nms]]# sort by confidence# Batched NMS
            c = x[:,5:6]*(0if agnostic else max_wh)# classes
            boxes, scores = x[:,:4]+ c, x[:,4]# boxes (offset by class), scores
            i = torchvision.ops.nms(boxes, scores, iou_thres)# NMSif i.shape[0]> max_det:# limit detections
                i = i[:max_det]if merge and(1< n <3E3):# Merge NMS (boxes merged using weighted mean)# update boxes as boxes(i,4) = weights(i,n) * boxes(n,4)
                iou = box_iou(boxes[i], boxes)> iou_thres  # iou matrix
                weights = iou * scores[None]# box weights
                x[i,:4]= torch.mm(weights, x[:,:4]).float()/ weights.sum(1, keepdim=True)# merged boxesif redundant:
                    i = i[iou.sum(1)>1]# require redundancy

            output[xi]= x[i]
            logits_output[xi]= log_[i]assert log_[i].shape[0]== x[i].shape[0]if(time.time()- t)> time_limit:print(f'WARNING: NMS time limit {time_limit}s exceeded')break# time limit exceededreturn output, logits_output

    @staticmethoddefyolo_resize(img, new_shape=(640,640), color=(114,114,114), auto=True, scaleFill=False, scaleup=True):return letterbox(img, new_shape=new_shape, color=color, auto=auto, scaleFill=scaleFill, scaleup=scaleup)defforward(self, img):
        prediction, logits, _ = self.model(img, augment=False)
        prediction, logits = self.non_max_suppression(prediction, logits, self.confidence, self.iou_thresh,
                                                      classes=None,
                                                      agnostic=self.agnostic)
        self.boxes, self.class_names, self.classes, self.confidences =[[[]for _ inrange(img.shape[0])]for _ inrange(4)]for i, det inenumerate(prediction):# detections per imageiflen(det):for*xyxy, conf, cls in det:# 返回整数
                    bbox =[int(b)for b in xyxy]
                    self.boxes[i].append(bbox)
                    self.confidences[i].append(round(conf.item(),2))
                    cls =int(cls.item())
                    self.classes[i].append(cls)if self.names isnotNone:
                        self.class_names[i].append(self.names[cls])else:
                        self.class_names[i].append(cls)return[self.boxes, self.classes, self.class_names, self.confidences], logits

    defpreprocessing(self, img):iflen(img.shape)!=4:
            img = np.expand_dims(img, axis=0)
        im0 = img.astype(np.uint8)
        img = np.array([self.yolo_resize(im, new_shape=self.img_size)[0]for im in im0])
        img = img.transpose((0,3,1,2))
        img = np.ascontiguousarray(img)
        img = torch.from_numpy(img).to(self.device)
        img = img /255.0return img
1.3 修改yolo.py文件
- 修改yolo.py中的 class Detect类中的def forward 方法, 修改后
classDetect(nn.Module):
    stride =None# strides computed during build
    onnx_dynamic =False# ONNX export parameter
    export =False# export modedef__init__(self, nc=80, anchors=(), ch=(), inplace=True):# detection layersuper().__init__()
        self.nc = nc  # number of classes
        self.no = nc +5# number of outputs per anchor
        self.nl =len(anchors)# number of detection layers
        self.na =len(anchors[0])//2# number of anchors
        self.grid =[torch.zeros(1)]* self.nl  # init grid
        self.anchor_grid =[torch.zeros(1)]* self.nl  # init anchor grid
        self.register_buffer('anchors', torch.tensor(anchors).float().view(self.nl,-1,2))# shape(nl,na,2)
        self.m = nn.ModuleList(nn.Conv2d(x, self.no * self.na,1)for x in ch)# output conv
        self.inplace = inplace  # use inplace ops (e.g. slice assignment)defforward(self, x):
        z =[]# inference output

        logits_ =[]# 修改---->1for i inrange(self.nl):
            x[i]= self.m[i](x[i])# conv
            bs, _, ny, nx = x[i].shape  # x(bs,255,20,20) to x(bs,3,20,20,85)
            x[i]= x[i].view(bs, self.na, self.no, ny, nx).permute(0,1,3,4,2).contiguous()ifnot self.training:# inferenceif self.onnx_dynamic or self.grid[i].shape[2:4]!= x[i].shape[2:4]:
                    self.grid[i], self.anchor_grid[i]= self._make_grid(nx, ny, i)

                logits = x[i][...,5:]#修改---->2

                y = x[i].sigmoid()if self.inplace:
                    y[...,0:2]=(y[...,0:2]*2+ self.grid[i])* self.stride[i]# xy
                    y[...,2:4]=(y[...,2:4]*2)**2* self.anchor_grid[i]# whelse:# for YOLOv5 on AWS Inferentia https://github.com/ultralytics/yolov5/pull/2953
                    xy, wh, conf = y.split((2,2, self.nc +1),4)# y.tensor_split((2, 4, 5), 4)  # torch 1.8.0
                    xy =(xy *2+ self.grid[i])* self.stride[i]# xy
                    wh =(wh *2)**2* self.anchor_grid[i]# wh
                    y = torch.cat((xy, wh, conf),4)
                z.append(y.view(bs,-1, self.no))

                logits_.append(logits.view(bs,-1, self.no -5))# 修改---->3# return x if self.training else (torch.cat(z, 1),) if self.export else (torch.cat(z, 1), x)# 修改---->4return x if self.training else(torch.cat(z,1), torch.cat(logits_,1), x)
1.4 运行main_gradcam.py
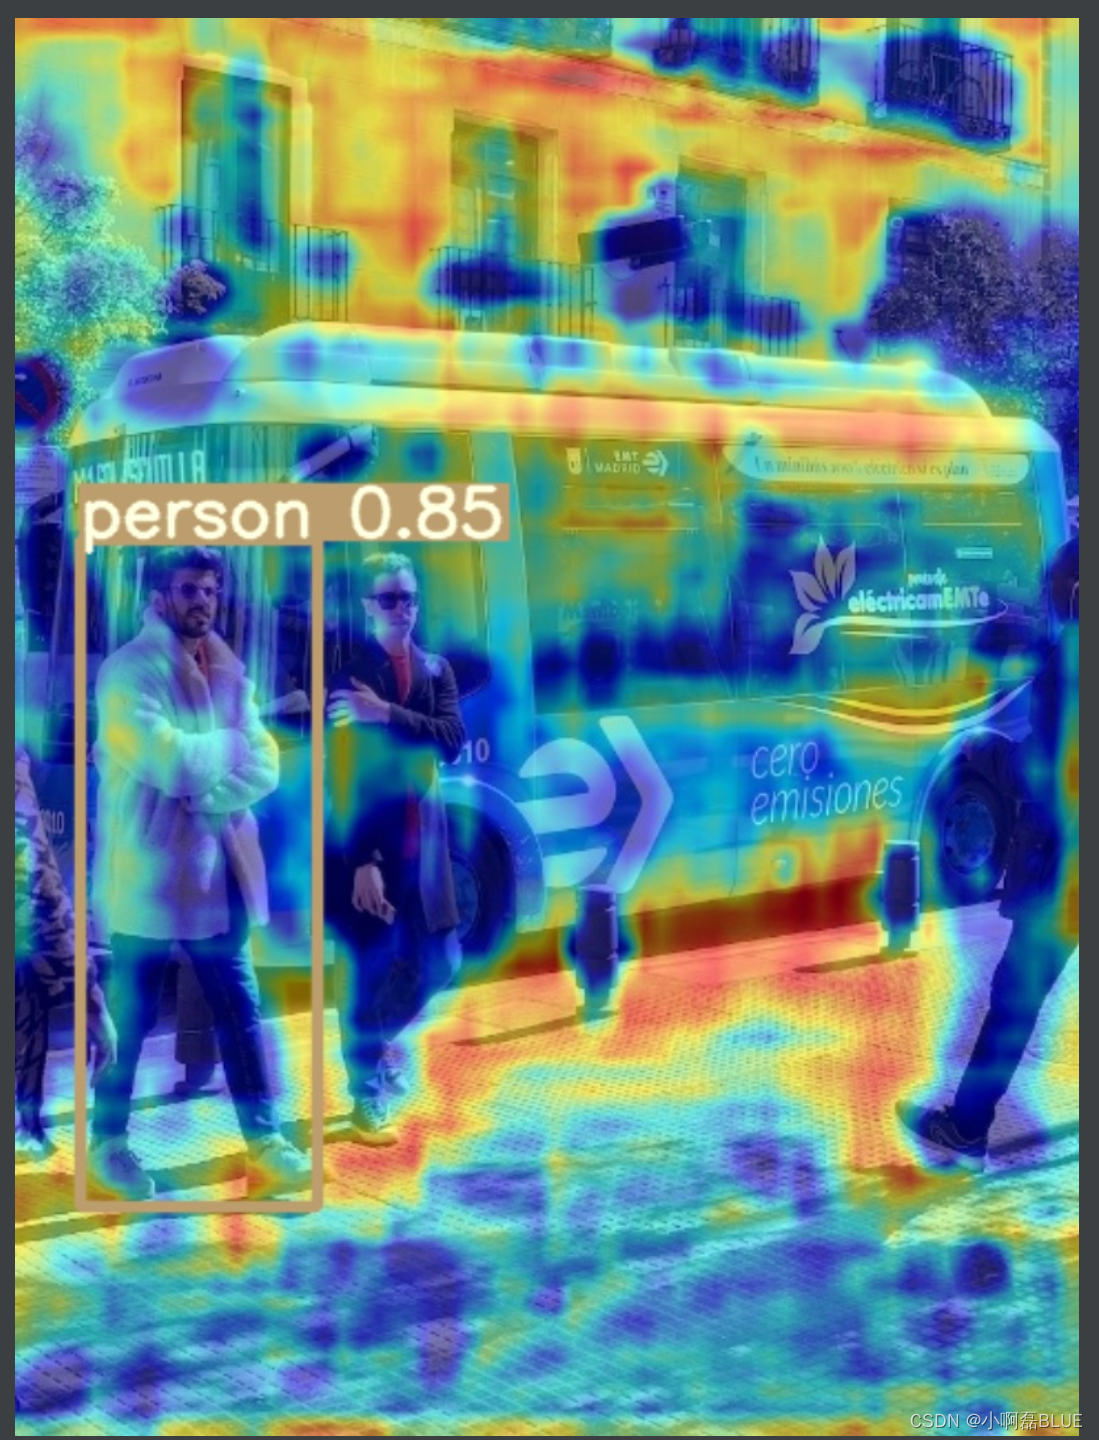
二、结合自己修改的v5网络实现热力图思路
2.1 相关参数解释
- target_layers是你可视化的层,
- ‘model_17_cv3_act’ : model --> 17层 --> cv3层 --> act层,最终的可视化层是model中的17层中的cv3的act进行可视化,之间层的索引以_来分隔索引区分。
# yolov5s网络中的三个detect层
target_layers =['model_17_cv3_act','model_20_cv3_act','model_23_cv3_act']
2.2 参数设置
- 需要修改数据集类别名中names
- 需要修检测的target_layers
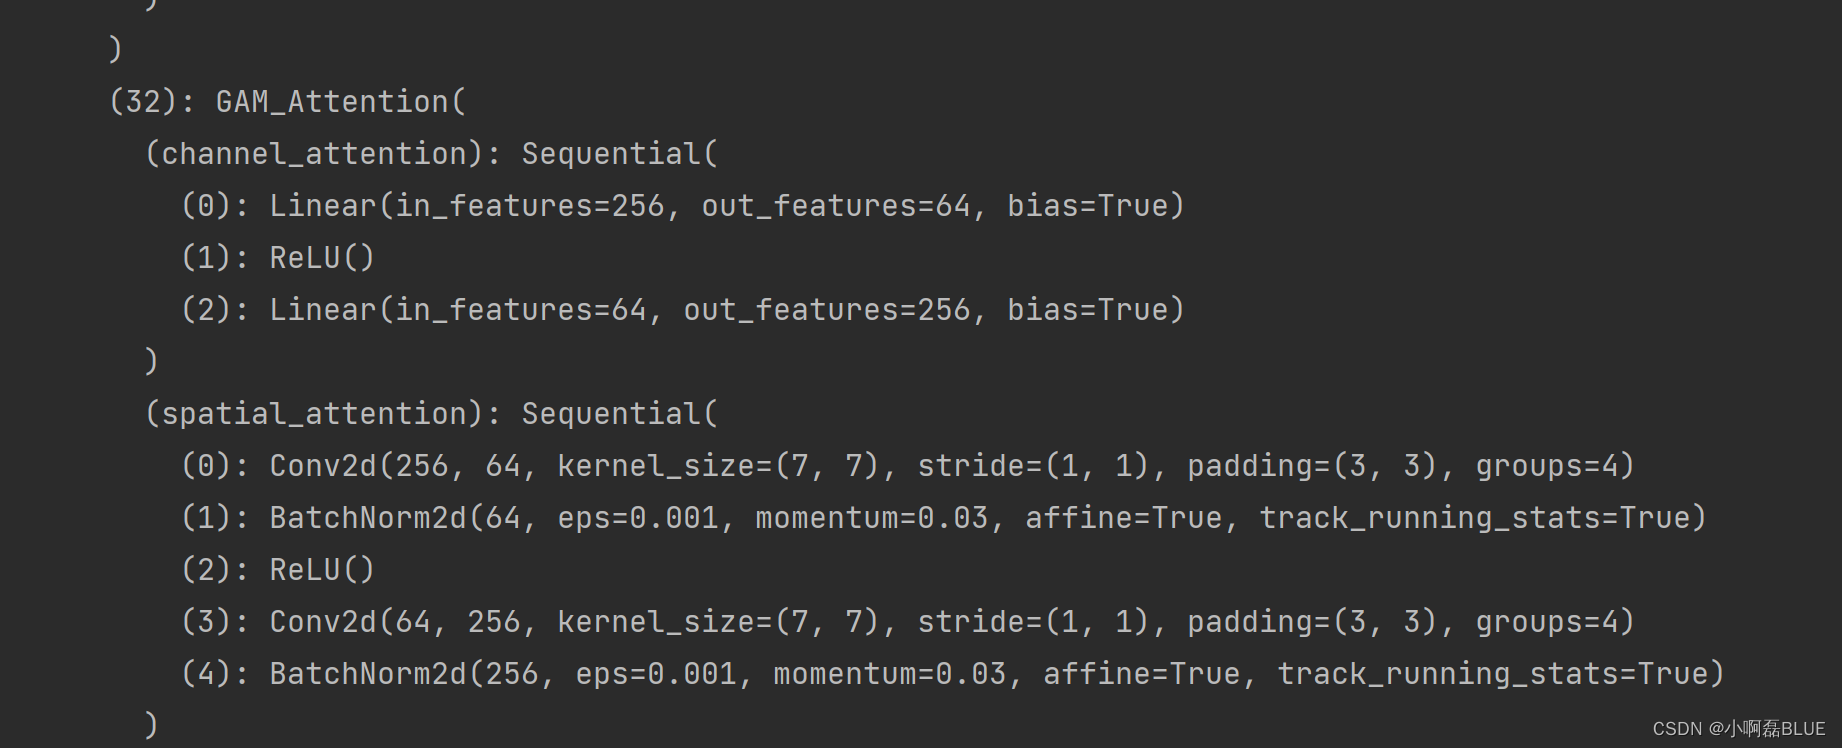
- 打印你的模型结构
在main_gradcam.py中的def main函数中打印你的网络模型结构
model = YOLOV5TorchObjectDetector(args.model_path, device, img_size=input_size, names=names)print(model)
- 由于我修改后的网络层,如spatial_attention中间有’_'号,在索引该层会以target_layers中的索引冲突
- 在gradcam.py文件中进行修改,用‘/’ 来区分层之间的索引
deffind_yolo_layer(model, layer_name):"""Find yolov5 layer to calculate GradCAM and GradCAM++

    Args:
        model: yolov5 model.
        layer_name (str): the name of layer with its hierarchical information.

    Return:
        target_layer: found layer
    """
    hierarchy = layer_name.split('/')
    target_layer = model.model._modules[hierarchy[0]]
2.3 参数配置
- 主要是 names, target_layers, --model-path, --img-path
- –model-path是我修改v5网络后,重新训练最好的权重。
# 数据集类别名 class names
names =['fire']

target_layers =['model/20/cv3/act','model/25/cv3/act','model/30/cv3/act']# Arguments
parser = argparse.ArgumentParser()# parser.add_argument('--model-path', type=str, default='./pretrained/yolov5s.pt', help='Path to the model')
parser.add_argument('--model-path',type=str, default='runs/train/exp32/weights/best.pt',help='Path to the model')
parser.add_argument('--img-path',type=str, default='data/images/test/fire.jpg',help='input image path')
parser.add_argument('--output-dir',type=str, default='runs/',help='output dir')
parser.add_argument('--img-size',type=int, default=640,help="input image size")
parser.add_argument('--target-layer',type=str, default='model_17_cv3_act',help='The layer hierarchical address to which gradcam will applied,'' the names should be separated by underline')
parser.add_argument('--method',type=str, default='gradcam',help='gradcam method')
parser.add_argument('--device',type=str, default='cuda',help='cuda or cpu')
parser.add_argument('--no_text_box', action='store_true',help='do not show label and box on the heatmap')
args = parser.parse_args()
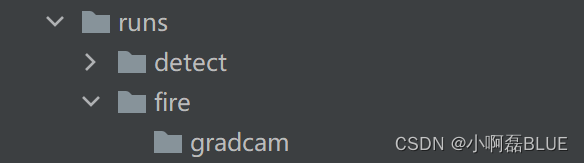
2.4 运行结果
- 代码运行成功,但还是空的文件夹,目前还在解决中。
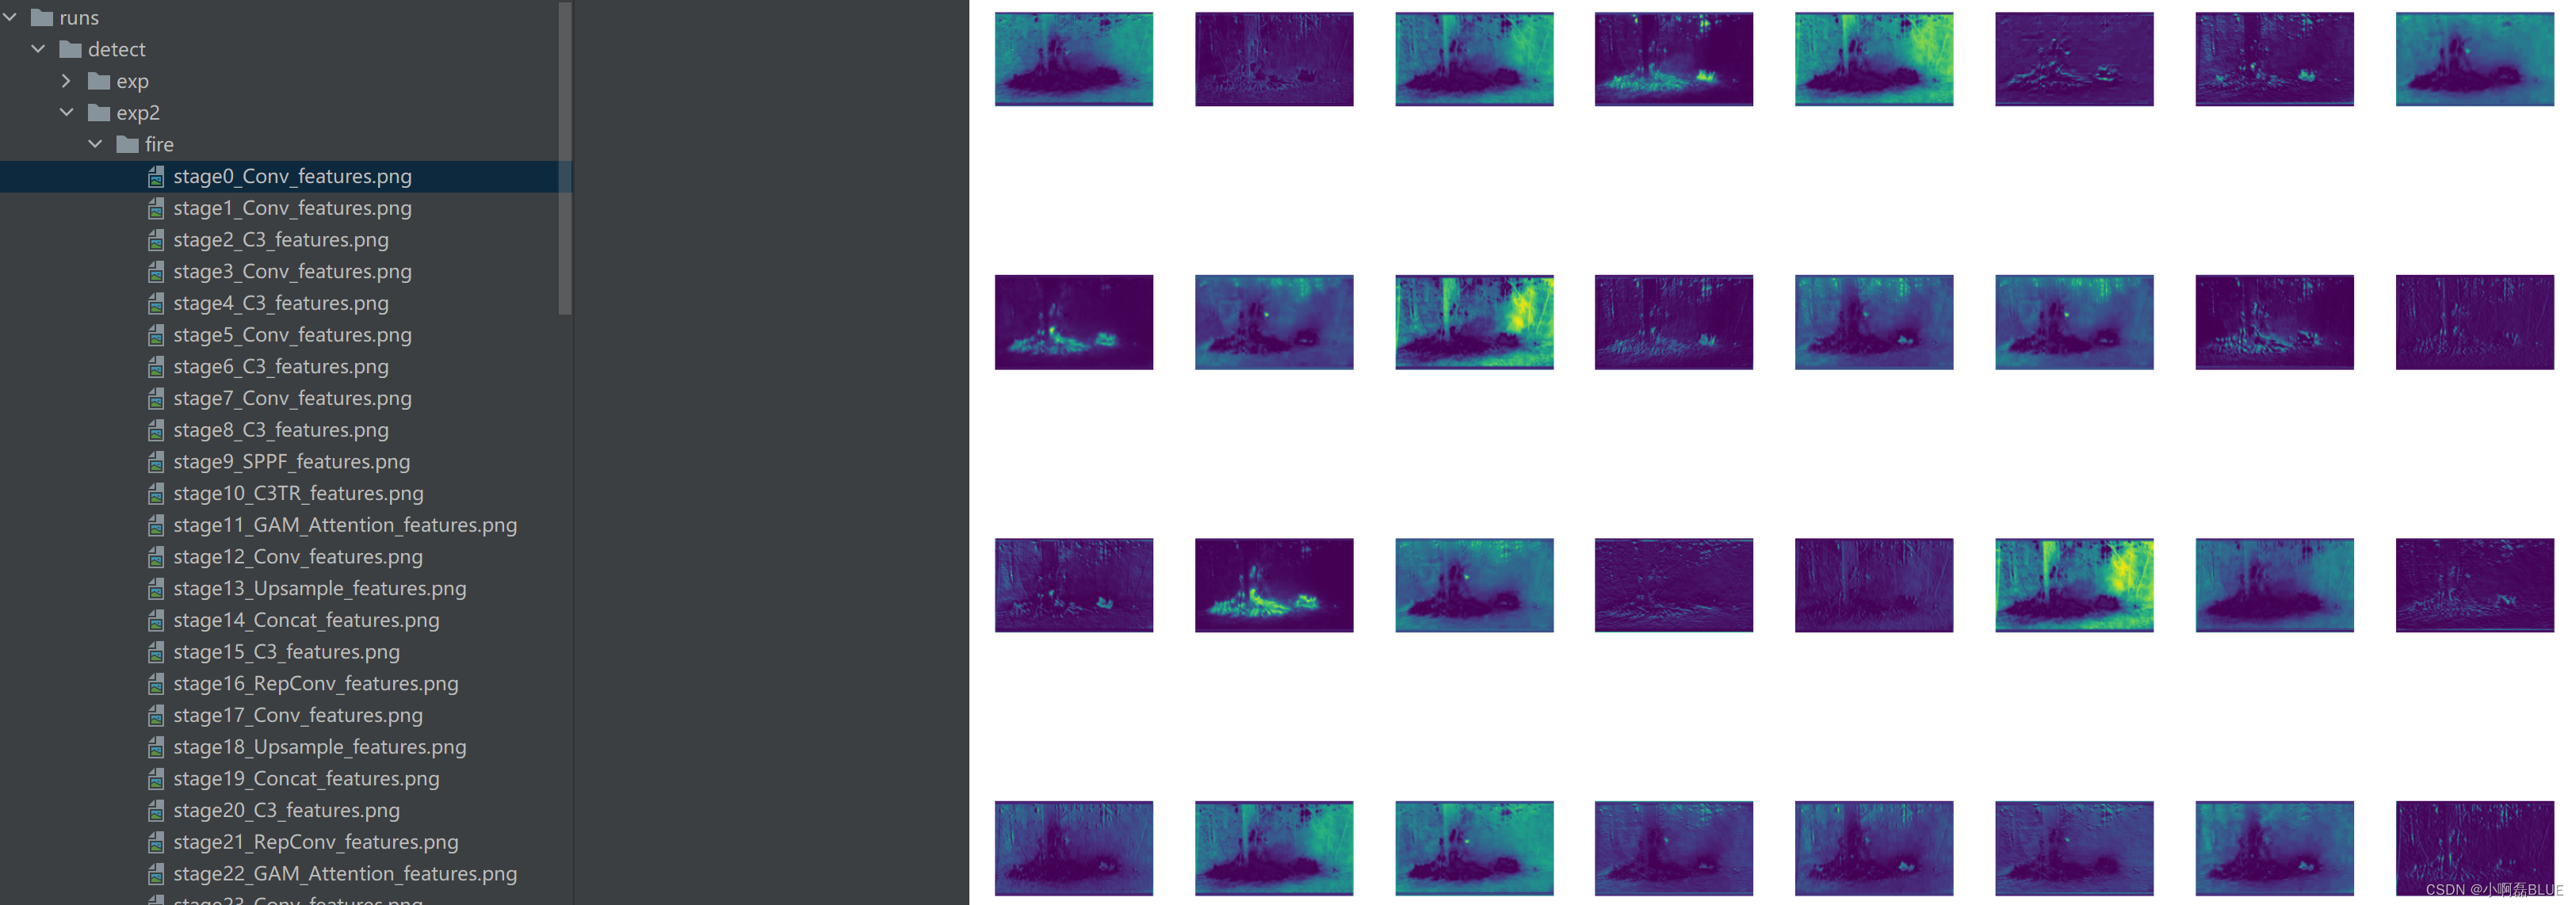
三、YOLO v5各层特征可视化
3.1 utils中的plots.py函数
- 进行简单修改,两条语句进行屏蔽
- def feature_visualization中的save_dir=Path(‘runs/detect/exp’)为保存路径
deffeature_visualization(x, module_type, stage, n=32, save_dir=Path('runs/detect/exp')):"""
    x:              Features to be visualized
    module_type:    Module type
    stage:          Module stage within model
    n:              Maximum number of feature maps to plot
    save_dir:       Directory to save results
    """if'Detect'notin module_type:
        batch, channels, height, width = x.shape  # batch, channels, height, widthif height >1and width >1:
            f = save_dir /f"stage{stage}_{module_type.split('.')[-1]}_features.png"# filename

            blocks = torch.chunk(x[0].cpu(), channels, dim=0)# select batch index 0, block by channels
            n =min(n, channels)# number of plots
            fig, ax = plt.subplots(math.ceil(n /8),8, tight_layout=True)# 8 rows x n/8 cols
            ax = ax.ravel()
            plt.subplots_adjust(wspace=0.05, hspace=0.05)for i inrange(n):
                ax[i].imshow(blocks[i].squeeze())# cmap='gray'
                ax[i].axis('off')

            LOGGER.info(f'Saving {f}... ({n}/{channels})')# 屏蔽 ----> 1# plt.title('Features')
            plt.savefig(f, dpi=300, bbox_inches='tight')
            plt.close()# 屏蔽 ----> 2# np.save(str(f.with_suffix('.npy')), x[0].cpu().numpy())  # npy save
3.2 运行detect.py函数
python detect.py --weights runs/train/exp32/weights/best.pt --source data/images/test/fire.jpg --visualize
3.2 结果可视化
- save_dir=Path(‘runs/detect/exp’)为保存路径
本文转载自: https://blog.csdn.net/m0_60890175/article/details/129587023
版权归原作者 小啊磊_Runing 所有, 如有侵权,请联系我们删除。
版权归原作者 小啊磊_Runing 所有, 如有侵权,请联系我们删除。