
往期内容
从零开始完成Yolov5目标识别(二)制作并训练自己的训练集
从零开始完成Yolov5目标识别(一)准备工作
一、项目框架:
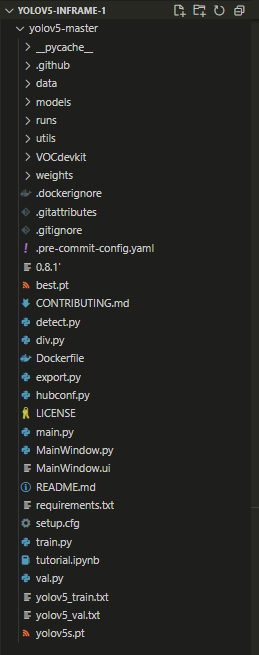
其中main.py和MainWindow.py是pyqt5的功能文件。
二、核心内容:
pyqt5的安装过程略过;
1. QtDesign设计:
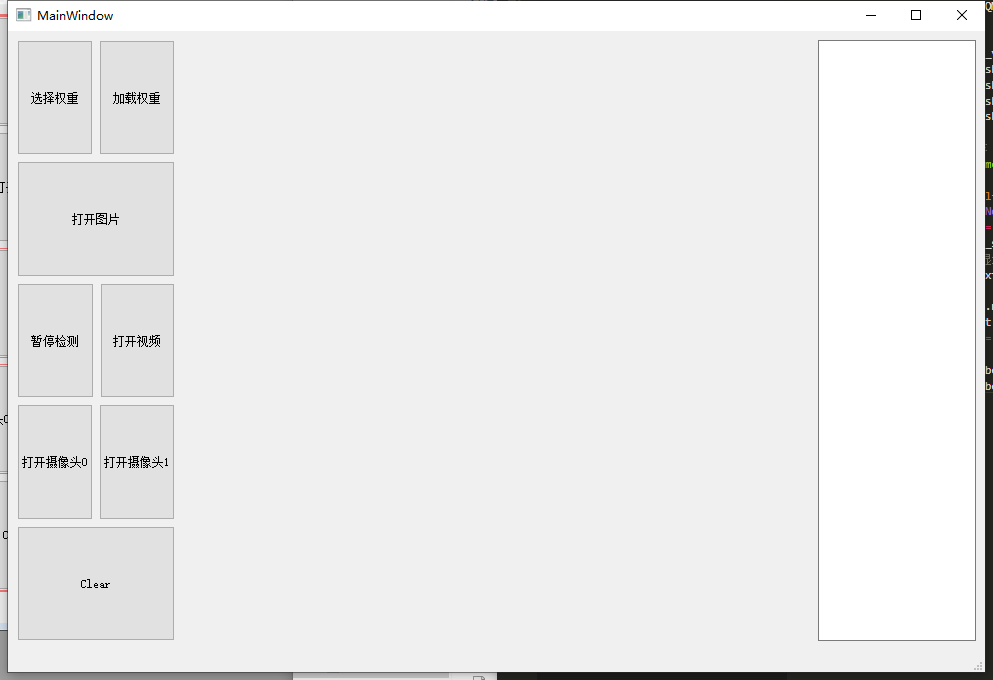
用来显示视频、图像和摄像头内容的label、textBrowser和按钮控件采用水平布局;
窗口空白处单击右击-》布局-》水平布局,可以使控件自适应页面大小。
用转换工具使.ui文件转化成python代码
pyuic5.bat -o MainWindow.py MainWindow.ui
2. 检测部分
2.1 导包
import sys
import cv2
import argparse
import random
import torch
import numpy as np
import torch.backends.cudnn as cudnn

from PyQt5 import QtCore, QtGui, QtWidgets
from PyQt5.QtCore import *
from PyQt5.QtGui import *
from PyQt5.QtWidgets import *

from utils.torch_utils import select_device
from models.experimental import attempt_load
from utils.general import check_img_size, non_max_suppression, scale_coords
from utils.datasets import letterbox
from utils.plots import *
util文件夹下plots.py随着YOLOv5版本更新发生了比较大的变化,这个文件主要负责各种图像的绘制。
plots中一些常用的方法:(不完整)
butter_lowpass_filtfilt:做平滑曲线
plot_images:在test.py中绘制预测框‘’
plot_lr_scheduler:train.py中学习率可视化
plot_labels:train.py中对label进行可视化
plot_results:训练结果可视化
为了方便PyQt5调用plots对图像锚框,在plots.py中加入上几个版本的YOLOv5的plot_one_box方法:
def plot_one_box(x, im, color=(128, 128, 128), label=None, line_thickness=3):
    """一般会用在detect.py中在nms之后变量每一个预测框,再将每个预测框画在原图上
    使用opencv在原图im上画一个bounding box
    :params x: 预测得到的bounding box  [x1 y1 x2 y2]
    :params im: 原图 要将bounding box画在这个图上  array
    :params color: bounding box线的颜色
    :params labels: 标签上的框框信息  类别 + score
    :params line_thickness: bounding box的线宽
    """
    # check im内存是否连续
    assert im.data.contiguous, 'Image not contiguous. Apply np.ascontiguousarray(im) to plot_on_box() input image.'
    # tl = 框框的线宽  要么等于line_thickness要么根据原图im长宽信息自适应生成一个
    tl = line_thickness or round(0.002 * (im.shape[0] + im.shape[1]) / 2) + 1  # line/font thickness
    # c1 = (x1, y1) = 矩形框的左上角   c2 = (x2, y2) = 矩形框的右下角
    c1, c2 = (int(x[0]), int(x[1])), (int(x[2]), int(x[3]))
    # cv2.rectangle: 在im上画出框框   c1: start_point(x1, y1)  c2: end_point(x2, y2)
    # 注意: 这里的c1+c2可以是左上角+右下角  也可以是左下角+右上角都可以
    cv2.rectangle(im, c1, c2, color, thickness=tl, lineType=cv2.LINE_AA)
    # 如果label不为空还要在框框上面显示标签label + score
    if label:
        tf = max(tl - 1, 1)  # label字体的线宽 font thickness
        # cv2.getTextSize: 根据输入的label信息计算文本字符串的宽度和高度
        # 0: 文字字体类型  fontScale: 字体缩放系数  thickness: 字体笔画线宽
        # 返回retval 字体的宽高 (width, height), baseLine 相对于最底端文本的 y 坐标
        t_size = cv2.getTextSize(label, 0, fontScale=tl / 3, thickness=tf)[0]
        c2 = c1[0] + t_size[0], c1[1] - t_size[1] - 3
        # 同上面一样是个画框的步骤  但是线宽thickness=-1表示整个矩形都填充color颜色
        cv2.rectangle(im, c1, c2, color, -1, cv2.LINE_AA)  # filled
        # cv2.putText: 在图片上写文本 这里是在上面这个矩形框里写label + score文本
        # (c1[0], c1[1] - 2)文本左下角坐标  0: 文字样式  fontScale: 字体缩放系数
        # [225, 255, 255]: 文字颜色  thickness: tf字体笔画线宽     lineType: 线样式
        cv2.putText(im, label, (c1[0], c1[1] - 2), 0, tl / 3, [225, 255, 255], thickness=tf, lineType=cv2.LINE_AA)
2.2 main.py要实现的主要功能
- 调用yolov5中的方法,设置权重
def model_init(self):
        # 模型相关参数配置
        parser = argparse.ArgumentParser()
        parser.add_argument('--weights', nargs='+', type=str, default='weights/yolov5s.pt', help='model.pt path(s)')
        parser.add_argument('--source', type=str, default='data/images', help='source')  # file/folder, 0 for webcam
        parser.add_argument('--img-size', type=int, default=640, help='inference size (pixels)')
        parser.add_argument('--conf-thres', type=float, default=0.25, help='object confidence threshold')
        parser.add_argument('--iou-thres', type=float, default=0.45, help='IOU threshold for NMS')
        parser.add_argument('--device', default='cpu', help='cuda device, i.e. 0 or 0,1,2,3 or cpu')
        parser.add_argument('--view-img', action='store_true', help='display results')
        parser.add_argument('--save-txt', action='store_true', help='save results to *.txt')
        parser.add_argument('--save-conf', action='store_true', help='save confidences in --save-txt labels')
        parser.add_argument('--nosave', action='store_true', help='do not save images/videos')
        parser.add_argument('--classes', nargs='+', type=int, help='filter by class: --class 0, or --class 0 2 3')
        parser.add_argument('--agnostic-nms', action='store_true', help='class-agnostic NMS')
        parser.add_argument('--augment', action='store_true', help='augmented inference')
        parser.add_argument('--update', action='store_true', help='update all models')
        parser.add_argument('--project', default='runs/detect', help='save results to project/name')
        parser.add_argument('--name', default='exp', help='save results to project/name')
        parser.add_argument('--exist-ok', action='store_true', help='existing project/name ok, do not increment')
        self.opt = parser.parse_args()
        print(self.opt)
        # 默认使用opt中的设置(权重等)来对模型进行初始化
        source, weights, view_img, save_txt, imgsz = self.opt.source, self.opt.weights, self.opt.view_img, self.opt.save_txt, self.opt.img_size

        # 若openfile_name_model不为空,则使用此权重进行初始化
        if self.openfile_name_model:
            weights = self.openfile_name_model
            print("Using button choose model")

        self.device = select_device(self.opt.device)
        self.half = self.device.type != 'cpu'  # half precision only supported on CUDA

        cudnn.benchmark = True

        # Load model
        self.model = attempt_load(weights, map_location=self.device)  # load FP32 model
        stride = int(self.model.stride.max())  # model stride
        self.imgsz = check_img_size(imgsz, s=stride)  # check img_size
        if self.half:
            self.model.half()  # to FP16

        # Get names and colors
        self.names = self.model.module.names if hasattr(self.model, 'module') else self.model.names
        self.colors = [[random.randint(0, 255) for _ in range(3)] for _ in self.names]
        print("model initial done")
        # 设置提示框
        QtWidgets.QMessageBox.information(self, u"Notice", u"模型加载完成", buttons=QtWidgets.QMessageBox.Ok,
                                      defaultButton=QtWidgets.QMessageBox.Ok)
- detect方法,输入原始图像返回监测信息
def detect(self, name_list, img):
        showimg = img
        with torch.no_grad():
            img = letterbox(img, new_shape=self.opt.img_size)[0]
            # Convert
            img = img[:, :, ::-1].transpose(2, 0, 1)  # BGR to RGB, to 3x416x416
            img = np.ascontiguousarray(img)
            img = torch.from_numpy(img).to(self.device)
            img = img.half() if self.half else img.float()  # uint8 to fp16/32
            img /= 255.0  # 0 - 255 to 0.0 - 1.0
            if img.ndimension() == 3:
                img = img.unsqueeze(0)
            # Inference
            pred = self.model(img, augment=self.opt.augment)[0]
            # Apply NMS
            pred = non_max_suppression(pred, self.opt.conf_thres, self.opt.iou_thres, classes=self.opt.classes,
                                       agnostic=self.opt.agnostic_nms)
            info_show = ""
            # Process detections
            for i, det in enumerate(pred):
                if det is not None and len(det):
                    # Rescale boxes from img_size to im0 size
                    det[:, :4] = scale_coords(img.shape[2:], det[:, :4], showimg.shape).round()
                    for *xyxy, conf, cls in reversed(det):
                        label = '%s %.2f' % (self.names[int(cls)], conf)
                        name_list.append(self.names[int(cls)])
                        #single_info = Annotator.box_label(xyxy, showimg, label=label, color=self.colors[int(cls)], line_thickness=2)
                        #single_info = Annotator.box_label(xyxy, showimg, label=label, color=self.colors[int(cls)])

                        single_info = plot_one_box(xyxy, showimg, label=label, color=self.colors[int(cls)], line_thickness=2)

                        # print(single_info)
                        # info_show = info_show + single_info + "\n"
        return  info_show
- 检测和显示各帧图像
def show_video_frame(self):
        name_list = []
        flag, img = self.cap.read()
        if img is not None:
            info_show = self.detect(name_list, img) # 检测结果写入到原始img上
            print(info_show)
            # 检测信息显示在界面
            self.ui.textBrowser.setText(info_show)

            show = cv2.resize(img, (640, 480)) # 直接将原始img上的检测结果进行显示
            self.result = cv2.cvtColor(show, cv2.COLOR_BGR2RGB)
            showImage = QtGui.QImage(self.result.data, self.result.shape[1], self.result.shape[0],
                                     QtGui.QImage.Format_RGB888)
            self.ui.label.setPixmap(QtGui.QPixmap.fromImage(showImage))
            self.ui.label.setScaledContents(True)  # 设置图像自适应界面大小

        else:
            self.timer_video.stop()
            self.cap.release()
            self.ui.label.clear()
            # 视频帧显示期间,禁用其他检测按键功能
            self.ui.pushButton_video.setDisabled(False)
            self.ui.pushButton_img.setDisabled(False)
            self.ui.pushButton_camer1.setDisabled(False)
            self.ui.pushButton_camer0.setDisabled(False)
- 各种控件功能
# 暂停与继续检测
    def button_video_stop(self):
        self.timer_video.blockSignals(False)
        # 暂停检测
        # 若QTimer已经触发,且激活
        if self.timer_video.isActive() == True and self.num_stop%2 == 1:
            self.ui.pushButton_stop.setText(u'暂停检测') # 当前状态为暂停状态
            self.num_stop = self.num_stop + 1 # 调整标记信号为偶数
            self.timer_video.blockSignals(True)
        # 继续检测
        else:
            self.num_stop = self.num_stop + 1
            self.ui.pushButton_stop.setText(u'继续检测')

    # 结束视频检测
    def finish_detect(self):
        # self.timer_video.stop()
        self.cap.release() # 释放cap
        self.ui.label.clear() # 清空label画布
        # 启动其他检测按键功能
        self.ui.pushButton_video.setDisabled(False)
        self.ui.pushButton_img.setDisabled(False)
        self.ui.pushButton_camer1.setDisabled(False)
        self.ui.pushButton_camer0.setDisabled(False)

        # 结束检测时,查看暂停功能是否复位,将暂停功能恢复至初始状态
        # Note:点击暂停之后,num_stop为偶数状态
        if(self.num_stop%2 == 0):
            print("Reset stop/begin!")
            self.ui.pushButton_stop.setText(u'暂停/继续')
            self.num_stop = self.num_stop + 1
            self.timer_video.blockSignals(False)
信号与槽不在展示了。
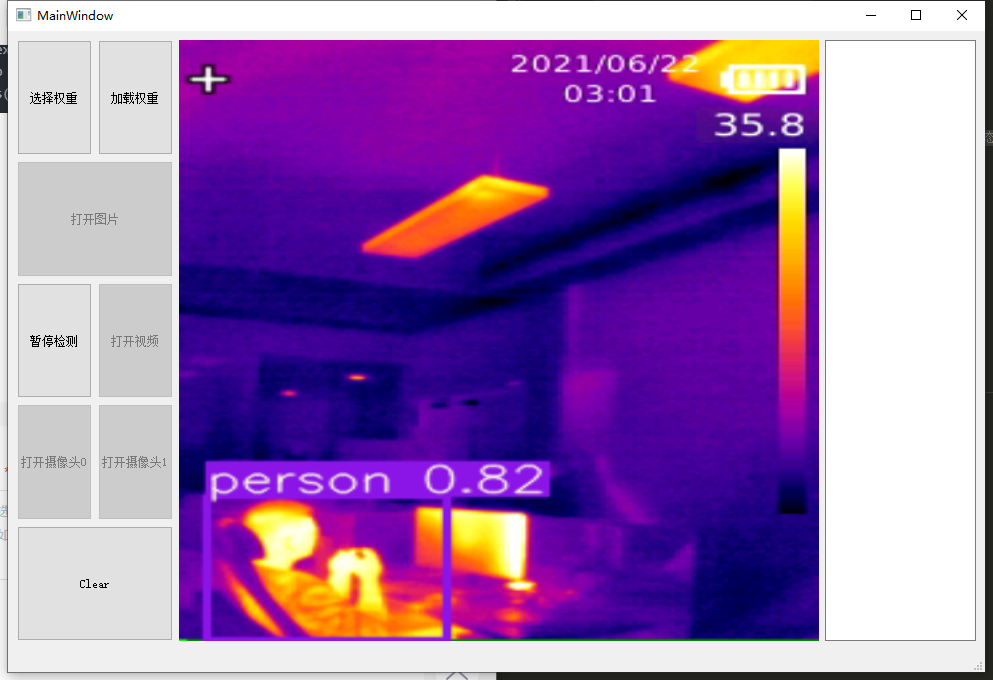
三、效果
特别感谢:使用PyQt5为YoloV5添加界面(一)_叼着狗骨头的猫的博客-CSDN博客_qt yolov5带来的帮助
本文转载自: https://blog.csdn.net/WZT725/article/details/123573512
版权归原作者 明天才有空 所有, 如有侵权,请联系我们删除。
版权归原作者 明天才有空 所有, 如有侵权,请联系我们删除。