
使用鸿蒙的ArkUI框架开发鸿蒙应用的时候,官方为我们提供了一个web组件,提供给开发者使用,通过本文学习,我们将了解并学会如何使用Web组件进行如下操作:
- 在线网页加载
- 本地离线网页加载
- Web组件常用属性设置
- 客户端与网页之间的双向通信交互
下面我们先来看下Web组件的介绍。
一、Web组件介绍
Web是提供网页显示能力的组件,具体用法请参考 Web API。
二、创建组件
在pages目录下创建WebComponent .ets的Page页面, 页面上放一个Web组件。在Web组件中通过src指定引用的网页路径,controller为组件的控制器,通过controller绑定Web组件,用于调用Web组件的方法。
@Entry
@Component
struct WebComponent {
controller: WebController = new WebController();
build() {
Column() {
Web({ src: 'https://www.douban.com/', controller: this.controller })
}
}
}
使用Web组件,访问在线网页,需要给应用配置网络权限,
权限列表
访问在线网页时需添加网络权限:ohos.permission.INTERNET
三、设置样式和属性
Web组件的使用需要添加丰富的页面样式和功能属性。设置height、padding样式可为Web组件添加高和内边距,设置fileAccess属性可为Web组件添加文件访问权限,设置javaScriptAccess属性为true使Web组件具有执行JavaScript代码的能力。
@Entry
@Component
struct WebComponent {
fileAccess: boolean = true;
controller: WebController = new WebController();
build() {
Column() {
Text('Hello world!')
.fontSize(20)
Web({ src: 'https://www.douban.com/', controller: this.controller })
// 设置高和内边距
.height(500)
.padding(20)
// 设置文件访问权限和脚本执行权限
.fileAccess(this.fileAccess)
.javaScriptAccess(true)
Text('End')
.fontSize(20)
}
}
}
四、添加事件和方法
为Web组件添加onProgressChange事件,该事件回调Web引擎加载页面的进度值。将该进度值赋值给Progress组件的value,控制Progress组件的状态。当进度为100%时隐藏Progress组件,Web页面加载完成。
import web_view from '@ohos.web.webview';
@Entry
@Component
struct RemoteWebPage {
@State progress: number = 0
@State hideProgress: boolean = true
controller: web_view.WebviewController = new web_view.WebviewController()
build() {
Column() {
Progress({ total: 100, value: this.progress })
.color('#ff5cea20')
.visibility(this.hideProgress ? Visibility.None : Visibility.Visible)
Web({ src: 'https://www.douban.com/', controller: this.controller })
.height('100%')
// 添加onProgressChange事件
.onProgressChange(e => {
this.progress = e.newProgress
// 当进度100%时,进度条消失
if (this.progress == 100) {
this.hideProgress = true
} else {
this.hideProgress = false
}
})
}.backgroundColor('0xFFFFFF')
}
}
效果如下:
上面讲的是使用Web组件访问一个在线网页,那怎么加载本地网页文件呢?
五、访问本地Html
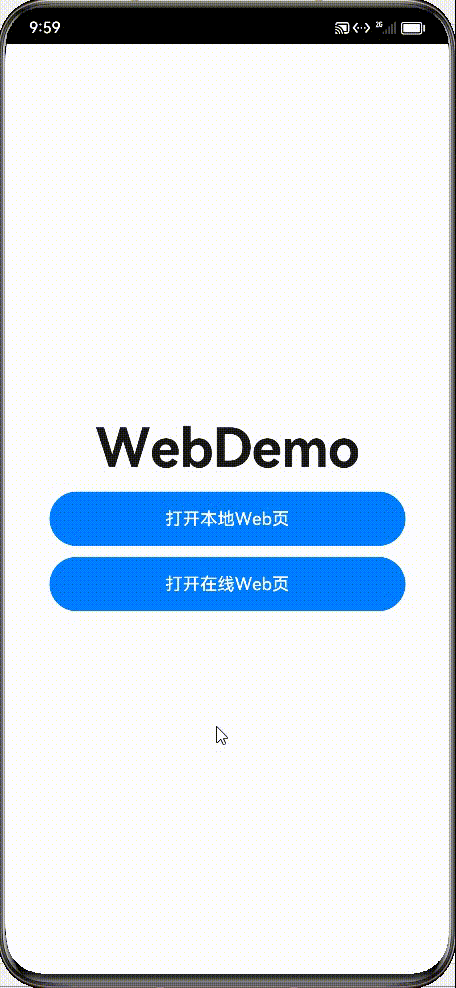
先看效果图

实现了一个加载本地网页文件,然后Html网页中调用客户端的方法,进行了一个关闭页面和拉起系统相册的功能,下面开始讲下代码实现。
1、本地html文件创建
在entry/src/main/resources/rawfile目录下,我们创建一个index.html文件
<!-- index.html -->

<!DOCTYPE html>

<html>

<body>

<p>Hello World</p>

<p>这个是来自本地的html文件</p>

<button type="button" onclick="window.jsBridge.closePage()">点击调用原生关闭页面</button>

<button type="button" onclick="window.jsBridge.jumpSystemPicture()">点击拉起原生系统相册</button>

</body>

</html>
2、本地html文件加载
创建一个LocalWebPage页面,加载index.html 文件
import web_view from '@ohos.web.webview';

@Entry

@Component

struct LocalWebPage {

  controller: web_view.WebviewController = new web_view.WebviewController()

  build() {

    Column() {

      Web({ src: $rawfile("index.html"), controller: this.controller })

        .height('100%')

    }

  }

}
这里我们使用$rawfile("index.html")进行本地html文件获取。
2、JS对象注入,Html使用JS对象调用客户端方法
如果需要进行网页跟客户端进行交互,我们需要设置往Html中注入一个JS对象,具体如下:
import web_view from '@ohos.web.webview';

import common from '@ohos.app.ability.common';

import router from '@ohos.router';

@Entry

@Component

struct LocalWebPage {

  controller: web_view.WebviewController = new web_view.WebviewController()

  jsBridge = {

    jumpSystemPicture() {

      let context = getContext(this) as common.UIAbilityContext;

      let want  = {

          "deviceId": "",

          "bundleName": "",

          "abilityName": "",

          "uri": "",

          "type": "image/*",

          "action": "android.intent.action.GET_CONTENT",

          "parameters":{},

          "entities":[]

      };

      context.startAbility(want);

    },

    closePage() {

      router.back()

    }

  }

  build() {

    Column() {

      Web({ src: $rawfile("index.html"), controller: this.controller })

        .javaScriptAccess(true)

        .javaScriptProxy({

          object: this.jsBridge,

          name: "jsBridge",

          methodList: ["closePage","jumpSystemPicture"],

          controller: this.controller

        })

        .height('100%')

    }

  }

}
这里我们定义了一个JS对象jsBridge ,定义了两个方法,jumpSystemPicture 和closePage,分别用于html 拉起系统相册和关闭客户端页面,然后使用Web的 javaScriptProxy方法进行JS对象注入设置,具体的配置如上述代码,需要配置对象名称,注入方法。
看下上文中Html 调用JS的代码,比如调用客户端的关闭页面方法,使用
window.jsBridge.closePage() 进行触发。
3、客户端调用本地Html网页中的JS方法
在onPageEnd事件中添加runJavaScript方法。onPageEnd事件是网页加载完成时的回调,runJavaScript方法可以执行HTML中的JavaScript脚本。当页面加载完成时,触发onPageEnd事件,调用HTML文件中的test方法,在控制台打印信息。
import web_view from '@ohos.web.webview';

import router from '@ohos.router';

@Entry

@Component

struct LocalWebPage {

  controller: web_view.WebviewController = new web_view.WebviewController()

  build() {

    Column() {

      Web({ src: $rawfile("index.html"), controller: this.controller })

        .javaScriptAccess(true)

      .onPageEnd(e =>{

          // test()在index.html中定义

          this.controller.runJavaScript('test()');

          console.info('url: ', e.url);

        })

        .height('100%')

    }

  }

}
<!-- index.html -->

<!DOCTYPE html>

<html>

<body>

<p>Hello World</p>

<p>这个是来自本地的html文件</p>

<button type="button" onclick="window.jsBridge.closePage()">点击调用原生关闭页面</button>

<button type="button" onclick="window.jsBridge.jumpSystemPicture()">点击拉起原生系统相册</button>

</body>

<script type="text/javascript">

  function test() {

      console.info('Ark Web Component');

  }

</script>

</html>
上面方法只提到了调用网页中的JS方法,如果要异步获取JS方法返回的数据,应该怎么操作呢,感兴趣的评论区留意讨论,有时间我再补充讲解下。
本文到此完结,谢谢阅读!
版权归原作者 小枫_S 所有, 如有侵权,请联系我们删除。