
上一篇写了 Ai 编程的准备工作,按照教程基本都可以装好,如果还有一些没装好的,那也没关系。我们先用Ai 帮你写一个不需要 Python 工具的页面。
一、使用提示词让 Ai 工具帮你写一个前端页面
1、前提说明
关于Ai 工具的选择?
没有强制性要求,但按照实际测试来说,Claude3.5 和 Chat GPT4.0在代码方面的反馈会好于国内的产品~所以能付费就付费,不能付费就用镜像版,此处不做过多介绍,使用自己力所能及的即可~我后续使用的都是 Claude3.5
开始之前我先简单说明下我们后期的提示词结构,因为后期会大量使用提示词向 Ai 提问,帮助我们进行迭代代码;提示词主要分为四个部分
背景:跟平时沟通一样,把背景说清楚让 Ai 更好理解(eg:我是一个没有编程经验的人)
角色:需要他从什么角度/角色给你答复(eg:请你担任一个资深的前端开发工程师,精通各项技术)
目标:告诉他你的目标是什么(eg:需要做一个可运行的网页)
结果:告诉他你要的结果是怎么样的(eg:需要生成一段可运行的代码)
如果涉及到一些自己不懂的知识,也可以直接先问 Ai,按照他给的回复你再进行提问。
2、使用 Ai 生成一段代码
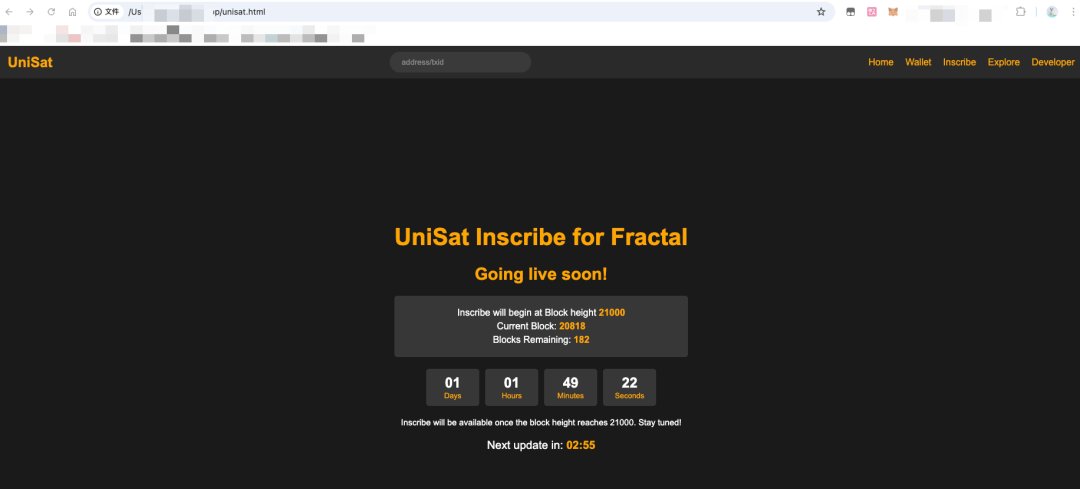
提示词:你是一个资深web前端开发工程师,精通前端当前的技术栈,精通各种前端设计规范,尤其擅长html5+css+javascript做页面。现在我需要做一个参考下方图片的html页面,请你用html5、css和javascript,参考网页设计规范,帮我生成一段可运行的html源代码。需要添加一些交互功能,例如倒计时。
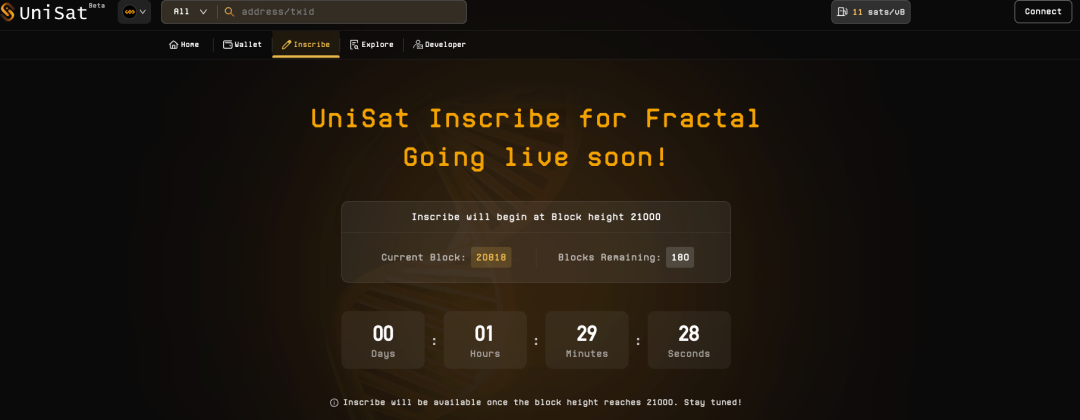
你是一个资深web前端开发工程师,精通前端当前的技术栈,精通各种前端设计规范,尤其擅长html5+css+javascript做页面。现在我需要做一个参考下方图片的html页面,请你用html5、css和javascript,参考网页设计规范,帮我生成一段可运行的html源代码。需要添加一些交互功能,例如倒计时
具体如下,输入文字时,可以在下方导入附件图片。
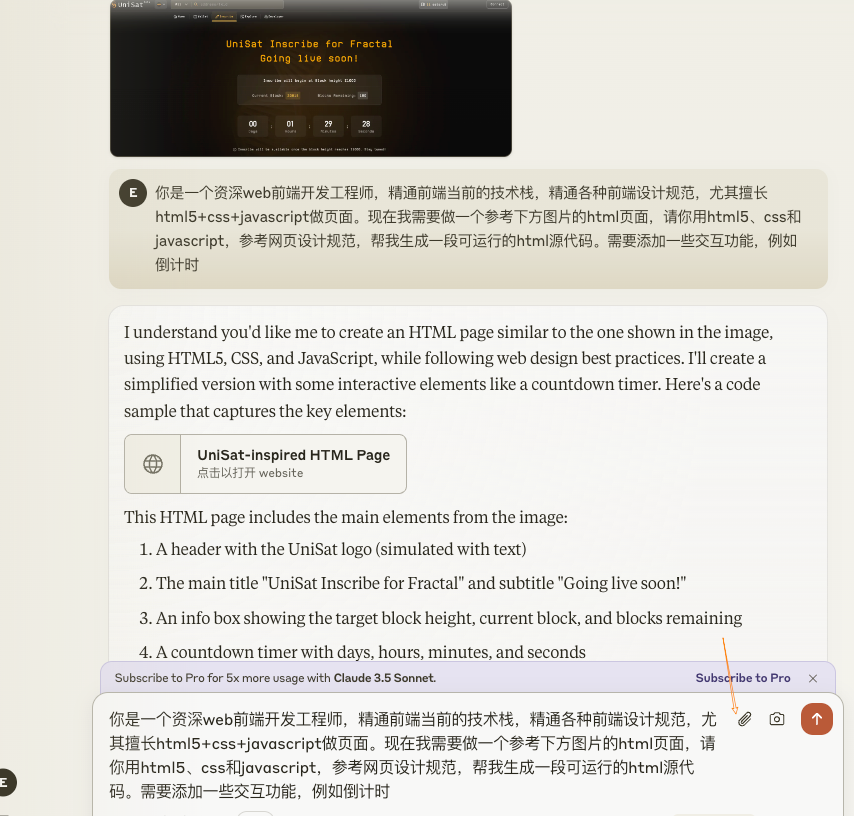
此处因为目的很明确,是需要他是一名前端工程师,并且需要掌握很多技术,而且我还有需要参考的页面,所以直接告诉他我们要的是可以运行的页面并且按照这个页面做就行。不需要背景。
- 生成之后右侧可以预览,但是看了一会可以颜色不对,而且很多地方信息不够完善。需要继续优化

- 把你认为有差距的地方告诉 Ai,让他继续优化代码;比如此处顶部导航缺失、没有搜索框、字段颜色不对;那可以参考下让他修改:顶部的搜索框、导航栏、logo 等地方没有内容,需要继续调整。还有需要注意识别参考图片中的文字样式、字体颜色的区分
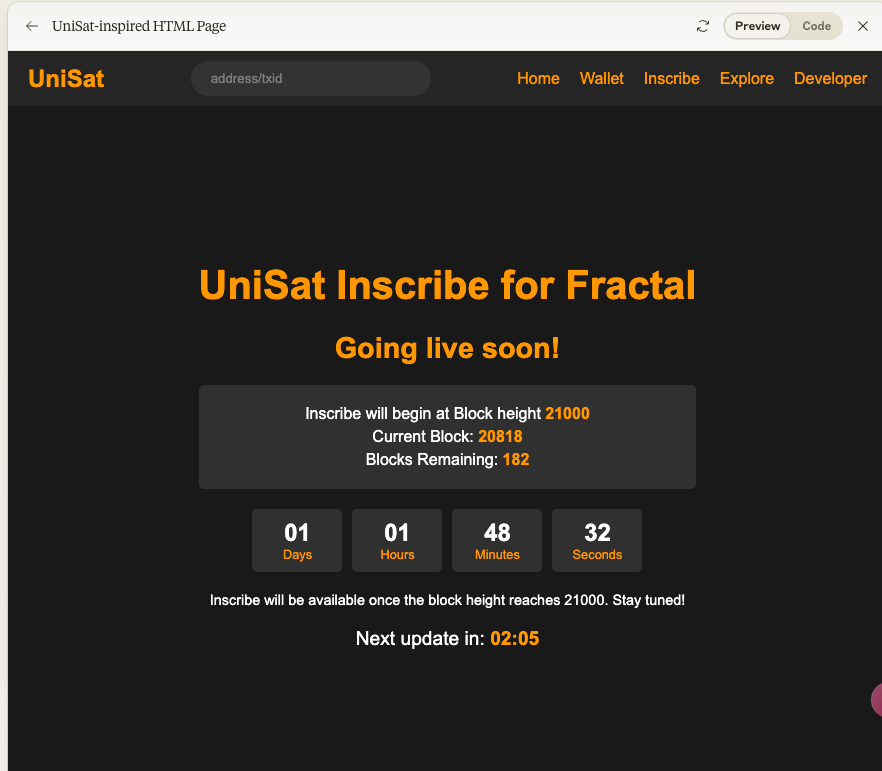 这是修改之后生成的页面,可以看到跟原画面其实比较接近了。对于一个初学者来说说能够快递的做出这个页面来已经很不错了。对于有经验的开发来说,这也算是一个半成品了,再去进行简单的调整也很快。所以这就是为什么建议大家都要认真学 Ai 编程;
 - 代码:
<!DOCTYPE html><html lang="en"><head> <meta charset="UTF-8"> <meta name="viewport" content="width=device-width, initial-scale=1.0"> <title>UniSat Inscribe for Fractal</title> <style> body, html { font-family: Arial, sans-serif; background-color: #1a1a1a; color: #ffa500; margin: 0; padding: 0; height: 100%; } .container { display: flex; flex-direction: column; min-height: 100vh; } header { background-color: #2a2a2a; padding: 10px 20px; display: flex; justify-content: space-between; align-items: center; } .logo { font-size: 24px; font-weight: bold; color: #ffa500; } .search-bar { display: flex; align-items: center; background-color: #3a3a3a; border-radius: 20px; padding: 5px 15px; } .search-bar input { background: none; border: none; color: #ffffff; padding: 5px; width: 200px; } .search-bar input::placeholder { color: #888; } nav { display: flex; gap: 20px; } nav a { color: #ffa500; text-decoration: none; } main { flex-grow: 1; display: flex; justify-content: center; align-items: center; padding: 20px; } .content { text-align: center; } h1 { font-size: 2.5em; margin-bottom: 10px; color: #ffa500; } h2 { font-size: 1.8em; margin-bottom: 20px; color: #ffa500; } .info-box { background-color: rgba(255, 255, 255, 0.1); border-radius: 5px; padding: 15px; margin-bottom: 20px; } .info-box p { margin: 5px 0; color: #ffffff; } .info-box span { color: #ffa500; font-weight: bold; } .countdown { display: flex; justify-content: center; gap: 10px; margin-bottom: 20px; } .countdown-item { background-color: rgba(255, 255, 255, 0.1); border-radius: 5px; padding: 10px; min-width: 70px; } .countdown-value { font-size: 1.5em; font-weight: bold; color: #ffffff; } .countdown-label { font-size: 0.8em; color: #ffa500; } .short-countdown { font-size: 1.2em; margin-top: 20px; color: #ffffff; } .short-countdown span { color: #ffa500; font-weight: bold; } .footer-text { color: #ffffff; font-size: 0.9em; }</style></head><body> <div class="container"> <header> <div class="logo">UniSat</div> <div class="search-bar"> <input type="text" placeholder="address/txid"> </div> <nav> <a href="#">Home</a> <a href="#">Wallet</a> <a href="#">Inscribe</a> <a href="#">Explore</a> <a href="#">Developer</a> </nav> </header> <main> <div class="content"> <h1>UniSat Inscribe for Fractal</h1> <h2>Going live soon!</h2> <div class="info-box"> <p>Inscribe will begin at Block height <span>21000</span></p> <p>Current Block: <span id="currentBlock">20818</span></p> <p>Blocks Remaining: <span id="blocksRemaining">182</span></p> </div> <div class="countdown"> <div class="countdown-item"> <div class="countdown-value" id="days">00</div> <div class="countdown-label">Days</div> </div> <div class="countdown-item"> <div class="countdown-value" id="hours">01</div> <div class="countdown-label">Hours</div> </div> <div class="countdown-item"> <div class="countdown-value" id="minutes">29</div> <div class="countdown-label">Minutes</div> </div> <div class="countdown-item"> <div class="countdown-value" id="seconds">28</div> <div class="countdown-label">Seconds</div> </div> </div> <p class="footer-text">Inscribe will be available once the block height reaches 21000. Stay tuned!</p> <div class="short-countdown"> Next update in: <span id="shortCountdown">03:00</span> </div> </div> </main> </div> <script> let mainCountdownTarget = new Date().getTime() + 92968000; // Set target time to about 1 day, 1 hour, 29 minutes, and 28 seconds from now let shortCountdownSeconds = 180; // 3 minutes function updateMainCountdown() { const now = new Date().getTime(); const timeLeft = mainCountdownTarget - now; const days = Math.floor(timeLeft / (1000 * 60 * 60 * 24)); const hours = Math.floor((timeLeft % (1000 * 60 * 60 * 24)) / (1000 * 60 * 60)); const minutes = Math.floor((timeLeft % (1000 * 60 * 60)) / (1000 * 60)); const seconds = Math.floor((timeLeft % (1000 * 60)) / 1000); document.getElementById('days').textContent = days.toString().padStart(2, '0'); document.getElementById('hours').textContent = hours.toString().padStart(2, '0'); document.getElementById('minutes').textContent = minutes.toString().padStart(2, '0'); document.getElementById('seconds').textContent = seconds.toString().padStart(2, '0'); } function updateShortCountdown() { const minutes = Math.floor(shortCountdownSeconds / 60); const seconds = shortCountdownSeconds % 60; document.getElementById('shortCountdown').textContent = `${minutes.toString().padStart(2, '0')}:${seconds.toString().padStart(2, '0')}`; if (shortCountdownSeconds > 0) { shortCountdownSeconds--; } else { // Reset short countdown shortCountdownSeconds = 180; // Decrease main countdown by 3 minutes mainCountdownTarget -= 180000; // Update block information const currentBlock = parseInt(document.getElementById('currentBlock').textContent); const newCurrentBlock = currentBlock + 1; const blocksRemaining = 21000 - newCurrentBlock; document.getElementById('currentBlock').textContent = newCurrentBlock; document.getElementById('blocksRemaining').textContent = blocksRemaining; } } // Update main countdown every second setInterval(updateMainCountdown, 1000); // Update short countdown every second setInterval(updateShortCountdown, 1000); // Initial call to set first values updateMainCountdown(); updateShortCountdown();</script></body></html
二、使用电脑笔记本工具新增代码
代码产出之后使用电脑自带的笔记本,把代码粘贴进去,保存成 Html 文件即可;我使用的是 Mac 电脑的【文本编辑.app】,win 电脑使用的是自带的笔记本都是一样的。只需要在保存的时候把文件后缀手动改成 html 即可。
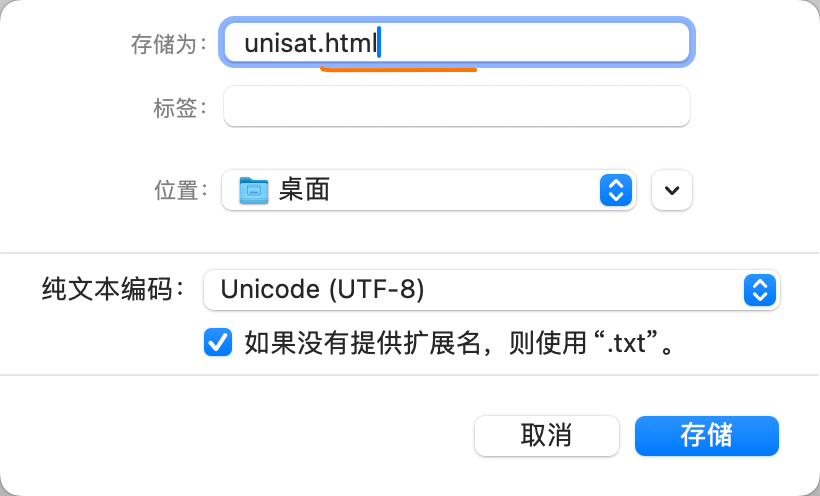
随后双击打开 Html 文件,则可以在浏览器中看到页面成品!****是不是很简单!!!动起来吧!
三、相关问题说明
我在这个步骤中发先比较常见的问题就是保存文件后,双击打开在浏览器里面是纯代码格式,无法预览效果。 如下图:
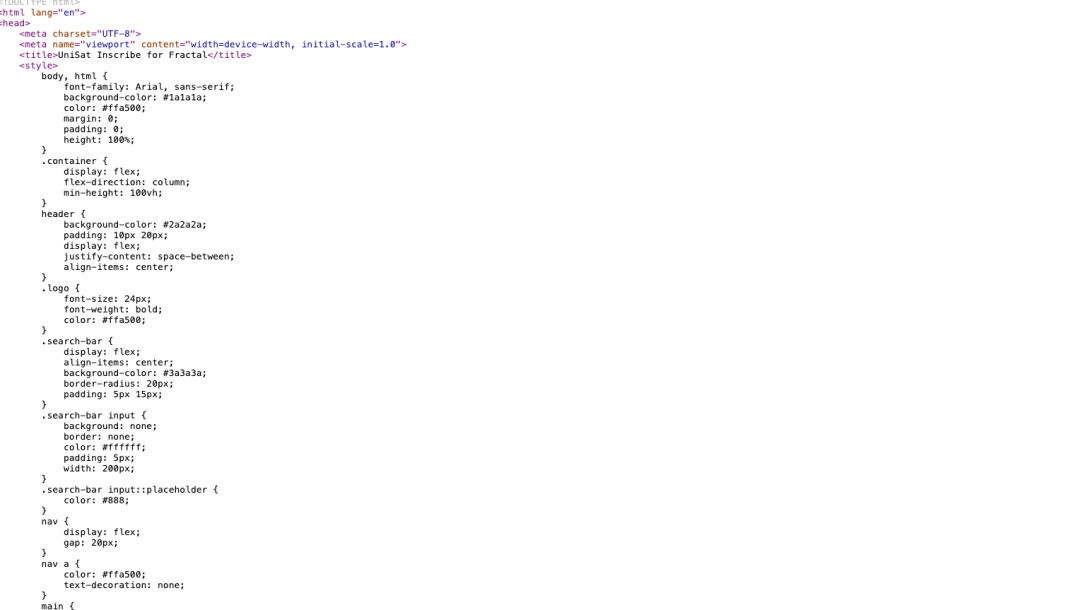
这个问题主要原因是保存文本的时候没有设置好,因为 mac 的文本编辑 app 默认是多格式文本,并且默认访问后是格式化后的内容。所以没有预览效果。解决方案如下:
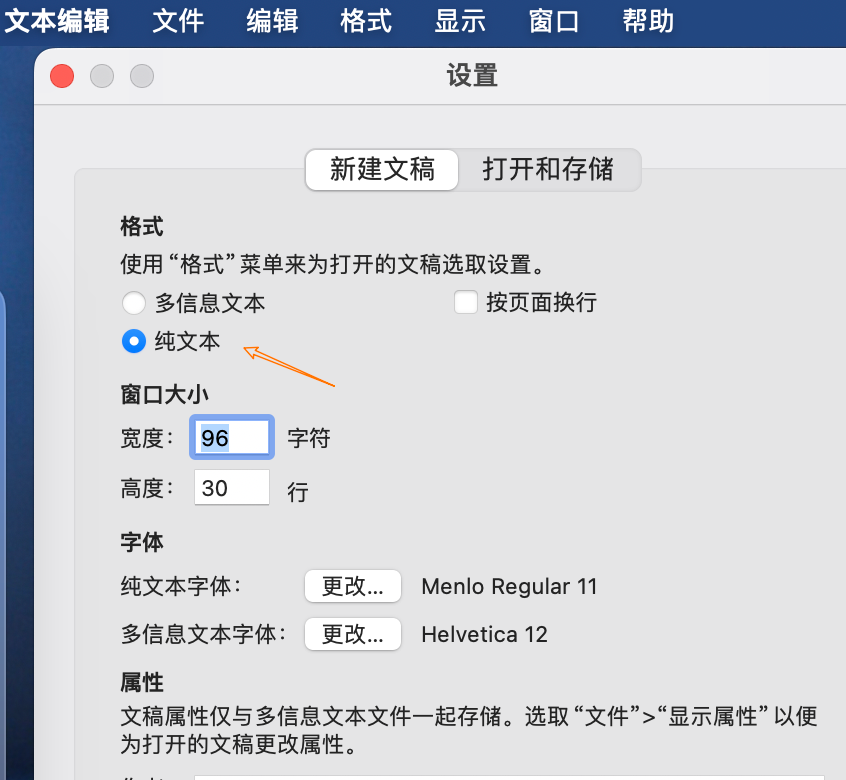
1、【新建文稿】中的格式改为“纯文本”
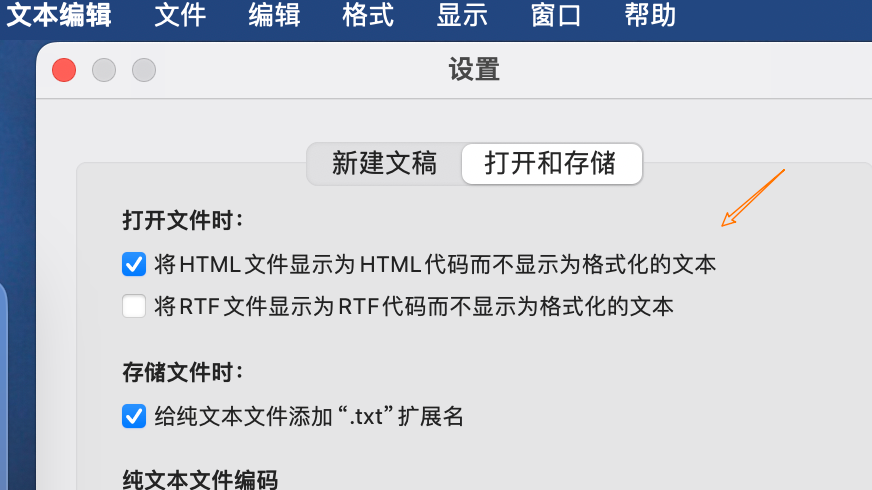
2、将【打开文件时】的设置改为将 HTML 文件显示为 HTML 代码而不是格式化的文本 设置成功后再新建即可。
后续将持续更新,感兴趣的可以一起交流~
版权归原作者 良逍成长笔记 所有, 如有侵权,请联系我们删除。