系列文章目录
- 手把手带你玩转Spark机器学习-专栏介绍
- 手把手带你玩转Spark机器学习-问题汇总
- 手把手带你玩转Spark机器学习-Spark的安装及使用
- 手把手带你玩转Spark机器学习-使用Spark进行数据处理和数据转换
- 手把手带你玩转Spark机器学习-使用Spark构建分类模型
- 手把手带你玩转Spark机器学习-使用Spark构建回归模型
- 手把手带你玩转Spark机器学习-使用Spark构建聚类模型
- 手把手带你玩转Spark机器学习-使用Spark进行数据降维
- 手把手带你玩转Spark机器学习-使用Spark进行文本处理
- 手把手带你玩转Spark机器学习-深度学习在Spark上的应用
文章目录
前言
本文将介绍深度学习在Spark上的应用,我们将聚焦于深度学习Pipelines库,并讲解使用DL Pipelines的方式。 我们将讲解如何通过Pipelines实现Transfer Learning,同时通过预训练模型实现来处理少量数据并实现预测。
一、Apache Spark Timeline
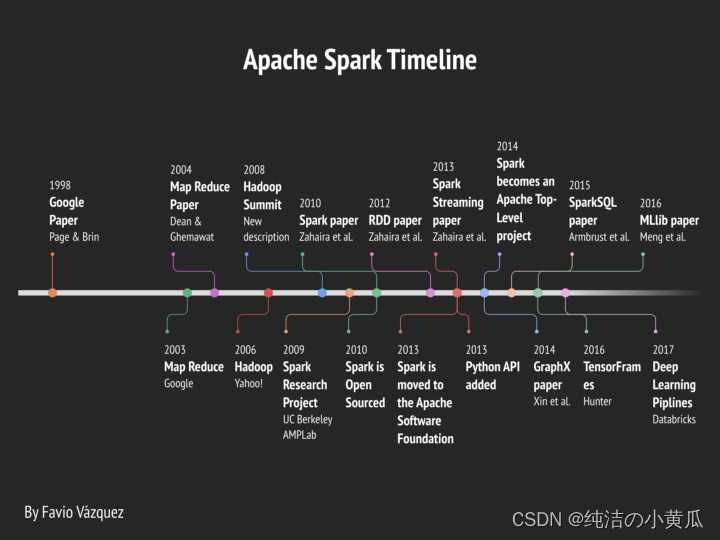
如上图所示,Deep Learning Pipelines在2017年开始被Apache支持。Deep Learning Pipelines 是一个由 Databricks 创建的开源库,使用 Apache Spark 的 Python 中的可扩展深度学习提供高级 API。
Deep Learning Pipelines 基于 Apache Spark 的 ML Pipelines 进行训练,并使用 Spark DataFrames 和 SQL 来部署模型。 它包括用于深度学习常见方面的高级 API,因此可以在几行代码中有效地完成它们:
- 数据导入
- 在spark ml pipeline中应用预训练模型作为转换器
- 迁移学习
- 大规模应用深度学习模型
- 分布式超参数调优
二、开发步骤
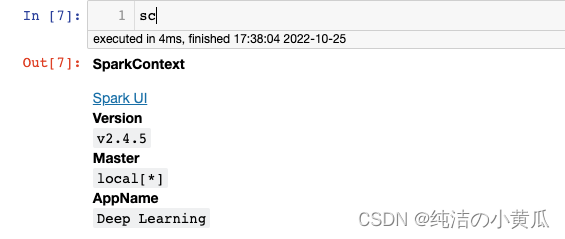
1.在jupyter中启动SparkSession 和 SparkContext
from pyspark.sql import SparkSession

spark = SparkSession.builder.appName("Deep Learning").getOrCreate()
sc = spark.sparkContext
sc
2.下载数据
在图像上应用深度学习的第一步是加载图像的能力。 Deep Learning Pipelines 创建了实用函数,可以将数百万张图像加载到 DataFrame 中,并以分布式方式自动解码,从而实现大规模操作。
我们将使用由 TensorFlow 的测试花卉照片(存在共享许可)来测试。我们先运行以下命令(我们还将创建一个示例文件夹), 来获取一组花卉照片:
!curl -O http://download.tensorflow.org/example_images/flower_photos.tgz
!tar xzf flower_photos.tgz
!mkdir flower_photos/sample
我们把部分图片名称改的简单些:
!cp flower_photos/daisy/100080576_f52e8ee070_n.jpg flower_photos/sample/
!cp flower_photos/daisy/10140303196_b88d3d6cec.jpg flower_photos/sample/
!cp flower_photos/tulips/100930342_92e8746431_n.jpg flower_photos/sample/
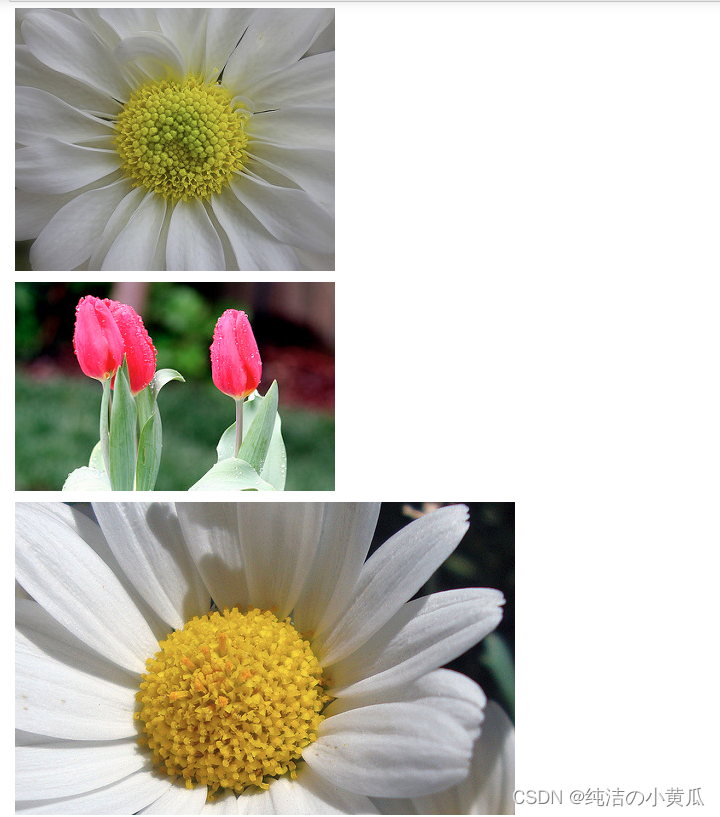
打印部分图片:
# collect all .png files in working dir
fs = !ls flower_photos/sample/*.jpg

import IPython.display as dp

# create list of image objects
images =[]for ea in fs:
    images.append(dp.Image(filename=ea,format='png'))# display all imagesfor ea in images:
    dp.display_png(ea)
3.用Spark读取图片
现在让我们使用 Spark 将这些图像加载为 DataFrame。 spark.readImage 方法将常见格式(jpg、png 等)的图像从 HDFS 存储读取到 DataFrame。 每个图像都以 imageSchema 格式存储为一行。 recursive选项允许从子文件夹中读取图像,例如正负标记样本。 sampleRatio 参数允许您在使用完整数据训练模型之前尝试使用较小的图像样本。
from pyspark.ml.image import ImageSchema
# Read images using Spark
image_df = ImageSchema.readImages("flower_photos/sample/")
如果我们看一下这个dataframe,我们会看到它创建了一个名为“image”的列。
image_df.show()
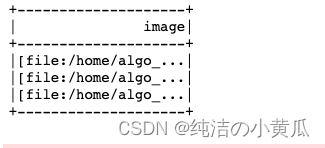
image 列包含一个字符串列包含一个带有 schema == ImageSchema 的图像结构。
3. Transfer Learning
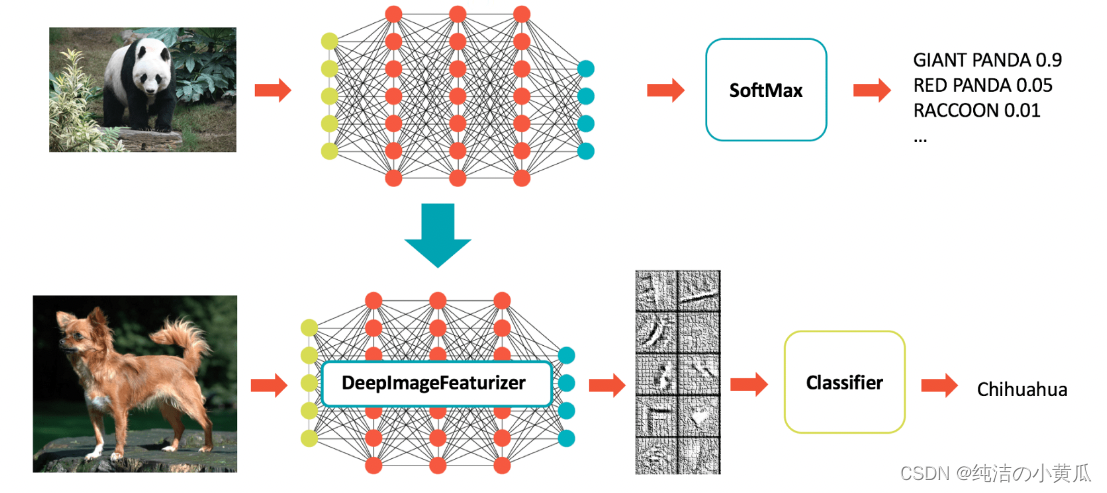
Deep Learning Pipelines 提供了对图像执行迁移学习的实用程序,这是开始使用深度学习的最快(代码和运行时)方法之一。 使用 Deep Learning Pipelines,只需几行代码即可完成。
Deep Learning Pipelines通过Featurizer的概念实现了快速迁移学习。 以下示例结合了 Spark 中的 InceptionV3 模型和逻辑回归,以使 InceptionV3 适应我们的特定领域。 DeepImageFeaturizer 自动剥离预训练神经网络的最后一层,并使用所有先前层的输出作为逻辑回归算法的特征。 由于逻辑回归是一种简单而快速的算法,因此这种迁移学习训练可以使用比从头开始训练深度学习模型通常所需的图像少得多的图像快速收敛。
首先,我们需要为迁移学习创建训练和测试数据帧。
from pyspark.ml.image import ImageSchema
from pyspark.sql.functions import lit
from sparkdl.image import imageIO

tulips_df = ImageSchema.readImages("flower_photos/tulips").withColumn("label", lit(1))
daisy_df = imageIO.readImagesWithCustomFn("flower_photos/daisy", decode_f=imageIO.PIL_decode).withColumn("label", lit(0))
tulips_train, tulips_test, _ = tulips_df.randomSplit([0.1,0.05,0.85])# use larger training sets (e.g. [0.6, 0.4] for getting more images)
daisy_train, daisy_test, _ = daisy_df.randomSplit([0.1,0.05,0.85])# use larger training sets (e.g. [0.6, 0.4] for getting more images)
train_df = tulips_train.unionAll(daisy_train)
test_df = tulips_test.unionAll(daisy_test)# Under the hood, each of the partitions is fully loaded in memory, which may be expensive.# This ensure that each of the paritions has a small size.
train_df = train_df.repartition(100)
test_df = test_df.repartition(100)
开始训练模型
from pyspark.ml.classification import LogisticRegression
from pyspark.ml import Pipeline
from sparkdl import DeepImageFeaturizer

featurizer = DeepImageFeaturizer(inputCol="image", outputCol="features", modelName="InceptionV3")
lr = LogisticRegression(maxIter=10, regParam=0.05, elasticNetParam=0.3, labelCol="label")
p = Pipeline(stages=[featurizer, lr])

p_model = p.fit(train_df)
接下来评估下模型性能
from pyspark.ml.evaluation import MulticlassClassificationEvaluator

tested_df = p_model.transform(test_df)
evaluator = MulticlassClassificationEvaluator(metricName="accuracy")print("Test set accuracy = "+str(evaluator.evaluate(tested_df.select("prediction","label"))))

大规模应用深度学习模型
Deep Learning Pipelines 支持使用 Spark 以分布式方式运行预训练模型,可用于批处理和流数据处理。
它包含一些最受欢迎的模型,使用户能够开始使用深度学习,而无需昂贵的模型训练步骤。 当然,模型的预测是与 Spark 带来的所有好处同时进行的。
除了使用内置模型外,用户还可以在 Spark 预测管道中插入 Keras 模型和 TensorFlow Graphs。 这将单节点工具上的任何单节点模型转换为可以以分布式方式应用于大量数据的模型。
以下代码使用 InceptionV3 创建 Spark 预测管道,InceptionV3 是用于图像分类的最先进的卷积神经网络 (CNN) 模型,并预测我们刚刚加载的图像中的对象。
from sparkdl import DeepImagePredictor
# Read images using Spark
image_df = ImageSchema.readImages("flower_photos/sample/")

predictor = DeepImagePredictor(inputCol="image", outputCol="predicted_labels", modelName="InceptionV3", decodePredictions=True, topK=10)
predictions_df = predictor.transform(image_df)
predictions_df.select("predicted_labels").show(truncate=False,n=3)
请注意,predicted_labels 列将“daisy”显示为使用此基本模型的所有样本花的高概率类别,由于某种原因,郁金香更接近栅栏而不是花朵(可能是因为照片的背景)。
然而,从概率值的差异可以看出,神经网络具有辨别两种花型的信息。 因此,我们上面的迁移学习示例能够从基本模型开始正确地学习雏菊和郁金香之间的差异。
让我们看看我们的模型如何识别花朵的类型:
df = p_model.transform(image_df)
def_p1(v):returnfloat(v.array[1])
take_one = udf(_p1, DoubleType())
df.select("image.origin",(1-take_one(df.probability)).alias("p_daisy")).show(truncate=False)

总结
本文主要介绍深度学习在Spark上的应用,以花卉图片为例,使用 Deep Learning Pipelines,并讲解使用DL Pipelines的方式。 我们还通过Pipelines实现Transfer Learning,同时通过预训练模型实现来处理少量数据并实现预测。
版权归原作者 纯洁の小黄瓜 所有, 如有侵权,请联系我们删除。