
人脸识别
了解常见的机器学习库Scikit-learn后,也想入门下深度学习库keras
以下就以Python来实现简单的人脸识别技术!
一、人脸识别认证
1.对照人脸获取
#-----获取人脸样本-----#1.导入库import cv2
#2.打开摄像头(调用笔记本内置摄像头,参数0保持摄像头不关闭,如果有其他的摄像头可以调整参数为1,2)
cap = cv2.VideoCapture(0)#3.加载人脸模型(费舍尔人脸建模,调用人脸分类器,要根据实际路径调整)
face_detector = cv2.CascadeClassifier(r'D:\SoftWare\Anaconda\Anaconda\Lib\site-packages\cv2\data\haarcascade_frontalface_default.xml')#为即将录入的脸标记一个id
face_id =input('\n 用户数据输入face_id,看摄像头等待 ...')#sampleNum用来计数样本数目
count =0#3获取摄像头的实时画面whileTrue:#从摄像头读取图片
success,img = cap.read()#4.图像的灰度处理(opencv不适用RGB通道,用GBR,所以需转化)#转为灰度图片,减少程序符合,提高识别度if success isTrue:
gray = cv2.cvtColor(img, cv2.COLOR_BGR2GRAY)else:break#5.检查人脸(120x120的识别框)#检测人脸,将每一帧摄像头记录的数据带入OpenCv中,让Classifier判断人脸
faces = face_detector.detectMultiScale(gray,1.3,5)#其中gray为要检测的灰度图像,1.3为每次图像尺寸减小的比例,5为minNeighbors#6.标记人脸(10是线的宽度 ,元组三元素是GBR,2是线宽度)#框选人脸,for循环保证一个能检测的实时动态视频流for(x, y, w, h)in faces:
cv2.rectangle(img,(x, y),(x+w, y+w),(255,0,0))#xy为左上角的坐标,w为宽,h为高,用rectangle为人脸标记画框#成功框选则样本数增加
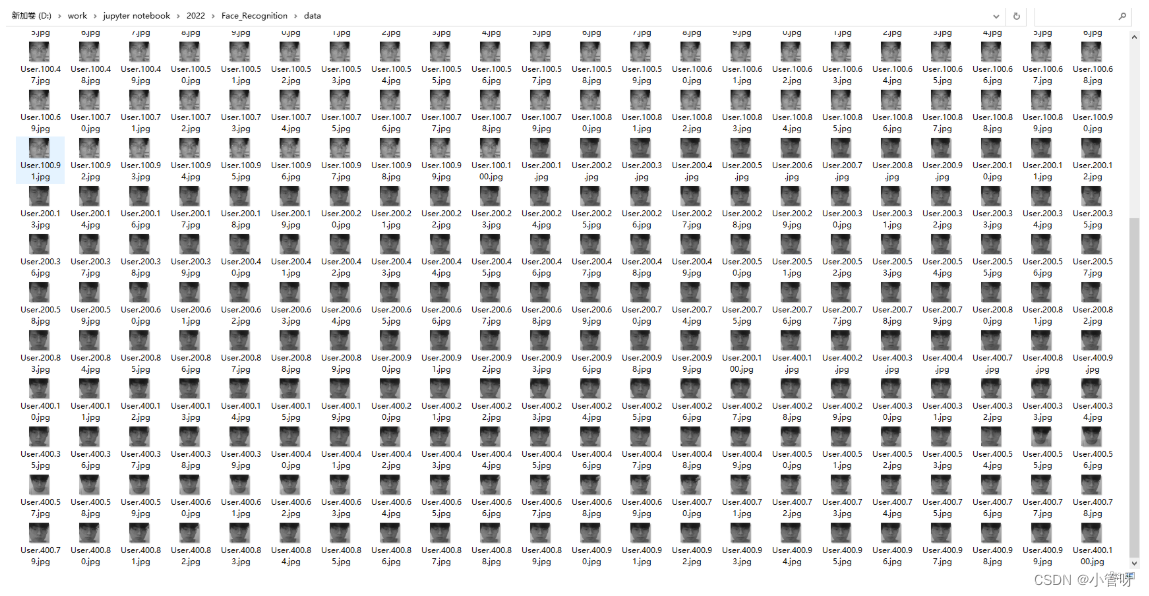
count +=1#保存图像,把灰度图片看成二维数组来检测人脸区域#(这里是建立了data的文件夹,当然也可以设置为其他路径或者调用数据库)
cv2.imwrite("data/User."+str(face_id)+'.'+str(count)+'.jpg',gray[y:y+h,x:x+w])#显示图片
cv2.imshow('image',img)#保持画面的连续。waitkey方法可以绑定按键保证画面的收放,通过q键退出摄像
k = cv2.waitKey(1)if k =='27':break#或者得到100个样本后退出摄像,这里可以根据实际情况修改数据量,实际测试后800张的效果是比较理想的elif count >=100:break#关闭摄像头,释放资源
cap.realease()
cv2.destroyAllWindows()
2.通过算法建立对照模型
#-----建立模型、创建数据集-----#-----建立模型、创建数据集-----import os
import cv2
import numpy as np
from PIL import Image
#导入pillow库,用于处理图像#设置之前收集好的数据文件路径
path ='data'#初始化识别的方法
recog = cv2.face.LBPHFaceRecognizer_create()#调用熟悉的人脸分类器
detector = cv2.CascadeClassifier('D:\SoftWare\Anaconda\Anaconda\Lib\site-packages\cv2\data\haarcascade_frontalface_default.xml')#创建一个函数,用于从数据集文件夹中获取训练图片,并获取id#注意图片的命名格式为User.id.sampleNumdefget_images_and_labels(path):
    image_paths =[os.path.join(path,f)for f in os.listdir(path)]#新建连个list用于存放
    face_samples =[]
    ids =[]#遍历图片路径,导入图片和id添加到list中for image_path in image_paths:#通过图片路径将其转换为灰度图片
        img = Image.open(image_path).convert('L')#将图片转化为数组
        img_np = np.array(img,'uint8')if os.path.split(image_path)[-1].split(".")[-1]!='jpg':continue#为了获取id,将图片和路径分裂并获取id=int(os.path.split(image_path)[-1].split(".")[1])
        faces = detector.detectMultiScale(img_np)#将获取的图片和id添加到list中for(x,y,w,h)in faces:
            face_samples.append(img_np[y:y+h,x:x+w])
            ids.append(id)return face_samples,ids

#调用函数并将数据喂给识别器训练print('Training...')
faces,ids = get_images_and_labels(path)#训练模型
recog.train(faces,np.array(ids))#保存模型
recog.save('./trainner.yml')

3.认证识别
#-----检测、校验并输出结果-----import cv2

#准备好识别方法
recognizer = cv2.face.LBPHFaceRecognizer_create()#使用之前训练好的模型
recognizer.read('./trainner.yml')#再次调用人脸分类器
cascade_path ="D:\SoftWare\Anaconda\Anaconda\Lib\site-packages\cv2\data\haarcascade_frontalface_default.xml"
face_cascade = cv2.CascadeClassifier(cascade_path)#加载一个字体,用于识别后,在图片上标注出对象的名字
font = cv2.FONT_HERSHEY_SIMPLEX

idnum =0#设置好与ID号码对应的用户名,如下,如0对应的就是初始

names =['kyle','patton','nicole','anthony','venus']#调用摄像头
cam = cv2.VideoCapture(0)
minW =0.1*cam.get(3)
minH =0.1*cam.get(4)whileTrue:
    ret,img = cam.read()
    gray = cv2.cvtColor(img,cv2.COLOR_BGR2GRAY)#识别人脸
    faces = face_cascade.detectMultiScale(
            gray,
            scaleFactor =1.2,
            minNeighbors =5,
            minSize =(int(minW),int(minH)))#进行校验for(x,y,w,h)in faces:
        cv2.rectangle(img,(x,y),(x+w,y+h),(0,255,0),2)
        idnum,confidence = recognizer.predict(gray[y:y+h,x:x+w])print(confidence)print(idnum)#计算出一个检验结果if confidence <100:
            idum = names[idnum]
            confidence ="{0}%",format(round(100-confidence))else:
            idum ="unknown"
            confidence ="{0}%",format(round(100-confidence))#输出检验结果以及用户名
        cv2.putText(img,str(idum),(x+5,y-5),font
                    ,1,(0,0,255),1)
        cv2.putText(img,str(confidence),(x+5,y+h-5),font
                    ,1,(0,0,0),1)#展示结果
        cv2.imshow('camera',img)
        k = cv2.waitKey(20)if k ==27:break#释放资源
cam.release()
cv2.destroyAllWindows()

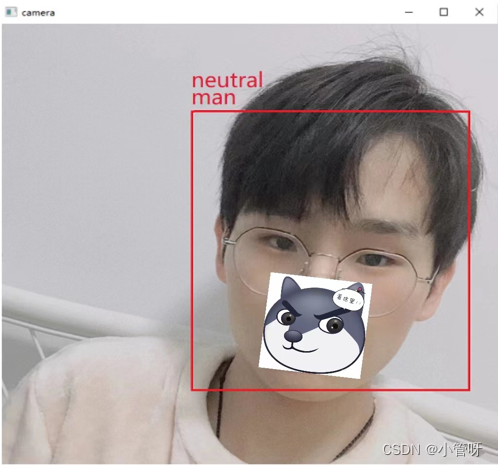
二、人脸检测微表情识别
识别7种微表情–愤怒、厌恶、恐惧、快乐、悲伤、惊喜、自然
性别识别
from statistics import mode
import cv2
import matplotlib.pyplot as plt
from keras.models import load_model
import numpy as np
import pandas as pd
from keras.preprocessing import image
from random import shuffle
import os
from scipy.io import loadmat

defget_labels(dataset_name):if dataset_name =='fer2013':return{0:'angry',1:'disgust',2:'fear',3:'happy',4:'sad',5:'surprise',6:'neutral'}elif dataset_name =='imdb':return{0:'woman',1:'man'}elif dataset_name =='KDEF':return{0:'AN',1:'DI',2:'AF',3:'HA',4:'SA',5:'SU',6:'NE'}else:raise Exception('Invalid dataset name')defdetect_faces(detection_model, gray_image_array):return detection_model.detectMultiScale(gray_image_array,1.3,5)defdraw_text(coordinates, image_array, text, color, x_offset=0, y_offset=0,
                                                font_scale=2, thickness=2):
    x, y = coordinates[:2]
    cv2.putText(image_array, text,(x + x_offset, y + y_offset),
                cv2.FONT_HERSHEY_SIMPLEX,
                font_scale, color, thickness, cv2.LINE_AA)defdraw_bounding_box(face_coordinates, image_array, color):
    x, y, w, h = face_coordinates
    cv2.rectangle(image_array,(x, y),(x + w, y + h), color,2)defapply_offsets(face_coordinates, offsets):
    x, y, width, height = face_coordinates
    x_off, y_off = offsets
    return(x - x_off, x + width + x_off, y - y_off, y + height + y_off)defload_detection_model(model_path):
    detection_model = cv2.CascadeClassifier(model_path)return detection_model

defpreprocess_input(x, v2=True):
    x = x.astype('float32')
    x = x /255.0if v2:
        x = x -0.5
        x = x *2.0return x

# 加载数据和图像的参数
detection_model_path ='D:/work/jupyter notebook/2022/face_classification-master/face_classification-master/trained_models/detection_models/haarcascade_frontalface_default.xml'
emotion_model_path   ='D:/work/jupyter notebook/2022/face_classification-master/face_classification-master/trained_models/emotion_models/fer2013_mini_XCEPTION.102-0.66.hdf5'
emotion_labels = get_labels('fer2013')# 边界框形状的超参数
frame_window =10
emotion_offsets =(20,40)#加载模型
face_detection = load_detection_model(detection_model_path)
emotion_classifier = load_model(emotion_model_path,compile=False)# 获取输入模型形状以进行推理
emotion_target_size = emotion_classifier.input_shape[1:3]# 计算模式的起始列表
emotion_window =[]# 开始视频流
cv2.namedWindow('window_frame')
video_capture = cv2.VideoCapture(0)whileTrue:
    bgr_image = video_capture.read()[1]
    gray_image = cv2.cvtColor(bgr_image, cv2.COLOR_BGR2GRAY)
    rgb_image = cv2.cvtColor(bgr_image, cv2.COLOR_BGR2RGB)
    faces = detect_faces(face_detection, gray_image)for face_coordinates in faces:

        x1, x2, y1, y2 = apply_offsets(face_coordinates, emotion_offsets)
        gray_face = gray_image[y1:y2, x1:x2]try:
            gray_face = cv2.resize(gray_face,(emotion_target_size))except:continue

        gray_face = preprocess_input(gray_face,True)
        gray_face = np.expand_dims(gray_face,0)
        gray_face = np.expand_dims(gray_face,-1)
        emotion_prediction = emotion_classifier.predict(gray_face)
        emotion_probability = np.max(emotion_prediction)
        emotion_label_arg = np.argmax(emotion_prediction)
        emotion_text = emotion_labels[emotion_label_arg]
        emotion_window.append(emotion_text)iflen(emotion_window)> frame_window:
            emotion_window.pop(0)try:
            emotion_mode = mode(emotion_window)except:continueif emotion_text =='angry':
            color = emotion_probability * np.asarray((255,0,0))elif emotion_text =='sad':
            color = emotion_probability * np.asarray((0,0,255))elif emotion_text =='happy':
            color = emotion_probability * np.asarray((255,255,0))elif emotion_text =='surprise':
            color = emotion_probability * np.asarray((0,255,255))else:
            color = emotion_probability * np.asarray((0,255,0))

        color = color.astype(int)
        color = color.tolist()

        draw_bounding_box(face_coordinates, rgb_image, color)
        draw_text(face_coordinates, rgb_image, emotion_mode,
                  color,0,-45,1,1)

    bgr_image = cv2.cvtColor(rgb_image, cv2.COLOR_RGB2BGR)
    cv2.imshow('window_frame', bgr_image)if cv2.waitKey(1)&0xFF==ord('q'):break

video_capture.release()
cv2.destroyAllWindows()
本文转载自: https://blog.csdn.net/weixin_44553044/article/details/124617283
版权归原作者 小管呀 所有, 如有侵权,请联系我们删除。
版权归原作者 小管呀 所有, 如有侵权,请联系我们删除。