边缘检测
边缘检测简介
边缘检测是图像处理和计算机视觉中的基本问题,边缘检测的目的是标识数字图像中亮度变化明显的点。图像边缘检测大幅度地减少了数据量,并且剔除量不相关的信息,保留了图像重要的结构属性。
一、边缘检测步骤
1.图像获取
2.图像滤波
3.图像增强
4.图像检测
5.图像定位
二、Canny
1.函数
voidCanny(InputArray image, OutputArray edges,double threshold1,double threshold2,int apertureSize =3,bool L2gradient =false);
    image 8位输入图像
    edges 单通道8位图像
    threshold1  迟滞过程第一个阈值
    threshold2  迟滞过程第二个阈值
    apertureSize 算子的孔径大小
    L2gradient 范数
2.代码
#include<iostream>#include<opencv.hpp>usingnamespace std;usingnamespace cv;intmain(){
    Mat img1;
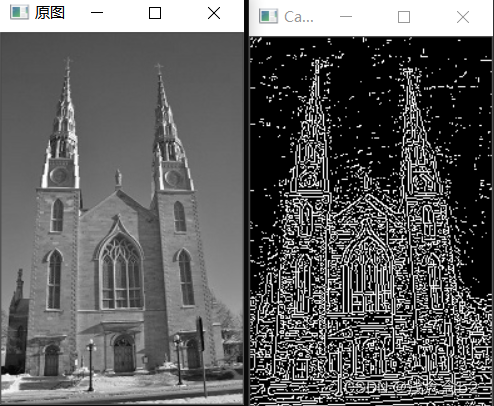
    img1 =imread("图片1.png",0);imshow("原图", img1);Canny(img1, img1,10,10);imshow("Canny", img1);waitKey(0);}
效果如下:
二、Sobel
1.函数
voidSobel(InputArray src, OutputArray dst,int ddepth,int dx,int dy,int ksize =3,double scale =1,double delta =0,int borderType = BORDER_DEFAULT);
    src 输入
    dst 输出
    ddepth 输出图像的数据类型
    dx x方向的差分阶数
    dy y方向的差分阶数
    Ksize 尺寸 1,3,5,7
    scale 缩放因子
    delta 偏值
    borderType 边界像素模式
2.代码
intmain(){
    Mat img1, img2;
    img1 =imread("图片1.png",0);imshow("原图", img1);Sobel(img1, img2, CV_8U,2,0,1);imshow("sobel", img2);waitKey(0);}
效果如下:

三、Scharr
1.函数
voidScharr(InputArray src, OutputArray dst,int ddepth,int dx,int dy,double scale =1,double delta =0,int borderType = BORDER_DEFAULT);

    src 输入
    dst 输出
    ddepth 输出图像的数据类型
    dx x方向的导数
    dy y方向的导数
    scale 缩放因子
    delta 偏值
    borderType 边界像素模式
2.代码
intmain(){
    Mat img1, img2;

    img1 =imread("图片1.png",0);imshow("原图", img1);Scharr(img1, img2, CV_8U,1,0);imshow("Scharr", img2);waitKey(0);}
效果如下:
三、Scharr
1.函数
voidLaplacian(InputArray src, OutputArray dst,int ddepth,int ksize =1,double scale =1,double delta =0,int borderType = BORDER_DEFAULT);

    src 输入
    dst 输出
    ddepth 输出图像的数据类型
    Ksize 滤波器大小 正奇数
    scale 缩放因子
    delta 偏值
    borderType 边界像素模式
2.代码
intmain(){
    Mat img1, img2;

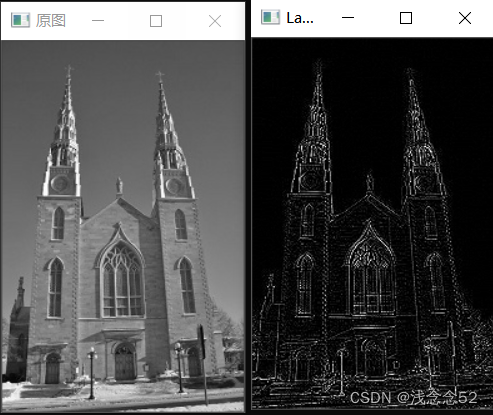
    img1 =imread("图片1.png",0);imshow("原图", img1);Laplacian(img1, img2,CV_8U,1);imshow("Laplacian", img2);waitKey(0);}
效果如下:
总结
本文只是简单介绍了几种常用的边缘检测算法函数,都是调用函数解决问题,大家可以更加深入的研究数学方式的边缘检测算法
版权归原作者 浅念念52 所有, 如有侵权,请联系我们删除。