
github代码库链接
Langchain-Chatchathttps://github.com/chatchat-space/Langchain-Chatchat
inferencehttps://github.com/xorbitsai/inference
本文将会用到两个代码库
第一个代码库是启动chatchat使用。
第二个代码库是加载推理模型使用。
安装Xinference
首先新建虚拟环境, 然后通过pip安装
pip install "xinference[all]"
启动方式
xinference-local --host 0.0.0.0 --port 8887
通过浏览器打开会看到这样一个界面
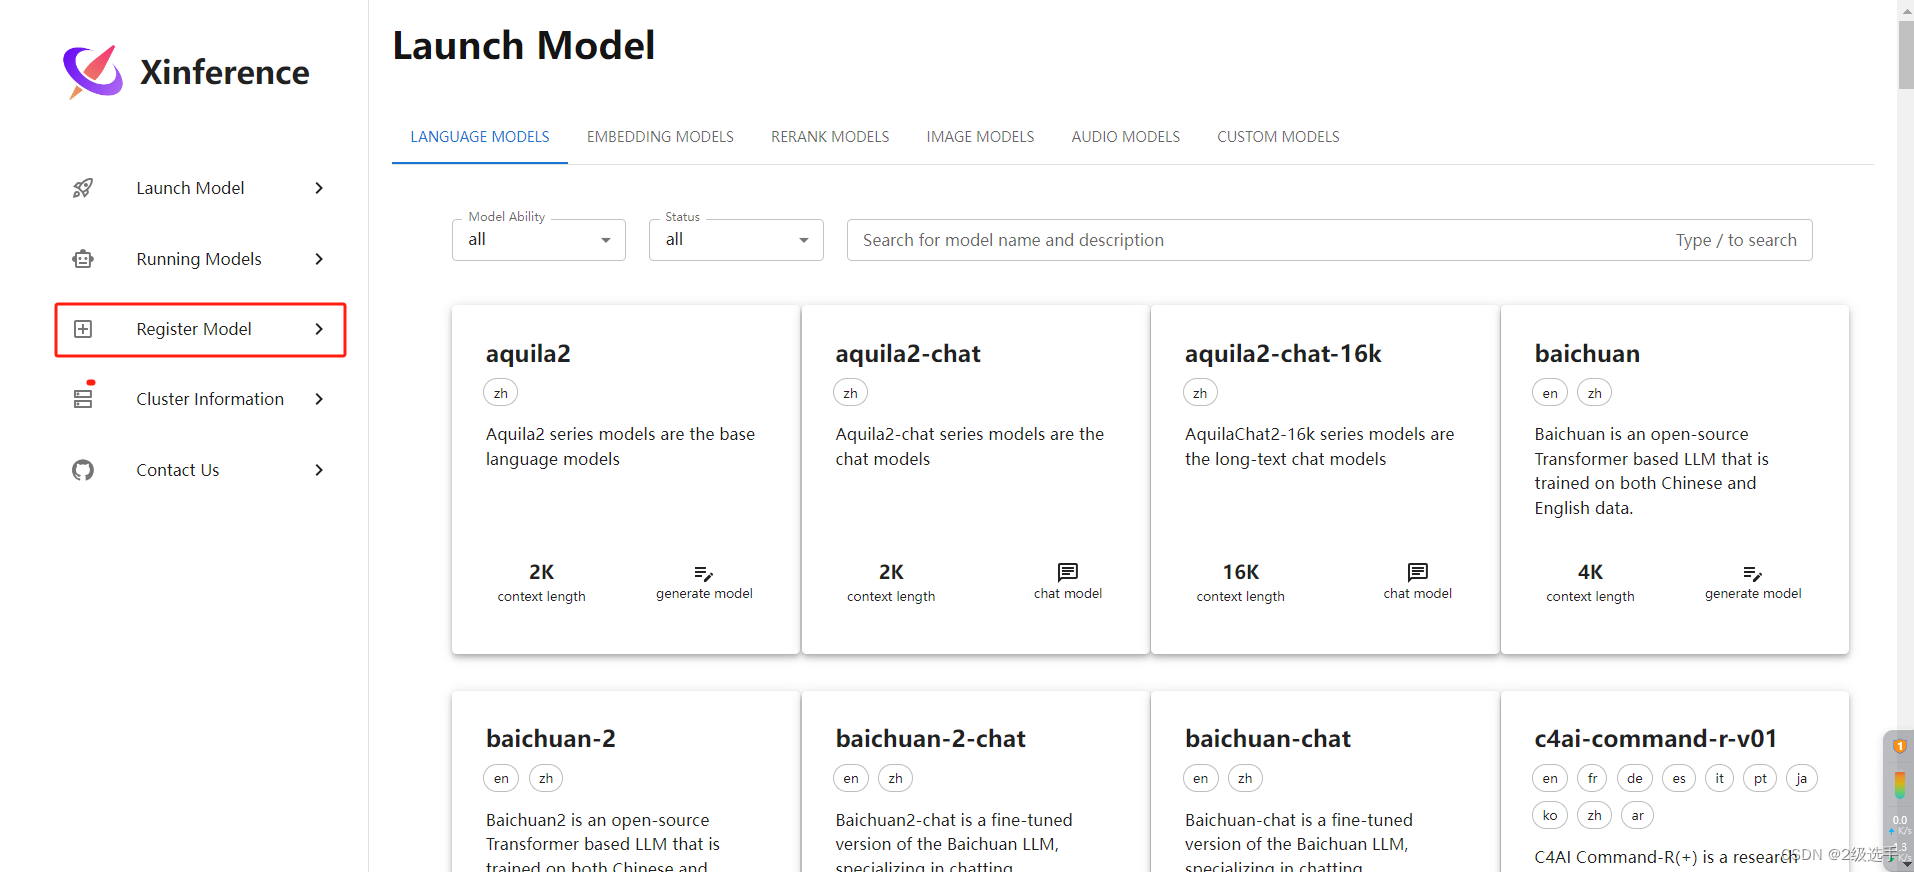
launch model 会自动下载模型文件,默认是从hugging face下载,如果网络不通可以更改到ModelScope。也可以添加本地模型
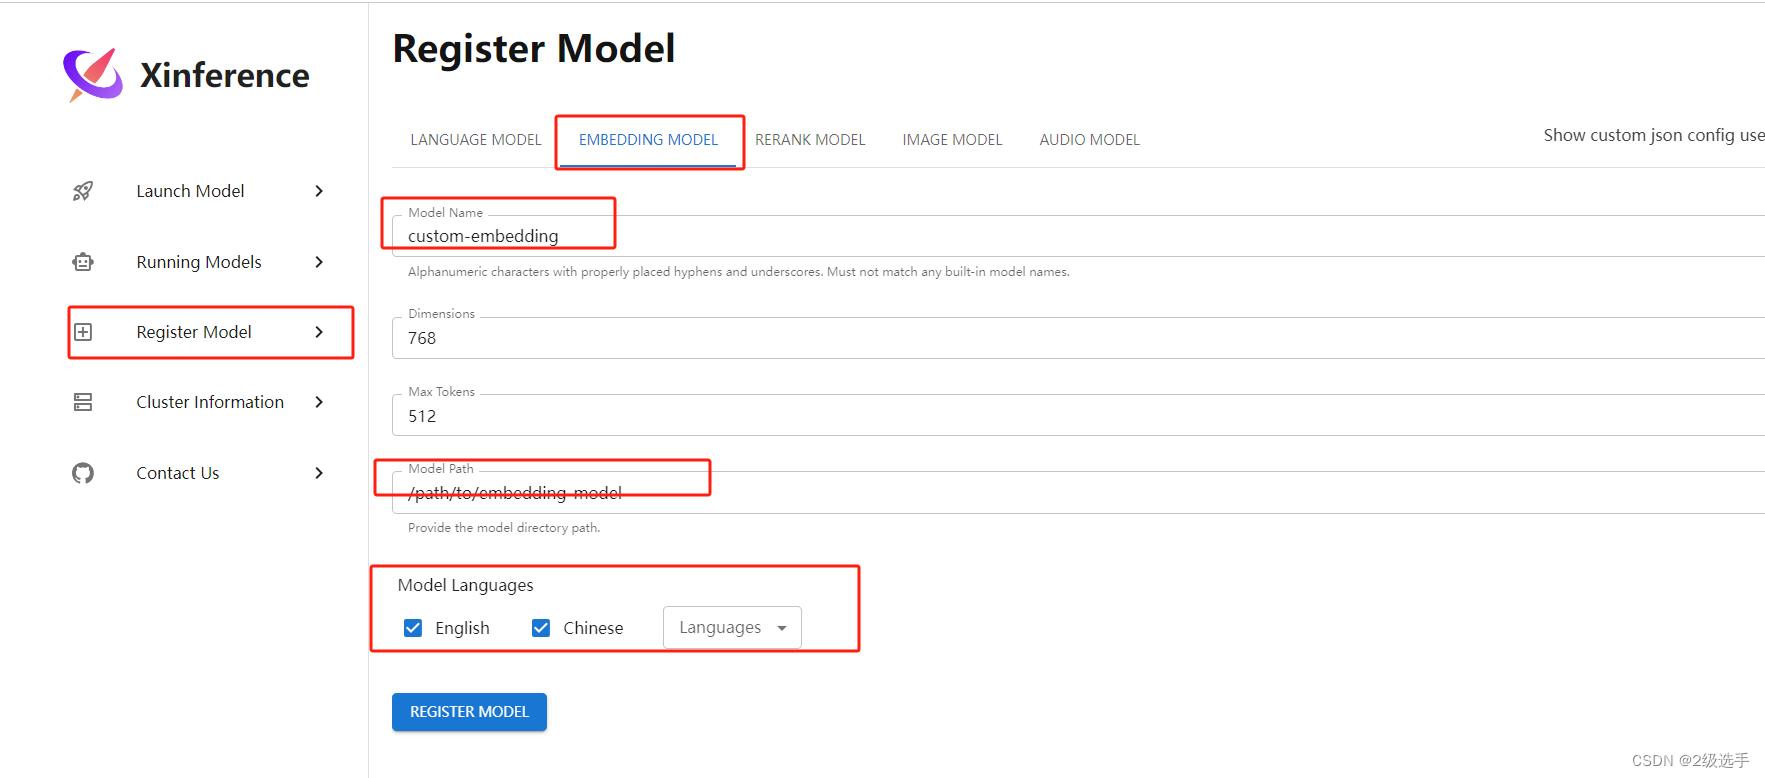
添加注册模型
点击resgister model
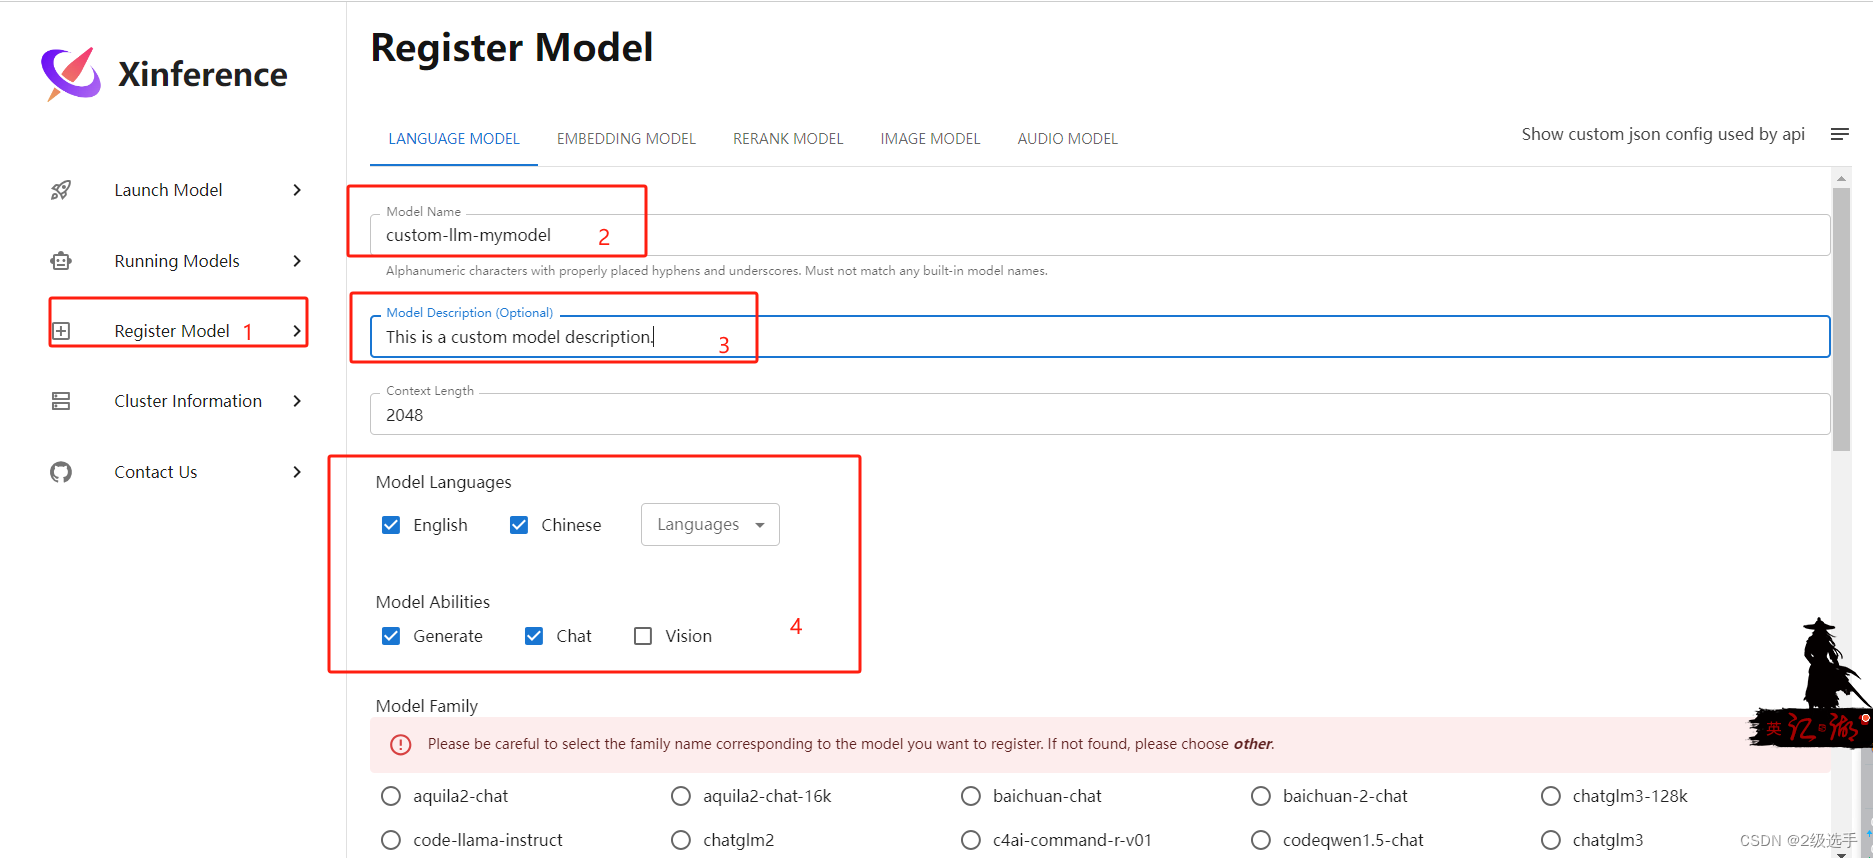
** 填写model name 自己随便起一个名字就好了**
模型介绍 可写可不写
按照截图勾选即可
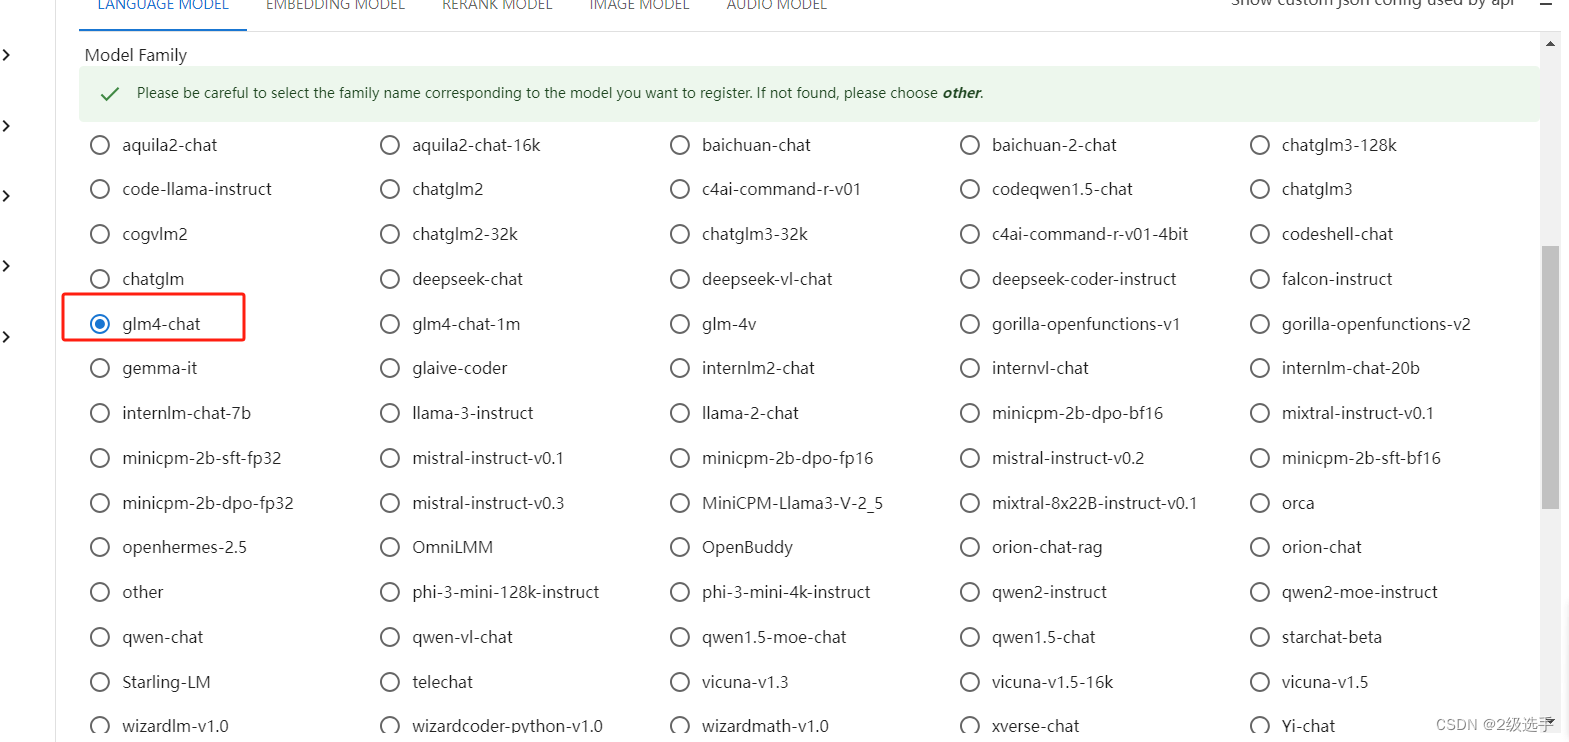
选择你下载到本地的大模型基座
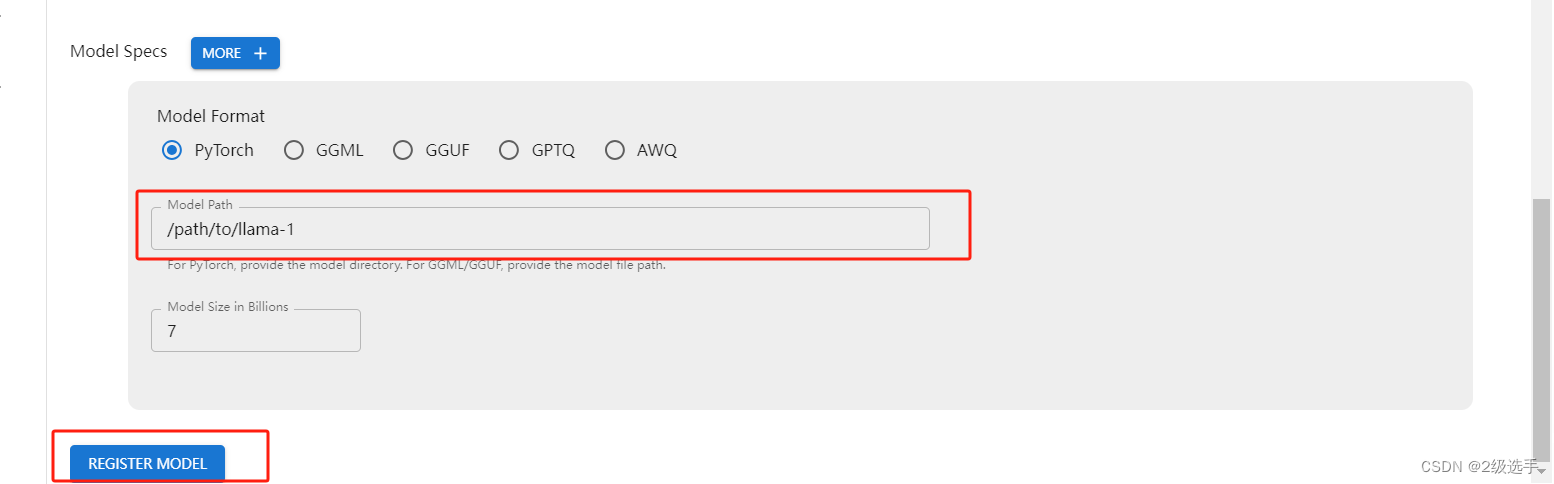
填写本地大模型的实际路径
register mdoel 点击注册
glm4-chat模型下载国内可以去魔塔社区下载:
魔搭社区汇聚各领域最先进的机器学习模型,提供模型探索体验、推理、训练、部署和应用的一站式服务。https://www.modelscope.cn/models/ZhipuAI/glm-4-9b
打开网址复制名字,以glm4为例,按照下面代码操作可以指定下载目录。
pip install modelscope
from modelscope import snapshot_download
download_dir = r'D:\mycode\MachineLearningPractice-main\modelscope_download'
model_dir = snapshot_download("ZhipuAI/glm-4-9b-chat", cache_dir=download_dir)

魔塔下载模型详细文档信息:魔搭社区汇聚各领域最先进的机器学习模型,提供模型探索体验、推理、训练、部署和应用的一站式服务。https://www.modelscope.cn/docs/%E6%A8%A1%E5%9E%8B%E7%9A%84%E4%B8%8B%E8%BD%BD
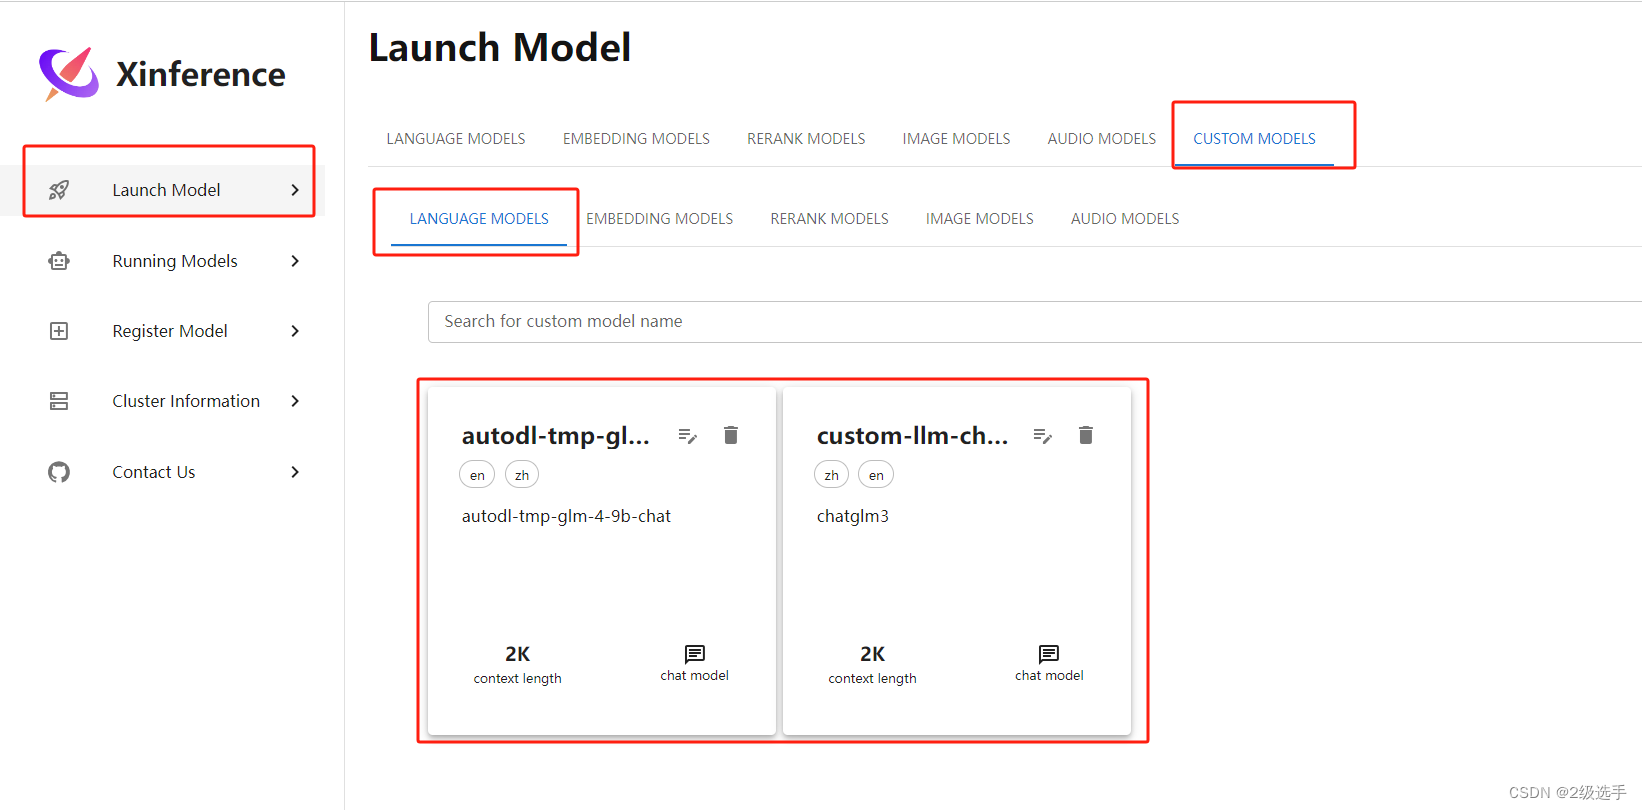
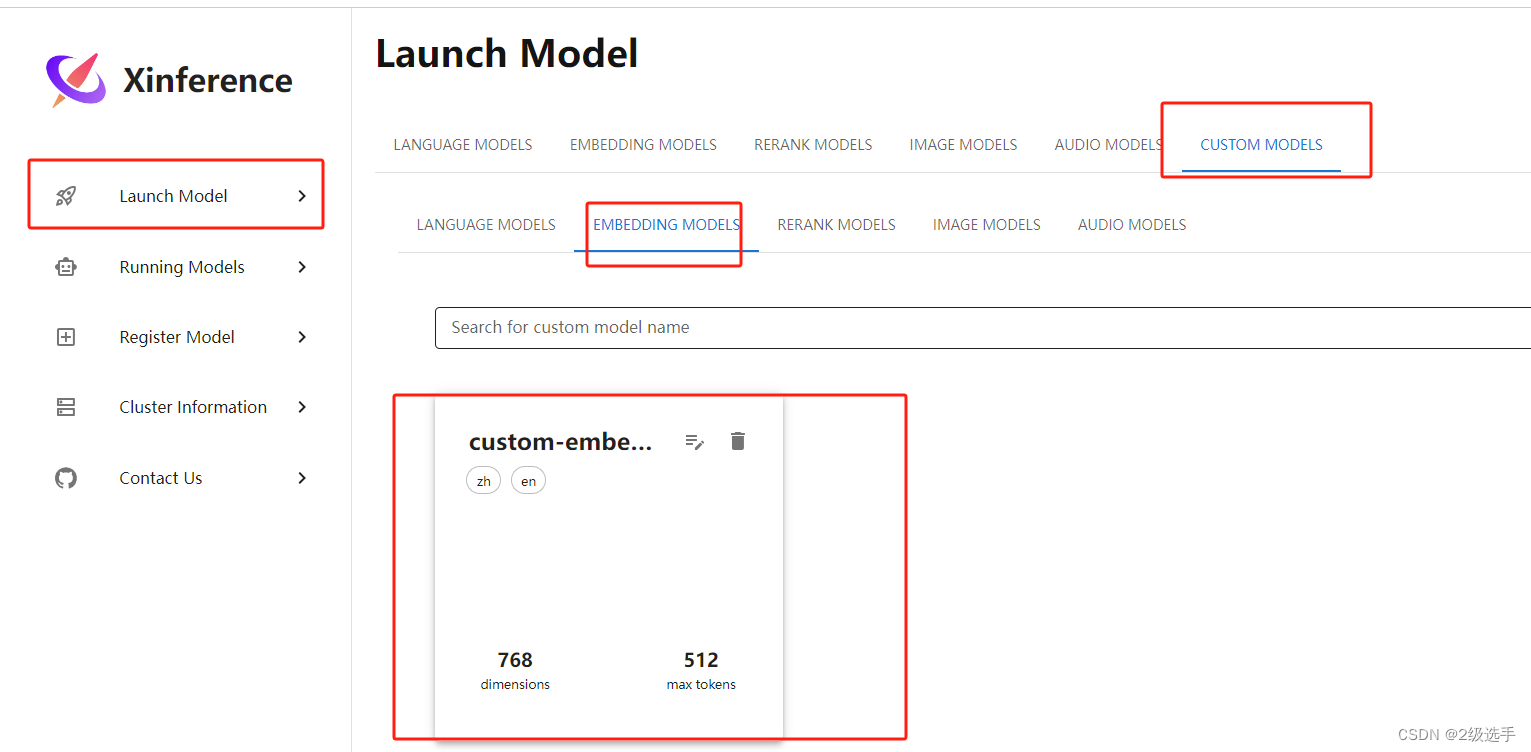
启动模型
- 点击launch model
- 点击custom models
- 点击language mdels
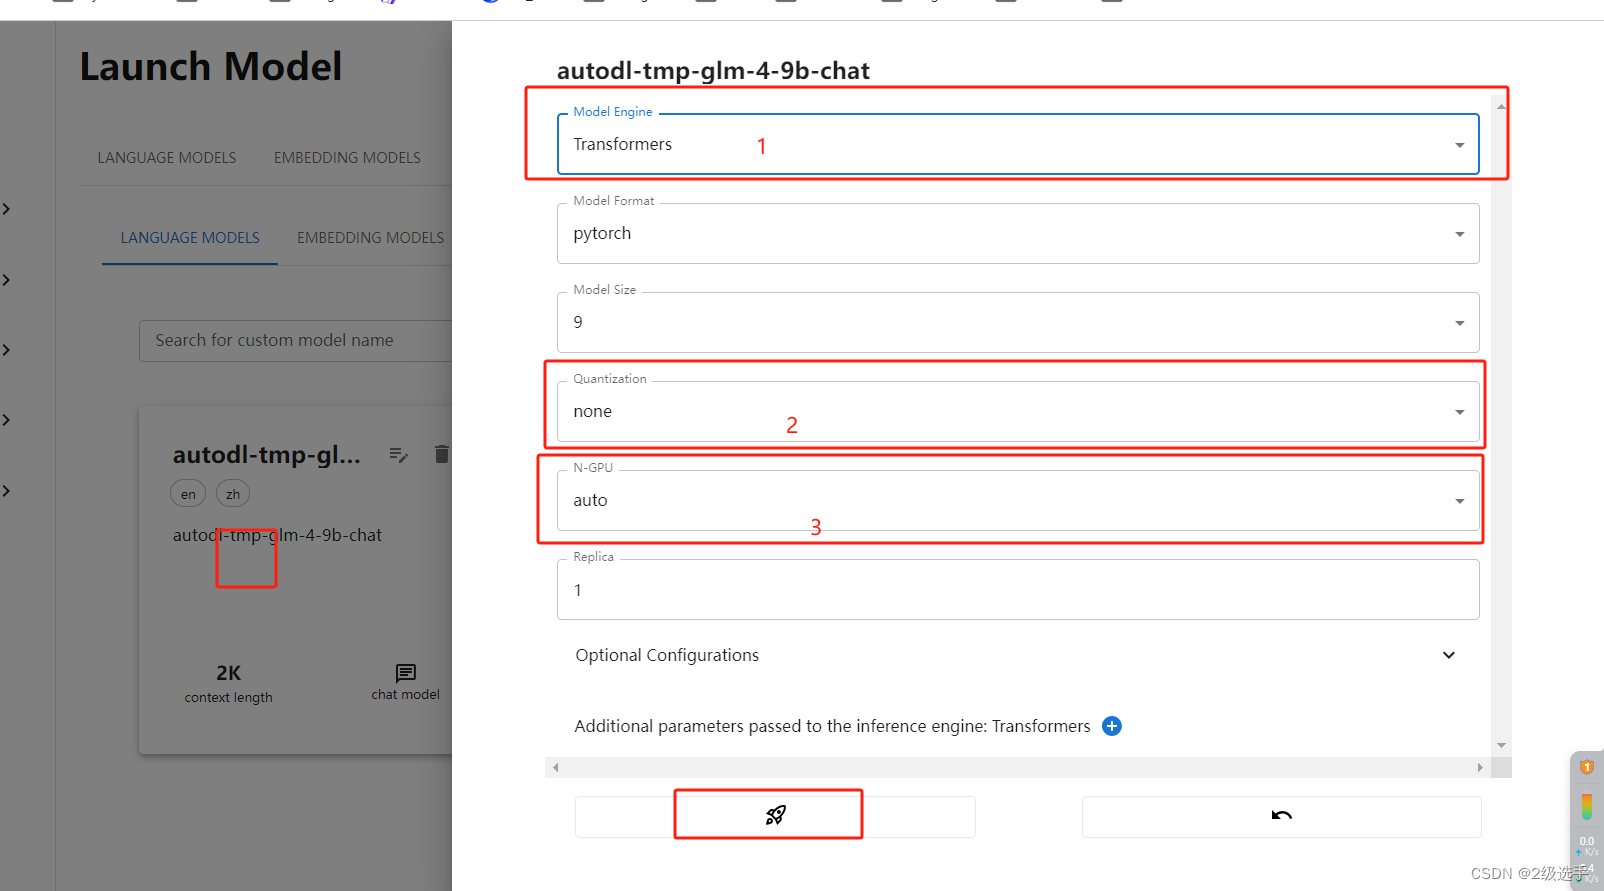
然后我们就会看到我们刚刚注册的大模型信息
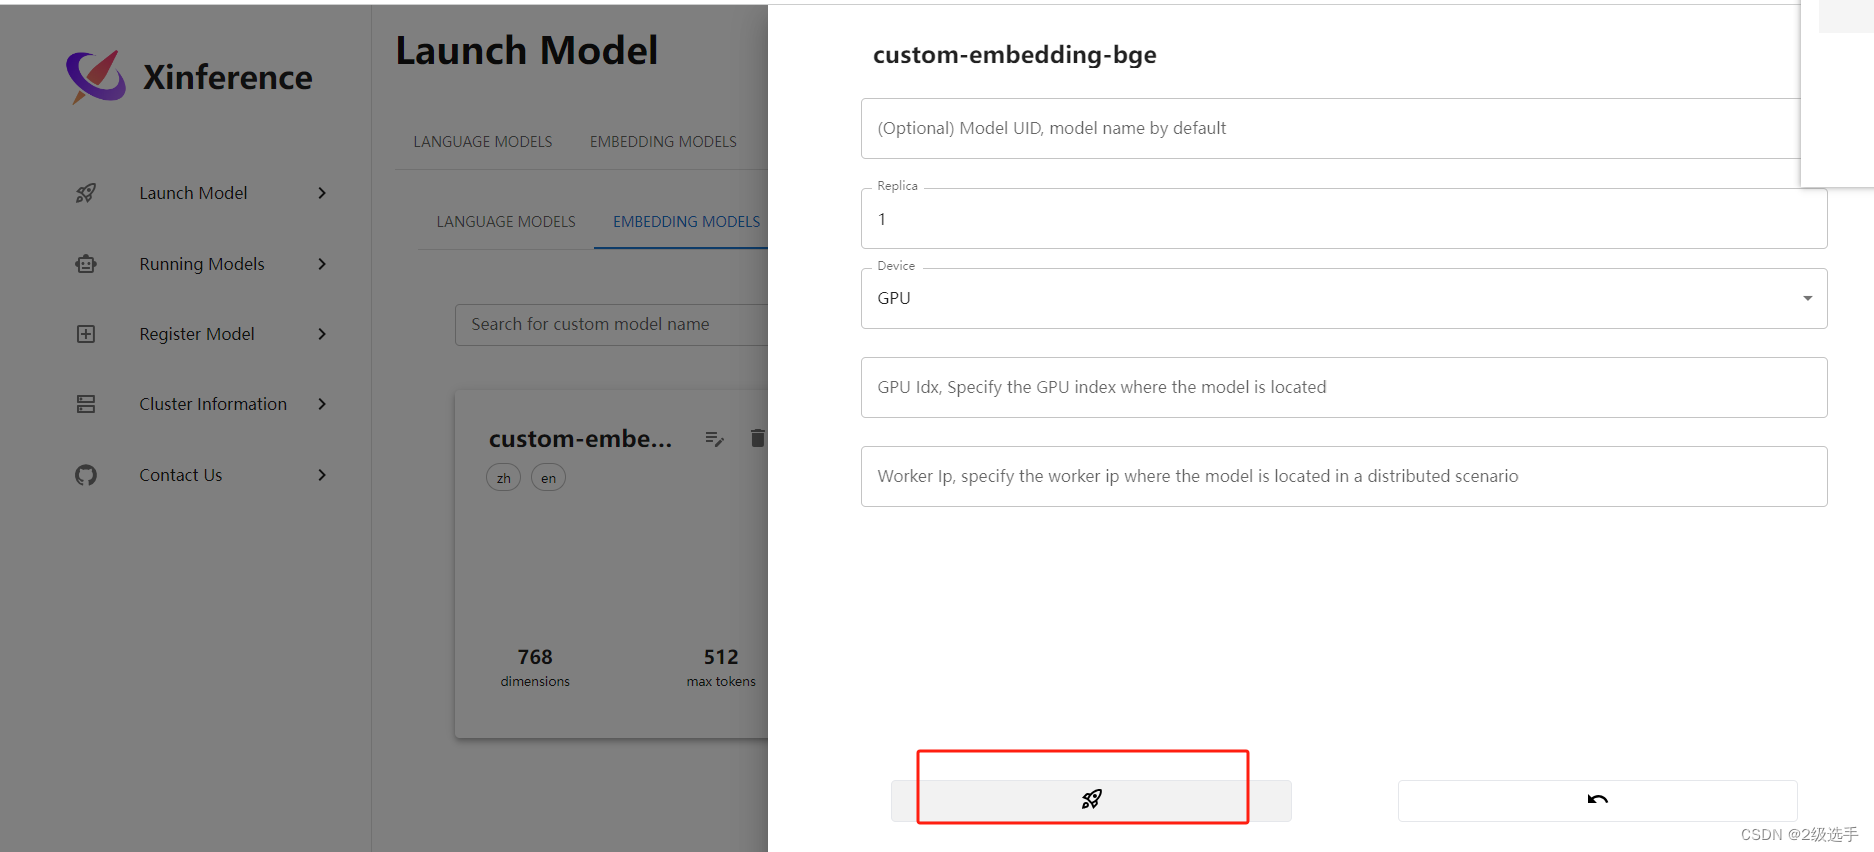
点击卡片--右边弹出信息
- 选择推理模型引擎
- 是否量化
- 选择gpu or cpu
- 小火箭启动模型API
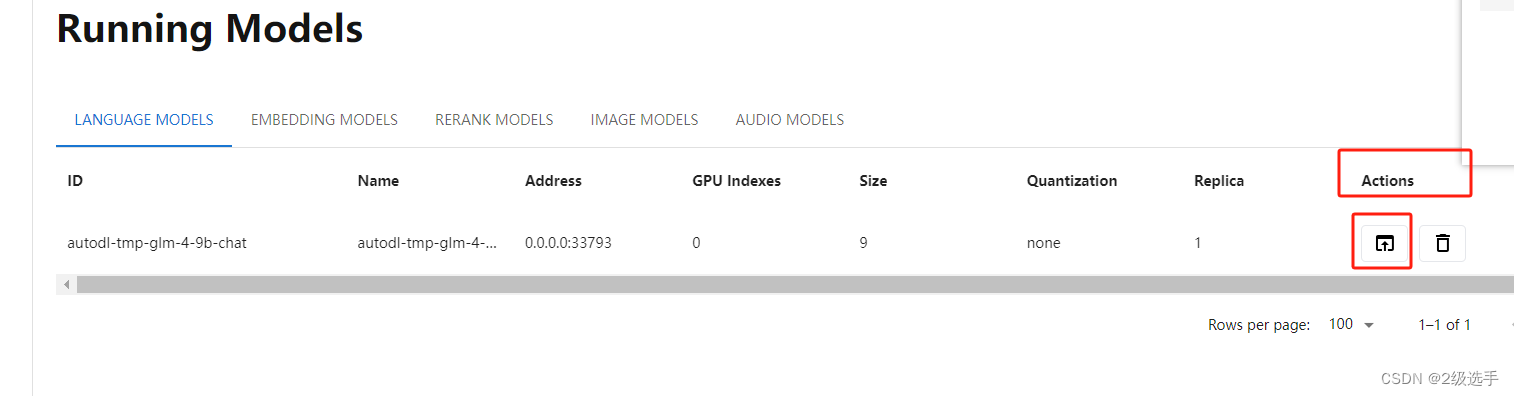
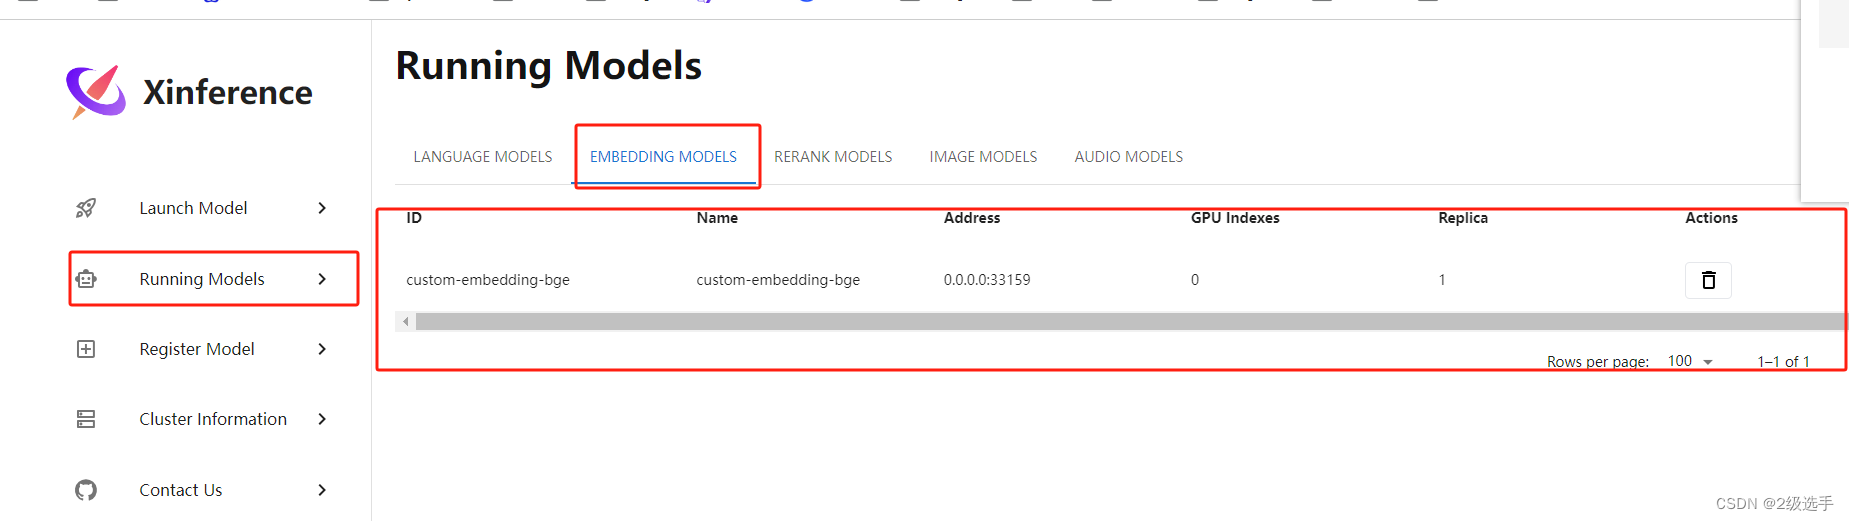
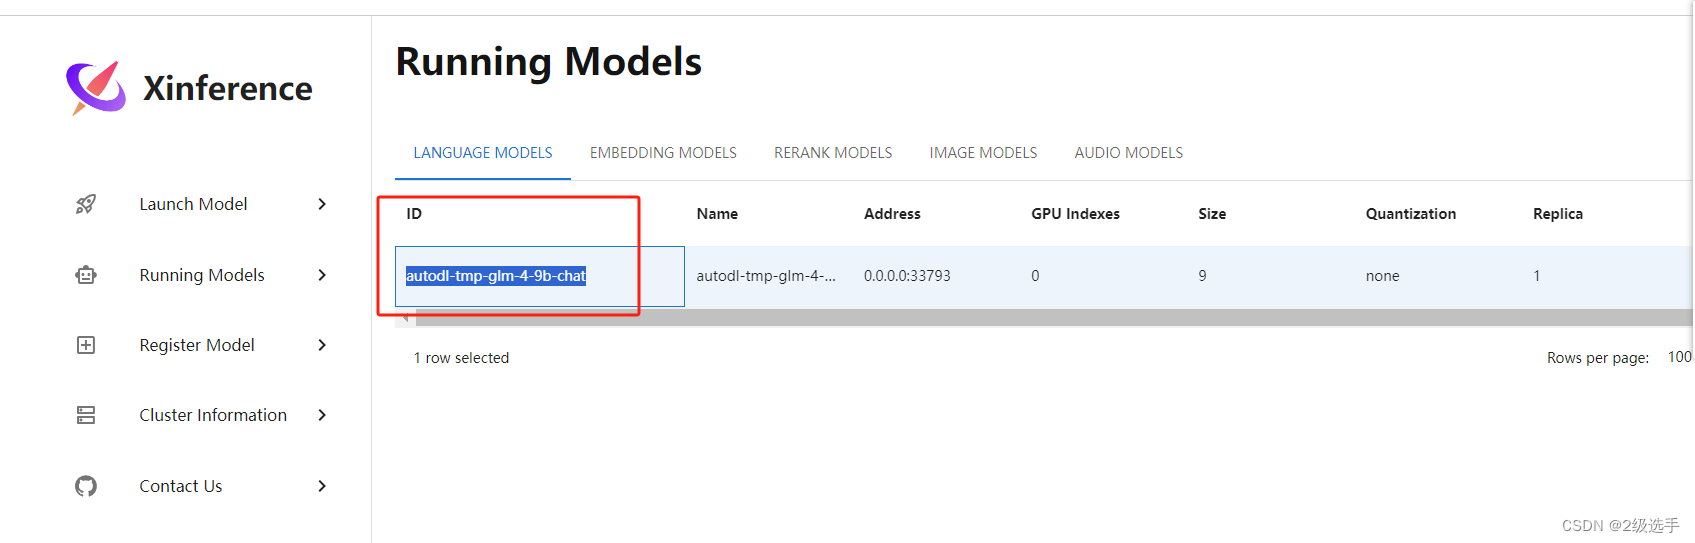
- 点击Running Model
- LANGUAGE MODELS
即可查看到我们启动的模型

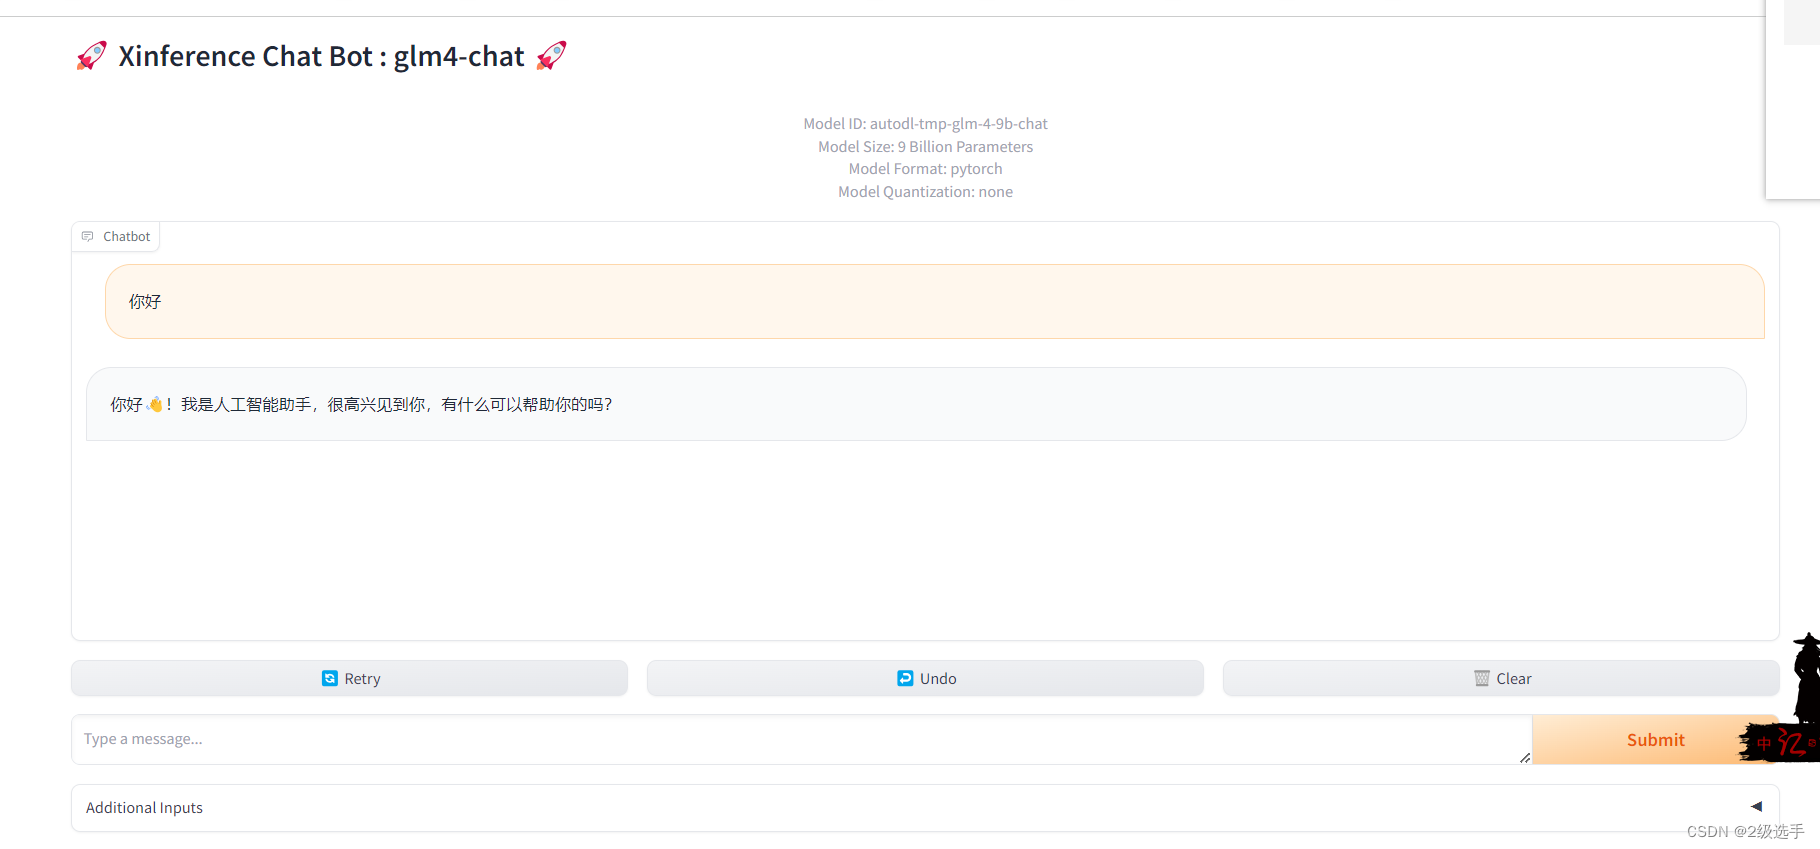
- Actions-向上箭头 ↑即可打开模型推理界面
- 右边垃圾桶 即关闭运行的模型
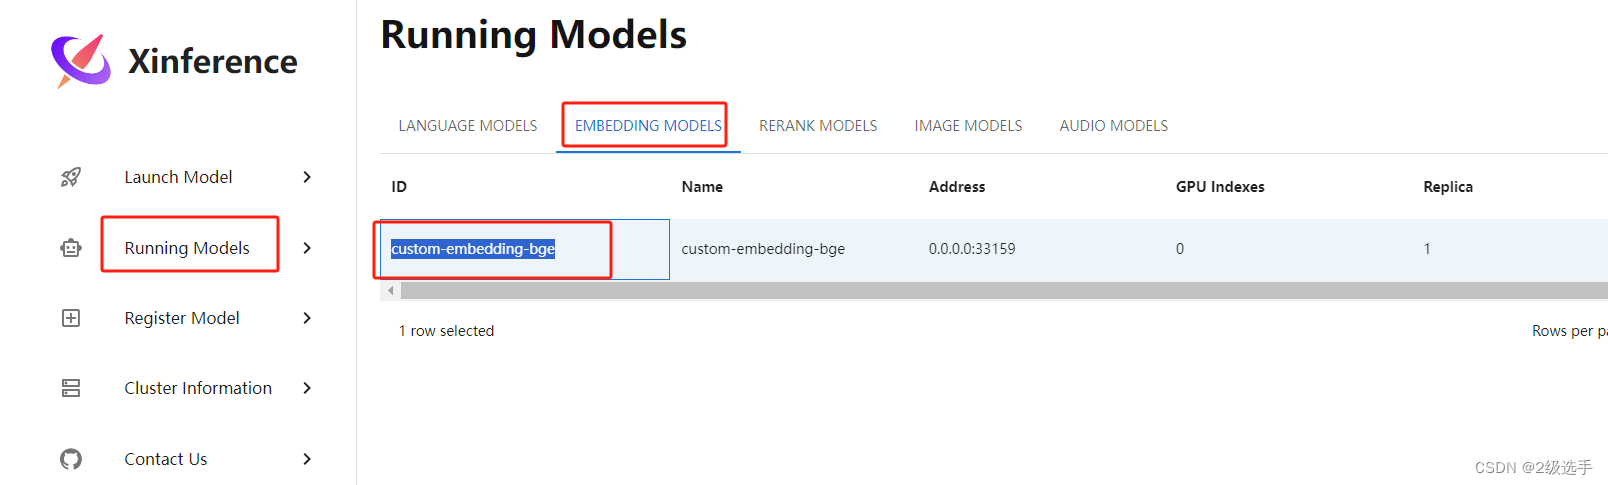
同理我们在注册一个embedding model
使用nohup方式启动xinference,这样我们关闭终端的时候,我们启动的API接口依然存在。
nohup xinference-local --host 0.0.0.0 --port 8887 > logfile.log 2>&1 &
安装chatchat3
退出xinference虚拟环境,新建一个虚拟环境用来运行Langchain-Chatchat
pip install "langchain-chatchat[xinference]" -U
需要修改
默认llm模型
可执行:
模型名字即为之前注册的模型ID,选择你所启动的模型的ID
chatchat-config model --default_llm_model autodl-tmp-glm-4-9b-chat
需要修改
默认embedding模型
可执行:
chatchat-config model --DEFAULT_EMBEDDING_MODEL custom-embedding-bge
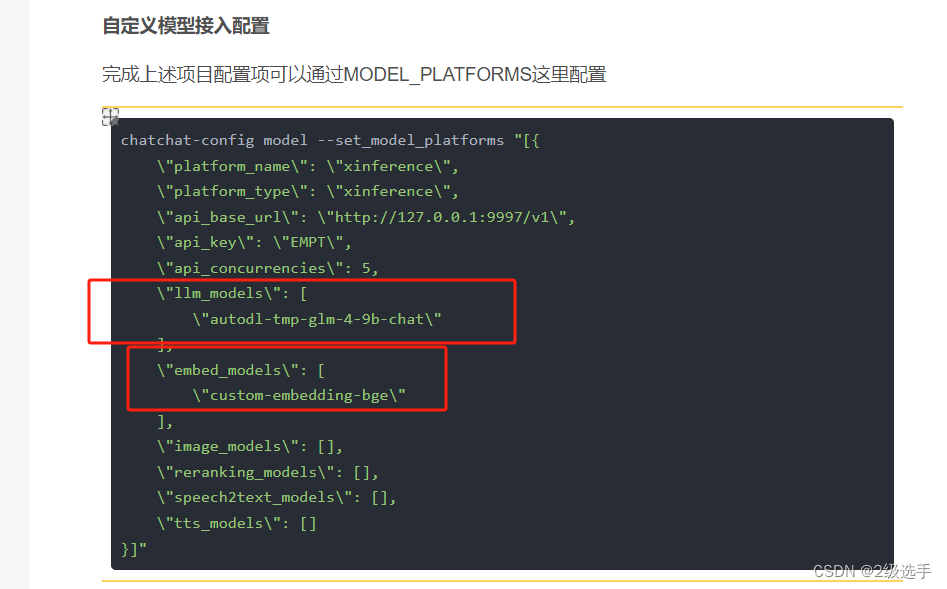
自定义模型接入配置
完成上述项目配置项可以通过MODEL_PLATFORMS这里配置
chatchat-config model --set_model_platforms "[{
    \"platform_name\": \"xinference\",
    \"platform_type\": \"xinference\",
    \"api_base_url\": \"http://127.0.0.1:9997/v1\",
    \"api_key\": \"EMPT\",
    \"api_concurrencies\": 5,
    \"llm_models\": [
        \"autodl-tmp-glm-4-9b-chat\"
    ],
    \"embed_models\": [
        \"custom-embedding-bge\"
    ],
    \"image_models\": [],
    \"reranking_models\": [],
    \"speech2text_models\": [],
    \"tts_models\": []
}]"
主要修改这两个选项
初始化知识库
指定自己在xinference平台上启动的embedding模型ID
chatchat-kb -r --embed-model=custom-embedding-bge
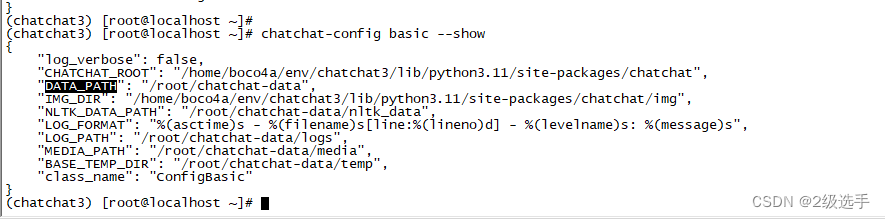
chatchat-config basic --show
知识库路径为 DATA_PATH 变量指向的路径下的 knowledge_base 目录中:
启动项目
chatchat -a
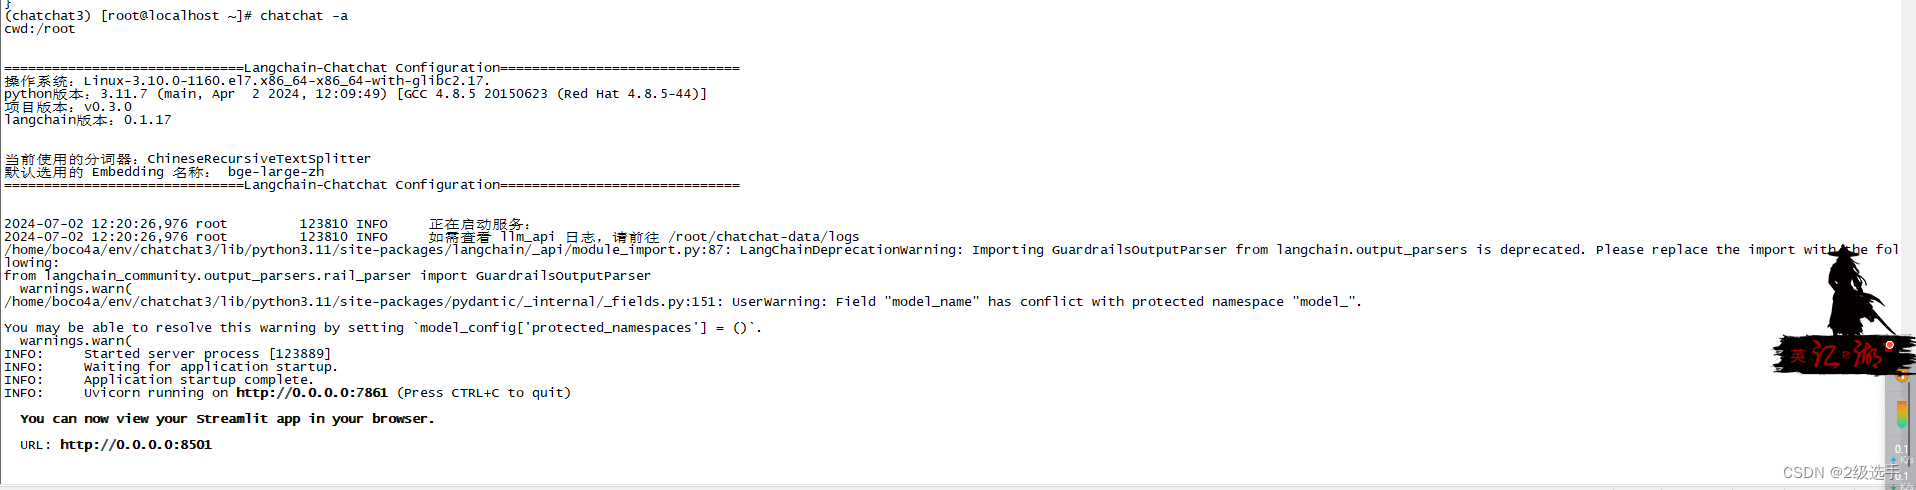
启动成功

由于 chatchat-config server 配置默认监听地址
DEFAULT_BIND_HOST
为 127.0.0.1, 所以无法通过其他 ip 进行访问。
chatchat-config server --show
{
    "HTTPX_DEFAULT_TIMEOUT": 300.0,
    "OPEN_CROSS_DOMAIN": true,
    "DEFAULT_BIND_HOST": "127.0.0.1",
    "WEBUI_SERVER_PORT": 8501,
    "API_SERVER_PORT": 7861,
    "WEBUI_SERVER": {
        "host": "127.0.0.1",
        "port": 8501
    },
    "API_SERVER": {
        "host": "127.0.0.1",
        "port": 7861
    },
    "class_name": "ConfigServer"
}
chatchat-config server --DEFAULT_BIND_HOST 0.0.0.0
修改监听地址
版权归原作者 2级选手 所有, 如有侵权,请联系我们删除。