1.gazebo 仿真环境创建
安装依赖:
(base) hjb@jl16k:~$ sudo apt install ros-$ROS_DISTRO-gazebo-ros-control
(base) hjb@jl16k:~$ sudo apt install ros-$ROS_DISTRO-effort-controllers
(base) hjb@jl16k:~$ sudo apt install ros-$ROS_DISTRO-joint-state-controller
(base) hjb@jl16k:~$ sudo apt install ros-$ROS_DISTRO-driver-base
(base) hjb@jl16k:~$ sudo apt install ros-$ROS_DISTRO-ackermann-msgs
(base) hjb@jl16k:~$ sudo apt install ros-$ROS_DISTRO-rtabmap-ros
(base) hjb@jl16k:~$ sudo apt install ros-$ROS_DISTRO-teb-local-planner
(base) hjb@jl16k:~$ sudo apt install tcl-dev tk-dev python3-tk
若在安装依赖的过程中出现以下错误:

通过输入以下代码尝试解决:
(base) hjb@jl16k:~$ sudo apt-get update
创建工作空间:
(base) hjb@jl16k:~$ mkdir -p catkin_gazebo_ws/src
下载git工程:
(base) hjb@jl16k:~/catkin_gazebo_ws$ cd src
(base) hjb@jl16k:~/catkin_gazebo_ws/src$ git clone https://github.com/soonuse/racecar.git
编译:
(base) hjb@jl16k:~/catkin_gazebo_ws/src$ cd ..
(base) hjb@jl16k:~/catkin_gazebo_ws$ catkin_make
如果编译过程中出现以下错误:
错误1:
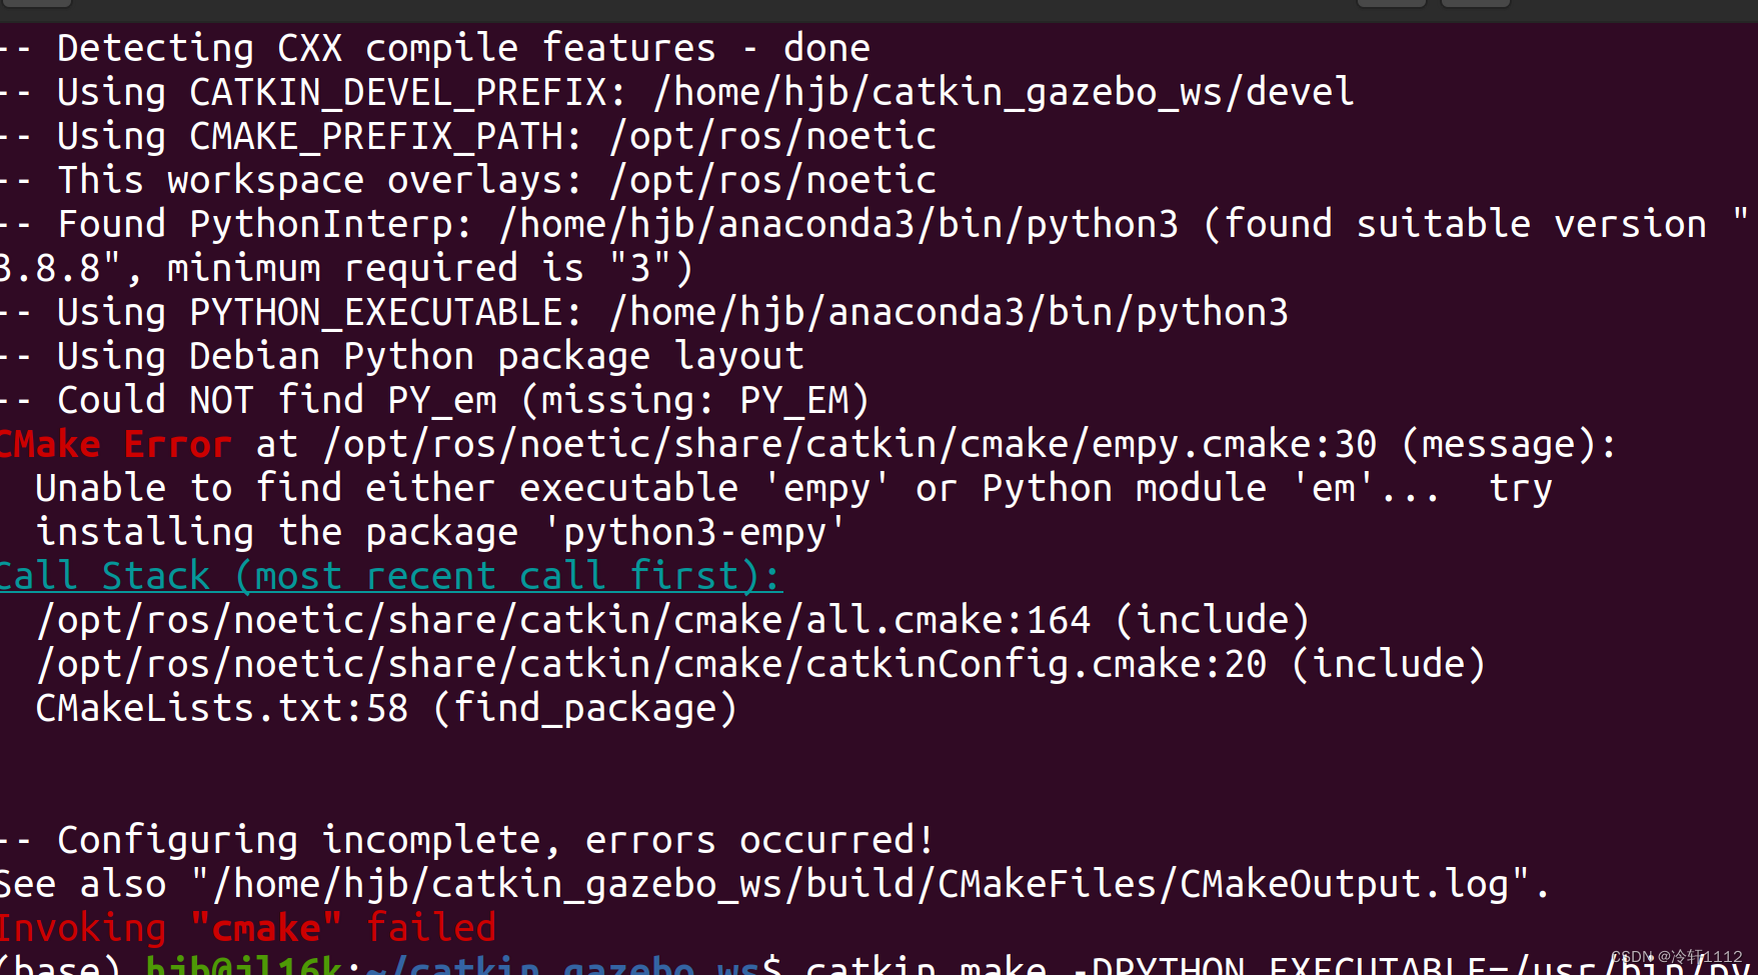
解决办法:
(base) hjb@jl16k:~/catkin_gazebo_ws$ catkin_make -DPYTHON_EXECUTABLE=/usr/bin/python3
错误2:

解决办法:
找到自己的opencv安装路径,像我的就是 /usr/local/include/opencv4/opencv2
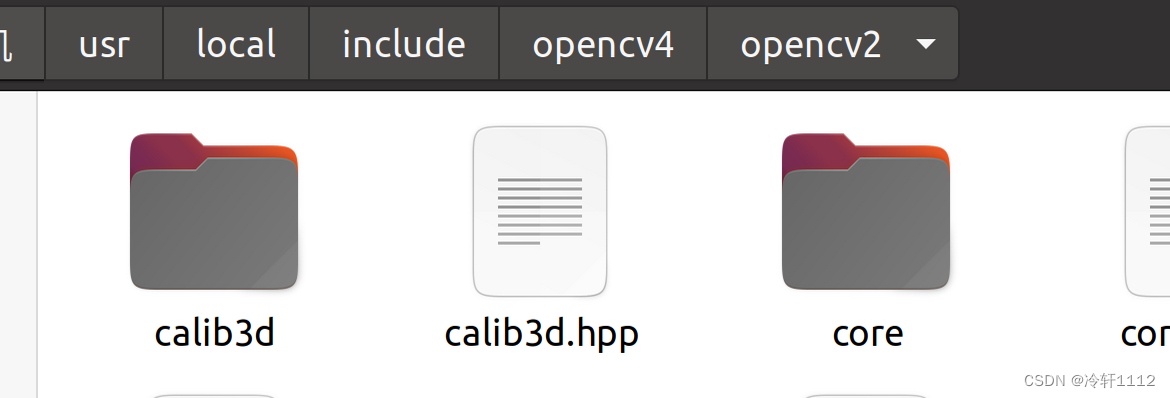
然后打开提示错误的这个文件,当然这个文件只可读,可以使用以下命令打开并修改:

(base) hjb@jl16k:/opt/ros/noetic/share/cv_bridge/cmake$ sudo gedit cv_bridgeConfig.cmake
大概在90多行,将箭头所指修改成上面找到的opencv安装路径,注意修改两个地方

修改完之后,重新编译:
(base) hjb@jl16k:~/catkin_gazebo_ws$ catkin_make -DPYTHON_EXECUTABLE=/usr/bin/python3
把工作区的setup.bash文件写入.bashrc文件中,先执行以下命令,然后得到路径/home/hjb/catkin_gazebo_ws/devel
 打开新的终端:
(base) hjb@jl16k:~$ sudo gedit .bashrc
添加下图中的两行,路径就是上面所得到的路径并加上setup.bash文件名:

保存文件,为了使用配置,输入:
(base) hjb@jl16k:~$ . .bashrc
** 需要注意的是,这个仿真环境是从网上下载的,也就是git那一步。需要了解这个工作空间中各个文件的用处:**

像途中racecar_description里面存的是机器人模型(urdf)等,而racecar_gazebo里面是放与Gazebo有关的启动文件(launch)和世界文件(word)等。这个工作空间完全是可以自己创建的,其中图所示名字也是可以改变的,例如racecar_description完全可以改成myrobot_description,当然这是有能力自己创建的前提下。
2.gazebo的使用
初次使用gazebo的可以参考一下,里面有一些功能建的说明与使用:ROS入门(四)——Gazebo的基本使用 - 古月居
(1)简单创建一个地图模型
首先进入gazebo:
(base) hjb@jl16k:~/catkin_gazebo_ws$ gazebo
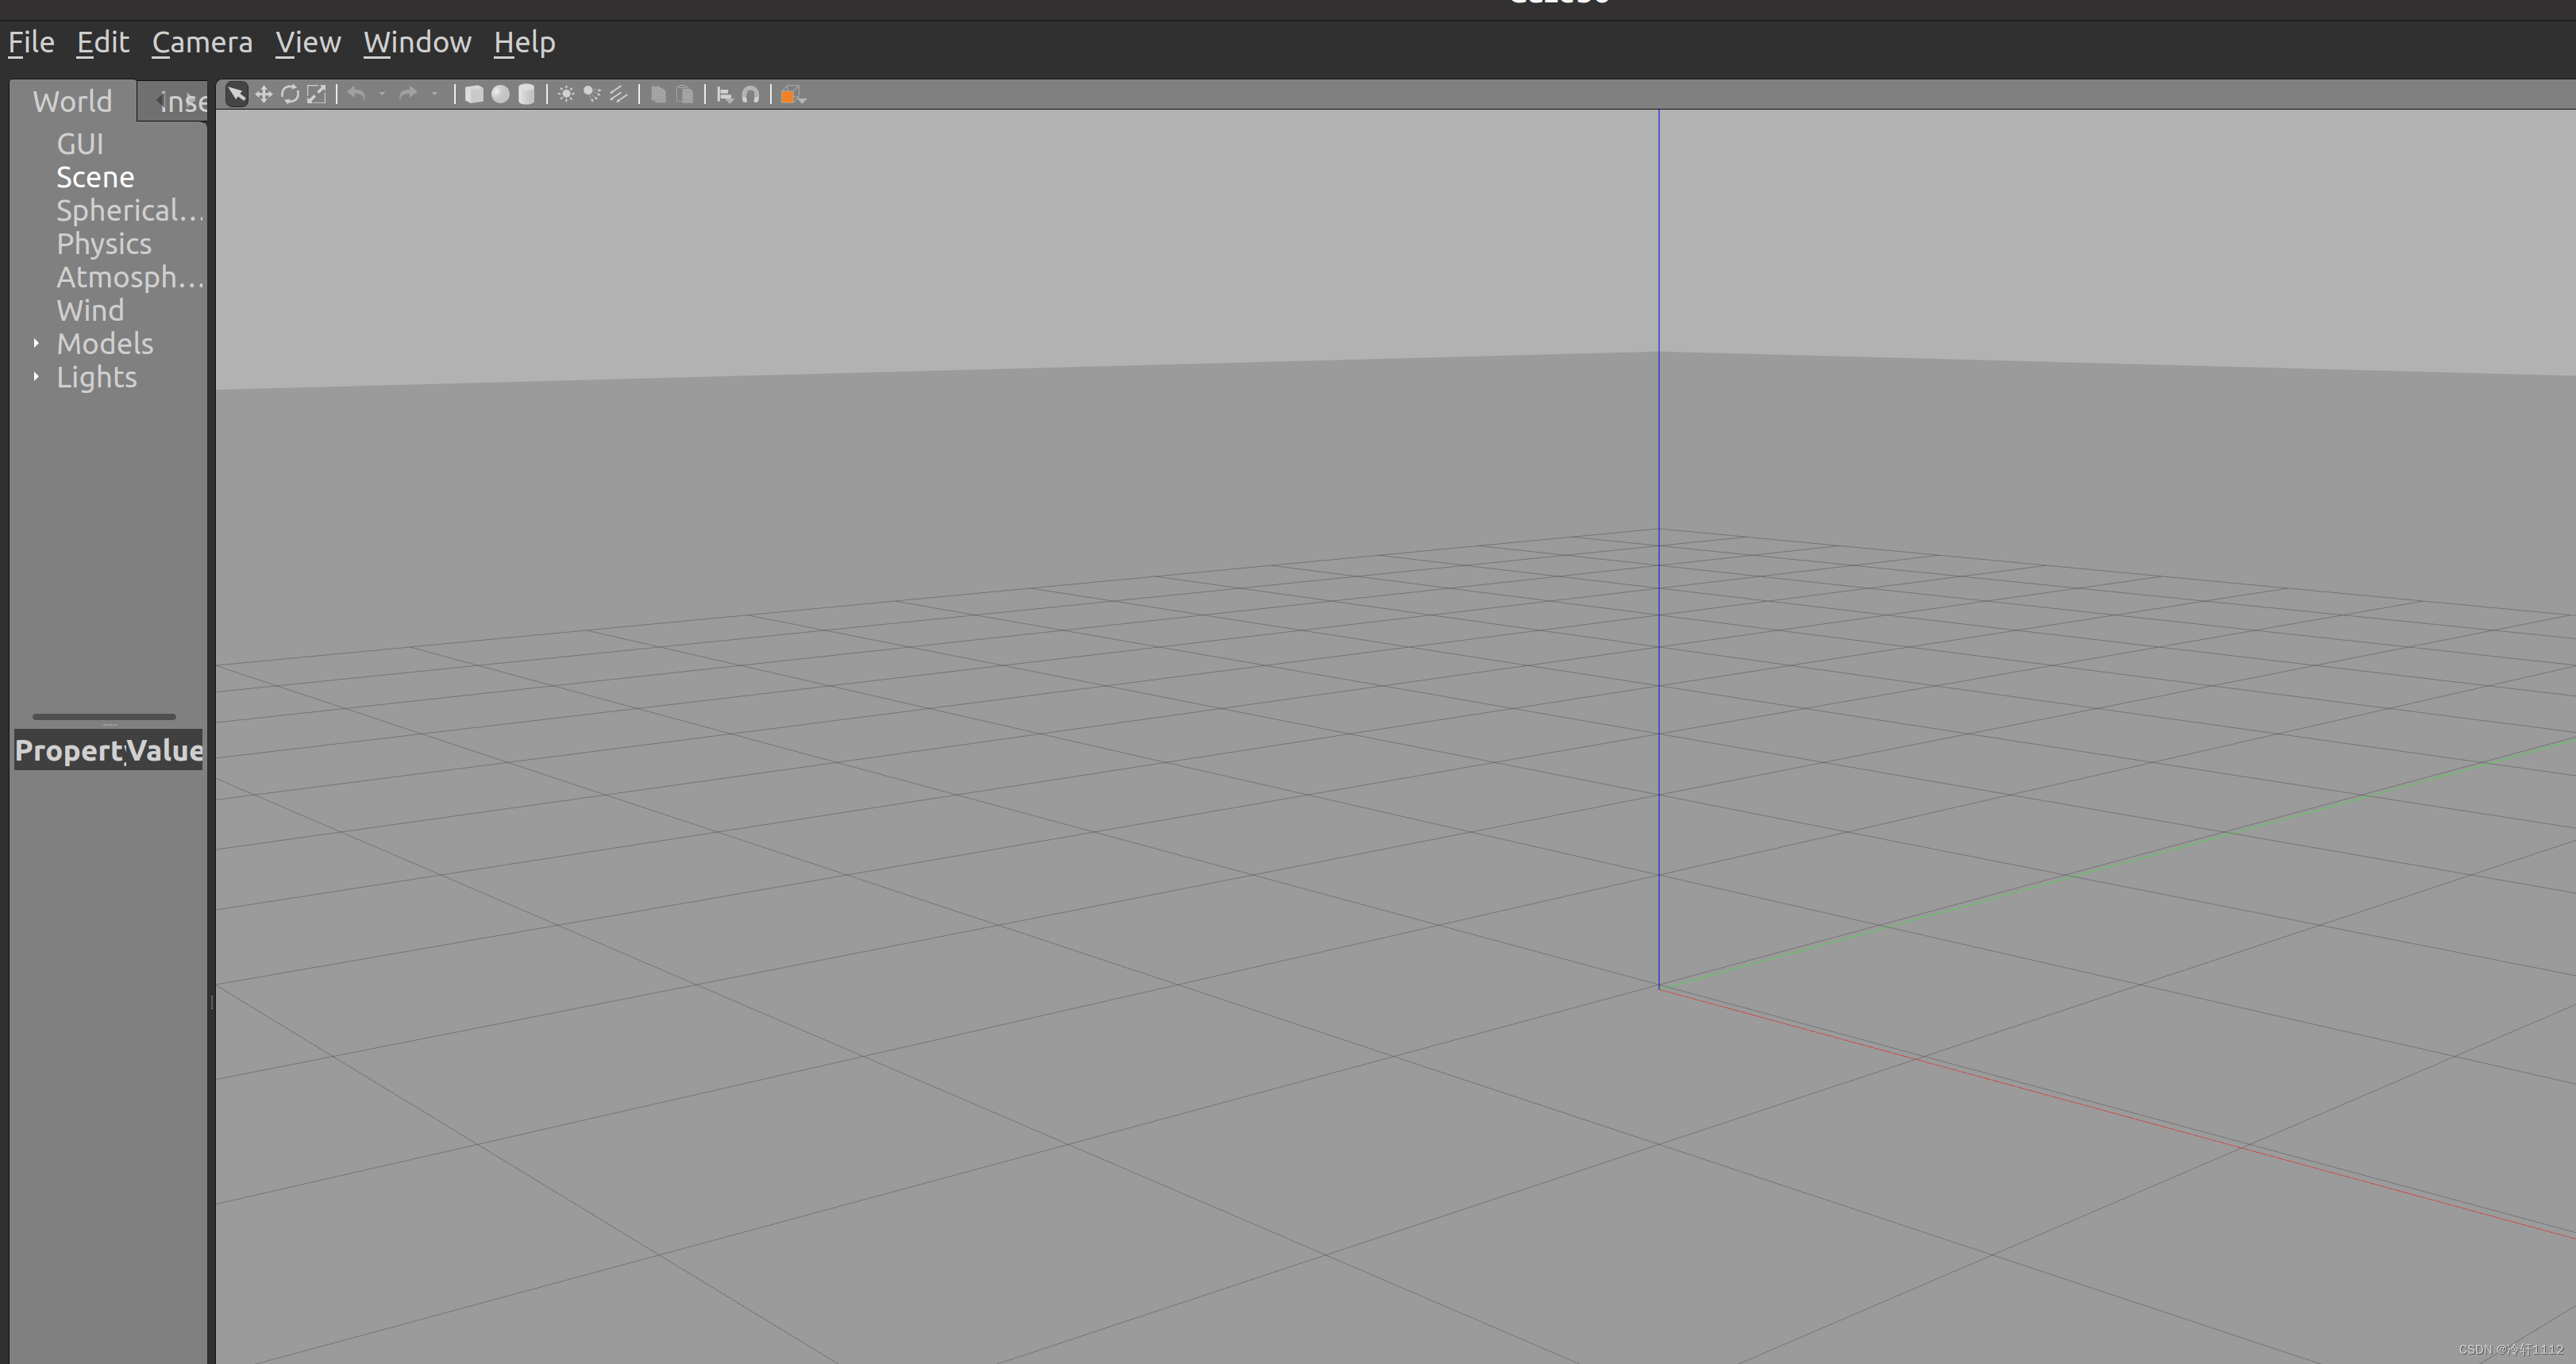
然后左上角点击Edit,选择Buiding Editor,进入下图界面

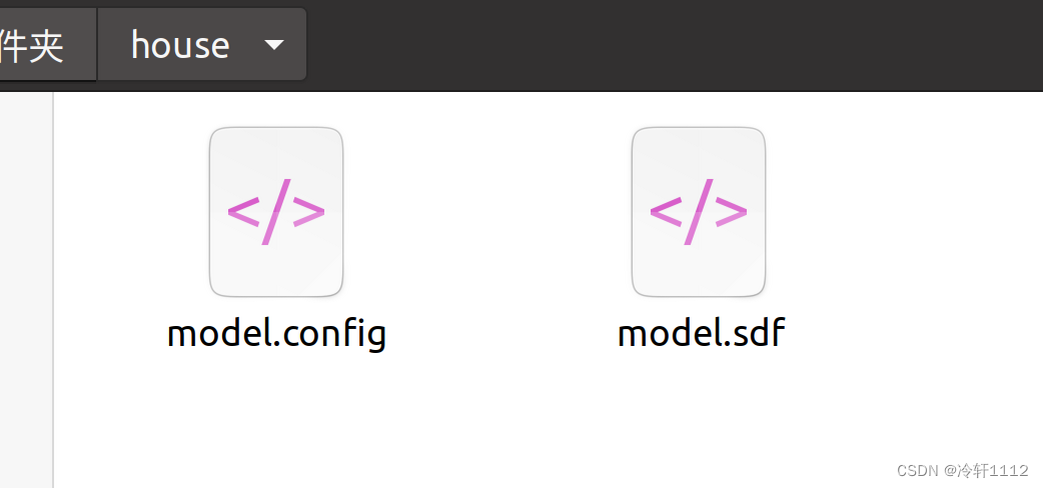
可以看到左窗口有walls(墙)等,点击wall简单创建一个房子后,点击左上角File,然后选择Save,建议第一次使用保存在主目录(home)下。如下图所示,我保存下来的是house文件,命名是随意的。打开house文件会发现有两个文件。
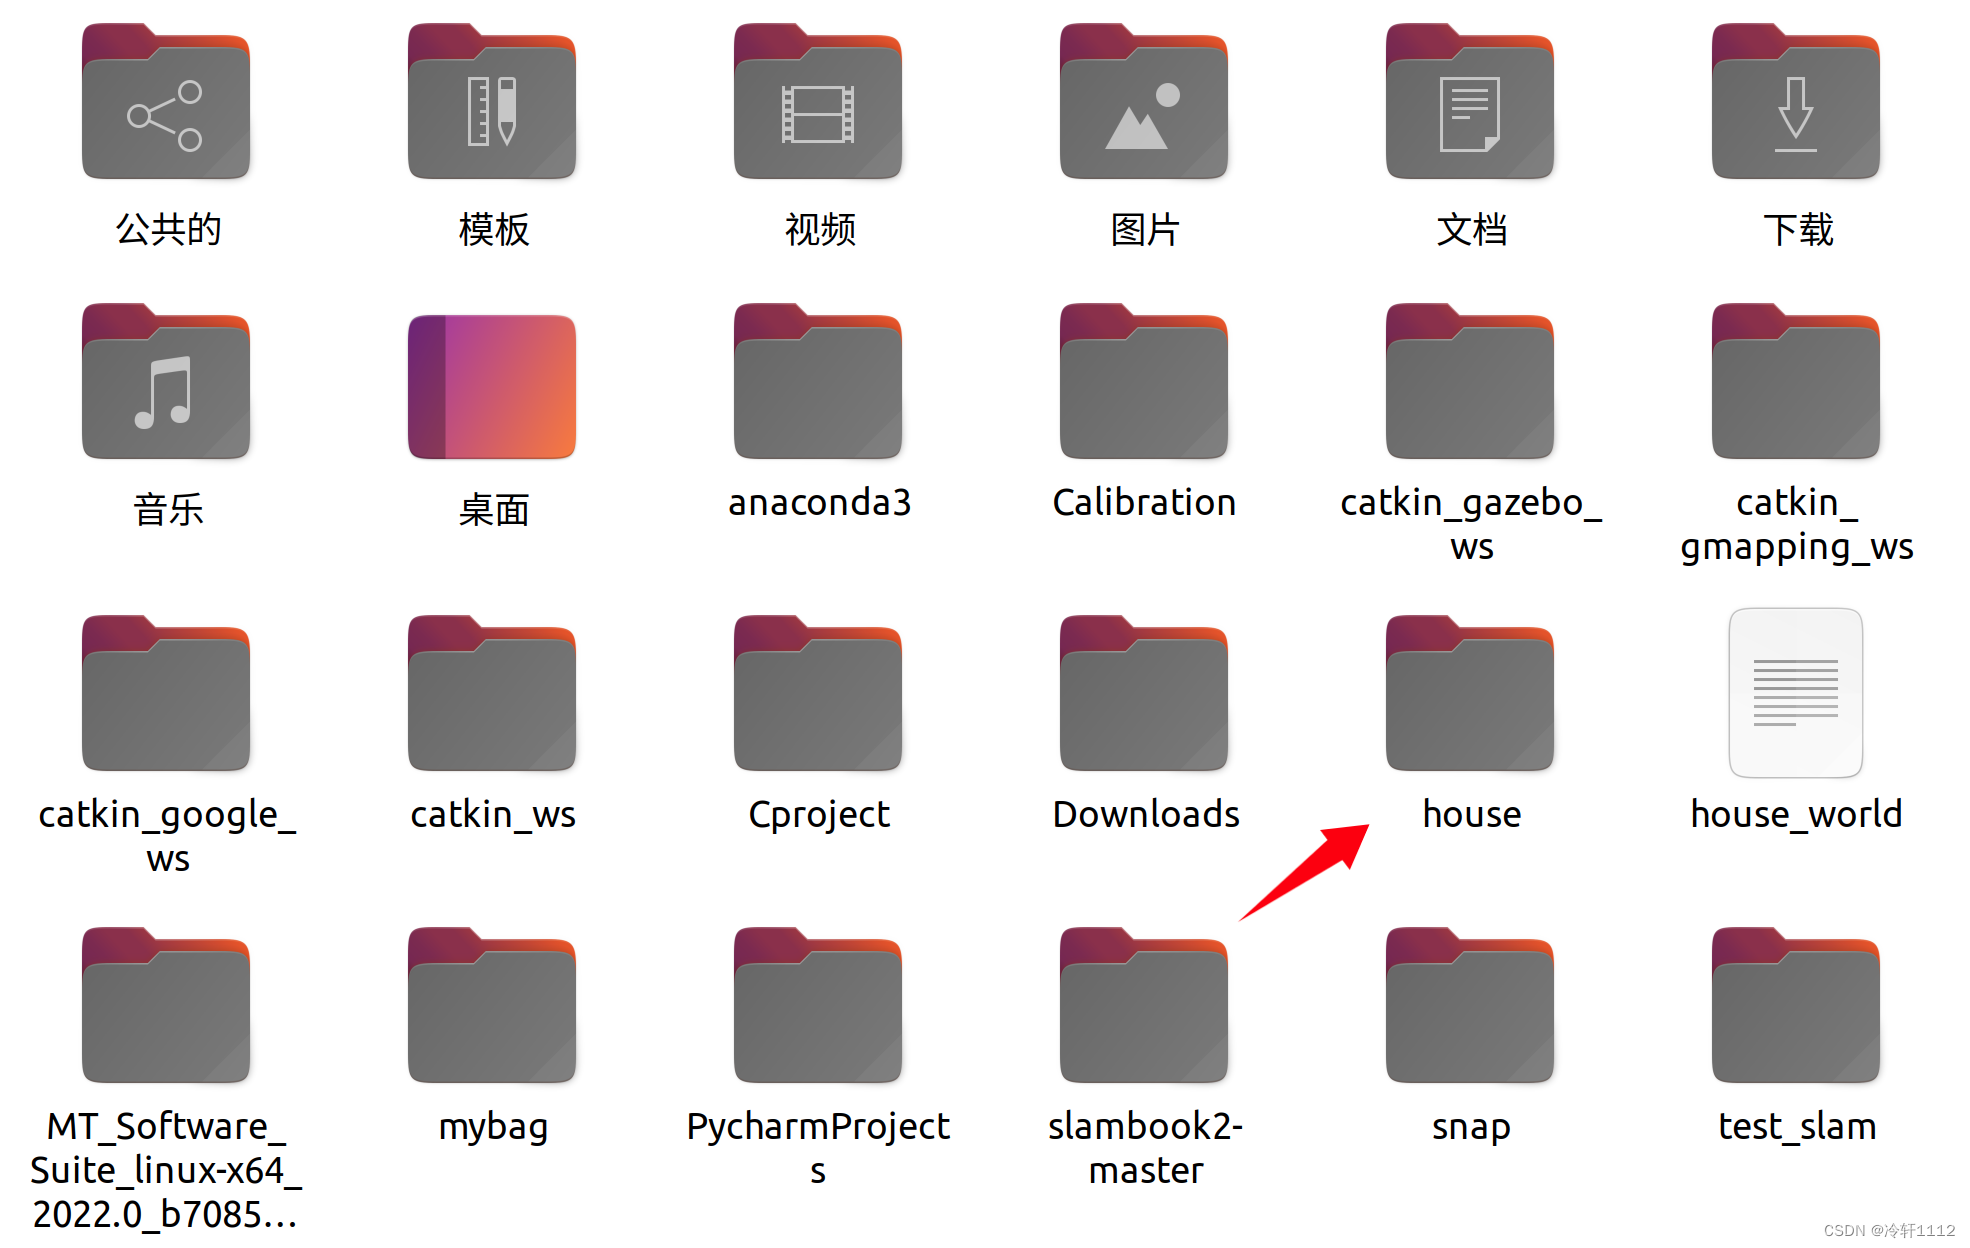
保存完之后,选择File Exit Building Editor,然后会有弹窗,选择Exit。就会回到原来的界面。如下图所示。
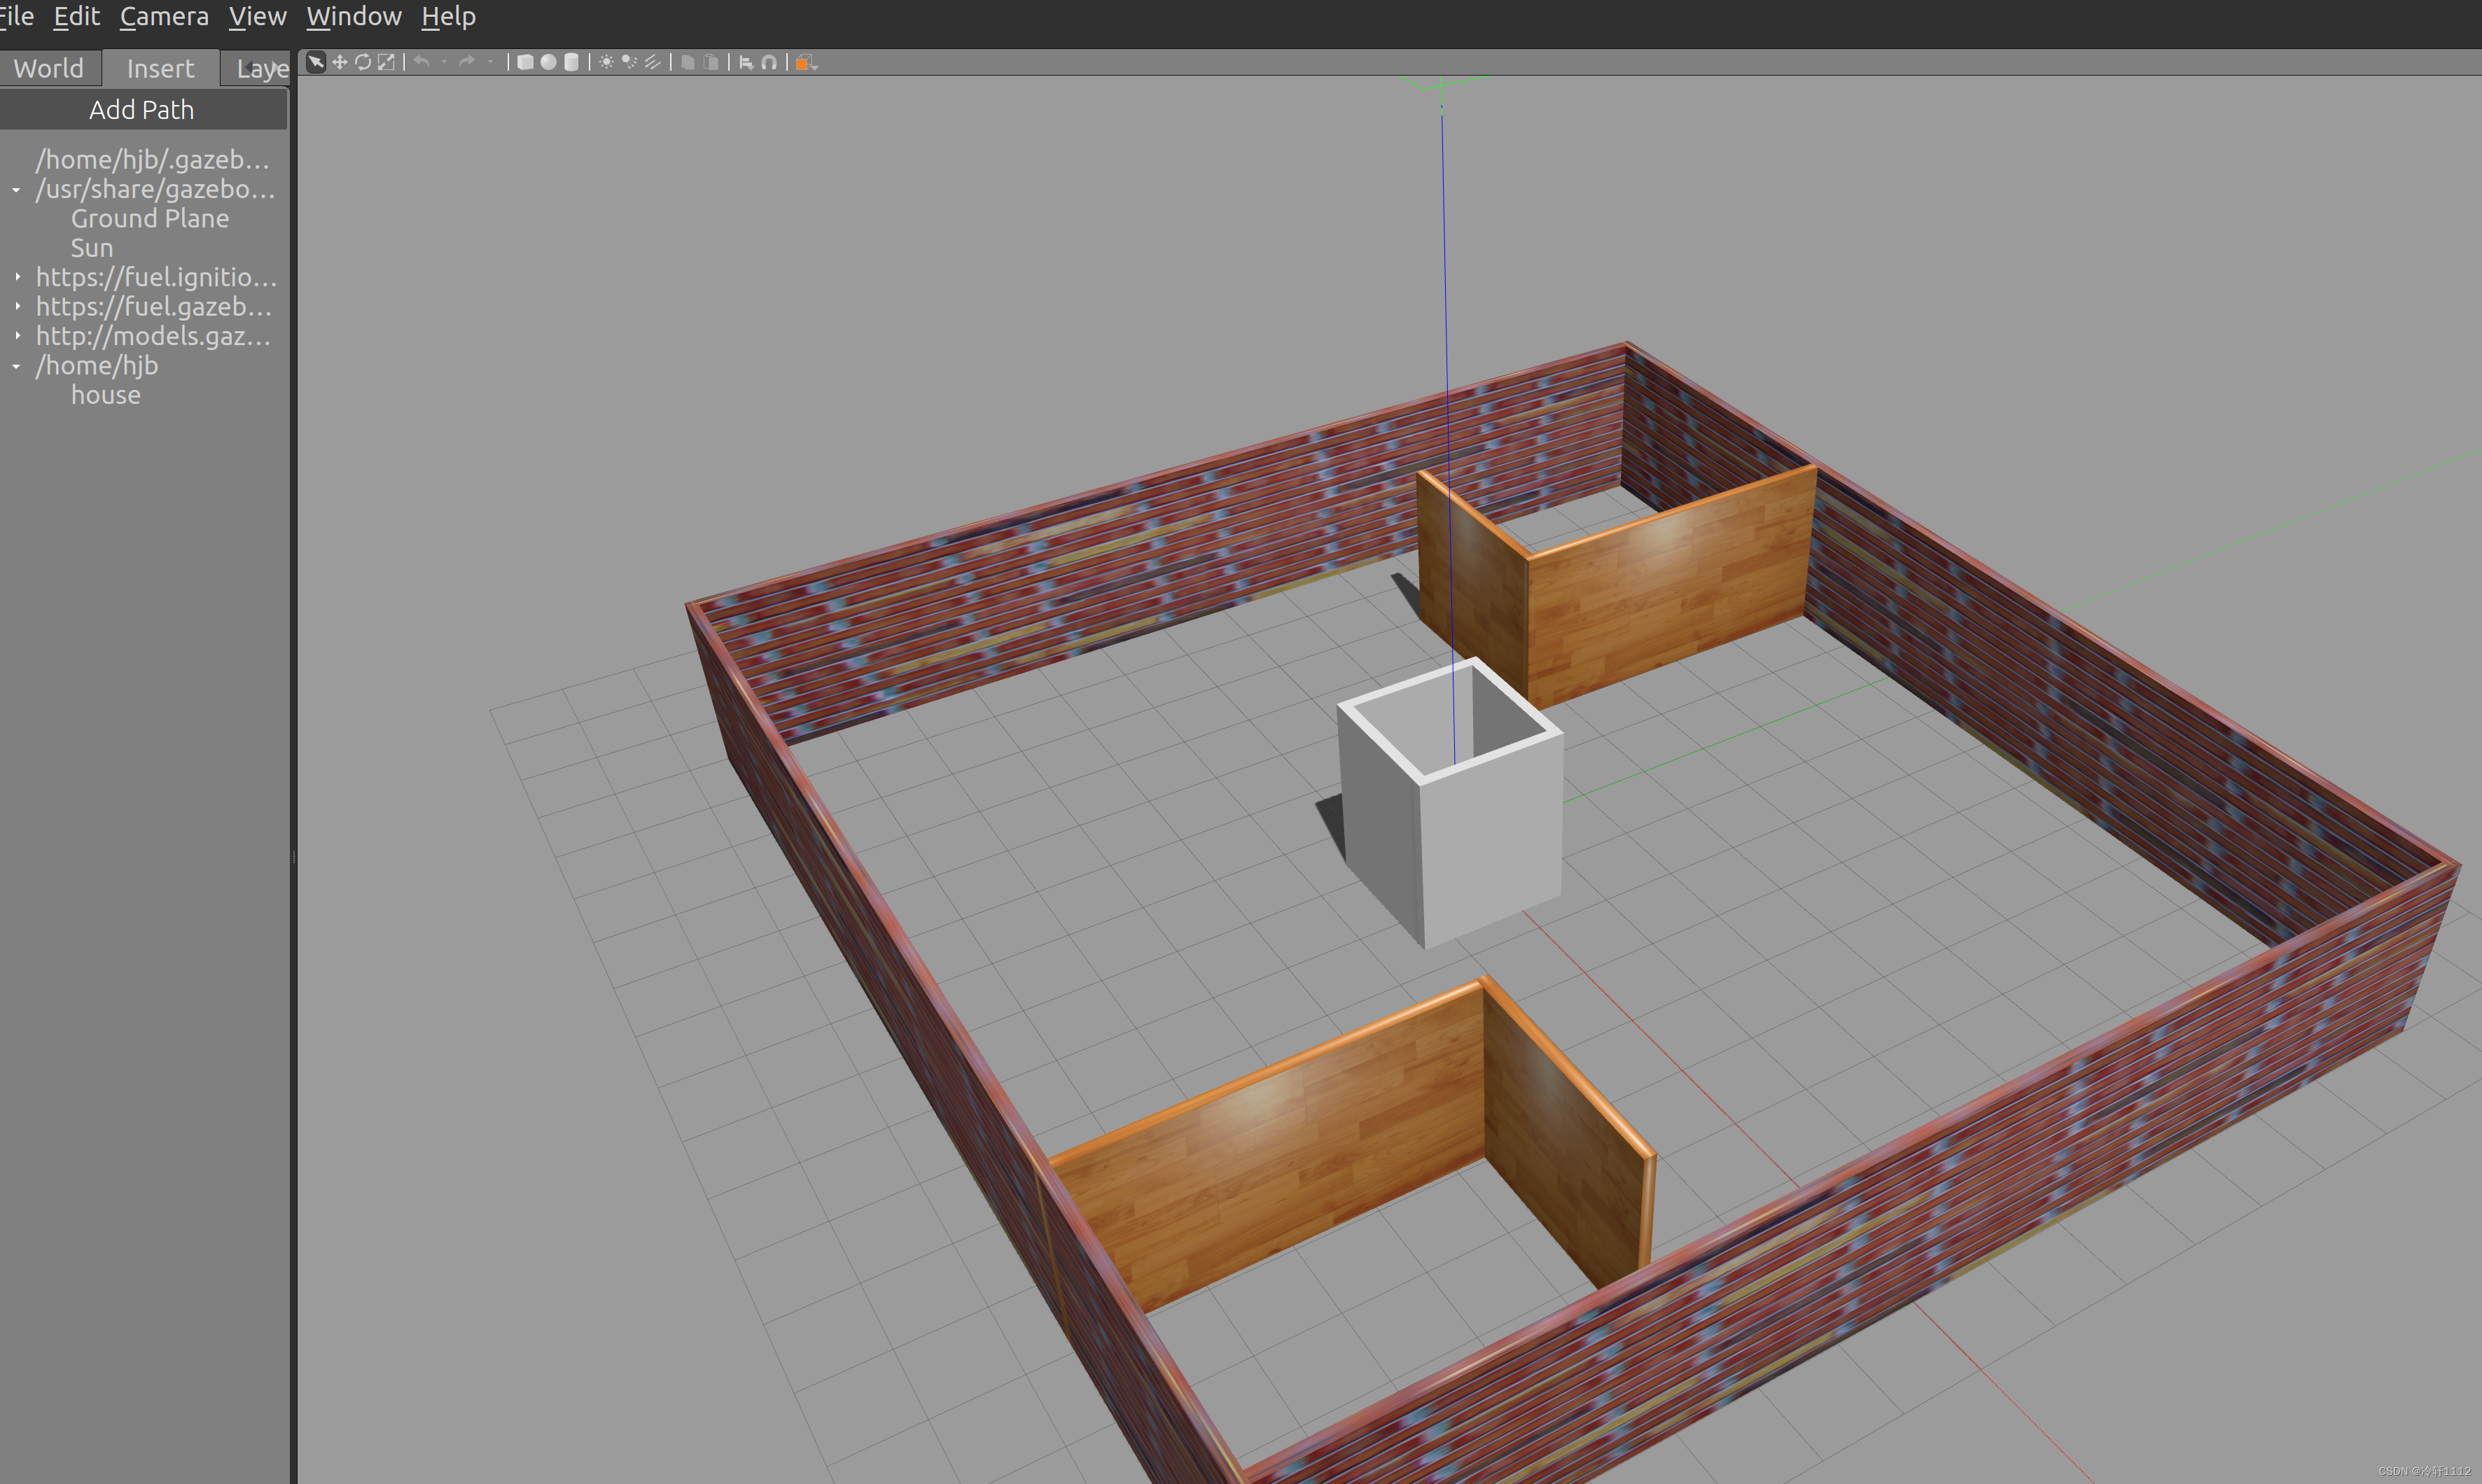
这个就属于world文件了,点击File,选择Save world,名字最好加上world(注意这个文件后缀记得加 .world,保存的时候不会默认是world文件的,需要自己加,图中我是保存错了)以区分这是一个world文件,然后也是先保存在主目录,以后熟练了可以根据需求保存。保存完之后目录下的文件如下图所示:

到此,关掉gazebo。那又该如何打开之前建好的模型呢?
重新打开gazebo,点击左窗口的Insert,然后看到我下图箭头所指,这个就是上面所建的模型,点击即可拉到界面。
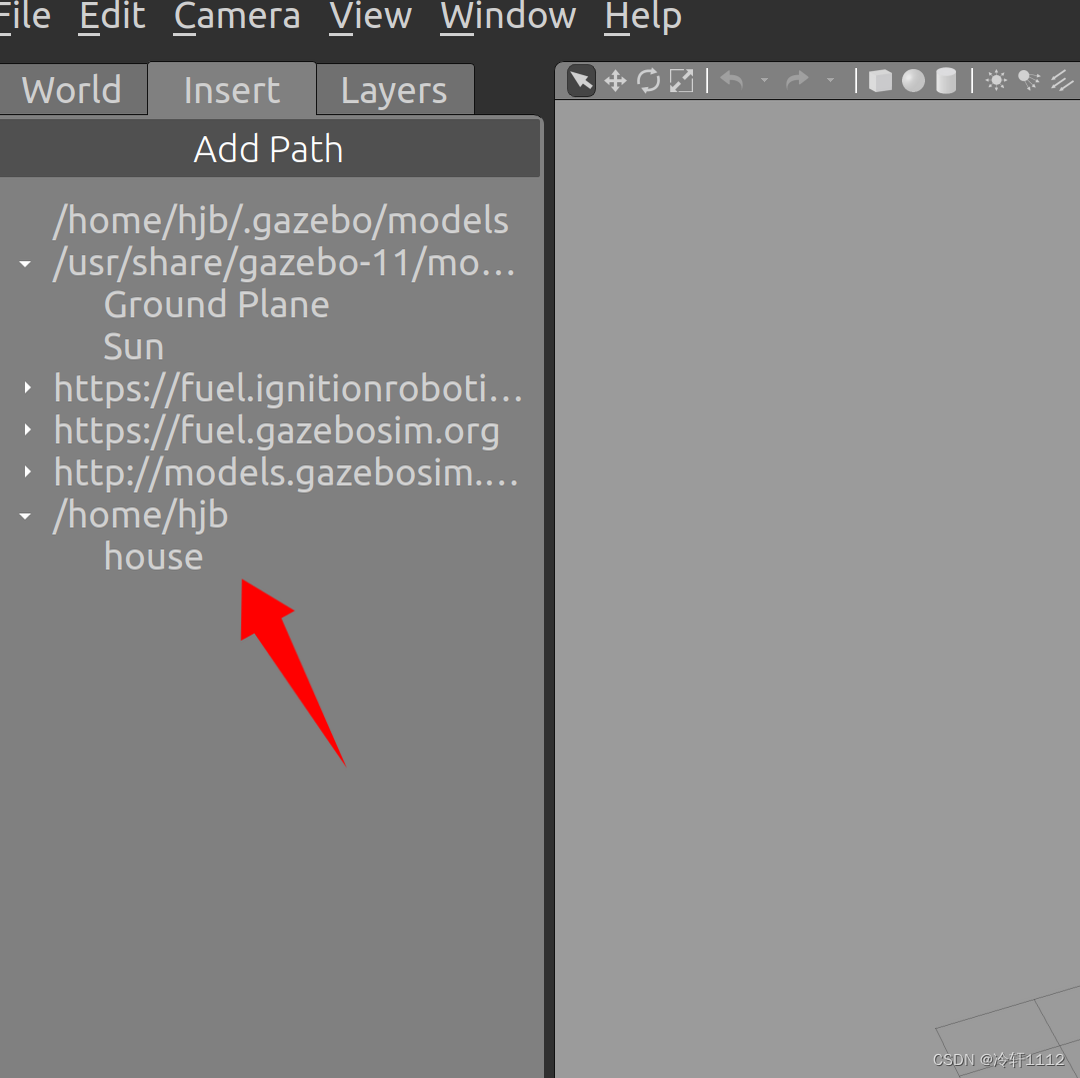
当然值的注意的是,上面的例子是墙体模型,也有其他的模型,这需要慢慢去探索了。
(2)下载模型
     一般来说,如果有现成的图形模型的话,那就大大节省了自己的时间,可以使用有的模型来做实验。

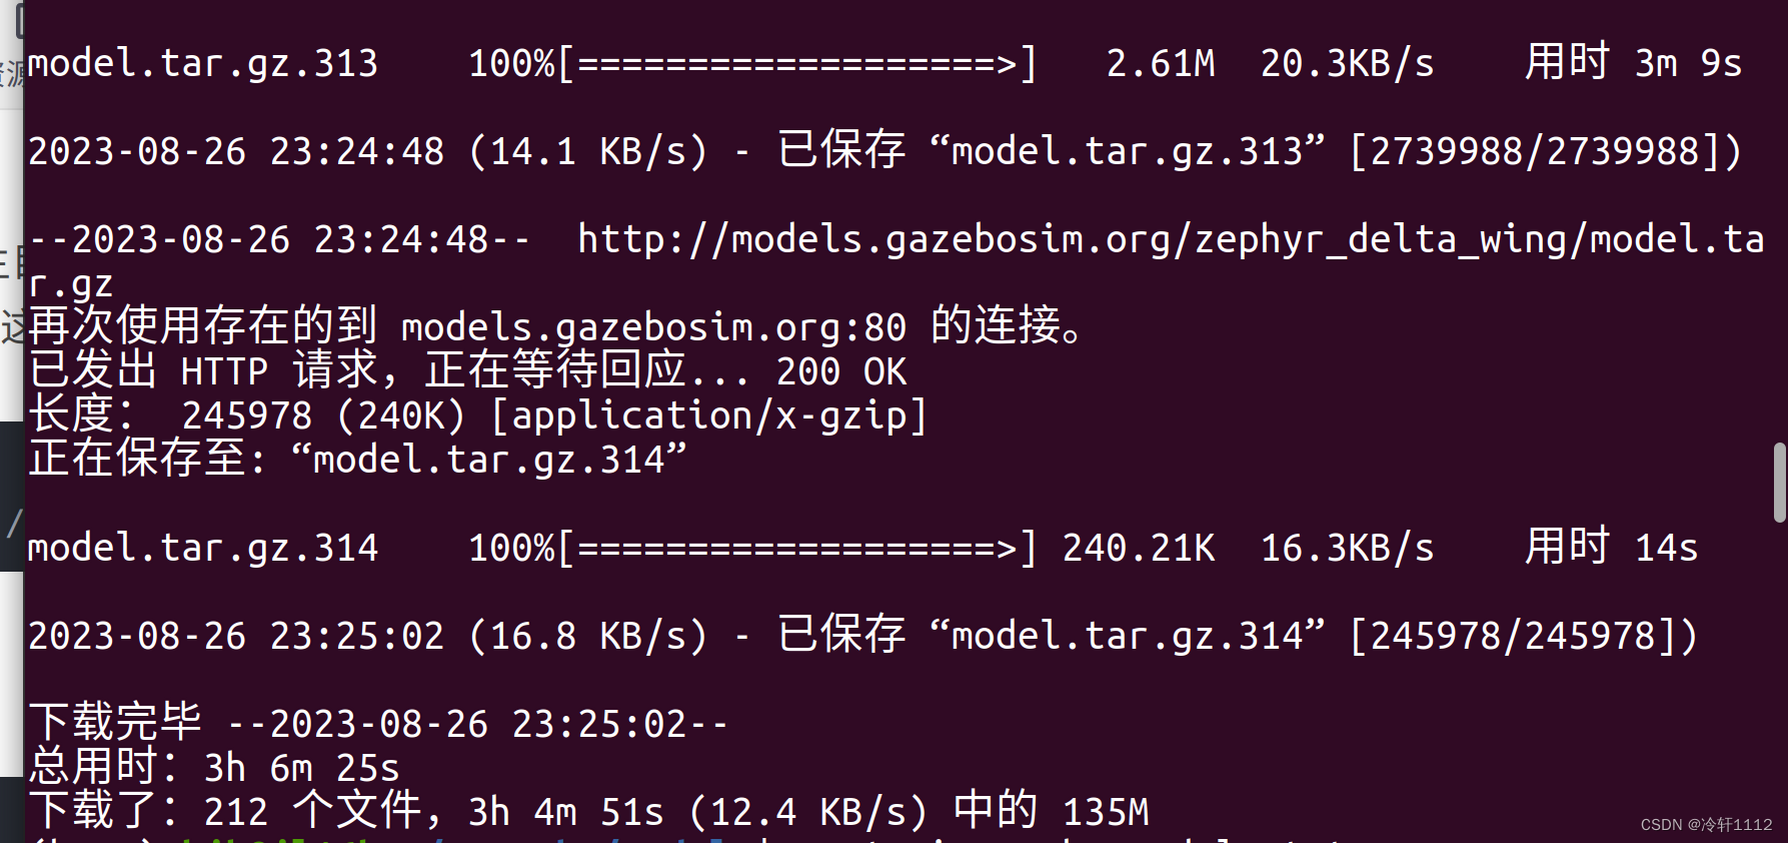
    下载模型有两种反法,我用的是第二种方法,因为第一种方法可能是我的网不行下载的非常慢,虽然第二种方法我也下载了3个多小时。

    方法1:注意的是.gazebo是隐藏的文件,可以在主目录(home)使用ctrl+H来显示出来,此外使用该方法下载的文件名为gazebo_models,需要将这个文件名改为models
(base) hjb@jl16k:~$ cd ~/.gazebo
(base) hjb@jl16k:~/.gazebo$ git clone https://github.com/osrf/gazebo_models
方法2:
(base) hjb@jl16k:~$ cd ~/.gazebo
(base) hjb@jl16k:~/.gazebo$ mkdir -p models
(base) hjb@jl16k:~/.gazebo$ cd models/
(base) hjb@jl16k:~/.gazebo/models$ wget http://file.ncnynl.com/ros/gazebo_models.txt
(base) hjb@jl16k:~/.gazebo/models$ wget -i gazebo_models.txt
(base) hjb@jl16k:~/.gazebo/models$ ls model.tar.g* | xargs -n1 tar xzvf
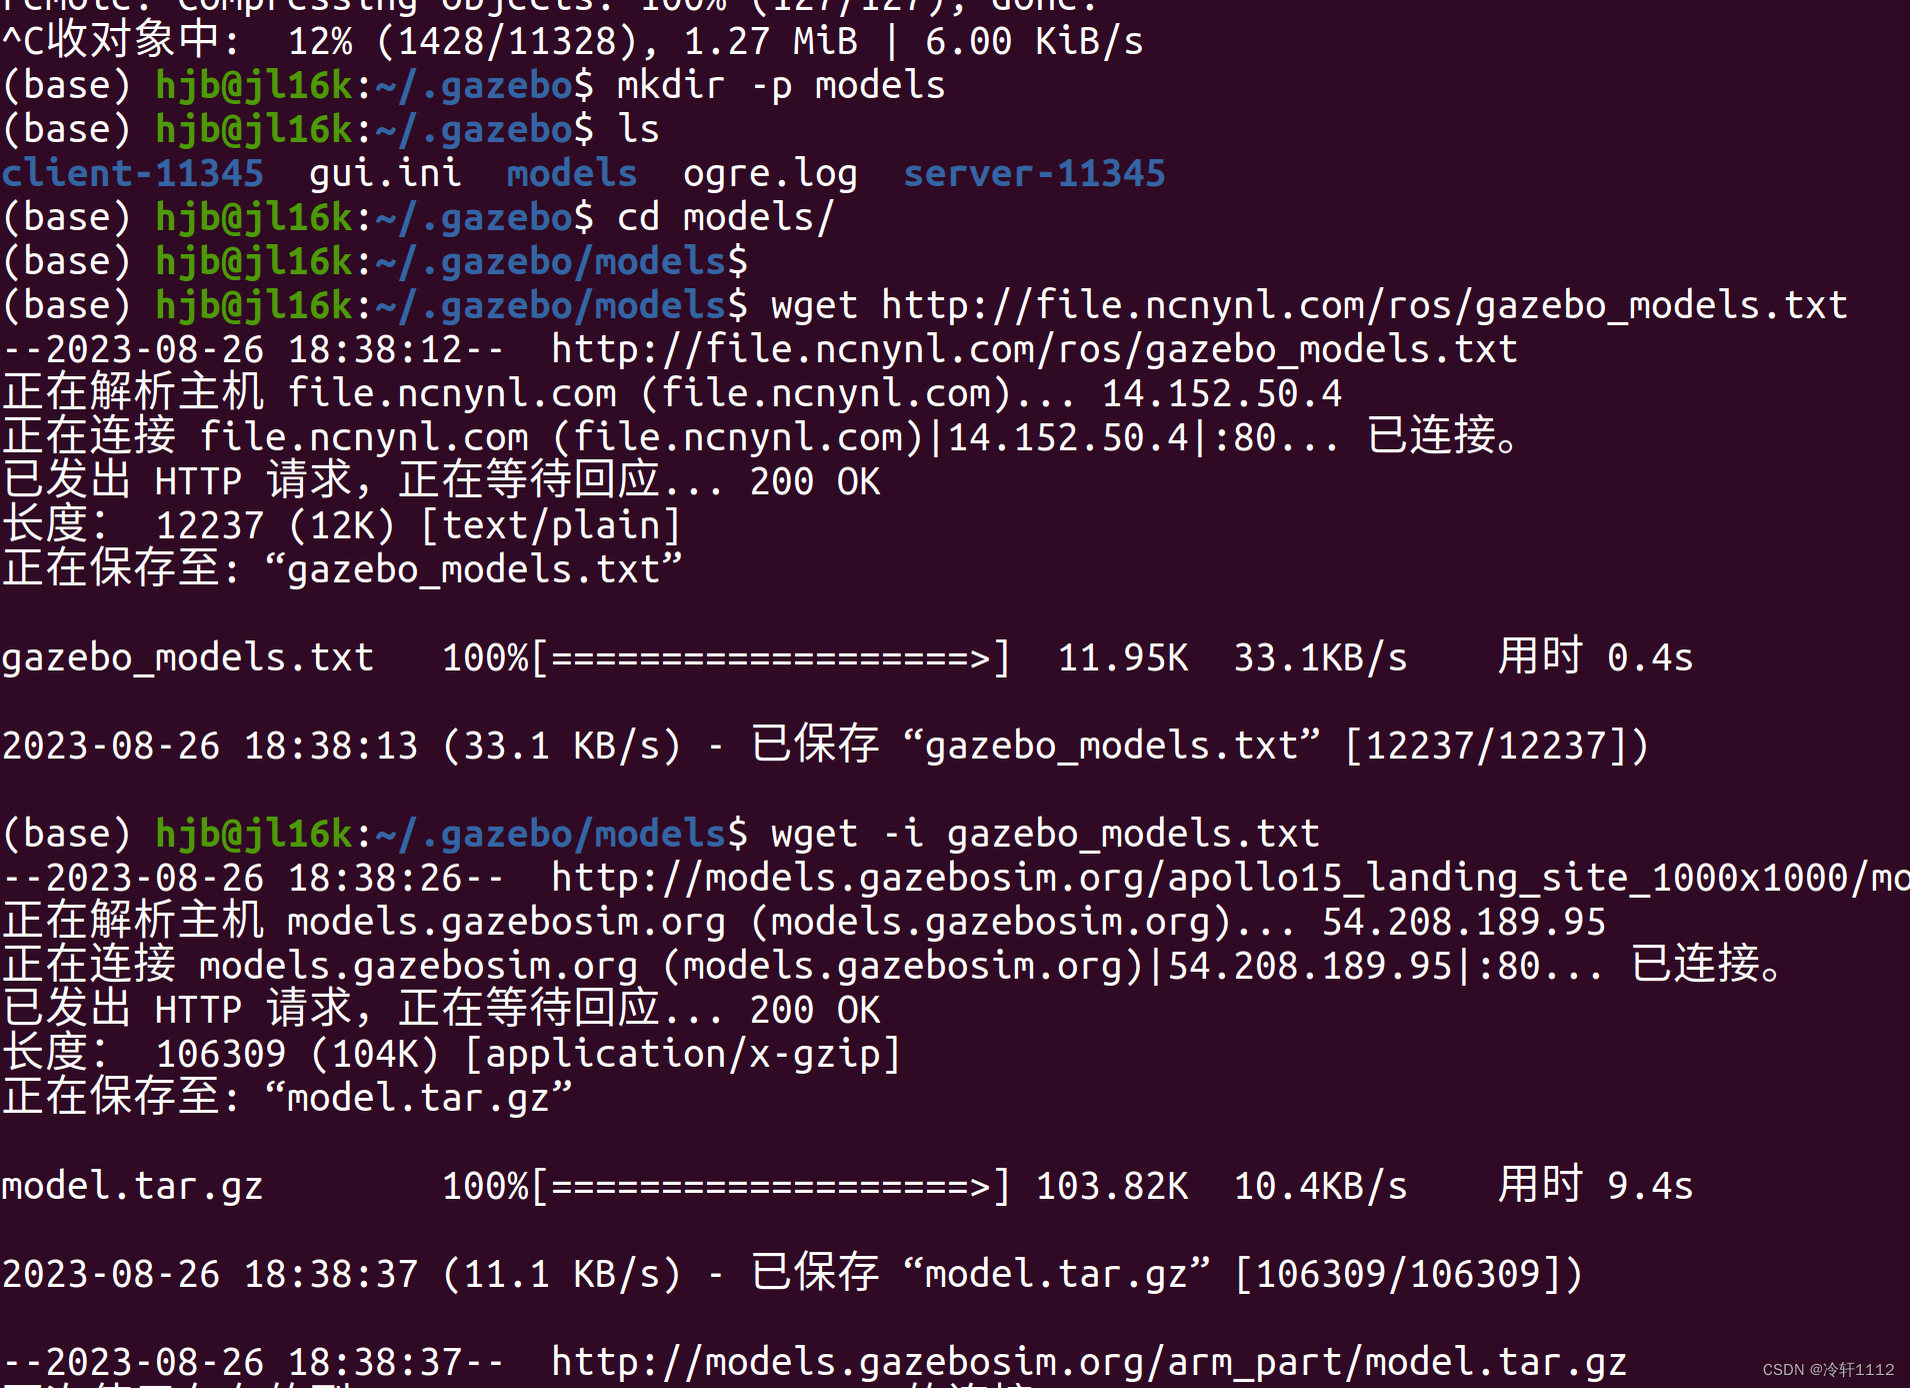
如果到下图这一步,应该算成功了吧。我也是刚入门不太懂,从文字上看下载了135M,应该不止这么小的。重复方法2倒数第二条命令还可以下载,我浅浅试了一下,不过我终止了,以后有需要再尝试一下吧。 最后解压一下就Ok了。

打开gazebo:
(base) hjb@jl16k:~/catkin_gazebo_ws$ gazebo
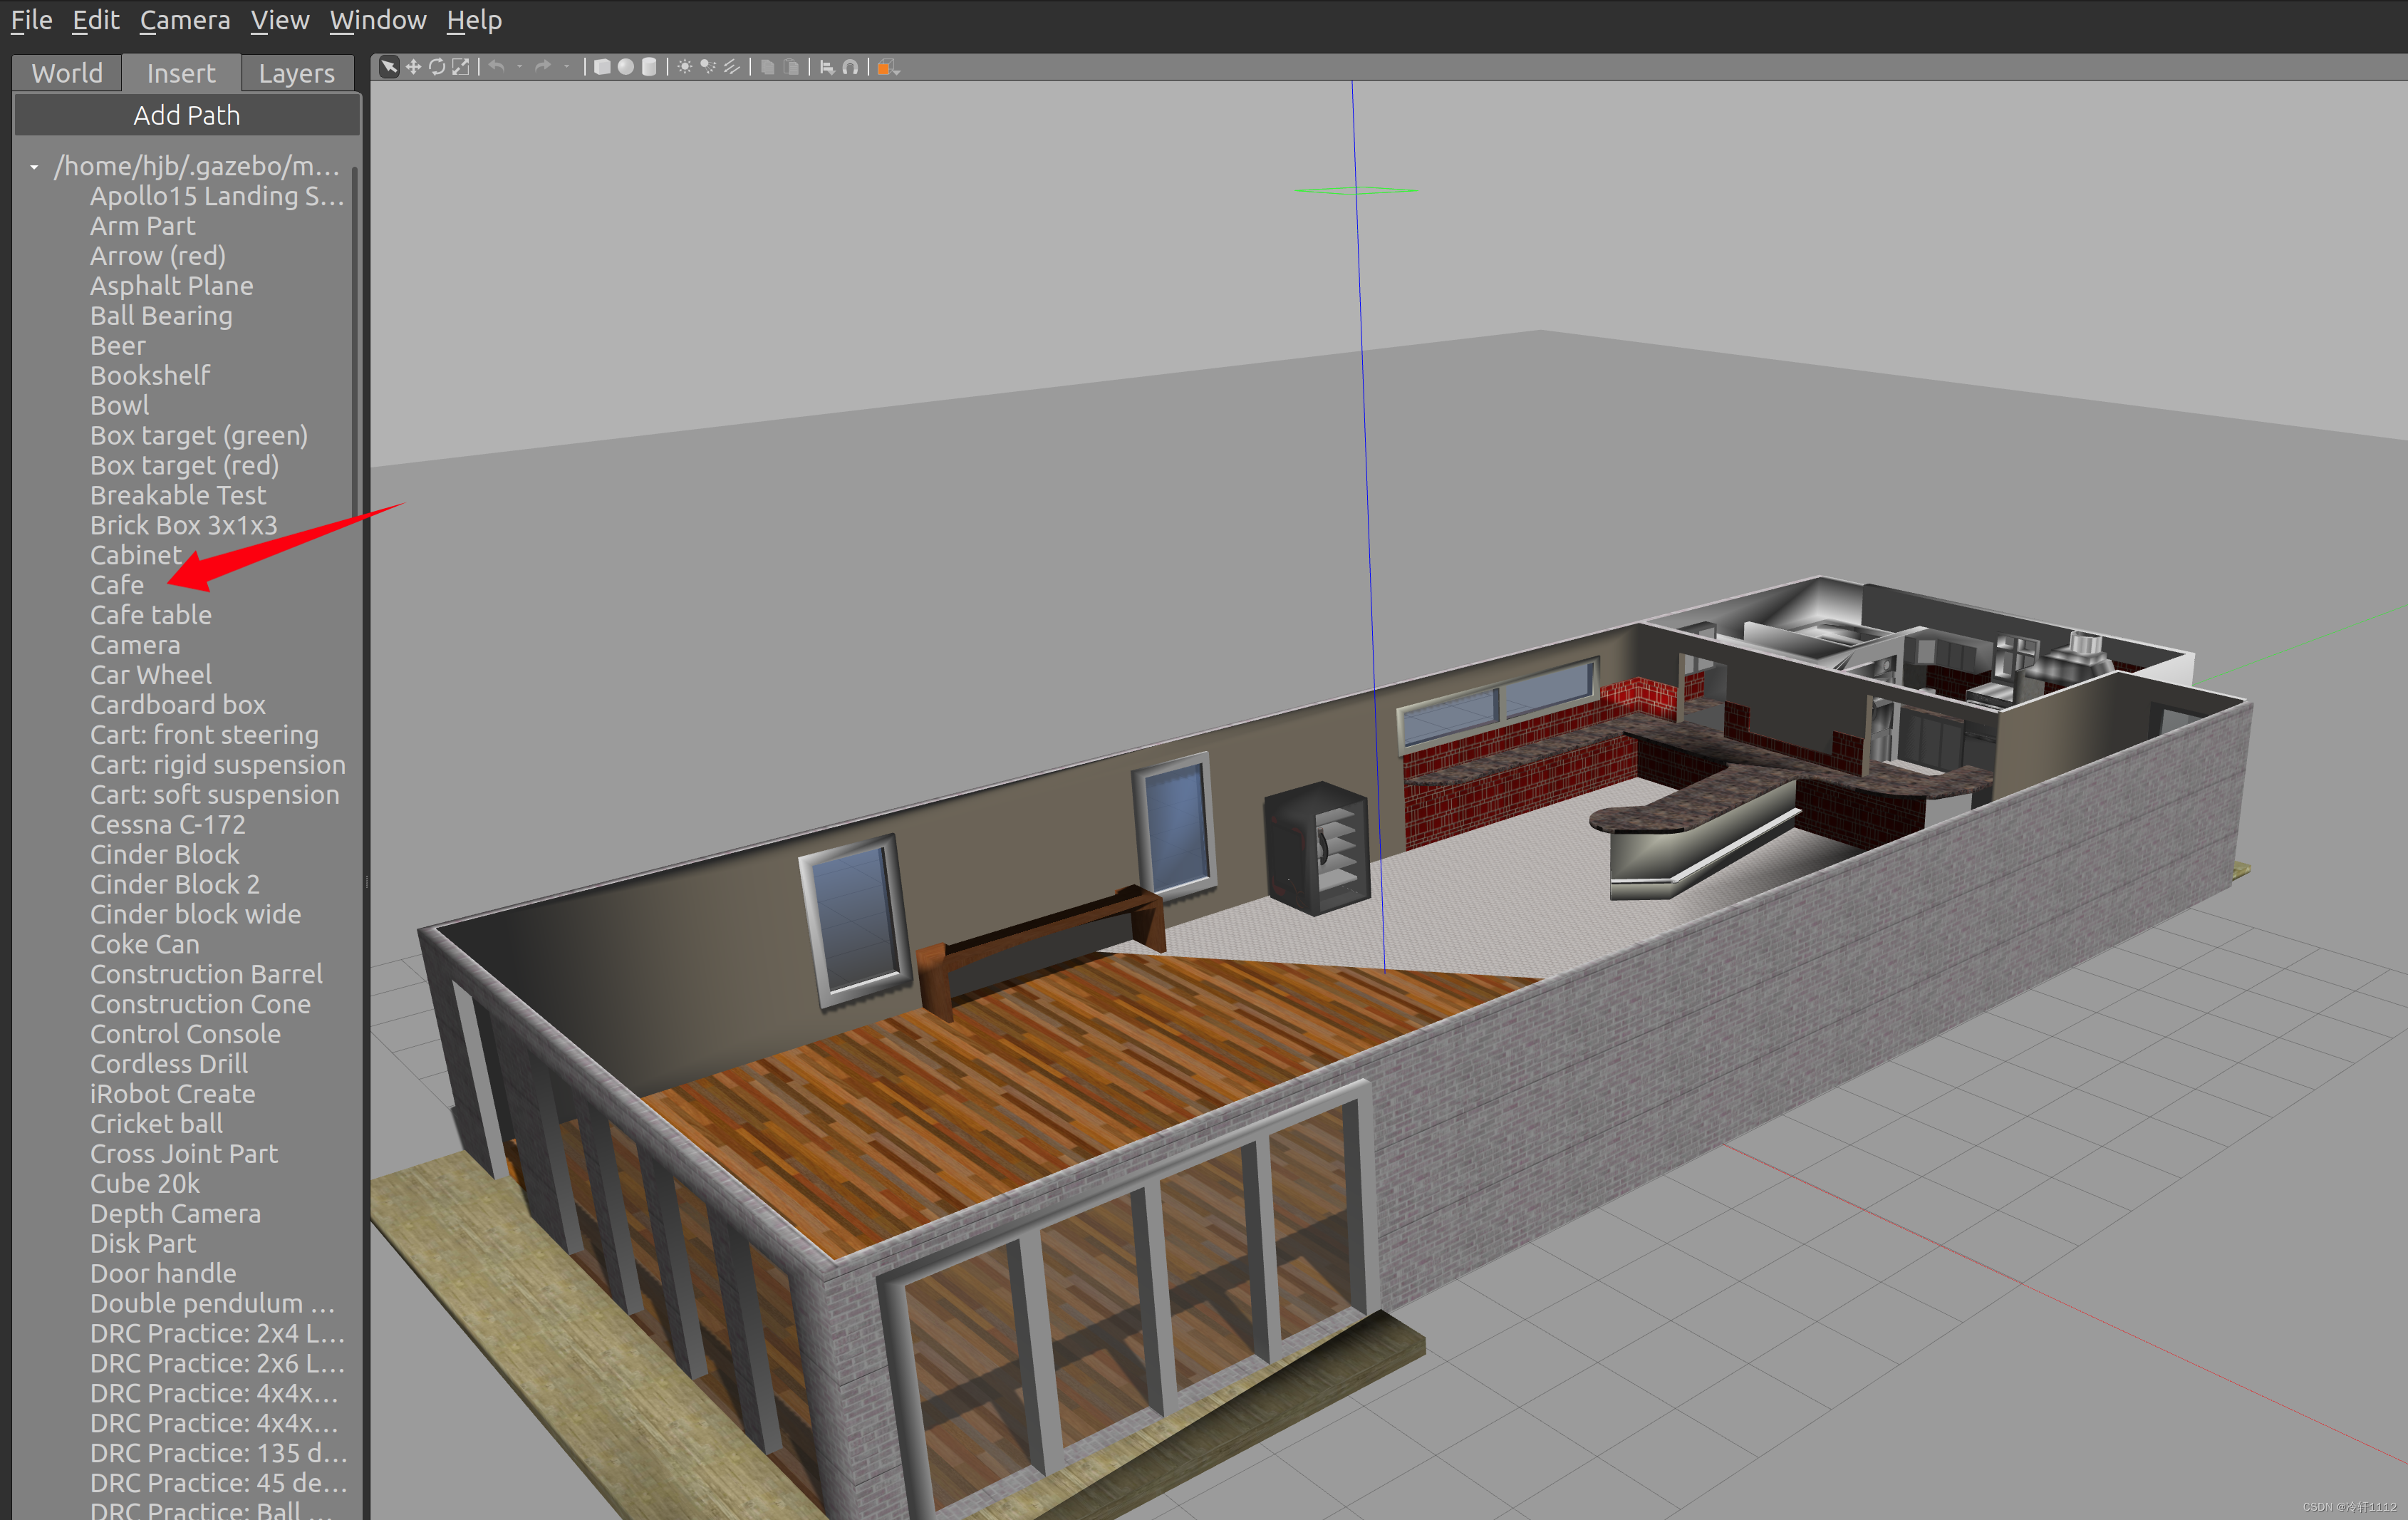
进入下图界面会发现,本地模型有了,随便拉一个进入 ,有显示就成功了。我拉了cafe这个模型进去。
(3)world模型的打开,使用launch文件
此前建了一个模型,有house的地图模型,以及world模型。

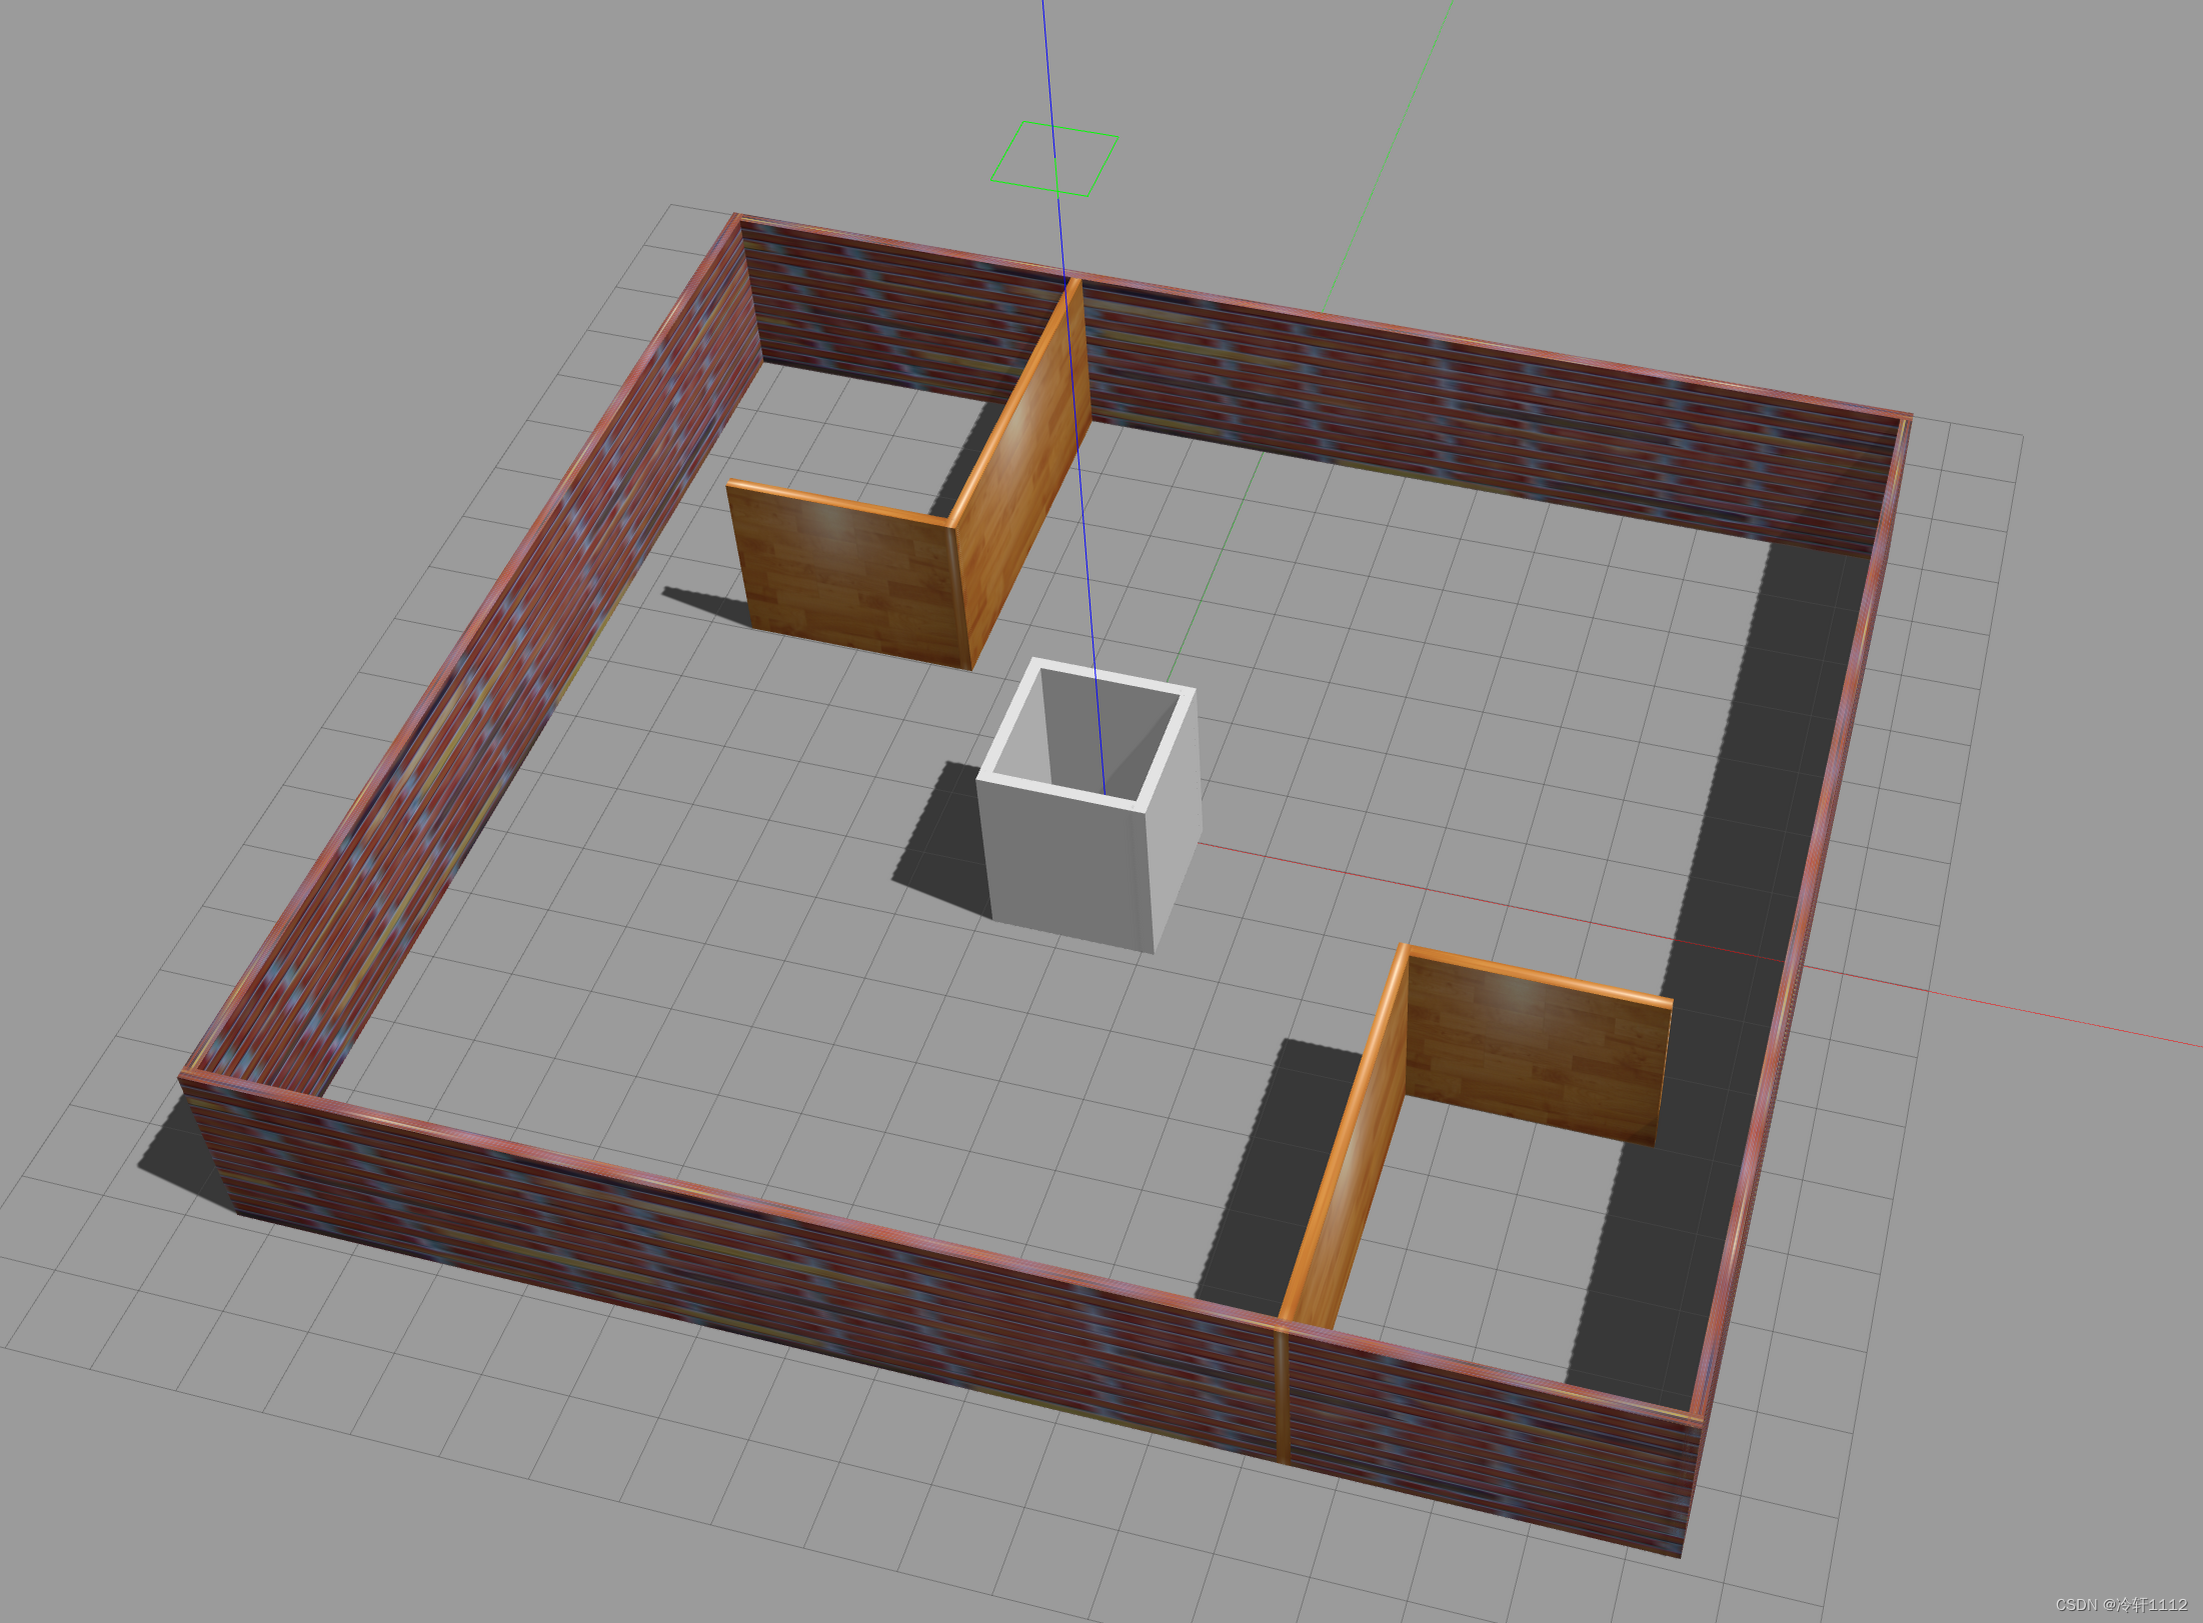
    上面所示的打开是使用house模型,而建好的world场景又如何打开呢?这就得用launch文件打开了。

    如下图所示,一般仿真环境都会有保存launch文件的功能包,像我这个环境存放launch文件的是racecar_gazebo,并且在这个功能包中有worlds文件,所创建的world文件应该拉到这个地方。所以将上面创建的house.world文件拉到worlds文件中,方便写launch文件。


     写文件推荐使用vscode,用vscode打开catkin_gazebo_ws这个工作空间,然后在launch文件夹中创建一个launch文件,我创建的文件名为 display_house_world_in_gazebo.launch,这样创建可以知道这个launch文件是干嘛的,从意思上看我这个就是在gazebo中展示house.world。

    代码如下,唯一要修改的就是 <arg name="world_name" value="$(find racecar_gazebo)/worlds/house_world_as.world"/>这一行了,自己world文件的路径如果不同根据自己作修改,$(find racecar_gazebo)就是找到racecar_gazebo这个功能包的路径,如果创建的功能包名字不一样修改一下就好了:
<?xml version="1.0"?>

<launch>


<!-- We resume the logic in empty_world.launch, changing only the name of the world to be launched -->

  <include file="$(find gazebo_ros)/launch/empty_world.launch">

    <arg name="world_name" value="$(find racecar_gazebo)/worlds/house_world_as.world"/>

    <arg name="paused" value="false"/>

    <arg name="use_sim_time" value="true"/>

    <arg name="gui" value="true"/>

    <arg name="headless" value="false"/>

    <arg name="debug" value="false"/>

  </include>


</launch>
然后执行一下命令即可看到打开的world文件:
(base) hjb@jl16k:~/catkin_gazebo_ws$ source devel/setup.bash
(base) hjb@jl16k:~/catkin_gazebo_ws$ roslaunch racecar_gazebo display_house_world_in_gazebo.launch
(4)world模型+小车模型的打开,使用launch文件
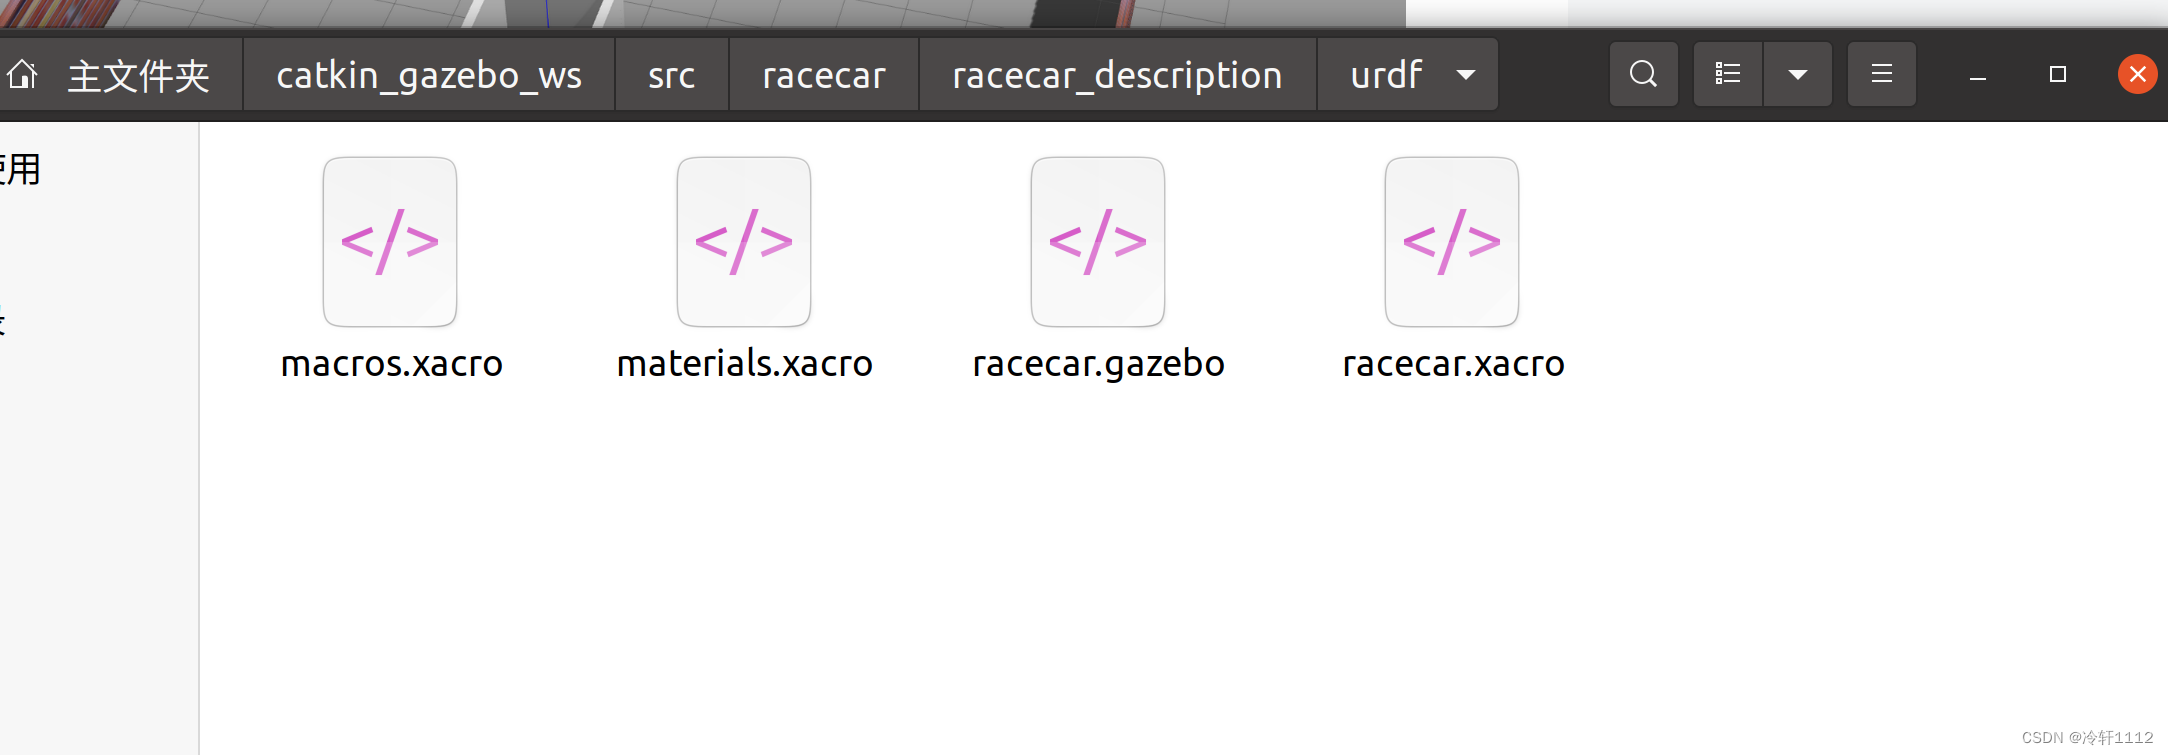
world+小车的打开也就是在world场景下增加了一辆小车,这就需要一个小车模型了。一般来说从网上下载的仿真环境都会有小车模型 。像下图中所示,我的小车模型就是在/catkin_gazebo_ws/src/racecar/racecar_description/urdf,其中我要使用的就是racecar_xacro。
     同样需要在launch文件夹中创建一个launch文件,一般来说展示world场景和小车的launch文件较为复杂,我是通过复制所下载的环境中的一个launch文件修改得到的。

    如下图所示,我所下载的仿真环境中小车+world展示的launch文件是racecar.launch,但是这个文件所指定的world文件并不是我想要的场景,因此负责该文件的内容创建一个launch文件,然后修改一下world文件的名字。
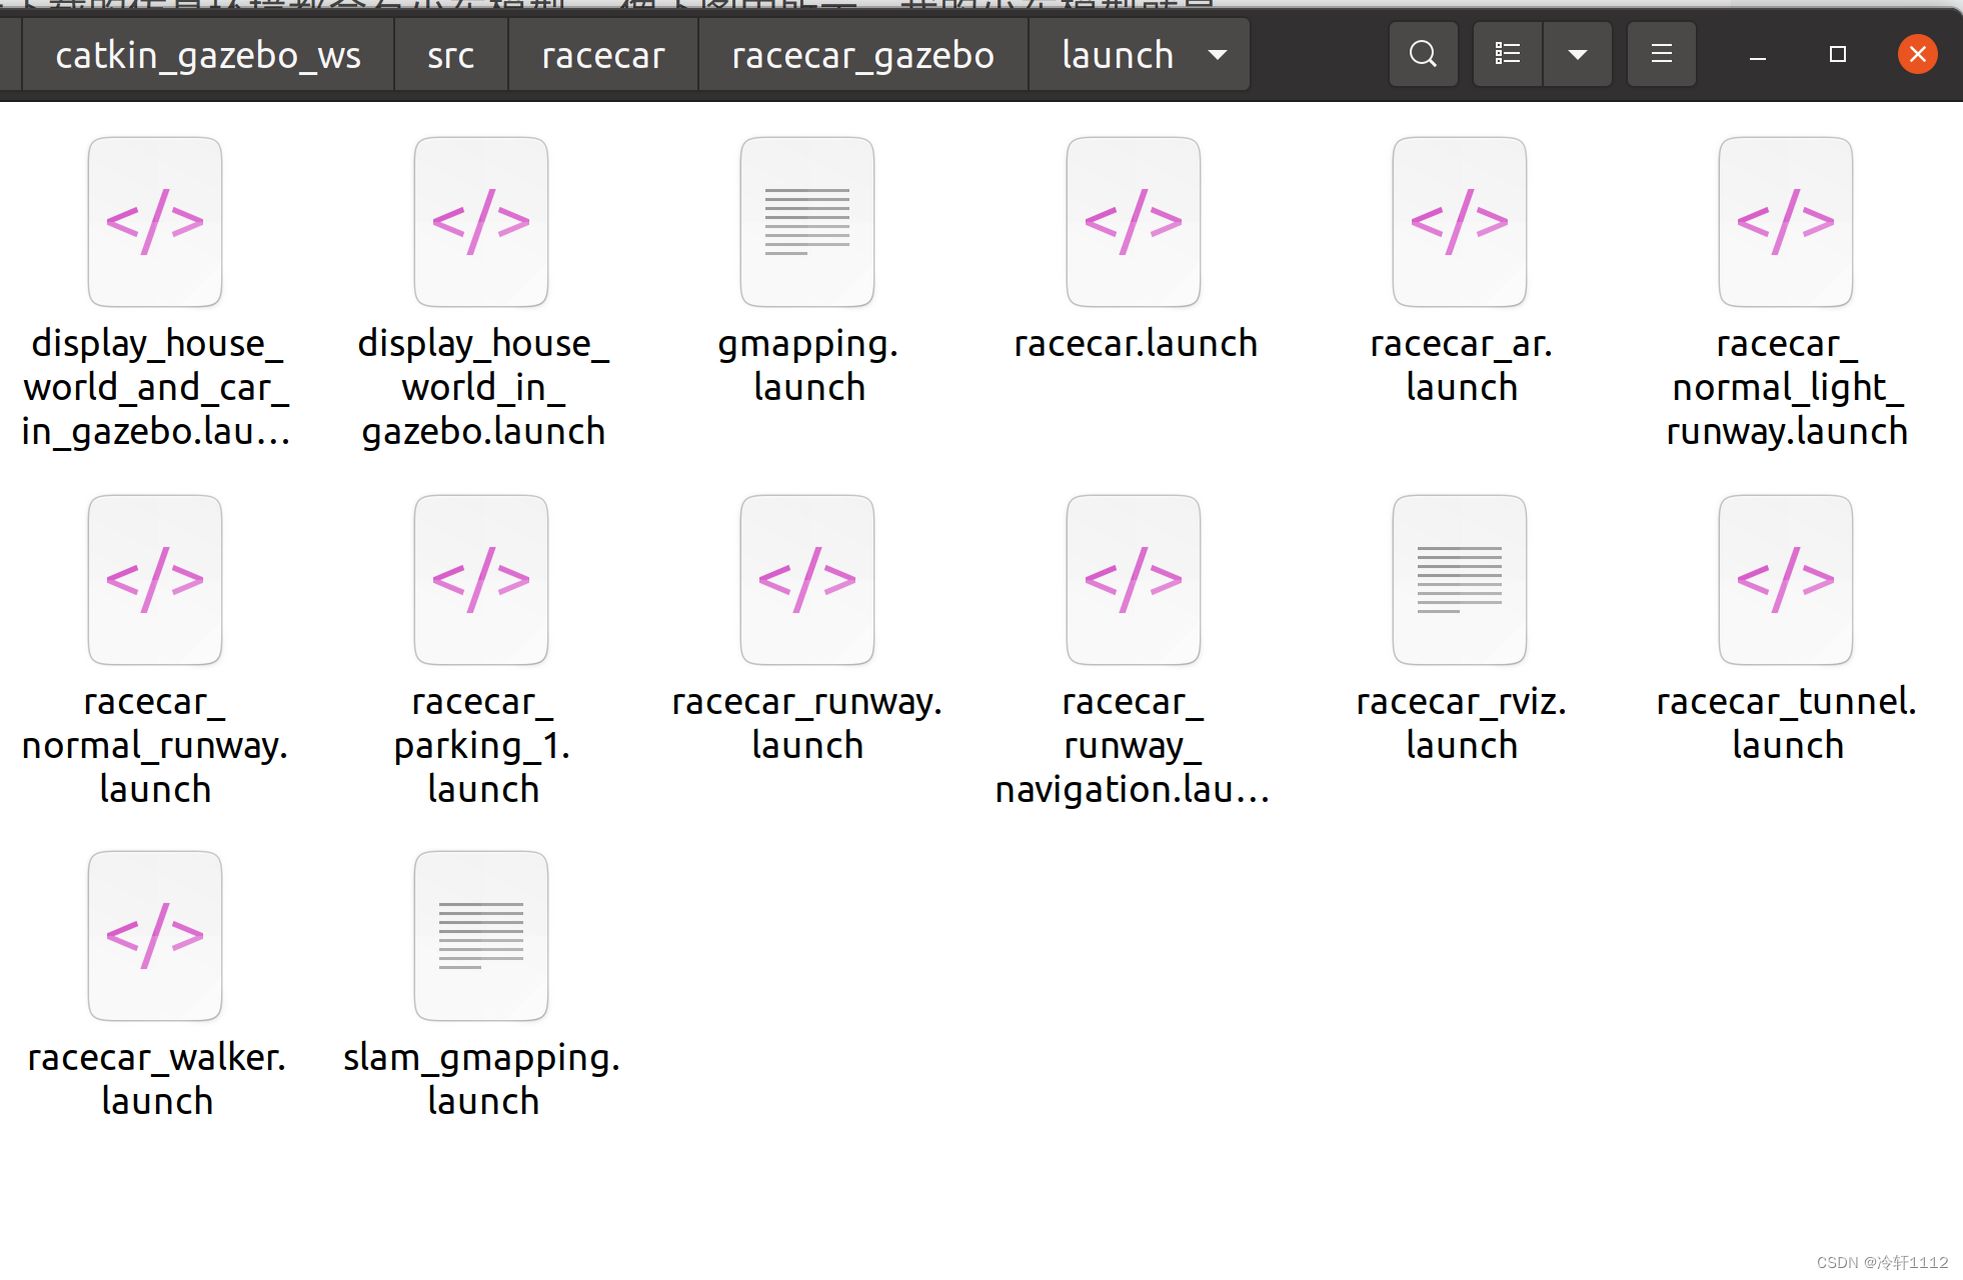 代码修改说明:
像我这个文件的话,其实以及很友好了,如果想要换world文件,只需要在<arg name="world_name" default="house_world_as" />这一行中修改default的值就可以了,像我的world文件名是house_world_as。注意这个地方不需要加文件名的后缀.world。当然在include的那部分中找world_name的路径也是需要注意的,如果和我的仿真环境不同需要自己改。我的launch文件名是display_house_world_and_car_in_gazebo.launch
<?xml version="1.0"?>
<launch>
  <arg name="world_name" default="house_world_as" />
  <arg name="gui" default="true" />
  <arg name="run_camera" default="false"/>

  <arg name="x_pos" default="-5.388334"/>
  <arg name="y_pos" default="-4.094883"/>
  <arg name="z_pos" default="0.0"/>

  <include file="$(find gazebo_ros)/launch/empty_world.launch">
    <arg name="world_name" value="$(find racecar_gazebo)/worlds/$(arg world_name).world"/>
    <arg name="gui" value="$(arg gui)"/>
  </include>

  <!-- urdf xml robot description loaded on the Parameter Server, converting the xacro into a proper urdf file-->
  <param name="robot_description" command="$(find xacro)/xacro --inorder '$(find racecar_description)/urdf/racecar.xacro'" />

  <!-- push robot_description to factory and spawn robot in gazebo -->
  <node name="racecar_spawn" pkg="gazebo_ros" type="spawn_model" output="screen" args="-urdf -param robot_description -model racecar -x $(arg x_pos) -y $(arg y_pos) -z $(arg z_pos)" />

  <!-- ros_control racecar launch file -->
  <include file="$(find racecar_control)/launch/racecar_control.launch" ns="/"/>

  <!-- Spawn the MUXs -->
  <arg name="racecar_version" default="racecar-v2" />
  <include file="$(find racecar)/launch/mux.launch" ns="vesc" />

  <!-- Publish "better odom" topic that is normally generated by the particle filter -->
  <node name="better_odom" pkg="topic_tools" type="relay"
          args="/vesc/odom /pf/pose/odom" />

  <!--Launch the simulation joystick control-->
  <rosparam command="load" file="$(find racecar_gazebo)/config/keyboard_teleop.yaml" />
  <node pkg="racecar_gazebo" type="keyboard_teleop.py" name="keyboard_teleop" />
</launch>
执行,会发现多了个小车:
(base) hjb@jl16k:~/catkin_gazebo_ws$ roslaunch racecar_gazebo display_house_world_and_car_in_gazebo.launch

(5)使用这个world模型+小车模型来建一下图(gmapping)
    这一步需要gmapping功能包,这个功能包的下载可以网上找教程下载,下载好之后就可以不管了。launch文件还是创在仿真环境中的,在launch文件中指定gmapping的功能包名字会自动寻找并使用。

    一般来说网上下载的仿真环境一般都会有gmapping的launch文件,如果没有也没有关系。启动gmapping建图需要创建两个launch文件,这些launch文件全都是放在图中上面所示的路径中,此后不在赘述。并且这两个文件的内容是不需要改就可以直接使用了,当然前提是有gmapping功能包。
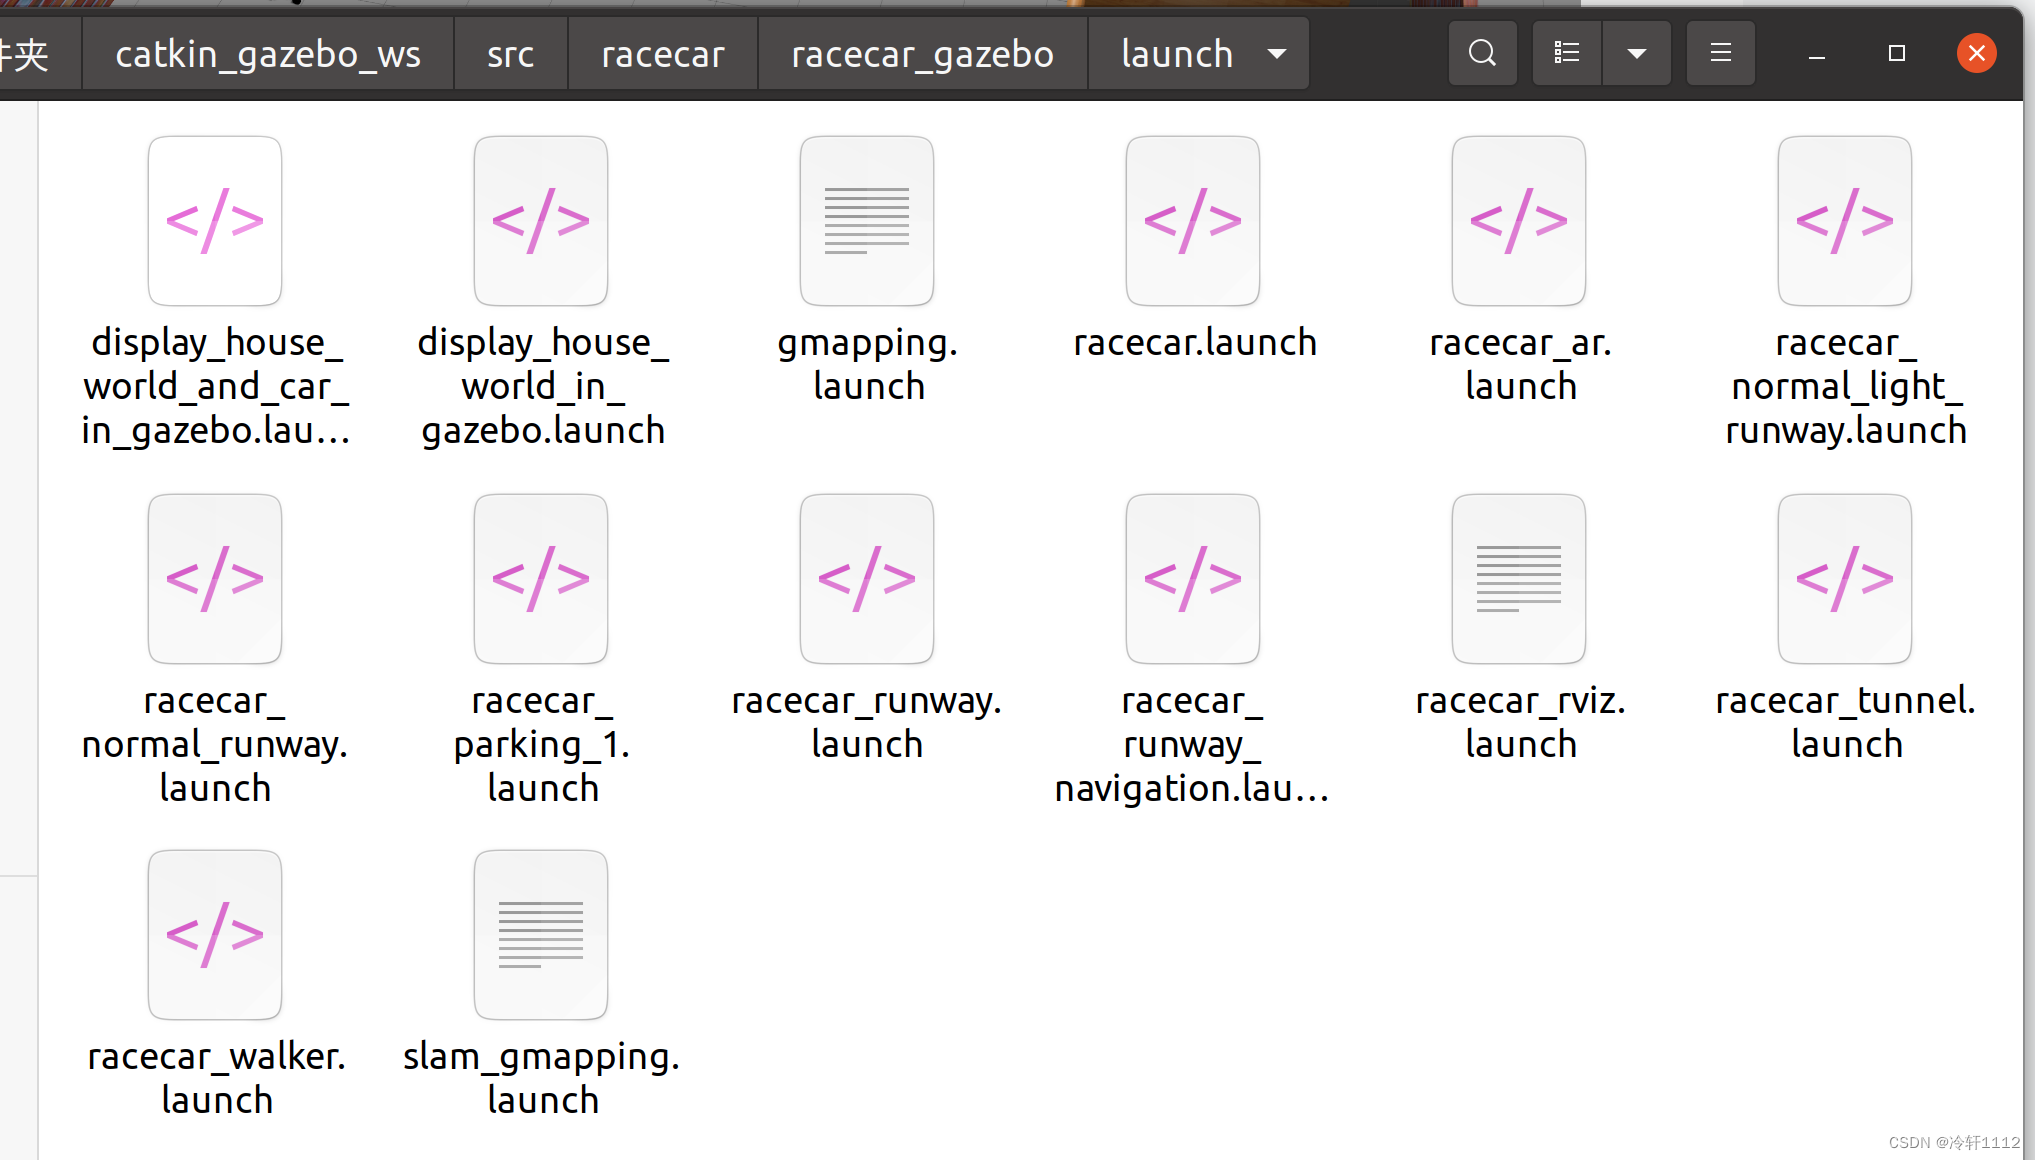
slam_gmapping.launch(这个文件的作用是调用gmapping,如果调用的文件名不一样注意修改文件路径):
<launch>

    <include file="$(find racecar_gazebo)/launch/gmapping.launch"/>

    <!-- 启动rviz -->
    <node pkg="rviz" type="rviz" name="rviz" args="-d $(find racecar_gazebo)/config/new_gmapping.rviz"/>

</launch>
gmapping.launch:
<launch>
    <node pkg="gmapping" type="slam_gmapping" name="slam_gmapping" output="screen">
      <param name="base_frame" value="base_link"/> <!--机器人底盘坐标系基框架,附带在移动底盘的框架,原点-->
      <param name="odom_frame" value="odom"/> <!--里程计坐标系里程计框架,附带在里程计的框架-->
      <param name="map_frame" value="map"/> <!--地图坐标系地图框架,附带在地图上的框架-->
      <param name="map_update_interval" value="0.01"/><!--地图更新速度,秒0.01-->
      <param name="maxUrange" value="10.0"/><!--激光最大可用距离-->
      <param name="maxRange" value="12.0"/><!--zuida juli-->
      <param name="sigma" value="0.05"/>
      <param name="kernelSize" value="3"/><!--moren:1-->
      <param name="lstep" value="0.05"/>
      <param name="astep" value="0.05"/>
      <param name="iterations" value="5"/>
      <param name="lsigma" value="0.075"/>
      <param name="ogain" value="3.0"/>
      <param name="lskip" value="0"/>
      <param name="srr" value="0.1"/>
      <param name="srt" value="0.2"/>
      <param name="str" value="0.1"/>
      <param name="stt" value="0.2"/>
      <param name="minimumScore" value="0"/>
      <param name="linearUpdate" value="0.05"/><!--线速度角速度在地图的更新-->
      <param name="angularUpdate" value="0.0436"/>
      <param name="temporalUpdate" value="-1"/><!--moren:-1-->
      <param name="resampleThreshold" value="0.5"/>
      <param name="particles" value="8"/><!--moren:30 gaicheng:8-->
      <param name="xmin" value="-50.0"/>
      <param name="ymin" value="-50.0"/>
      <param name="xmax" value="50.0"/>
      <param name="ymax" value="50.0"/>
      <param name="delta" value="0.05"/>
      <param name="llsamplerange" value="0.01"/>
      <param name="llsamplestep" value="0.01"/>
      <param name="lasamplerange" value="0.005"/>
      <param name="lasamplestep" value="0.005"/>
      <!--param name="transform_publish_period" value="0.01"/-->

    </node>
</launch>
    有了建图启动文件就可以建图了。

    一般来说,我一旦使用ros,都会先roscore一下,建议也roscore一下:
(base) hjb@jl16k:~$ roscore
首先,先打开之前自己创建的场景,也就是world+小车的场景,打开一个新的终端,使用launch文件启动:
(base) hjb@jl16k:$ cd catkin_gazebo_ws
(base) hjb@jl16k:~/catkin_gazebo_ws$ source devel/setup.bash
(base) hjb@jl16k:~/catkin_gazebo_ws$ roslaunch racecar_gazebo display_house_world_and_car_in_gazebo.launch
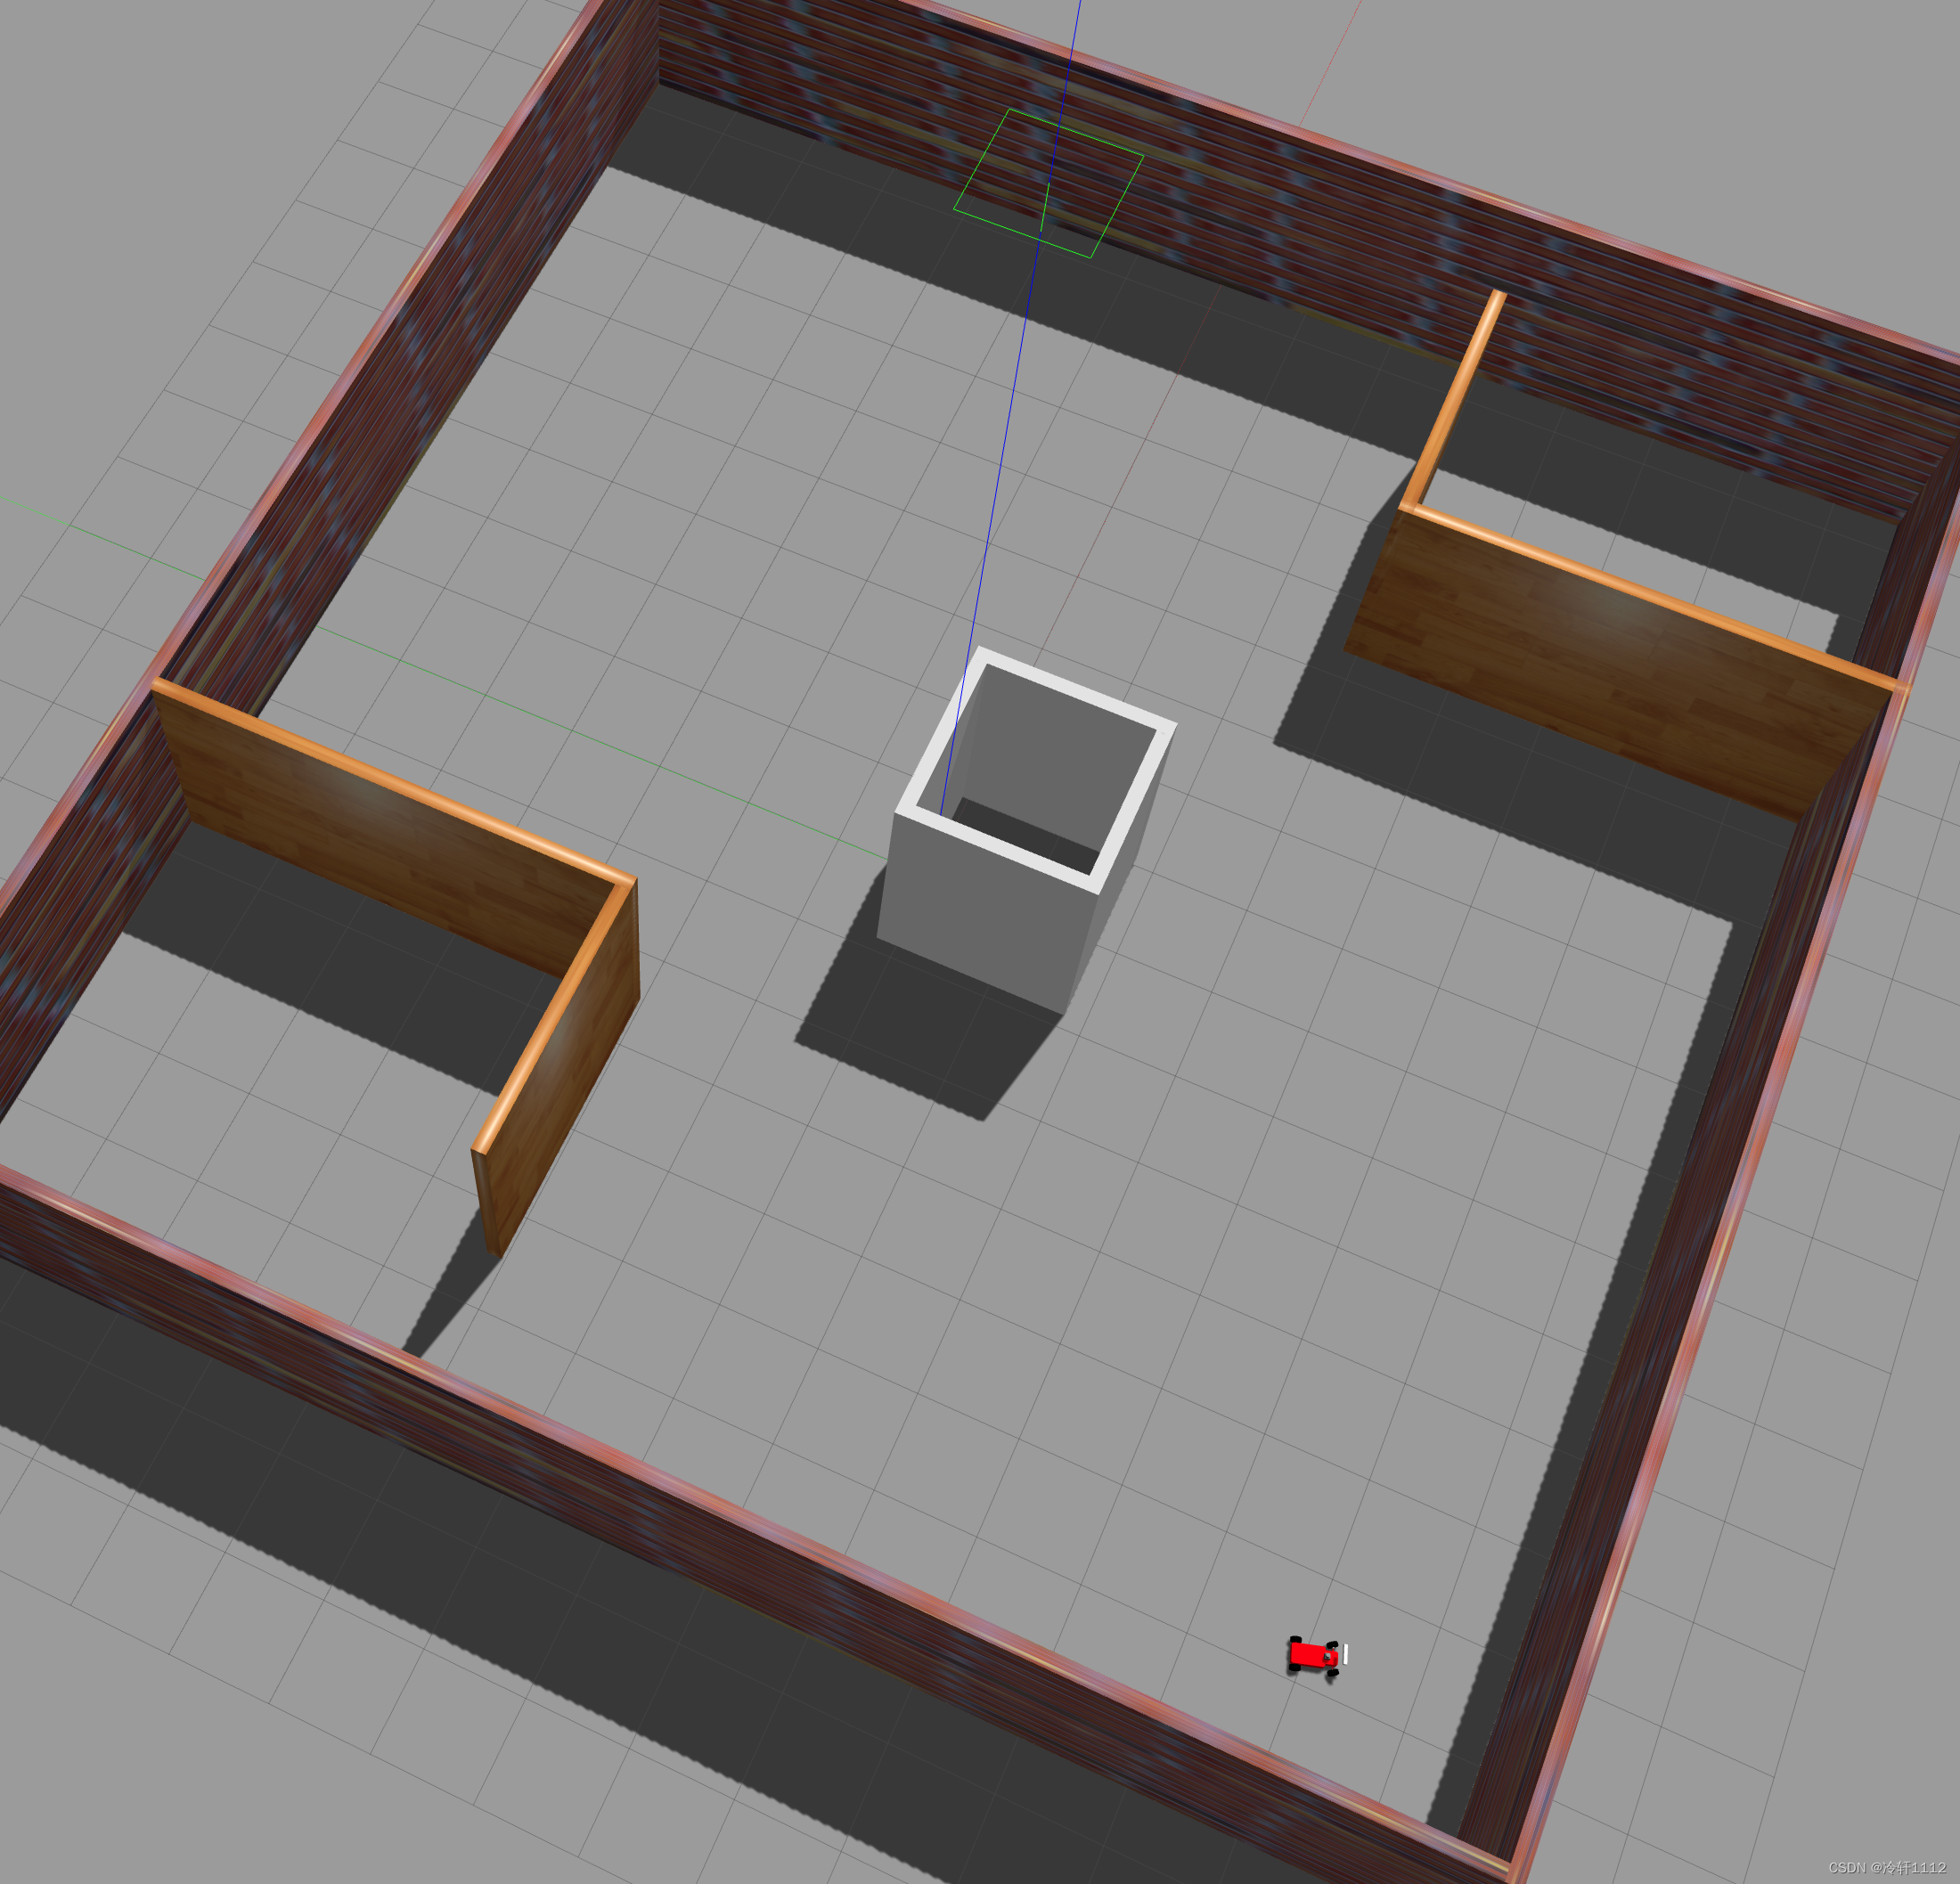
    有真实地图和机器人了,就可以控制机器人使用算法建图了,使用launch文件启动建图和键盘控制,这个键盘控制是我这个仿真环境写好的,至于其他仿真环境的话,那我只能说我无能为力:

    打开新终端:
(base) hjb@jl16k:~$ cd catkin_gazebo_ws/
(base) hjb@jl16k:~/catkin_gazebo_ws$ source devel/setup.bash
(base) hjb@jl16k:~/catkin_gazebo_ws$ roslaunch racecar_gazebo slam_gmapping.launch
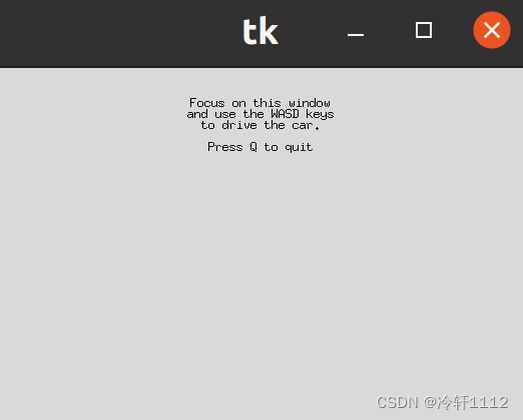
键盘控制移动扫描完整个地图完成建图,在建图想要移动必须点击下图所示的这个界面才能移动:
建好图的效果:
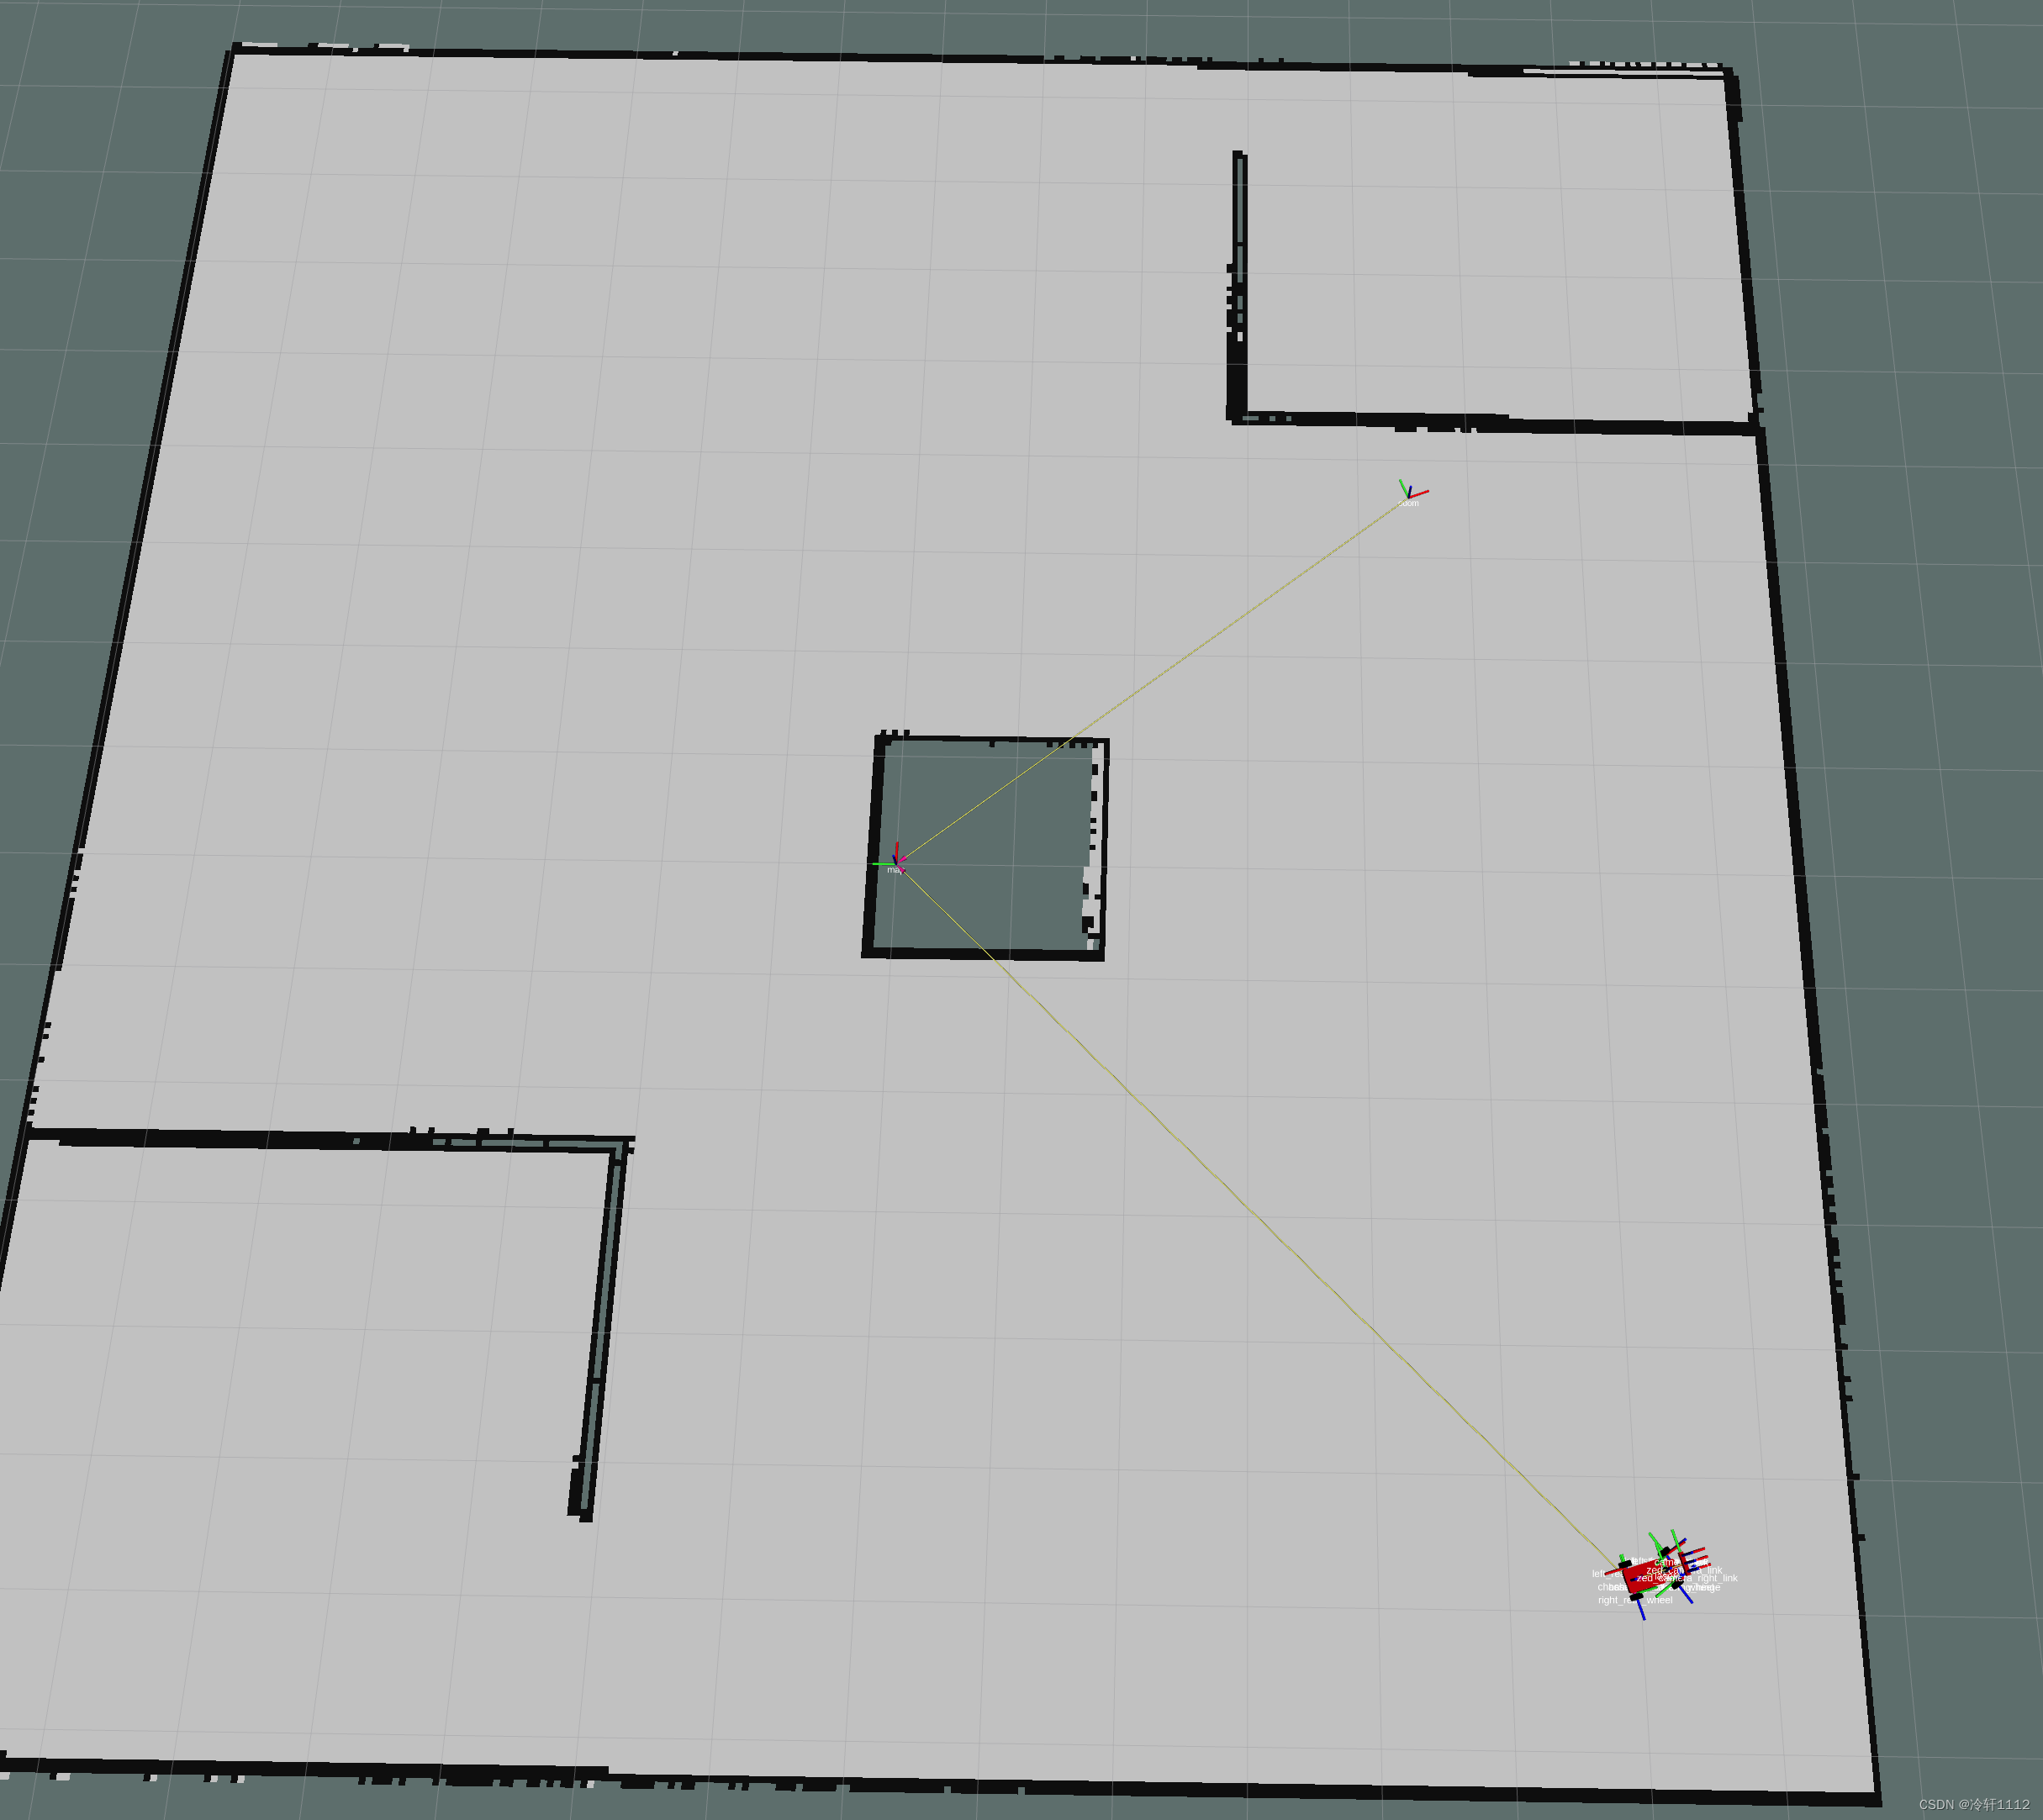
打开新终端,保存地图,可以根据自己需求改路径:
(base) hjb@jl16k:~$ rosrun map_server map_saver -f /home/hjb/catkin_gazebo_ws/src/racecar/racecar_gazebo/map/house
(6)使用上步所保存的图来导航
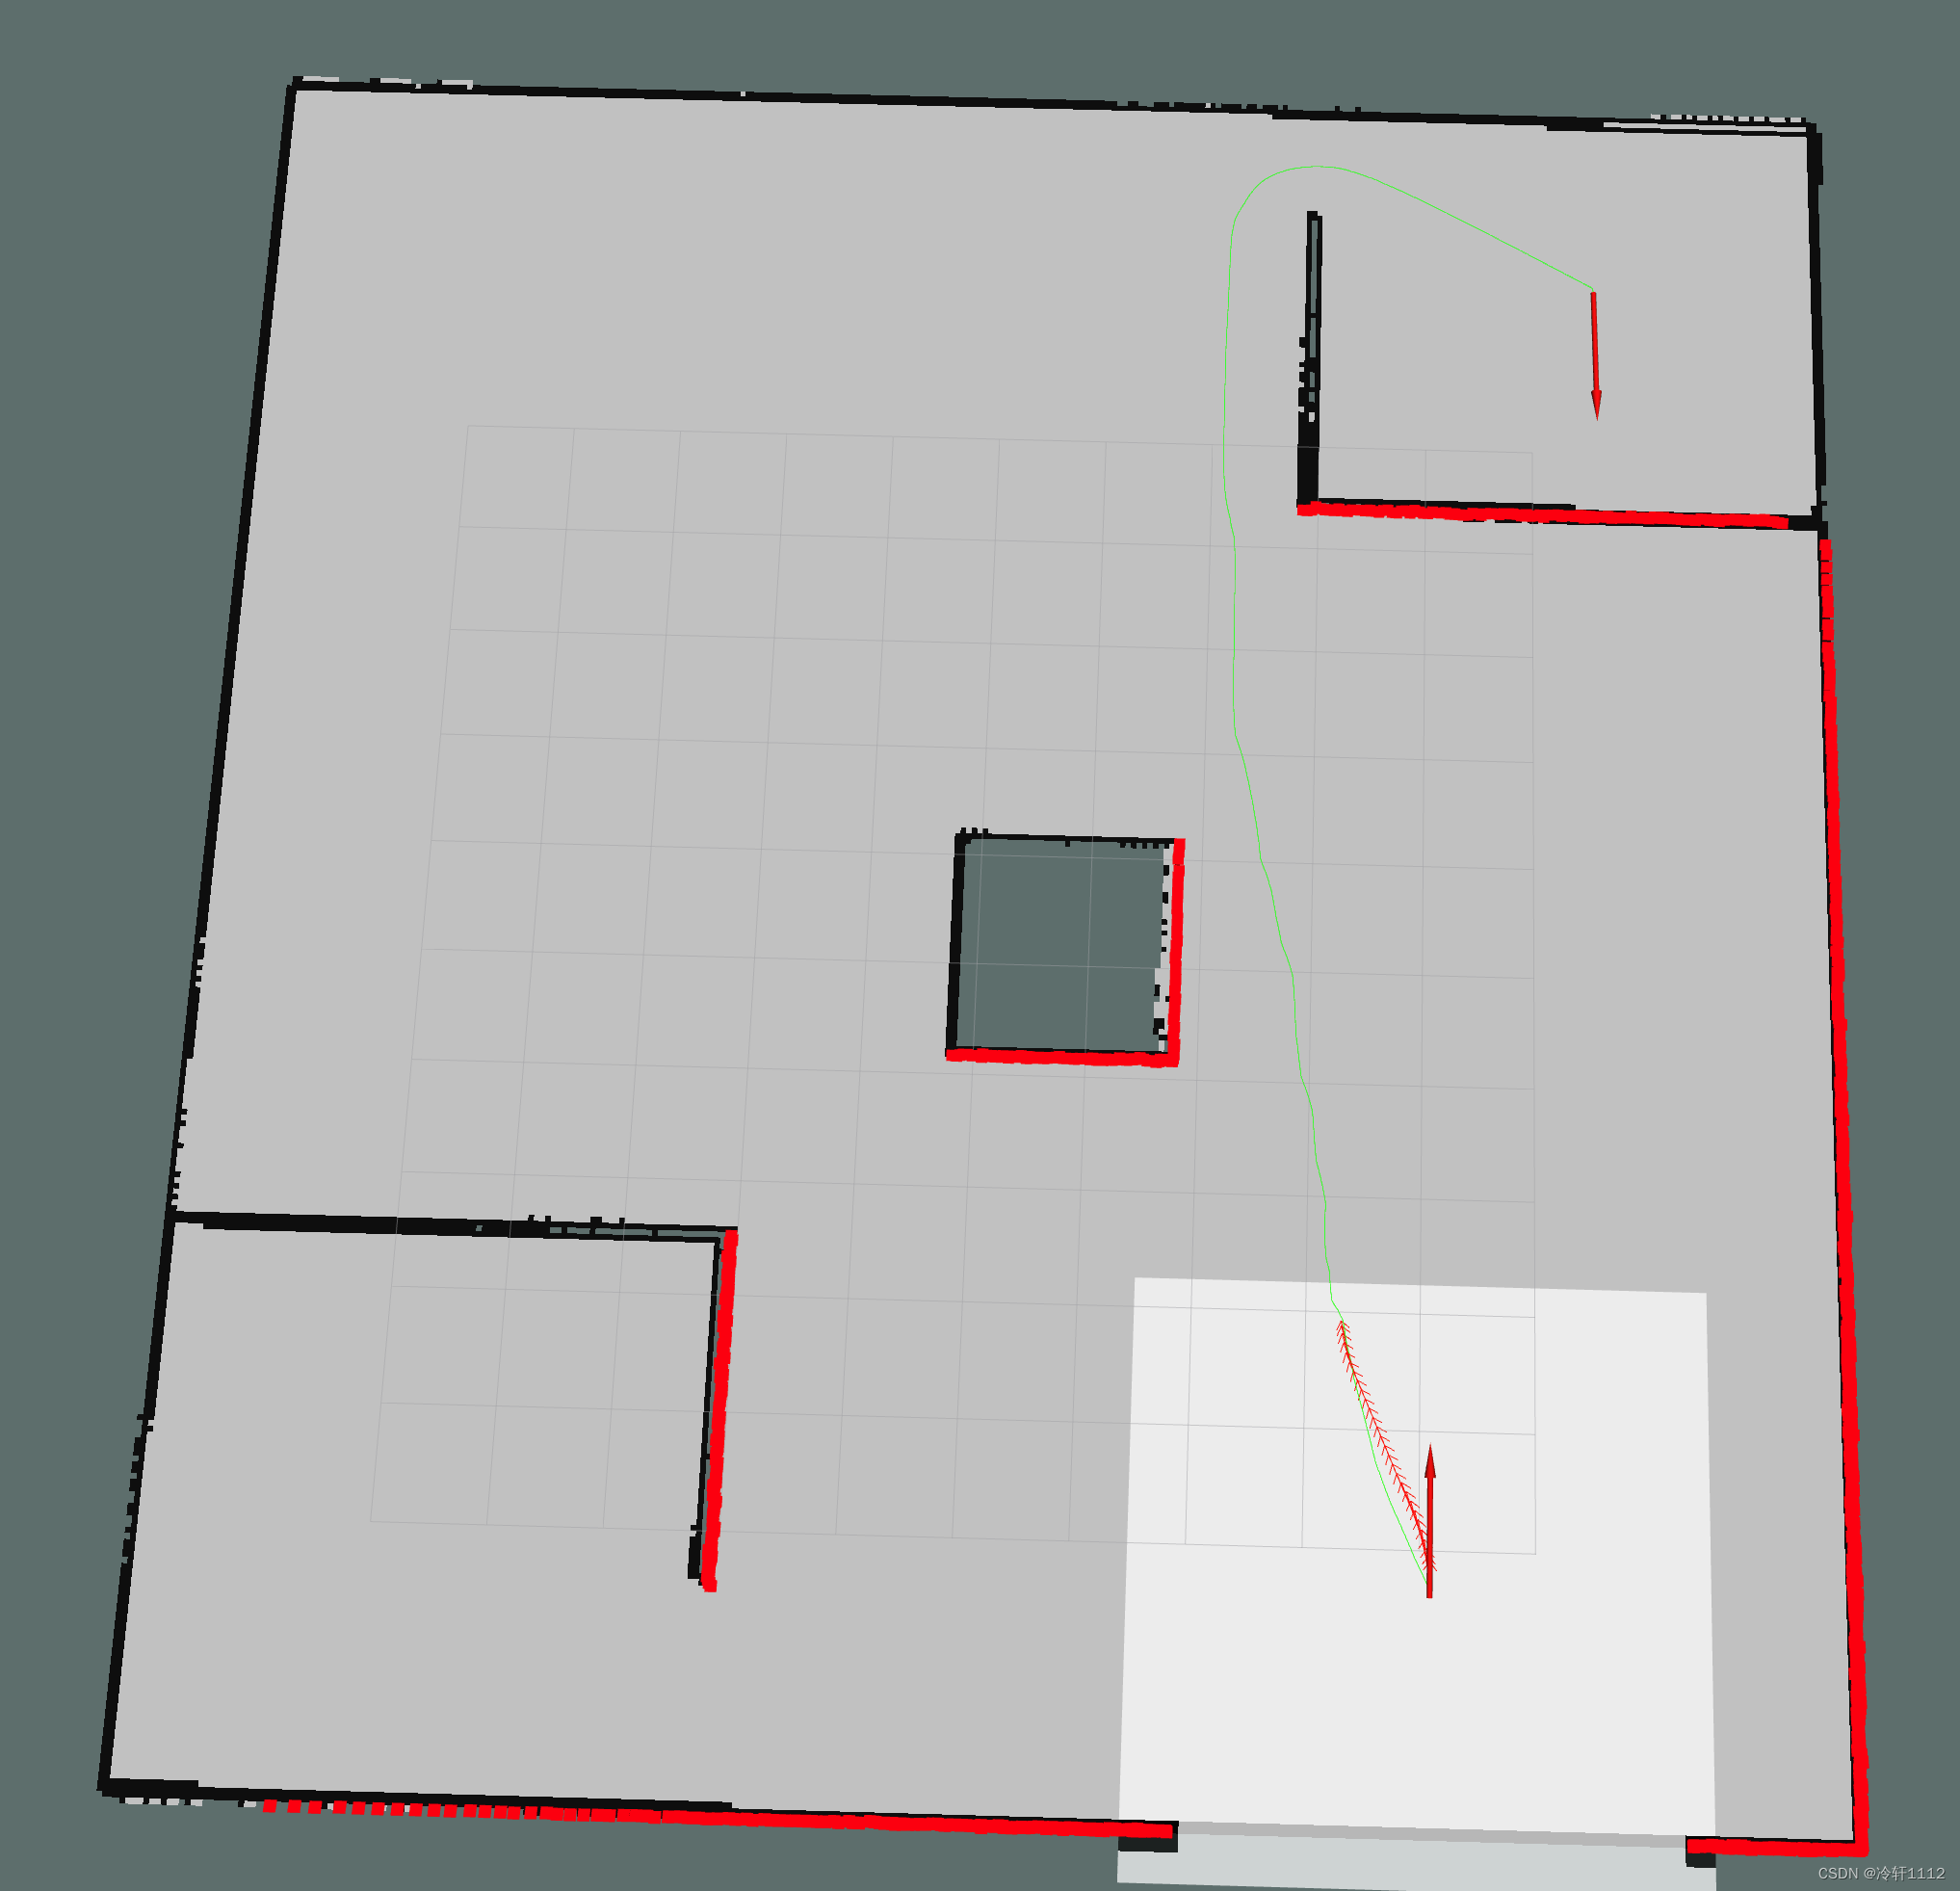
    有了建图自然少不了导航,先说一下导航的前提条件,一般来说导航需要使用move_base功能包,这个包一般在navigation包中。而这个navigation包一般安装gmapping算法的时候会自带,如果没有需要自己下载这个navigation包,这个包网上教程参考下载即可。

    到这一步,之前打开的终端可以都关了。实现导航需要两个launch文件,一个rivz配置文件,以及一个路径追踪的脚本。

    racecar_house_and_car_world_navigation.launch :

    有两处有根据自己修改:
<arg name="world_name" value="house_world_as"/> 的house_world_as要改成自己的文件名。
<node name="map_server" pkg="map_server" type="map_server" args="$(find racecar_gazebo)/map/house .yaml" />要house.yaml文件的路径要根据自己保存的修改,这个文件就是(5)保存地图的文件。
<?xml version="1.0"?>
<launch>
  <!-- Launch the racecar -->
  <include file="$(find racecar_gazebo)/launch/racecar.launch">
    <arg name="world_name" value="house_world_as"/>
  </include>

  <!-- Launch the built-map -->
  <node name="map_server" pkg="map_server" type="map_server" args="$(find racecar_gazebo)/map/house .yaml" />

  <!--Launch the move base with time elastic band-->
  <param name="/use_sim_time" value="true"/>
  <node pkg="move_base" type="move_base" respawn="false" name="move_base" output="screen">
    <rosparam file="$(find racecar_gazebo)/config/costmap_common_params.yaml" command="load" ns="global_costmap" />
    <rosparam file="$(find racecar_gazebo)/config/costmap_common_params.yaml" command="load" ns="local_costmap" />
    <rosparam file="$(find racecar_gazebo)/config/local_costmap_params.yaml" command="load" />
    <rosparam file="$(find racecar_gazebo)/config/global_costmap_params.yaml" command="load" />
    <rosparam file="$(find racecar_gazebo)/config/teb_local_planner_params.yaml" command="load" />

    <param name="base_global_planner" value="global_planner/GlobalPlanner" />
    <param name="planner_frequency" value="0.01" />
    <param name="planner_patience" value="5.0" />
    <!--param name="use_dijkstra" value="false" /-->

    <param name="base_local_planner" value="teb_local_planner/TebLocalPlannerROS" />
    <param name="controller_frequency" value="5.0" />
    <param name="controller_patience" value="15.0" />

    <param name="clearing_rotation_allowed" value="false" />
  </node>

</launch>
racecar_rviz.launch :
<launch>
    <!-- 启动rviz -->
    <node pkg="rviz" type="rviz" name="rviz" args="-d $(find racecar_gazebo)/config/racecar_rviz.rviz"/>

</launch>
     因为这个rviz配置是我所下载的这个仿真环境自带有的,如果使用的不是我这个仿真环境需要自己写一个rviz配置文件,并将上面的racecar_rviz.launch文件的路径改为这个rviz文件的路径。。

    racecar_rviz.rviz :
Panels:
  - Class: rviz/Displays
    Help Height: 78
    Name: Displays
    Property Tree Widget:
      Expanded:
        - /Global Options1
        - /Status1
        - /LaserScan1
        - /PoseArray1
      Splitter Ratio: 0.5
    Tree Height: 775
  - Class: rviz/Selection
    Name: Selection
  - Class: rviz/Tool Properties
    Expanded:
      - /2D Pose Estimate1
      - /2D Nav Goal1
      - /Publish Point1
    Name: Tool Properties
    Splitter Ratio: 0.588679016
  - Class: rviz/Views
    Expanded:
      - /Current View1
    Name: Views
    Splitter Ratio: 0.5
  - Class: rviz/Time
    Experimental: false
    Name: Time
    SyncMode: 0
    SyncSource: LaserScan
Toolbars:
  toolButtonStyle: 2
Visualization Manager:
  Class: ""
  Displays:
    - Alpha: 0.5
      Cell Size: 1
      Class: rviz/Grid
      Color: 160; 160; 164
      Enabled: true
      Line Style:
        Line Width: 0.0299999993
        Value: Lines
      Name: Grid
      Normal Cell Count: 0
      Offset:
        X: 0
        Y: 0
        Z: 0
      Plane: XY
      Plane Cell Count: 10
      Reference Frame: <Fixed Frame>
      Value: true
    - Alpha: 0.699999988
      Class: rviz/Map
      Color Scheme: map
      Draw Behind: false
      Enabled: true
      Name: Map
      Topic: /map
      Unreliable: false
      Use Timestamp: false
      Value: true
    - Alpha: 1
      Axes Length: 1
      Axes Radius: 0.100000001
      Class: rviz/Pose
      Color: 255; 25; 0
      Enabled: true
      Head Length: 0.300000012
      Head Radius: 0.100000001
      Name: Pose
      Shaft Length: 1
      Shaft Radius: 0.0500000007
      Shape: Arrow
      Topic: /move_base_simple/goal
      Unreliable: false
      Value: true
    - Angle Tolerance: 0.100000001
      Class: rviz/Odometry
      Covariance:
        Orientation:
          Alpha: 0.5
          Color: 255; 255; 127
          Color Style: Unique
          Frame: Local
          Offset: 1
          Scale: 1
          Value: true
        Position:
          Alpha: 0.300000012
          Color: 204; 51; 204
          Scale: 1
          Value: true
        Value: true
      Enabled: true
      Keep: 100
      Name: Odometry
      Position Tolerance: 0.100000001
      Shape:
        Alpha: 1
        Axes Length: 1
        Axes Radius: 0.100000001
        Color: 255; 25; 0
        Head Length: 0.300000012
        Head Radius: 0.100000001
        Shaft Length: 1
        Shaft Radius: 0.0500000007
        Value: Arrow
      Topic: /vesc/odom
      Unreliable: false
      Value: true
    - Alpha: 1
      Autocompute Intensity Bounds: true
      Autocompute Value Bounds:
        Max Value: 10
        Min Value: -10
        Value: true
      Axis: Z
      Channel Name: intensity
      Class: rviz/LaserScan
      Color: 255; 255; 255
      Color Transformer: Intensity
      Decay Time: 0
      Enabled: true
      Invert Rainbow: false
      Max Color: 255; 255; 255
      Max Intensity: 0
      Min Color: 0; 0; 0
      Min Intensity: 0
      Name: LaserScan
      Position Transformer: XYZ
      Queue Size: 10
      Selectable: true
      Size (Pixels): 3
      Size (m): 0.100000001
      Style: Flat Squares
      Topic: /scan
      Unreliable: false
      Use Fixed Frame: true
      Use rainbow: true
      Value: true
    - Alpha: 1
      Buffer Length: 1
      Class: rviz/Path
      Color: 25; 255; 0
      Enabled: true
      Head Diameter: 0.300000012
      Head Length: 0.200000003
      Length: 0.300000012
      Line Style: Lines
      Line Width: 0.0299999993
      Name: Path
      Offset:
        X: 0
        Y: 0
        Z: 0
      Pose Color: 255; 85; 255
      Pose Style: None
      Radius: 0.0299999993
      Shaft Diameter: 0.100000001
      Shaft Length: 0.100000001
      Topic: /move_base/TebLocalPlannerROS/global_plan
      Unreliable: false
      Value: true
    - Alpha: 0.699999988
      Class: rviz/Map
      Color Scheme: map
      Draw Behind: false
      Enabled: true
      Name: Map
      Topic: /move_base/local_costmap/costmap
      Unreliable: false
      Use Timestamp: false
      Value: true
    - Alpha: 1
      Axes Length: 1
      Axes Radius: 0.100000001
      Class: rviz/Pose
      Color: 255; 25; 0
      Enabled: true
      Head Length: 0.300000012
      Head Radius: 0.100000001
      Name: Pose
      Shaft Length: 1
      Shaft Radius: 0.0500000007
      Shape: Arrow
      Topic: /move_base/current_goal
      Unreliable: false
      Value: true
    - Alpha: 1
      Arrow Length: 0.300000012
      Axes Length: 0.300000012
      Axes Radius: 0.00999999978
      Class: rviz/PoseArray
      Color: 255; 25; 0
      Enabled: true
      Head Length: 0.0700000003
      Head Radius: 0.0299999993
      Name: PoseArray
      Shaft Length: 0.230000004
      Shaft Radius: 0.00999999978
      Shape: Arrow (Flat)
      Topic: /move_base/TebLocalPlannerROS/teb_poses
      Unreliable: false
      Value: true
  Enabled: true
  Global Options:
    Background Color: 48; 48; 48
    Default Light: true
    Fixed Frame: map
    Frame Rate: 30
  Name: root
  Tools:
    - Class: rviz/Interact
      Hide Inactive Objects: true
    - Class: rviz/MoveCamera
    - Class: rviz/Select
    - Class: rviz/FocusCamera
    - Class: rviz/Measure
    - Class: rviz/SetInitialPose
      Topic: /initialpose
    - Class: rviz/SetGoal
      Topic: /move_base_simple/goal
    - Class: rviz/PublishPoint
      Single click: true
      Topic: /clicked_point
  Value: true
  Views:
    Current:
      Class: rviz/Orbit
      Distance: 4.41030741
      Enable Stereo Rendering:
        Stereo Eye Separation: 0.0599999987
        Stereo Focal Distance: 1
        Swap Stereo Eyes: false
        Value: false
      Focal Point:
        X: -0.749346972
        Y: -3.23726511
        Z: 2.81896186
      Focal Shape Fixed Size: true
      Focal Shape Size: 0.0500000007
      Invert Z Axis: false
      Name: Current View
      Near Clip Distance: 0.00999999978
      Pitch: 1.13039768
      Target Frame: <Fixed Frame>
      Value: Orbit (rviz)
      Yaw: 6.17858267
    Saved: ~
Window Geometry:
  Displays:
    collapsed: false
  Height: 1056
  Hide Left Dock: false
  Hide Right Dock: false
  QMainWindow State: 000000ff00000000fd00000004000000000000016a00000396fc0200000008fb0000001200530065006c0065006300740069006f006e00000001e10000009b0000006100fffffffb0000001e0054006f006f006c002000500072006f007000650072007400690065007302000001ed000001df00000185000000a3fb000000120056006900650077007300200054006f006f02000001df000002110000018500000122fb000000200054006f006f006c002000500072006f0070006500720074006900650073003203000002880000011d000002210000017afb000000100044006900730070006c006100790073010000002800000396000000d700fffffffb0000002000730065006c0065006300740069006f006e00200062007500660066006500720200000138000000aa0000023a00000294fb00000014005700690064006500530074006500720065006f02000000e6000000d2000003ee0000030bfb0000000c004b0069006e0065006300740200000186000001060000030c00000261000000010000010f00000396fc0200000003fb0000001e0054006f006f006c002000500072006f00700065007200740069006500730100000041000000780000000000000000fb0000000a00560069006500770073010000002800000396000000ad00fffffffb0000001200530065006c0065006300740069006f006e010000025a000000b200000000000000000000000200000490000000a9fc0100000001fb0000000a00560069006500770073030000004e00000080000002e100000197000000030000073f0000003efc0100000002fb0000000800540069006d006501000000000000073f0000030000fffffffb0000000800540069006d00650100000000000004500000000000000000000004ba0000039600000004000000040000000800000008fc0000000100000002000000010000000a0054006f006f006c00730100000000ffffffff0000000000000000
  Selection:
    collapsed: false
  Time:
    collapsed: false
  Tool Properties:
    collapsed: false
  Views:
    collapsed: false
  Width: 1855
  X: 65
  Y: 24
    最后的脚本文件,用来让机器人根据规划好的路径移动到终点。

    path_pursuit.py :
#!/usr/bin/env python

import rospy
from nav_msgs.msg import Path, Odometry
from ackermann_msgs.msg import AckermannDriveStamped
from geometry_msgs.msg import PoseStamped, PoseArray
import math
import numpy as np
from numpy import linalg as LA
from tf.transformations import euler_from_quaternion, quaternion_from_euler
import csv
import os

class following_path:
    def __init__(self):
        self.current_pose = rospy.Subscriber('/pf/pose/odom', Odometry, self.callback_read_current_position, queue_size=1)
        self.Pose = []
        self.path_pose = rospy.Subscriber('/move_base/TebLocalPlannerROS/global_plan', Path, self.callback_read_path, queue_size=1)
        self.path_info = []
        self.Goal = []
        self.navigation_input = rospy.Publisher('/vesc/low_level/ackermann_cmd_mux/input/navigation', AckermannDriveStamped, queue_size=1)
        self.reach_goal = False
        self.MAX_VELOCITY = 0.5
        self.MIN_VELOCITY = 0
        self.max_angle = 1
        self.steering_velocity = 1
        self.jerk = 0.0
        self.acceleration = 0.0
        self.LOOKAHEAD_DISTANCE = 0.4
        self.Low_Speed_Mode = False

    def callback_read_path(self, data):
        # Organize the pose message and only ask for (x,y) and orientation
        # Read the Real time pose message and load them into path_info
        self.path_info = []
        path_array = data.poses
        for path_pose in path_array:
            path_x = path_pose.pose.position.x
            path_y = path_pose.pose.position.y
            path_qx = path_pose.pose.orientation.x
            path_qy = path_pose.pose.orientation.y
            path_qz = path_pose.pose.orientation.z
            path_qw = path_pose.pose.orientation.w
            path_quaternion = (path_qx, path_qy, path_qz, path_qw)
            path_euler = euler_from_quaternion(path_quaternion)
            path_yaw = path_euler[2]
            self.path_info.append([float(path_x), float(path_y), float(path_yaw)])
        self.Goal = list(self.path_info[-1]) # Set the last pose of the global path as goal location

    def callback_read_current_position(self, data):
        if self.reach_goal: # Stop updating the information.
            self.path_info = []
            self.Pose = []
            ackermann_control = AckermannDriveStamped()
            ackermann_control.drive.speed = 0.0
            ackermann_control.drive.steering_angle = 0.0
            ackermann_control.drive.steering_angle_velocity = 0.0

        if not len(self.path_info) == 0:
            # Read the path information to path_point list
            path_points_x = [float(point[0]) for point in self.path_info]
            path_points_y = [float(point[1]) for point in self.path_info]
            path_points_w = [float(point[2]) for point in self.path_info]

            # Read the current pose of the car from particle filter
            x = data.pose.pose.position.x
            y = data.pose.pose.position.y
            qx = data.pose.pose.orientation.x
            qy = data.pose.pose.orientation.y
            qz = data.pose.pose.orientation.z
            qw = data.pose.pose.orientation.w

            # Convert the quaternion angle to eular angle
            quaternion = (qx,qy,qz,qw)
            euler = euler_from_quaternion(quaternion)
            yaw = euler[2]
            self.Pose = [float(x), float(y), float(yaw)]

            if self.dist(self.Goal, self.Pose) < 1.0:
                self.Low_Speed_Mode = True
                if self.dist(self.Goal, self.Pose) < 0.3:
                    self.reach_goal = True
                    print('Goal Reached!')
                else:
                    print('Low Speed Mode ON!')
            else:
                self.Low_Speed_Mode = False

            # 2. Find the path point closest to the vehichle tat is >= 1 lookahead distance from vehicle's current location.
            dist_array = np.zeros(len(path_points_x))

            for i in range(len(path_points_x)):
                dist_array[i] = self.dist((path_points_x[i], path_points_y[i]), (x,y))

            goal = np.argmin(dist_array) # Assume the closet point as the goal point at first
            goal_array = np.where((dist_array < (self.LOOKAHEAD_DISTANCE + 0.3)) & (dist_array > (self.LOOKAHEAD_DISTANCE - 0.3)))[0]
            for id in goal_array:
                v1 = [path_points_x[id] - x, path_points_y[id] - y]
                v2 = [math.cos(yaw), math.sin(yaw)]
                diff_angle = self.find_angle(v1,v2)
                if abs(diff_angle) < np.pi/4: # Check if the one that is the cloest to the lookahead direction
                    goal = id
                    break

            L = dist_array[goal]
            # 3. Transform the goal point to vehicle coordinates.
            glob_x = path_points_x[goal] - x
            glob_y = path_points_y[goal] - y
            goal_x_veh_coord = glob_x*np.cos(yaw) + glob_y*np.sin(yaw)
            goal_y_veh_coord = glob_y*np.cos(yaw) - glob_x*np.sin(yaw)

            # 4. Calculate the curvature = 1/r = 2x/l^2
            # The curvature is transformed into steering wheel angle by the vehicle on board controller.
            # Hint: You may need to flip to negative because for the VESC a right steering angle has a negative value.
            diff_angle = path_points_w[goal] - yaw # Find the turning angle
            r = L/(2*math.sin(diff_angle)) # Calculate the turning radius
            angle = 2 * math.atan(0.4/r) # Find the wheel turning radius

            angle = np.clip(angle, -self.max_angle, self.max_angle) # 0.4189 radians = 24 degrees because car can only turn 24 degrees max
            angle = (0 if abs(angle) < 0.1 else angle)
            VELOCITY = self.speed_control(angle, self.MIN_VELOCITY, self.MAX_VELOCITY)

            # Write the Velocity and angle data into the ackermann message
            ackermann_control = AckermannDriveStamped()
            ackermann_control.drive.speed = VELOCITY
            ackermann_control.drive.steering_angle = angle
            ackermann_control.drive.steering_angle_velocity = self.steering_velocity
        else:
            ackermann_control = AckermannDriveStamped()
            ackermann_control.drive.speed = 0.0
            ackermann_control.drive.steering_angle = 0.0
            ackermann_control.drive.steering_angle_velocity = 0.0

        self.navigation_input.publish(ackermann_control)

    # Computes the Euclidean distance between two 2D points p1 and p2
    def dist(self, p1, p2):
        try:
            return np.sqrt((p1[0] - p2[0]) ** 2 + (p1[1] - p2[1]) ** 2)
        except:
            return 0.5

    # Compute the angle between car direction and goal direction
    def find_angle(self, v1, v2):
        cos_ang = np.dot(v1, v2)
        sin_ang = LA.norm(np.cross(v1, v2))
        return np.arctan2(sin_ang, cos_ang)

    # Control the speed of the car within the speed limit
    def speed_control(self, angle, MIN_VELOCITY, MAX_VELOCITY):
        # Assume the speed change linearly with respect to yaw angle
        if self.Low_Speed_Mode:
            Velocity = 0.5
        else:
            k = (MIN_VELOCITY - MAX_VELOCITY)/self.max_angle + 0.5
            Velocity = k * abs(angle) + MAX_VELOCITY
        return Velocity


if __name__ == "__main__":

    rospy.init_node("pursuit_path")
    following_path()
    rospy.spin()
都完成后打开新终端,启动导航的launch文件:
(base) hjb@jl16k:~$ cd catkin_gazebo_ws/
(base) hjb@jl16k:~/catkin_gazebo_ws$ source devel/setup.bash
(base) hjb@jl16k:~/catkin_gazebo_ws$ roslaunch racecar_gazebo racecar_house_and_car_world_navigation.launch
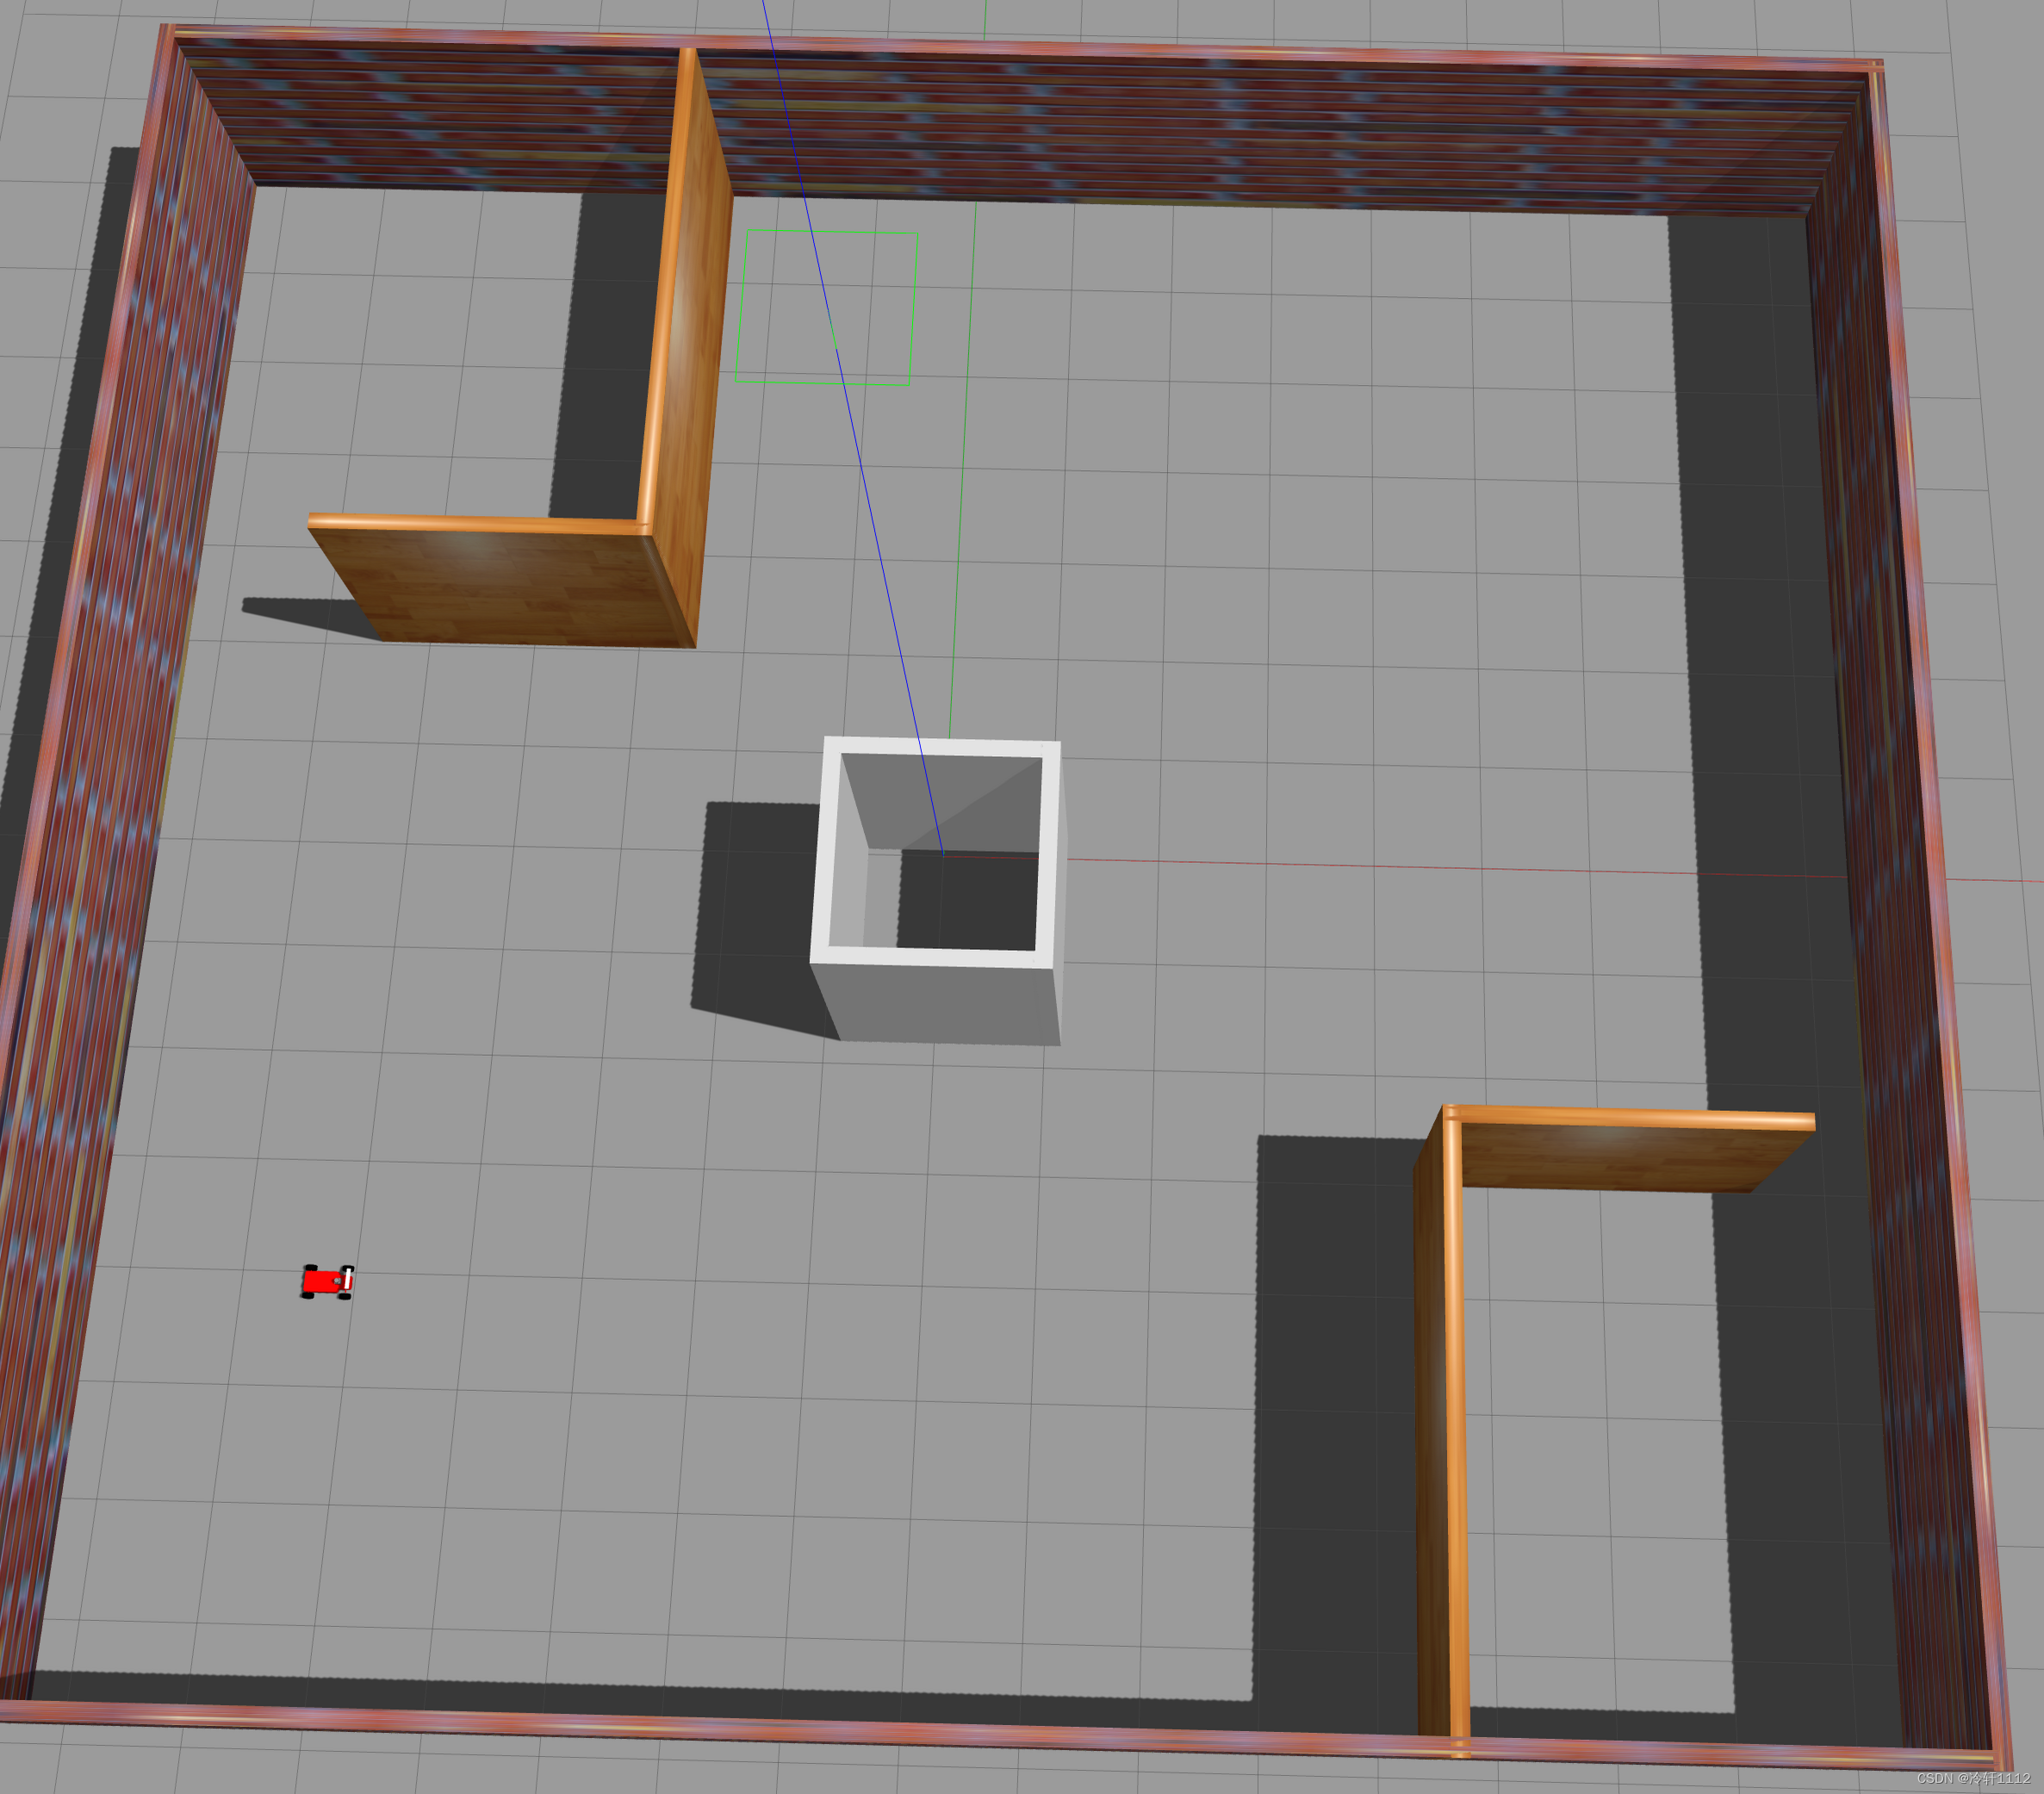
再打开一个终端,启动rivz:
(base) hjb@jl16k:~$ cd catkin_gazebo_ws/
(base) hjb@jl16k:~/catkin_gazebo_ws$ source devel/setup.bash
(base) hjb@jl16k:~/catkin_gazebo_ws$ roslaunch racecar_gazebo racecar_rviz.launch
 在rviz中点击下图箭头所指的2D Nav Goal,然后将箭头方向拉成像我一样的 ,当然其他方向也ok的。就会看到算法所得到的路径,绿色那条线。

再打开一个新终端:
(base) hjb@jl16k:~$ cd catkin_gazebo_ws/
(base) hjb@jl16k:~/catkin_gazebo_ws$ source devel/setup.bash
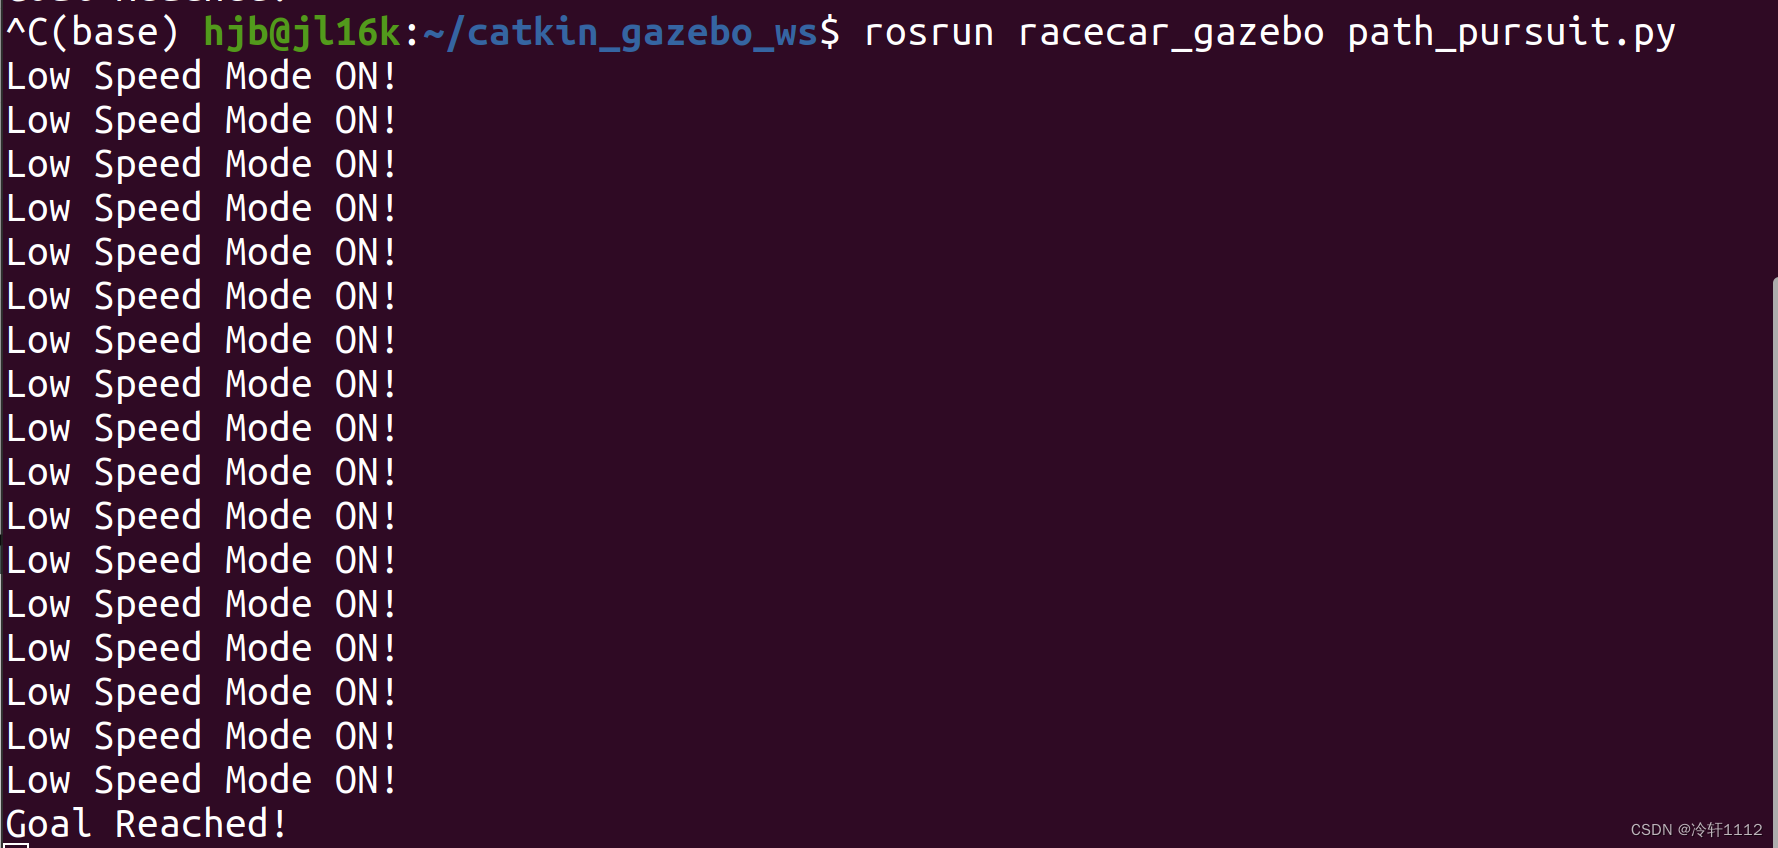
(base) hjb@jl16k:~/catkin_gazebo_ws$ rosrun racecar_gazebo path_pursuit.py
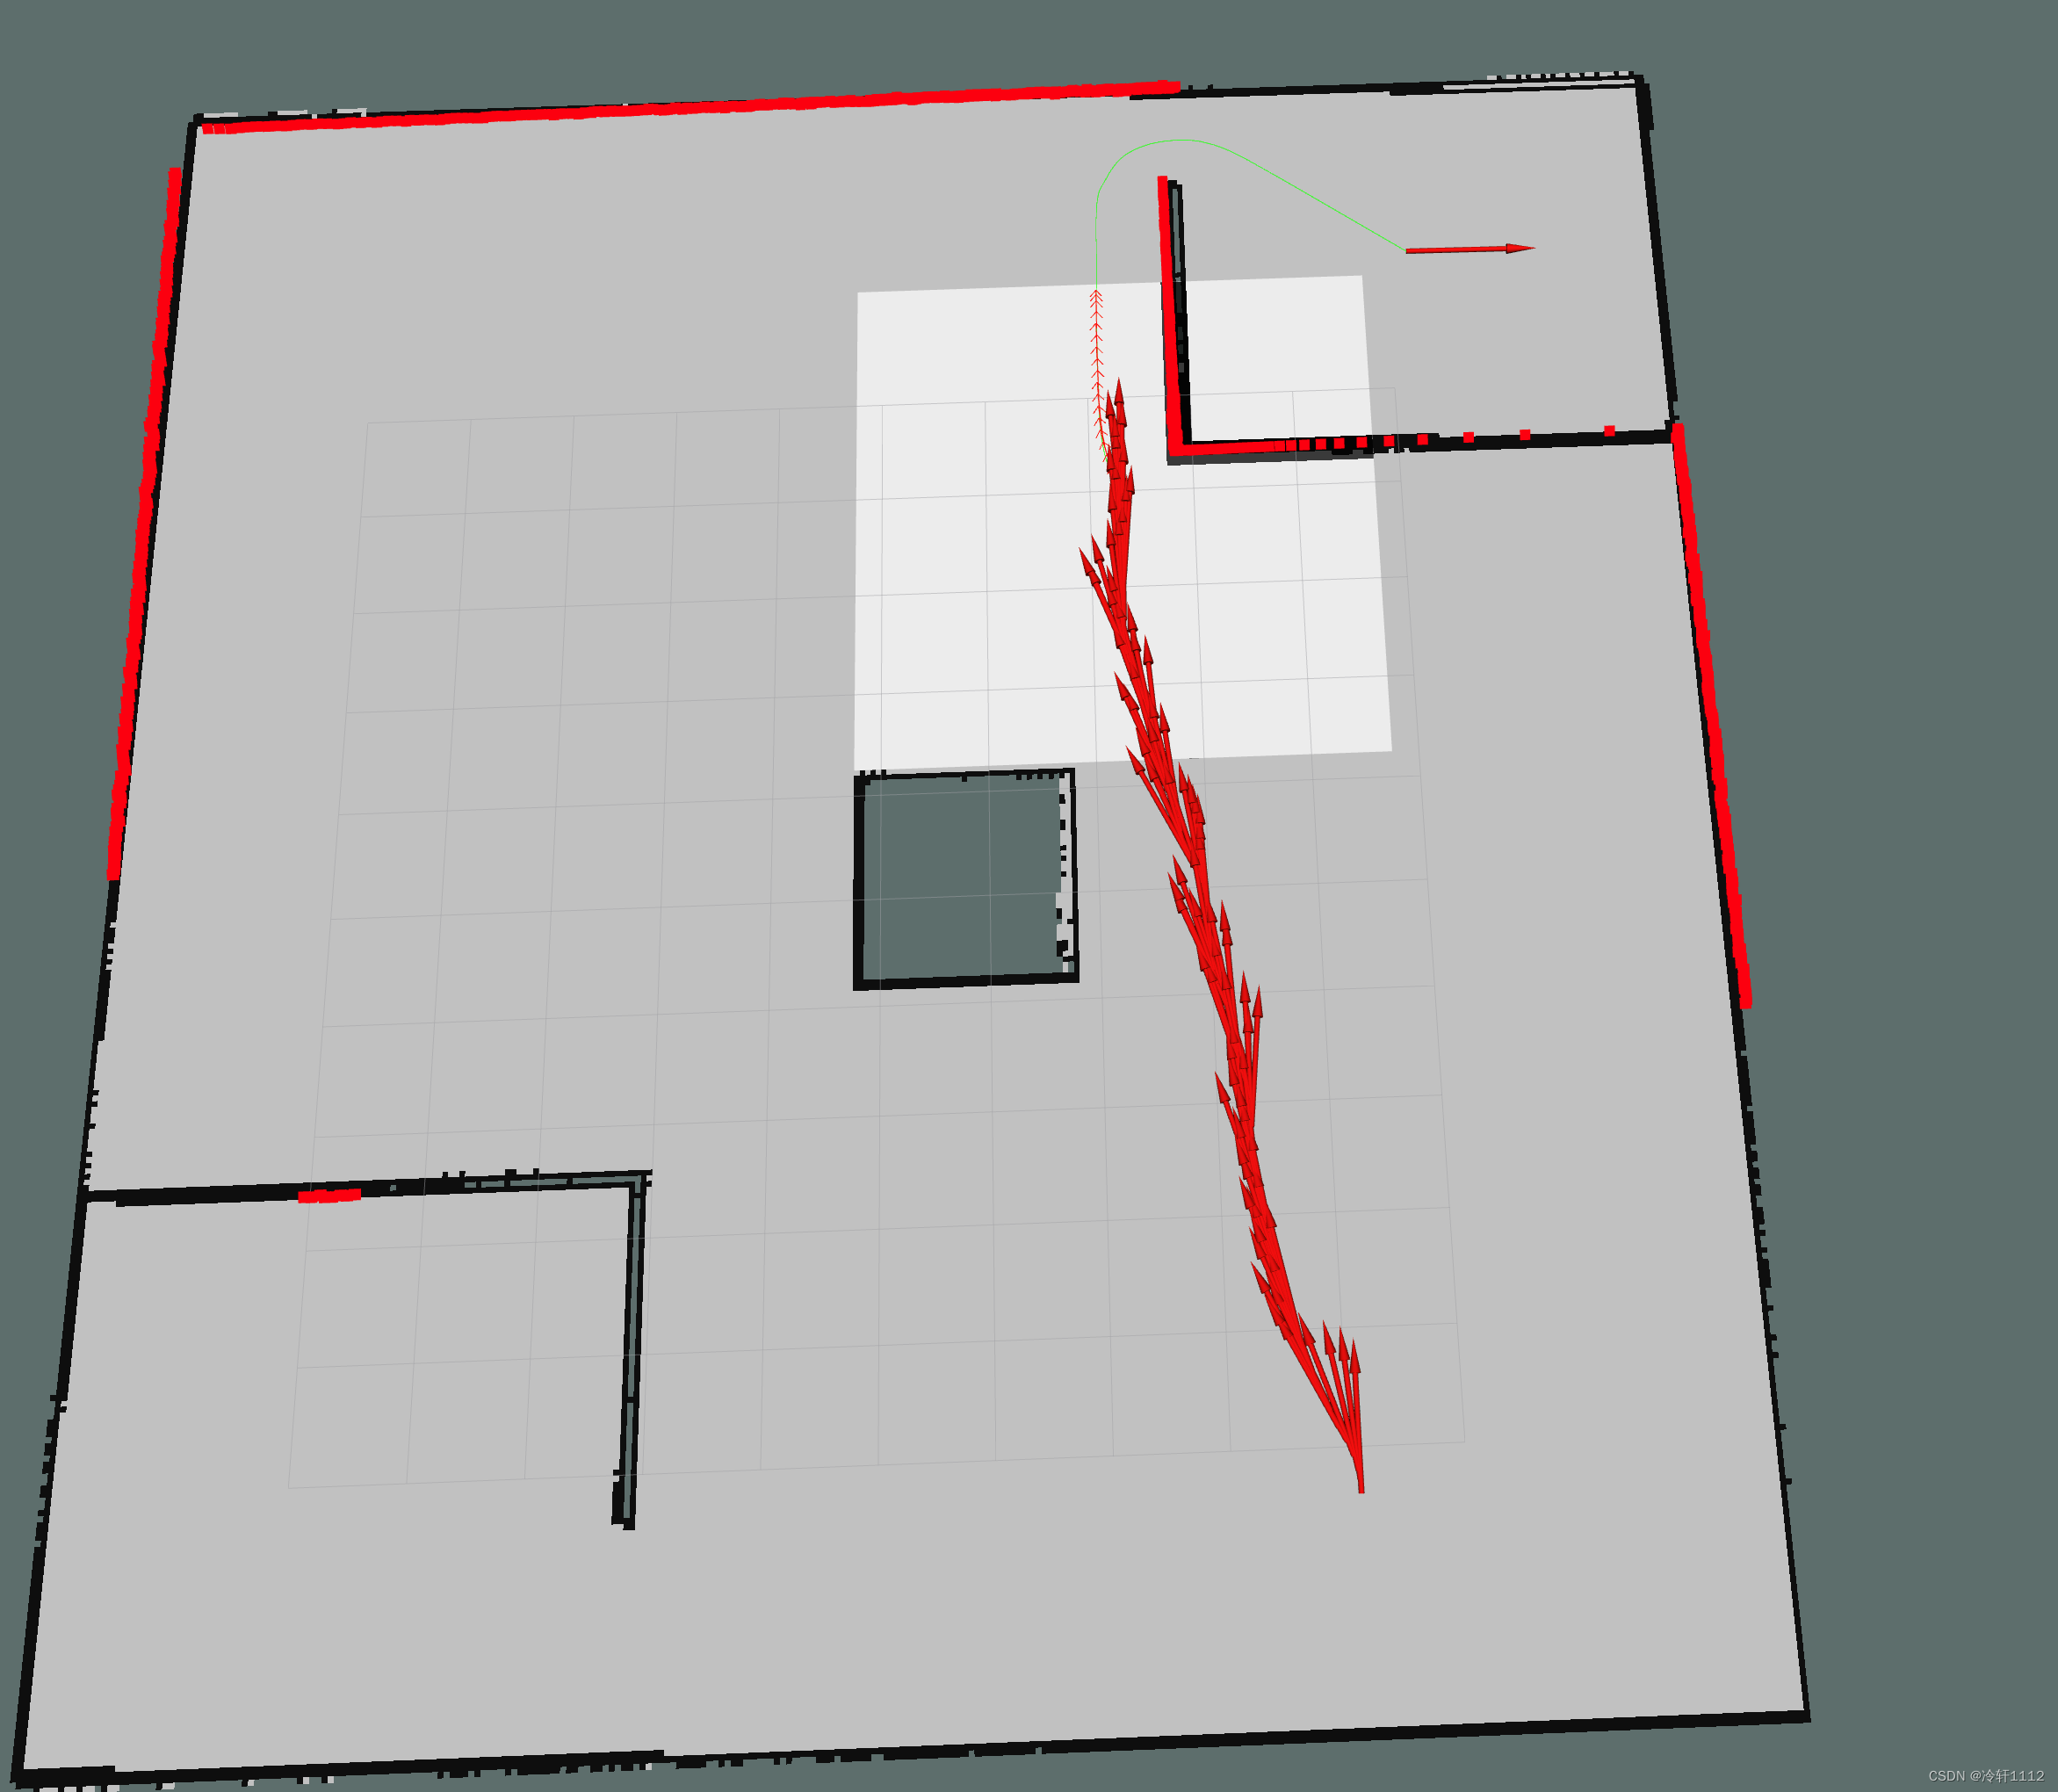
3.结束
一次完整的仿真。
版权归原作者 冷轩1112 所有, 如有侵权,请联系我们删除。