写在前面
在之前的文章中我们有介绍过
SpringAI
这个项目。
SpringAI
是Spring 官方社区项目,旨在简化 Java AI 应用程序开发,
让 Java 开发者像使用 Spring 开发普通应用一样开发 AI 应用。
而
SpringAI
主要面向的是国外的各种大模型接入,对于国内开发者可能不太友好。
于是乎,
Spring Cloud Alibaba AI
便问世了,
Spring Cloud Alibaba AI
以 Spring AI 为基础,并在此基础上提供阿里云通义系列大模型全面适配,
让用户在 5 分钟内开发基于通义大模型的 Java AI 应用。
一、Spring AI 简介
可能有些小伙伴已经忘记了
SpringAI
是啥?我们这儿再来简单回顾一下。
Spring AI是一个面向AI工程的应用框架。其目标是将可移植性和模块化设计等设计原则应用于AI领域的Spring生态系统,
并将
POJO
作为应用程序的构建块推广到AI领域。
转换为人话来说就是:Spring出了一个AI框架,帮助我们快速调用AI,从而实现各种功能场景。
二、Spring Cloud Alibaba AI 简介
Spring Cloud Alibaba AI
以
Spring AI
为基础,并在此基础上,基于 Spring AI 0.8.1 版本 API 完成通义系列大模型的接入
实现阿里云通义系列大模型全面适配。
在当前最新版本中,
Spring Cloud Alibaba AI
主要完成了几种常见生成式模型的适配,包括对话、文生图、文生语音等,
开发者可以使用
Spring Cloud Alibaba AI
开发基于通义的聊天、图片或语音生成 AI 应用,
框架还提供
OutParser
、
Prompt Template
、
Stuff
等实用能力。
三、第一个Spring AI应用开发
① 新建maven 项目
注: 在创建项目的时候,jdk版本必须选择17+

② 添加依赖
<dependency><groupId>com.alibaba.cloud</groupId><artifactId>spring-cloud-alibaba-dependencies</artifactId><version>2023.0.1.0</version><type>pom</type><scope>import</scope></dependency><dependency><groupId>com.alibaba.cloud</groupId><artifactId>spring-cloud-starter-alibaba-ai</artifactId><version>2023.0.1.0</version></dependency>
注: 这里我们需要配置镜像源,否则是没法下载依赖的。会报如下错误
spring-ai: 0.8.1 dependency not found
<repositories><repository><id>spring-milestones</id><name>Spring Milestones</name><url>https://repo.spring.io/milestone</url><snapshots><enabled>false</enabled></snapshots></repository></repositories>
③ 在
application.yml
配置文件中添加
api-key
spring:cloud:ai:tongyi:api-key: 你自己申请的api-key
小伙伴如果不知道在哪申请,我把申请连接也放这儿了
https://dashscope.console.aliyun.com/apiKey
操作步骤:https://help.aliyun.com/zh/dashscope/developer-reference/activate-dashscope-and-create-an-api-key
④ 新建
TongYiController
类,代码如下
@RestController@RequestMapping("/ai")@CrossOrigin@Slf4jpublicclassTongYiController{@Autowired@Qualifier("tongYiSimpleServiceImpl")privateTongYiService tongYiSimpleService;@GetMapping("/example")publicStringcompletion(@RequestParam(value ="message", defaultValue ="Tell me a joke")String message){return tongYiSimpleService.completion(message);}}
⑤ 新建
TongYiService
接口,代码如下
publicinterfaceTongYiService{Stringcompletion(String message);}
⑥ 新建
TongYiSimpleServiceImpl
实现类,代码如下
@Service@Slf4jpublicclassTongYiSimpleServiceImplimplementsTongYiService{privatefinalChatClient chatClient;@AutowiredpublicTongYiSimpleServiceImpl(ChatClient chatClient,StreamingChatClient streamingChatClient){this.chatClient = chatClient;}@OverridepublicStringcompletion(String message){Prompt prompt =newPrompt(newUserMessage(message));return chatClient.call(prompt).getResult().getOutput().getContent();}}
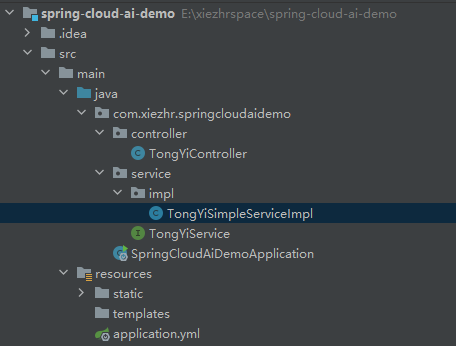
到这儿我们一个简单的AI应用已经开发完成了,最终项目结构如下
四、运行AI应用
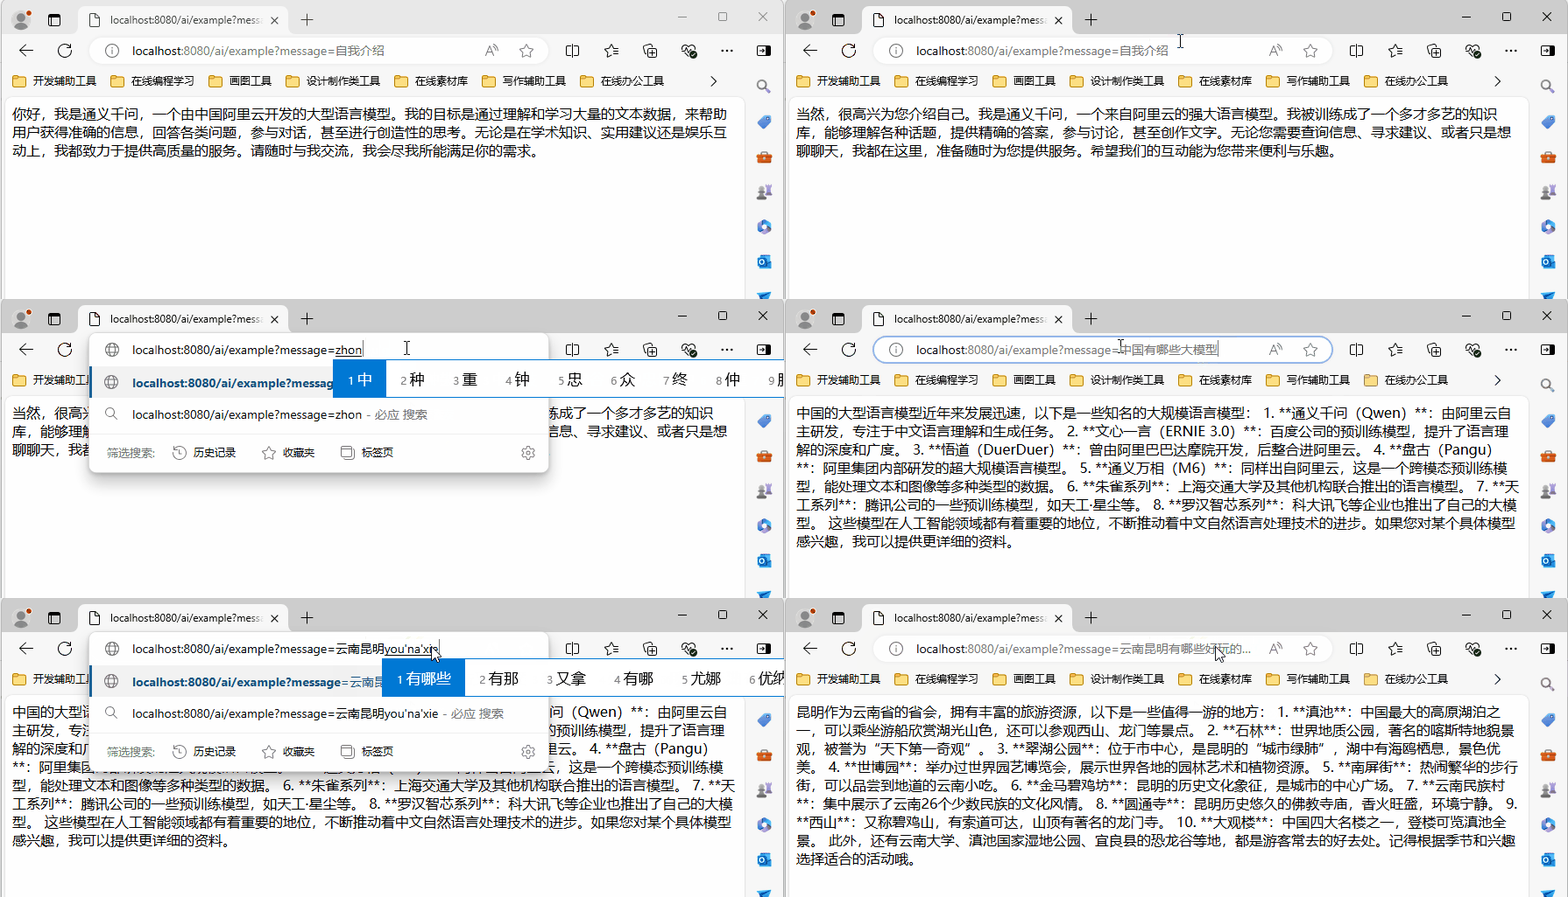
启动服务,我们只需要在浏览器中输入:http://localhost:8080/ai/example 即可与AI交互。
① 不带message参数,则message=Tell me a joke,应用随机返回一个笑话

② 我们在浏览器中输入:http://localhost:8080/ai/example?message=对话内容
五、前端页面对话模式
我们只需要在
resources/static
路径下添加一个index.html前端页面,即可拥有根据美观的交互体验。
index.html
代码官方
github
仓库中已给出样例,由于代码比较长,这里就不贴代码了
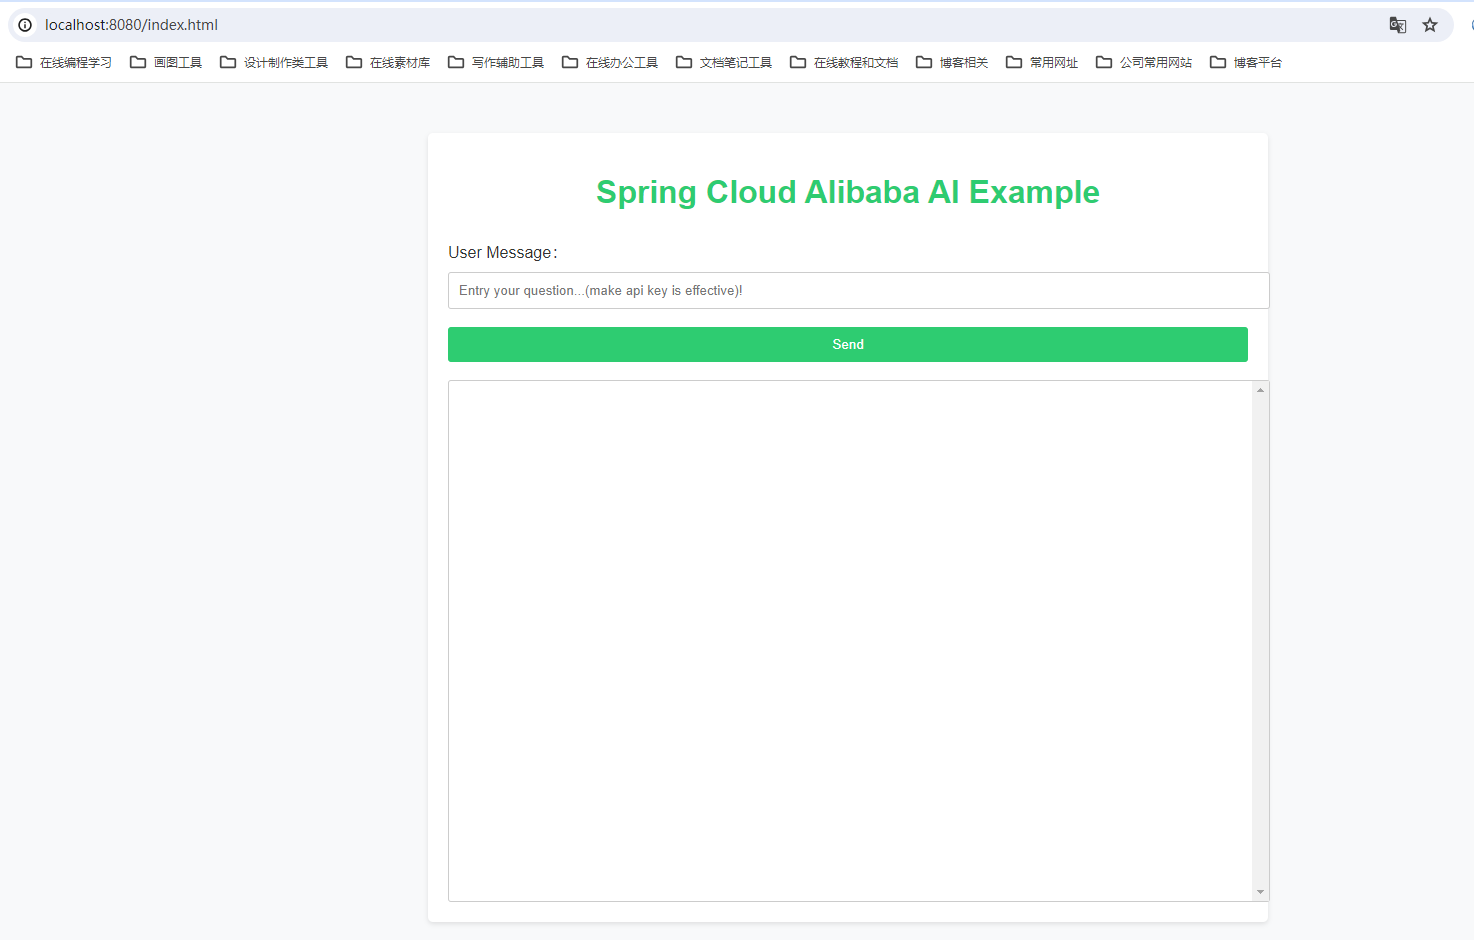
添加完静态页面之后,我们浏览器中输入:http://localhost:8080/index.html 就可以得到一个美观的交互界面
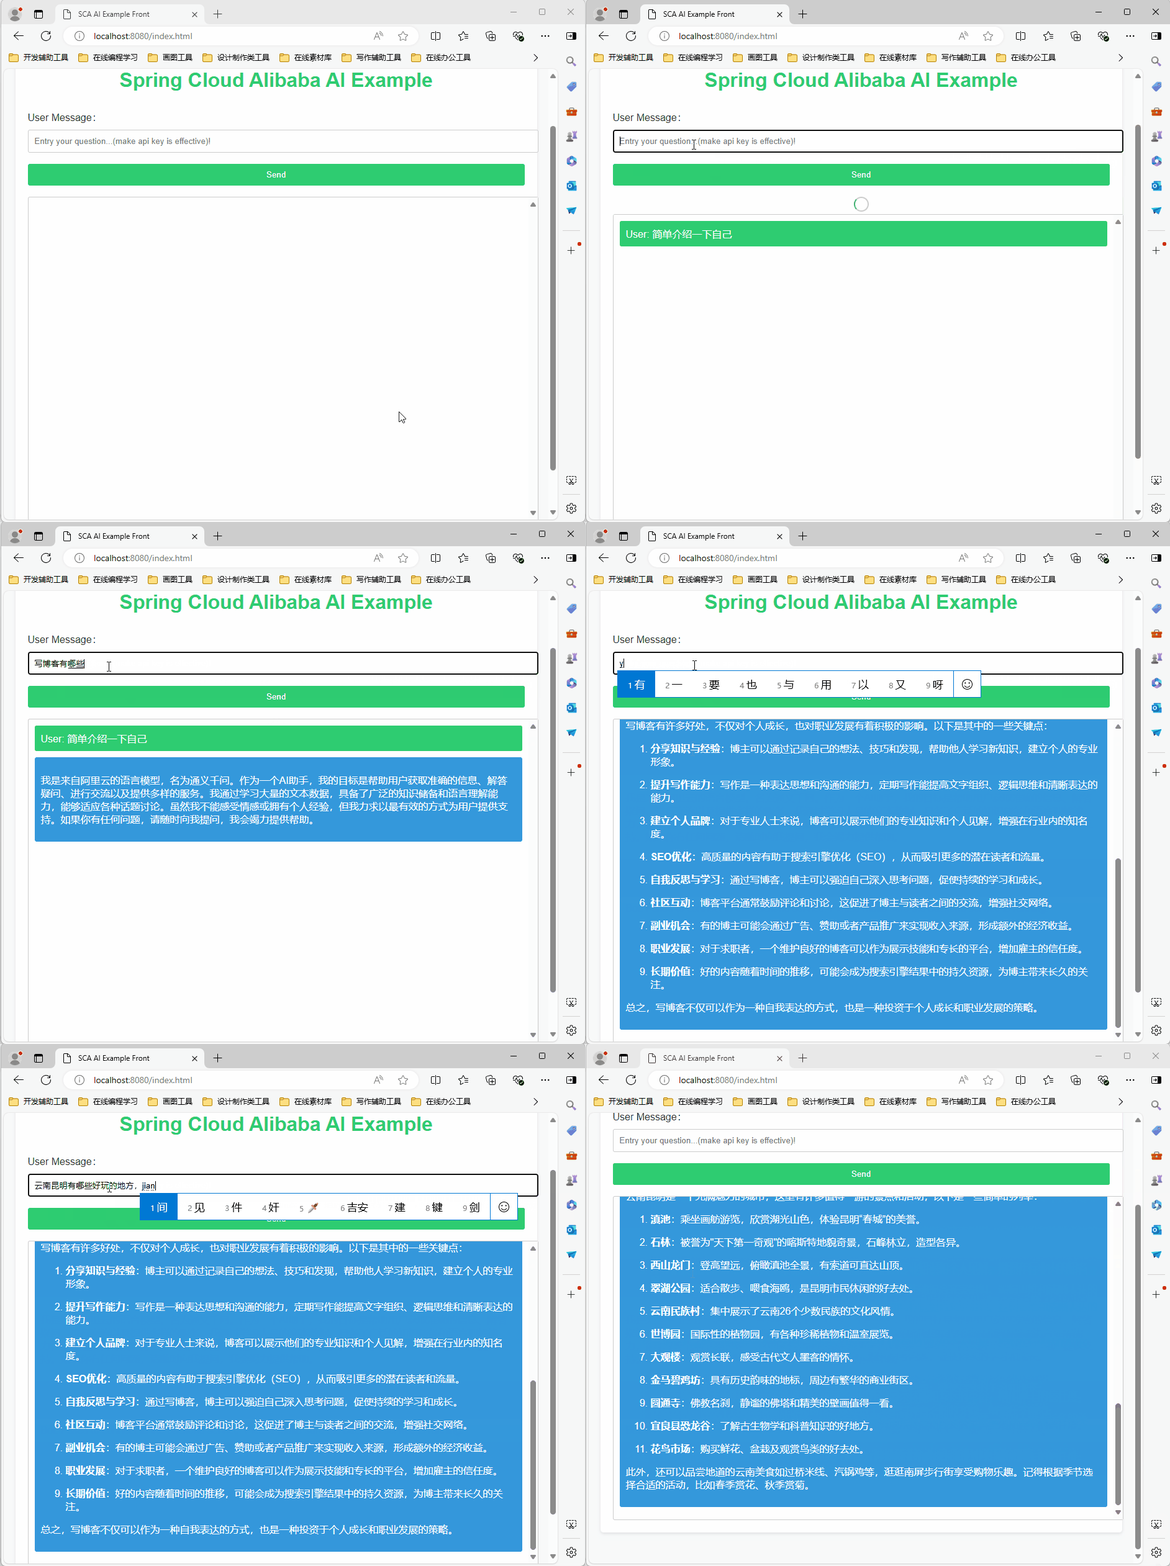
接下来,我们来实际体验一下
六、其他模型
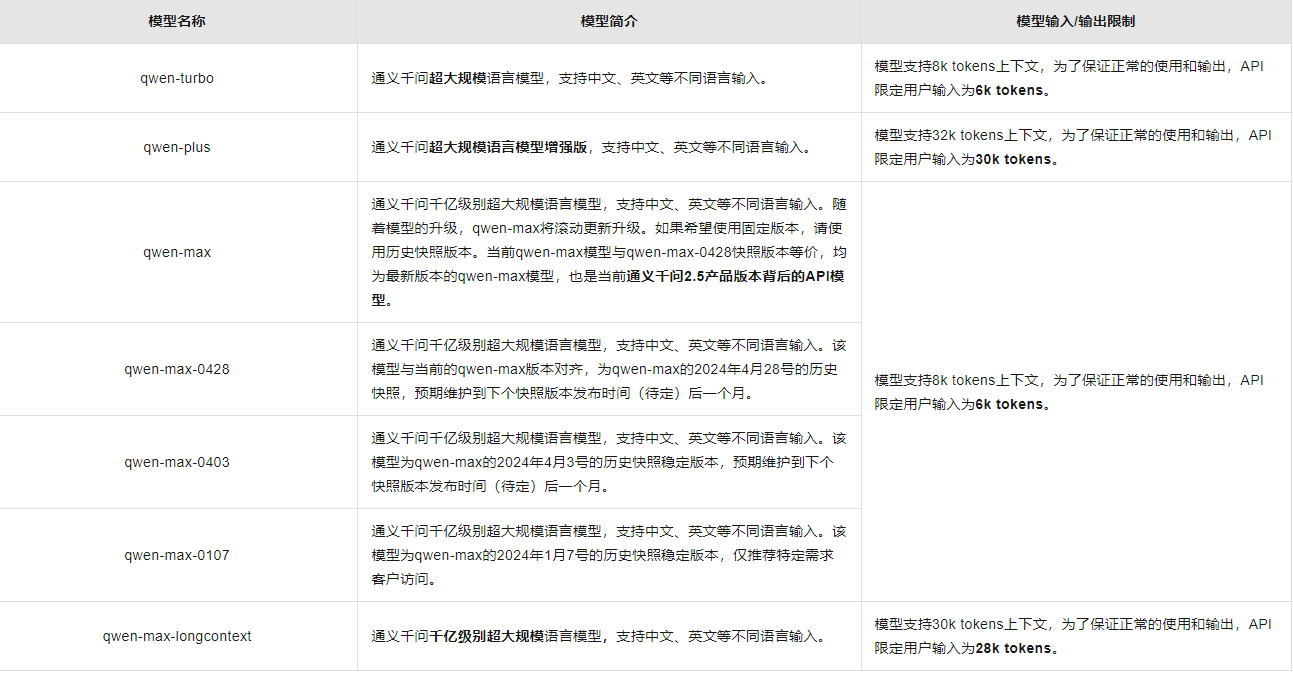
上面章节中我们只简单体验了对话模型,阿里还有很多其他模型。由于篇幅原因这里就不一一带大家一起体验了。
应用场景:

各个模型概述:
七、怎么样快速接入大模型
各种应用场景阿里官方GitHub都给出了接入例子
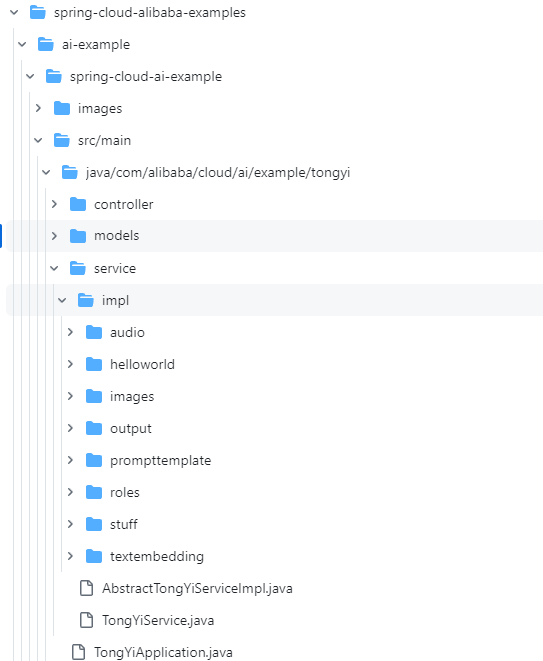
感兴趣的小伙伴可以自己到上面github 仓库看代码研究
本期内容到这儿就结束了,★,°:.☆( ̄▽ ̄)/$:.°★ 。 希望对您有所帮助
我们下期再见 ヾ(•ω•`)o (●’◡’●)
版权归原作者 xie_zhr 所有, 如有侵权,请联系我们删除。