
Numpy 长期以来一直是 Python 开发人员进行数组操作的通用选择,它是基于C语言构建的这使得它成为执行数组操作的快速和可靠的选择,并且它已经成为机器学习和数据科学必备的基础库。
在本文中,我整理了一些 NumPy 代码的片段,这些代码片段都是在日常开发中经常用到的。
1、创建数组
import numpy as np

new_array = np.array([1,2,3])

print(new_array)

# Output[1 2 3]
2、获取 Numpy 数组的形状、维度和大小
# shape
print(new_array.shape)

# dimensions
print(new_array.ndim)

# size
print(new_array.size)

# Output(3,)
1
3
3、查看Numpy数组中元素的类型
array = np.arange(0,10,1)
print(array.dtype)

# Output
int64
4、获取数组中每个元素的占用字节大小
array = np.array([1,2])
print(array.itemsize)

# Output
8
5、创建时指定数组的类型
array = np.array([[1,2], [3,4]], dtype=complex)
array

# Output
array([[1.+0.j, 2.+0.j],
       [3.+0.j, 4.+0.j]])
6、使用占位符创建数组
# 全零数组
array = np.zeros((3,4))
print(array)
print("---")

# 全1数组
array = np.ones((1,2))
print(array)
print("---")

# shape (2,3)的空数组,随机产生数据
array = np.empty((2,3))
print(array)
print("---")

# Output
[[0. 0. 0. 0.]
 [0. 0. 0. 0.]
 [0. 0. 0. 0.]]
---
[[1. 1.]]
---
[[4.67280967e-310 0.00000000e+000 0.00000000e+000]
 [0.00000000e+000 0.00000000e+000 0.00000000e+000]]
---
7、创建序列
# 使用 np.arange 创建一个从 0 到 42 个元素的序列,步长1
array = np.arange(0,42,1)
print(array)
print("---")

# 使用 np.linspace 在 0 到 100 之间插入 42 个元素
array = np.linspace(0,100,42)
print(array)
print("---")

# Output
[ 0  1  2  3  4  5  6  7  8  9 10 11 12 13 14 15 16 17 18 19 20 21 22 23
 24 25 26 27 28 29 30 31 32 33 34 35 36 37 38 39 40 41]
---
[  0.           2.43902439   4.87804878   7.31707317   9.75609756
  12.19512195  14.63414634  17.07317073  19.51219512  21.95121951
  24.3902439   26.82926829  29.26829268  31.70731707  34.14634146
  36.58536585  39.02439024  41.46341463  43.90243902  46.34146341
  48.7804878   51.2195122   53.65853659  56.09756098  58.53658537
  60.97560976  63.41463415  65.85365854  68.29268293  70.73170732
  73.17073171  75.6097561   78.04878049  80.48780488  82.92682927
  85.36585366  87.80487805  90.24390244  92.68292683  95.12195122
  97.56097561 100.        ]
---
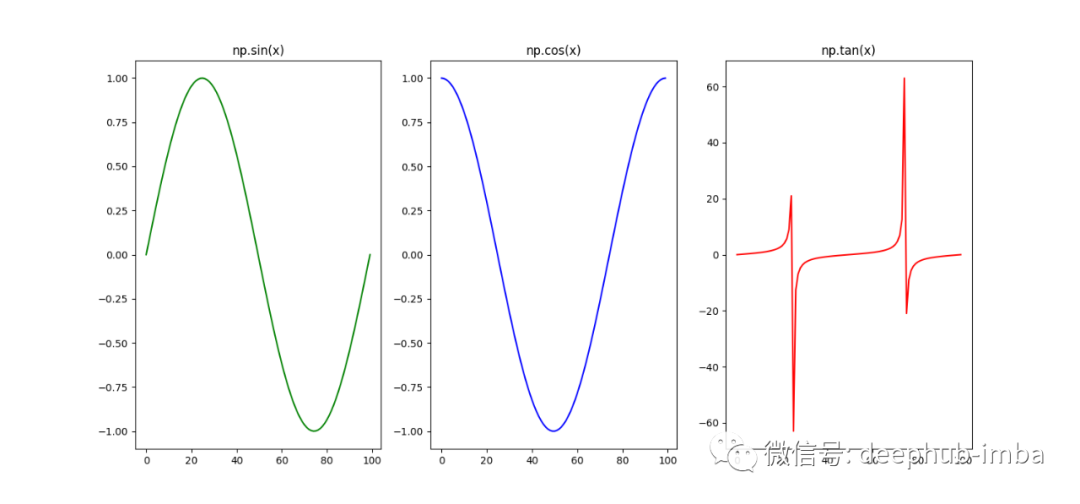
8、Numpy中的数学函数
import numpy as np
import matplotlib.pyplot as plt

# sine function
x = np.linspace(0,2*np.pi, 100)
f = np.sin(x)
plt.figure(figsize=(15,7))
plt.subplot(1,3,1)
plt.plot(f, color="green")
plt.title("np.sin(x)")

# cosine function
f = np.cos(x)
plt.subplot(1,3,2)
plt.plot(f, color="blue")
plt.title("np.cos(x)")

# tangent function
f = np.tan(x)
plt.subplot(1,3,3)
plt.plot(f, color="red")
plt.title("np.tan(x)")
plt.show()
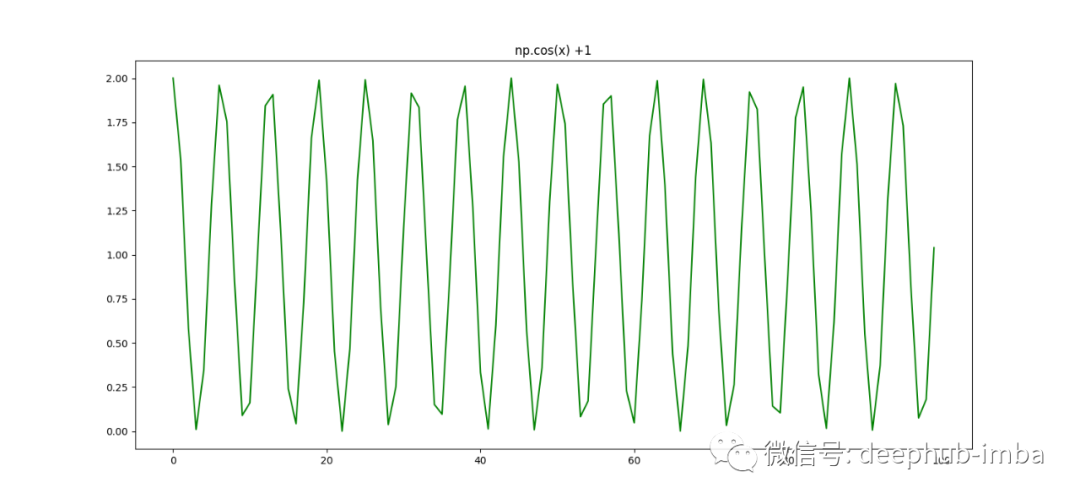
9、通过在每个坐标上执行函数来创建数组
some_function = lambda x: np.cos(x)+1
array = np.fromfunction(some_function, (100,))
plt.figure(figsize=(15,7))
plt.plot(array, color="green")
plt.title("np.cos(x) +1")
plt.show()
10、遍历Numpy数组的所有元素
a = np.arange(0,23,1)
for i in a.flat:
    print(i)


# Output
0
1
2
...
22
11、获取浮点数的下限
np.floor(10.5)

10.0
12、使用.ravel()压扁数组
array = np.full(shape=(5,5),fill_value=10)
print(array)
print("---")
print("Flattened array:")
print(array.ravel())

# Output

[[10 10 10 10 10]
 [10 10 10 10 10]
 [10 10 10 10 10]
 [10 10 10 10 10]
 [10 10 10 10 10]]
---
Flattened array:
[10 10 10 10 10 10 10 10 10 10 10 10 10 10 10 10 10 10 10 10 10 10 10 10
 10]
13、获取一个数组的转置
array = np.random.random((2,5))
print(array)
print(array.T)

[[0.18735704 0.22800582 0.02552177 0.93552346 0.20720663]
 [0.74303284 0.1897481  0.91389602 0.23099501 0.07565492]]
[[0.18735704 0.74303284]
 [0.22800582 0.1897481 ]
 [0.02552177 0.91389602]
 [0.93552346 0.23099501]
 [0.20720663 0.07565492]]
14、使用. shape()和.resize()进行重塑
a = np.random.randint(100,size=(3,4))
print(a)
a_reshaped = np.reshape(a, (1,12))
print(a_reshaped)

# 使用.resize()方法
a.resize((1,12))

# Output

[[29 18 39 24]
 [53 45 49  8]
 [90 75 61 61]]
[[29 18 39 24 53 45 49  8 90 75 61 61]]
15、将数组沿不同轴进行堆叠
a = np.random.random((2,2))
print(a)
b = np.random.random((2,2))
print(b)

# 沿垂直轴堆叠(获得更多行)
print(np.vstack((a,b)))
print(np.vstack((a,b)).shape)

# 沿水平轴堆叠(获得更多列)
print(np.hstack((a,b)))
print(np.hstack((a,b)).shape)

# column_stack列叠加
print(np.column_stack((a,b)))

# Output
[[0.67028492 0.86322792]
 [0.38906266 0.36967583]]
[[0.51419553 0.21937852]
 [0.50375453 0.31634597]]
[[0.67028492 0.86322792]
 [0.38906266 0.36967583]
 [0.51419553 0.21937852]
 [0.50375453 0.31634597]]
(4, 2)
[[0.67028492 0.86322792 0.51419553 0.21937852]
 [0.38906266 0.36967583 0.50375453 0.31634597]]
(2, 4)
[[0.67028492 0.86322792 0.51419553 0.21937852]
 [0.38906266 0.36967583 0.50375453 0.31634597]]
16、将一个数组拆分为几个较小的数组
使用hsplit,通过指定要返回的相同shape的array的数量,或者通过指定分割应该发生之后的列来沿着其横轴拆分原array。vsplit沿着垂直轴分割,其分割方式与hsplit用法相同
# 沿着水平轴将数组拆分为5个较小的数组
a = np.arange(0, 5, 1)
print("Horizontal split")
print(np.hsplit(a, 5))
print("---")

# 沿着垂直轴将数组拆分成5个更小的数组
a = np.random.random((5,5))
print("Vertical split")
print(np.vsplit(a, 5))

Horizontal split
[array([0]), array([1]), array([2]), array([3]), array([4])]
---
Vertical split
[array([[0.69059321, 0.55703093, 0.20019592, 0.19697317, 0.37278251]]), array([[0.24597633, 0.87216661, 0.634432  , 0.35326185, 0.03130537]]), array([[0.18063077, 0.45045441, 0.06882852, 0.91273837, 0.07332161]]), array([[0.61738939, 0.11291748, 0.73152623, 0.49177006, 0.95750985]]), array([[0.90212777, 0.53825846, 0.86733505, 0.76165564, 0.17337721]])]
17、数组的浅拷贝
.view() 方法创建了一个与原数组对象相同的对象,它创建了该数组的浅拷贝,浅拷贝只复制指向某个对象的指针,而不复制对象数据,新旧对象还是共享同一块内存。所以如果其中一个对象改变了内存的数值,就会影响到另一个对象,也就是说一个对象的数值改变了,其他的也会改变(使用相同的内存)。
a = np.array([
    [0,1,2,3,4],
    [5,6,7,8,9],
    [10,11,12,13,14]
    ])

array_object = np.arange(0,10,1)

shallow_copy_object = array_object.view() # shallow copy

print("Array")
print(array_object)
print(f"Id = {id(array_object)}")
print("---")

print("Shallow Copy")
print(shallow_copy_object)
print(f"Id = {id(shallow_copy_object)}")
print("---")

shallow_copy_object[0] = 200

print("After assigment: shallow_copy_object[0] = 200")

print("Array")
print(array_object)

print("Shallow copy")
print(shallow_copy_object)

# Output

Array
[0 1 2 3 4 5 6 7 8 9]
Id = 139980496768528
---
Shallow Copy
[0 1 2 3 4 5 6 7 8 9]
Id = 139980496768720
---
After assigment: shallow_copy_object[0] = 200
Array
[200   1   2   3   4   5   6   7   8   9]
Shallow copy
[200   1   2   3   4   5   6   7   8   9]
18、数组的深拷贝
copy 方法复制对象及其数据的完整副本。完全拷贝了一个副本,内部元素地址都不一样,数值的改变不会互相影响。
array_object = np.arange(0, 23, 1)
deep_copy_object = array_object.copy()

print(deep_copy_object is array_object)

print("Array")
print(array_object)
print(f"Array id = {id(array_object)}")
print("---")

print("Deep Copy")
print(deep_copy_object)
print(f"Deep copy id = {id(deep_copy_object)}")
print("---")

deep_copy_object[0] = 234

print("After assignment: deep_copy_object[0] = 234")
print("Array")
print(array_object)
print("Deep copy")

print(deep_copy_object)

False
Array
[ 0  1  2  3  4  5  6  7  8  9 10 11 12 13 14 15 16 17 18 19 20 21 22]
Array id = 139980498767472
---
Deep Copy
[ 0  1  2  3  4  5  6  7  8  9 10 11 12 13 14 15 16 17 18 19 20 21 22]
Deep copy id = 139980496039824
---
After assignment: deep_copy_object[0] = 234
Array
[ 0  1  2  3  4  5  6  7  8  9 10 11 12 13 14 15 16 17 18 19 20 21 22]
Deep copy
[234   1   2   3   4   5   6   7   8   9  10  11  12  13  14  15  16  17
  18  19  20  21  22]
作者:Lucas Soares