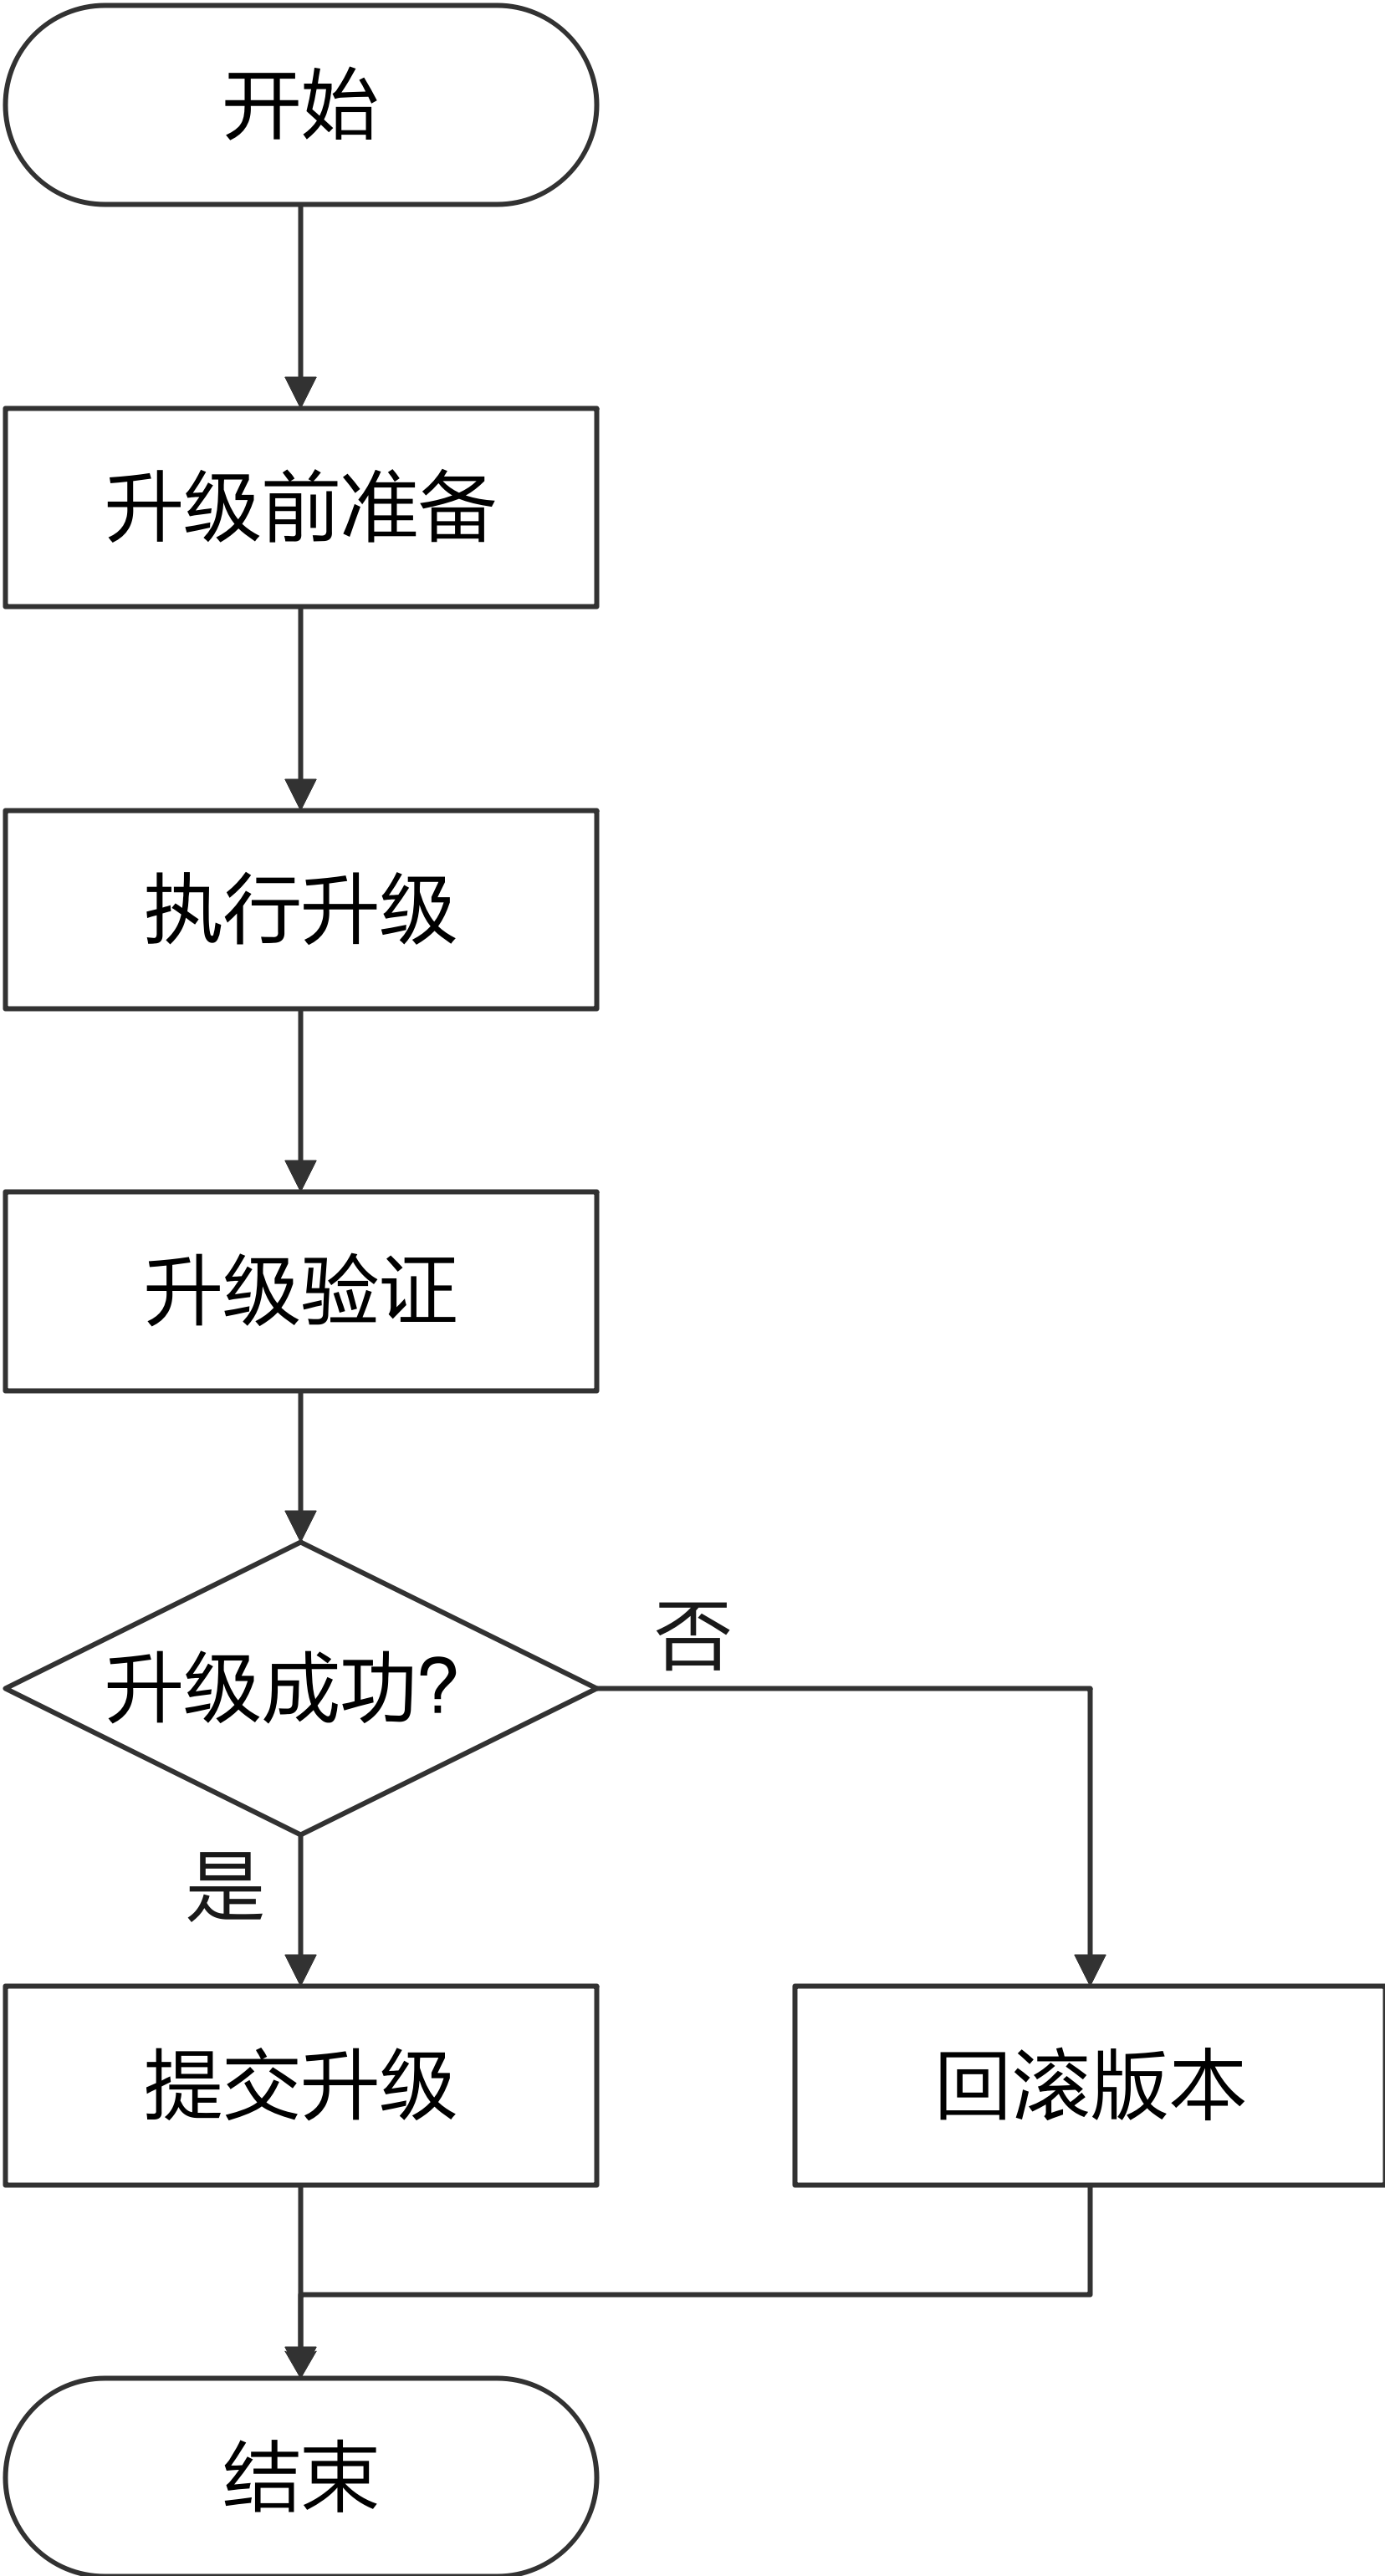
国产数据库openGauss 9.30日新出了3.1.0版本,想必有些小伙伴已经迫不及待想尝试了吧。之前基于3.0.0版本进行了一些实践,本篇就详细介绍如何将openGauss数据库从3.0.0升级到3.1.0。
升级流程

升级约束官网文档详细列出,具体就不再一一列举。主要就是升级期间不要做增删改。生产和商业环境务必按照要求执行。
升级前准备
1.检查升级前版本
openGauss升级版本要求如下表所示。
版本
升级说明
openGauss1.0.1版本之前的版本
可以升级到openGauss1.0.1之前的任意版本。
openGauss1.0.1版本
可以升级到openGauss1.1.0版本
openGauss1.1.0版本之后的版本
可以升级到openGauss1.1.0之后的任意版本
[omm@pekphisprb70593 ~]$ gsql --version

gsql (openGauss 3.0.0 build 02c14696) compiled at 2022-04-01 18:12:34 commit 0 last mr
我这里查出来就是3.0.0版本
2.查看数据库节点磁盘使用率,低于80%时再执行升级操作。
[omm@pekphisprb70593 ~]$ df -h

Filesystem      Size  Used Avail Use% Mounted on

/dev/vda3        35G  7.0G   26G  22% /

devtmpfs        3.9G     0  3.9G   0% /dev

tmpfs           3.9G   12K  3.9G   1% /dev/shm

tmpfs           3.9G   49M  3.8G   2% /run

tmpfs           3.9G     0  3.9G   0% /sys/fs/cgroup

/dev/vda1       976M  117M  793M  13% /boot

tmpfs           783M     0  783M   0% /run/user/0
- 以数据库用户(如omm)登录节点,执行如下命令查看数据库状态,确认cluster_state : Normal。
[omm@pekphisprb70593 ~]$ gs_om -t status

-----------------------------------------------------------------------

cluster_name    : opengSingle

cluster_state   : Normal

redistributing  : No

-----------------------------------------------------------------------
4.以root用户执行如下命令对服务器的OS参数进行检查。检查服务器的OS参数的目的是为了保证数据库正常通过预安装,并且在安装成功后可以安全高效的运行。详细的检查项目请参见《工具参考》中的“服务端工具 > gs_checkos”工具。
gs_checkos -i A
5.官网并没有提供单独的升级包,所以根据情况获取新的版本安装包。我的旧版本是centos企业版,继续获取3.1.0企业版。
https://opengauss.org/zh/download.html
6.手动备份
多一重备份永远没有过错。不过我这里没有重要数据,就跳过了。
升级前自己先建个表,验证升级后是不是正常。

升级操作
- root用户创建新包目录。
mkdir -p /opt/software/gaussdb_upgrad
2.将需要更新的新包上传至目录“/opt/software/gaussdb_upgrade”并解压,把之前旧版本使用的cluster_config.xml也拷贝过来。
- 修改属主
[root@pekphisprb70593 software]# chown -R omm:dbgrp gaussdb_upgrade/
4.进入安装包解压出的script目录下,在升级前执行前置脚本gs_preinstall。
cd /opt/software/gaussdb_upgrade/script
./gs_preinstall -U omm -G dbgrp -X /opt/software/gaussdb_upgrade/cluster_config.xml
这里报错了,在产品文档里面查看错误码描述是说python版本的问题。

根据提示重新编译python,补充CFLAGS=-fPIC 。之前3.0.0版本没有个这个要求。
cd 到Python安装包目录下
./configure --prefix=/usr/local/python3 --enable-shared CFLAGS=-fPIC
make
make install
重新执行gs_preinstall命令成功。
[root@pekphisprb70593 script]# ./gs_preinstall -U omm -G dbgrp -X  /opt/software/gaussdb_upgrade/cluster_config.xml

Parsing the configuration file.

Successfully parsed the configuration file.

Installing the tools on the local node.

Successfully installed the tools on the local node.

Setting host ip env

Successfully set host ip env.

Are you sure you want to create the user[omm] (yes/no)? no

Preparing SSH service.

Successfully prepared SSH service.

Checking OS software.

Successfully check os software.

Checking OS version.

Successfully checked OS version.

Creating cluster's path.

Successfully created cluster's path.

Set and check OS parameter.

Setting OS parameters.

Successfully set OS parameters.

Warning: Installation environment contains some warning messages.

Please get more details by "/opt/software/gaussdb_upgrade/script/gs_checkos -i A -h pekphisprb70593 --detail".

Set and check OS parameter completed.

Preparing CRON service.

Successfully prepared CRON service.

Setting user environmental variables.

Successfully set user environmental variables.

Setting the dynamic link library.

Successfully set the dynamic link library.

Setting Core file

Successfully set core path.

Setting pssh path

Successfully set pssh path.

Setting Cgroup.

Successfully set Cgroup.

Set ARM Optimization.

No need to set ARM Optimization.

Fixing server package owner.

Setting finish flag.

Successfully set finish flag.

Preinstallation succeeded.
5.切换至omm用户 使用如下命令进行就地升级或者灰度升级。
gs_upgradectl -t auto-upgrade -X /opt/software/gaussdb_upgrade/cluster_config.xml --grey
中途根据提示多次输入omm用户的密码,最后提示successfully upgrade all nodes.就可以了。详细可参加下文。
[omm@pekphisprb70593 script]$ gs_upgradectl -t auto-upgrade -X /opt/software/gaussdb_upgrade/cluster_config.xml --grey

Static configuration matched with old static configuration files.

The authenticity of host 'pekphisprb70593 (fe80::f816:3eff:fee3:12fb%eth0)' can't be established.

ECDSA key fingerprint is SHA256:yOyJOqmNfoKjxATR/5n3JNeEQDqH2BVAKz/Sxr27clA.

ECDSA key fingerprint is MD5:42:8f:e9:f1:88:6e:18:c0:d0:68:6a:97:30:0b:d0:77.

Are you sure you want to continue connecting (yes/no)? yes

omm@pekphisprb70593's password:

omm@pekphisprb70593's password:

Successfully set upgrade_mode to 0.

Checking upgrade environment.

Successfully checked upgrade environment.

Start to do health check.

Successfully checked cluster status.

Upgrade one node 'pekphisprb70593'.

NOTICE: The directory /opt/huawei/install/app_02c14696 will be deleted after commit-upgrade, please make sure there is no personal data.

Performing grey rollback.

omm@pekphisprb70593's password:

omm@pekphisprb70593's password:

No need to rollback.

The directory /opt/huawei/install/app_02c14696 will be deleted after commit-upgrade, please make sure there is no personal data.

Installing new binary.

copy certs from /opt/huawei/install/app_02c14696 to /opt/huawei/install/app_4e931f9a.

Successfully copy certs from /opt/huawei/install/app_02c14696 to /opt/huawei/install/app_4e931f9a.

Successfully backup hotpatch config file.

Sync cluster configuration.

Successfully synced cluster configuration.

Switch symbolic link to new binary directory.

Successfully switch symbolic link to new binary directory.

Switching all db processes.

Check cluster state.

Cluster state: [   Cluster State   ]

cluster_state   : Normal

redistributing  : No

current_az      : AZ_ALL

[  Datanode State   ]

node           node_ip         port      instance     state

-------------------------------------------------------------------------------

1  pekphisprb70593 10.x.x.218  15400      6001       P Primary Normal

Create checkpoint before switching.

Switching DN processes.

Ready to grey start cluster.

Grey start cluster successfully.

Wait for the cluster status normal or degrade.

Successfully switch all process version

The nodes ['pekphisprb70593'] have been successfully upgraded to new version. Then do health check.

Start to do health check.

Successfully checked cluster status.

Waiting for the cluster status to become normal.

.

The cluster status is normal.

Upgrade main process has been finished, user can do some check now.

Once the check done, please execute following command to commit upgrade:

gs_upgradectl -t commit-upgrade -X /opt/software/gaussdb_upgrade/cluster_config.xml

Successfully upgrade all nodes.
升级验证
以数据库用户(如omm)登录节点,source环境变量,执行如下命令查看所有节点的版本信息。
[omm@pekphisprb70593 script]$ gsql --version

gsql (openGauss 3.1.0 build 4e931f9a) compiled at 2022-09-29 14:19:24 commit 0 last mr
以数据库用户(如omm)执行如下命令查看数据库状态,查询结果的cluster_state为Normal代表数据库正常。
[omm@pekphisprb70593 script]$ gs_om -t status

-----------------------------------------------------------------------

cluster_name    : opengSingle

cluster_state   : Normal

redistributing  : No

-----------------------------------------------------------------------
原来的数据也在,新建也操作正常。
opengauss_db=# select * from test1;

id

----

1

(1 row)

opengauss_db=# create table test2(name varchar(20));

CREATE TABLE
提交升级
升级完成后,如果验证也没问题,接下来就可以提交升级,需要注意的是,一旦提交操作完成,则不能再执行回滚操作。
以数据库用户(如omm)执行如下命令完成升级提交。
gs_upgradectl -t commit-upgrade -X /opt/software/gaussdb_upgrade/cluster_config.xml

至此,升级完成。
openGauss: 一款高性能、高安全、高可靠的企业级开源关系型数据库。
🍒如果您觉得博主的文章还不错或者有帮助的话,请关注一下博主,如果三连收藏支持就更好啦!谢谢各位大佬给予的鼓励!
版权归原作者 Gauss松鼠会 所有, 如有侵权,请联系我们删除。