
安装TeXLive2022
下载安装texlive2022,镜像文件还是有点大的,考虑到网速,这里直接到清华镜像网站上进行下载。

下载4.3GB的文件,随便挑一个iso文件应该都差不多,下载下来之后,打开iso文件,双击下图中的批处理文件进行安装。
安装没啥好说的,但是记得修改安装目录,不要安装在C盘!!
点击修改,只要不是C盘都行,然后建议安装目录不要有中文!!!这是给自己省事!此外,TeXworks这个软件,不需要的可以取消勾选,事实上,大概率都不会用这玩意儿吧,毕竟有更好用的编译器!
点击完了之后,等待就行了。大概会持续1h左右,视电脑配置而定,注意,一定不要急着关闭。安装完成的标志是显示欢迎进入Tex世界!我电脑安装好了,就不演示了。
安装Vscode
下载安装vscode,到官网上直接下载安装。
Visual Studio Code:https://code.visualstudio.com/

直接安装即可,没啥好说了。下面开始配置Vscode。
配置Vscode
进入vscode,安装插件LaTeX Workshop以及LaTeX language support两种支持插件。
安装好后,在左边,应该有这个图标,
有一些常用的符号,以及运行tex程序也是在这里,当然为了方便,可以配置快捷键,看后文。
然后,开始VSCode LaTeX配置,在 VSCode 界面下按下ctrl+shift+P,键入“
settings
”打
开settings.jso
n,将下面的内容粘贴进文件里面即可。
{"latex-workshop.latex.tools":[{// 编译工具和命令"name":"xelatex","command":"xelatex","args":["-synctex=1","-interaction=nonstopmode","-file-line-error","-pdf","%DOCFILE%"]},{"name":"pdflatex","command":"pdflatex","args":["-synctex=1","-interaction=nonstopmode","-file-line-error","%DOCFILE%"]},{"name":"bibtex","command":"bibtex","args":["%DOCFILE%"]}],"latex-workshop.latex.recipes":[{"name":"xelatex","tools":["xelatex"],},{"name":"pdflatex","tools":["pdflatex"]},{"name":"xe->bib->xe->xe","tools":["xelatex","bibtex","xelatex","xelatex"]},{"name":"pdf->bib->pdf->pdf","tools":["pdflatex","bibtex","pdflatex","pdflatex"]}],//设定清理文件的类型 "latex-workshop.latex.autoClean.run":"onFailed","latex-workshop.latex.clean.fileTypes":["*.aux","*.bbl","*.blg","*.idx","*.ind","*.lof","*.lot","*.out","*.toc","*.acn","*.acr","*.alg","*.glg","*.glo","*.gls","*.ist","*.fls","*.log","*.fdb_latexmk","*.nav","*.snm",],"latex-workshop.latex.autoBuild.run":"never","latex-workshop.synctex.afterBuild.enabled":true,"latex-workshop.message.error.show":false,"latex-workshop.message.warning.show":false,"latex-workshop.view.pdf.ref.viewer":"external","latex-workshop.view.pdf.viewer":"external","latex-workshop.view.pdf.external.viewer.command":"D:/SumatraPDF/SumatraPDF.exe","latex-workshop.view.pdf.external.viewer.args":["%PDF%"],"latex-workshop.view.pdf.external.synctex.command":"D:/SumatraPDF/SumatraPDF.exe","latex-workshop.view.pdf.external.synctex.args":["-forward-search","%TEX%","%LINE%","-reuse-instance","-inverse-search","\"D:/Microsoft VS Code/code.exe\" -g \"%f:%l\"","%PDF%",],"latex-workshop.view.pdf.internal.synctex.keybinding":"double-click","explorer.confirmDelete":false,"editor.fontSize":17,"kite.showWelcomeNotificationOnStartup":false,"[latex]":{"editor.defaultFormatter":"nickfode.latex-formatter"},}
注意:上面的代码,涉及到目录的都需要修改,将自己电脑里面的目录替换上面代码的目录即可。
快捷键设置
在 VSCode 界面下按下ctrl+shift+P,键入“
keyjson
”,选择“打开键盘快捷方式(JSON)”,然后把以下代码放入
[]
里面:
{"key":"alt+s","command":"latex-workshop.synctex","when":"editorTextFocus && !isMac"},{"key":"ctrl+b","command":"latex-workshop.build","when":"editorTextFocus && !isMac"},{"key":"alt+t","command":"latex-workshop.kill","when":"editorTextFocus && !isMac"},{"key":"ctrl+r","command":"latex-workshop.recipes"},
用的比较多的还是
ctrl+b
和
ctrl+r
,前者是设置的编译的快捷键,后者设置的是选择其他recipe编译,当然也可以自行更换为适合自己的快捷键,只需修改“
key
”那一项即可,这只是我用习惯了的快捷键指令。
代码片段设置(效率++)
在Vscode中,按快捷键
ctrl+shift+P
打开命令面板,键入
snippets
,选择配置用户代码片段: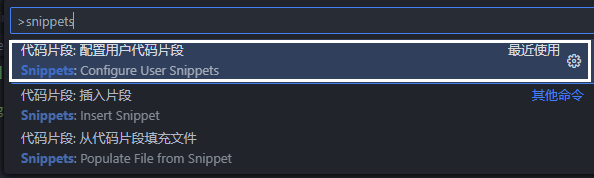
输入latex(或者下滑找到latex),点击
latex.json
,
粘贴下面的代码到
latex.json
文件中:
{"compile setting":{"prefix":"compile","body":["%!TEX program = ${1:xelatex} -> bibtex -> xelatex -> ${1:xelatex}"],"description":"set default the compile order"},"insert figure":{"prefix":"figure","body":["\\begin{figure}[htbp]\n\t\\centering\n\t\\includegraphics[width=${1}\\textwidth]{picture/${2}}\n\t\\caption{${3}}\n\t\\label{${4}}\n\\end{figure}"],"description":"insert figure snippet"},"insert table":{"prefix":"table","body":["\\begin{table}[${1:htbp}]\n\t\\centering\n\t\\caption{${2:caption}}\n\t\t\\begin{tabular}{${3:c|c}}\n\t\t\\hline\n\t\t${4:column1 & column2}\n\t\t\\end{tabular}\n\t\\label{${5:label}}\n\\end{table}"],"description":"insert table snippet"},"insert enumerate":{"prefix":"enumerate","body":["\\begin{enumerate}\n\t\\item ${1:enumerate1}\n\t\\item ${2:enumerate2}\n\\end{enumerate}"],"description":"insert enumerate snippet"},"insert item":{"prefix":"itemize","body":["\\begin{itemize}\n\t\\item ${1:itemsize1}\n\t\\item ${2:itemsize2}\n\\end{itemize}"],"description":"insert item snippet"},"insert frame":{"prefix":"frame","body":["\\begin{frame}{${1}}\n\t${2}\n\\end{frame}"],"description":"insert frame snippet"},"insert paragraph":{"prefix":"paragraph","body":["\\paragraph{${1}}~{}\\par"],"description":"insert paragraph snippet"},"insert columns":{"prefix":"columns","body":["\\begin{columns}\n\t\\column{0.5\\textwidth}\n${1}\n\t\\column{0.5\\textwidth}\n\\end{columns}"],"description":"insert columns snippet"},"insert figures":{"prefix":"figures","body":["\\begin{figure*}[htbp]\n\t\\begin{minipage}{0.5\\textwidth}\n\t\t\\includegraphics[width=${1}\\textwidth]{picture/${2}}\n\t\t\\caption{${3}}\n\t\t\\label{${4}}\n\t\\end{minipage}\n\t\\hfill\n\t\\begin{minipage}{0.5\\textwidth}\n\t\t\\includegraphics[width=${1}\\textwidth]{picture/${2}}\n\t\t\\caption{${3}}\n\t\t\\label{${4}}\n\t\\end{minipage}\n\\end{figure*}"],"description":"insert figures snippet"},"insert algorithmic":{"prefix":"algorithmic","body":["%%%%%%%%%%%%%%%%%%%%%%%%%%%%%%%%%%%%%%%%%%%%%%%%%%%%\n%\\STATE\\IF \\ENDIF\\FOR \\ENDFOR\\FOR \\TO \\ENDFOR\\FORALL \n%\\ENDFOR\\WHILE \\ENDWHILE\\REPEAT \\UNTIL\\LOOP\n%\\ENDLOOP\\REQUIRE \\ENSURE \\RETURN \\PRINT \\COMMENT,\\AND, \\OR, \\XOR, \\NOT, \\TO, \\TRUE, \\FALSE \n%%%%%%%%%%%%%%%%%%%%%%%%%%%%%%%%%%%%%%%%%%%%%%%%%%%%\n\\begin{algorithm}[htbp]\n\t\\caption{${1}}\n\t\\label{al:${2}}\n\t\\begin{algorithmic}\n\t\t\\REQUIRE{${3}}\n\t\t\\ENSURE{${3}}\n\t\\end{algorithmic}\n\\end{algorithm}"],"description":"insert algorithmic snippet"},"insert algorithm":{"prefix":"algorithm","body":["\\begin{algorithm}[htbp]\n\t\\caption{${1}}\n\t\\label{al:${2}}\n\t\t\\KwIn{${3}}\n\t\t\\KwOut{${3}}\n\\end{algorithm}"],"description":"insert algorithm snippet"},"insert thebibliography":{"prefix":"thebibliography","body":["\\begin{thebibliography}{99}\n\t\\bibitem{ref1} \n\t\\bibitem{ref2} \n\\end{thebibliography}"],"description":"insert thebibliography snippet"},}
类似于利用我们自定义的代码片段来自动补全,看个gif演示:
删除编译产生的无关文件
由于LaTeX文件在编译时会产生一大堆我们不需要的文件,会导致本地目录下一大堆奇奇怪怪的文件,因此强迫症建议直接在编译之后自动删除这些文件。直接在
setting.json
文件中添加:
"latex-workshop.view.pdf.viewer":"tab",// "latex-workshop.latex.clean.enabled": true,"latex-workshop.latex.clean.fileTypes":["*.aux","*.bbl","*.blg","*.idx","*.ind","*.lof","*.lot","*.out","*.toc","*.acn","*.acr","*.alg","*.glg","*.glo","*.gls","*.ist","*.fls","*.log","*.fdb_latexmk","*.gz"],"latex-workshop.latex.autoClean.run":"onBuilt"
其他设置
- LaTeX Workshop 默认保存的时候自动编译,如果不喜欢这个设置,可以添加以下代码进入设置区:
"latex-workshop.latex.autoBuild.run":"never",
- 如果编译出错,插件会弹出两个很烦人的气泡,不喜欢的话可以在设置中添加以下代码:
"latex-workshop.message.error.show":false,"latex-workshop.message.warning.show":false,
PS:如果使用VsCode+SumatraPdf来写LaTeX的话,需要注意SumatraPdf只能从VSCode打开,不然双击pdf会跳到cls文件中,导致搜索失败!!这里很烦,算是一个bug,但是平时注意以下就行了,也不算麻烦。
版权归原作者 奋斗的西瓜瓜 所有, 如有侵权,请联系我们删除。