
文章目录
Spring Boot
Spring Boot概念
Spring Boot是作为Spring的脚手架框架,其本身并不提供Spring的核心功能,而是来达到快速构建项目、预置三方配置、开箱即用的目的。
从本质上来说,Spring Boot就是Spring,它做了那些没有它你自己也会去做的Spring Bean配置。
Spring Boot使用“习惯优于配置”的理念让你的项目快速地运行起来,使用Spring Boot很容易创建一个能独立运行、准生产级别、基于Spring框架的项目,使用Spring Boot你可以不用或者只需要很少的Spring配置。
Spring Boot有如下的优点:
- 可以快速构建项目;
- 可以对主流开发框架的无配置集成;
- 项目可独立运行,无需外部依赖Servlet容器;
- 提供运行时的应用监控;
- 可以极大地提高开发、部署效率;
- 可以与云计算天然集成。
Spring Boot的启动流程
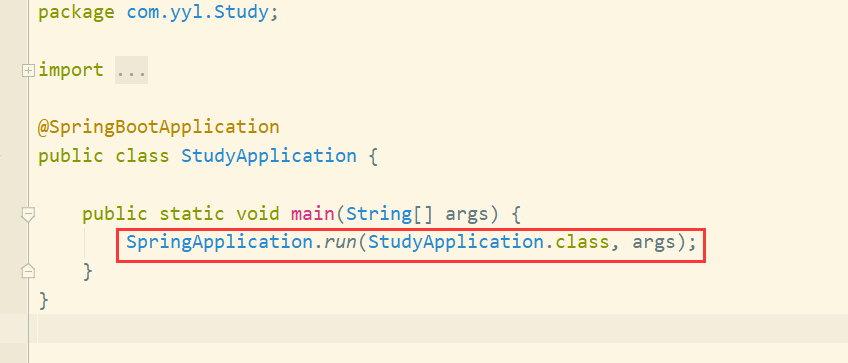
首先,Spring Boot项目创建完成会默认生成一个名为
*Application
的入口类,我们是通过该类的main方法启动Spring Boot项目的。在main方法中,通过SpringApplication的静态方法,即run方法进行SpringApplication类的实例化操作,然后再针对实例化对象调用另外一个run方法来完成整个项目的初始化和启动。
再调用另外一个run方法: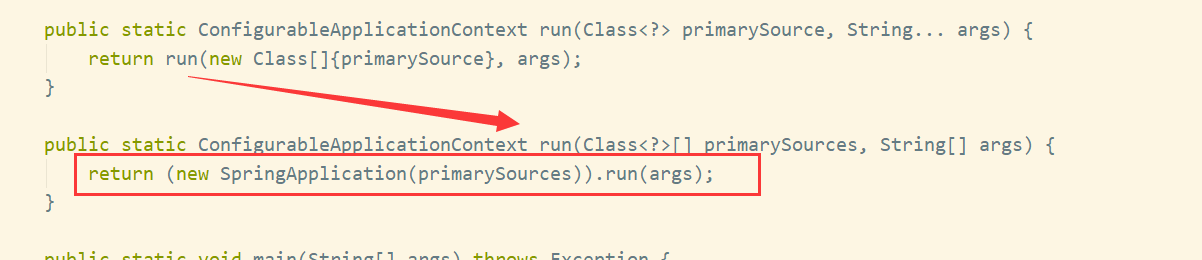
我们可以看到run方法里主要干了两件事:
- 构造SpringApplection的实例
- 调用实例的run方法
1. 构造SpringApplection的实例
构造SpringApplection的实例过程主要干了下面几件事:
- 把参数sources设置到SpringApplection属性中,这个sources可以是任何类型的参数
- 获取应用类型,判断是否是web程序,并设置到webEnvironment的boolean属性中
- 创建并初始化ApplectionInitializer(初始化器),设置到initializers属性中
- 创建并初始化ApplicationListener(初监听器),设置到listeners属性中
- 初始化主类mainApplectionClass,定位main方法。
我们追踪其源码:
然后我们跟进这个
this构造
,可以看到初始化了很多成员变量:

我们将其提炼出来,他主要进行了下面的代码
publicSpringApplication(ResourceLoader resourceLoader,Class<?>... primarySources){this.resourceLoader = resourceLoader;Assert.notNull(primarySources,"PrimarySources must not be null");this.primarySources =newLinkedHashSet<>(Arrays.asList(primarySources));//获取应用类型,判断是不是web程序this.webApplicationType =WebApplicationType.deduceFromClasspath();//获取所有初始化器this.setInitializers((Collection)getSpringFactoriesInstances(ApplicationContextInitializer.class));//获取所有监听器this.setListeners((Collection)getSpringFactoriesInstances(ApplicationListener.class));//定位main方法this.mainApplicationClass =deduceMainApplicationClass();}
首先是把参数sources设置到SpringApplection属性中,这个sources可以是任何类型的参数
然后我们再获取应用类型, 判断是否是web程序,并设置到webEnvironment的boolean属性中,我们跟进
deduceFromClasspath函数
:
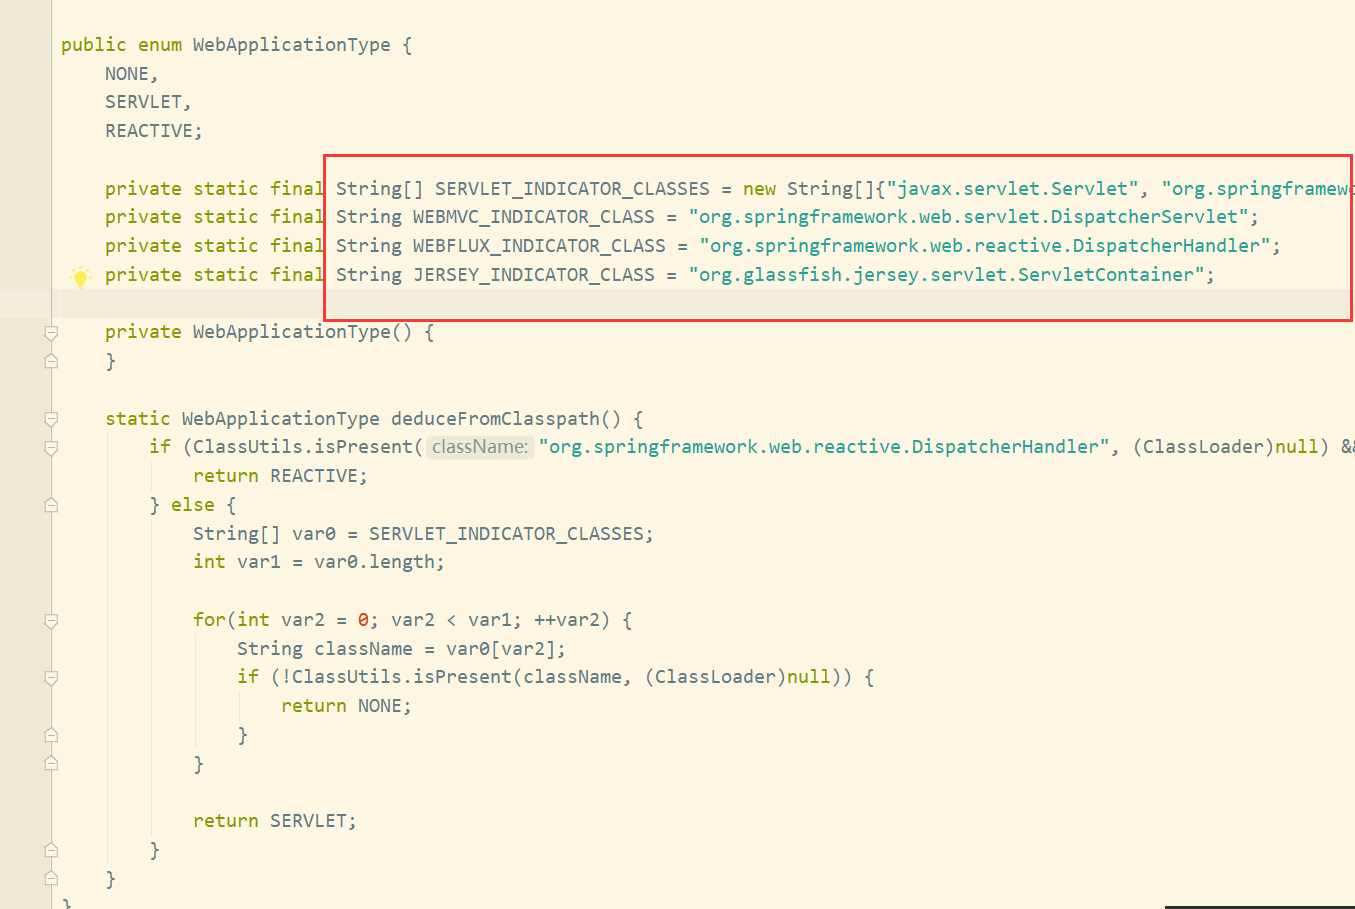
从返回结果我们可以看出应用类型一共有三种,分别是
返回值说明NONE非web应用,即不会启动服务器SERVLET基于servlet的web应用REACTIVE响应式web应用(暂未接触过)
staticWebApplicationTypededuceFromClasspath(){if(ClassUtils.isPresent("org.springframework.web.reactive.DispatcherHandler",(ClassLoader)null)&&!ClassUtils.isPresent("org.springframework.web.servlet.DispatcherServlet",(ClassLoader)null)&&!ClassUtils.isPresent("org.glassfish.jersey.servlet.ServletContainer",(ClassLoader)null)){return REACTIVE;}else{String[] var0 = SERVLET_INDICATOR_CLASSES;int var1 = var0.length;for(int var2 =0; var2 < var1;++var2){String className = var0[var2];if(!ClassUtils.isPresent(className,(ClassLoader)null)){return NONE;}}return SERVLET;}}
判断一共涉及四个常量:
WEBFLUX_INDICATOR_CLASS , WEBMVC_INDICATOR_CLASS,JERSEY_INDICATOR_CLASS,SERVLET_INDICATOR_CLASSES
springboot在初始化容器的时候,会对以上四个常量所对应的class进行判断,看看他们是否存在,从而返回应用类型!
常量代表哪些class,也在当前类中:
然后是创建并初始化ApplectionInitializer,设置到initializers属性中,该步骤调用了
getSpringFactoriesInstances函数
,我们跟进其源码:
private<T>Collection<T>getSpringFactoriesInstances(Class<T> type){returngetSpringFactoriesInstances(type,newClass<?>[]{});}private<T>Collection<T>getSpringFactoriesInstances(Class<T> type,Class<?>[] parameterTypes,Object... args){ClassLoader classLoader =getClassLoader();// Use names and ensure unique to protect against duplicates// 获取所有初始化器的名称集合Set<String> names =newLinkedHashSet<>(SpringFactoriesLoader.loadFactoryNames(type, classLoader));// 根据名称集合实例化这些初始化器List<T> instances =createSpringFactoriesInstances(type, parameterTypes, classLoader, args, names);// 排序 AnnotationAwareOrderComparator.sort(instances);return instances;}
从源代码中,我们可以看出是在
META-INF/spring.factories
配置文件里获取初始化器,然后实例化、排序后再设置到initializers属性中。
然后是创建并初始化ApplicationListener,设置到listeners属性中,该步骤调用了
getSpringFactoriesInstances函数
,步骤和上一步获取初始化器一样
最后初始化主类mainApplectionClass,我们继续跟踪源码进入deduceMainApplicationClass方法
privateClass<?>deduceMainApplicationClass(){try{// 通过创建运行时异常的方式获取栈StackTraceElement[] stackTrace =newRuntimeException().getStackTrace();// 遍历获取main方法所在的类并且返回for(StackTraceElement stackTraceElement : stackTrace){if("main".equals(stackTraceElement.getMethodName())){returnClass.forName(stackTraceElement.getClassName());}}}catch(ClassNotFoundException ex){// Swallow and continue}returnnull;}
其实遍历当前虚拟机栈获取main方法所在的类并且返回
2. 调用实例的run方法
SpringApplication调用的run方法的大致流程,如下图:
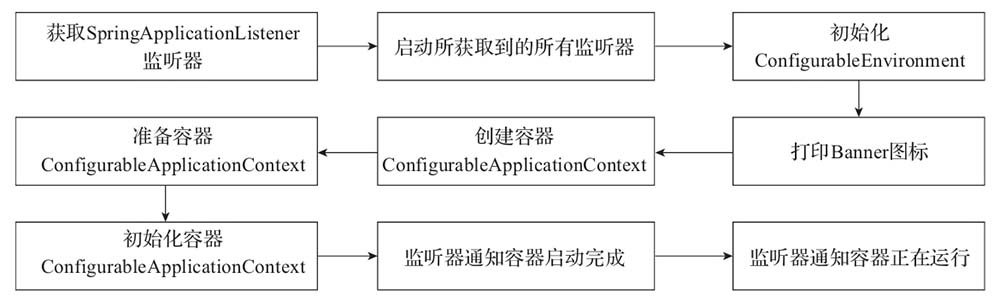
其中,SpringApplication在run方法中重点做了以下操作:
- 获取监听器和参数配置;
- 打印Banner信息;
- 创建并初始化容器;
- 监听器发送通知。
当然,除了上述核心操作,run方法运行过程中还涉及启动时长统计、异常报告、启动日志、异常处理等辅助操作。
比较完整的流程,可以参考如下源代码:
publicConfigurableApplicationContextrun(String... args){// 创建StopWatch对象,用于统计run方法启动时长。StopWatch stopWatch =newStopWatch();// 启动统计
    stopWatch.start();ConfigurableApplicationContext context =null;Collection<SpringBootExceptionReporter> exceptionReporters =newArrayList<>();// 配置Headless属性configureHeadlessProperty();// 获得SpringApplicationRunListener数组,// 该数组封装于SpringApplicationRunListeners对象的listeners中。SpringApplicationRunListeners listeners =getRunListeners(args);// 启动监听,遍历SpringApplicationRunListener数组每个元素,并执行。
    listeners.starting();try{// 创建ApplicationArguments对象ApplicationArguments applicationArguments =newDefaultApplicationArguments(args);// 加载属性配置,包括所有的配置属性。ConfigurableEnvironment environment =prepareEnvironment(listeners, applicationArguments);configureIgnoreBeanInfo(environment);// 打印BannerBanner printedBanner =printBanner(environment);// 创建容器
        context =createApplicationContext();// 异常报告器
        exceptionReporters =getSpringFactoriesInstances(SpringBootExceptionReporter.class,newClass[]{ConfigurableApplicationContext.class}, context);// 准备容器,组件对象之间进行关联。prepareContext(context, environment, listeners, applicationArguments, printedBanner);// 初始化容器refreshContext(context);// 初始化操作之后执行,默认实现为空。afterRefresh(context, applicationArguments);// 停止时长统计
        stopWatch.stop();// 打印启动日志if(this.logStartupInfo){newStartupInfoLogger(this.mainApplicationClass).logStarted(getApplicationLog(), stopWatch);}// 通知监听器:容器完成启动。
        listeners.started(context);// 调用ApplicationRunner和CommandLineRunner的运行方法。callRunners(context, applicationArguments);}catch(Throwable ex){// 异常处理handleRunFailure(context, ex, exceptionReporters, listeners);thrownewIllegalStateException(ex);}try{// 通知监听器:容器正在运行。
        listeners.running(context);}catch(Throwable ex){// 异常处理handleRunFailure(context, ex, exceptionReporters,null);thrownewIllegalStateException(ex);}return context;}
Spring Boot启动流程总结:
--------------------------------创建springbootApplication对象---------------------------------------------1. 创建springbootApplication对象springboot容器初始化操作
2. 获取当前应用的启动类型。
    2.1:通过判断当前classpath是否加载servlet类,返回servlet web启动方式。
    2.2:webApplicationType三种类型:
        1.reactive:响应式启动(spring5新特性)
        2.none:即不嵌入web容器启动(springboot放在外部服务器运行 )
        3.servlet:基于web容器进行启动
3. 读取springboot下的META-INFO/spring.factories文件,获取对应的ApplicationContextInitializer装配到集合
4. 读取springboot下的META-INFO/spring.factories文件,获取对应的ApplicationListener装配到集合
5. mainApplicationClass,获取当前运行的主函数

------------------调用springbootApplication对象的run方法,实现启动,返回当前容器的上下文----------------------------------------------1. 调用run方法启动
2.StopWatch stopWatch =newStopWatch(),记录项目启动时间
3. getRunListeners,读取META-INF/spring.factores,将SpringApplicationRunListeners类型存到集合中
4. listeners.starting();循环调用starting方法
5.prepareEnvironment(listeners, applicationArguments);将配置文件读取到容器中
        读取多数据源:classpath:/,classpath:/config/,file:./,file:./config/底下。其中classpath是读取编译后的,file是读取编译前的
        支持yml,yaml,xml,properties
6.Banner printedBanner =printBanner(environment);开始打印banner图,就是sprongboot启动最开头的图案
7. 初始化AnnotationConfigServletWebServerApplicationContext对象
8. 刷新上下文,调用注解,refreshContext(context);9. 创建tomcat
10. 加载springmvc
11. 刷新后的方法,空方法,给用户自定义重写afterRefresh()
12. stopWatch.stop();结束计时
13. 使用广播和回调机制告诉监听者springboot容器已经启动化成功,listeners.started(context);14. 使用广播和回调机制告诉监听者springboot容器已经启动化成功, listeners.running(context);15. 返回上下文
版权归原作者 杨 戬 所有, 如有侵权,请联系我们删除。