将第三方库PubSubClient下载到lib文件夹
一、阿里云IOT使用
1、打开阿里云IOT官网,登录阿里云账号
https://iot.console.aliyun.com
2、创建实例

3、新建产品

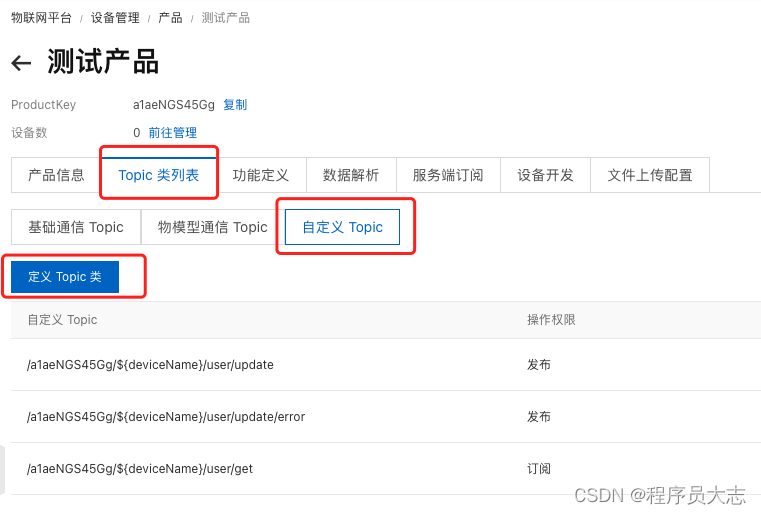
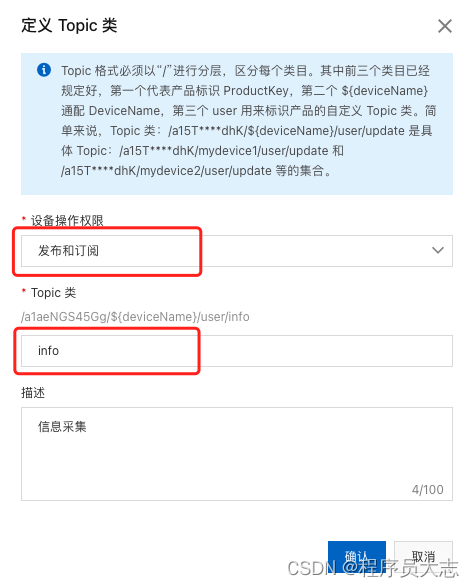
4、自定义主题
5、添加设备

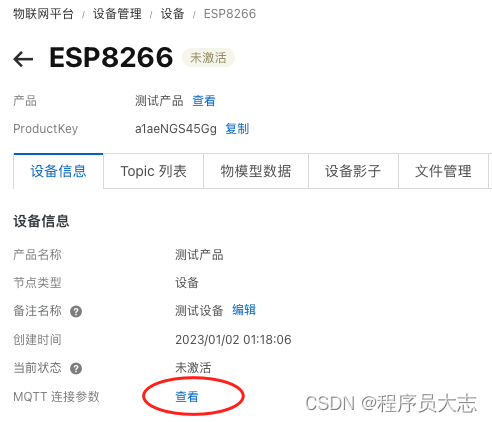
6、查看设备配置

二、连接阿里云MQTT服务器
1、修改PubSubClient.h头文件,否则无法连接阿里云MQTT服务器
将MQTT_MAX_PACKET_SIZE的值改为1024
将MQTT_KEEPALIVE的值改为65

2、代码解析
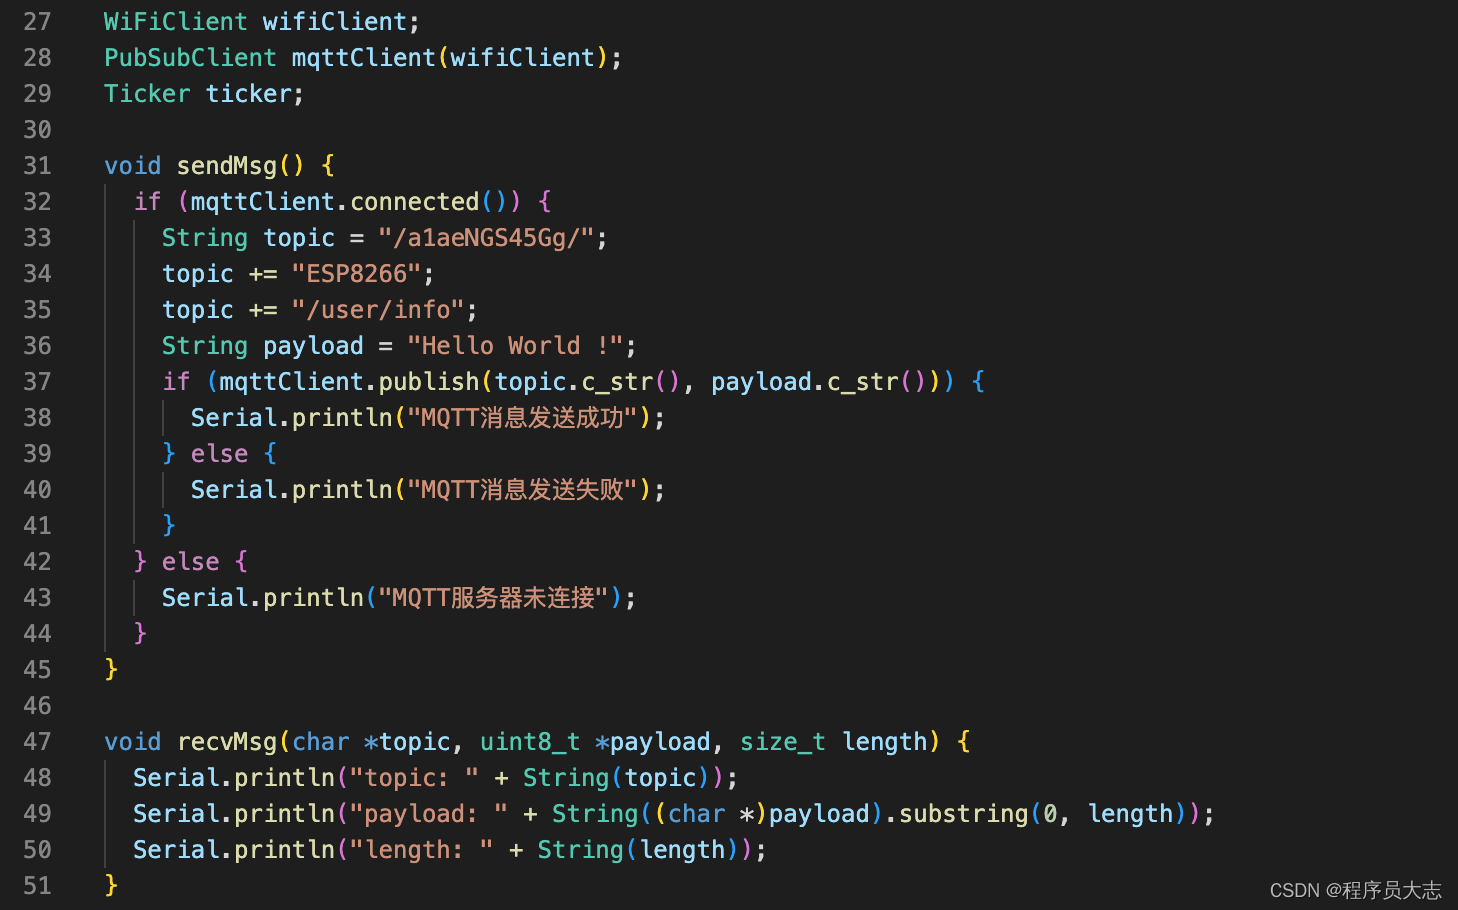
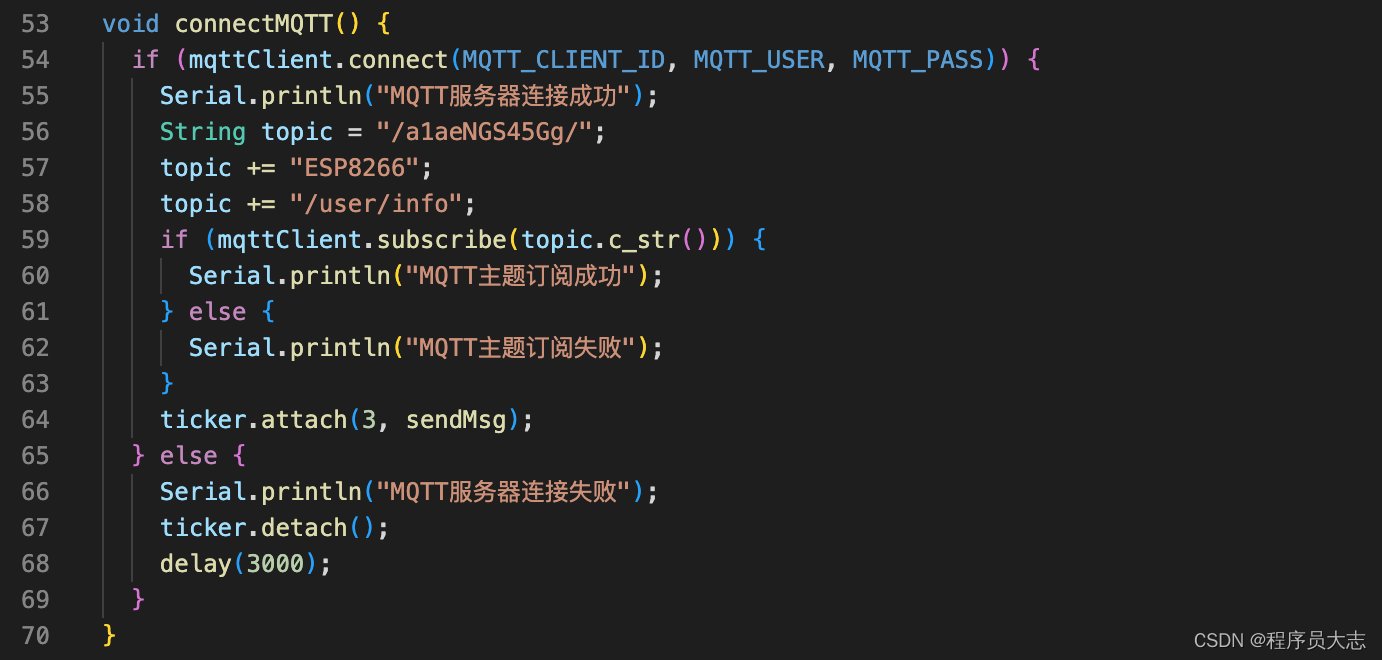
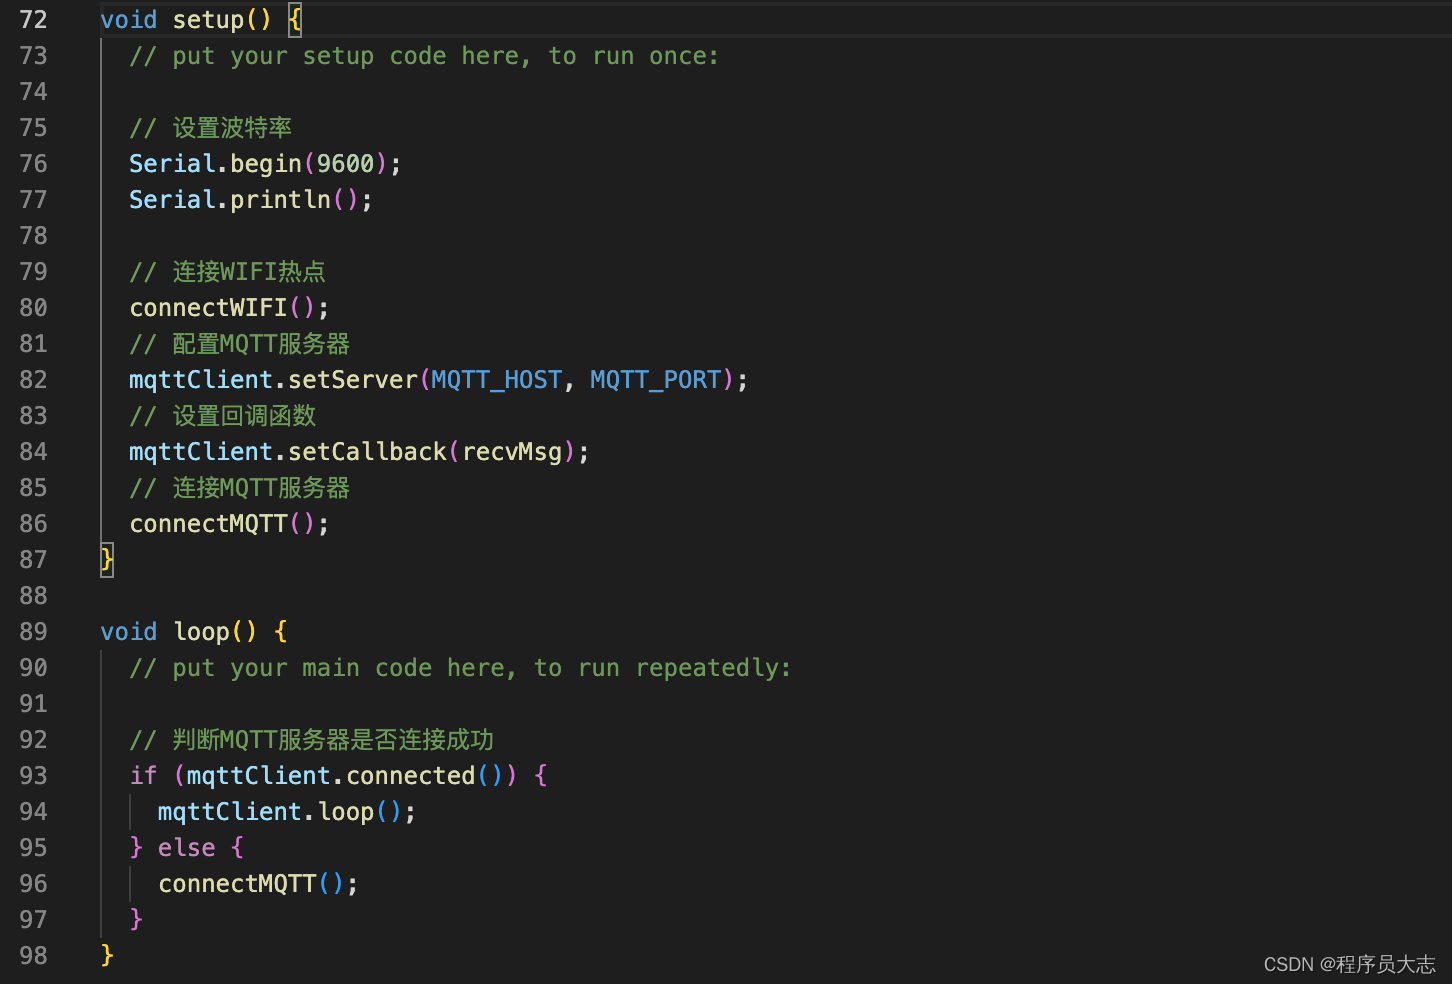
第27行:创建WIFI客户端
第28行:创建MQTT客户端
第29行:创建任务对象
第30行:定义MQTT消息发送函数
第32行:发送消息前先判断MQTT服务器是否连接成功
第37行:发送MQTT消息
第47行:定义MQTT消息接收函数
第53行:定义MQTT服务器连接函数
第54行:请求连接MQTT服务器
第59行:订阅MQTT主题
第64行:开始定时任务,每隔三秒发送一条MQTT消息
第67行:结束定时任务
第82行:设置MQTT服务器主机地址和端口号
第84行:设置MQTT消息接收回调函数
第94行:保持MQTT客户端心跳,否则会连接中断
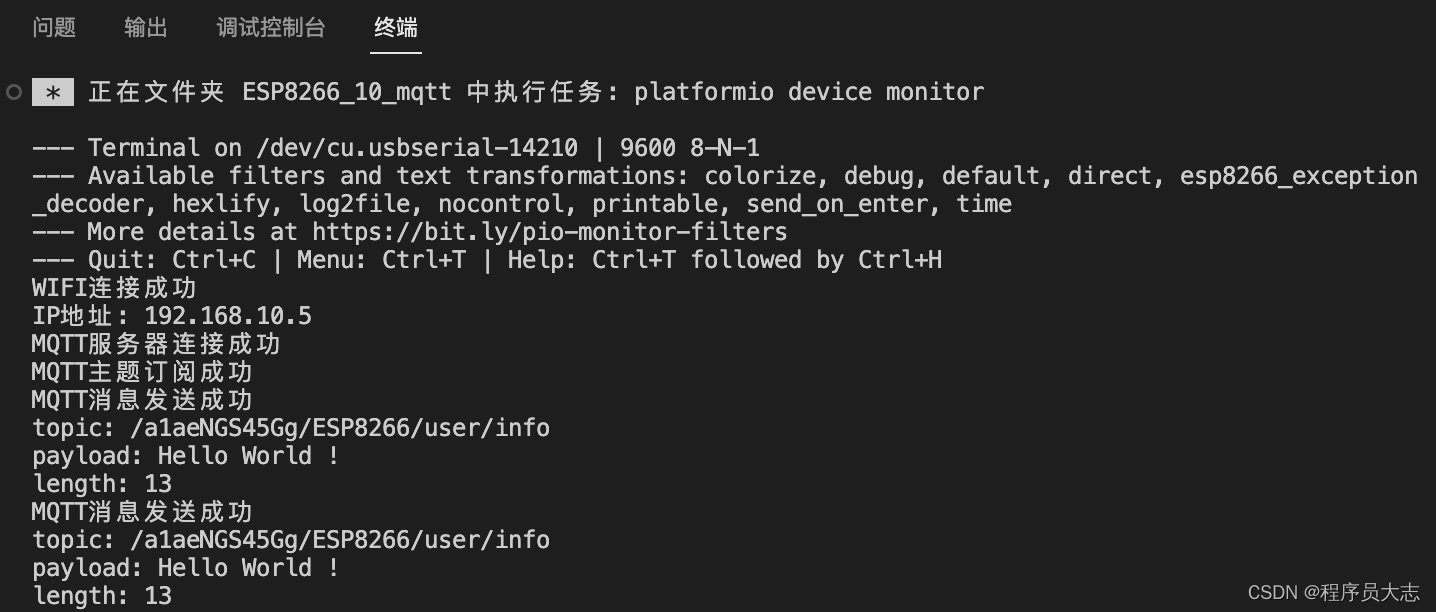
三、测试效果
四、完整代码
#include <Arduino.h>
#include <ESP8266WiFi.h>
#include <Ticker.h>
#include "../lib/pubsubclient/src/PubSubClient.h"

#define WIFI_SSID "WWW"
#define WIFI_PASS "00000000"
#define MQTT_HOST "MQTT服务器地址"
#define MQTT_PORT 1883
#define MQTT_CLIENT_ID "MQTT客户端名称"
#define MQTT_USER "MQTT用户名"
#define MQTT_PASS "MQTT登录密码"

void connectWIFI() {
  // 连接WIFI热点
  WiFi.begin(WIFI_SSID, WIFI_PASS);
  int retryCount = 1;
  while (WiFi.status() != WL_CONNECTED) {
    Serial.println("重试次数: " + String(retryCount));
    retryCount++;
    delay(1000);
  }
  Serial.println("WIFI连接成功");
  Serial.println("IP地址: " + WiFi.localIP().toString());
}

WiFiClient wifiClient;
PubSubClient mqttClient(wifiClient);
Ticker ticker;

void sendMsg() {
  if (mqttClient.connected()) {
    String topic = "/a1aeNGS45Gg/";
    topic += "ESP8266";
    topic += "/user/info";
    String payload = "Hello World !";
    if (mqttClient.publish(topic.c_str(), payload.c_str())) {
      Serial.println("MQTT消息发送成功");
    } else {
      Serial.println("MQTT消息发送失败");
    }
  } else {
    Serial.println("MQTT服务器未连接");
  }
}

void recvMsg(char *topic, uint8_t *payload, size_t length) {
  Serial.println("topic: " + String(topic));
  Serial.println("payload: " + String((char *)payload).substring(0, length));
  Serial.println("length: " + String(length));
}

void connectMQTT() {
  if (mqttClient.connect(MQTT_CLIENT_ID, MQTT_USER, MQTT_PASS)) {
    Serial.println("MQTT服务器连接成功");
    String topic = "/a1aeNGS45Gg/";
    topic += "ESP8266";
    topic += "/user/info";
    if (mqttClient.subscribe(topic.c_str())) {
      Serial.println("MQTT主题订阅成功");
    } else {
      Serial.println("MQTT主题订阅失败");
    }
    ticker.attach(3, sendMsg);
  } else {
    Serial.println("MQTT服务器连接失败");
    ticker.detach();
    delay(3000);
  }
}

void setup() {
  // put your setup code here, to run once:

  // 设置波特率
  Serial.begin(9600);
  Serial.println();

  // 连接WIFI热点
  connectWIFI();
  // 配置MQTT服务器
  mqttClient.setServer(MQTT_HOST, MQTT_PORT);
  // 设置回调函数
  mqttClient.setCallback(recvMsg);
  // 连接MQTT服务器
  connectMQTT();
}

void loop() {
  // put your main code here, to run repeatedly:

  // 判断MQTT服务器是否连接成功
  if (mqttClient.connected()) {
    mqttClient.loop();
  } else {
    connectMQTT();
  }
}
版权归原作者 程序员大志 所有, 如有侵权,请联系我们删除。