
这里写目录标题
一、pytest的命名规则
**文件:
test开头或者_test结尾
类名 :
Test开头
方法名 :
test_开头
特别注意:
测试类中不能定义__init__()方法
**
二、界面化配置

符合命名规则的方法前面会有运行标记
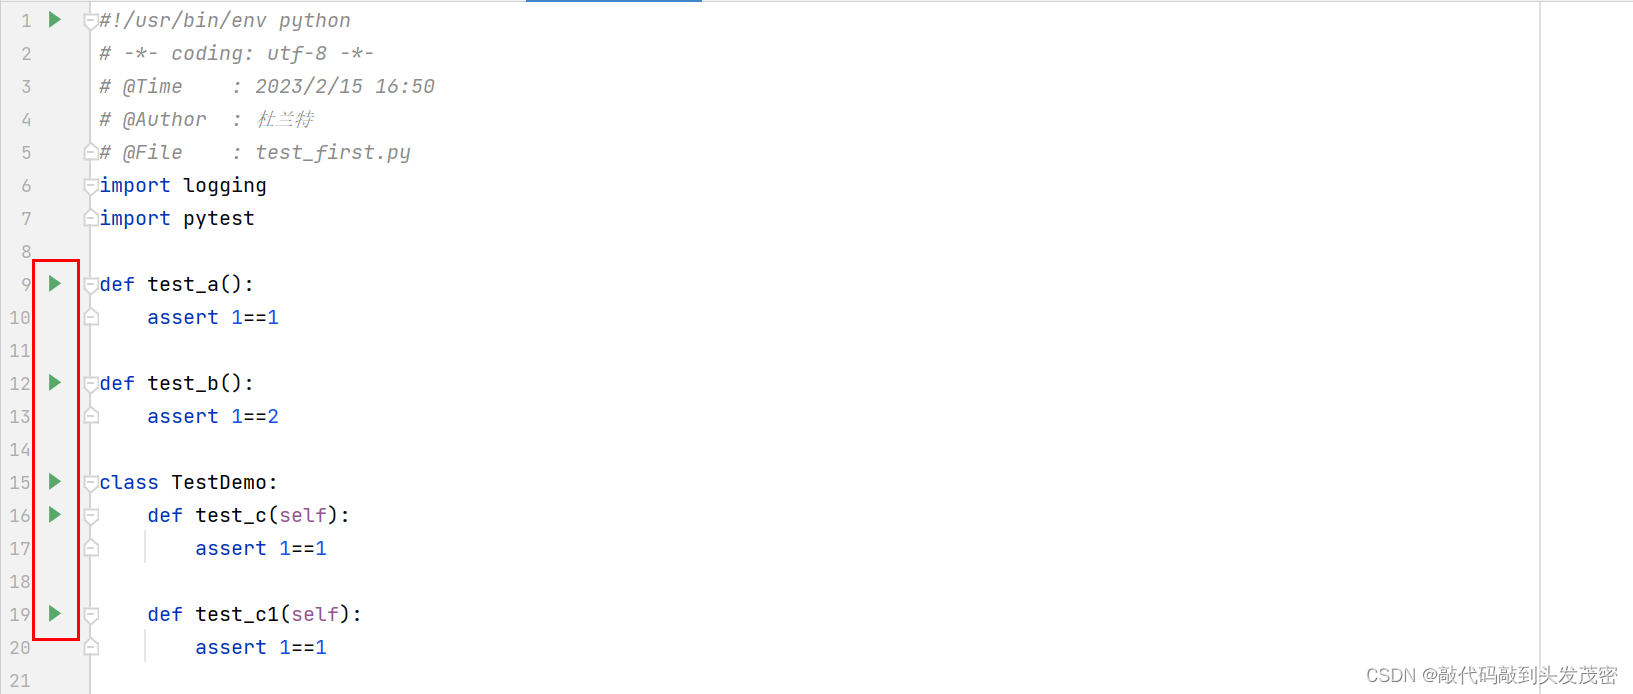
三、pytest的用例结构
三部分组成
用例名称
用例步骤
用例断言
classTestXXX:defsetup(self):#资源准备passdefteardown(self):#资源销毁passdeftest_xxx(self):#测试步骤1#测试步骤2#断言 实际结果 对比  期望结果
        logging.info('这是xxx测试用例')assert1==1
四、pytest的用例断言
断言(assert),是一种在程序中的一阶逻辑(如:一个结果为真或假的逻辑判断式),目的为了表示与验证软件开发者预期的结果。当程序执行到断言的位置时,对应的断言应该为真。若断言不为真时,程序会中止执行,并给出错误信息。
断言写法:
assert 表达式
assert 表达式,描述:当断言成功时,描述语句不会执行;当断言失败时,描述语句会执行。
classTestDemo:deftest_c(self):assert1==1deftest_c1(self):assert'abc1'in'abcdef','abc不在abcdef中'
五、pytest测试框架结构
setup_module/teardown_module:全局模块级,只运行一次
setup_class/teardown_class:类级,只在类中前后运行一次
setup_function/teardown_function:函数级别:在类外
setup_method/teardown_method:方法级别,在类中。类中每个方法执行前后
setup/teardown:在类中,在每个测试方法前后执行
六、pytest参数化用例
通过参数的方式传递数据,从而实现数据和脚本的分离
并且可以实现用例的重复生成和执行
1、pytest参数化实现方式
装饰器:pytest.mark.parametrize
2、单参数:每一条测试数据都会生成一条测试用例
#单参数import pytest
search_list=['appium','selenium','pytest']# 两组测试数据:两条测试用例@pytest.mark.parametrize('search_key',['java','appium'])deftest_search_params(search_key):assert search_key in search_list

3、多参数:
ids:为测试用例起名字
注意:ids 列表参数的个数要与参数值的个数一致
import pytest

#测试数据有2个参数@pytest.mark.parametrize("username,password",[["kobe",666],["kd",111],[" ",888]],
                         ids=['success','fail','username is None'])deftest_login1(username,password):print(f'登录的用户名:{username},密码:{password}')
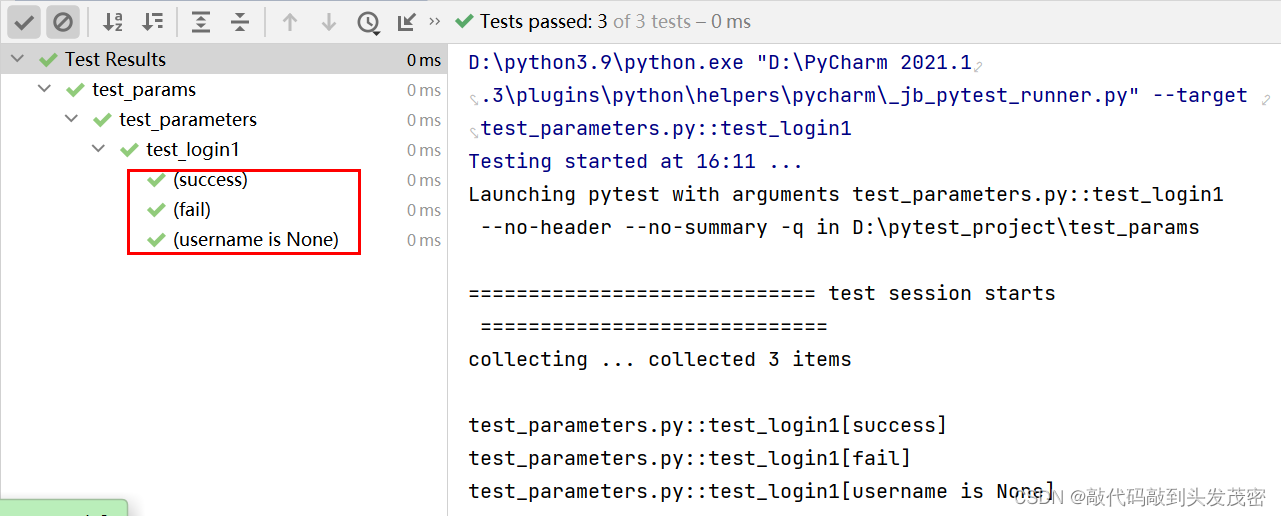
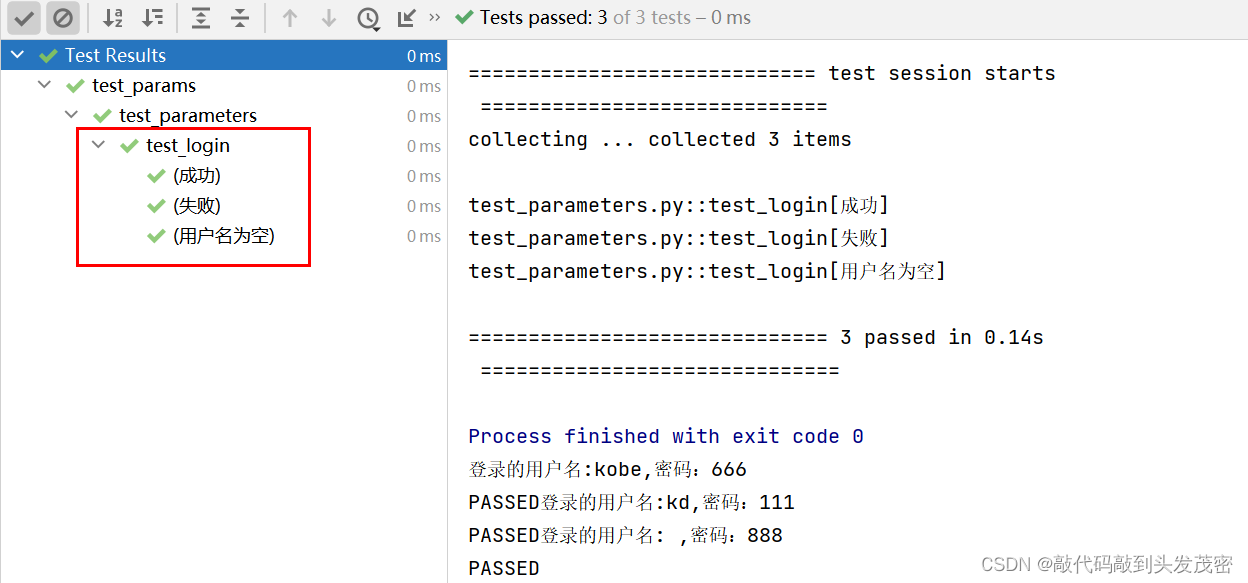
ids有中文的情况
import pytest

@pytest.mark.parametrize("username,password",[["kobe",666],["kd",111],[" ",888]],
                         ids=['成功','失败','用户名为空'])deftest_login(username,password):print(f'登录的用户名:{username},密码:{password}')
需要在conftest.py中定义pytest_collection_modifyitems方法
defpytest_collection_modifyitems(items):"""
    测试用例收集完成时,将收集到的用例名name和用例标识nodeid的中文信息显示在控制台上
    """for i in items:
        i.name=i.name.encode('utf-8').decode('unicode-escape')
        i._nodeid=i.nodeid.encode('utf-8').decode('unicode-escape')
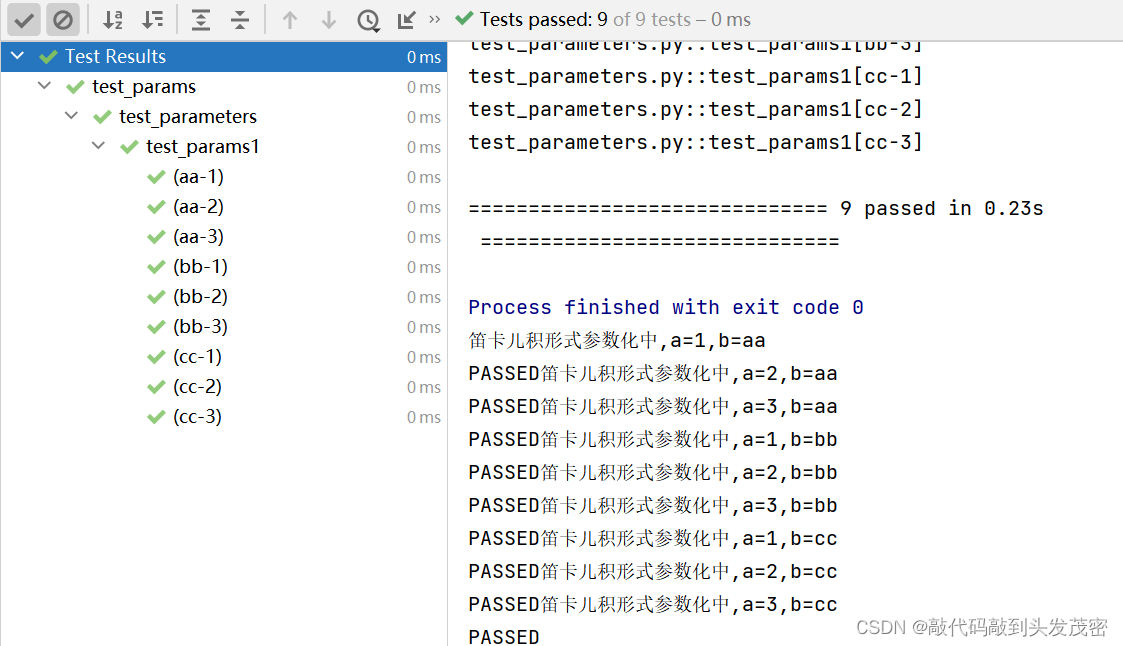
4、笛卡儿积
两组数据a=[1,2,3],b=[a,b,c]
对应的有几组组合形式?
(1,a)(1,b)(1,c)
(2,a)(2,b)(2,c)
(3,a)(3,b)(3,c)
import pytest

@pytest.mark.parametrize('a',[1,2,3])@pytest.mark.parametrize('b',['aa','bb','cc'])deftest_params1(a,b):print(f'笛卡儿积形式参数化中,a={a},b={b}')
七、标记测试用例
场景:只执行符合要求的某一部分用例可以把一个web项目划分为多个模块,然后指定模块名执行
解决:在测试用例方法上加@pytest.mark.标签名
执行:-m 执行自定义标记的相关用例
import pytest
#测试数据:整型@pytest.mark.intdeftest_int():assertisinstance(2,int)#测试数据:字符串@pytest.mark.strdeftest_str():assertisinstance('str',str)#测试数据:浮点型@pytest.mark.floatdeftest_float():assertisinstance('2.7',float)
执行测试用例
D:\pytest_project\test_params>pytest test_mark.py -vs -m int
测试结果
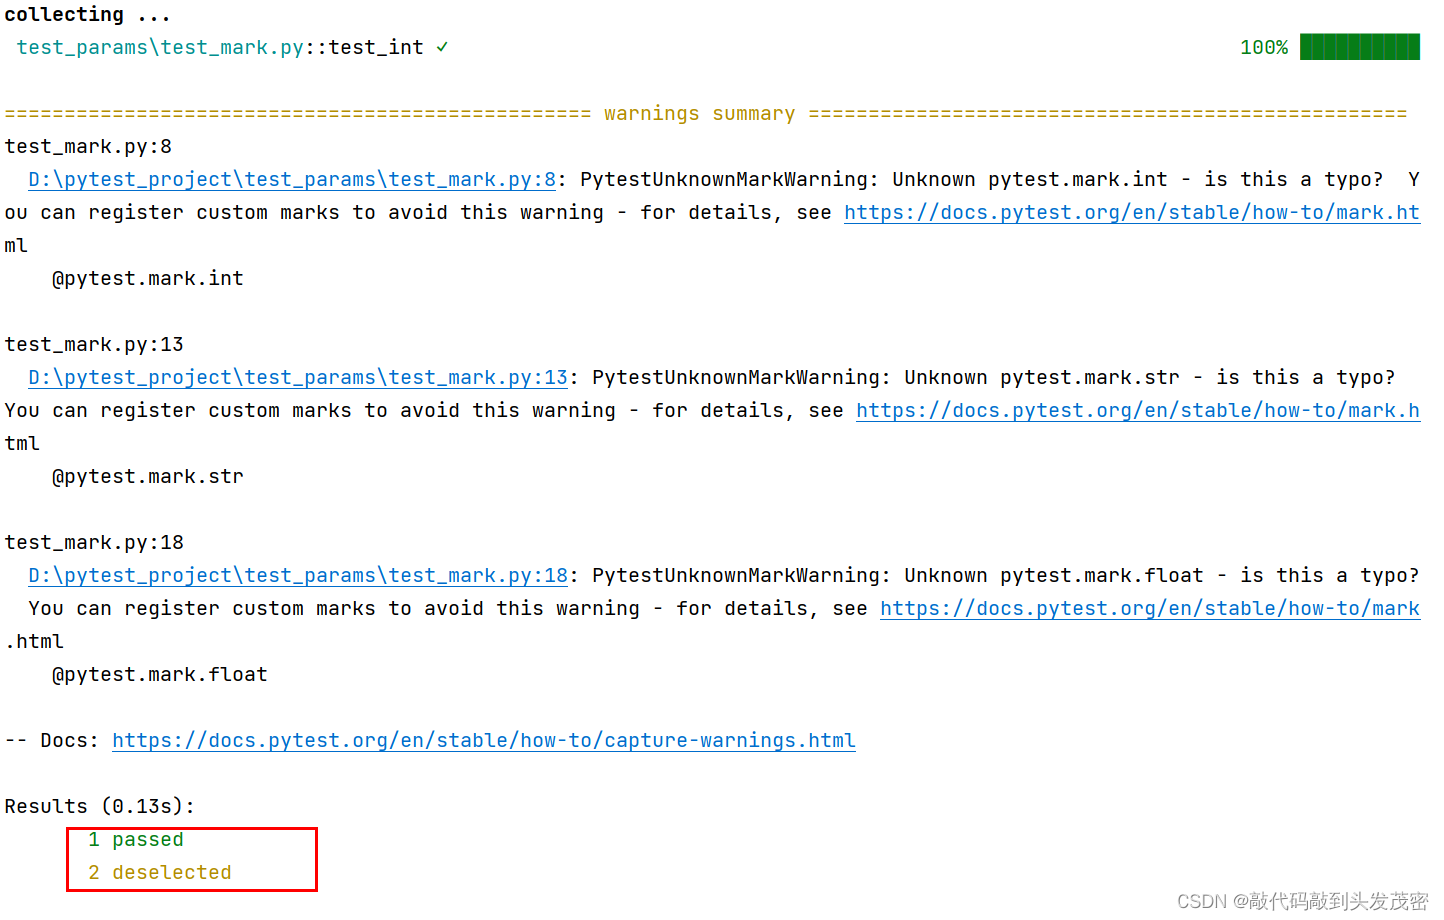
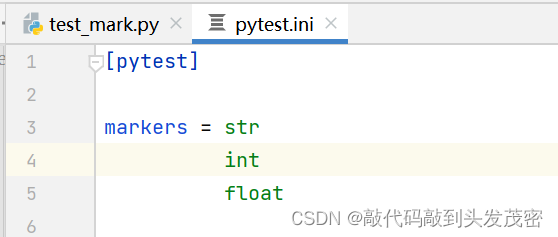
执行用例会出现警告,解决方法:在pytest.ini中将标签注册
再次执行,没有警告了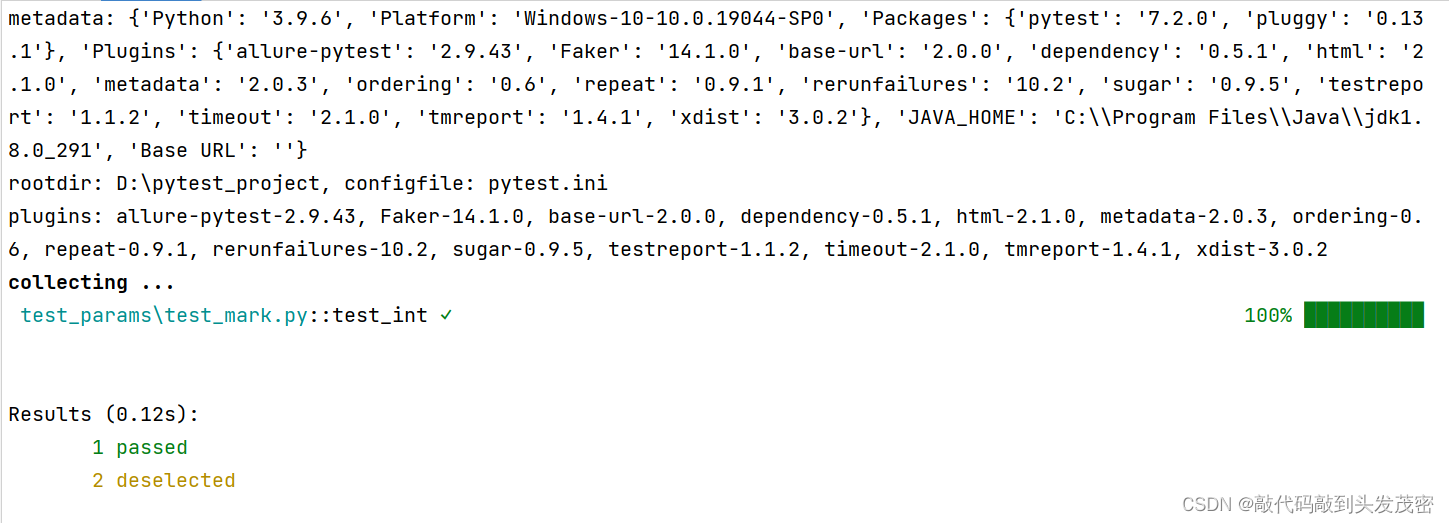
八、pytest设置跳过、预期失败用例
这是pytest的内置标签,可以处理一些特殊的测试用例
skip:始终跳过该测试用例
skipif:遇到特定情况跳过该测试用例
xfail:遇到特定情况,产生一个”预期失败“输出
1、skip的使用场景:
1、调试时不想运行这个测试用例
2、标记无法在某些平台运行的测试用例
3、在某些版本中执行,其他版本中跳过
import pytest

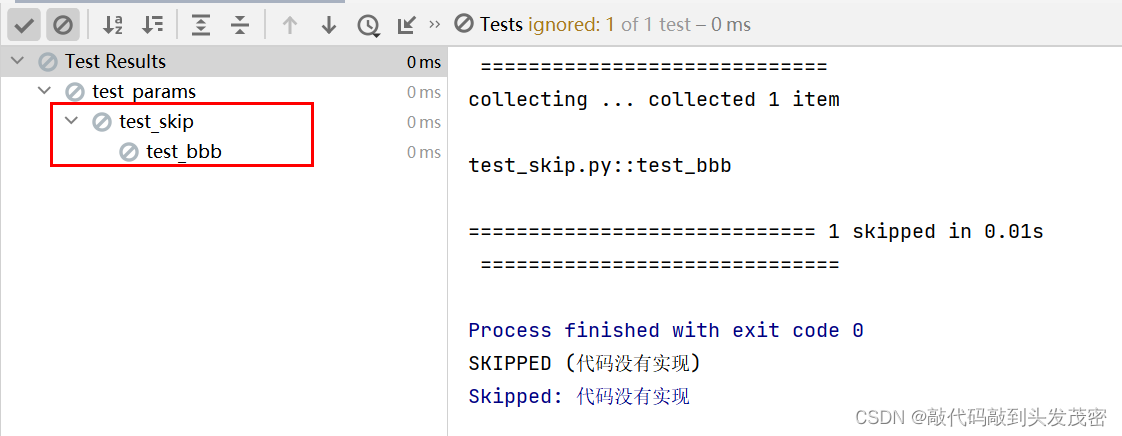
@pytest.mark.skipdeftest_aaa():print("代码未开发完")[email protected](reason="代码没有实现")deftest_bbb():assertFalse
执行测试用例:测试用例跳过图标默认置灰
案例:做判断
defcheck_login():returnFalsedeftest_function():print("start")#如果未登录,则跳过后续步骤ifnot check_login():
        pytest.skip("unsupported configuration")print("end")
2、skipif的使用场景:
import sys
print(sys.platform)@pytest.mark.skipif(sys.platform =='darwin', reason="does not run on mac")deftest_case1():[email protected](sys.platform =='win', reason="does not run on windows")deftest_case2():[email protected](sys.version_info <(3,6), reason="requires python3.6 or higher")deftest_case3():assertTrue
3、xfail的使用场景:
import pytest

@pytest.mark.xfaildeftest_aaa():print("test_xfail1 方法执行")assert2==2

xfail =pytest.mark.xfail

@xfail(reason="bug")deftest_hello4():assert0
九、pytest运行测试用例
1、运行多个测试包
目录结构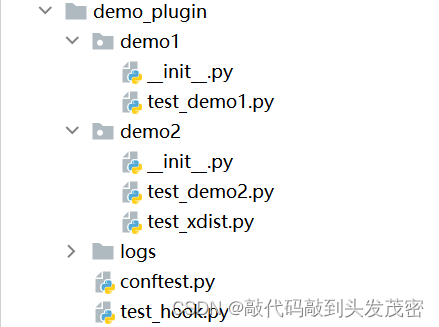
运行测试用例:
D:\pytest_project>pytest demo_plugin
2、运行多个测试模块
运行测试用例:
D:\pytest_project>pytest demo_plugin/demo1
3、运行多个测试类
运行测试用例:
D:\pytest_project>pytest demo_plugin/demo2/test_demo2.py
4、运行多个测试方法
运行测试用例:
D:\pytest_project>pytest demo_plugin/demo2/test_demo2.py::TestB
5、运行单个测试方法
运行测试用例:
D:\pytest_project>pytest demo_plugin/demo2/test_demo2.py::TestB::test_d
6、运行结果分析
常用的:pass(通过)、fail(失败)、error(代码错误)
特殊的:warning(警告,例如pytest.ini中没有注册标签名)、deselect(跳过,加标签skip、skipif)
十、pytest命令行常用参数
-m:执行加标签的测试用例
-k:执行测试用例中包含某个关键字的测试用例(windows中关键字使用双引号)
-x:用例一旦运行失败,立刻停止运行(冒烟测试)
– maxfail=num:测试用例失败达到num个时,立刻停止运行
-v:打印详细信息
-s:打印输出日志
-n:并发执行测试用例
-lf:只执行上次用例失败的测试用例
-ff:先执行上次用例失败的测试用例,再执行其他的测试用例
–collect-only:测试平台,pytest自动导入功能
#!/usr/bin/env python# -*- coding: utf-8 -*-# @Time    : 2023/2/15 20:10# @Author  : 杜兰特# @File    : test_mark.pyimport pytest
#测试数据:整型@pytest.mark.intdeftest_int():assertisinstance(2,int)#测试数据:字符串@pytest.mark.strdeftest_str():assertisinstance('str',str)#测试数据:浮点型@pytest.mark.floatdeftest_float():assertisinstance('2.7',float)#测试数据:列表@pytest.mark.listdeftest_list():assertisinstance('[1,2,3]',list)#测试数据:元组@pytest.mark.tupledeftest_tuple():assertisinstance('(1,)',tuple)
1、-x:
D:\pytest_project\test_params>pytest test_mark.py -x

2、–maxfail=2:用例允许失败1条,第2条失败时,stop
D:\pytest_project\test_params>pytest test_mark.py --maxfail=2
3、-k:执行测试用例中,包含“tup”的用例(采用双引号)
D:\pytest_project\test_params>pytest test_mark.py -k "tup"

4、-k:执行测试用例中,除了“tup”之外的用例(采用双引号)
D:\pytest_project\test_params>pytest test_mark.py -k "not tup"
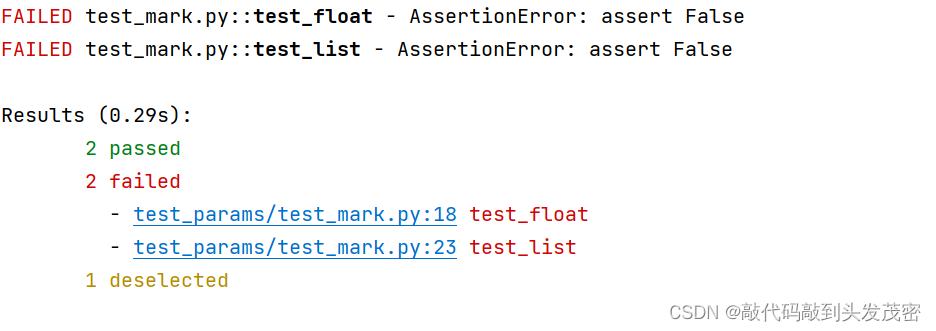
5、–collect-only:只收集不运行
十一、python执行pytest
1、使用main函数
a、pytest.main() :执行当前目录下符合规则的所有测试用例
test_first.py文件
import pytest

deftest_a():assert1==1deftest_b():assert1==2classTestDemo:deftest_c(self):assert1==1deftest_c1(self):assert'abc1'in'abcdef','abc不在abcdef中'classTestXXX:defsetup(self):#资源准备passdefteardown(self):#资源销毁passdeftest_xxx(self):#测试步骤1#测试步骤2#断言 实际结果 对比  期望结果assert1==1if __name__ =='__main__':pass#todo 1、运行当前目录下所有的用例
    pytest.main()#相当于pytest.main(['./'])
执行测试用例
D:\pytest_project>python test_first.py
b、运行某一条用例
import pytest

if __name__ =='__main__':#todo 2、运行test_parameters.py::test_login中的某一条用例
    pytest.main(['test_params/test_parameters.py::test_login','-vs'])
执行测试用例
D:\pytest_project>python test_first.py
c、运行某个标签
import pytest

if __name__ =='__main__':#todo 3、运行某个标签
    pytest.main(['test_params/test_mark.py','-vs','-m','int'])
执行测试用例
D:\pytest_project>python test_first.py
2、使用python -m pytest调用pytest
D:\pytest_project>python -m pytest test_first.py
十二、pytest异常处理
try…except
pytest.raises()
可以捕获特定的异常
获取捕获的异常的细节(异常类型、异常信息)
发生异常,后面的代码将不会被执行
1、捕获异常:意料之内的异常,不会报错
import pytest
deftest_raise():with pytest.raises(expected_exception=ValueError,match='must be 0 or None'):raise ValueError("value must be 0 or None")
2、捕获异常:意料之外的异常,会报错
deftest_raise1():with pytest.raises(expected_exception=ValueError,match='must be 0 or None'):raise ZeroDivisionError("除数为0的")
3、捕获多个异常
deftest_raise2():with pytest.raises(expected_exception=(ValueError,ZeroDivisionError),match='must be 0 or None'):raise ZeroDivisionError("value must be 0 or None")
4、捕获异常后获取异常值和异常类型
deftest_raise2():with pytest.raises(ValueError)as exc_info:raise ValueError("value must be 42")assert exc_info.typeis ValueError
    assert exc_info.value.args[0]=="value must be 42"

版权归原作者 敲代码敲到头发茂密 所有, 如有侵权,请联系我们删除。