
基于Spring Boot 3.1.0 系列文章
- Spring Boot 源码阅读初始化环境搭建
- Spring Boot 框架整体启动流程详解
- Spring Boot 系统初始化器详解
- Spring Boot 监听器详解
- Spring Boot banner详解
- Spring Boot 属性配置解析
- Spring Boot 属性加载原理解析
在《Spring Boot 框架整体启动流程详解》中,我们了解到有一步是准备环境prepareEnvironment,属性加载就是在这一步开始的。
privateConfigurableEnvironmentprepareEnvironment(SpringApplicationRunListeners listeners,DefaultBootstrapContext bootstrapContext,ApplicationArguments applicationArguments){//创建并配置环境ConfigurableEnvironment environment =getOrCreateEnvironment();//配置环境,如果需要转换服务,添加ApplicationConversionService,另外委托给了configurePropertySources(属性源)和configureProfiles(配置文件),子类可以覆盖该方法或分别覆盖两者进行细粒度控制configureEnvironment(environment, applicationArguments.getSourceArgs());//将ConfigurationPropertySource支持附加到指定的环境ConfigurationPropertySources.attach(environment);//调用environmentPrepared方法
    listeners.environmentPrepared(bootstrapContext, environment);//将defaultProperties属性源移动到指定配置环境的最后DefaultPropertiesPropertySource.moveToEnd(environment);Assert.state(!environment.containsProperty("spring.main.environment-prefix"),"Environment prefix cannot be set via properties.");//绑定环境到SpringApplicationbindToSpringApplication(environment);//非自定义环境配置,就将其转换为标准类型if(!this.isCustomEnvironment){EnvironmentConverter environmentConverter =newEnvironmentConverter(getClassLoader());
        environment = environmentConverter.convertEnvironmentIfNecessary(environment,deduceEnvironmentClass());}//重新将ConfigurationPropertySource支持附加到指定的环境ConfigurationPropertySources.attach(environment);return environment;}
进入
getOrCreateEnvironment()
privateConfigurableEnvironmentgetOrCreateEnvironment(){//判断environment 是否为null,不为null使用environmentif(this.environment !=null){returnthis.environment;}//根据web应用程序类型,通过applicationContextFactory创建environmentConfigurableEnvironment environment =this.applicationContextFactory.createEnvironment(this.webApplicationType);//如果environment为null,并且applicationContextFactory不是用的默认ApplicationContextFactoryif(environment ==null&&this.applicationContextFactory !=ApplicationContextFactory.DEFAULT){//使用默认的ApplicationContextFactory创建environment
        environment =ApplicationContextFactory.DEFAULT.createEnvironment(this.webApplicationType);}//如果不为null返回environment,否则只显示创建一个ApplicationEnvironmentreturn(environment !=null)? environment :newApplicationEnvironment();}
this.applicationContextFactory
由于没有显示设置,使用的是默认的ApplicationContextFactory
private ApplicationContextFactory applicationContextFactory = ApplicationContextFactory.DEFAULT;
ApplicationContextFactory DEFAULT = new DefaultApplicationContextFactory();
进入
createEnvironment(this.webApplicationType)
中:
publicConfigurableEnvironmentcreateEnvironment(WebApplicationType webApplicationType){returngetFromSpringFactories(webApplicationType,ApplicationContextFactory::createEnvironment,null);}
进入
getFromSpringFactories
中:
private<T>TgetFromSpringFactories(WebApplicationType webApplicationType,BiFunction<ApplicationContextFactory,WebApplicationType,T> action,Supplier<T> defaultResult){//循环获取ApplicationContextFactory类型的实例for(ApplicationContextFactory candidate :SpringFactoriesLoader.loadFactories(ApplicationContextFactory.class,getClass().getClassLoader())){//调用实例的createEnvironment方法T result = action.apply(candidate, webApplicationType);if(result !=null){return result;}}return(defaultResult !=null)? defaultResult.get():null;}
SpringFactoriesLoader.loadFactories(ApplicationContextFactory.class, getClass().getClassLoader())
从
META-INF/spring.factories
中获取并实例化ApplicationContextFactory实例,Spring Boot定义了
ReactiveWebServerApplicationContextFactory
和
ServletWebServerApplicationContextFactory
,所以在这里会分别去调用其中的
createEnvironment
方法,由于这边是web环境,进入ServletWebServerApplicationContextFactory的createEnvironment中。
publicConfigurableEnvironmentcreateEnvironment(WebApplicationType webApplicationType){//不是Web Servlet环境的话返回null,是的话创建一个ApplicationServletEnvironmentreturn(webApplicationType !=WebApplicationType.SERVLET)?null:newApplicationServletEnvironment();}
进入ApplicationServletEnvironment类中,其继承了StandardServletEnvironment,StandardServletEnvironment类继承了StandardEnvironment并实现了ConfigurableWebEnvironment接口,StandardEnvironment继承了AbstractEnvironment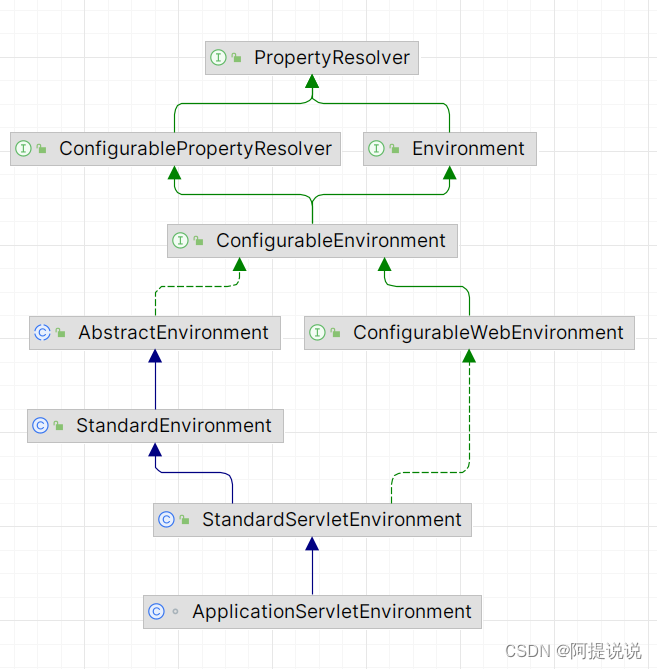
在创建ApplicationServletEnvironment的时候,会先创建父类的构造器,所以会先执行AbstractEnvironment的构造器,AbstractEnvironment是Environment的抽象基类
publicAbstractEnvironment(){this(newMutablePropertySources());}
MutablePropertySources 是PropertySources接口的默认实现,PropertySources是属性配置源接口,描述了如何获取属性值。
这里再调用了当前类的有参构造器。
protectedAbstractEnvironment(MutablePropertySources propertySources){this.propertySources = propertySources;//创建配置解析器this.propertyResolver =createPropertyResolver(propertySources);//调用自定义配置源,具体由子类实现customizePropertySources(propertySources);}protectedvoidcustomizePropertySources(MutablePropertySources propertySources){}
这里就调用到了
StandardServletEnvironment
的
customizePropertySources
中:
protectedvoidcustomizePropertySources(MutablePropertySources propertySources){
    propertySources.addLast(newStubPropertySource(SERVLET_CONFIG_PROPERTY_SOURCE_NAME));
    propertySources.addLast(newStubPropertySource(SERVLET_CONTEXT_PROPERTY_SOURCE_NAME));if(jndiPresent &&JndiLocatorDelegate.isDefaultJndiEnvironmentAvailable()){
        propertySources.addLast(newJndiPropertySource(JNDI_PROPERTY_SOURCE_NAME));}super.customizePropertySources(propertySources);}
在这里添加了关于
ServletConfig、ServletContext、JNDI
的配置源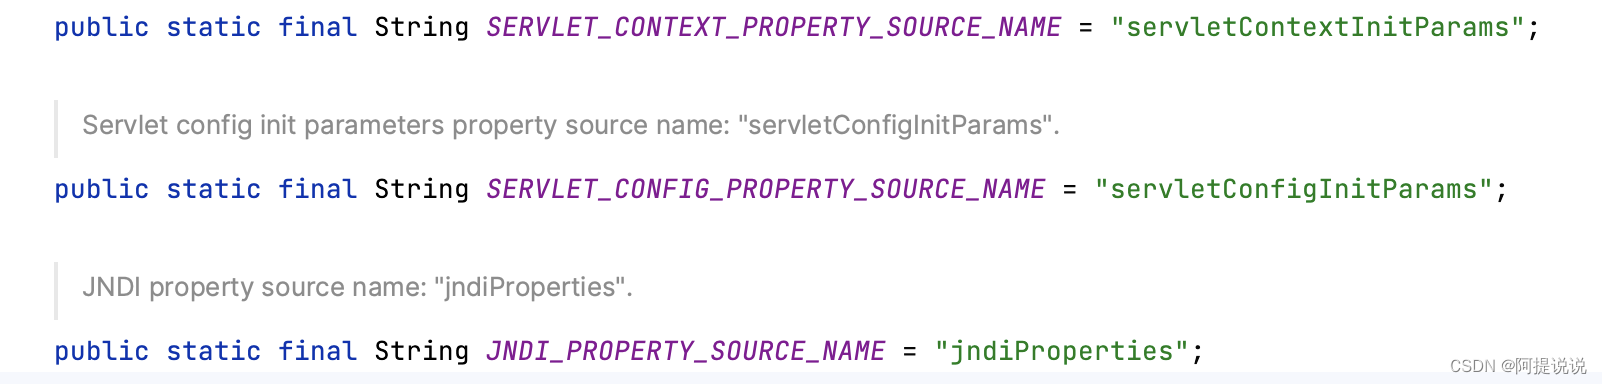
在该方法的最后,又调用到了父类
StandardEnvironment
的
customizePropertySources
中:
protectedvoidcustomizePropertySources(MutablePropertySources propertySources){
    propertySources.addLast(newPropertiesPropertySource(SYSTEM_PROPERTIES_PROPERTY_SOURCE_NAME,getSystemProperties()));
    propertySources.addLast(newSystemEnvironmentPropertySource(SYSTEM_ENVIRONMENT_PROPERTY_SOURCE_NAME,getSystemEnvironment()));}
在这里添加了
Java System属性、操作系统环境变量
两个配置源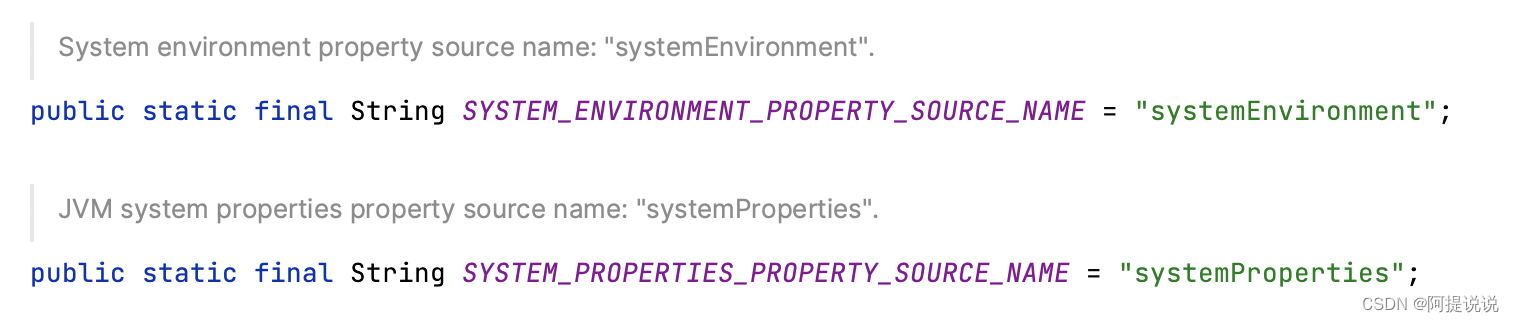
到此为止已经添加了4个配置源,
由于这里不是JNDI环境,没有添加JNDI的配置源
,这里执行结束后返回到SpringApplication的getOrCreateEnvironment()处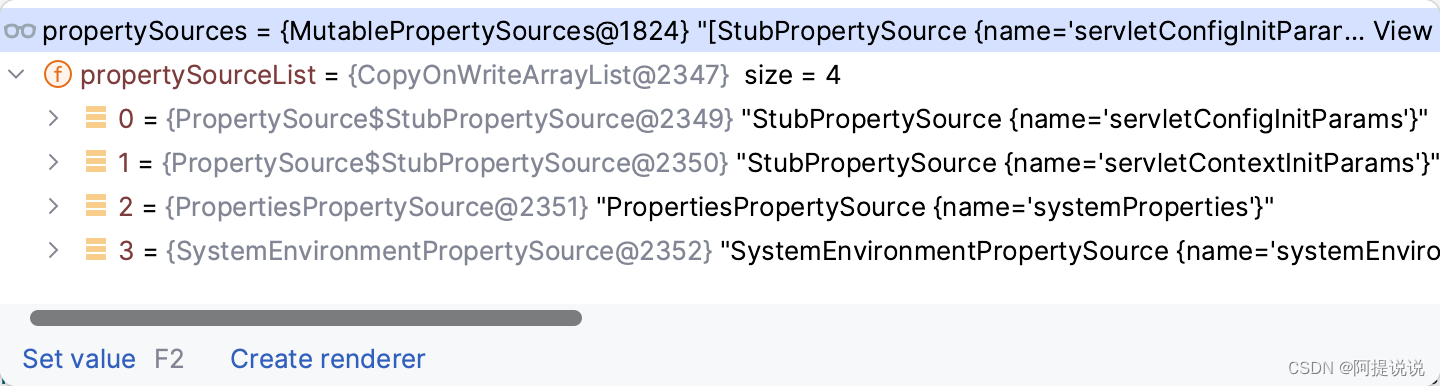
接着进入
configureEnvironment(environment, applicationArguments.getSourceArgs())
中
protectedvoidconfigureEnvironment(ConfigurableEnvironment environment,String[] args){//这里用于添加转换服务if(this.addConversionService){
        environment.setConversionService(newApplicationConversionService());}//这里也是设置配置源,后面详解configurePropertySources(environment, args);//设置激活的配置文件configureProfiles(environment, args);}
进入
configurePropertySources(environment, args)
中
protectedvoidconfigurePropertySources(ConfigurableEnvironment environment,String[] args){//获取环境中已有的配置源MutablePropertySources sources = environment.getPropertySources();//默认配置不为空,则添加到配置源中,defaultProperties通过springApplication.setDefaultProperties(properties) 配置if(!CollectionUtils.isEmpty(this.defaultProperties)){//addOrMerge会判断已有的配置源中是否已经存在了defaultProperties,来判断是合并还是直接添加DefaultPropertiesPropertySource.addOrMerge(this.defaultProperties, sources);}//判断是否有命令行参数,addCommandLineProperties表示是否允许添加命令行配置,默认为true,可通过setAddCommandLineProperties配置if(this.addCommandLineProperties && args.length >0){//命令行配置源名称String name =CommandLinePropertySource.COMMAND_LINE_PROPERTY_SOURCE_NAME;//已有配置源中是否包含命令行配置源名称if(sources.contains(name)){PropertySource<?> source = sources.get(name);CompositePropertySource composite =newCompositePropertySource(name);//创建一个具有新名称的组合配置源
            composite
                .addPropertySource(newSimpleCommandLinePropertySource("springApplicationCommandLineArgs", args));
            composite.addPropertySource(source);//使用新的替换原来的配置源
            sources.replace(name, composite);}else{//不包含就添加到已有源的最前面
            sources.addFirst(newSimpleCommandLinePropertySource(args));}}}
SimpleCommandLinePropertySource
用于解析命令行参数并填充到CommandLineArgs中,解析规则为:
–optName[=optValue]
必须以“–”为前缀,并且可以指定值,也可以不指定值。如果指定了值,则名称和值必须用等号(“=”)分隔,不带空格。该值可以是空字符串(可选)。
有效示例有:
–foo
–foo=
–foo=“”
–foo=bar
–foo=“bar then baz”
–foo=bar,baz,biz
无效示例:
-foo
–foo bar
–foo = bar
–foo=bar --foo=baz --foo=biz
添加完命令行配置源有,进入
configureProfiles(environment, args)
中,开始设置激活的配置文件:
protectedvoidconfigureProfiles(ConfigurableEnvironment environment,String[] args){}
这是一个空的protected方法,可见需要子类去实现,这边没有SpringApplication的子类,也就不会在这里处理。
configureEnvironment
处理完后,进入
ConfigurationPropertySources.attach(environment)
:
publicstaticvoidattach(Environment environment){Assert.isInstanceOf(ConfigurableEnvironment.class, environment);MutablePropertySources sources =((ConfigurableEnvironment) environment).getPropertySources();PropertySource<?> attached =getAttached(sources);if(attached ==null||!isUsingSources(attached, sources)){
        attached =newConfigurationPropertySourcesPropertySource(ATTACHED_PROPERTY_SOURCE_NAME,newSpringConfigurationPropertySources(sources));}
    sources.remove(ATTACHED_PROPERTY_SOURCE_NAME);
    sources.addFirst(attached);}
该处代码用于将
ConfigurationPropertySourcesPropertySource
类型的源添加到已有的配置源中,名称为
configurationProperties
这里处理完后,会调用
listeners.environmentPrepared(bootstrapContext, environment)
,通过
EventPublishingRunListener
发送ApplicationEnvironmentPreparedEvent事件,这块前面我们已经多次讲到过,这里不再复述,我们进入
EnvironmentPostProcessorApplicationListener
,其中的
onApplicationEvent
在收到ApplicationEnvironmentPreparedEvent事件后,执行
onApplicationEnvironmentPreparedEvent(ApplicationEnvironmentPreparedEvent event)
privatevoidonApplicationEnvironmentPreparedEvent(ApplicationEnvironmentPreparedEvent event){ConfigurableEnvironment environment = event.getEnvironment();SpringApplication application = event.getSpringApplication();for(EnvironmentPostProcessor postProcessor :getEnvironmentPostProcessors(application.getResourceLoader(),
            event.getBootstrapContext())){
        postProcessor.postProcessEnvironment(environment, application);}}
getEnvironmentPostProcessors(application.getResourceLoader(), event.getBootstrapContext()) 会获取所有的
EnvironmentPostProcessor
实例,如根据本系列文章的Demo获取到的实例有:
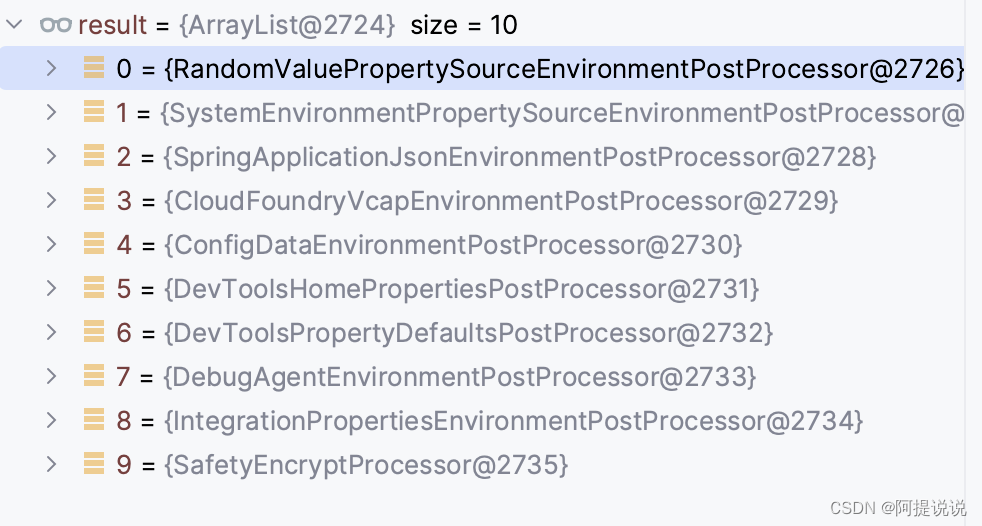
我们主要关注如下几个,其他的忽略:
RandomValuePropertySourceEnvironmentPostProcessor: 添加RandomValuePropertySource 配置源,用来解析RandomValuePropertySource的随机值属性SystemEnvironmentPropertySourceEnvironmentPostProcessor:将原来的SystemEnvironmentPropertySource替换为OriginAwareSystemEnvironmentPropertySource,以便能够跟踪每个属性的SystemEnvironmentOriginSpringApplicationJsonEnvironmentPostProcessor:添加嵌入在环境变量或系统属性中的SPRING_APPLICATION_JSON 的属性CloudFoundryVcapEnvironmentPostProcessor:如果是Cloud Foundry平台,添加Cloud Foundry相关的配置源ConfigDataEnvironmentPostProcessor:添加application.yml等配置源DevToolsHomePropertiesPostProcessor:添加Devtools 全局配置的配置源
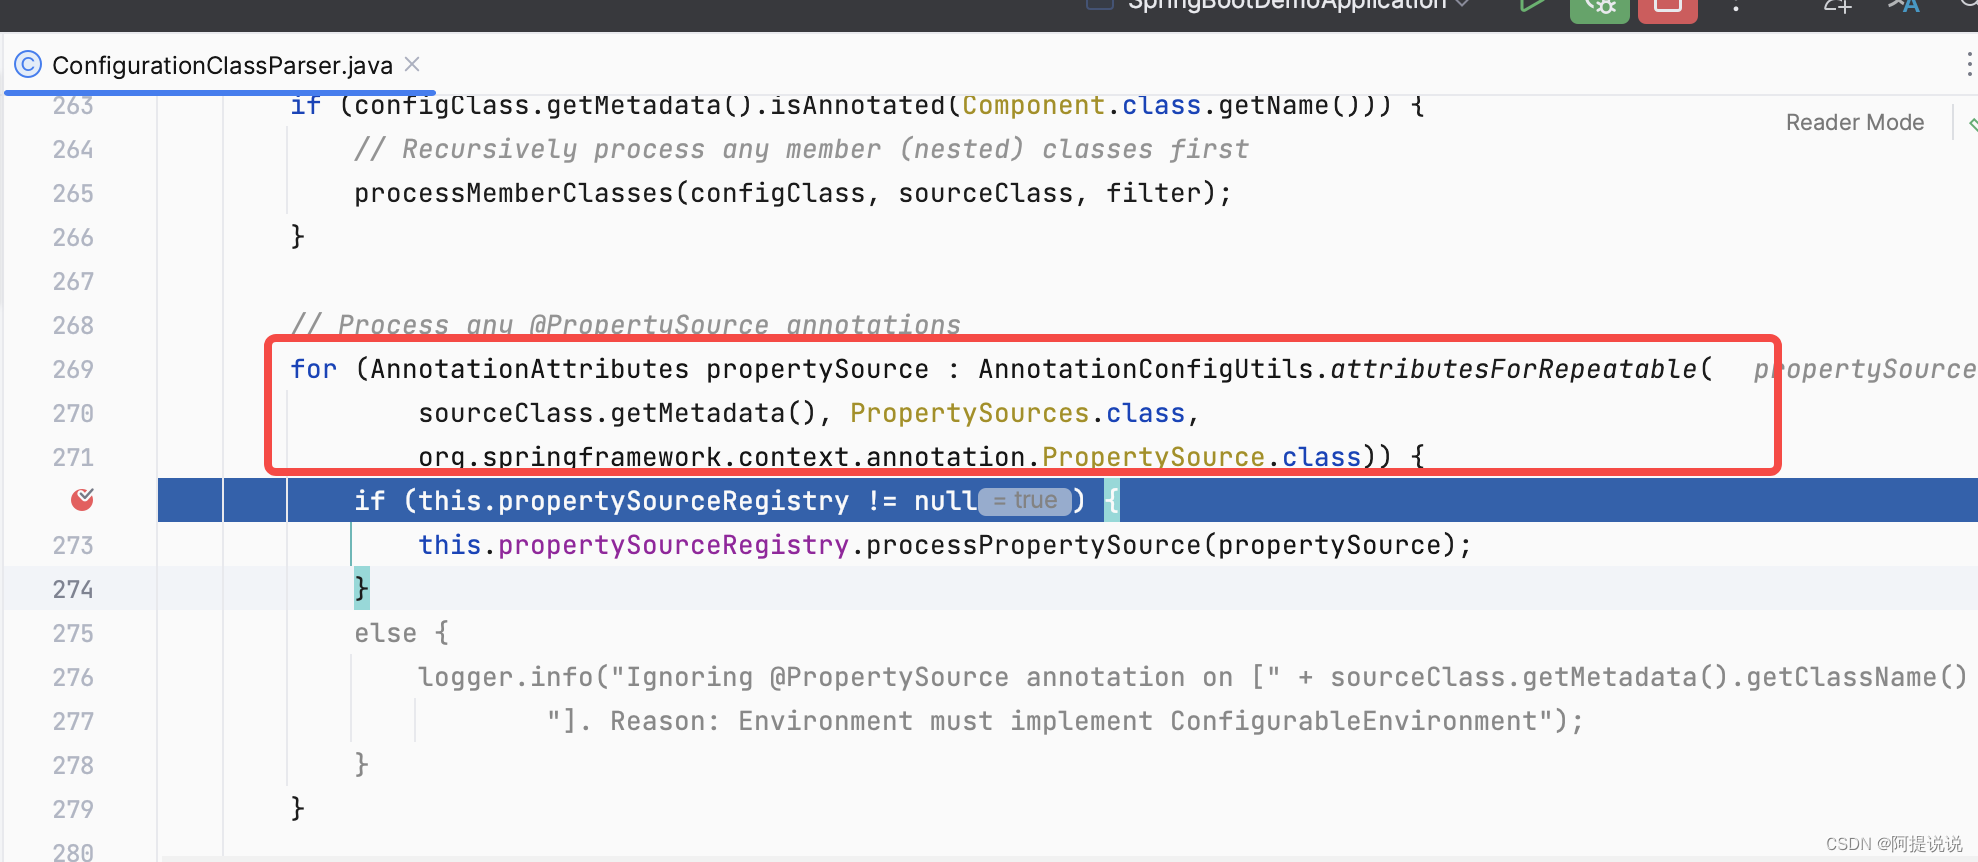
另外
@PropertySource注解配置
的加载是在
刷新上下文
中的
ConfigurationClassPostProcessor
类中处理,具体代码可见
ConfigurationClassParser
:
17种属性配置的加载基本都在这里了,最后总结一下
总结

作者其他要推荐的文章,欢迎来学习:
Prometheus 系列文章
- Prometheus 的介绍和安装
- 直观感受PromQL及其数据类型
- PromQL之选择器和运算符
- PromQL之函数
- Prometheus 告警机制介绍及命令解读
- Prometheus 告警模块配置深度解析
- Prometheus 配置身份认证
- Prometheus 动态拉取监控服务
- Prometheus 监控云Mysql和自建Mysql
Grafana 系列文章,版本:OOS v9.3.1
- Grafana 的介绍和安装
- Grafana监控大屏配置参数介绍(一)
- Grafana监控大屏配置参数介绍(二)
- Grafana监控大屏可视化图表
- Grafana 查询数据和转换数据
- Grafana 告警模块介绍
- Grafana 告警接入飞书通知
Spring Boot Admin 系列
- Spring Boot Admin 参考指南
- SpringBoot Admin服务离线、不显示健康信息的问题
- Spring Boot Admin2 @EnableAdminServer的加载
- Spring Boot Admin2 AdminServerAutoConfiguration详解
- Spring Boot Admin2 实例状态监控详解
- Spring Boot Admin2 自定义JVM监控通知
- Spring Boot Admin2 自定义异常监控
- Spring Boot Admin 监控指标接入Grafana可视化
版权归原作者 阿提说说 所有, 如有侵权,请联系我们删除。