vue3中使用swiper(9)完整版

1、使用方式
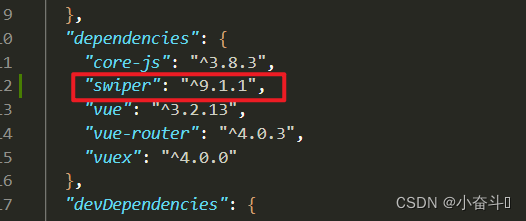
1)安装
swiper
插件;
方法一:npm install swiper
方法二:yarn add swiper
注意:如果npm 无法安装swiper时,使用yarn安装;
npm install -g yarn // 安装yarn
yarn init # yarn  // 初始化
yarn remove 包名称  // 删除某个包
yarn run serve  // 运行

2)参数介绍
- modules:
- loop: 是否循环播放
- slides-per-view:控制一次显示几张轮播图
- space-between: 每张轮播图之间的距离,该属性不可以和margin 属性同时使用;
- autoplay: 是否自动轮播, delay为间隔的毫秒数;disableOnInteraction属性默认是true,也就是当用户手动滑动后禁用自动播放, 设置为false后,将不会禁用,会每次手动触发后再重新启动自动播放。
- navigation: 定义左右切换箭头
- pagination: 控制是否可以点击圆点指示器切换轮播
- scrollbar: 是否显示轮播图的滚动条, draggable设置为 true就可以拖动底部的滚动条(轮播当中,一般不怎么会使用到这个属性)
2、代码如下
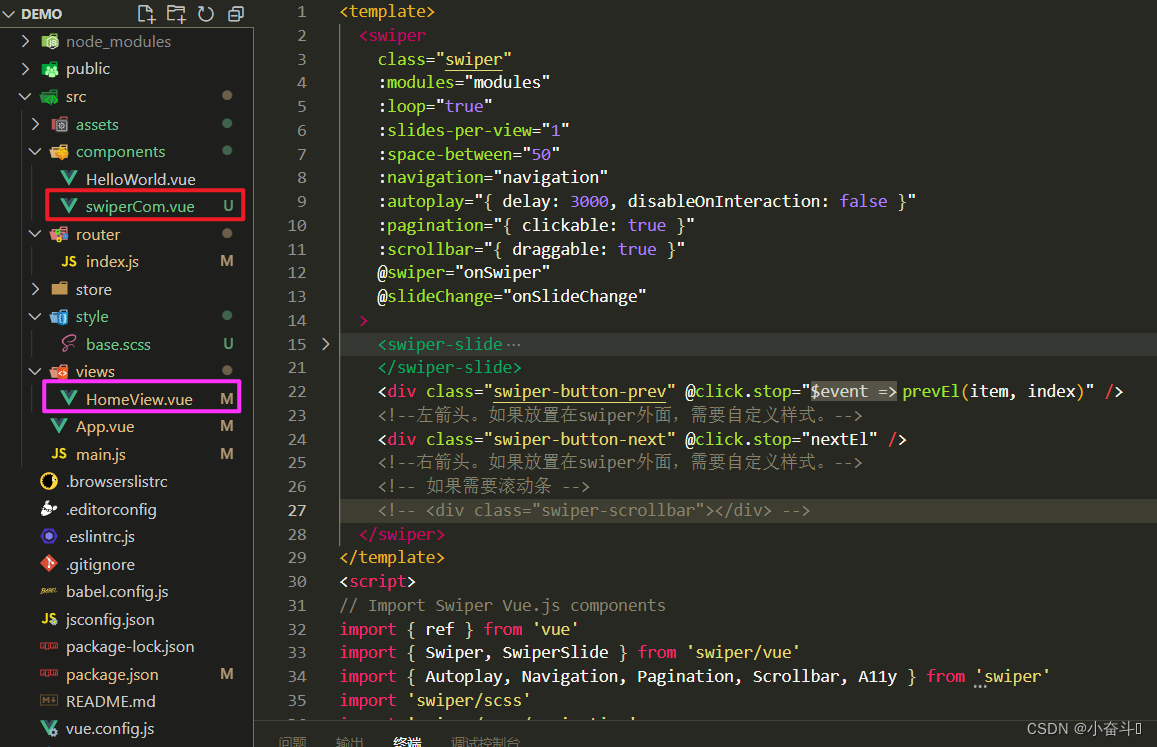
1)组件swiperCom.vue的代码:
<template>
  <swiper
    class="swiper"
    :modules="modules"
    :loop="true"
    :slides-per-view="1"
    :space-between="50"
    :navigation="navigation"
    :autoplay="{ delay: 3000, disableOnInteraction: false }"
    :pagination="{ clickable: true }"
    :scrollbar="{ draggable: true }"
    @swiper="onSwiper"
    @slideChange="onSlideChange"
  >
    <swiper-slide
      v-for="(item, index) in imgs"
      :key="index"
      class="swiper-slide"
    >
      <img :src="item.pic" alt="" class="swiper-img" />
    </swiper-slide>
    <div class="swiper-button-prev" @click.stop="prevEl(item, index)" />
    <!--左箭头。如果放置在swiper外面,需要自定义样式。-->
    <div class="swiper-button-next" @click.stop="nextEl" />
    <!--右箭头。如果放置在swiper外面,需要自定义样式。-->
    <!-- 如果需要滚动条 -->
    <!-- <div class="swiper-scrollbar"></div> -->
  </swiper>
</template>
<script>
// Import Swiper Vue.js components
import { ref } from 'vue'
import { Swiper, SwiperSlide } from 'swiper/vue'
import { Autoplay, Navigation, Pagination, Scrollbar, A11y } from 'swiper'
import 'swiper/scss'
import 'swiper/scss/navigation'
import 'swiper/scss/pagination'
// import 'swiper/css/scrollbar'

export default {
  name: 'SwiperCom',
  data () {
    return {
      imgs: [
        { pic: require('../assets/001.jpg') },
        { pic: require('../assets/002.jpg') },
        { pic: require('../assets/003.jpg') },
        { pic: require('../assets/004.png') }
      ]
    }
  },
  components: {
    Swiper,
    SwiperSlide
  },
  setup () {
    const onSwiper = (swiper) => {
      console.log(swiper)
    }
    const navigation = ref({
      nextEl: '.swiper-button-next',
      prevEl: '.swiper-button-prev'
    })
    const prevEl = (item, index) => {
      // console.log('上一张' + index + item)
    }
    const nextEl = () => {
      // console.log('下一张')
    }
    // 更改当前活动swiper
    const onSlideChange = (swiper) => {
      // swiper是当前轮播的对象,里面可以获取到当前swiper的所有信息,当前索引是activeIndex
      console.log(swiper.activeIndex)
    }
    return {
      onSwiper,
      onSlideChange,
      prevEl,
      nextEl,
      navigation,
      modules: [Autoplay, Navigation, Pagination, Scrollbar, A11y]
    }
  }
}
</script>
<style lang="scss" >
.swiper {
  width: 339rem;
  height: 150rem;
  background-color: antiquewhite;
  .swiper-slide {
    .swiper-img {
      width: 339px;
      height: 150px;
    }
  }
  .swiper-button-next,
  .swiper-button-prev {
    --swiper-theme-color: red;
    --swiper-navigation-size: 20rem;
  }
//   改变小圆点的样式
  .swiper-pagination-bullet-active {
    background: white;
  }
}
</style>

2)组件HomeView.vue的代码:
<template>
  <div class="home">
    <swiperCom />  // 在HomeView中调用组件swiperCom
  </div>
</template>

<script>
// @ is an alias to /src
import swiperCom from '@/components/swiperCom.vue' // 引入组件swiperCom
export default {
  name: 'HomeView',
  components: {
    swiperCom   // 所用到的组件记得写在components中
  }
}
</script>
3、基本步骤
1)在 components 文件中新建组件 swiperCom.vue ,在HomeView.vue中调用组件

版权归原作者 小奋斗♛ 所有, 如有侵权,请联系我们删除。