
vue集成tui.calendar日历组件
前言
vue2的集成在git上官方已经给出了demo这里就不贴代码了。本次主要是vue3集成
最近有个功能需要一个日历视图显示出什么时间段上什么课、点击可以查看详情、点击日历空白出可以创建课程或者日程。并且可以拖动。找了挺多组件,最后跟团队商量一下决定使用tui.calendar
下面是我找的日历视图组件:
名称地址VCalendarhttps://vcalendar.io/tui.calendarhttps://ui.toast.com/tui-calendarelementhttps://element-plus.org/zh-CN/component/calendar.htmlfullcalendarhttps://fullcalendar.io/demos
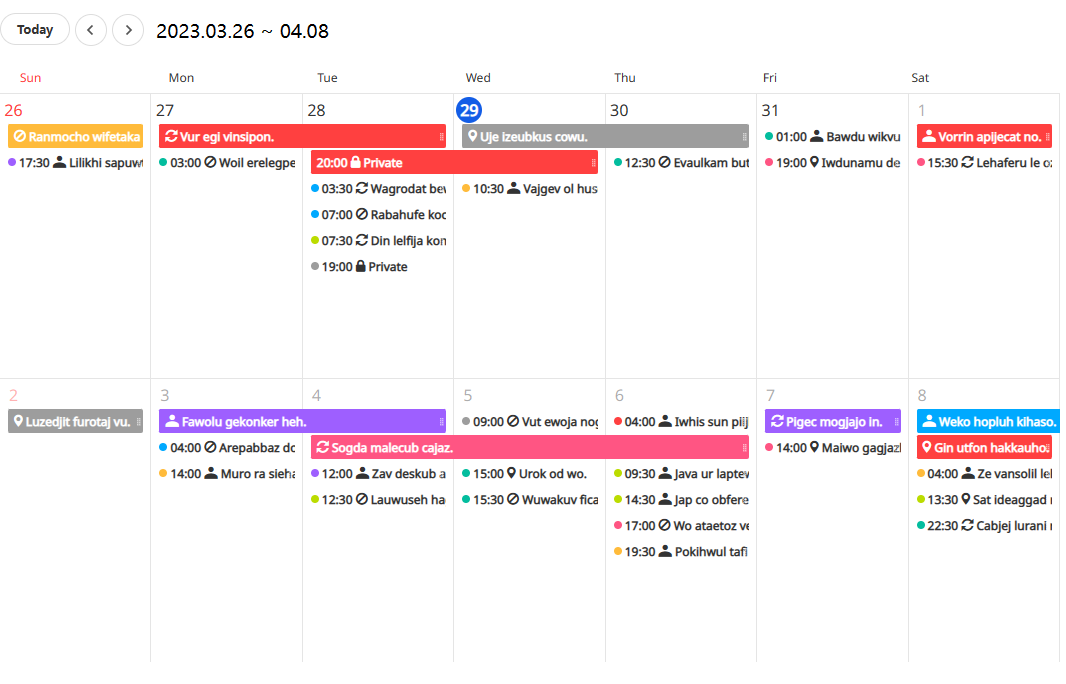
一、简介、效果图
The Calendar supports monthly, weekly, daily views and more, and you can create or edit your event with a simple dragging motion.
名称地址官网https://ui.toast.com/tui-calendar源码地址https://github.com/nhn/tui.calendar
tui.calendar有3中集成方式:js、vue2、react
https://github.com/nhn/tui.calendar/tree/main/apps
二、vue简单集成(集成js版本,没有使用官方的vue2版本)
这里使用的是引用js的方式进行集成
1.引包
#tui.calendar包npminstall --save @toast-ui/calendar
#因为calendar中默认使用了时间组件这里引入一下npminstall tui-date-picker
npminstall tui-time-picker
#demo中用到uuid生成idnpminstall uuid
2.简单示例
直接上代码:
<template><el-date-pickerv-model="selectDate"type="date"placeholder="Pick a day"@change="handleSelectDate"/><el-buttonicon="ArrowLeft"circle@click="handleLeftBtn"/><el-buttonicon="ArrowRight"circle@click="handleRightBtn"/><divid="calendar"style="height: 100%"></div></template><script>import Calendar from'@toast-ui/calendar';import'@toast-ui/calendar/dist/toastui-calendar.min.css';import'tui-date-picker/dist/tui-date-picker.min.css';import'tui-time-picker/dist/tui-time-picker.min.css';import{ v4 as uuidv4 }from'uuid'exportdefault{data(){return{useCreatePopup:true,useDetailPopup:true,calendar:undefined,selectDate:''}},methods:{init(){this.calendar =newCalendar('#calendar',{defaultView:'week',useFormPopup:this.useCreatePopup,useDetailPopup:this.useDetailPopup,usageStatistics:false,// timezone:{//   zones:[//     {//       timezoneName:'Australia/Sydney',//     }//   ]// },template:{milestone:function(model){return'<span class="calendar-font-icon ic-milestone-b"></span> <span style="background-color: '+ model.bgColor +'">'+ model.title +'</span>';},popupIsAllday(){return'All day';},popupStateFree(){return'Free';},popupEdit(){return'Edit';},popupDelete(){return'Delete';},popupDetailTitle({title}){return title;},popupDetailLocation({location}){return location;},},week:{taskView:false}});this.calendar.createEvents([{id:uuidv4(),title:'Weekly Meeting',start:newDate(Date.now()),end:newDate(Date.now()+30*60*1000),},]);// 创建this.calendar.on("beforeCreateEvent",(e)=>{
        console.log("创建",e)this.calendar.createEvents([{id:uuidv4(),calendarId:'cal1',title: e.title,start: e.start.d.d,end: e.end.d.d,isAllday: e.isAllday,location: e.location,state: e.state,color:'#fff',backgroundColor:'#3c056d',dragBackgroundColor:'#3c056d',customStyle:{fontStyle:'italic',fontSize:'15px',},},// EventObject])})//修改this.calendar.on('beforeUpdateEvent',(e)=>{
        console.log("修改",e)const targetEvent = e.event;const changes ={...e.changes};this.calendar.updateEvent(targetEvent.id, targetEvent.calendarId, changes);});//删除this.calendar.on('beforeDeleteEvent',(e)=>{
        console.log("删除",e)this.calendar.deleteEvent(e.id, e.calendarId);});},handleLeftBtn(){this.calendar.prev()},handleRightBtn(){this.calendar.next()},handleSelectDate(){this.calendar.setDate(this.selectDate)}},mounted(){this.init()}}</script><stylescoped></style>
参数详解:
参数默认值描述defaultView‘week’默认视图类型,可选为month、week、dayuseFormPopupfalse是否开启创建修改弹窗useDetailPopupfalse是否开启详情弹窗usageStatisticstrue是否允许google收集信息isReadOnlyfalse日历是否为只读的timezone{ zones: [] }日历使用的时区选项
更多参数参考文档https://github.com/nhn/tui.calendar/tree/main/docs/en/apis
三、自定义功能
1.需求分析、效果展示
根据需求点击event展示信息如下
1.需要实现点击左侧侧边栏选项calendar动态加载
2.点击event自定义弹窗显示信息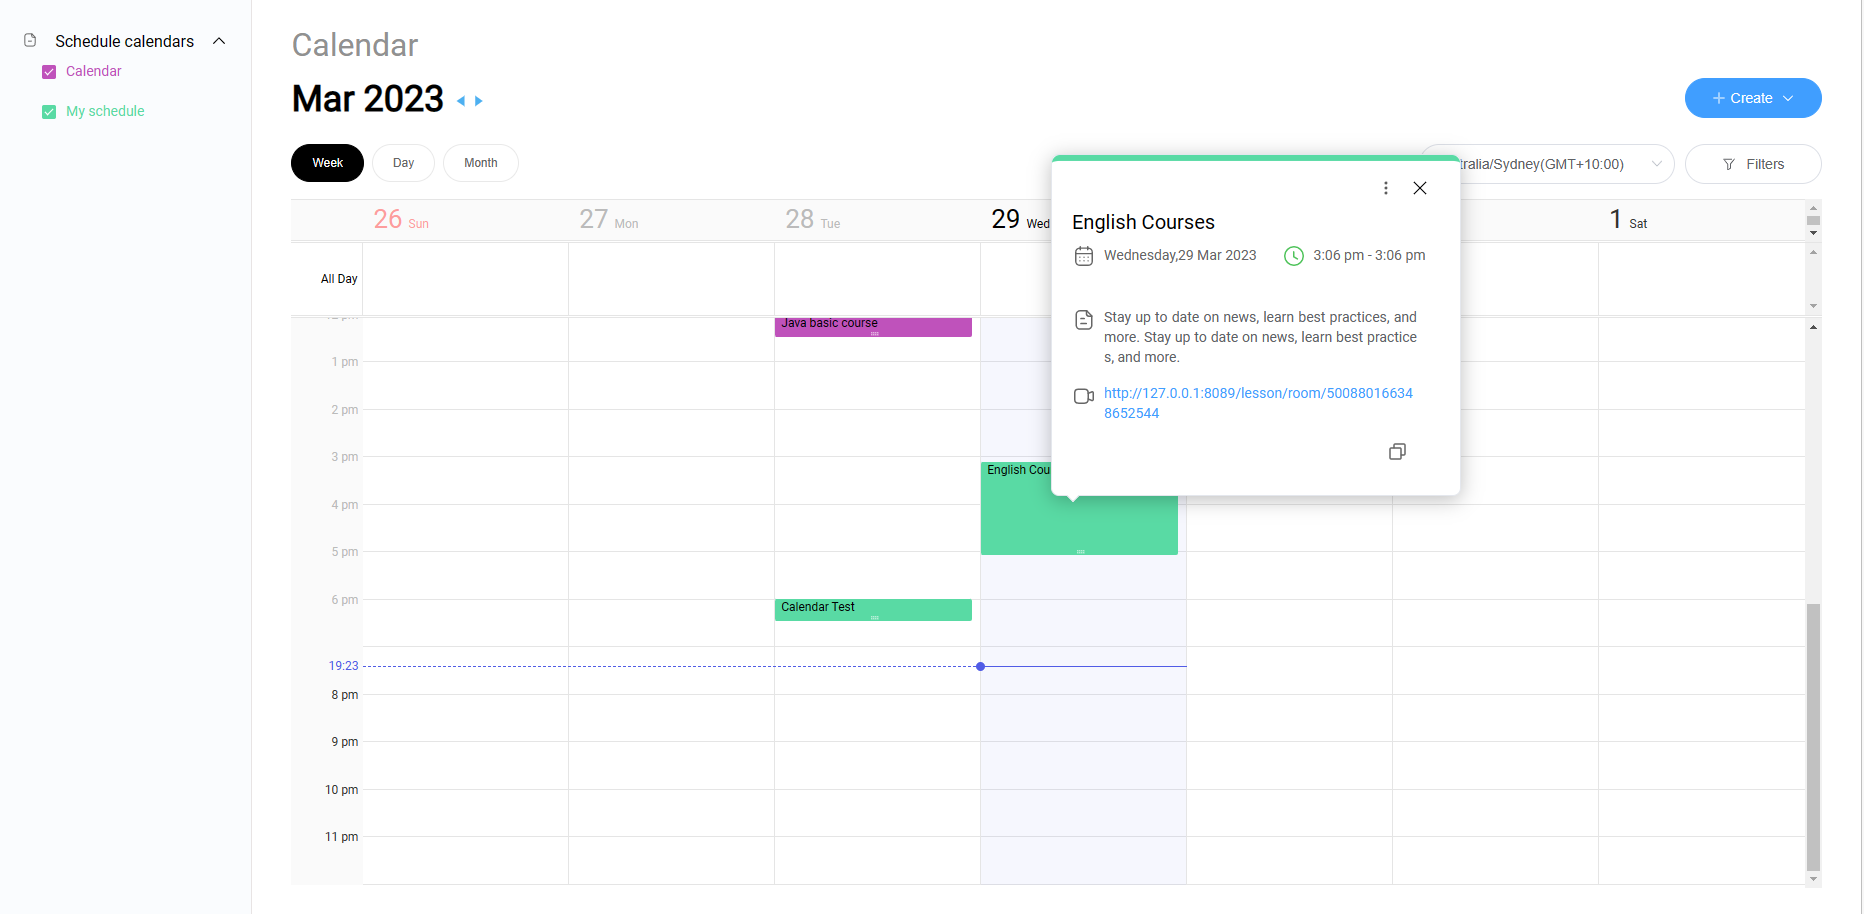
2.实现思路
具体代码因公司原因就不贴了。这里讲一下思路:
1.侧边栏实现
给多选框添加change事件,用一个数组接受已经勾选了的选项id,然后去请求后端calendar事件接0口。
接受到新的events后先清空当前日程表上的事件calendar.clear()。
然后调用calendar.createEvents()去重新添加到日历中
事件文档:https://github.com/nhn/tui.calendar/blob/main/docs/en/apis/calendar.md
2.弹出框实现
这里我有考虑自定义。但是看了两天文档并没有看到组件可以自定义弹框(或者我笨没有发现)
所以我打算通过监听事件自己添加一个
我这里使用的饿了么组件el-popover
首先我们需要获取到点击事件的坐标,通过监听calendar.on(‘clickEvent’, (e) => {})获取坐标包括event详情。有了坐标信息那么popover弹出在这个坐标上就可以了
el-popover使用demo
<el-popover
    placement="top-start"title="标题"width="200"trigger="hover"content="这是一段内容,这是一段内容,这是一段内容,这是一段内容。"><el-button slot="reference">hover 激活</el-button></el-popover>
我这里通过样式z-index:-1;position: absolute;left:(xxx)px;right:(xxx)px设置这个按钮的位置并且使用z-index显示在日历视图之下。然后触发这个按钮显示出弹框。这里就基本上实现了。
如果想做创建窗口监听
calendar.on('selectDateTime', (e)=>{
  console.log("selectDateTime",e)});
然后跟上边同理获取到点击时间块的信息进行处理
版权归原作者 落魄实习生 所有, 如有侵权,请联系我们删除。