
提示:文章写完后,目录可以自动生成,如何生成可参考右边的帮助文档
文章目录
SpringAMQP
1.SpringBoot 的支持
- SpringBoot 已经提供了对 AMQP 协议完全支持的 spring-boot-starter-amqp 依赖,引入此依赖即可快速方便的在 SpringBoot 中使用 RabbitMQ。
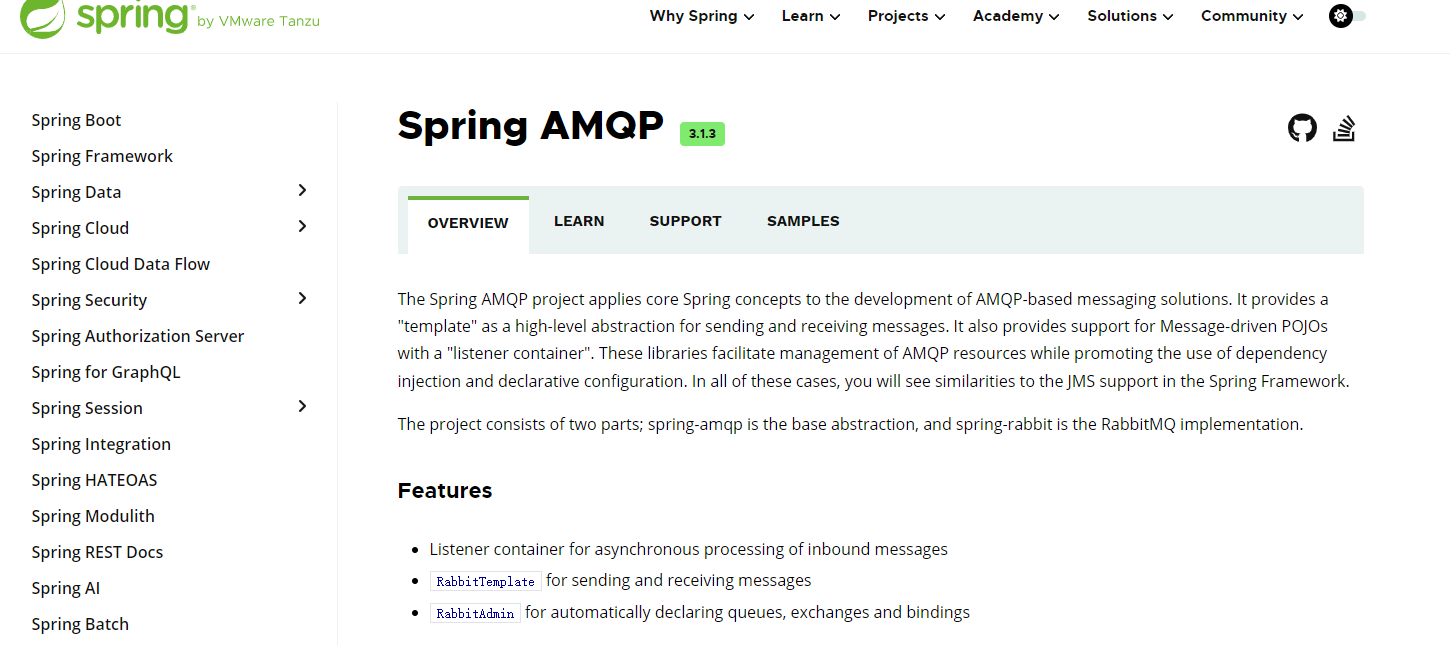
https://spring.io/projects/spring-amqp
2.RabbitTemplate
- RabbitTemplate 是 SpringBoot AMQP 提供的快速发 RabbitMQ 消息的模板类,与 RestTemplate 有类似之处,意指方便、简单、快速的发 RabbitMQ 消息。
@Slf4j@ComponentpublicclassClientReportTopicProducer{@AutowiredprivateRabbitTemplate rabbitTemplate;privatestaticfinalStringROUTING_KEY="report";publicvoidsend(String param){
        rabbitTemplate.send(TopicConst.CLIENT_REPORT_TOPIC,ROUTING_KEY,newMessage(param.getBytes(),newMessageProperties()));}}

send:将消息发送到指定的交换机和路由键中。
convertAndSend:将Java对象转换为消息,然后将其发送到指定的交换机和路由键中。
sendAndReceive:发送一个请求消息并接收一个响应消息。
convertSendAndReceive:将Java对象转换为请求消息,发送请求消息,并接收响应消息。
convertSendAndReceiveAsType:将Java对象转换为请求消息,发送请求消息,并接收响应消息,并将响应消息转换为指定类型的Java对象。
convertSendAndReceiveAsType:将Java对象转换为请求消息,发送请求消息,并接收响应消息,并将响应消息转换为指定类型的Java对象。
sendWithMessagePostProcessor:发送消息,并在发送之前进行处理。
execute:执行Rabbit操作并返回一个结果。
receive:从队列接收一条消息。
receiveAndConvert:从队列接收一条消息,并将其转换为Java对象。
receiveAndReply:从队列接收一条请求消息,并发送一个响应消息。
convertSendAndReceiveAsType:将Java对象转换为请求消息,发送请求消息,并接收响应消息,并将响应消息转换为指定类型的Java对象。
convertSendAndReceiveAsType:将Java对象转换为请求消息,发送请求消息,并接收响应消息,并将响应消息转换为指定类型的Java对象。
convertSendAndReceiveAndReplyHeader:将Java对象转换为请求消息,并发送请求消息。接收到请求消息后,将其转换为响应消息,并设置响应消息的头信息。
convertAndSend:将Java对象转换为消息,并发送消息。
convertAndSend:将Java对象转换为消息,并发送消息。在发送之前,先对消息进行处理。
convertAndSend:将Java对象转换为消息,并发送消息。在发送之前,先对消息进行处理,并指定响应消息的类型。
convertAndSend:将Java对象转换为消息,并发送消息。在发送之前,先对消息进行处理,并指定响应消息的类型和交换机。
send:将消息发送到指定的交换机和路由键中。
send:将消息发送到指定的交换机和路由键中。在发送之前,先对消息进行处理。
send:将消息发送到指定的交换机和路由键中。在发送之前,先对消息进行处理,并指定响应消息的类型。
sendAndReceive:发送一个请求消息并接收一个响应消息。
sendAndReceive:发送一个请求消息并接收一个响应消息。在发送之前,先对消息进行处理。
sendAndReceive:发送一个请求消息并接收一个响应消息。在发送之前,先对消息进行处理,并指定响应消息的类型。
sendAndReceive:发送一个请求消息并接收一个响应消息。在发送之前,先对消息进行处理,并指定响应消息的类型和交换机。
setConnectionFactory:设置RabbitMQ连接工厂。
getConnectionFactory:获取RabbitMQ连接工厂。
setExchange:设置默认的交换机。
getExchange:获取默认的交换机。
setRoutingKey:设置默认的路由键。
getRoutingKey:获取默认的路由键。
setQueue:设置默认的队列。
getQueue:获取默认的队列。
setMandatory:设置消息是否强制路由到队列。
isMandatory:检查消息是否强制路由到队列。
setReplyTimeout:设置接收响应消息的超时时间。
getReplyTimeout:获取接收响应消息的超时时间。
setChannelTransacted:设置通道是否应该在事务中使用。
isChannelTransacted:检查通道是否应该在事务中使用。
setConfirmCallback:设置确认回调。
getConfirmCallback:获取确认回调。
setReturnCallback:设置返回回调。
getReturnCallback:获取返回回调。
setBeforePublishPostProcessor:设置发布之前的后处理器。
getBeforePublishPostProcessor:获取发布之前的后处理器。
setAfterReceivePostProcessor:设置接收后的后处理器。
getAfterReceivePostProcessor:获取接收后的后处理器。
setUsePublisherConnection:设置是否应该使用发布者连接。
isUsePublisherConnection:检查是否应该使用发布者连接。
setApplicationContext:设置应用程序上下文。
3.@RabbitListener(终极监听方案)
使用此方案做监听消息功能,就可以把之前的 SimpleMessageListenerContainer 进行监听的方案舍弃掉了,就是这么的喜新厌旧,不过之前的 SimpleMessageListenerContainer 也不是一无是处,学过之后可以更好的理解内部的一些逻辑。
@RabbitListener 的特点:
- RabbitListener 是 SpringBoot 架构中监听消息的终极方案。
- RabbitListener 使用注解声明,对业务代码无侵入。
- RabbitListener 可以在 SpringBoot 配置文件中进行配置。
@RabbitListener 本身是 Java 中的注解,可以搭配其他注解一起使用:
- @Exchange:自动声明 Exchange。
- @Queue:自动声明队列。
- @QueueBinding:自动声明绑定关系。
packagecom.rabbitmqdemoconsumer.rabbitmq;importorg.springframework.amqp.rabbit.annotation.RabbitListener;importorg.springframework.stereotype.Component;@ComponentpublicclassSpringRabbitLeistener{@RabbitListener(queues ="MqTest1")publicvoidlistenSimpleQueueMessage1(String msg){System.out.println("consume1接收到的消息:"+msg);}@RabbitListener(queues ="MqTest1")publicvoidlistenSimpleQueueMessage2(String msg){System.out.println("consume2接收到的消息:"+msg);}}
4.RabbitConfig—rabbitmq配置类
声明式实现(推荐)
@Slf4j@ConfigurationpublicclassRabbitConfig{publicstaticfinalStringEXCHANGE_NAME="exchange.cat.dog";publicstaticfinalStringEXCHANGE_DLX="exchange.dlx";publicstaticfinalStringQUEUE_NAME="queue.cat";publicstaticfinalStringQUEUE_DLX="queue.dlx";publicstaticfinalStringKEY_NAME="key.yingduan";publicstaticfinalStringKEY_DLX="#";@BeanConnectionFactoryconnectionFactory(){CachingConnectionFactory connectionFactory =newCachingConnectionFactory();
        connectionFactory.setHost("127.0.0.1");
        connectionFactory.setUsername("admin");
        connectionFactory.setPassword("kzh_mxg4vfb2QRP*xkv");return connectionFactory;}@BeanRabbitAdminrabbitAdmin(@AutowiredConnectionFactory connectionFactory){returnnewRabbitAdmin(connectionFactory);}@BeanExchangeexchange(){returnnewDirectExchange(EXCHANGE_NAME);}@BeanQueuequeue(){returnnewQueue(QUEUE_NAME);}@BeanBindingbinding(){// 目的地名称、目的地类型、绑定交换机、绑定 key、参数returnnewBinding(QUEUE_NAME,Binding.DestinationType.QUEUE,EXCHANGE_NAME,KEY_NAME,null);}//死信队列机制  死信队列需要在创建 Queue 时指定对应属性:@BeanQueuequeue(){// 配置声明队列时使用的参数Map<String,Object> args =newHashMap<>(1);// 设置死信队列指向的交换机
          args.put("x-dead-letter-exchange",EXCHANGE_DLX);returnnewQueue(QUEUE_NAME,true,false,false, args);}}
注意,以上配置再启动 SpringBoot 并不会立马创建交换机、队列、绑定,SpringBoot AMQP 有懒加载,需要等到使用 connection 时才会创建。什么是使用 connection 呢?
- 比如创建 connection
@BeanConnectionFactoryconnectionFactory(){CachingConnectionFactory connectionFactory =newCachingConnectionFactory();
  connectionFactory.setHost("127.0.0.1");
  connectionFactory.setUsername("admin");
  connectionFactory.setPassword("kzh_mxg4vfb2QRP*xkv");
  connectionFactory.createConnection();return connectionFactory;}
- 再比如监听了队列
@RabbitListener(queues ={"test"})voidtest(){
  log.info("【测试监听消息】");}
SpringBoot集成RabbitMQ 案例
配置
导入maven坐标
<!--rabbitmq--><dependency><groupId>org.springframework.boot</groupId><artifactId>spring-boot-starter-amqp</artifactId></dependency>
yml配置
spring:rabbitmq:addresses: 192.168.100.120:5672,192.168.100.121:5672,192.168.100.122:5672username: admin
    password: admin
    #开启消息确认模式,新版本已经弃用#publisher-confirms: true#开启消息送达提示publisher-returns:true# springboot.rabbitmq.publisher-confirm 新版本已被弃用,现在使用 spring.rabbitmq.publisher-confirm-type = correlated 实现相同效果publisher-confirm-type: correlated
    virtual-host: /
    listener:type: simple
      simple:acknowledge-mode: auto #确认模式prefetch:1#限制每次发送一条数据。concurrency:3#同一个队列启动几个消费者max-concurrency:3#启动消费者最大数量#重试策略相关配置retry:# 开启消费者(程序出现异常)重试机制,默认开启并一直重试enabled:true# 最大重试次数max-attempts:5# 重试间隔时间(毫秒)initial-interval:3000
RabbitMQ 参数配置说明
spring:rabbitmq:host: 127.0.0.1 #ipport:5672#端口username: guest #账号password: guest #密码virtualHost:#链接的虚拟主机addresses: 127.0.0.1:5672#多个以逗号分隔,与host功能一样。requestedHeartbeat:60#指定心跳超时,单位秒,0为不指定;默认60spublisherConfirms:true#发布确认机制是否启用#确认消息已发送到交换机(Exchange)#publisher-confirm-type参数有三个可选值:#SIMPLE:会触发回调方法,相当于单个确认(发一条确认一条)。#CORRELATED:消息从生产者发送到交换机后触发回调方法。#NONE(默认):关闭发布确认模式。#publisher-confirm-type: correlated #发布确认机制是否启用 高版本Springboot使用替换掉publisher-confirms:truepublisherReturns:true#发布返回是否启用connectionTimeout:#链接超时。单位ms。0表示无穷大不超时### ssl相关ssl:enabled:#是否支持sslkeyStore:#指定持有SSL certificate的key store的路径keyStoreType:#key store类型 默认PKCS12keyStorePassword:#指定访问key store的密码trustStore:#指定持有SSL certificates的Trust storetrustStoreType:#默认JKStrustStorePassword:#访问密码algorithm:#ssl使用的算法,例如,TLSv1.1verifyHostname:#是否开启hostname验证### cache相关cache:channel:size:#缓存中保持的channel数量checkoutTimeout:#当缓存数量被设置时,从缓存中获取一个channel的超时时间,单位毫秒;如果为0,则总是创建一个新channelconnection:mode:#连接工厂缓存模式:CHANNEL 和 CONNECTIONsize:#缓存的连接数,只有是CONNECTION模式时生效### listenerlistener:type:#两种类型,SIMPLE,DIRECT## simple类型simple:concurrency:#最小消费者数量maxConcurrency:#最大的消费者数量transactionSize:#指定一个事务处理的消息数量,最好是小于等于prefetch的数量missingQueuesFatal:#是否停止容器当容器中的队列不可用## 与direct相同配置部分autoStartup:#是否自动启动容器acknowledgeMode:#表示消息确认方式,其有三种配置方式,分别是none、manual和auto;默认autoprefetch:#指定一个请求能处理多少个消息,如果有事务的话,必须大于等于transaction数量defaultRequeueRejected:#决定被拒绝的消息是否重新入队;默认是true(与参数acknowledge-mode有关系)idleEventInterval:#container events发布频率,单位ms##重试机制retry:stateless:#有无状态enabled:#是否开启maxAttempts:#最大重试次数,默认3initialInterval:#重试间隔multiplier:#对于上一次重试的乘数maxInterval:#最大重试时间间隔direct:consumersPerQueue:#每个队列消费者数量missingQueuesFatal:#...其余配置看上方公共配置## template相关template:mandatory:#是否启用强制信息;默认falsereceiveTimeout:#`receive()`接收方法超时时间replyTimeout:#`sendAndReceive()`超时时间exchange:#默认的交换机routingKey:#默认的路由defaultReceiveQueue:#默认的接收队列## retry重试相关retry:enabled:#是否开启maxAttempts:#最大重试次数initialInterval:#重试间隔multiplier:#失败间隔乘数maxInterval:#最大间隔
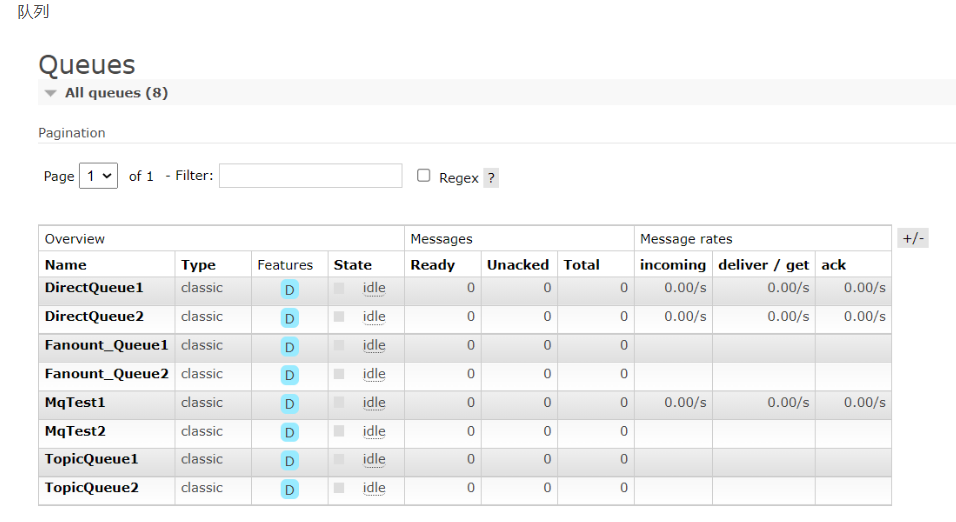
1.基本消息队列
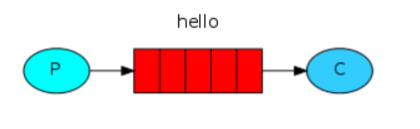
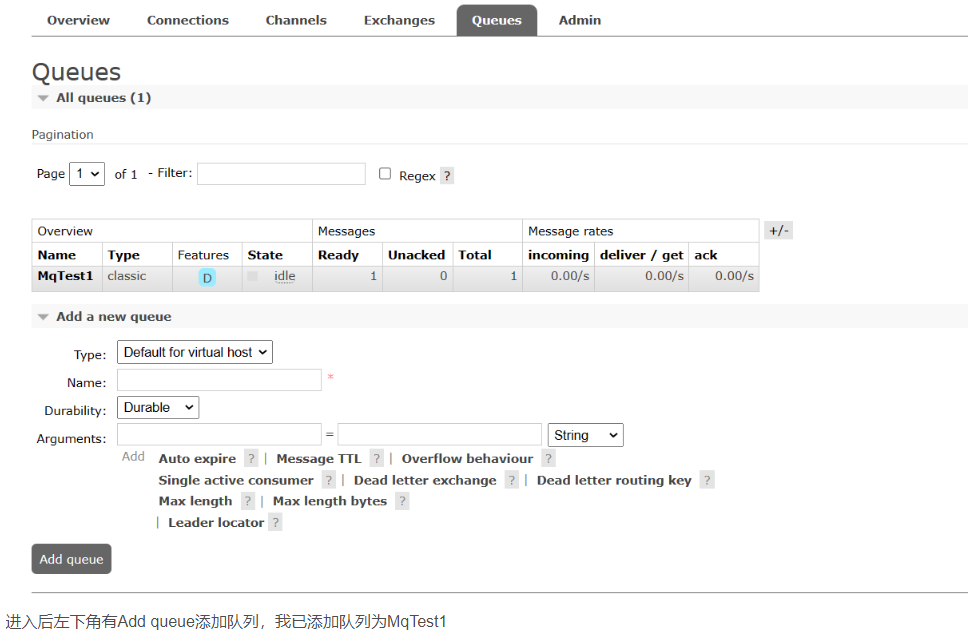
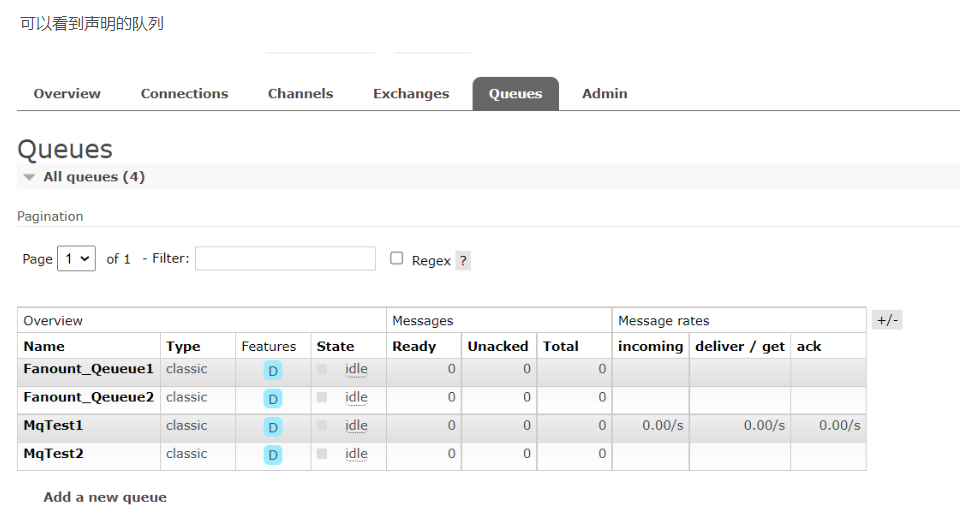
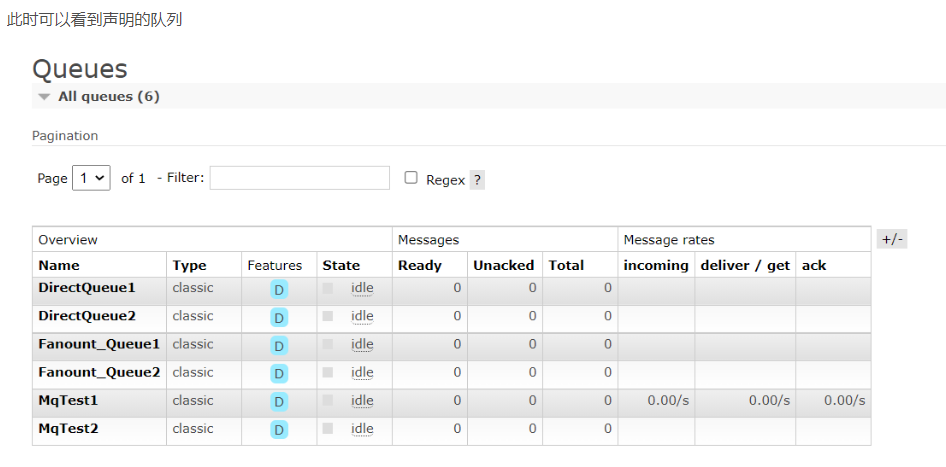
1、创建队列
2、发布消息
@SpringBootTestclassRabbitMQDemoPublishApplicationTests{@AutowiredprivateRabbitTemplate rabbitTemplate;@TestvoidcontextLoads(){String queue="MqTest1";String message="message1";
        rabbitTemplate.convertAndSend(queue,message);}}
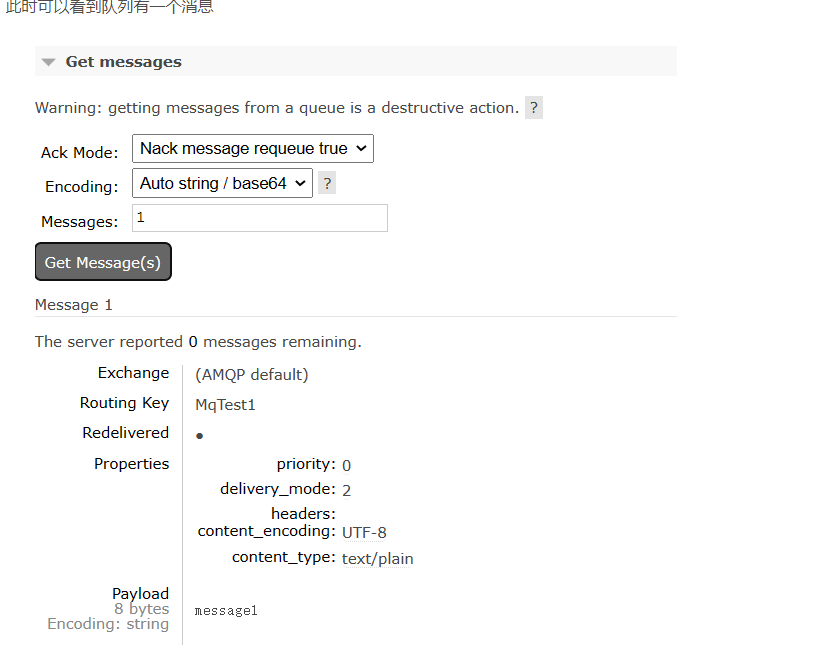
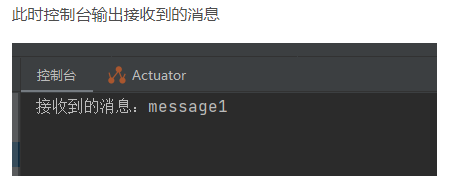
3、接受消息
packagecom.rabbitmqdemoconsumer.rabbitmq;importorg.springframework.amqp.rabbit.annotation.RabbitListener;importorg.springframework.stereotype.Component;@ComponentpublicclassSpringRabbitLeistener{@RabbitListener(queues ="MqTest1")publicvoidlistenSimpleQueueMessage(String msg){System.out.println("接收到的消息:"+msg);}}
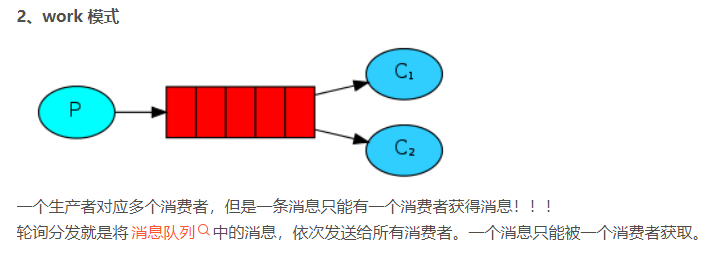
2.工作消息队列(Work Queue)
- 可以提高消息处理速度,避免队列消息堆积
1、发布消息
@SpringBootTestclassRabbitMQDemoPublishApplicationTests{@AutowiredprivateRabbitTemplate rabbitTemplate;@TestvoidcontextLoads(){String queue="MqTest1";String message="message1";for(int i=0;i<10;i++){
            rabbitTemplate.convertAndSend(queue,message);}}}
2、接受消息
packagecom.rabbitmqdemoconsumer.rabbitmq;importorg.springframework.amqp.rabbit.annotation.RabbitListener;importorg.springframework.stereotype.Component;@ComponentpublicclassSpringRabbitLeistener{@RabbitListener(queues ="MqTest1")publicvoidlistenSimpleQueueMessage1(String msg){System.out.println("consume1接收到的消息:"+msg);}@RabbitListener(queues ="MqTest1")publicvoidlistenSimpleQueueMessage2(String msg){System.out.println("consume2接收到的消息:"+msg);}}
3、控制台输出结果
consume1接收到的消息:message1
consume2接收到的消息:message1
consume1接收到的消息:message1
consume2接收到的消息:message1
consume1接收到的消息:message1
consume2接收到的消息:message1
consume1接收到的消息:message1
consume2接收到的消息:message1
consume1接收到的消息:message1
consume2接收到的消息:message1
4、消息预取问题
- 但是此时有一个问题就是消息预取,比如队列有10条消息,两个消费者各自直接先预取5个消息,如果一个消费者接受消息的速度慢,一个快,就会导致一个消费者已经完成工作,另一个还在慢慢处理,会造成消息堆积消费者身上,要解决这个问题需要在yml文件配置相关配置
rabbitmq:host: 43.140.244.236
    port:5672username: guest
    password: guest
    virtual-host: /
    listener:simple:prefetch:1#每次只能取一个,处理完才能取下一个消息
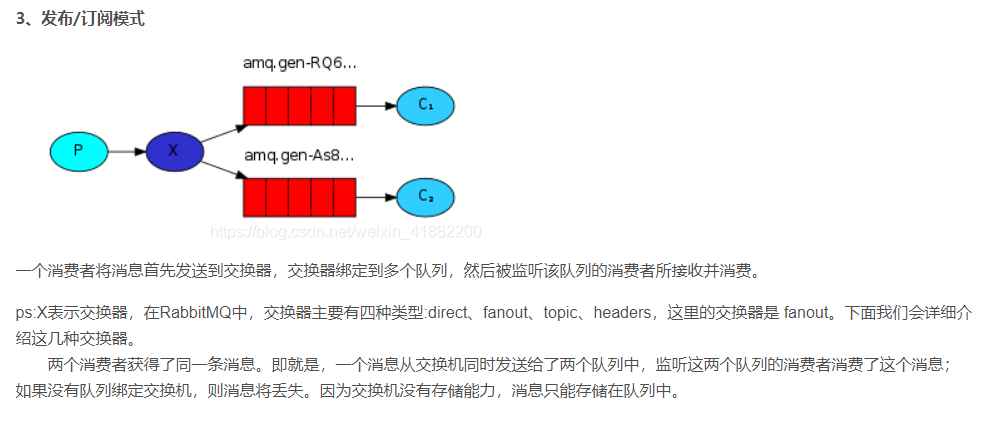
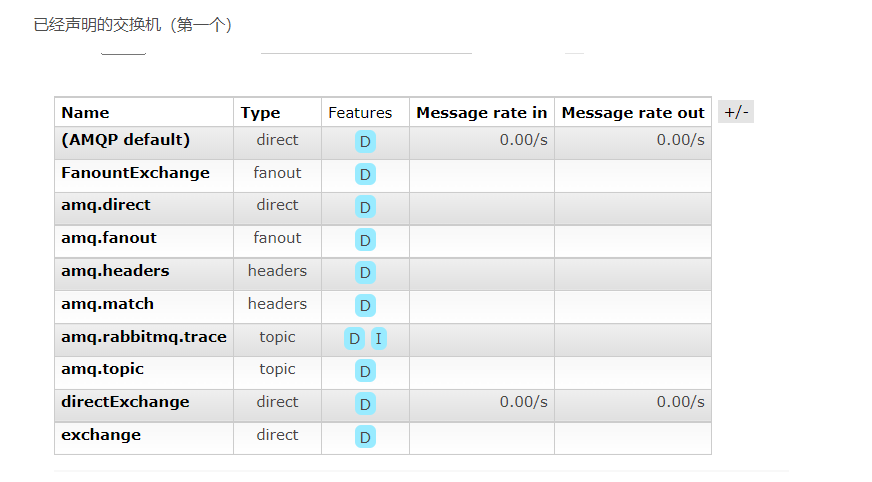
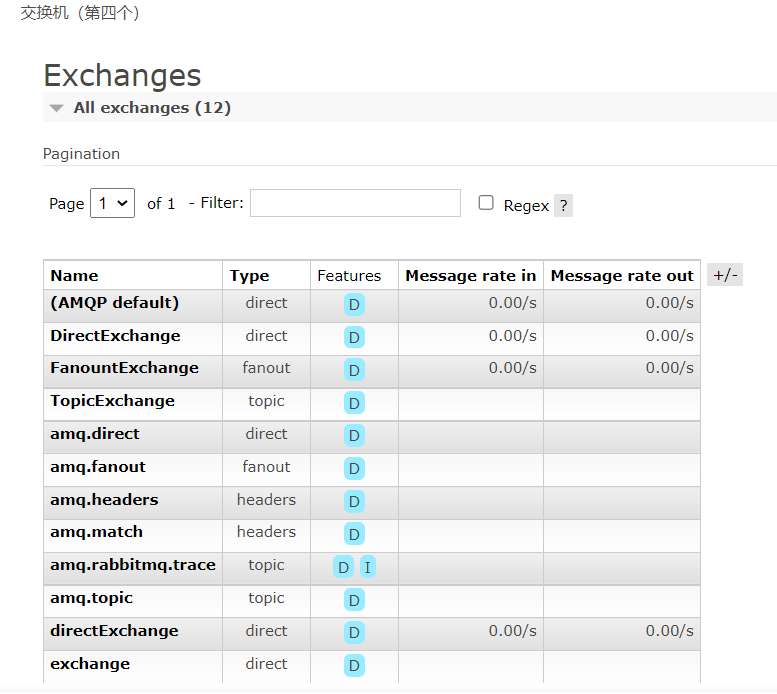
3.发布订阅模式之模式(Fanout)
exchange是交换机,负责消息路由,但不存储消息,路由失败则消息丢失
生产者将消息发送到fanout交换器
- fanout交换机非常简单。它只是将接收到的所有消息广播给它所知道的所有队列

1、Fanout配置类(@Bean声明)
packagecom.rabbitmqdemoconsumer.config;importorg.springframework.amqp.core.Binding;importorg.springframework.amqp.core.BindingBuilder;importorg.springframework.amqp.core.FanoutExchange;importorg.springframework.amqp.core.Queue;importorg.springframework.context.annotation.Bean;importorg.springframework.context.annotation.Configuration;@ConfigurationpublicclassFanountConfig{//交换机声明@BeanpublicFanoutExchangefanoutExchange(){returnnewFanoutExchange("FanountExchange");}//声明队列1@BeanpublicQueueFanount_Qeueue1(){returnnewQueue("Fanount_Qeueue1");}//声明队列2@BeanpublicQueueFanount_Qeueue2(){returnnewQueue("Fanount_Qeueue2");}//绑定交换机和队列@BeanpublicBindingbindingFanount_Qeueue1(QueueFanount_Qeueue1,FanoutExchange fanoutExchange){returnBindingBuilder.bind(Fanount_Qeueue1).to(fanoutExchange);}@BeanpublicBindingbindingFanount_Qeueue2(QueueFanount_Qeueue2,FanoutExchange fanoutExchange){returnBindingBuilder.bind(Fanount_Qeueue2).to(fanoutExchange);}}

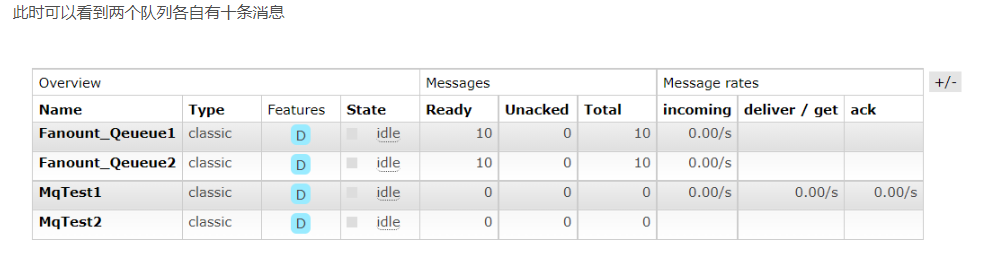
2、发送消息
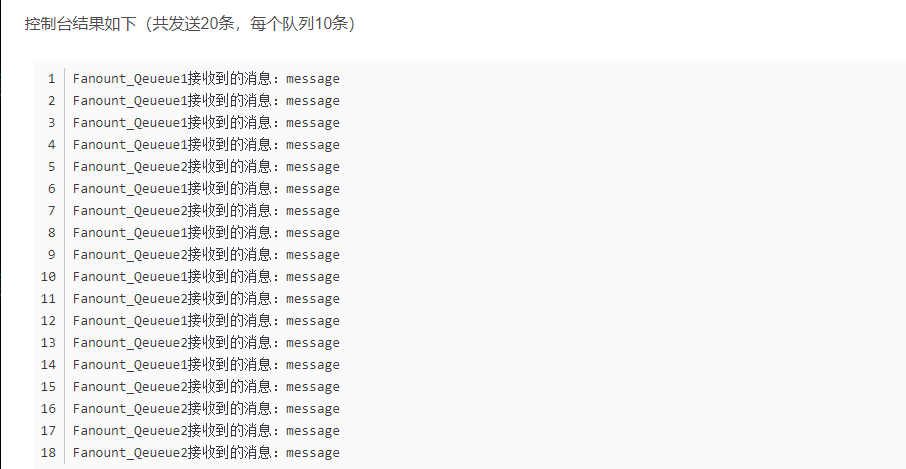
首先发送10条消息,经过交换机转发到队列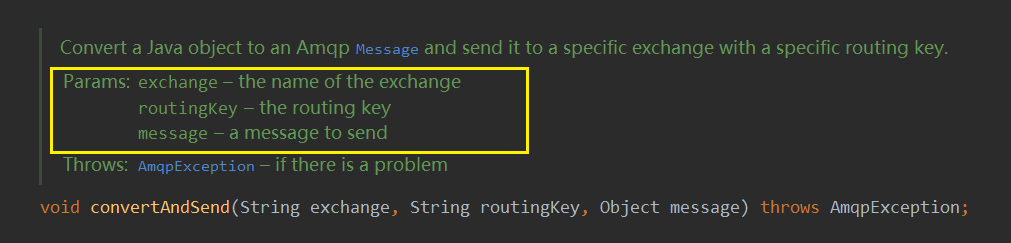
@SpringBootTestclassRabbitMQDemoPublishApplicationTests{@AutowiredprivateRabbitTemplate rabbitTemplate;@TestvoidcontextLoads2(){String exchange="FanountExchange";String message="message";for(int i=0;i<10;i++){
            rabbitTemplate.convertAndSend(exchange,"",message);}}}
3、接受消息
//监听交换机Fanount_Qeueue1@RabbitListener(queues ="Fanount_Qeueue1")publicvoidlistenFanountQeueue1(String msg){System.out.println("Fanount_Qeueue1接收到的消息:"+msg);}//监听交换机Fanount_Qeueue2@RabbitListener(queues ="Fanount_Qeueue2")publicvoidlistenFanountQeueue2(String msg){System.out.println("Fanount_Qeueue2接收到的消息:"+msg);}
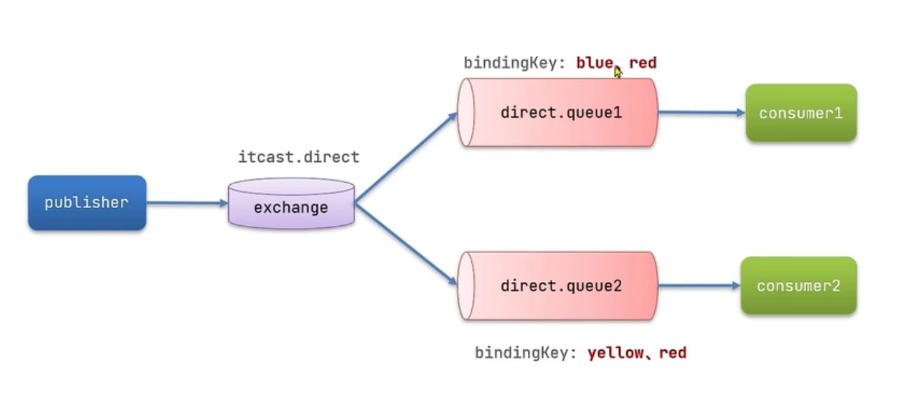
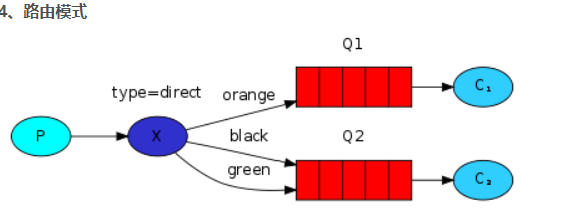
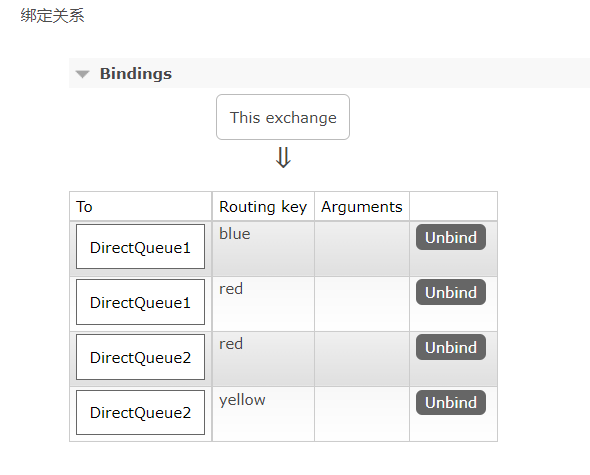
4.路由模式(Direct)
- 会将消息根据规则路由到指定的队列
生产者将消息发送到direct交换器
1、声明(基于@RabbitListener声明)
packagecom.rabbitmqdemoconsumer.rabbitmq;importorg.springframework.amqp.core.ExchangeTypes;importorg.springframework.amqp.rabbit.annotation.Exchange;importorg.springframework.amqp.rabbit.annotation.Queue;importorg.springframework.amqp.rabbit.annotation.QueueBinding;importorg.springframework.amqp.rabbit.annotation.RabbitListener;importorg.springframework.stereotype.Component;@ComponentpublicclassSpringRabbitLeistener{/**
     * 绑定交换机和队列,并为key赋值
     * @param msg
     */@RabbitListener(bindings =@QueueBinding(
        value =@Queue(name ="DirectQueue1"),
        exchange =@Exchange(name ="DirectExchange",type =ExchangeTypes.DIRECT),
        key ={"red","blue"}))publicvoidlistenDirectQueue1(String msg){System.out.println("listenDirectQueue1接收到的消息:"+msg);}@RabbitListener(bindings =@QueueBinding(
        value =@Queue(name ="DirectQueue2"),
        exchange =@Exchange(name ="DirectExchange",type =ExchangeTypes.DIRECT),
        key ={"red","yellow"}))publicvoidlistenDirectQueue2(String msg){System.out.println("listenDirectQueue2接收到的消息:"+msg);}}

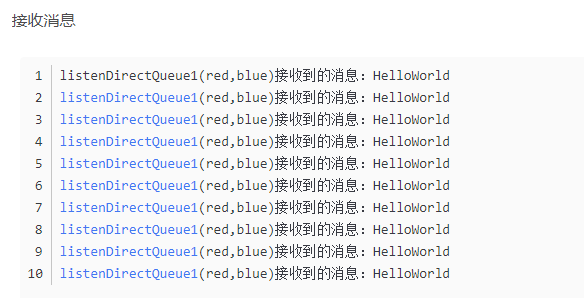
2、发送给blue
发送消息
@SpringBootTestclassRabbitMQDemoPublishApplicationTests{@AutowiredprivateRabbitTemplate rabbitTemplate;@TestvoidcontextLoads2(){String exchange="DirectExchange";String message="HelloWorld";for(int i=0;i<10;i++){
            rabbitTemplate.convertAndSend(exchange,"blue",message);}}}
3、发送给red
发送消息
@SpringBootTestclassRabbitMQDemoPublishApplicationTests{@AutowiredprivateRabbitTemplate rabbitTemplate;@TestvoidcontextLoads2(){String exchange="DirectExchange";String message="HelloWorld";for(int i=0;i<10;i++){
            rabbitTemplate.convertAndSend(exchange,"red",message);}}}

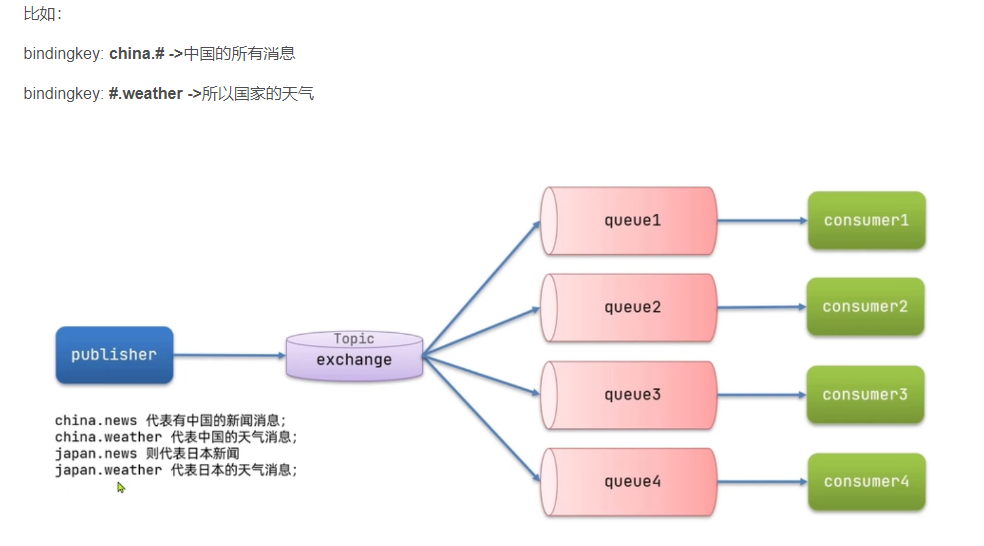
5.主题模式(Topic)
生产者将消息发送到 topic交换器

Queue与Exchange指定BindingKey可以使用通配符:
#:代指0个或多个单词
*:代指一个单词
1、声明
@RabbitListener(bindings =@QueueBinding(
        value =@Queue(name ="TopicQueue1"),
        exchange =@Exchange(name ="TopicExchange",type =ExchangeTypes.TOPIC),
        key ={"china.#"}))publicvoidlistenTopicQueue1(String msg){System.out.println("listenTopicQueue1接收到的消息:"+msg);}@RabbitListener(bindings =@QueueBinding(
    value =@Queue(name ="TopicQueue2"),
    exchange =@Exchange(name ="TopicExchange",type =ExchangeTypes.TOPIC),
    key ={"#.news"}))publicvoidlistenTopicQueue2(String msg){System.out.println("listenTopicQueue2接收到的消息:"+msg);}
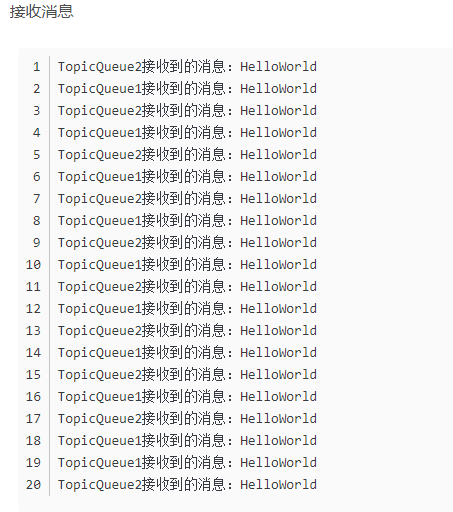
2、发送消息(测试1)
packagecom.rabbitmqdemo;importorg.junit.jupiter.api.Test;importorg.springframework.amqp.rabbit.core.RabbitTemplate;importorg.springframework.beans.factory.annotation.Autowired;importorg.springframework.boot.test.context.SpringBootTest;@SpringBootTestclassRabbitMQDemoPublishApplicationTests{@AutowiredprivateRabbitTemplate rabbitTemplate;@TestvoidcontextLoads2(){String exchange="TopicExchange";String message="HelloWorld";for(int i=0;i<10;i++){
            rabbitTemplate.convertAndSend(exchange,"china.news",message);}}}
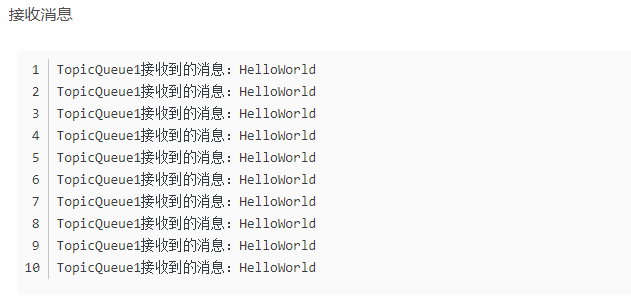
3、发送消息(测试2)
packagecom.rabbitmqdemo;importorg.junit.jupiter.api.Test;importorg.springframework.amqp.rabbit.core.RabbitTemplate;importorg.springframework.beans.factory.annotation.Autowired;importorg.springframework.boot.test.context.SpringBootTest;@SpringBootTestclassRabbitMQDemoPublishApplicationTests{@AutowiredprivateRabbitTemplate rabbitTemplate;@TestvoidcontextLoads2(){String exchange="TopicExchange";String message="HelloWorld";for(int i=0;i<10;i++){
            rabbitTemplate.convertAndSend(exchange,"china.weather",message);}}}
版权归原作者 知行合一。。。 所有, 如有侵权,请联系我们删除。