
多一些不为什么的坚持🤳
这里是 大眼(◉ɷ◉ )萌 – 贤蛋 🥚,一名很普通但不想普通的程序媛🙊
📝本文章收录于专栏:Vue3+Ts 管理系统
Vue3+Ts--管理系统02
第三方库集成
🎲 1.1 配置
vue.config.js
- 方式一:直接通过CLI提供给我们的选项来配置:- 比如publicPath:配置应用程序部署的子目录(默认是
/,相当于部署在https://www.my-app.com/);- 比如outputDir:修改输出的文件夹;
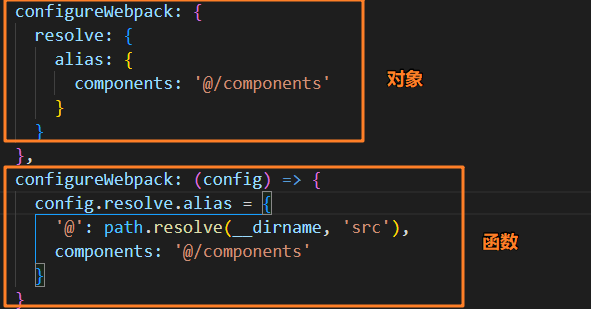
- 方式二:通过configureWebpack修改webpack的配置:- 可以是一个对象,直接会被合并;- 可以是一个函数,会接收一个config,可以通过config来修改配置;
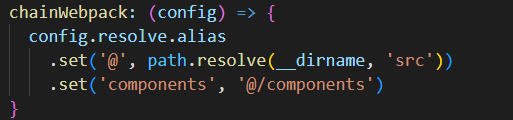
- 方式三:通过chainWebpack修改webpack的配置:- 是一个函数,会接收一个基于 webpack-chain 的config对象,可以对配置进行修改;
因为项目是在node环境下运行的,这里使用 CommonJS 规范。
🧰 1.2 vue-router 集成
安装 vue-router
yarnadd vue-router@next
#或者用npm也可以npminstall vue-router@next
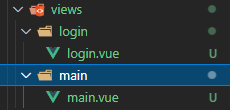
创建跳转页面:
创建router对象
import{ createRouter, createWebHashHistory }from'vue-router'import{ RouteRecordRaw }from'vue-router'const routes: RouteRecordRaw[]=[{
    path:'/',
    redirect:'/main'},{
    path:'/main',component:()=>import('../views/main/main.vue')},{
    path:'/login',component:()=>import('../views/login/login.vue')}]const router =createRouter({
  routes,
  history:createWebHashHistory()})exportdefault router
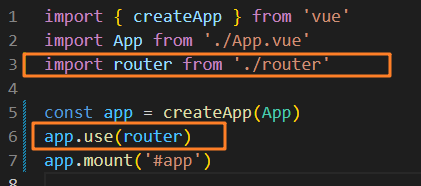
在
mian.ts
中注册路由
在
App.vue
中测试是否跳转:
<template><divid="app"><router-linkto="/login">登录</router-link><router-linkto="/main">首页</router-link><router-view></router-view></div></template>
🧻 1.3 vuex 集成
安装 vuex
yarn addvuex@nex
创建 store (
@/store/mian.ts
)
import{ createStore }from'vuex'const store =createStore({state(){return{
      name:'evla'}}})exportdefault store
在
mian.ts
中注册 vuex

在
App.vue
中测试使用:

🧲 1.4 element-plus 集成
Element Plus,一套为开发者、设计师和产品经理准备的基于 Vue 3.0 的桌面端组件库:
- element-ui是主要在vue2中使用的,而element-plus正是element-ui针对于vue3开发的一个UI组件库;
- 它的使用方式和很多其他的组件库是一样的,所以学会element-plus,其他类似于ant-design-vue、NaiveUI、VantUI都是差不多的;
安装
element-plus
yarnadd element-plus
#npminstall element-plus
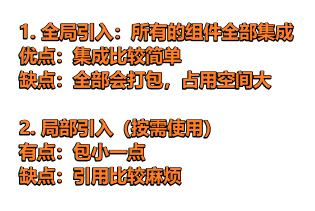
全局引入
//main.ts目录下import ElementPlus from'element-plus'import'element-plus/lib/theme-chalk/index.css'createApp(App).use(ElementPlus).mount('#app')
局部引入
单独引入某一组件+样式是比较麻烦的,这里采用官网提供的按需引入的做法。
- 安装 babel 插件
yarnadd babel-plugin-import -D
- 配置 babel.config.js
module.exports ={
  plugins:[['import',{
        libraryName:'element-plus',customStyleName:(name)=>{return`element-plus/lib/theme-chalk/${name}.css`}}]],
  presets:['@vue/cli-plugin-babel/preset']}
这里为了以后方便,我们直接采用全局注册,但是需要做封装处理。
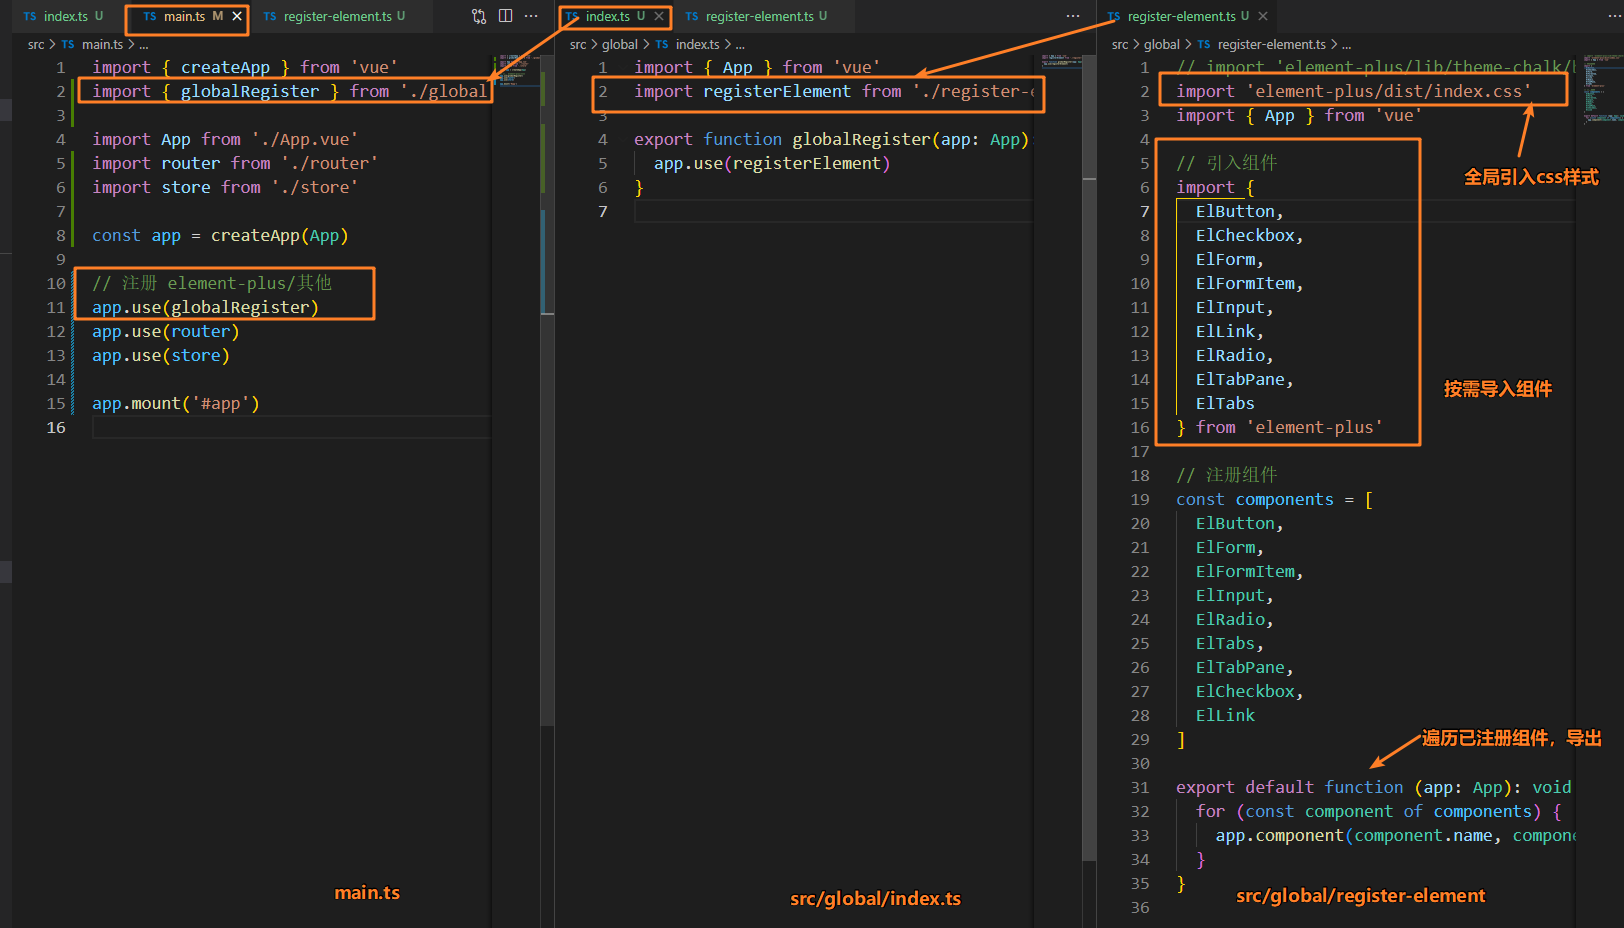
import'element-plus/dist/index.css'import{ App }from'vue'// 引入组件import{
  ElButton,
  ElCheckbox,
  ElForm,
  ElFormItem,
  ElInput,
  ElLink,
  ElRadio,
  ElTabPane,
  ElTabs
}from'element-plus'// 注册组件const components =[
  ElButton,
  ElForm,
  ElFormItem,
  ElInput,
  ElRadio,
  ElTabs,
  ElTabPane,
  ElCheckbox,
  ElLink
]exportdefaultfunction(app: App):void{for(const component of components){
    app.component(component.name, component)}}
最后测试
<template><divclass="app"><h2>{{ $store.state.name }}</h2><router-linkto="/login">登录</router-link><router-linkto="/main">首页</router-link><router-view></router-view><el-button>默认按钮</el-button><el-buttontype="primary">主要按钮</el-button><el-buttontype="success">成功按钮</el-button><el-buttontype="info">信息按钮</el-button><el-buttontype="warning">警告按钮</el-button><el-buttontype="danger">危险按钮</el-button></div></template>
✂️ 1.5 axios 集成
因为集成比较复杂,单独抽出成另外一篇文章

本文转载自: https://blog.csdn.net/weixin_47980825/article/details/125949314
版权归原作者 大眼(◉ɷ◉ )萌 所有, 如有侵权,请联系我们删除。
版权归原作者 大眼(◉ɷ◉ )萌 所有, 如有侵权,请联系我们删除。