目录
前言
插槽是vue中一个很有用的工具。本篇文章将讲解vue插槽的基本用法,并详细讲解作用域插槽。
希望能对读者有所帮助!
一,插槽的基本使用
1.1 引出插槽
我们对组件进行复用的时候,虽可以通过父子传值改变组件的数据,但页面的结构还是取决于组件本身。
那么,如何不改变组件本身的结构,且能够在组件本身结构的基础上再添加想加的内容呢?使用插槽可以办到。
插槽概念:
插槽就是子组件中的提供给父组件使用的一个占位符,用slot标签 表示,父组件可以在这个占位符中填充任何模板代码,如 HTML、组件等,填充的内容会替换子组件的slot标签。简单理解就是子组件中留下个“坑”,父组件可以使用指定内容来补“坑”。
1.2 插槽的基本使用
如下所示,一个父组件里面复用了子组件:
<template><div class="container"><Student></Student><Student></Student><Student></Student></div></template>
student的结构也非常简单:
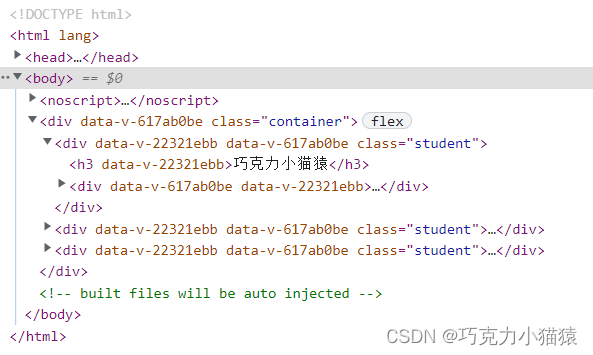
<template><div class="student"><h3>巧克力小猫猿</h3></div></template>
最后的效果:
现在,我想在不改变student组件的前提下,给‘巧克力小猫猿’的上面添加一个‘加油’,于是我们可以使用插槽。
插槽其实很简单,结合定义不难理解。我们可以在子组件中给父组件挖一个坑,父组件把内容放入子组件的坑中:
子组件中用slot标签挖坑
<template><div class="student"><slot></slot><h3>巧克力小猫猿</h3></div></template>
在父组件中填坑:
<template><div class="container"><Student>加油</Student><Student></Student><Student></Student></div></template>
于是可以看到效果:
同样如果我们想给’巧克力小猫猿’的下面添加一个加油,我们可以把坑挖在此结构的下面:
<template><div class="student"><!--<slot></slot>--><h3>巧克力小猫猿</h3><slot></slot></div></template>
于是效果变成了:
以上就是插槽的基本使用。
1.3 默认插槽
我们在使用插槽的时候,可以看出,给子组件挖了个slot的坑,父组件中通过子组件名的标签内部填坑的内容。
如果父组件中未指定内容,我们却需要一个默认值,该怎么办?
很简单,给插槽设置一个默认值即可:
<template><div class="student"><!--<slot></slot>--><h3>巧克力小猫猿</h3><slot>我是默认值</slot></div></template>
在父组件中只有第一个student的实例对象指定了插槽的内容,其他没有:
<template><div class="container"><Student>加油</Student><Student></Student><Student></Student></div></template>
则指定内容的显示内容,未指定的显示默认内容:
这就是默认插槽。
1.4 插槽样式
父组件填坑,样式在父组件中的style中写即可:
<template><div class="container"><Student><h3 class="up">加油</h3></Student><Student></Student><Student></Student></div></template>
样式:
.up {color: skyblue
}
效果:
为什么可以这么写:插槽极其内部内容可以被vue解析到。
以上,是插槽的基本使用。
二,具名插槽
2.1 引出具名插槽
还是最开始的结构,什么都没有:
但是需求增加啦,我希望在’巧克力小猫猿‘的上面写’加油‘,下面写’找到工作‘。那么,该如何做?
如果按照刚刚的做法可以实现, 但是只能使用默认插槽。一旦父组件提供填补插槽的内容,则无法实现:
<template><div class="student"><slot>加油</slot><h3>巧克力小猫猿</h3><slot>找到工作</slot></div></template>

但是现在的需求是,不使用默认插槽,而是通过父组件提供内容实现,该如何做?具名插槽可以为我们解决问题。
2.2 具名插槽的使用
具名插槽,通过名字可知,是具有名字的插槽。
解决刚刚的问题,我们只需要给插槽和对应的内容模块带上相同的标记。让vue知道,把什么内容填充到什么插槽去。
在子组件中,给插槽取一个名字:
<template><div class="student"><slot name="up"></slot><h3>巧克力小猫猿</h3><slot name="job"></slot></div></template>
在父组件中,为内容指定需要放入的插槽名:
<template><div class="container"><Student><h3 slot="up">加油</h3><h3 slot="job">找到工作</h3></Student><Student></Student><Student></Student></div></template>
于是,这样一一对应起来,内容可以成功被填充:
这就是具名插槽。
三,template标签
3.1 引出template标签
还是最初的结构:
现在的需求:使用具名标签,在’巧克力小猫猿‘的下面添加一个h3标签,一个div标签。
相信看懂了上述的讲解,这个问题应该很好解决:
父组件中:
<template><div class="student"><h3>巧克力小猫猿</h3><slot name="add"></slot></div></template>
子组件中:
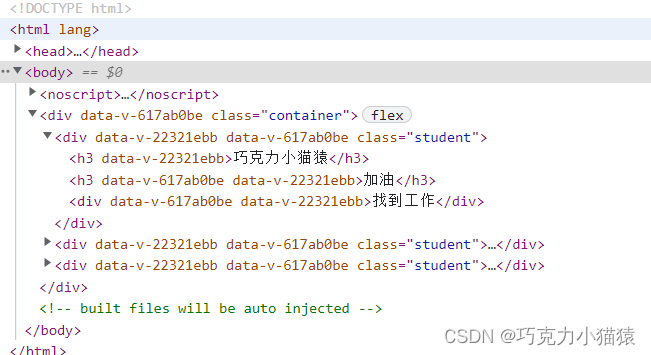
<template><div class="container"><Student><h3 slot="add">加油</h3><div slot="add">找到工作</div></Student><Student></Student><Student></Student></div></template>
效果:
效果实现。但是如果每一个添加的内容都写一个slot会很麻烦,怎么解决?
我们可以设置一个div,把所有的内容都装进去,这样就可以只写一个slot了:
<template><div class="container"><Student><div slot="add"><h3>加油</h3><div>找到工作</div></div></Student><Student></Student><Student></Student></div></template>
效果是一模一样的,但是不够好:因为这里多增加了一个div结构:
那么该如何解决,可以使用template标签。
3.2 template标签的使用
很简单,把刚刚外部的div替换为template标签:
<template><div class="container"><Student><template slot="add"><h3>加油</h3><div>找到工作</div></template></Student><Student></Student><Student></Student></div></template>
效果与刚刚一样,但是结构上,并未多出什么多余结构,不生成真实DOM。
四,作用域插槽
4.1 引出作用域插槽
大家请看如下效果:
如果要实现这种效果,有哪些做法?做法有多种,可以分为两种情况:情况一,数据在子组件中,在子组件中写出相关内容,直接在父组件中复用即可;情况二,数据在父组件中,由父组件使用props传给子组件,子组件使用数据并遍历也可实现。
但现在有一个新的需求:数据在子组件中,要用ul,ol两种列表来展示这些数据,该怎么做?
我们来分析一下,可以在父组件中设置type:
<template><div class="container"><Student type="ul"></Student><Student type="ol"></Student><Student type="ul"></Student></div></template>
把它传给子组件,子组件在用v-show或者v-if进行判断,如果是ul则用ul的结构写,如果是ol则用ol的结构写。
这样可以完成目标,但是非常麻烦。如何使用更简单的方法来实现?
同样,更简单的做法,也来自于插槽:
<template><div class="container"><Student><ul><li v-for="stu in stus":key="stu.index">{{ stu }}</li></ul></Student><Student><ol><li v-for="stu in stus":key="stu.index">{{ stu }}</li></ol></Student><student><ul><li v-for="stu in stus":key="stu.index">{{ stu }}</li></ul></Student></div></template>
这样做即可实现内容,用相同的数据,做不同的事情。
但是,别忘了,我们一开始的条件是,数据在子组件中。所以我们还需要提前把子组件中的数据传给父组件,一样有些麻烦。
有没有更好的办法?利用作用域插槽。
4.2 作用域插槽
这里我们可以来总结一下作用域插槽是什么了,如刚刚的情况,我们在父组件中利用插槽实现问题,但是插槽在子组件中。
而数据只在子组件中能够被使用,是因为数据的作用域仅限于子组件中。
如何简单方便的把子组件中的数据传给父组件中要填充插槽的结构呢?作用域插槽可以实现。
请看子组件结构,在插槽标签中,类似于v-bind的使用,我们把stus数组以student的名字传给父组件:
<template><div class="student"><slot :student="stus"></slot></div></template><script>exportdefault{name:'Student',data(){return{stus:['巧克力','小猫','猿']}}}</script>
在父组件中使用template标签才可以成功接收,并且,接受的所有数据都放在scope中,取名为data:
<Student><template scope="data"></template></Student>
如何证明:我们打印scope的data:
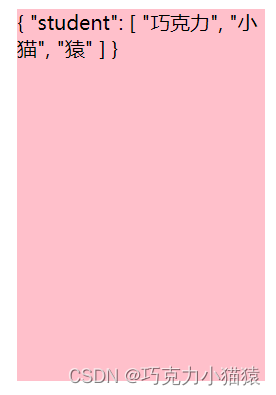
<template><div class="container"><Student><template scope="data">{{ data }}</template></Student></div></template>
结果是:
可以看出,data是一个对象,内部存放的是所有传过来的数据,我们如果要使用student,data.student即可:
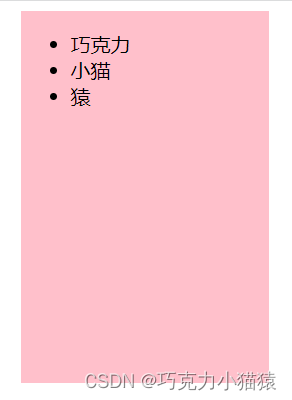
<Student><template scope="data"><ul><li v-for="s in data.student":key="s.index">{{ s }}</li></ul></template></Student></div>
效果:
于是,我们可以轻松的实现需求:
这就是作用域插槽的使用方法。
我们更进一步的理解作用域插槽的使用情景:当数据在组件自身,但根据数据生成的结构需要组件使用者来定,我们则可以使用作用域插槽。
后记
以上,就是对插槽的相关讲解,希望能够帮助读者朋友。
欢迎关注,希望能为您带来更多精彩内容!
版权归原作者 巧克力小猫猿 所有, 如有侵权,请联系我们删除。