
一、什么是后端开发
1.前端与后端
(1)前端是指在客户端上运行的代码
(2)后端是运行在服务器端的程序
2.后端开发组成
(1)语言:PHP/JAVA/C#/Javascript
(2)Web服务器:Apache/Tomcat
(3)数据库:MySQL/Orice/MongoDB
3.后端开发平台
(1)LAMP
(2)JavaEE
(3).NET
(4)Node.js
二、学习路径
1.JS基础语法
2.内置API(fs, path, http等等)
3.第三方模块(express,koa,mysql,mongodb等)
三、安装
1.官网:http://nodejs.cn/ (版本选择可按自己需求)
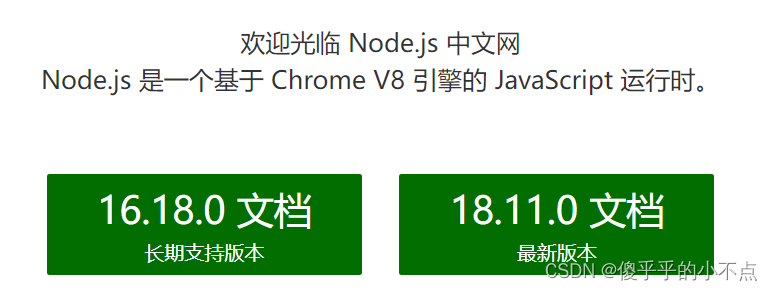
注意:尽量安装在默认路径下
2.打开终端,使用“node -v”命令检查是否安装成功
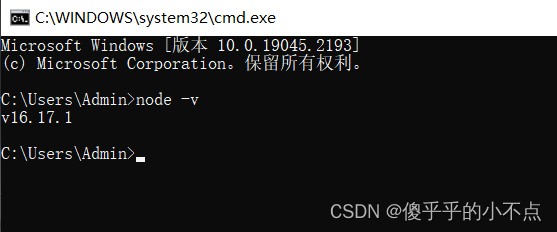
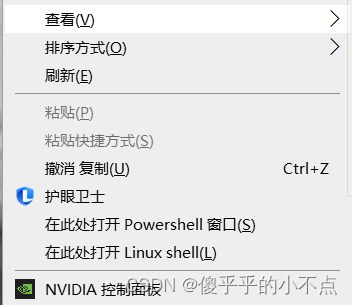
注意:打开终端的方法(windows+R、桌面空白按住shift键并点击右键选择打开Powershell窗口)
四、运行代码
1.打开终端
2.输入“node执行文件路径”
五、终端快捷键
1.⬆:上一个命令
2.tab:快速补全路径
3.esc:清空当前输入的命令
4.cls命令 /clear:清空终端
5.ls:查看当前路径下文件
6.cd文件夹名,打开文件夹
7.cd ../:返回上一级
六、核心模块
1.fs模块
注意:./yes.txt执行路径会影响结果,不建议使用相对路径,建议使用绝对路径
(1)文件操作
<1>fs.readFile():读文件
fs.readFile("./yes.txt",function(err,data){
    if(err)  throw  err;
    console.log(data);
    //data是一个buffer
})
fs.readFile("./yes.txt","utf8",function(err,data){
    if(err)  throw  err;
    console.log(data);
    //以指定编码输出
})
<2>fs.writeFile():写文件
fs.writeFile("./yes.txt","大郎,该吃药了!",function(err){
    if(err)  throw  err;
})
注意:默认是utf8的编码格式
效果:删掉文档原内容,写入新内容,如果指定内容不存在,则新建
<3>fs.appendFile():追加
for(let  i=0;i<10;i++){
    fs.appendFile("./yes.txt","item"+i+"\n",function(err){
        if(err)  throw  err;
    })
}
<4>fs.copyFile():拷贝
fs.copyFile("./yes.txt","./ok.txt",function(err){
    if(err)  throw err;
})
(2)流操作
<1>一般读取的是大文件
<2>读取流
const  fs = require("fs");
var  rs = fs.createReadStream("./ok.txt",{encoding:"utf8"});
rs.on("open",function(){
    consol.log("开读流开启")
})
rs.on("data",function(chunk){
    console.log(chunk);
})
rs.on("end",function(){
    console.log("可读流读取结束")
})
rs.on("close",function(){
    console.log("可读流关闭")
})
注意:chunk是一个buffer,当前读取的是数据片段,二进制数据流
<3>写入流
const  fs = require("fs");
var  ws = fs.createWriteStream("./ok.txt");
ws.write("欢迎学习node知识");
ws.end();
ws.on("open",function(){
    console.log("可写流开启");
})
ws.on("close",function(){
    console.log("可写流关闭");
})
补充小知识:
(1)__dirname:文件夹名字 (2) __filename:文件名字
2.http模块
(1)创建web服务器,将普通电脑编程web服务器
(2)前言
<1>IP地址
  1)每一台计算机在互联网的地址唯一

  2)点分十进制:192.168.0.1

  3)在终端通过ping + 网址  可查看ip

  4)127.0.0.1是自己电脑的可访问地址(localhost)
<2>域名:好比 姓名与身份证号
<3>端口号
  1)域名就好比点外卖的地址写到了某个小区的几号楼,那么端口就是具体的门牌号

  2)一台电脑可以开启多个web服务,但是每个web服务对应唯一端口,80端口可省略不写。
(3)第一个http服务文件
const  http = require('http');

//createServer()   创建服务
//listen(port)  监听端口并开启服务
//request:请求体
//response:响应体

http.createServer(function(request,response){

    //发送HTTP头部
    //HTTP状态值: 200 : OK
    //内容类型: text/plain
    response.writeHead(200,{"Content-Type":"text/html;charset=utf-8"});
    console.log("hello  world");
    //发送响应数据   "Hello  World"
    response.end('Hello  World\n');
}).listen(8888);
(4)可根据 req.url来区分请求状态
const  http = require("http");

http.createServer((req,res) => {
    //req.url  路由
    console.log(req.url);
    if(req.url === "/" || req.url === "/index"){
        //返回首页
        res.writeHead(200,{"content-type":"text/html;charset=utf-8"})
        res.end("首页")
    }else if(req.url === "/mine"){
        res.writeHead(200,{"content-type":"text/html;charset=utf-8"})
        res.end("我的")
    }else{
        res.writeHead(404,{"content-type":"text/html;charset=utf-8"})
        res.end("找不到页面")
    }
}).listen(8080,() => {
    console.log("http  serve  is  running  on  port  8080")
})
3.path模块:用来处理路径的模块
注意:使用path模块来处理路径,需引入const path = require('path')
(1)path.join()方法:用来将多个路径片段拼接成一个完整的路径字符串
const  path = require('path');

let  p = 'C://user/leo/day03/ok/index.html'
console.log("/a" + "/b/c" + "../d");

//可以识别向上返回路径的命令
console.log(path.join("/a","/b/c","../d"));
(2)path.basename()方法:用来从路径字符串中将文件名和后缀解析出来
const  path = require('path');

let  p = 'C://user/leo/day03/ok/index.html'

console.log(path.basename(p));
(3)path.extname()方法:可以用来获取路径中的扩展名部分
const  path = require('path');

let  p = 'C://user/leo/day03/ok/index.html'

console.log(path.extname(p));
(4)path.dirname():可以用来获取路径名
const  path = require('path');

let  p = 'C://user/leo/day03/ok/index.html'

console.log(path.dirname(p));
(5)path.parse():将路径解析成对象
const  path = require('path');

let  p = 'C://user/leo/day03/ok/index.html'

console.log(path.parse(p));
(6)path.format():将对象整合成路径字符串
const  path = require('path');

console.log(path.format({
    root: '',
    dir: 'C://user/leo/day03/ok',
    base: 'index.html',
    ext: '.html',
    name: 'index'
}));
注意:path.parse()方法与path.format()方法互为反操作
(7)path.isAbsolute():是否是一个绝对路径
const  path = require('path');

let  p = 'Users/leo/Desktop/node/node/ok/yes/index.html';

//返回值为布尔值
console.log(path.isAbsolute(p));
4.url模块
(1)注意:使用url模块来处理路径,需引入const {URL} = require("url")
const  {URL} = require("url");

const  url = new URL("http://localhost:8080/index.html?a=1&b=2");
(2)结果
href: 'http://localhost:8080/index.html?a=1&b=2/tower/index.html?a=1&b=2&c=3',
origin: 'http://localhost:8080',
protocol: 'http:',
username: '',
password: '',
host: 'localhost:8080',
hostname: 'localhost',
port: '8080',
pathname: '/index.html',
search: '?a=1&b=2/tower/index.html?a=1&b=2&c=3',
searchParams: URLSearchParams{'a' => '1','b' => '2/tower/index.html?a=1','b' => '2', 'c' => '3'}
5.自定义模块
(1)自己实现的js代码,每个单独的.js文件就是一个模块
(2)注意:路径必须以 ./ 开头
(3)注意:每一个模块中都有一个module变量,代表当前模块
(4)module的exports属性是对外的接口
(5)尽量使用module.exsports的方法或属性导出才能被外部调用
(4)如果导入文件夹为模块私有,不能被外部访问,使用的时候通过require引入
具体案例:
calculate.js文件代码如下:
//calculate模块
// module 表示当前模块

//定义一个圆周率常量
const PI = 3.14;

//计算圆的周长
const perimeter = (r) => {
  return 2 * PI * r;
}

//计算圆的面积
function area (r)  {
  //2次幂可以通过 r*r表示,也可以通过math对象的pow方法
  return PI * Math.pow(r,2);
}

//导出
module.exports = {
  perimeter,
  area
}
app.js文件的代码如下:
//导入模块
const circle = require('./calculate');

//定义一个r半径常量,用于传输
const r = 10;
console.log('周长',circle.perimeter(r));
console.log('面积',circle.area(r));
6.第三方模块
(1)使用npm管理下载的他人写好的模块
例:在终端写入npm install figlet
(2)第三方模块会从node-modules文件夹向上寻找
app.js文件的代码如下:
const figlet = require("figlet");

figlet("study",(err,data) => {
    console.log(data);
})
七、加载静态模块
创建HTTP服务,创建app.js并写入以下代码:
const  http = require("http");
const  fs = require("fs");

http.createServer((req,res) => {
    //req.url  路由
    if(req.url === "/tower/index.html" ){
        fs.readFile(__dirname + "/tower/index.html",(err,data) => {
            if(err){
                fs.readFile(__dirname + "/tower/err.html",(err,data) => {
                    res.writeHead(404,{"content-type": "text/html;charset=utf8"});
                    res.end(data);
                })
            }
            res.writeHead(200,{"content-type": "text/html;charset=utf8"});
            res.end(data);
        })
    }
}).listen(8080,() => {
    console.log("http  serve  is  running  on  port  8080")
})
静态文件 : 创建err.html并写入以下代码:
<!DOCTYPE html>
<html lang="en">
<head>
    <meta charset="UTF-8">
    <title>Title</title>
</head>
<body>
<h2 style="font-size: 100px; color: red;">404</h2>
</body>
</html>
八、npm知识总结
1.什么是npm
(1)Node Package Manager为Node包管理工具
(2)npm为你和团队打开了连接整个JavaScript天才世界的大门,它是世界上最大的软件注册表,每星期大约有30亿次的下载量,包含600000个包。
(3)常用场景
<1>允许用户从NPM服务器下载别人编写的第三方包到本地使用
<2>允许用户从NPM服务器下载并安装别人编写的命令行程到本地使用
<3>允许用户将自己编写的包或命令工具上传到NPM服务器供别人使用
(4)官网:https://www.npmjs.com/
(5)包质量对比:https://www.npmjs.io
2.常用操作
(1)安装模块:npm install 包名
(2)查看已经安装的包:npm list
(3)查看具体包:npm list 包名
(4)安装指定版本号的包:
<1>npm install 包名@版本号
<2>npm install 包名@主版本号
(5)删掉一个包:npm uninstall 包名
(6)更新包:
<1>npm update 包名
<2>npm update(更新所有)
注意:更新包依赖于package.json
3.全局安装
(1)命令
<1>npm install 包名 -g
<2>npm uninstall 包名 -g
<3>npm list -g
(2)查看全局目录:npm config get prefix
4.使用淘宝镜像
(1)npm的服务器在国外,所以有时候不太方便使用,所以我们使用淘宝镜像,将下载路径转移到国内服务器,但是不能再使用npm而要使用cnpm(c为china)
(2)npm install -g cnpm --registry=https://registry.npm.taobao.org
5.package.json
(1)作用:项目初始化 ==》 npm init
(2)main字段制定了程序的主入口
(3)使用npm install 包 --save 会将下载的模块自动引入json文件中
(4)scripts:引入需要执行的nodejs代码然后使用npm run key值,就可以运行了
注意:只有start可以直接用npm start
(5)dependencies:
<1>依赖,下载的类库在这里
<2>如果没有,项目无法运行
(6)devDependencies:
<1>开发依赖
<2>如果没有,项目无法写作,不影响运作
6.发布包
(1)注册用户:npm adduser
(2)登录:npm login
(3)退出登录:npm logout
(4)发布:npm publish
(5)取消发布:npm unpublish 包名 --force
版权归原作者 傻乎乎的小不点 所有, 如有侵权,请联系我们删除。