
文章目录
一、Feign概述
Feign是一个声明式的客户端负载均衡器;采用的是基于接口的注解;整合了ribbon,具有负载均衡的能力;整合了Hystrix,具有熔断的能力;
1、为什么会使用Feign代替Ribbon
使用RestTemplate + ribbon的方式来进行服务间的调用,会导致我们每次去调用其他服务的一个接口,都要单独写一些代码。
而Feign是声明式调用,可以让我们不用写代码,直接用一些接口和注解就可以完成对其他服务的调用。
2、Feign和OpenFeign的区别?
- 依赖不同:一个是spring-cloud-starter-feign,一个是spring-cloud-starter-openfeign
- 支持的注解:OpenFeign是springcloud在Feign的基础上支持了SpringMVC的注解,如@RequestMapping等等。 即:OpenFeign的@FeignClient可以解析SpringMVC的@RequestMapping注解下的接口,并通过动态代理的方式产生实现类,实现类中做负载均衡并调用其他服务。
二、Feign实现负载均衡
整体项目目录包括四个Module,分别为:eureka-server、feign-server-api、feign-server、feign-consumer。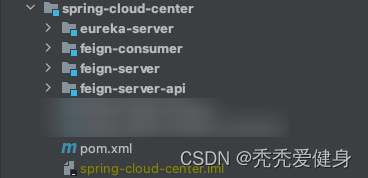
其中eureka-server作为服务注册中心、feign-server-api作为服务提供者给consumer引入、feign-server作为具体的服务提供者实现、feign-consumer作为服务消费者。
0、最上层父项目spring-cloud-center的pom.xml文件
<?xml version="1.0" encoding="UTF-8"?><projectxmlns="http://maven.apache.org/POM/4.0.0"xmlns:xsi="http://www.w3.org/2001/XMLSchema-instance"xsi:schemaLocation="http://maven.apache.org/POM/4.0.0 http://maven.apache.org/xsd/maven-4.0.0.xsd"><parent><groupId>org.springframework.boot</groupId><artifactId>spring-boot-starter-parent</artifactId><version>2.3.7.RELEASE</version><relativePath/><!-- lookup parent from repository --></parent><modelVersion>4.0.0</modelVersion><packaging>pom</packaging><!--子模块--><modules><module>feign-server-api</module><module>feign-server</module><module>feign-consumer</module><module>eureka-server</module></modules><artifactId>spring-cloud-center</artifactId><groupId>com.saint</groupId><version>0.0.1-SNAPSHOT</version><name>spring-cloud-center</name><properties><java.version>1.8</java.version></properties><dependencyManagement><dependencies><dependency><groupId>org.springframework.boot</groupId><artifactId>spring-boot-dependencies</artifactId><version>2.3.7.RELEASE</version><type>pom</type><scope>import</scope></dependency><!--整合spring cloud--><dependency><groupId>org.springframework.cloud</groupId><artifactId>spring-cloud-dependencies</artifactId><version>Hoxton.SR8</version><type>pom</type><scope>import</scope></dependency><!--整合spring cloud alibaba--><dependency><groupId>com.alibaba.cloud</groupId><artifactId>spring-cloud-alibaba-dependencies</artifactId><version>2.2.5.RELEASE</version><type>pom</type><scope>import</scope></dependency></dependencies></dependencyManagement><build><plugins><!-- java编译插件 --><plugin><groupId>org.apache.maven.plugins</groupId><artifactId>maven-compiler-plugin</artifactId><configuration><source>1.8</source><target>1.8</target><encoding>UTF-8</encoding></configuration></plugin><plugin><groupId>org.springframework.boot</groupId><artifactId>spring-boot-maven-plugin</artifactId></plugin></plugins></build></project>
关于Spring-cloud和SpringBoot的版本对应关系,参考博文:SpringBoot、SpringCloud、SpringCloudAlibaba的版本对应关系。
1、搭建服务注册中心eureka-server
eureka-server整体代码结构目录如下: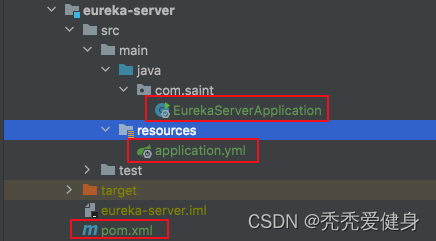
其整体很简单、仅仅包含一个pom.xml文件、一个配置文件、一个启动类。
1、pom.xml
<?xml version="1.0" encoding="UTF-8"?><projectxmlns="http://maven.apache.org/POM/4.0.0"xmlns:xsi="http://www.w3.org/2001/XMLSchema-instance"xsi:schemaLocation="http://maven.apache.org/POM/4.0.0 http://maven.apache.org/xsd/maven-4.0.0.xsd"><parent><artifactId>spring-cloud-center</artifactId><groupId>com.saint</groupId><version>0.0.1-SNAPSHOT</version></parent><modelVersion>4.0.0</modelVersion><artifactId>eureka-server</artifactId><version>0.0.1-SNAPSHOT</version><description>eureka-server</description><dependencies><!--集成Eureka-server--><dependency><groupId>org.springframework.cloud</groupId><artifactId>spring-cloud-starter-netflix-eureka-server</artifactId></dependency><dependency><groupId>org.springframework.boot</groupId><artifactId>spring-boot-starter-web</artifactId></dependency><dependency><groupId>org.springframework.boot</groupId><artifactId>spring-boot-starter</artifactId><optional>true</optional></dependency><dependency><groupId>org.springframework.boot</groupId><artifactId>spring-boot-autoconfigure</artifactId></dependency></dependencies></project>
2、修改配置文件application.yml
server:port:10010spring:application:name: eureka-server
eureka:client:# 把自身注册到Eureka-server中register-with-eureka:true# 服务注册中心不需要去检索其他服务fetch-registry:false# 指定服务注册中心的位置service-url:defaultZone: http://localhost:10010/eureka
  instance:hostname: localhost
3、修改启动类
packagecom.saint;importorg.springframework.boot.SpringApplication;importorg.springframework.boot.autoconfigure.SpringBootApplication;importorg.springframework.cloud.netflix.eureka.server.EnableEurekaServer;/**
 * @author Saint
 */@EnableEurekaServer@SpringBootApplicationpublicclassEurekaServerApplication{publicstaticvoidmain(String[] args){SpringApplication.run(EurekaServerApplication.class, args);}}
这里和普通的启动有一个区别:需要加上
@EnableEurekaServer
注解开启Eureka-Server。
4、启动eureka-server
启动成功后,控制台输出如下:
进入到eureka-server 的dashboard,可以看到eureka-server已经上线: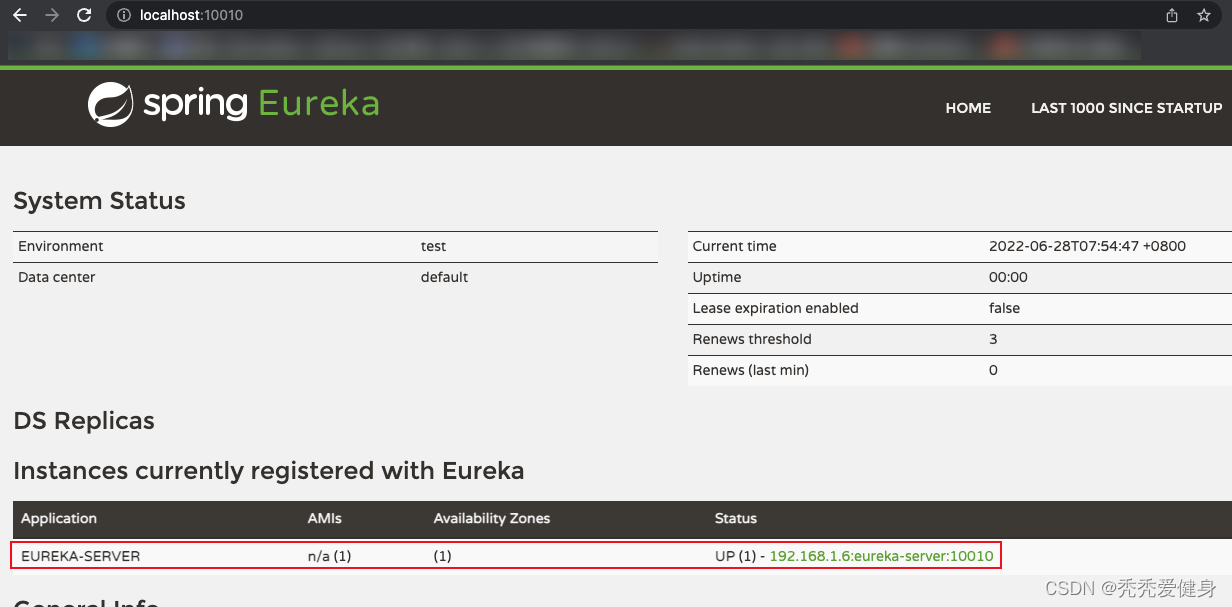
2、搭建服务提供者API(feign-server-api)
feign-server-api整体代码结构目录如下:
其中包含一个pom.xml文件、一个用户类User、一个标注@RequestMapping注解的接口ServiceA。
1、pom.xml
<?xml version="1.0" encoding="UTF-8"?><projectxmlns="http://maven.apache.org/POM/4.0.0"xmlns:xsi="http://www.w3.org/2001/XMLSchema-instance"xsi:schemaLocation="http://maven.apache.org/POM/4.0.0 http://maven.apache.org/xsd/maven-4.0.0.xsd"><parent><artifactId>spring-cloud-center</artifactId><groupId>com.saint</groupId><version>0.0.1-SNAPSHOT</version></parent><modelVersion>4.0.0</modelVersion><artifactId>feign-server-api</artifactId><version>0.0.1-SNAPSHOT</version><description>feign test service provider api</description><dependencies><dependency><groupId>org.springframework.boot</groupId><artifactId>spring-boot-starter-web</artifactId></dependency></dependencies></project>
2、User
packagecom.saint.feign.model;/**
 * @author Saint
 */publicclassUser{privateLong id;privateString name;privateInteger age;publicUser(){}publicUser(Long id,String name,Integer age){this.id = id;this.name = name;this.age = age;}publicLonggetId(){return id;}publicvoidsetId(Long id){this.id = id;}publicStringgetName(){return name;}publicvoidsetName(String name){this.name = name;}publicIntegergetAge(){return age;}publicvoidsetAge(Integer age){this.age = age;}@OverridepublicStringtoString(){return"User [id="+ id +", name="+ name +", age="+ age +"]";}}
3、ServiceA
packagecom.saint.feign.service;importcom.saint.feign.model.User;importorg.springframework.web.bind.annotation.*;/**
 * @author Saint
 */@RequestMapping("/user")publicinterfaceServiceA{@RequestMapping(value ="/sayHello/{id}", method =RequestMethod.GET)StringsayHello(@PathVariable("id")Long id,@RequestParam("name")String name,@RequestParam("age")Integer age);@RequestMapping(value ="/", method =RequestMethod.POST)StringcreateUser(@RequestBodyUser user);@RequestMapping(value ="/{id}", method =RequestMethod.PUT)StringupdateUser(@PathVariable("id")Long id,@RequestBodyUser user);@RequestMapping(value ="/{id}", method =RequestMethod.DELETE)StringdeleteUser(@PathVariable("id")Long id);@RequestMapping(value ="/{id}", method =RequestMethod.GET)UsergetById(@PathVariable("id")Long id);}
3、搭建服务提供者implement(feign-server)
feign-server-api整体代码结构目录如下:
其中包含一个pom.xml文件、一个application配置文件、一个启动类、一个Controller。
1、pom.xml
<?xml version="1.0" encoding="UTF-8"?><projectxmlns="http://maven.apache.org/POM/4.0.0"xmlns:xsi="http://www.w3.org/2001/XMLSchema-instance"xsi:schemaLocation="http://maven.apache.org/POM/4.0.0 http://maven.apache.org/xsd/maven-4.0.0.xsd"><parent><artifactId>spring-cloud-center</artifactId><groupId>com.saint</groupId><version>0.0.1-SNAPSHOT</version></parent><modelVersion>4.0.0</modelVersion><artifactId>feign-server</artifactId><version>0.0.1-SNAPSHOT</version><description>feign test service provider</description><dependencies><dependency><groupId>com.saint</groupId><artifactId>feign-server-api</artifactId><version>0.0.1-SNAPSHOT</version></dependency><!--集成eureka-client--><dependency><groupId>org.springframework.cloud</groupId><artifactId>spring-cloud-starter-netflix-eureka-client</artifactId></dependency><dependency><groupId>org.springframework.boot</groupId><artifactId>spring-boot-starter-web</artifactId></dependency></dependencies></project>
2、application.yml
server:port:8081spring:application:name: service-a
eureka:client:# 将当前服务注册到服务注册中心service-url:defaultZone: http://localhost:10010/eureka
3、启动类FeignServerApplication
packagecom.saint.feign;importorg.springframework.boot.SpringApplication;importorg.springframework.boot.autoconfigure.SpringBootApplication;importorg.springframework.cloud.netflix.eureka.EnableEurekaClient;/**
 * @author Saint
 */@EnableEurekaClient@SpringBootApplicationpublicclassFeignServerApplication{publicstaticvoidmain(String[] args){SpringApplication.run(FeignServerApplication.class, args);}}
4、编写ServiceAController
ServiceAController实现
feign-server-api
模块下的
ServiceA
,提供具体的业务实现。
packagecom.saint.feign.controller;importcom.saint.feign.model.User;importcom.saint.feign.service.ServiceA;importorg.springframework.web.bind.annotation.PathVariable;importorg.springframework.web.bind.annotation.RequestBody;importorg.springframework.web.bind.annotation.RequestParam;importorg.springframework.web.bind.annotation.RestController;/**
 * @author Saint
 */@RestControllerpublicclassServiceAControllerimplementsServiceA{@OverridepublicStringsayHello(@PathVariable("id")Long id,@RequestParam("name")String name,@RequestParam("age")Integer age){System.out.println("打招呼,id="+ id +", name="+ name +", age="+ age);return"{'msg': 'hello, "+ name +"'}";}@OverridepublicStringcreateUser(@RequestBodyUser user){System.out.println("创建用户,"+ user);return"{'msg': 'success'}";}@OverridepublicStringupdateUser(@PathVariable("id")Long id,@RequestBodyUser user){System.out.println("更新用户,"+ user);return"{'msg': 'success'}";}@OverridepublicStringdeleteUser(@PathVariable("id")Long id){System.out.println("删除用户,id="+ id);return"{'msg': 'success'}";}@OverridepublicUsergetById(@PathVariable("id")Long id){System.out.println("查询用户,id="+ id);returnnewUser(1L,"张三",20);}}
5、启动service-a服务实例1(8081端口)
服务启动成功后,控制台输出如下:
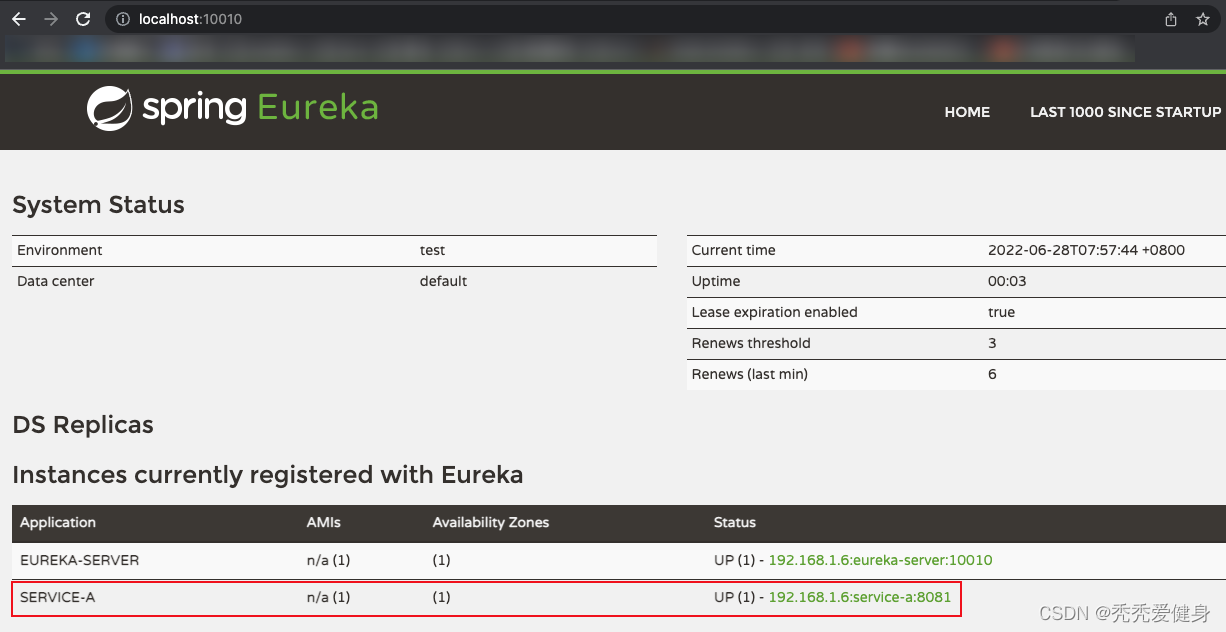
再看eureka-server dashboard中多了一个
SERVICE-A
服务,并且其有一个实例
192.168.1.6:service-a:8081
。
6、启动service-a服务实例2(8082端口)
**1> 修改
FeignServerApplication
的配置:**
2> 复制出一个FeignServerApplication配置: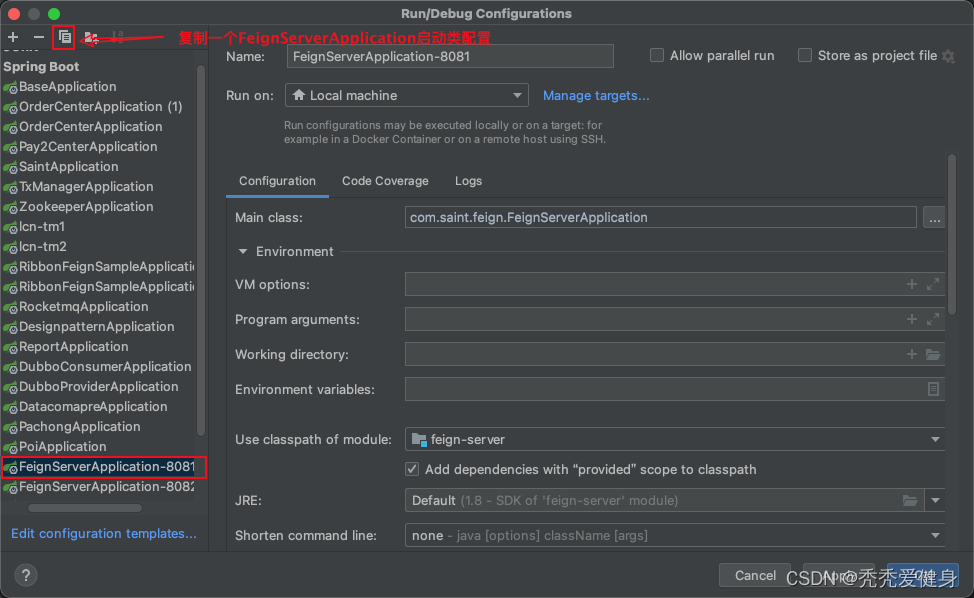
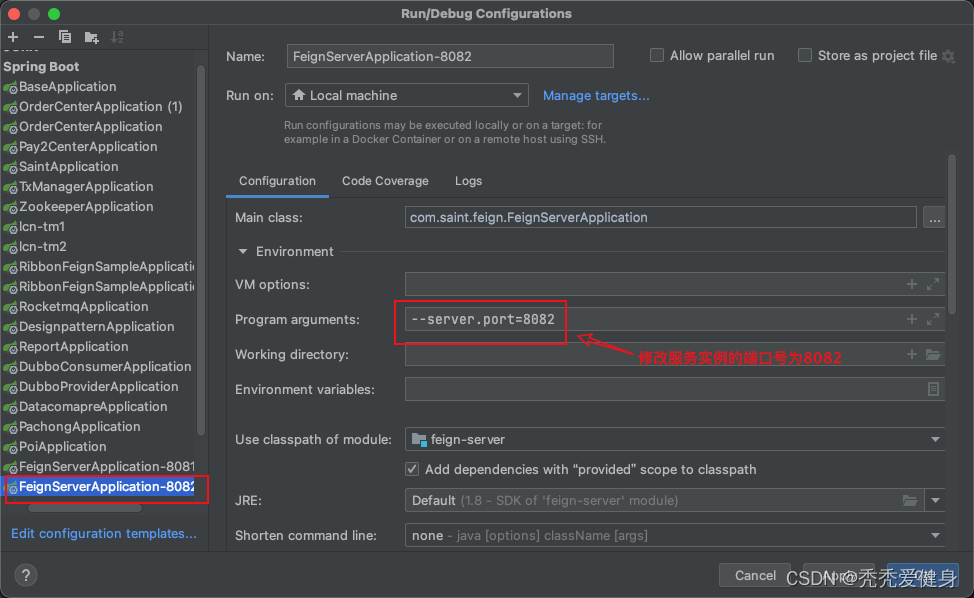
**3> 修改第二启动类配置名为:
FeignServerApplication-8082
,启动端口为
8082
:**
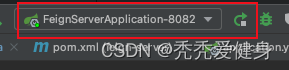
**4> 运行
FeignServerApplication-8082
:**
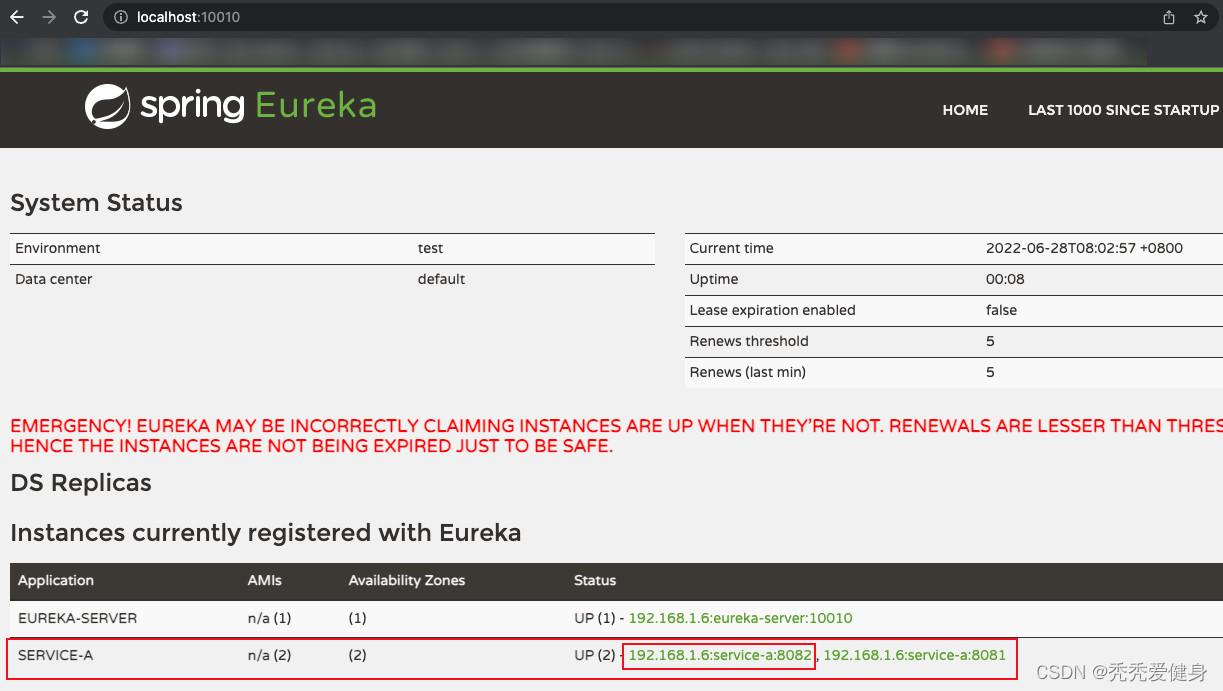
**5> 启动之后,看eureka-server dashboard中
SERVICE-A
服务多了一个实例
192.168.1.6:service-a:8082
:**
4、搭建服务消费者feign-consumer
feign-consumer整体代码结构目录如下: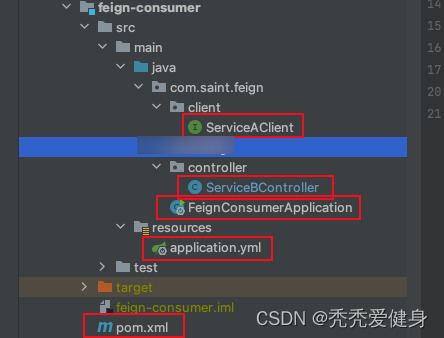
其包含一个pom.xml文件、一个application配置文件、一个启动类、一个FeignClient接口、一个Controller。
1、pom.xml
这里使用的是open-feign,想使用老版本的feign把代码中的注释放开;并把
spring-cloud-starter-openfeign
依赖注掉即可。
<?xml version="1.0" encoding="UTF-8"?><projectxmlns="http://maven.apache.org/POM/4.0.0"xmlns:xsi="http://www.w3.org/2001/XMLSchema-instance"xsi:schemaLocation="http://maven.apache.org/POM/4.0.0 http://maven.apache.org/xsd/maven-4.0.0.xsd"><parent><artifactId>spring-cloud-center</artifactId><groupId>com.saint</groupId><version>0.0.1-SNAPSHOT</version></parent><modelVersion>4.0.0</modelVersion><artifactId>feign-consumer</artifactId><version>0.0.1-SNAPSHOT</version><description>feign test consumer</description><dependencies><dependency><groupId>com.saint</groupId><artifactId>feign-server-api</artifactId><version>0.0.1-SNAPSHOT</version></dependency><!--集成feign PS: 博主使用的SpringCloud版本内部没有管理feign的版本,而是管理的open-feign版本--><!-- <dependency>--><!-- <groupId>org.springframework.cloud</groupId>--><!-- <artifactId>spring-cloud-starter-feign</artifactId>--><!-- <version>1.4.7.RELEASE</version>--><!-- </dependency>--><!--集成openfeign--><dependency><groupId>org.springframework.cloud</groupId><artifactId>spring-cloud-starter-openfeign</artifactId></dependency><!--集成eureka-client--><dependency><groupId>org.springframework.cloud</groupId><artifactId>spring-cloud-starter-netflix-eureka-client</artifactId></dependency><dependency><groupId>org.springframework.boot</groupId><artifactId>spring-boot-starter-web</artifactId></dependency></dependencies></project>
2、修改配置文件application.yml
server:port:9090spring:application:name: service-b
eureka:client:# 将当前服务注册到服务注册中心service-url:defaultZone: http://localhost:10010/eureka
注:服务端口为9090,后面我们进行接口调用的时候会用到。
3、修改启动类
packagecom.saint.feign;importorg.springframework.boot.SpringApplication;importorg.springframework.boot.autoconfigure.SpringBootApplication;importorg.springframework.cloud.netflix.eureka.EnableEurekaClient;importorg.springframework.cloud.openfeign.EnableFeignClients;/**
 * @author Saint
 */@SpringBootApplication@EnableEurekaClient@EnableFeignClientspublicclassFeignConsumerApplication{publicstaticvoidmain(String[] args){SpringApplication.run(FeignConsumerApplication.class, args);}}
其中的
@EnableFeignClients
注解负责使
@FeignClient
注解生效,可以被扫描到。
4、FeignClient接口(ServiceAClient)
packagecom.saint.feign.client;importcom.saint.feign.service.ServiceA;importorg.springframework.cloud.openfeign.FeignClient;/**
 * @author Saint
 */@FeignClient("SERVICE-A")publicinterfaceServiceAClientextendsServiceA{}
**FeignClient接口要实现
feign-server-api
中的
ServiceA
接口,以表明当前FeignClient针对的对象**
5、编写ServiceBController
packagecom.saint.feign.controller;importcom.saint.feign.model.User;importcom.saint.feign.client.ServiceAClient;importorg.springframework.beans.factory.annotation.Autowired;importorg.springframework.web.bind.annotation.PathVariable;importorg.springframework.web.bind.annotation.RequestBody;importorg.springframework.web.bind.annotation.RequestMapping;importorg.springframework.web.bind.annotation.RequestMethod;importorg.springframework.web.bind.annotation.RequestParam;importorg.springframework.web.bind.annotation.RestController;@RestController@RequestMapping("/ServiceB/user")publicclassServiceBController{@AutowiredprivateServiceAClient serviceA;@RequestMapping(value ="/sayHello/{id}", method =RequestMethod.GET)publicStringgreeting(@PathVariable("id")Long id,@RequestParam("name")String name,@RequestParam("age")Integer age){return serviceA.sayHello(id, name, age);}@RequestMapping(value ="/", method =RequestMethod.POST)publicStringcreateUser(@RequestBodyUser user){return serviceA.createUser(user);}@RequestMapping(value ="/{id}", method =RequestMethod.PUT)publicStringupdateUser(@PathVariable("id")Long id,@RequestBodyUser user){return serviceA.updateUser(id, user);}@RequestMapping(value ="/{id}", method =RequestMethod.DELETE)publicStringdeleteUser(@PathVariable("id")Long id){return serviceA.deleteUser(id);}@RequestMapping(value ="/{id}", method =RequestMethod.GET)publicUsergetById(@PathVariable("id")Long id){return serviceA.getById(id);}}
ServiceBController中通过FeignClient做负载均衡调用
SERVICE-A
服务中提供的接口。
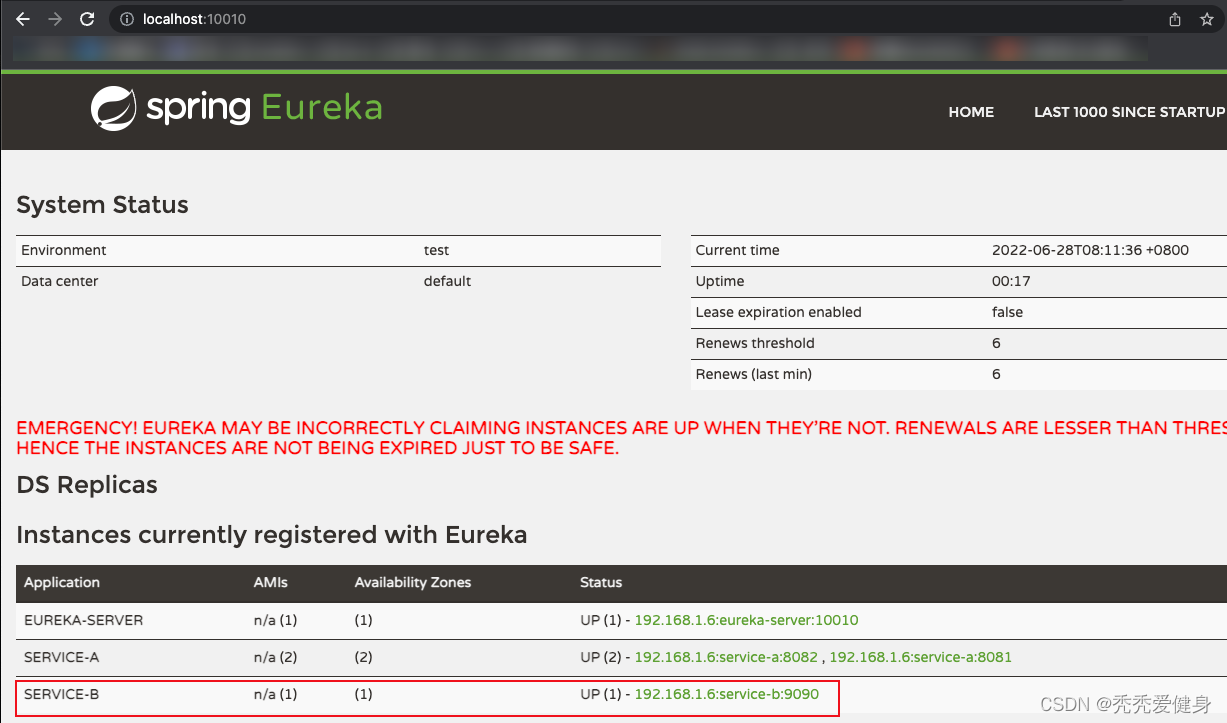
6、启动feign-consumer
启动成功后,看eureka-server dashboard中多了一个
SERVICE-B
服务,并且其有一个实例
192.168.1.6:service-b:9090
。
5、使用浏览器进行调用服务消费者
上述步骤中,我们已经依次启动了eureka-server、feign-server-8081、feign-server-8082、feign-consumer;三个服务、四个实例。
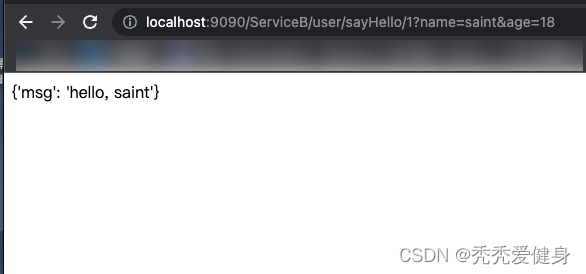
此处我们针对服务消费者
ribbon-feign-sample-consumer
做四次接口调用,均为:
http://localhost:9090/ServiceB/user/sayHello/1?name=saint&age=18
然后我们去看feign-server-8081、feign-server-8082的控制台输出:
1> feign-server-8081控制台输出: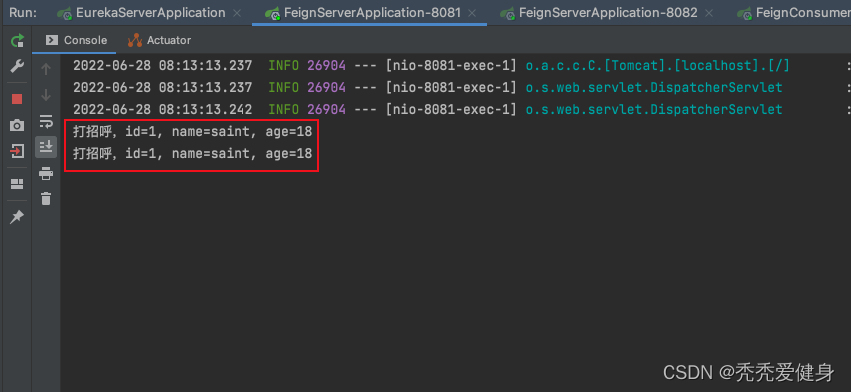
2> feign-server-8082控制台输出: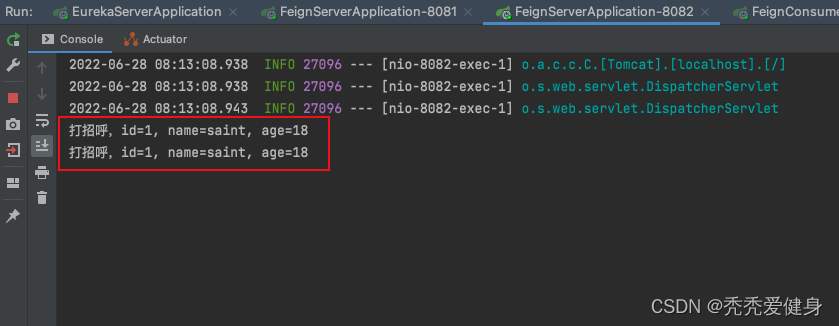
3> 结果说明:
我们可以发现,四个请求,ribbon-feign-sample-8081和ribbon-feign-sample-8082各分担了两个请求。
从现象上来看,已经Feign实现了负载均衡,并且默认是按照轮询的方式。
下文我们接着讨论 Feign是如何实现负载均衡(源码分析)?
版权归原作者 秃秃爱健身 所有, 如有侵权,请联系我们删除。