- Obsidian下载
- git下载
- git 教程
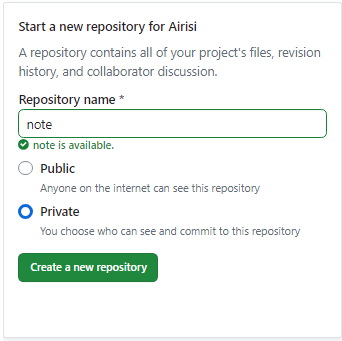
- 创建github仓库
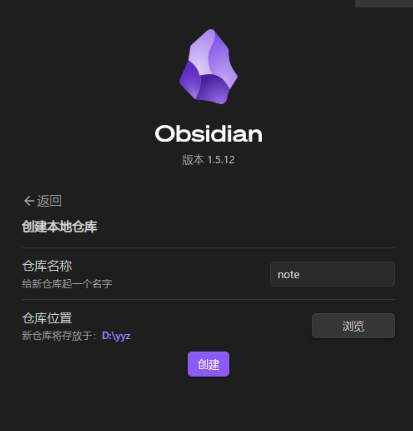
- 创建Obsidian仓库
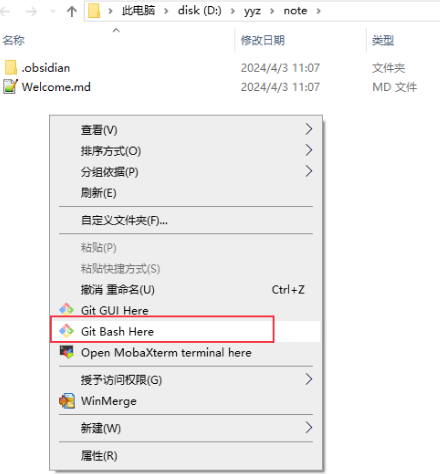
- 配置仓库- 在Obsidian仓库根目录右键单击执行
Git Bash Here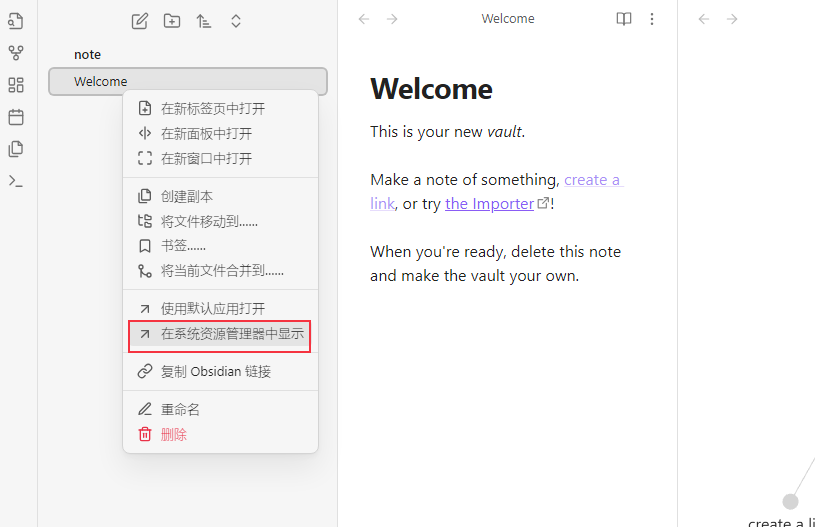
 - git配置
git config --global user.name "user"# 设置全局用户名为 "user"git config --global user.email "[email protected]"# 设置全局用户邮箱为 "[email protected]"git init # 初始化新的 Git 仓库gitadd.# 将所有文件添加到暂存区git commit -m"first commit"# 提交更改并添加提交信息- 仓库地址使用HTTPS(HTTPS与SSH二选一)-git remote add origin https://github.com/xxx/note.git -
- git push -u origin master - 也可以使用GitHub Desktop部署,更加方便- 仓库地址使用
SSH(HTTPS与SSH二选一)-git remote add origin [email protected]:xxx/note.git -
- git push -u origin master未添加密钥前push失败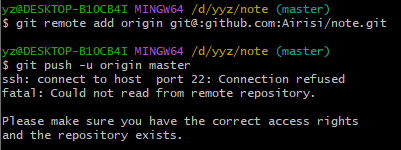 - 执行
- 执行 ssh-keygen -t rsa -C "你的邮箱"生成密钥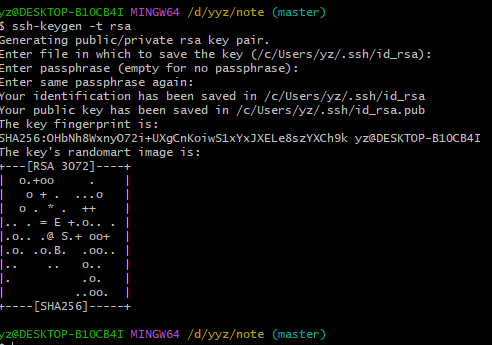 - 添加公钥,文件保存在
C:\Users\%USERNAME%\.ssh\id_rsa.pub``````cat ~/.ssh/id_rsa.pub - Github上传公钥
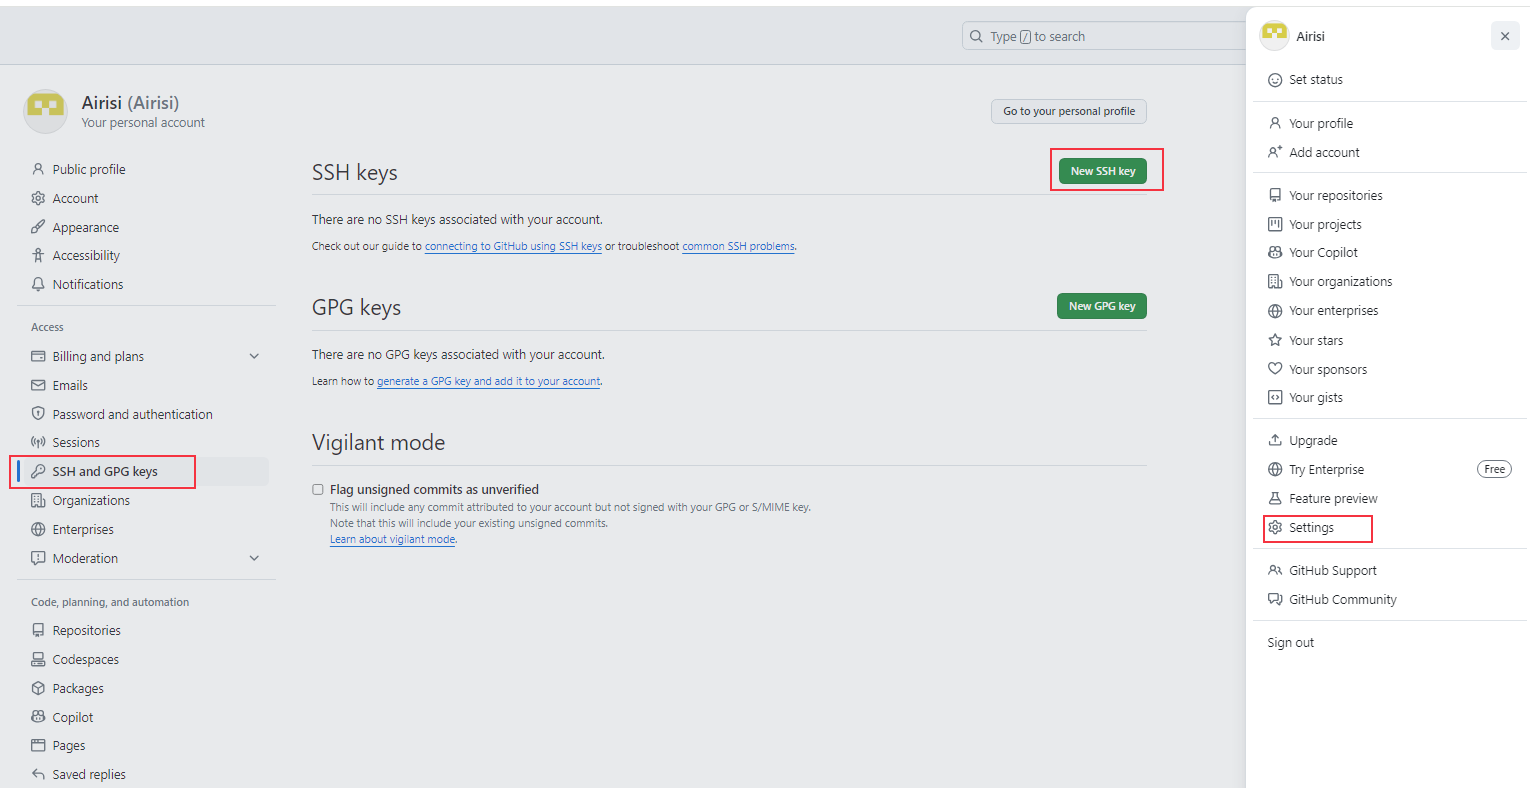
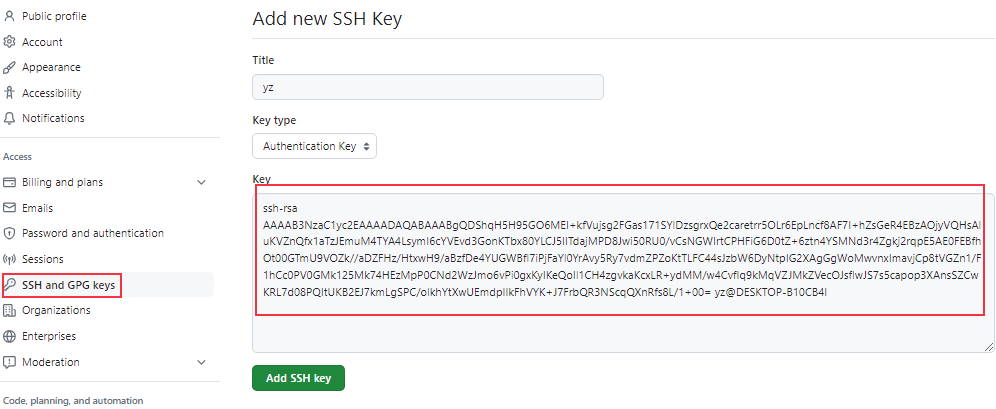
 -
- git push -u origin master添加密钥后重新执行push成功
- Obsidian设置- git插件安装 - 关闭安全模式
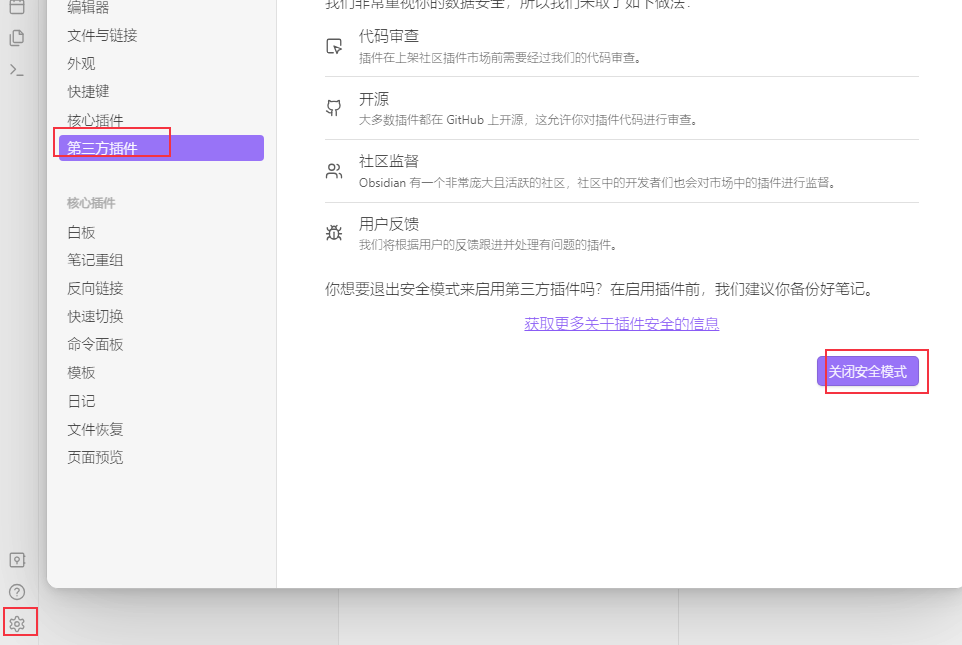 - 浏览社区插件市场
 - 安装Git插件
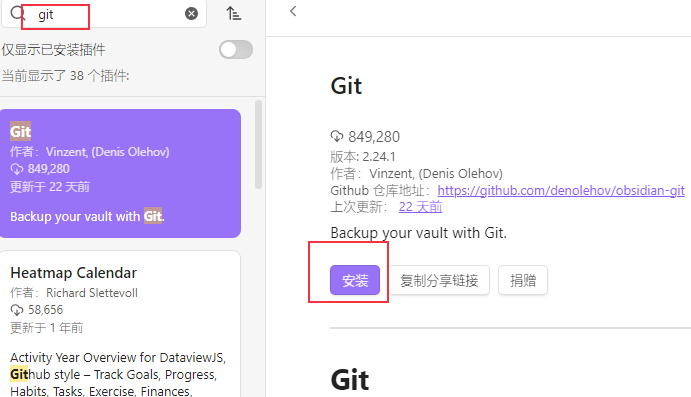 - 启用Git插件
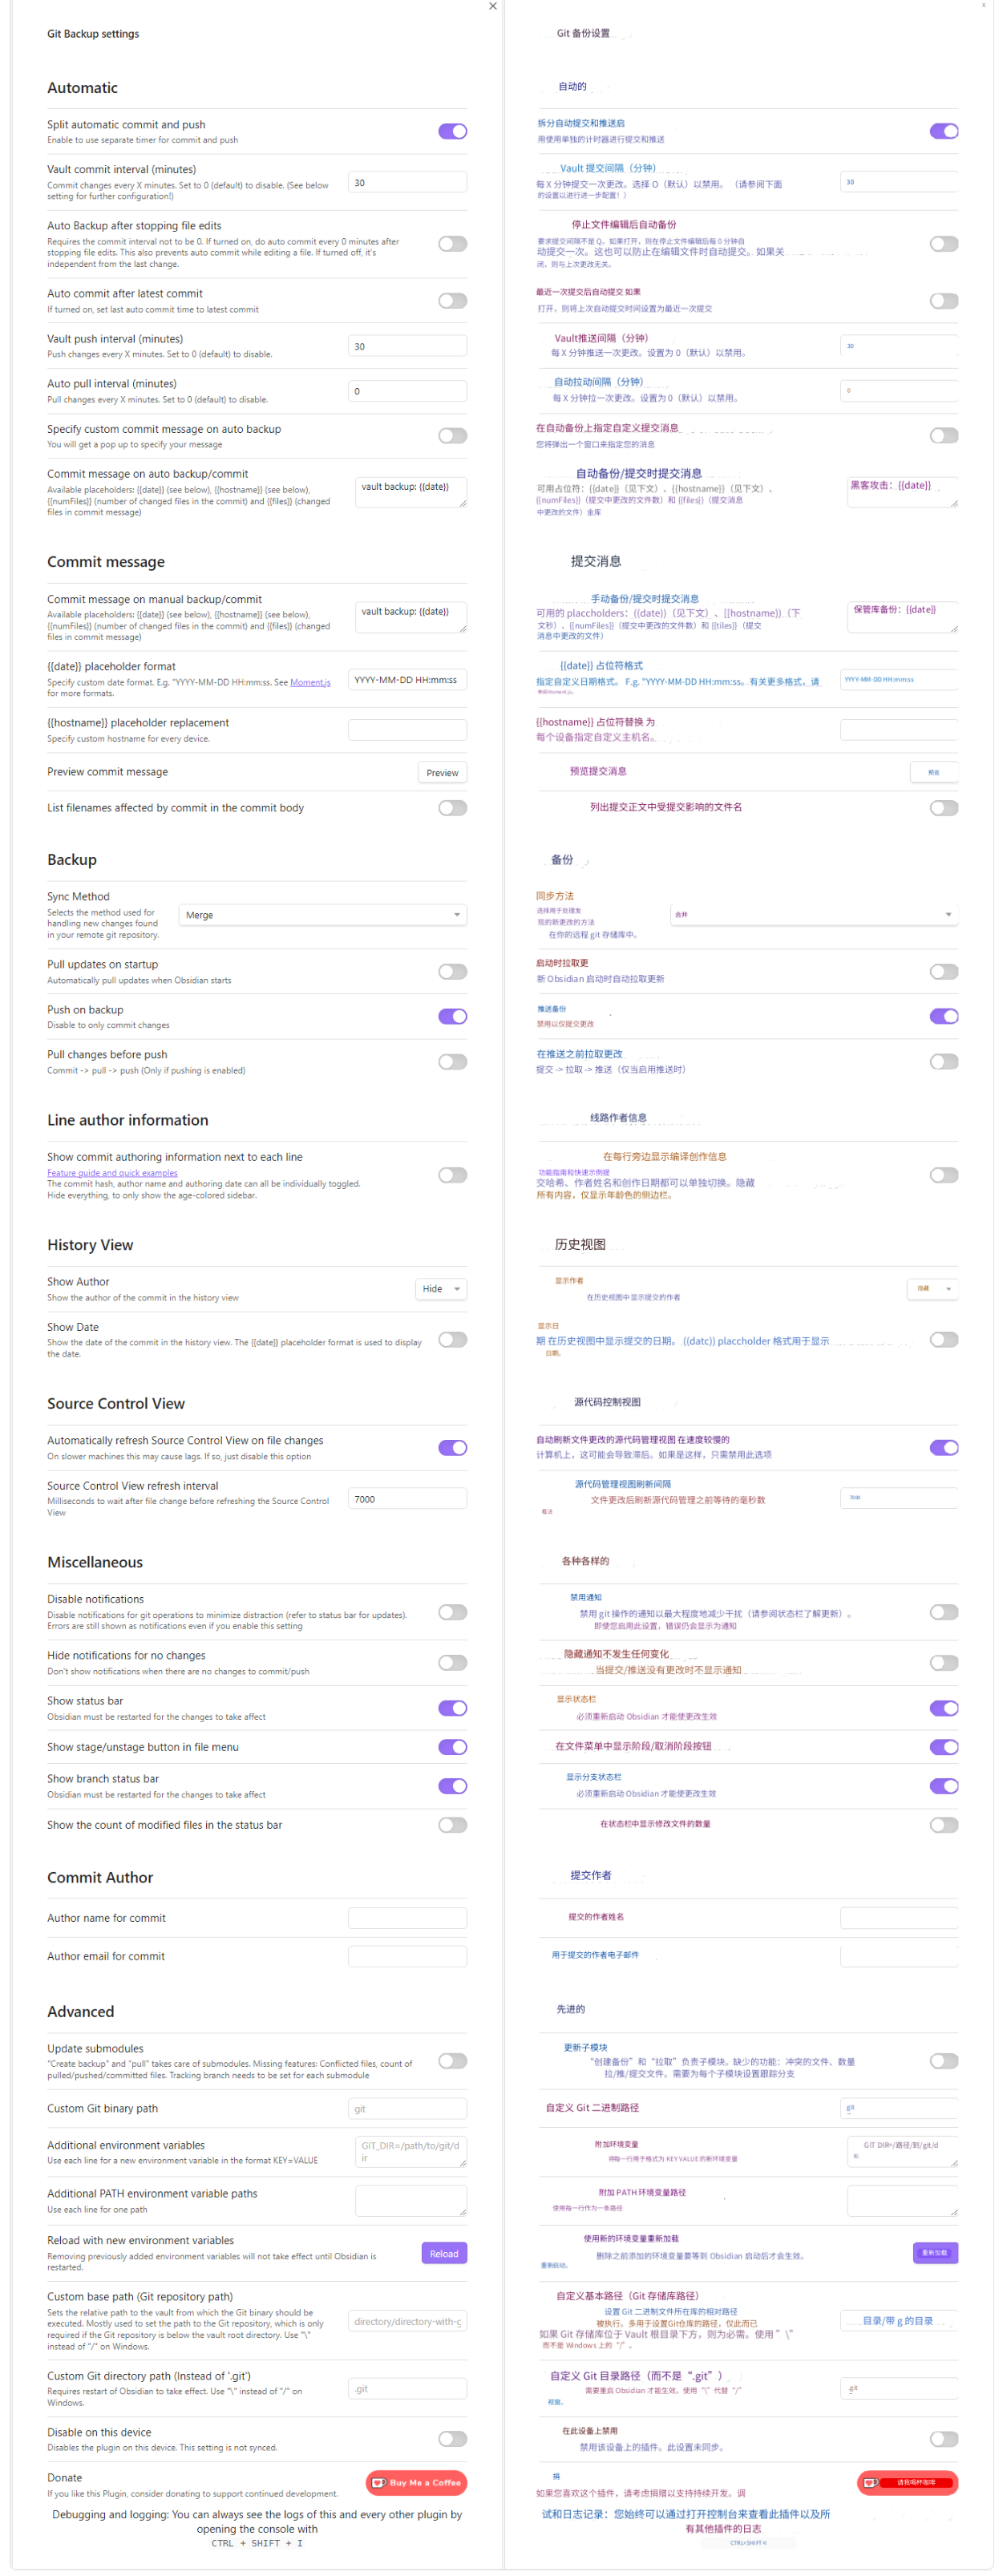
 - Git插件配置 - 以下配置表示每隔30分钟会commit和push,禁用了自动pull最新版本,可根据自己需求配置。
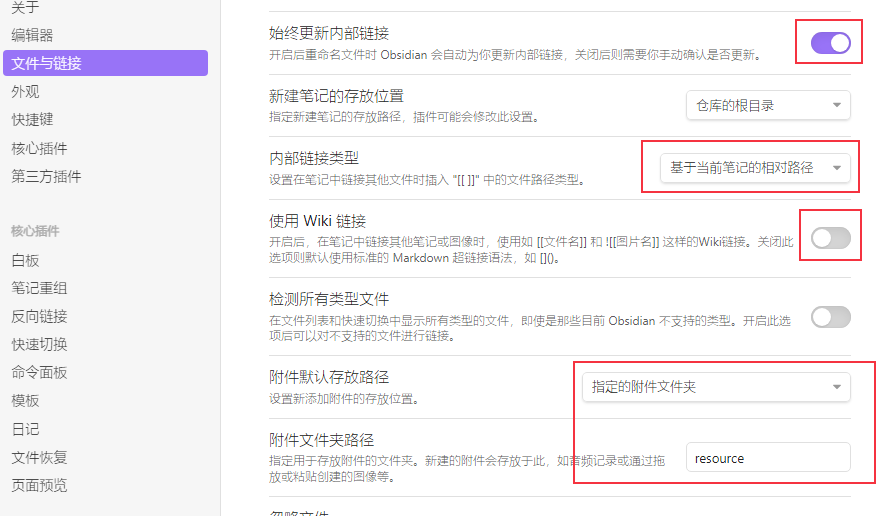
 - Obsidian设置 - 以下设置开启里的始终更新内部链接,且内部链接基于当前笔记相对路径,禁用了WiKi链接,并指定附件存放在了仓库根目录的resource下。
- 添加
.gitignore# 忽略自动生成的缓存和临时文件.cache/.tmp/temp/*.swp*.log*.log.**.tmp*.bak*.cache# 忽略本地生成的笔记文件备份*~# 忽略IDE生成的文件和文件夹.idea/.vscode/.obsidian/*.iml*.ipr*.iws# 忽略编译生成的文件*.class*.war*.ear*.jar# 忽略node.js和npm生成的文件夹node_modules/npm-debug.log# 忽略Jupyter Notebook生成的文件和文件夹.ipynb_checkpoints/# 忽略编译输出目录build/dist/# 忽略Mac OS生成的临时文件.DS_Store# 忽略Windows生成的临时文件Thumbs.db## git files that we don't want to ignore even if they are dot-files#!.gitignore!.mailmap!.cocciconfig
本文转载自: https://blog.csdn.net/weixin_47711503/article/details/137544921
版权归原作者 黄金门票 所有, 如有侵权,请联系我们删除。
版权归原作者 黄金门票 所有, 如有侵权,请联系我们删除。