
资源地址:
整合junit的代码:https://download.csdn.net/download/zhiaidaidai/88291527
整合redis的代码:https://download.csdn.net/download/zhiaidaidai/88291536
整合mybatis的代码:https://download.csdn.net/download/zhiaidaidai/88307290
首先先在IDEA里创建一个空项目。
整合junit
整体流程
搭建SpringBoot工程
引入starter-test起步依赖
编写测试类
添加测试相关注解
@RunWith(SpringRunner.class) 和 @SpringBootTest(classes=启动类.class)编写测试方法
创建模块:

整体项目结构和对应的代码
整体项目:
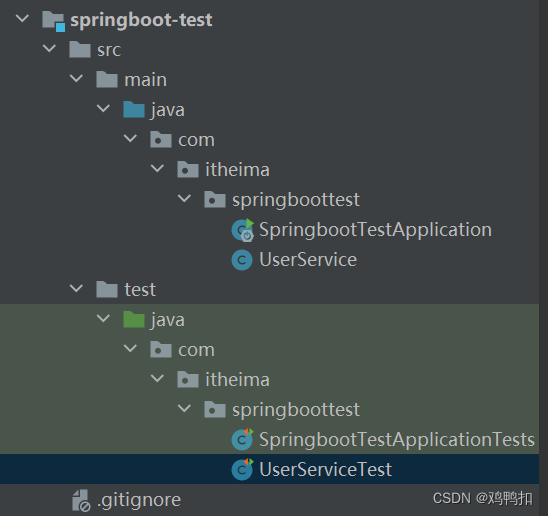
UserService.java:
package com.itheima.springboottest;

import org.springframework.stereotype.Service;

@Service
public class UserService {
    public void add(){
        System.out.println("add..");
    }
}
UserServiceTest.java:
package com.itheima.springboottest;

import org.junit.jupiter.api.Test;
import org.junit.runner.RunWith;
import org.springframework.beans.factory.annotation.Autowired;
import org.springframework.boot.test.context.SpringBootTest;
import org.springframework.test.context.junit4.SpringRunner;

@RunWith(SpringRunner.class)
@SpringBootTest(classes = SpringbootTestApplication.class)
//使用IDE自动创建的项目没有加引导类。是因为如果测试文件属于service文件对应的同一包结构或者在其子包之下,可以不用加。
// 如果不在同一包结构或者子包之下,则必须加引导类class

public class UserServiceTest {
    @Autowired
    private  UserService userService;

    @Test
    public void testAdd(){
        userService.add();
    }
}
导入RunWith和SpringRunner爆红:
选中RunWith,alt+enter后选择选项‘将JUnit4”添加到类路径中’。
随后分别选中RunWith和SpringRunner,按alt+enter,选择选项“导入类”。
整合redis
整体流程
- 搭建SpringBoot工程
- 引入redis起步依赖
- 配置redis相关属性
- 注入RedisTemplate模板
- 编写测试方法,测试
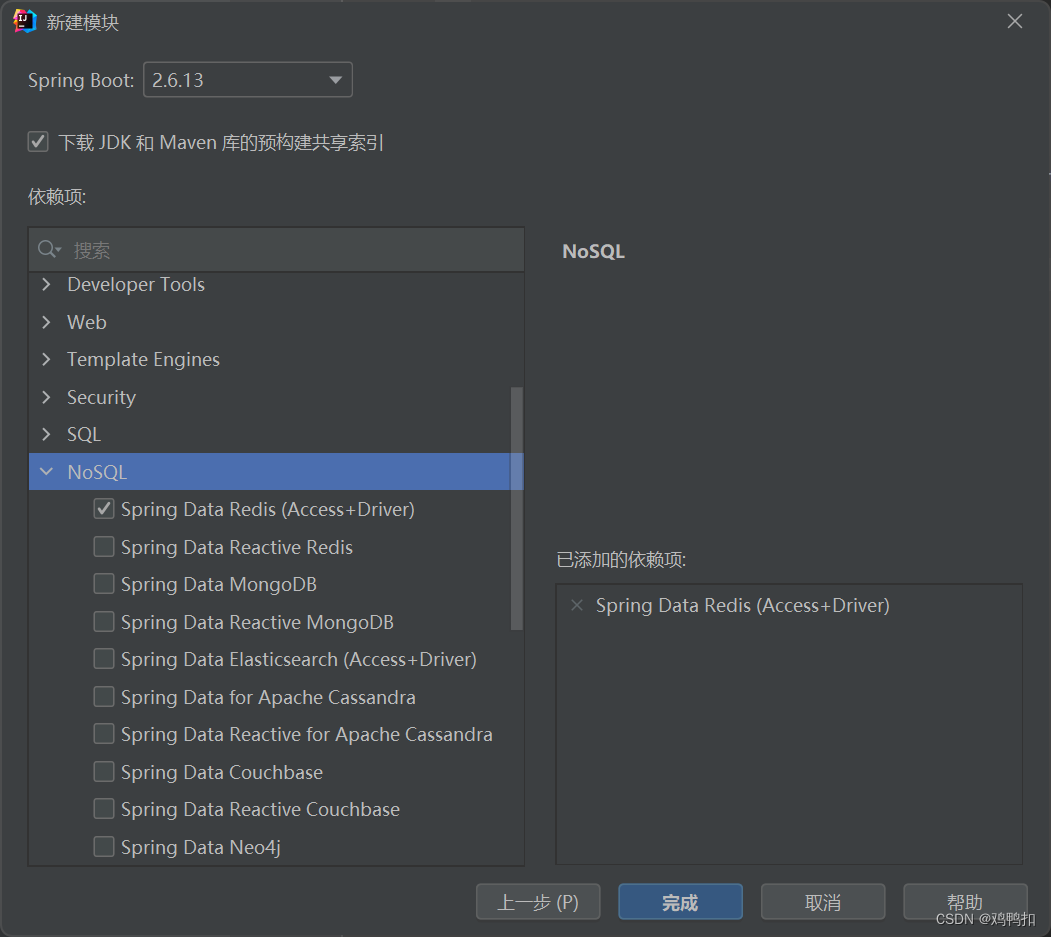
创建模块:

整合本机redis:
只有本机的redis不需要进行配置。我们先启动本机redis服务。redis的安装与启动可以见我的另一篇博客:http://t.csdn.cn/AlSjX
整体项目结构和对应的代码
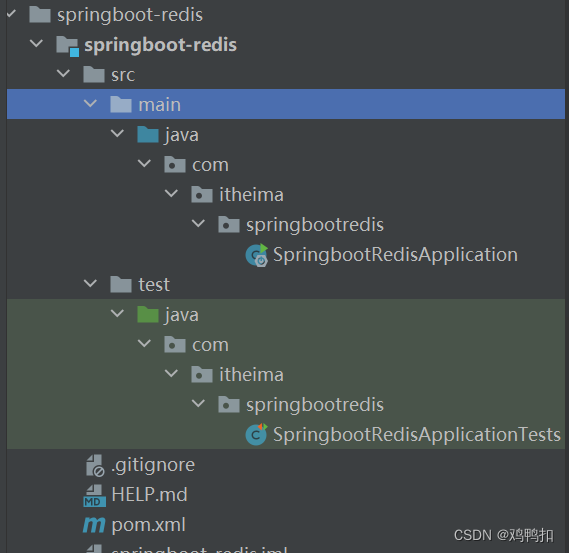
将SpringbootRedisApplicationTests.java中改写为以下代码:
package com.itheima.springbootredis;

import org.junit.jupiter.api.Test;
import org.junit.runner.RunWith;
import org.springframework.beans.factory.annotation.Autowired;
import org.springframework.boot.test.context.SpringBootTest;
import org.springframework.data.redis.core.RedisTemplate;
import org.springframework.test.context.junit4.SpringRunner;

@RunWith(SpringRunner.class)
@SpringBootTest
class SpringbootRedisApplicationTests {

    @Autowired
    private RedisTemplate redisTemplate;

    @Test
    public void testSet() {
        //存入数据
        redisTemplate.boundValueOps("name").set("zhangsan");
    }

    @Test
    public void testGet() {
        //存入数据
        Object name = redisTemplate.boundValueOps("name").get();
        System.out.println(name);
    }

}
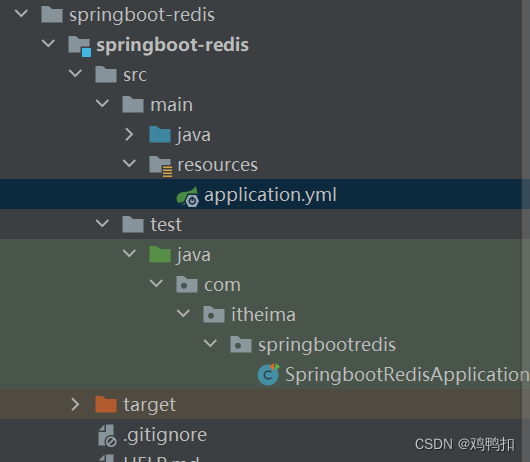
整合远程redis:
在resources包下面新建application.yml(原本就有个application.properties也没有关系)
整体项目结构和对应的代码:
application.yml(redis配置了密码的话就写password字段,否则不用):
spring:
  redis:
    host: 127.0.0.1
    port: 6379
    password: 123456
整合mybatis:
整体流程:
- 搭建SpringBoot.工程
- 引入mybatis起步依赖,添动加mysq驱动
- 编写DataSource和MyBatis相关配置
- 定义表和实体类
- 编写dao和mapper文件/纯注解开发
- 测试
创建模块、准备数据库环境:
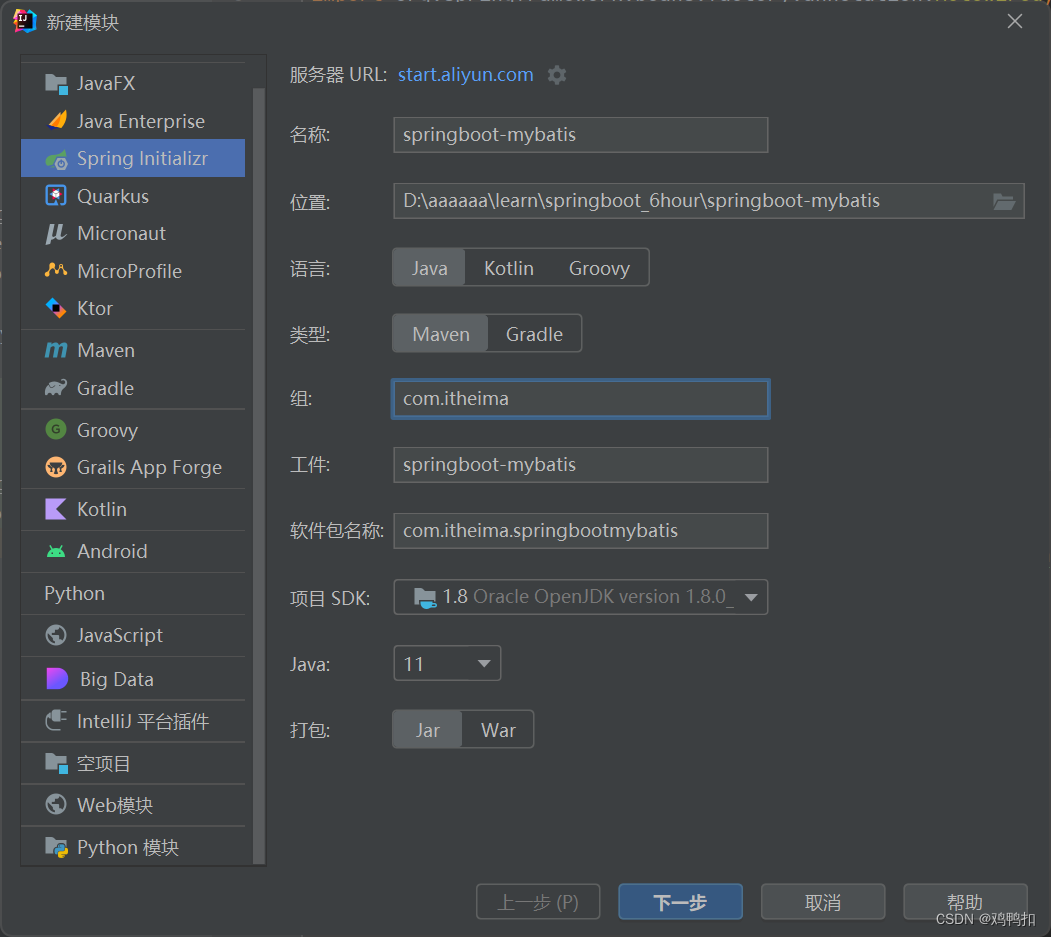

注意:勾选了两个依赖项。
准备数据库环境可以通过以下任意一种方法:
1、新建一个文件user.txt,将以下代码复制进去后名字保存为user.sql,然后在navicat里执行这个sql文件。
2、cmd命令行打开mysql服务,随后直接复制以下代码回车后运行。
/*!40101 SET NAMES utf8 */;

/*!40101 SET SQL_MODE=''*/;

/*!40014 SET @OLD_UNIQUE_CHECKS=@@UNIQUE_CHECKS, UNIQUE_CHECKS=0 */;
/*!40014 SET @OLD_FOREIGN_KEY_CHECKS=@@FOREIGN_KEY_CHECKS, FOREIGN_KEY_CHECKS=0 */;
/*!40101 SET @OLD_SQL_MODE=@@SQL_MODE, SQL_MODE='NO_AUTO_VALUE_ON_ZERO' */;
/*!40111 SET @OLD_SQL_NOTES=@@SQL_NOTES, SQL_NOTES=0 */;
CREATE DATABASE /*!32312 IF NOT EXISTS*/`springboot` /*!40100 DEFAULT CHARACTER SET utf8mb4 COLLATE utf8mb4_unicode_ci */;

USE `springboot`;

/*Table structure for table `t_user` */

DROP TABLE IF EXISTS `t_user`;

CREATE TABLE `t_user` (
  `id` int(11) NOT NULL AUTO_INCREMENT,
  `username` varchar(32) COLLATE utf8mb4_unicode_ci DEFAULT NULL,
  `password` varchar(32) COLLATE utf8mb4_unicode_ci DEFAULT NULL,
  PRIMARY KEY (`id`)
) ENGINE=InnoDB AUTO_INCREMENT=3 DEFAULT CHARSET=utf8mb4 COLLATE=utf8mb4_unicode_ci;

/*Data for the table `t_user` */

insert  into `t_user`(`id`,`username`,`password`) values (1,'zhangsan','123'),(2,'lisi','234');

/*!40101 SET SQL_MODE=@OLD_SQL_MODE */;
/*!40014 SET FOREIGN_KEY_CHECKS=@OLD_FOREIGN_KEY_CHECKS */;
/*!40014 SET UNIQUE_CHECKS=@OLD_UNIQUE_CHECKS */;
/*!40111 SET SQL_NOTES=@OLD_SQL_NOTES */;
整体项目结构和对应的代码:
新建domain包,User类:
以下的代码可以先定义好类和三个字段,然后使用alt+insert快速生成getter和setter和tostring方法
package com.itheima.springbootmybatis.domain;

public class User {
    private int id;
    private String username;
    private String password;

    public int getId() {
        return id;
    }

    public void setId(int id) {
        this.id = id;
    }

    public String getUsername() {
        return username;
    }

    public void setUsername(String username) {
        this.username = username;
    }

    public String getPassword() {
        return password;
    }

    public void setPassword(String password) {
        this.password = password;
    }

    @Override
    public String toString() {
        return "User{" +
                "id=" + id +
                ", username='" + username + '\'' +
                ", password='" + password + '\'' +
                '}';
    }
}
新建mapper包,UserMapper类:
package com.itheima.springbootmybatis.mapper;

import com.itheima.springbootmybatis.domain.User;
import org.apache.ibatis.annotations.Mapper;
import org.apache.ibatis.annotations.Select;

import java.util.List;

@Mapper
public interface UserMapper {
    @Select("select * from t_user")
    public List<User> findaAll();
}
SpringbootMybatisApplicationTests.java中:
package com.itheima.springbootmybatis;

import com.itheima.springbootmybatis.domain.User;
import com.itheima.springbootmybatis.mapper.UserMapper;
import org.junit.jupiter.api.Test;
import org.junit.runner.RunWith;
import org.springframework.beans.factory.annotation.Autowired;
import org.springframework.boot.test.context.SpringBootTest;
import org.springframework.test.context.junit4.SpringRunner;

import java.util.List;

@RunWith(SpringRunner.class)
@SpringBootTest
class SpringbootMybatisApplicationTests {

    @Autowired
    private UserMapper userMapper;

    @Test
    public void testFindAll(){
        List<User> list = userMapper.findaAll();
        System.out.println(list);
    }

}
application.yml:
spring:
  datasource:
    url: jdbc:mysql:///springboot?serverTimezone=UTC
    username: root
    password: 123456
    driver-class-name: com.mysql.jdbc.Driver
出现的问题:
alt+insert快速生成方法失效/只有版权的问题:
首先要确保在类里定义了相应的字段,其次需要确保光标在类的大括号里。这两个条件都确认了后可能是电脑的快捷键冲突的原因,直接鼠标右键找到生成(generate)也是一样的。
yml文件里driver-class-name的mysql.jdbc爆红:
可以去pom.xml文件里找到mysql这个依赖项,将其<scope>runtime</scope>注释掉。
SpringbootMybatisApplicationTests中userMapper类爆红:
其实并不影响程序运行,但是如果觉得有影响的话,可以在UserMapper类里面额外加个
@Repository注解。
版权归原作者 鸡鸭扣 所有, 如有侵权,请联系我们删除。