部署机器
主机名(hostname)IP版本master192.168.0.112CentOS Linux release 7.9.2009 (Core)node192.168.0.113CentOS Linux release 7.9.2009 (Core)
2台机器都进行以下安装步骤
创建并进入目录
mkdir /usr/local/elasticsearch ; cd /usr/local/elasticsearch
下载安装包,这里我安装的是7.13.1版本
wget https://artifacts.elastic.co/downloads/elasticsearch/elasticsearch-7.13.1-linux-x86_64.tar.gz
解压安装包
tar -zxvf elasticsearch-7.13.1-linux-x86_64.tar.gz
修改配置文件 /usr/local/elasticsearch/elasticsearch-7.13.1/config/elasticsearch.yml
master机器配置:
cluster.name: elasticsearch
node.name: es-master
node.master: true

network.host: 0.0.0.0
network.publish_host: 192.168.0.112

http.port: 9200
transport.tcp.port: 4930

discovery.seed_hosts: ["192.168.0.112","192.168.0.113"]
cluster.initial_master_nodes: ["es-master"]

path.data: /usr/local/elasticsearch/elasticsearch-7.13.1/data
path.logs:  /usr/local/elasticsearch/elasticsearch-7.13.1/logs

http.cors.enabled: true
http.cors.allow-origin: "*"
node机器配置:
cluster.name: elasticsearch
node.name: es-node
node.master: false

network.host: 0.0.0.0
network.publish_host: 192.168.0.113

http.port: 9200
transport.tcp.port: 4930

discovery.seed_hosts: ["192.168.0.112","192.168.0.113"]
cluster.initial_master_nodes: ["es-master"]

path.data: /usr/local/elasticsearch/elasticsearch-7.13.1/data
path.logs:  /usr/local/elasticsearch/elasticsearch-7.13.1/logs

http.cors.enabled: true
http.cors.allow-origin: "*"
区别在于network.publish_host、node.name、node.master 三个配置
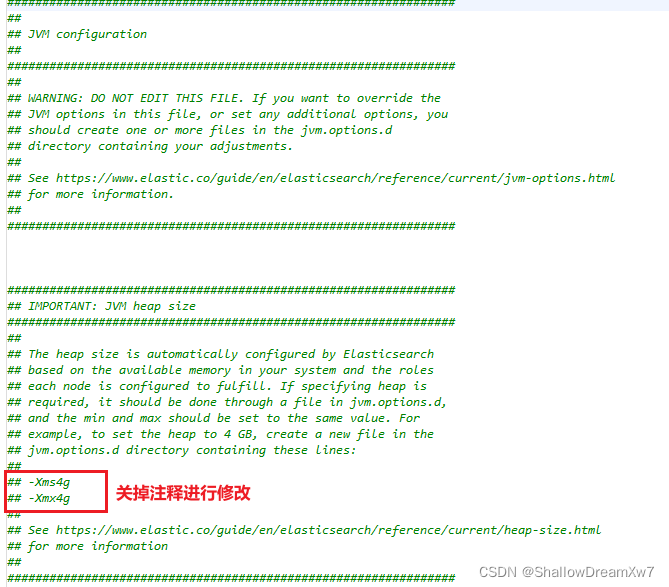
如果不希望ES占用内存过大则修改配置文件 /config/jvm.options 增加内存限制

编辑/etc/security/limits.conf 追加配置
es soft nofile 65535
es hard nofile 65537
编辑 /etc/sysctl.conf 追加配置
vm.max_map_count=262144
执行/sbin/sysctl -p 立即生效
由于elasticsearch不可以使用root账号启动,所以需要增加es用户启动
# 创建es用户
useradd es
#给用户授权
chown es /usr/local/elasticsearch/elasticsearch-7.13.1 -R
#切换用户
su es
#进入bin目录后台启动es
./elasticsearch -d
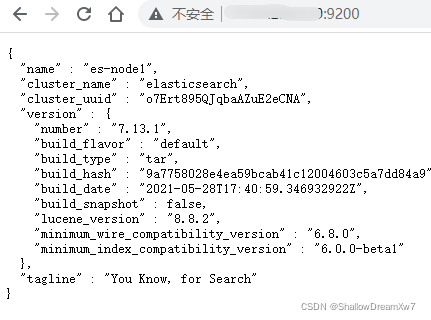
启动完成访问 IP:9200 成功出现ES信息则安装成功

版权归原作者 ShallowDreamXw7 所有, 如有侵权,请联系我们删除。