uniapp结合webview实现(微信和app上)简单版导航打车应用,总体实现方案是 在uniapp上嵌入web网页,在web网页上调用高德地图api实现渲染地图及路线
1. 前置准备工作
- 去高德开放平台注册账号并创建web应用,再生成web安全密钥和key
- 如果需要运行到微信上则需要开通微信公众平台上应用需要的定位权限(有啥开通啥),如果需要发版不是本地运行的demo的话足以,否则还要将网站升级成https,备案,开通443端口,将这个网站网址添加到微信公众上那个业务域名里(根据提示将校验文件放在根目录下即可添加),不然线上访问不通(微信安全限制了的没办法)。
2.web端开发
- web vue项目引入这个
"@amap/amap-jsapi-loader": "^1.0.1"插件, - 在你页面js中先挂载window上这个安全密钥
window._AMapSecurityConfig = { securityJsCode: '生成的安全密钥', } - 初始化地图:
asyncinitMap(){try{this.AMap =awaitthis.AMapLoader.load({key:"你生成到的key",version:"2.0",plugins:[],// resizeEnable: truedragEnable:true,})this.mapInstance =awaitnewthis.AMap.Map("mapContainer",{//设置地图容器idviewMode:"3D",//是否为3D地图模式zoom:15,// 缩放级别pitch:0,// 俯视角度center:newthis.AMap.LngLat(this.myLocation.longitude,this.myLocation.latitude),//初始化地图中心点位置});// 画用自定义点this.selfMarker =awaitnewthis.AMap.Marker({map:this.mapInstance,position:[this.preLocation.longitude,this.preLocation.latitude],content:this.$refs.selfMarkerRef,// 自定义地图锚点domanchor:newthis.AMap.Pixel(0,0),offset:newthis.AMap.Pixel(-20,-20),size:newthis.AMap.Size(20,20)});// 自己走过的线(先定义)this.passedPolylineInstance =newthis.AMap.Polyline({map:this.mapInstance,strokeColor:"#b6bcb2",//线颜色strokeWeight:6,//线宽});
         Promise.all([this.AMap,this.mapInstance,this.selfMarker,this.passedPolylineInstance]).then(res=>{this.getPositionByAmap()// 路线规划this.routePlan()})}catch(err){}},
- 高德获取定位信息
// 获取定位getPositionByAmap(){if(this.AMap){this.AMap.plugin('AMap.Geolocation',()=>{let geolocation =newthis.AMap.Geolocation({// enableHighAccuracy: true,//是否使用高精度定位,默认:truenoIpLocate:3,// 禁止ip定位maximumAge:300,//定位结果缓存0毫秒,默认:0convert:true,//自动偏移坐标,偏移后的坐标为高德坐标,默认:trueshowButton:false,//显示定位按钮,默认:trueshowMarker:false,//定位成功后在定位到的位置显示点标记,默认:trueshowCircle:false,//定位成功后用圆圈表示定位精度范围,默认:truepanToLocation:false,//定位成功后将定位到的位置作为地图中心点,默认:truezoomToAccuracy:false//定位成功后调整地图视野范围使定位位置及精度范围视野内可见,默认:false});if(positionTimer){clearInterval(positionTimer)}
            positionTimer =setInterval(()=>{
              geolocation.getCurrentPosition((status,result)=>{if(status ==='complete'){this.myLocation.longitude = result.position.lng
                  this.myLocation.latitude = result.position.lat
                  if(this.selfMarker){this.selfMarker.setPosition([this.myLocation.longitude,this.myLocation.latitude])}}});},1000)});}}// 获取当前城市adcode行政编码this.cityInfo  =awaitnewPromise((resolve,reject)=>{this.AMap.plugin('AMap.Geocoder',()=>{newthis.AMap.Geocoder({city:'',radius:1000}).getAddress([this.fromAppInfo.fromLongitude,this.fromAppInfo.fromLatitude],(status, result)=>{if(status ==='complete'&& result.regeocode){let address = result.regeocode.addressComponent;
                    address.adcode = adcodeDeal.dealAdCode(address.adcode)// 直辖市去除resolve(address)}else{resolve({adcode:null})}});})})
- 绘制路线
// 规划绘制路线drawRoute(planingRoutes){// 解析线路constparseRouteToPath=(route)=>{let path =[]let continuityPath =[]for(let i =0, l = route.steps.length; i < l; i++){let step = route.steps[i]const arrayOfCoordinates = step.polyline.split(";").map(coord=> coord.split(","));
            path.push(arrayOfCoordinates.flat())}
          path = path.flat()for(let i=0;i < path.length -1;i++){
            continuityPath.push([Number(path[i]),Number(path[i+1])])
            i++}return continuityPath
        }
        planingRoutes.forEach(itemRoute=>{this.routeLines.push(parseRouteToPath(itemRoute))})// 开始图标this.startMarker =newthis.AMap.Marker({position:[this.routeLines[0][0][0],this.routeLines[0][0][1]],// icon: 'https://webapi.amap.com/theme/v1.3/markers/n/start.png',map:this.mapInstance,content:this.$refs.startMarkerRef,// offset: new this.AMap.Pixel(-80, -40),anchor:newthis.AMap.Pixel(0,0),offset:newthis.AMap.Pixel(-80,-50),size:newthis.AMap.Size(100,100)})// 结束图标this.endMarker =newthis.AMap.Marker({position:[this.routeLines[0][this.routeLines[0].length-1][0],this.routeLines[0][this.routeLines[0].length-1][1]],// icon: 'https://webapi.amap.com/theme/v1.3/markers/n/end.png',map:this.mapInstance,content:this.$refs.endMarkerRef,// offset: new this.AMap.Pixel(-80, -40),anchor:newthis.AMap.Pixel(0,0),offset:newthis.AMap.Pixel(-80,-50),size:newthis.AMap.Size(100,100)})// 画线this.routeLinesInstance =[]this.routeLines.forEach((path,index)=>{let polyline =newthis.AMap.Polyline({path: path,isOutline:true,outlineColor:'#366d33',borderWeight: index ===0?2:1,strokeWeight: index ===0?5:4,showDir:true,strokeOpacity: index ===0?0.9:0.3,strokeColor: index ===0?'#45ed45':'#30aa30',lineJoin:'round',extData:{isSelect: index ===0,index: index
            }})
          polyline.hide()this.routeLinesInstance.push(polyline)this.mapInstance.add(polyline);})// 注册事件 实现点击切换线路this.routeLinesInstance.forEach((polyline,index)=>{
          polyline.on('click',(e)=>{
            polyline.setOptions({borderWeight:2,strokeWeight:5,strokeOpacity:0.9,strokeColor:'#45ed45',extData:{isSelect:true,index: index
              }})let otherPath=this.routeLinesInstance.filter((item,ind)=>ind !== index)
            otherPath.forEach(item=>{
              item.setOptions({borderWeight:1,strokeWeight:4,strokeOpacity:0.3,strokeColor:'#30aa30',extData:{isSelect:false,index: item.getExtData().index,}})})// 变更路线this.$eventBus.$emit('changeRouteLine')// 调整视野达到最佳显示区域this.mapInstance.setFitView([this.startMarker,this.endMarker,...this.routeLinesInstance ],false,[70,260,60,60])})})this.routeLinesInstance[0].show()this.startMarker.show()this.endMarker.show()},
3. uniapp端开发
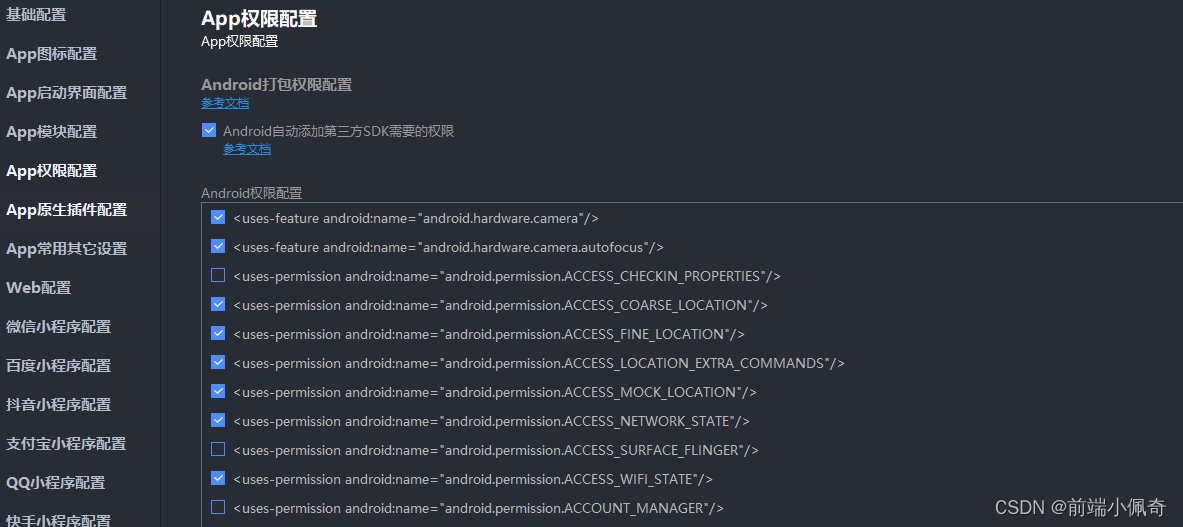
- 在manifest.json将这些定位权限开启,还要将key填写到App模块配置里的高德key里

- 在nvue中创建webview(nvue对webview层级问题和双向通信友好)
<template><view><web-view
         :src="src":style="[{ height: `${webHeight}px`,width: '750rpx'}]"
         ref="webviewRef"
         @onPostMessage="getMessageFromWeb"/></view></template>// webHeight =  uni.getSystemInfoSync().windowHeight
3. uniapp与webview双向通信(微信小程序与app略有不同)
App中:app与webview双向通信
// app 向 web发送消息1. 通过src路径 拼接params参数传递
 // app上发送this.src =  href +'?pageInfo='+encodeURIComponent(JSON.stringify(params))// web上接收const params =JSON.parse(this.$route.query.pageInfo)2. 通过evalJs注册函数在web的windows上调用
 // app向 web发送消息 (注意 需要将web在页面加载好了再调用,以防止报错,或加个延时再调用)const params =JSON.stringify({id:'1234',token:'xxxxxxx'})this.$refs.webviewRef.evalJs(`sendMsgFromApp(${params})`)// web上接收
 window.sendMsgFromApp(params){
   console.log(params)}
// web 向 app发消息1. 在web的index.html上引入这个uni插件(注意版本)<script type="text/javascript" src="https://unpkg.com/@dcloudio/[email protected]/index.js"></script>2. 这个方法判断下插件是否注册挂载完成
document.addEventListener('UniAppJSBridgeReady',()=>{// 挂载好了,可以使用插件中的方法了3. 向app发消息
  uni.postMessage({data:{message:'这是一段消息'}})// uni.navigateTo({url:'xxx'})  // 直接跟uni方法一样})3. app中webview上注册的方法 @onPostMessage="getMessageFromWeb" 进行实时接收
微信小程序中:微信小程序与webview双向通信
// 微信小程序 向 web发送消息1. 通过src路径 拼接params参数传递 ,这个方法每次调用都会让页面刷新(注意频率)// 微信小程序 上发送this.src = href +'?pageInfo='+encodeURIComponent(JSON.stringify(params))// web上接收const params =JSON.parse(this.$route.query.pageInfo)-----> 注意不能使用evalJs调用......
// web 向 微信小程序发消息(由于微信小程序没法实时通过webview上onPostMessage方法调用,只能当页面摧毁或隐藏的时候才能调用,所以通过互转路由来获取web传递参数最好)1. 在web的index.html上引入这个微信的插件(注意版本)<script type="text/javascript" src="https://res.wx.qq.com/open/js/jweixin-1.4.0.js"></script><script type="text/javascript" src="https://unpkg.com/@dcloudio/[email protected]/index.js"></script>2. 这个方法判断下插件是否注册挂载完成
document.addEventListener('UniAppJSBridgeReady',()=>{// 挂载好了,可以使用插件中的方法了3. 只能通过跳转url传参
  uni.navigateTo({url:`/pages/pageRedirect?`+`payType=${params}`});})4.在 pageRedirect页面中接收参数
    onLoad(options){this.webInfo =JSON.parse(decodeURIComponent(JSON.stringify(options)))
        uni.navigateBack({delta:1})},onUnload(){
        uni.$emit("webPageMsgEvent",this.webInfo);}5.当回到本页面时(写webview的页面中)接收来自pageRedirect的参数
    onShow(){
        uni.$on("webPageMsgEvent",webInfo=>{// 拿到从web发向微信小程序中的参数
            console.log(webinfo)
         uni.$off('webPageMsgEvent');})
本文转载自: https://blog.csdn.net/qq_44761755/article/details/134463852
版权归原作者 前端小佩奇 所有, 如有侵权,请联系我们删除。
版权归原作者 前端小佩奇 所有, 如有侵权,请联系我们删除。