文章目录
在Ubuntu 22.04上安装MySQL 8.0的步骤相对直接,可以使用APT包管理器从官方存储库中安装。

更新软件包列表
更新软件包列表:
sudo apt-get update
mirror@mirror-Virtual-Machine:~$ sudoapt-get update
获取:1 http://security.ubuntu.com/ubuntu jammy-security InRelease [110 kB]
命中:2 http://archive.ubuntu.com/ubuntu jammy InRelease
获取:3 http://archive.ubuntu.com/ubuntu jammy-updates InRelease [119 kB]
获取:4 http://security.ubuntu.com/ubuntu jammy-security/main amd64 Packages [1,109 kB]
命中:5 http://archive.ubuntu.com/ubuntu jammy-backports InRelease
获取:6 http://archive.ubuntu.com/ubuntu jammy-updates/main amd64 Packages [1,325 kB]
获取:7 http://security.ubuntu.com/ubuntu jammy-security/main Translation-en [207 kB]
获取:8 http://security.ubuntu.com/ubuntu jammy-security/universe amd64 Packages [837 kB]
获取:9 http://security.ubuntu.com/ubuntu jammy-security/universe Translation-en [160 kB]
获取:10 http://archive.ubuntu.com/ubuntu jammy-updates/universe amd64 Packages [1,042 kB]
获取:11 http://archive.ubuntu.com/ubuntu jammy-updates/universe Translation-en [235 kB]
已下载 5,145 kB,耗时 4秒 (1,396 kB/s)
正在读取软件包列表... 完成
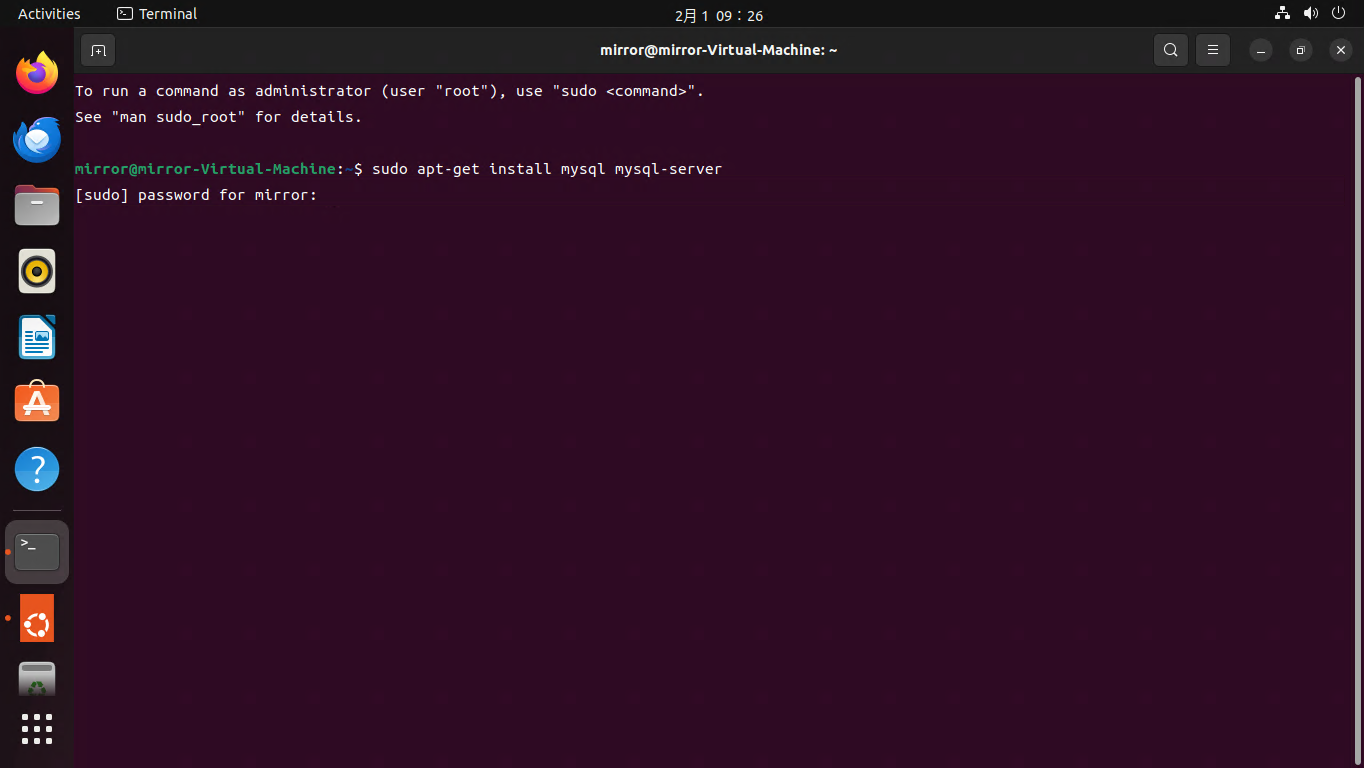
安装MySQL服务器
sudoapt-getinstall mysql mysql-server

但是会提示报错,无法定位软件包mysql
E: 无法定位软件包 mysql

修正安装命令:
sudoapt-getinstall mysql-server

关于安装完成后,部分关键信息的说明:
- mysql配置文件 /etc/mysql/my.cnf (my.cnf)
- mysql错误日志路径 /var/log/mysql/error.log
- 系统自动建立的软连接 symlink /etc/systemd/system/multi-user.target.wants/mysql.service → /lib/systemd/system/mysql.service
- 安装mysql的版本 mysql-server (8.0.36-0ubuntu0.22.04.1)
配置MySQL账号密码
配置MySQL账号密码
sudo mysqladmin -u root -p password 'parish@1234'
mirror@mirror-Virtual-Machine:~$ sudo mysqladmin -u root -p password 'parish@1234'
Enter password:
mysqladmin: [Warning] Using a password on the command line interface can be insecure.
Warning: Since password will be sent to server in plain text, use ssl connection to ensure password safety.
mirror@mirror-Virtual-Machine:~$
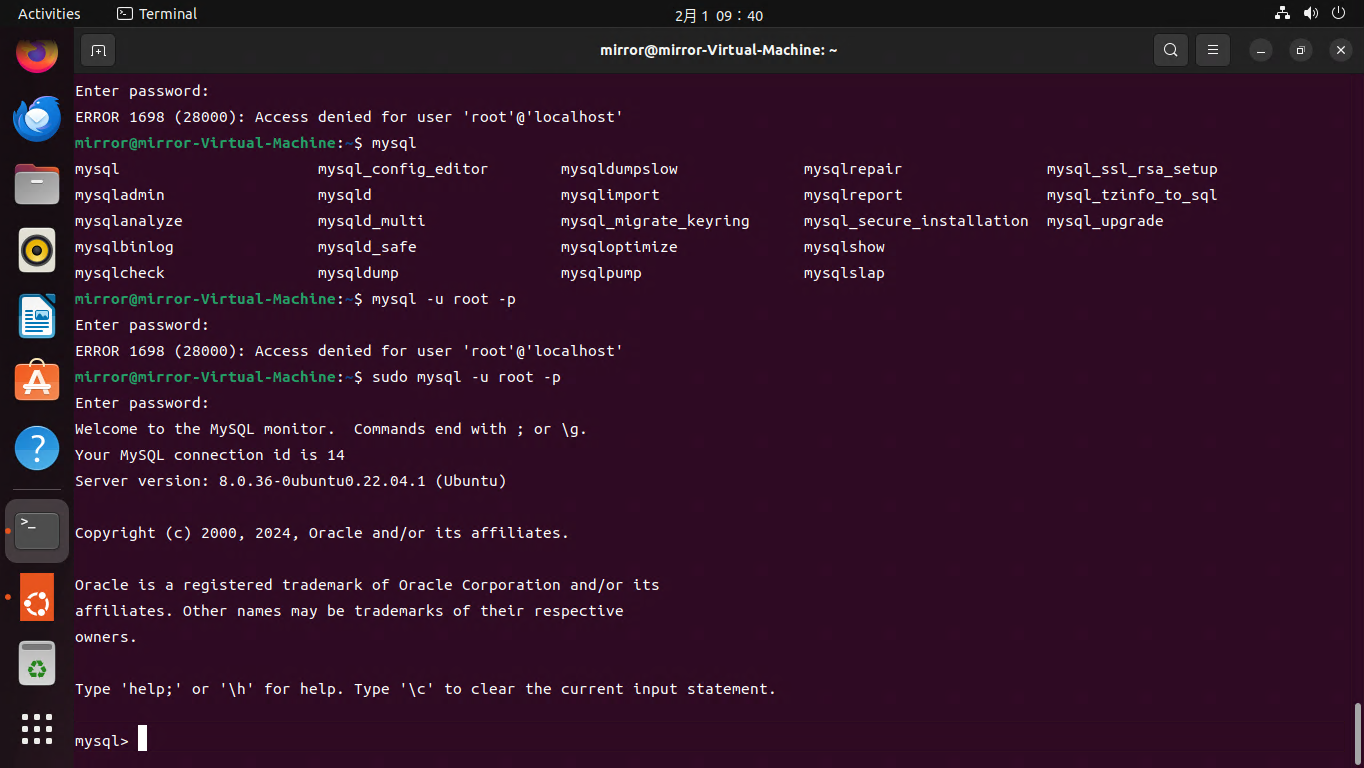
用刚才建立的账号密码登录到MySQL
sudo mysqladmin -u root -p

配置MySQL的统一字符
通过对MySQL字符的配置,确保数据库服务器和客户端之间使用统一的字符集进行通信。
sudovi /etc/mysql/mysql.conf.d/mysqld.cnf
[client]
default-character-set=utf8
#  指定MySQL客户端连接到服务器时的默认字符集[mysqld]
character-set-server=utf8
# 设置服务器端的默认字符集。
default-storage-engine=INNODB
# 定义MySQL在创建新表时,默认使用的存储引擎为InnoDB
default-character-set=utf8
所有通过这个客户端连接的SQL查询和数据传输都会使用UTF-8字符集,确保在客户端与服务器交互过程中不会出现乱码问题,特别是处理非ASCII字符(例如中文、日文、韩文等多语言环境下的字符)。
character-set-server=utf8
当创建新的数据库或表时,如果没有明确指定字符集,使用UTF-8作为默认字符编码。
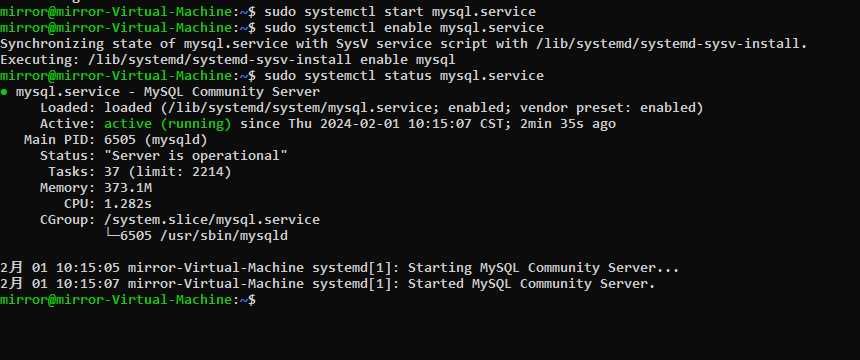
启动MySQL服务
使用Systemd来启动MySQL服务
sudo systemctl start mysql.service
确保MySQL在系统启动时自动运行
sudo systemctl enable mysql.service
查看MySQL在当前的状态
sudo systemctl status mysql.service

允许远程连接
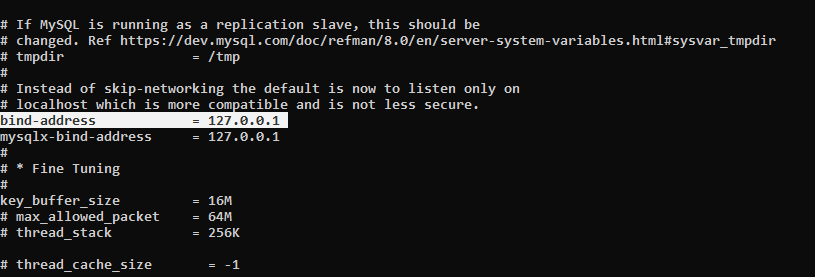
默认情况下,MySQL只监听本地接口(localhost)。如果你想允许来自局域网的访问,需要编辑MySQL的配置文件,找到 bind-address 行并修改它为你的服务器IP地址或0.0.0.0以监听所有接口。
编辑MySQL的配置文件
sudovi /etc/mysql/mysql.conf.d/mysqld.cnf
找到 bind-address 行
bind-address =127.0.0.1 # 修改为0.0.0.0或者指定的IP地址段

修改保存退出后,需要再次重启MySQL服务:
sudo systemctl restart mysql.service
Windows SSH连接Ubuntu
通过Windows安装的SSH工具,连接Ubuntu,注意Ubuntu需要安装ssh服务。
ssh [email protected]

以上就是MySQL数据在Ubuntu 22.04版本中安装的过程,希望对大家有所帮助。
推荐阅读
- MySQL的SQL分类与数据类型
- PowerShell 内网不能直接安装SqlServer模块的处理办法
- MS-SQL创建查询排序语句总结
- Python 连接 SQL 数据库 -pyodbc
版权归原作者 Par@ish 所有, 如有侵权,请联系我们删除。