本文将从源代码和docker安装两种方式带大家从0~1通过
Gitea搭建一个私有git服务器
Gitea——私有git服务器搭建教程
什么是Gitea
Gitea是一个开源社区驱动的轻量级代码托管解决方案,后端采用 Go 编写,采用 MIT 许可证.
官网:https://gitea.io/zh-cn/
一、源代码安装方式
实验环境为MacOS系统,Windows系统以下操作大同小异
1. 前置环境要求
- Go环境安装(版本要求大于1.16,一定要设置
$GOPATH环境变量,并将其bin目录添加到$PATH中) - Go语言环境搭建(Windows+Linux)_欢迎来到 Baret~H 的博客-CSDN博客 - Node.JS环境安装(版本要求大于等于12.17,用于构建js和css文件,建议安装最新版本) - Node.JS安装教程_欢迎来到 Baret~H 的博客-CSDN博客
- 数据库环境安装,建议MySQL - MySQL最新版8.0.21安装配置教程_欢迎来到 Baret~H 的博客-CSDN博客
# 我的环境
zhongsiru@zhongsirudeMacBook-Air ~ % go version
go version go1.17.1 darwin/arm64
zhongsiru@zhongsirudeMacBook-Air ~ % node -v
v14.17.6
zhongsiru@zhongsirudeMacBook-Air ~ % npm -v
8.1.3
zhongsiru@zhongsirudeMacBook-Air ~ % mysql -V
mysql  Ver 8.0.27 for macos11 on x86_64 (MySQL Community Server - GPL)
2. 下载gitea
- Github:https://github.com/go-gitea/gitea
- Gitee镜像:https://gitee.com/mirrors/gitea
通过git将项目下载到
$GOPATH/src
目录下
git clone https://github.com/go-gitea/gitea
3. 构建运行
下载完成后用Goland打开,在项目根目录下使用以下命令安装各种前端依赖,下载好的依赖在项目根目录下生的
node_modules
目录中
npminstall
然后通过以下目录构建后端代码
TAGS="bindata"make backend
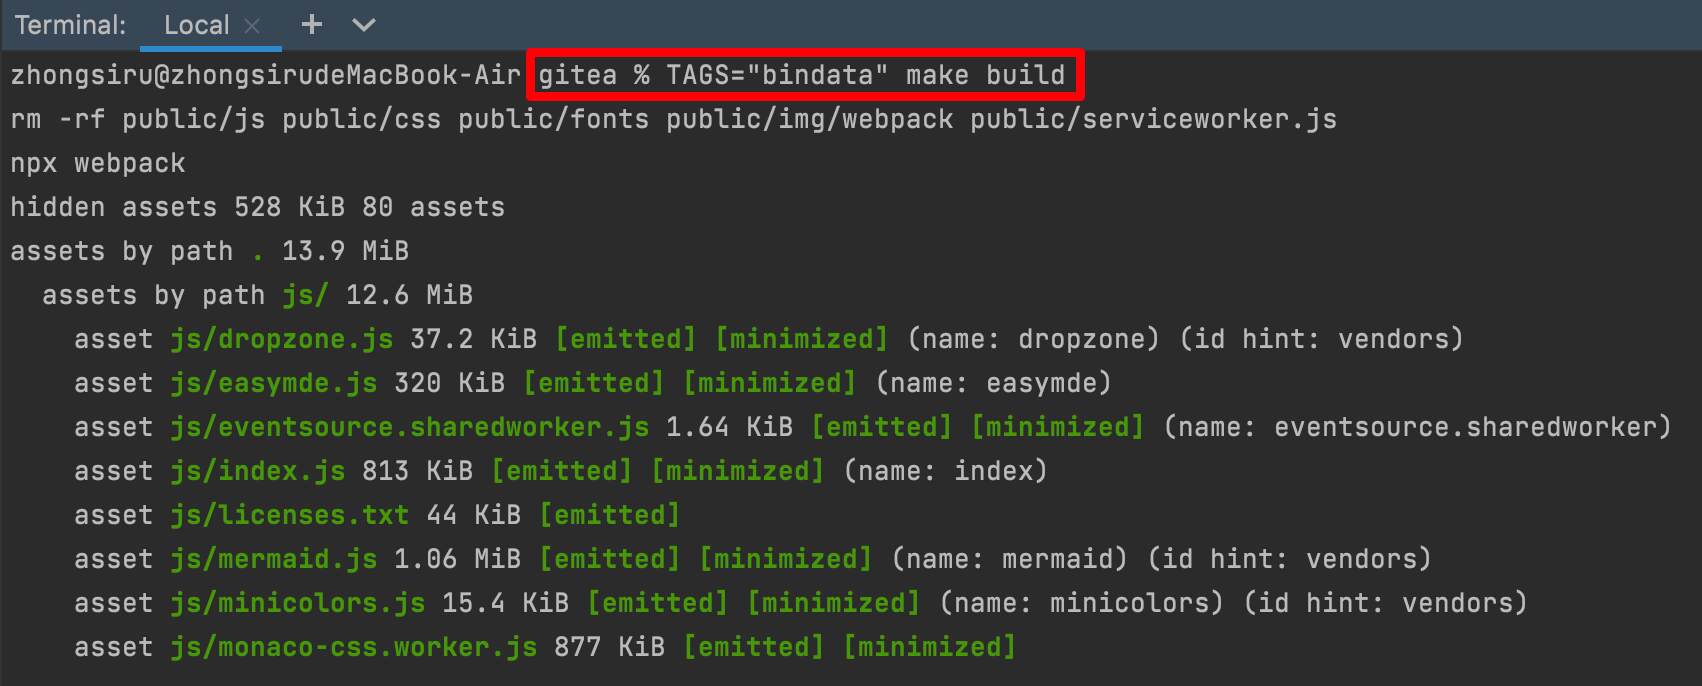
构建完成后,会在项目根目录下生成
gitea
可执行文件,我们使用以下命令来启动项目
./gitea web

启动成功后我们访问本机的3000端口,可以看到如下界面:
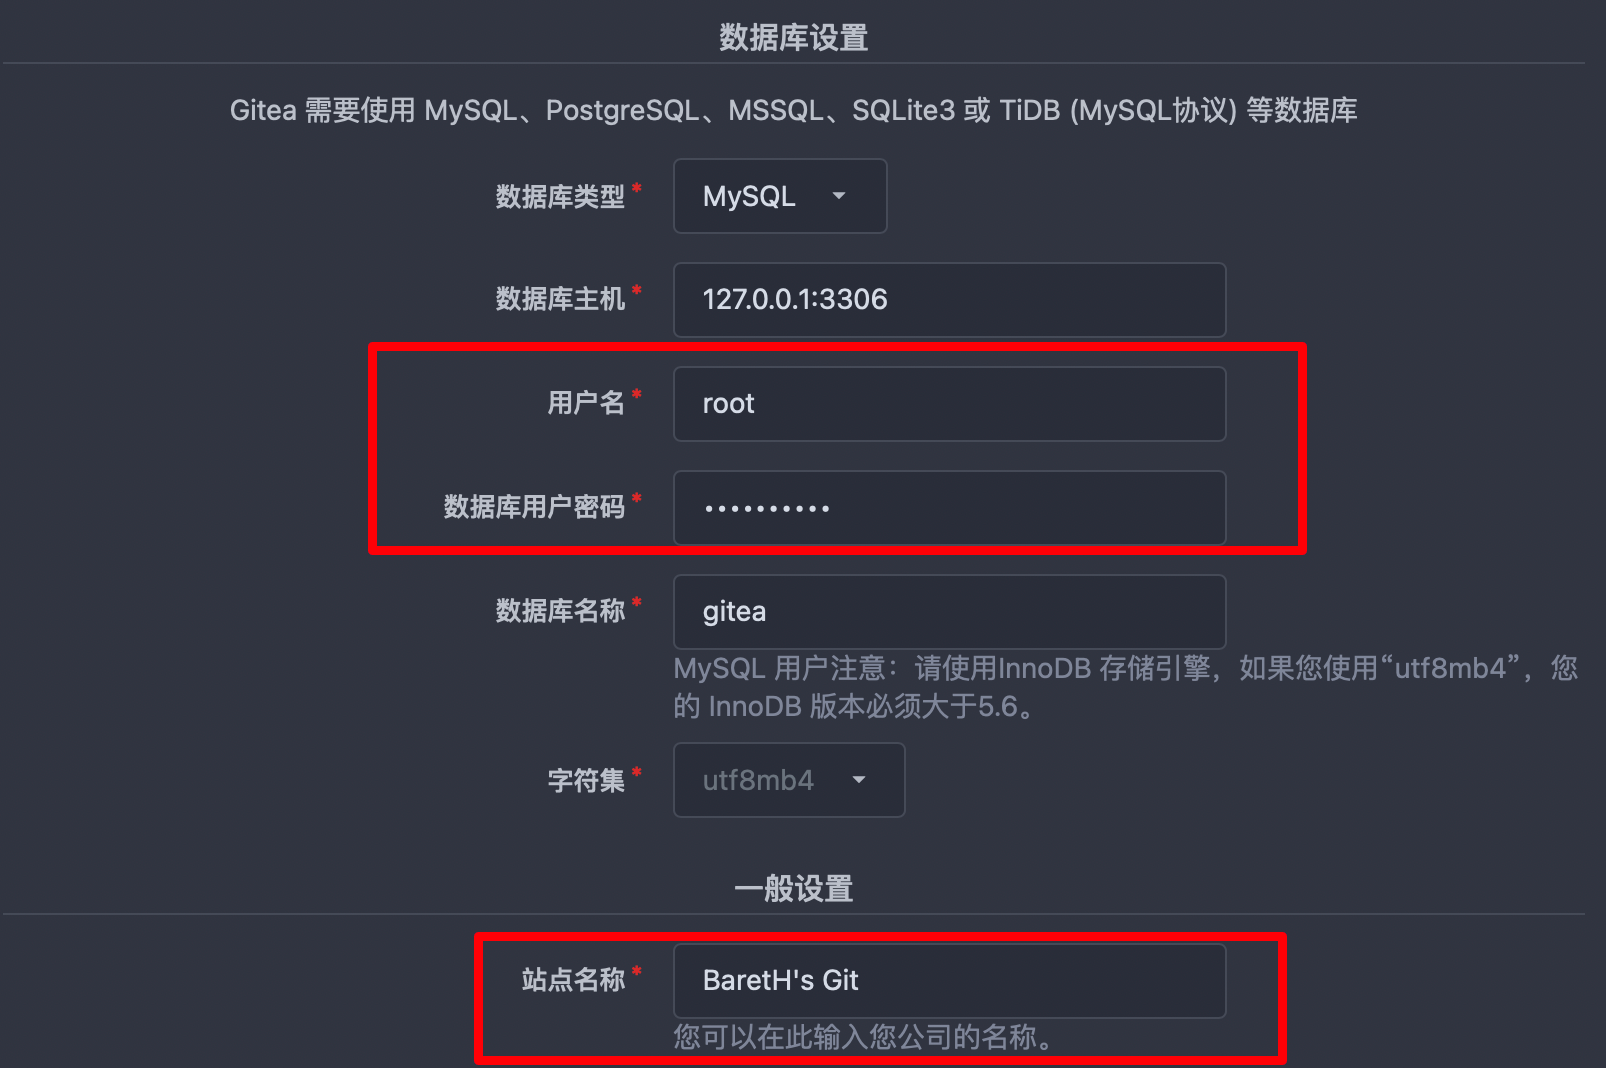
这里我们配置我们所安装的mysql数据库和密码即可,这里的数据库名称需要我们提前创建一个数据库,这里创建的名称为
gitea
,此外还可以更改站点名称为自己想要的名称。
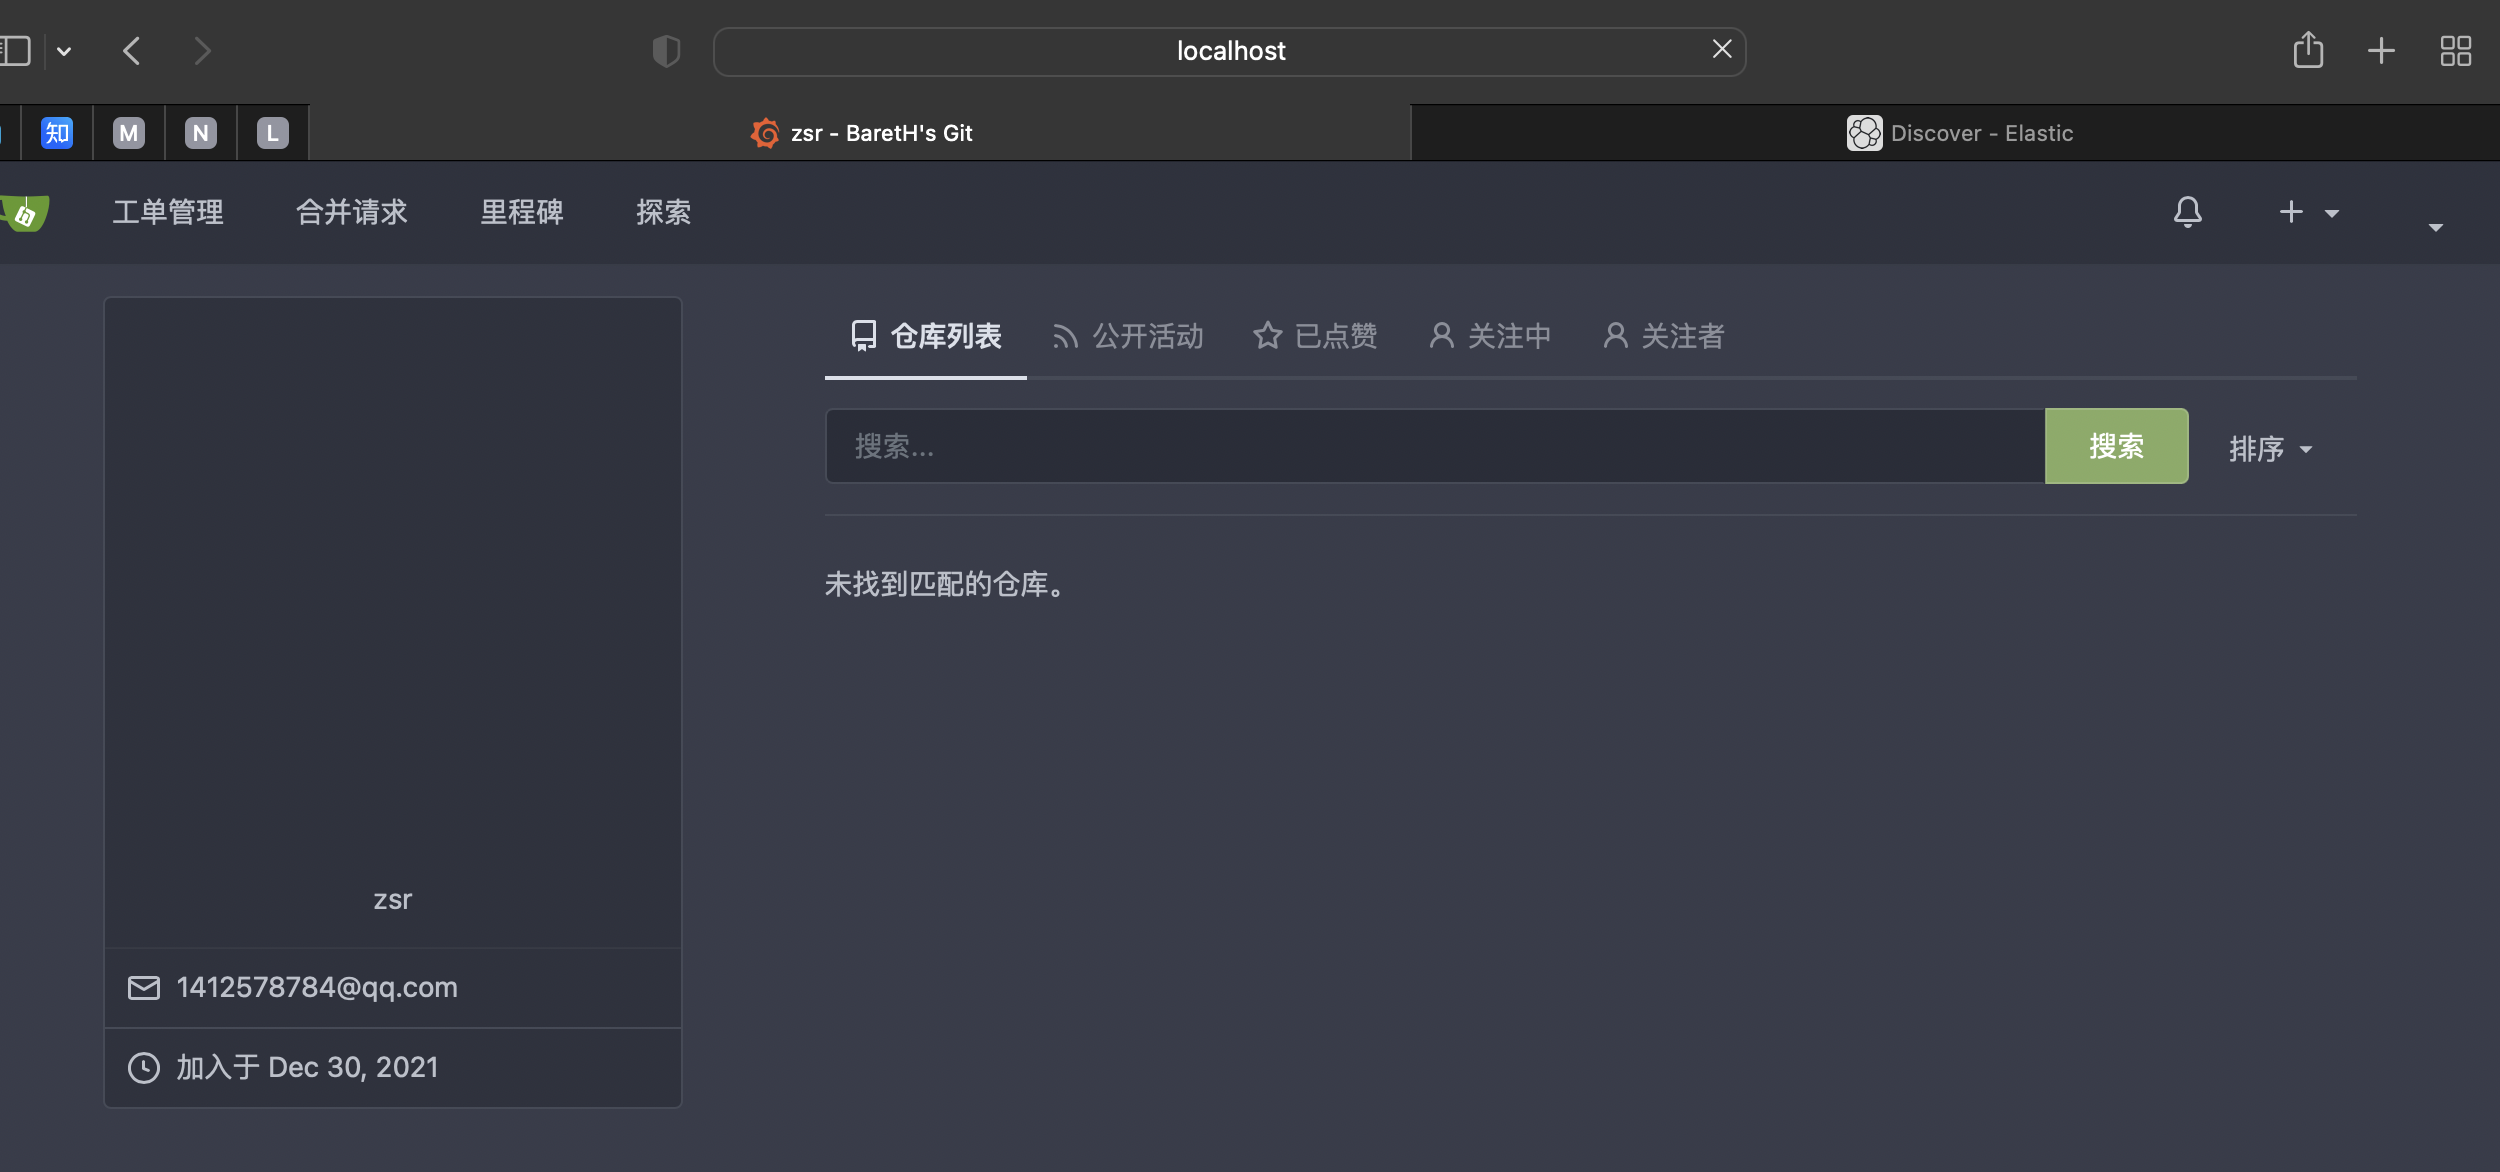
设置更新完后,点击安装即可,然后就进入到gitea的控制台,到此即安装配置成功。
二、Docker安装方式
实验环境为CentOS7.6服务器,可以使用任意云厂商或者centos虚拟机
1. Docker安装
官方文档:Install Docker Engine on CentOS | Docker Documentation
# 1.移除以前docker相关包sudo yum remove docker \
                  docker-client \
                  docker-client-latest \
                  docker-common \
                  docker-latest \
                  docker-latest-logrotate \
                  docker-logrotate \
                  docker-engine

# 2. 配置yum源sudo yum install -y yum-utils
sudo yum-config-manager \
--add-repo \
http://mirrors.aliyun.com/docker-ce/linux/centos/docker-ce.repo

# 3. 安装dockersudo yum install -y docker-ce docker-ce-cli containerd.io

# 4. 启动docker
systemctl enable docker --now

# 5. 配置阿里云加速sudomkdir -p /etc/docker
sudotee /etc/docker/daemon.json <<-'EOF'
{
  "registry-mirrors": ["https://82m9ar63.mirror.aliyuncs.com"],
  "exec-opts": ["native.cgroupdriver=systemd"],
  "log-driver": "json-file",
  "log-opts": {
    "max-size": "100m"
  },
  "storage-driver": "overlay2"
}
EOFsudo systemctl daemon-reload
sudo systemctl restart docker
以上操作完成后,我们可以使用
systemctl status docker
来查看 Docker 服务是否启动

2. Dokcer Compose安装
官方文档:Install Docker Compose | Docker Documentation
# 1.安装docker composesudocurl -L "https://github.com/docker/compose/releases/download/1.29.2/docker-compose-$(uname -s)-$(uname -m)" -o /usr/local/bin/docker-compose

# 2.赋予下载的docker-compose执行权限sudochmod +x /usr/local/bin/docker-compose
注意:Docker Compose 存放在GitHub不太稳定,可以通过镜像网址高速安装。
curl -L https://get.daocloud.io/docker/compose/releases/download/v2.2.2/docker-compose-`uname -s`-`uname -m`> /usr/local/bin/docker-compose
chmod +x /usr/local/bin/docker-compose
下载完成后可以输入
docker-compose --version
来查看是否安装成功

3. 安装启动gitea
我们通过docker compose的yaml配置文件来安装gitea,其中选用数据库mysql来存储gitea的数据文件。
创建
docker-compose.yml
文件,内容如下:
version:"3"networks:gitea:external:falseservices:server:image: gitea/gitea:1.15.9
    container_name: gitea
    environment:- USER_UID=1000
      - USER_GID=1000
      - DB_TYPE=mysql
      - DB_HOST=db:3306- DB_NAME=gitea
      - DB_USER=gitea
      - DB_PASSWD=gitea
    restart: always
    networks:- gitea
    volumes:- ./gitea:/data
      - /etc/timezone:/etc/timezone:ro
      - /etc/localtime:/etc/localtime:ro
    ports:-"3000:3000"-"222:22"depends_on:- db

  db:image: mysql:8restart: always
     environment:- MYSQL_ROOT_PASSWORD=gitea
       - MYSQL_USER=gitea
       - MYSQL_PASSWORD=gitea
       - MYSQL_DATABASE=gitea
     networks:- gitea
     volumes:- ./mysql:/var/lib/mysql
编写完成后,我们通过以下命令再启动 Gitea
# 后台启动gitea
docker-compose up -d server


待启动成功,可以看到它启动在3000端口,然后我们通过服务器
公网IP:3000
即可访问到其web界面,注意服务器安全组规则要放行3000端口
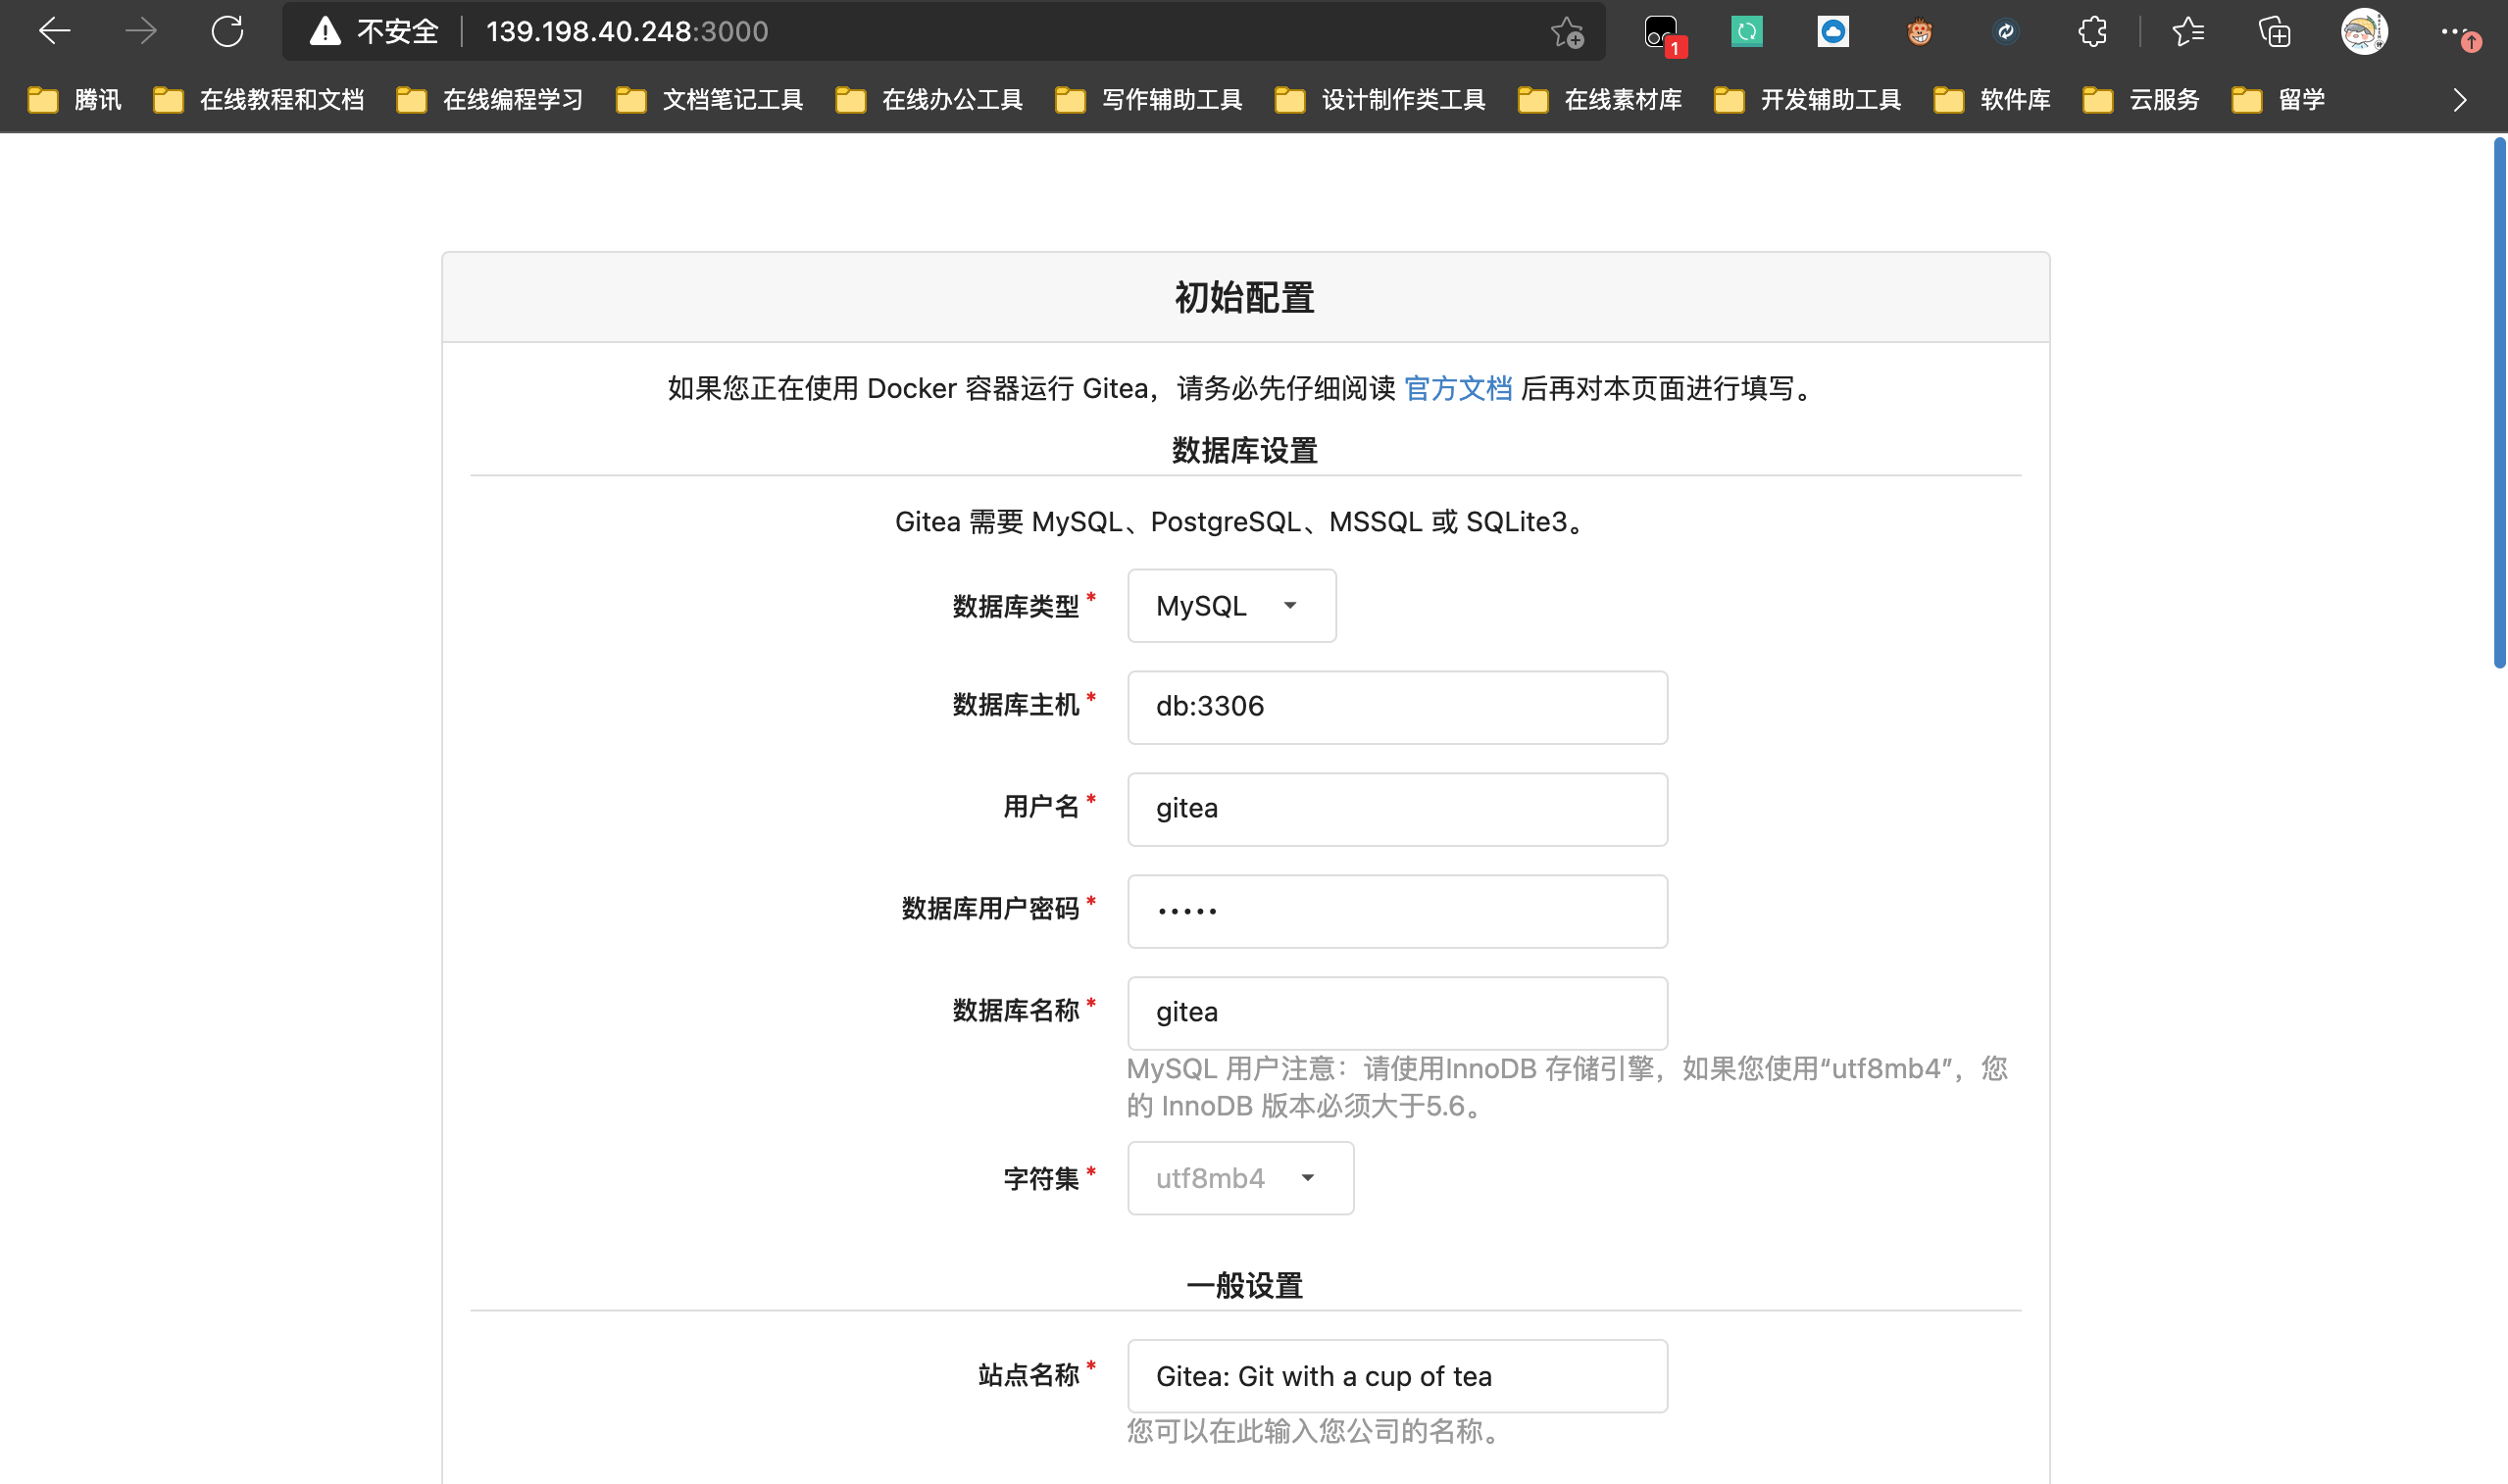
其中数据库设置我们不需要更改,因为是根据上述docker-compose.yml文件中的数据库配置来读取的,我们需要更改ssh服务的域名为服务器的公网ip,通知基础url的前缀也更改为服务器的公网ip
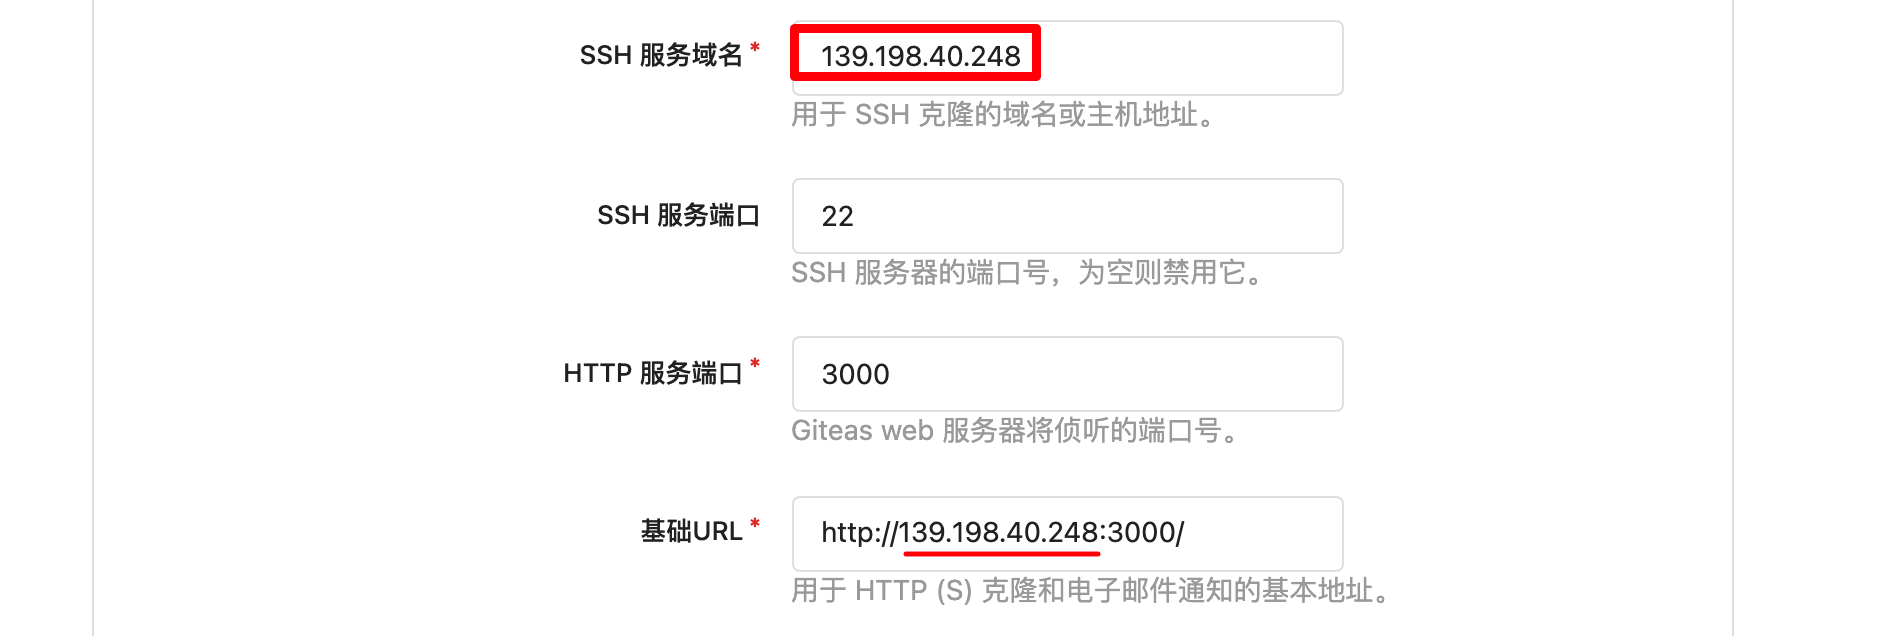
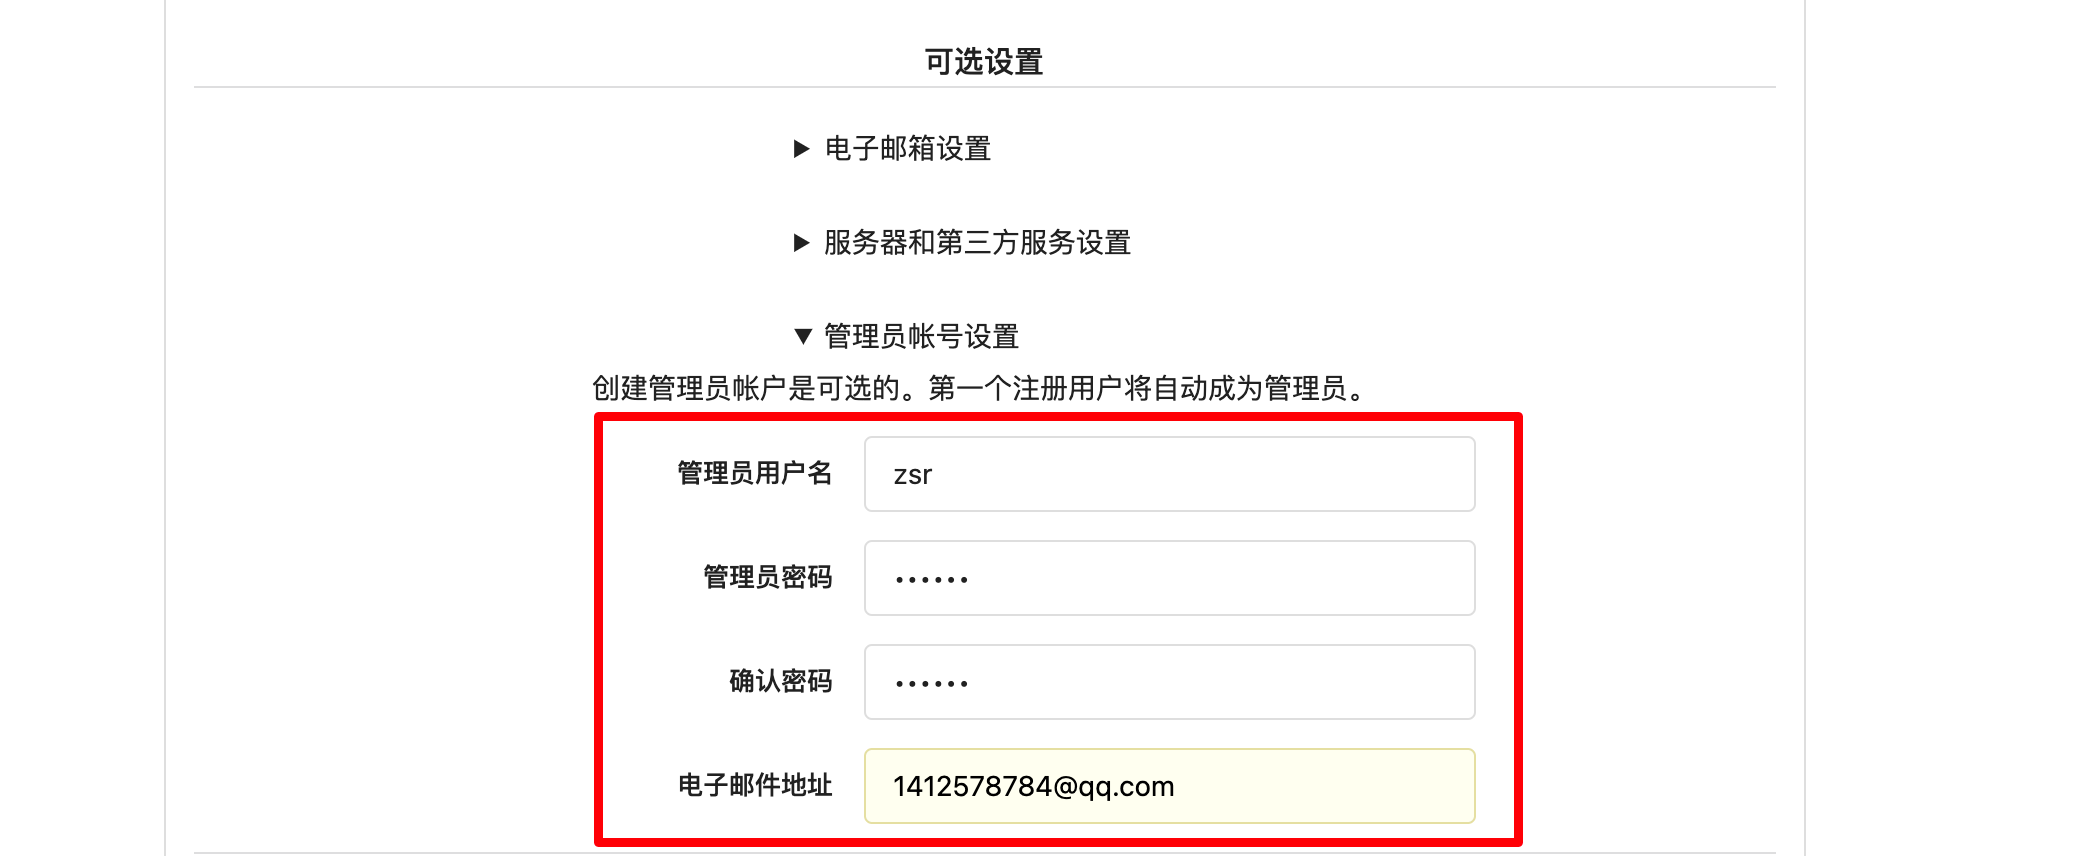
然后创建一个管理员用户(zsr/123456)即可,然后点击安装
设置完成后,点击立即安装,然后即可进入如下界面
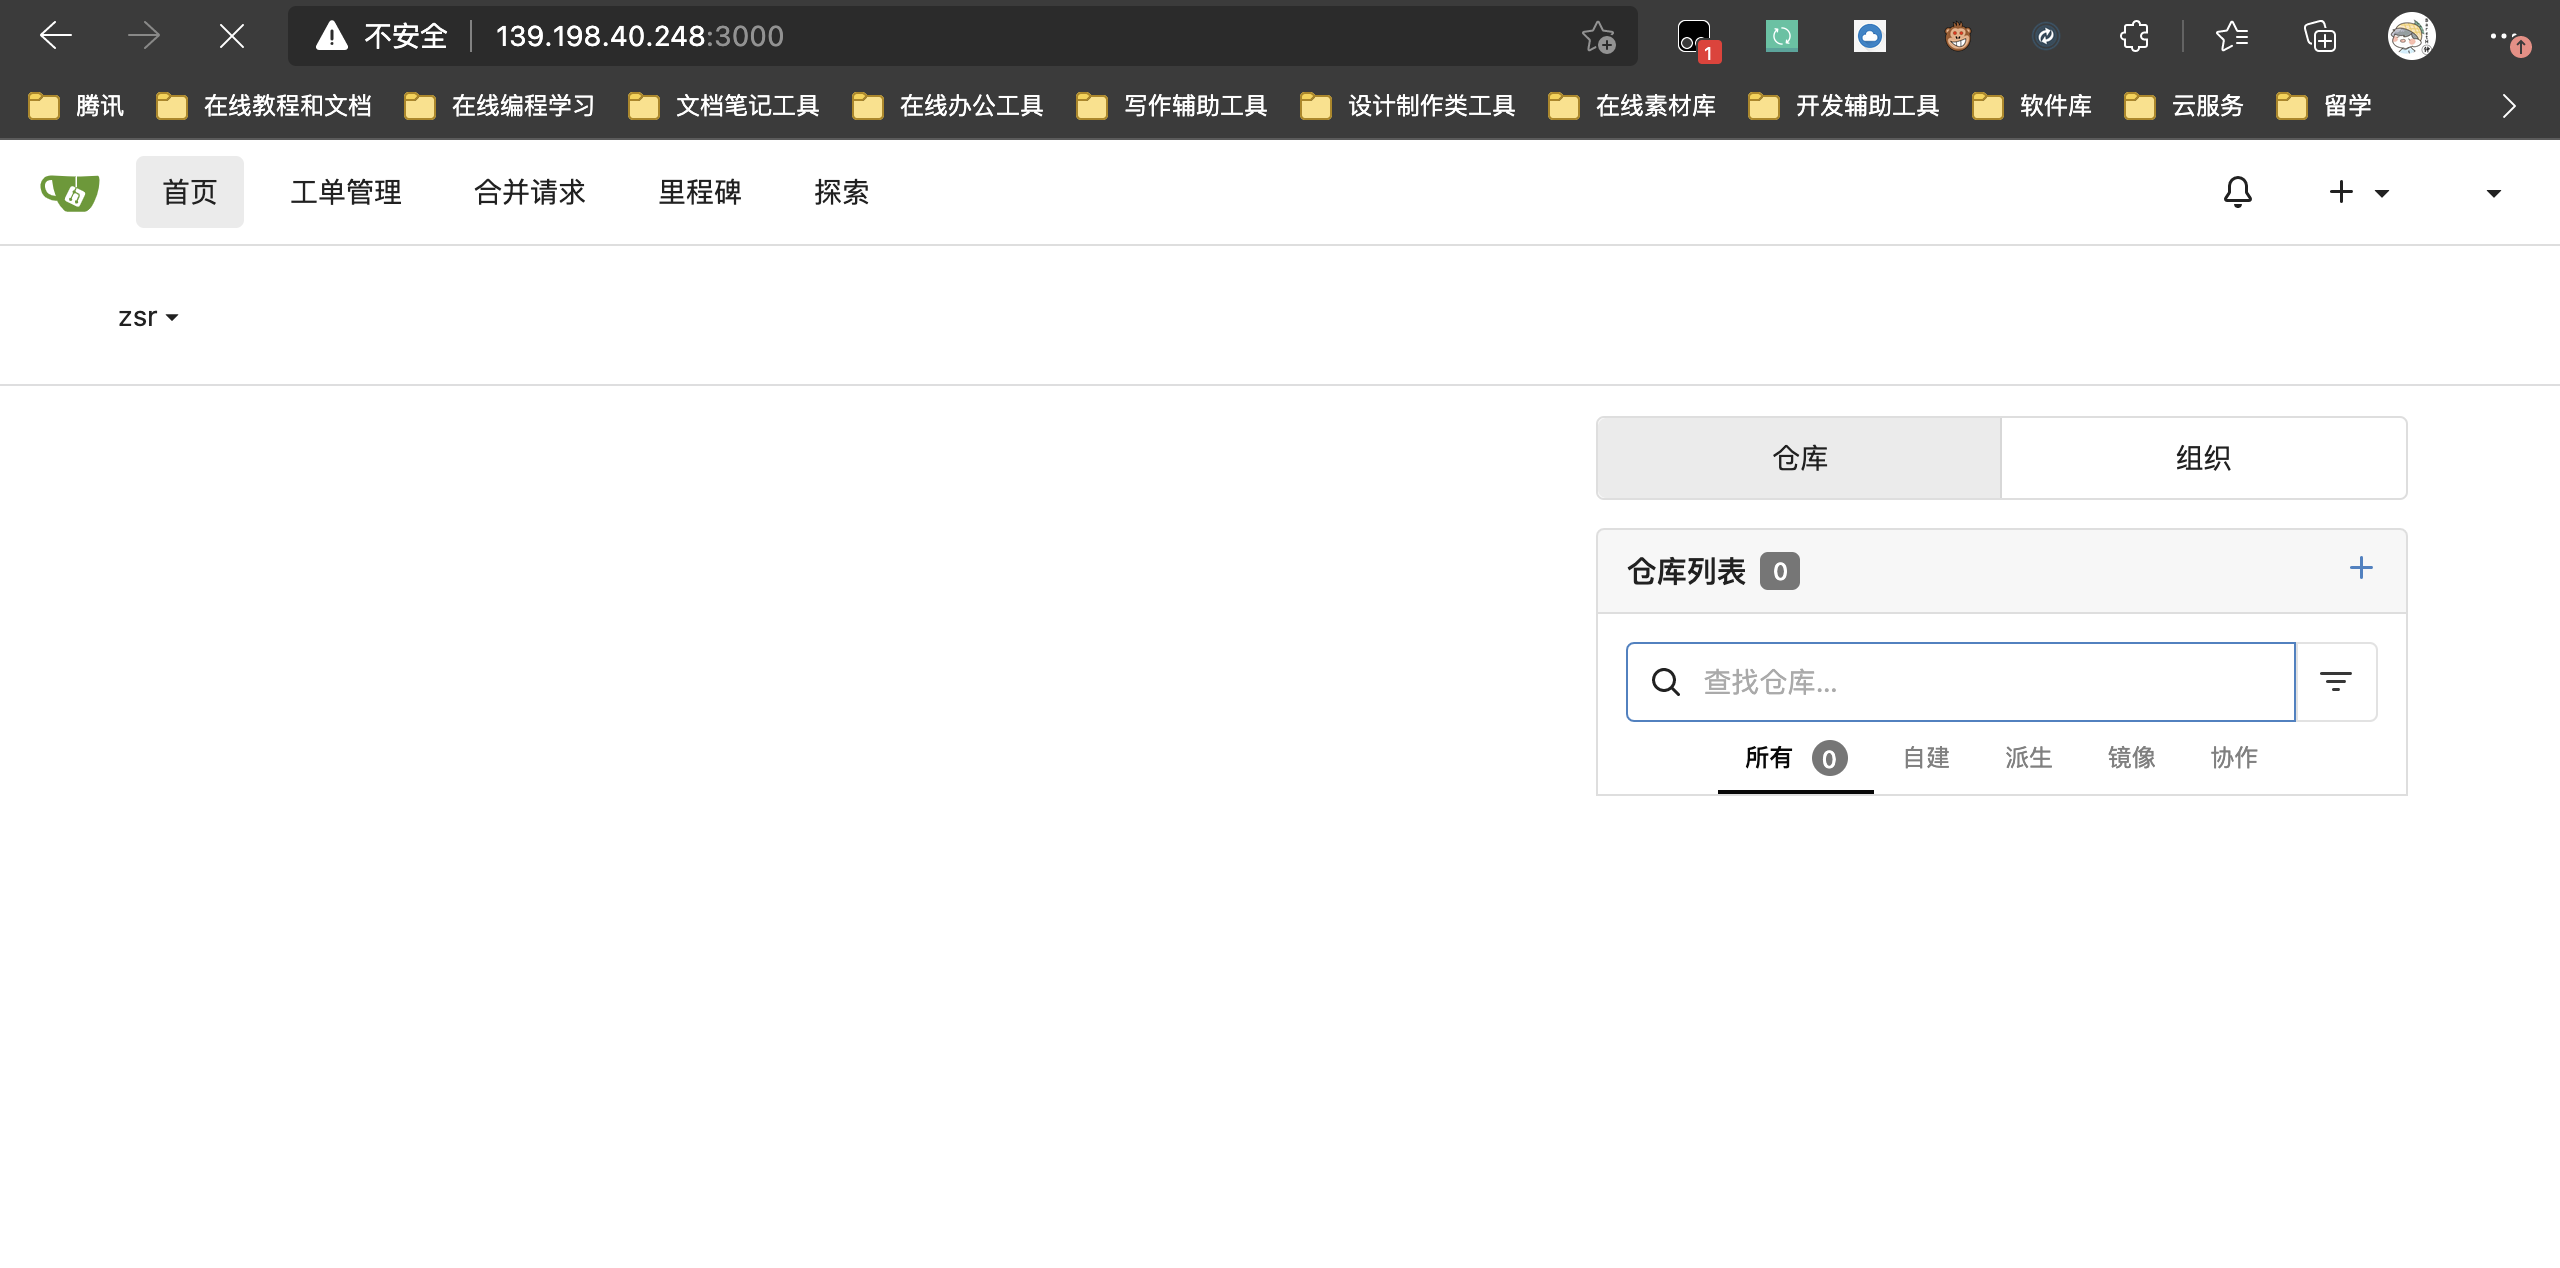
到此gitea的已经安装部署完成
4. 基本操作实例
我们来新建一个仓库:
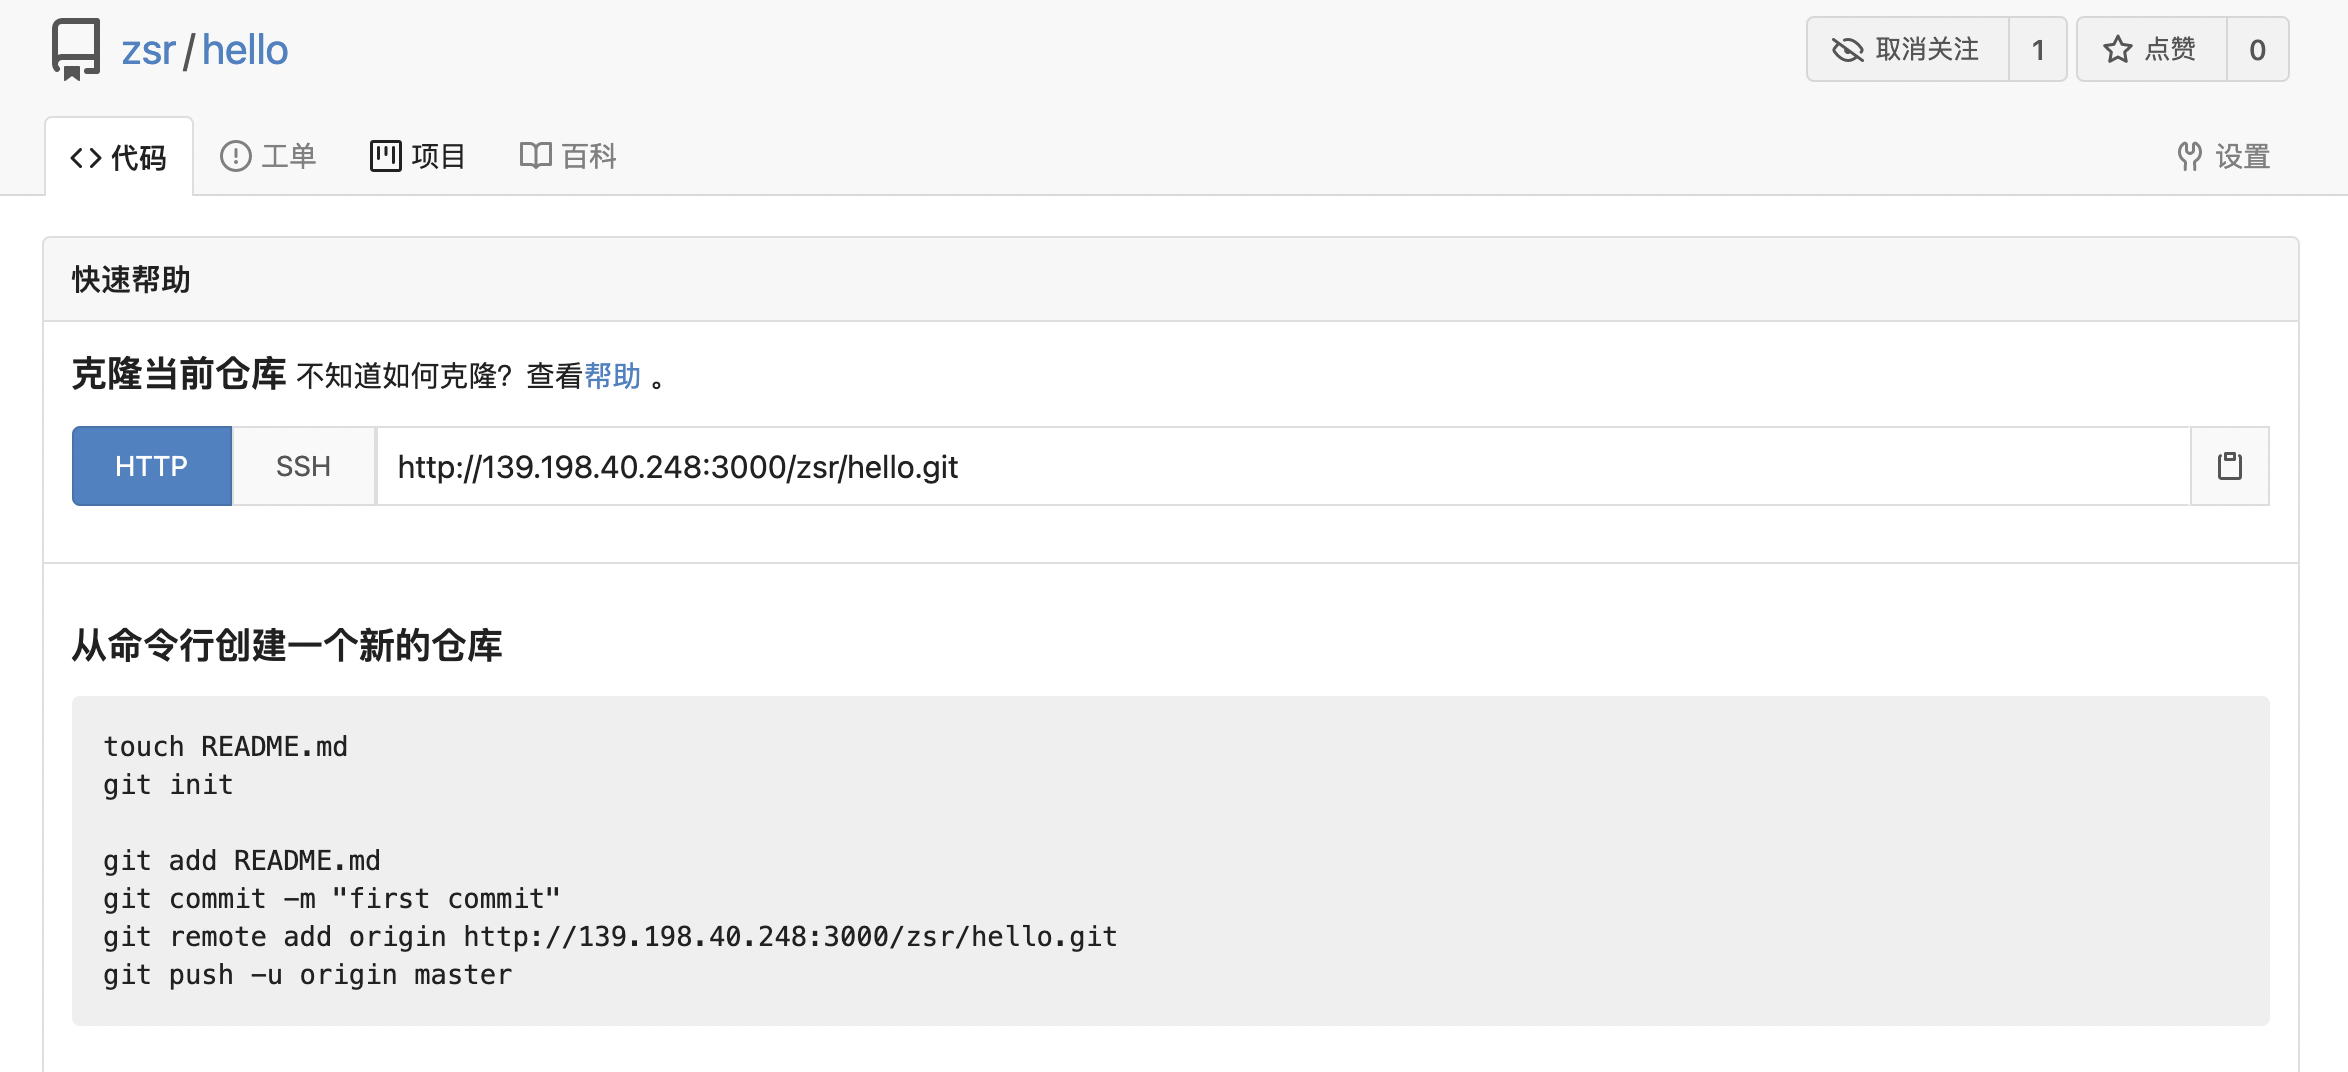
然后我们将仓库克隆下来新增一个文件然后再推送回去:
# 克隆仓库
zhongsiru@zhongsirudeMacBook-Air Desktop % git clone http://139.198.40.248:3000/zsr/hello.git
Cloning into 'hello'...
warning: You appear to have cloned an empty repository.

# 进入本地仓库目录
zhongsiru@zhongsirudeMacBook-Air Desktop % cd hello

# 新增hello.txt文件
zhongsiru@zhongsirudeMacBook-Air hello % vim hello.txt
zhongsiru@zhongsirudeMacBook-Air hello % ls
hello.txt

# 将变更添加到暂存区
zhongsiru@zhongsirudeMacBook-Air hello % gitadd.# 将暂存区的内容添加到本地仓库
zhongsiru@zhongsirudeMacBook-Air hello % git commit -m "添加hello.txt"[master (root-commit) 1f46f0e] 添加hello.txt
 1file changed, 1 insertion(+)
 create mode 100644 hello.txt

# 推送到远程仓库(要输入用户名和密码)
zhongsiru@zhongsirudeMacBook-Air hello % git push origin master
Username for'http://139.198.40.248:3000': zsr
Password for'http://[email protected]:3000':
Enumerating objects: 3, done.
Counting objects: 100% (3/3), done.
Writing objects: 100% (3/3), 230 bytes |230.00 KiB/s, done.
Total 3(delta 0), reused 0(delta 0), pack-reused 0
remote: . Processing 1 references
remote: Processed 1 references in total
To http://139.198.40.248:3000/zsr/hello.git
 * [new branch]      master -> master
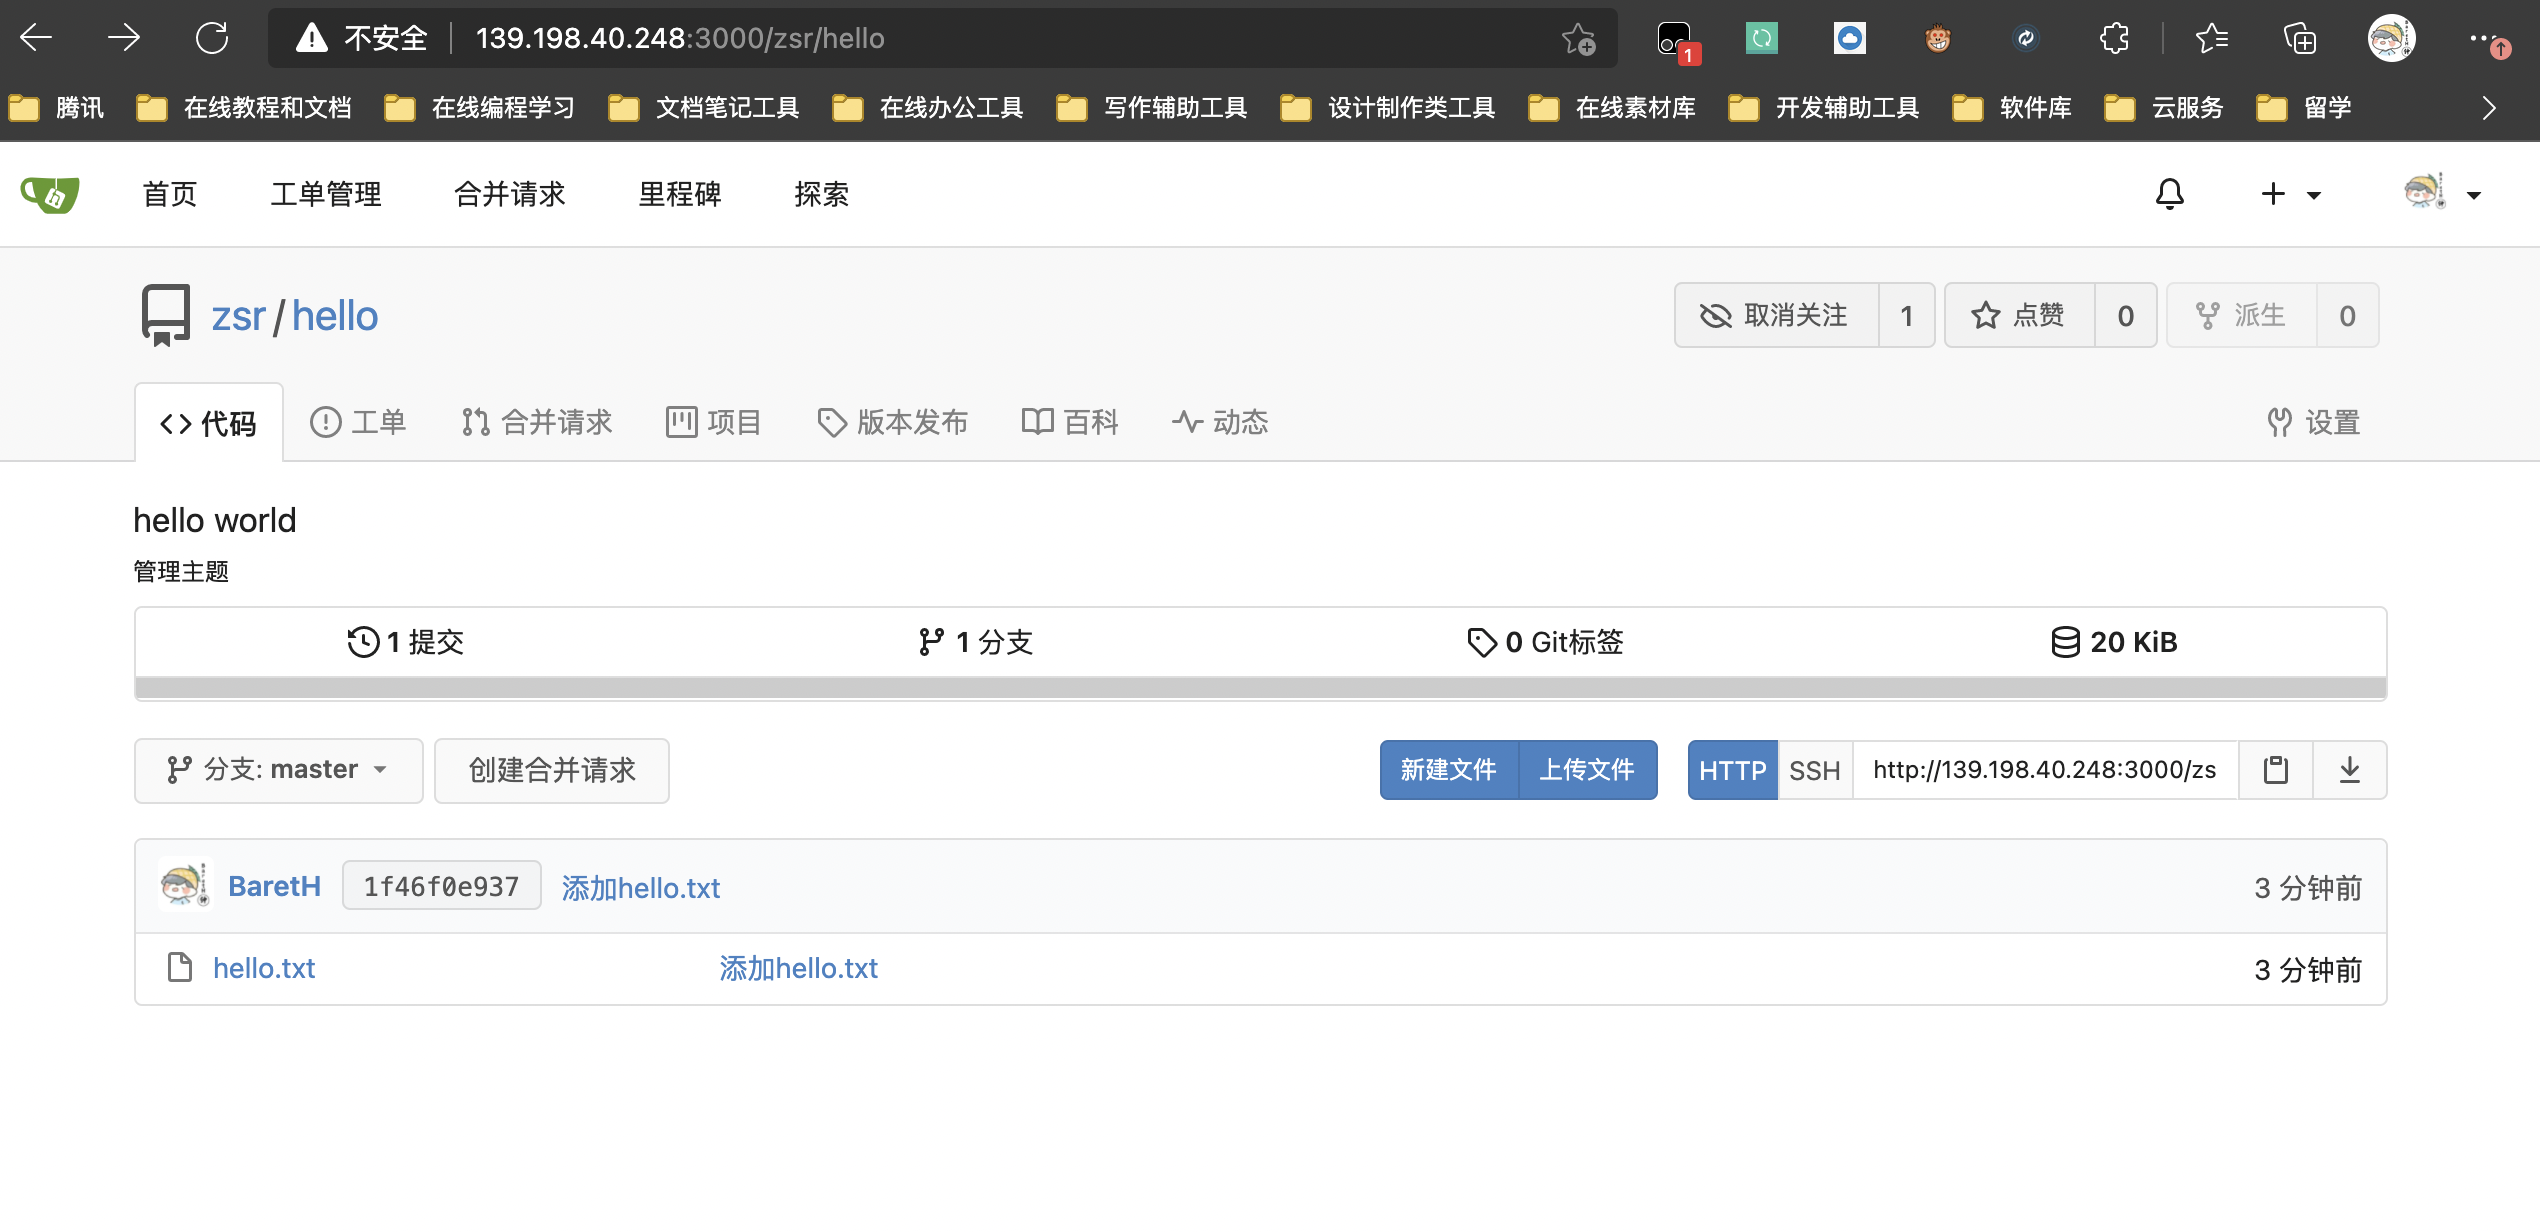
上述命令操作完成后,我们回到gitea web页面,即可看到变更
5. ssh配置
上述我们推送到远程仓库要输入用户名和密码进行校验,这是十分麻烦的,我们可以配置ssh实现免密登陆:
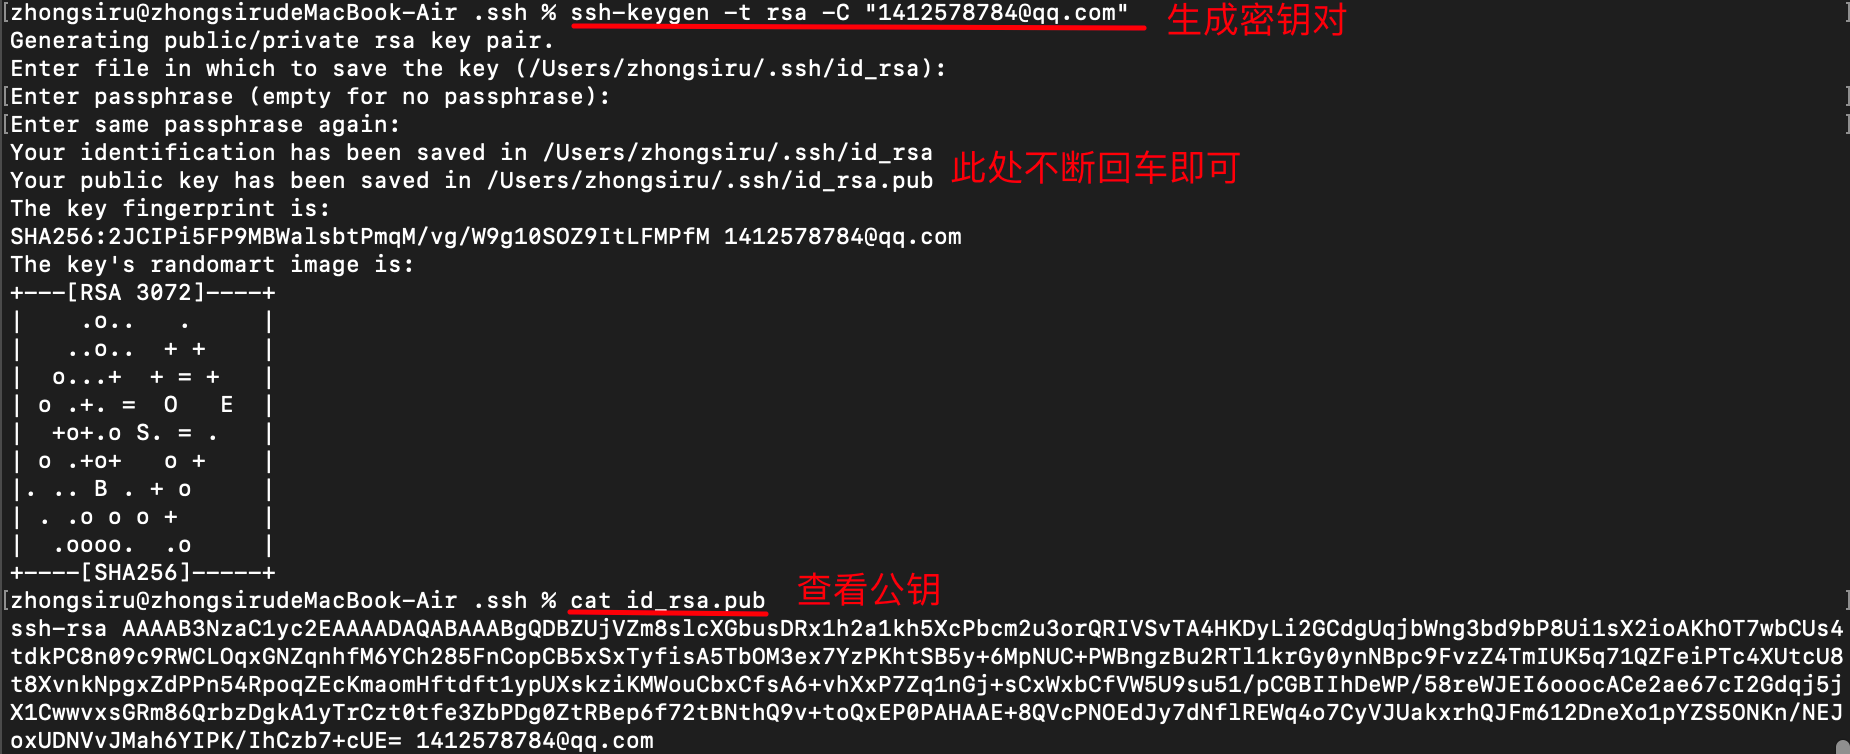
1️⃣ 首先在本机生成公钥:
# 进入到.ssh目录cd ~/.ssh

# 生成密钥对
ssh-keygen -t rsa -C "邮箱"# 查看公钥内容cat id_rsa.pub
2️⃣ gitea中添加公钥
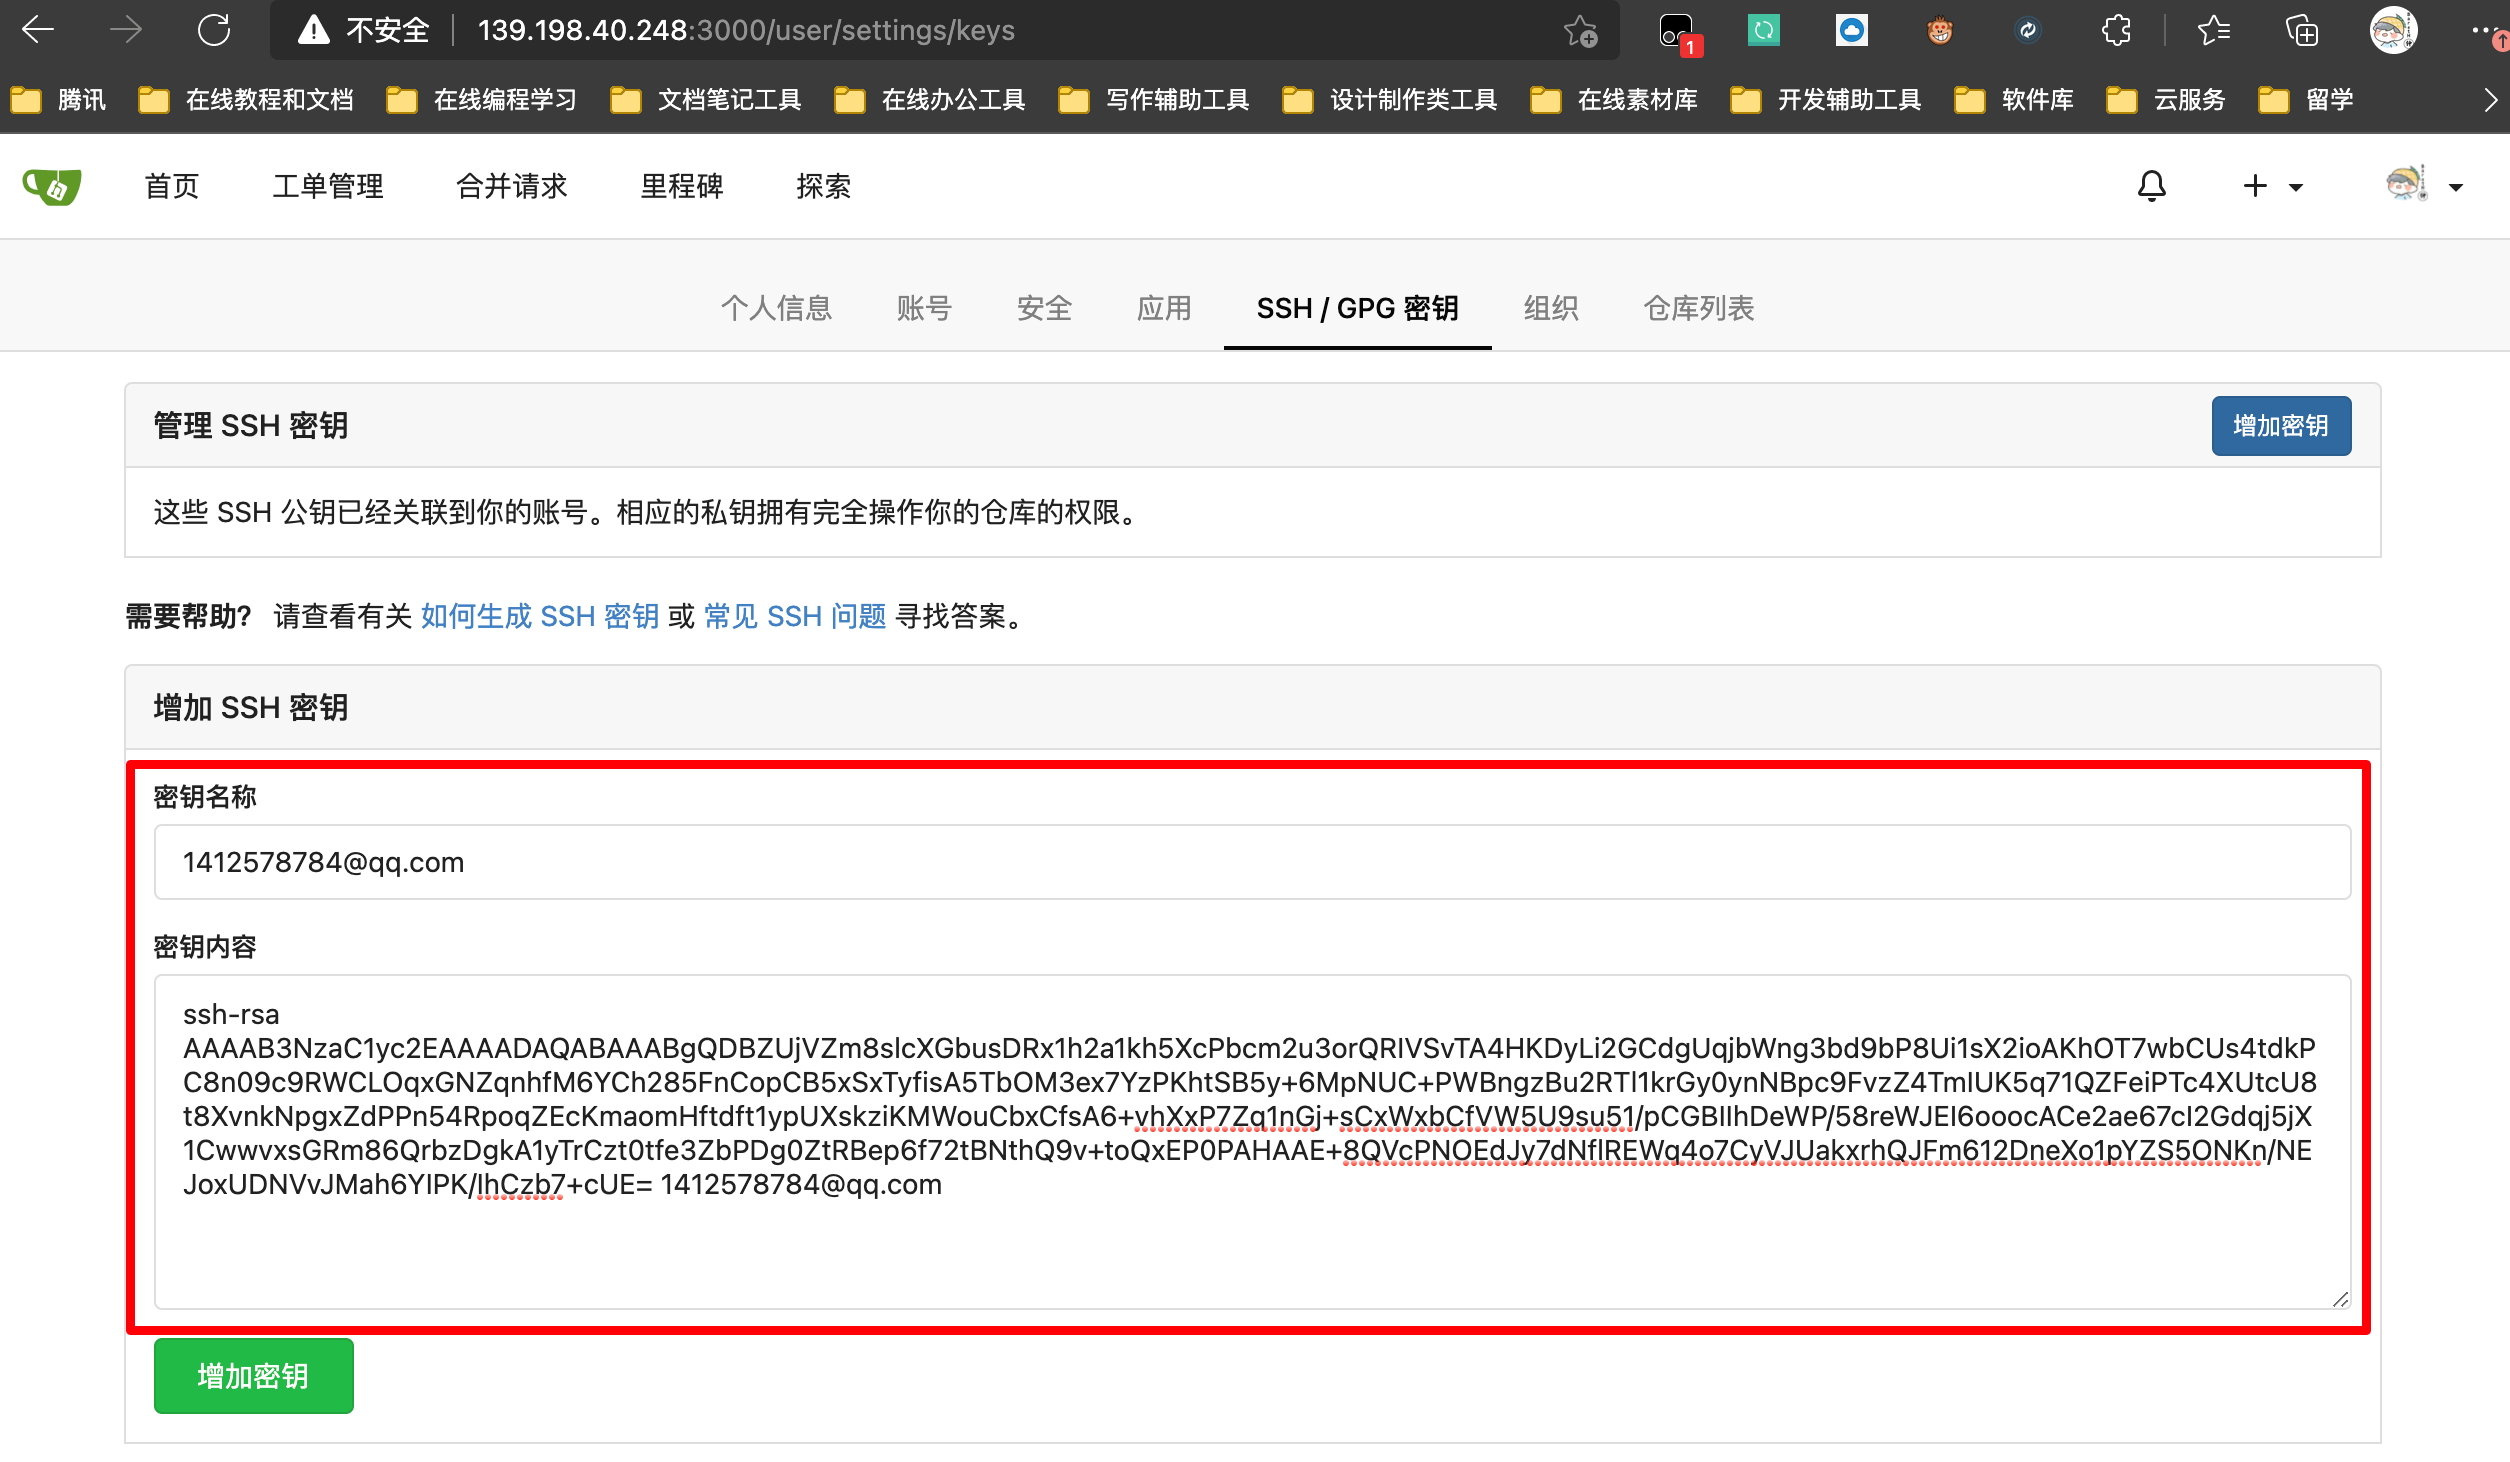
在gitea web界面的ssh配置页面新增一个ssh密钥,复制上面生成的公钥粘贴进去即可
添加完成后如下所示

此时如果我们修改hello.txt的内容再重新推送到gitea仓库,就不需要输入密码了

如果我们采用ssh的方式克隆下来呢?
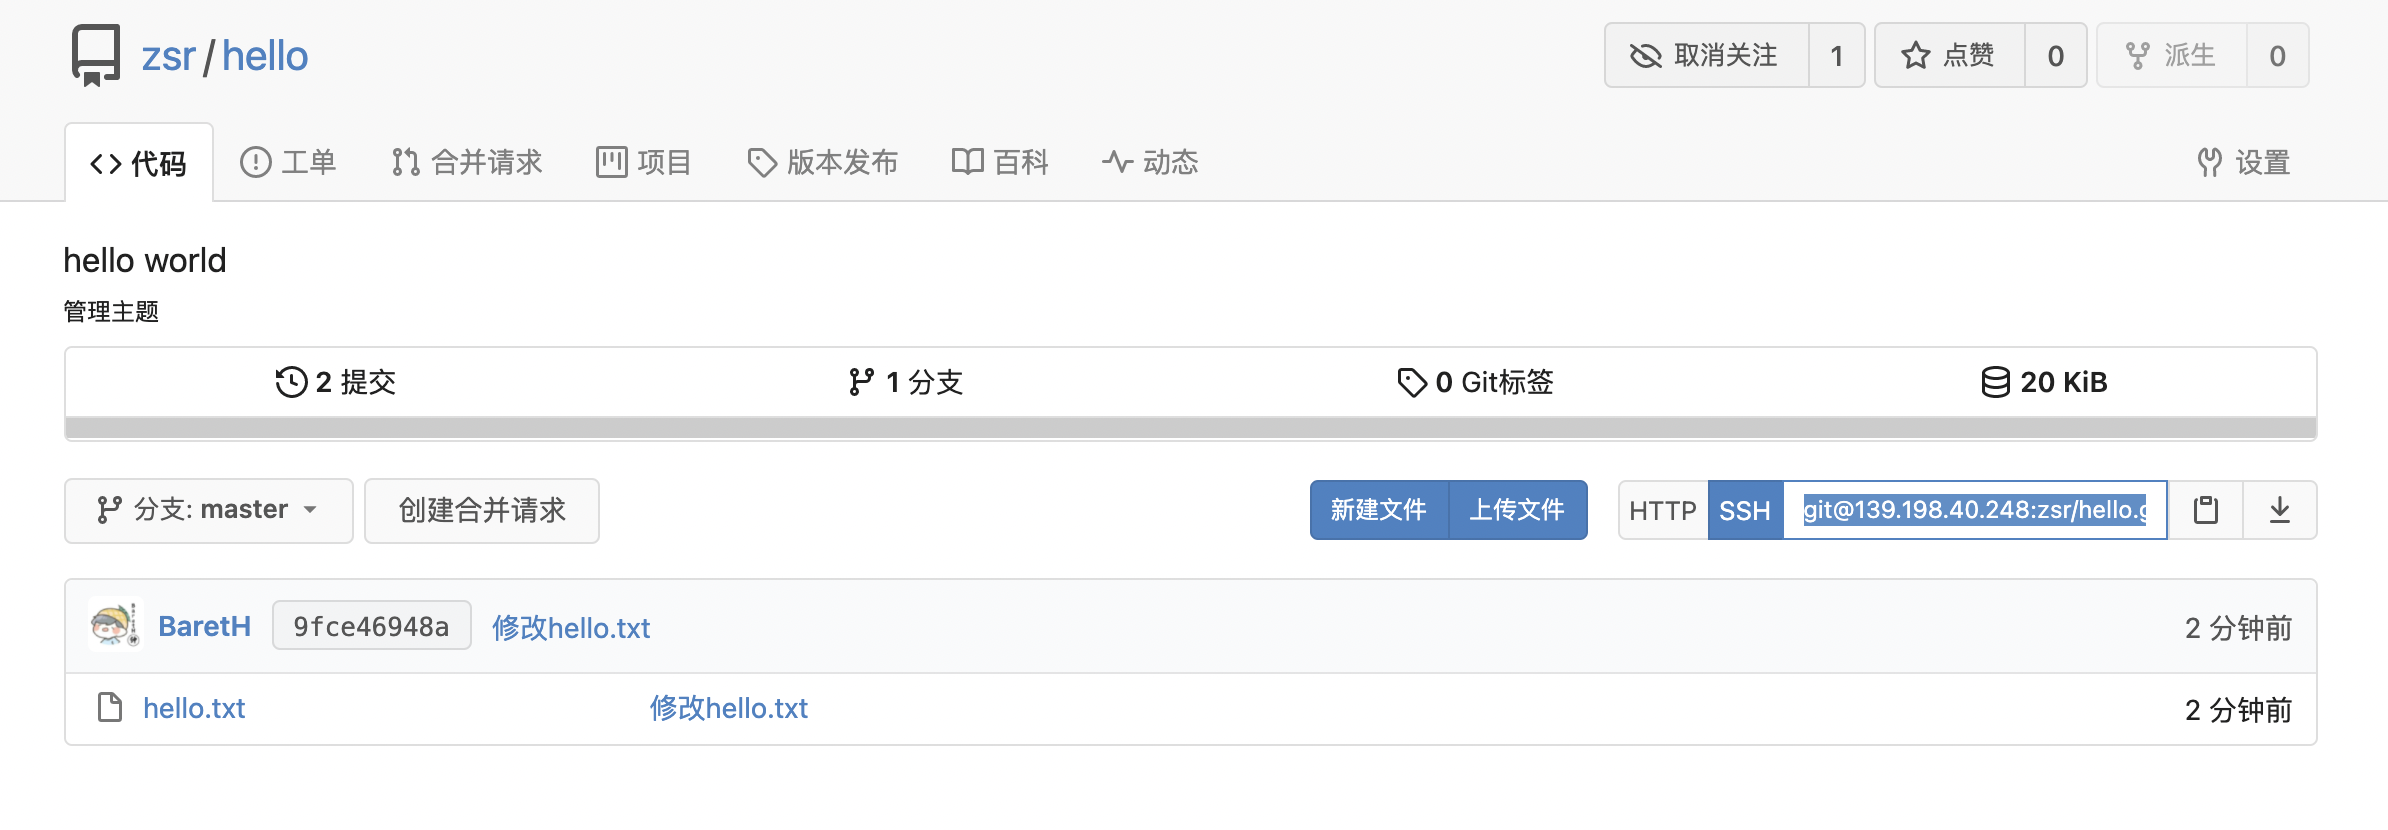
我们复制这个ssh地址来看看:

发现还让我们输密码,我们不是刚刚配置的ssh吗?我们仔细看这个ssh地址:
[email protected]:zsr/hello.git
在服务器公网ip后面直接接了
zsr
用户名,没有接任何端口,也就是想当于走了默认端口
22
,等价于
服务器公网ip:22
也就是要登陆服务器的操作,这当然是需要密码的,我们应该是登陆服务器内部gitea容器的操作,因此我们需要修改gitea的一些配置:

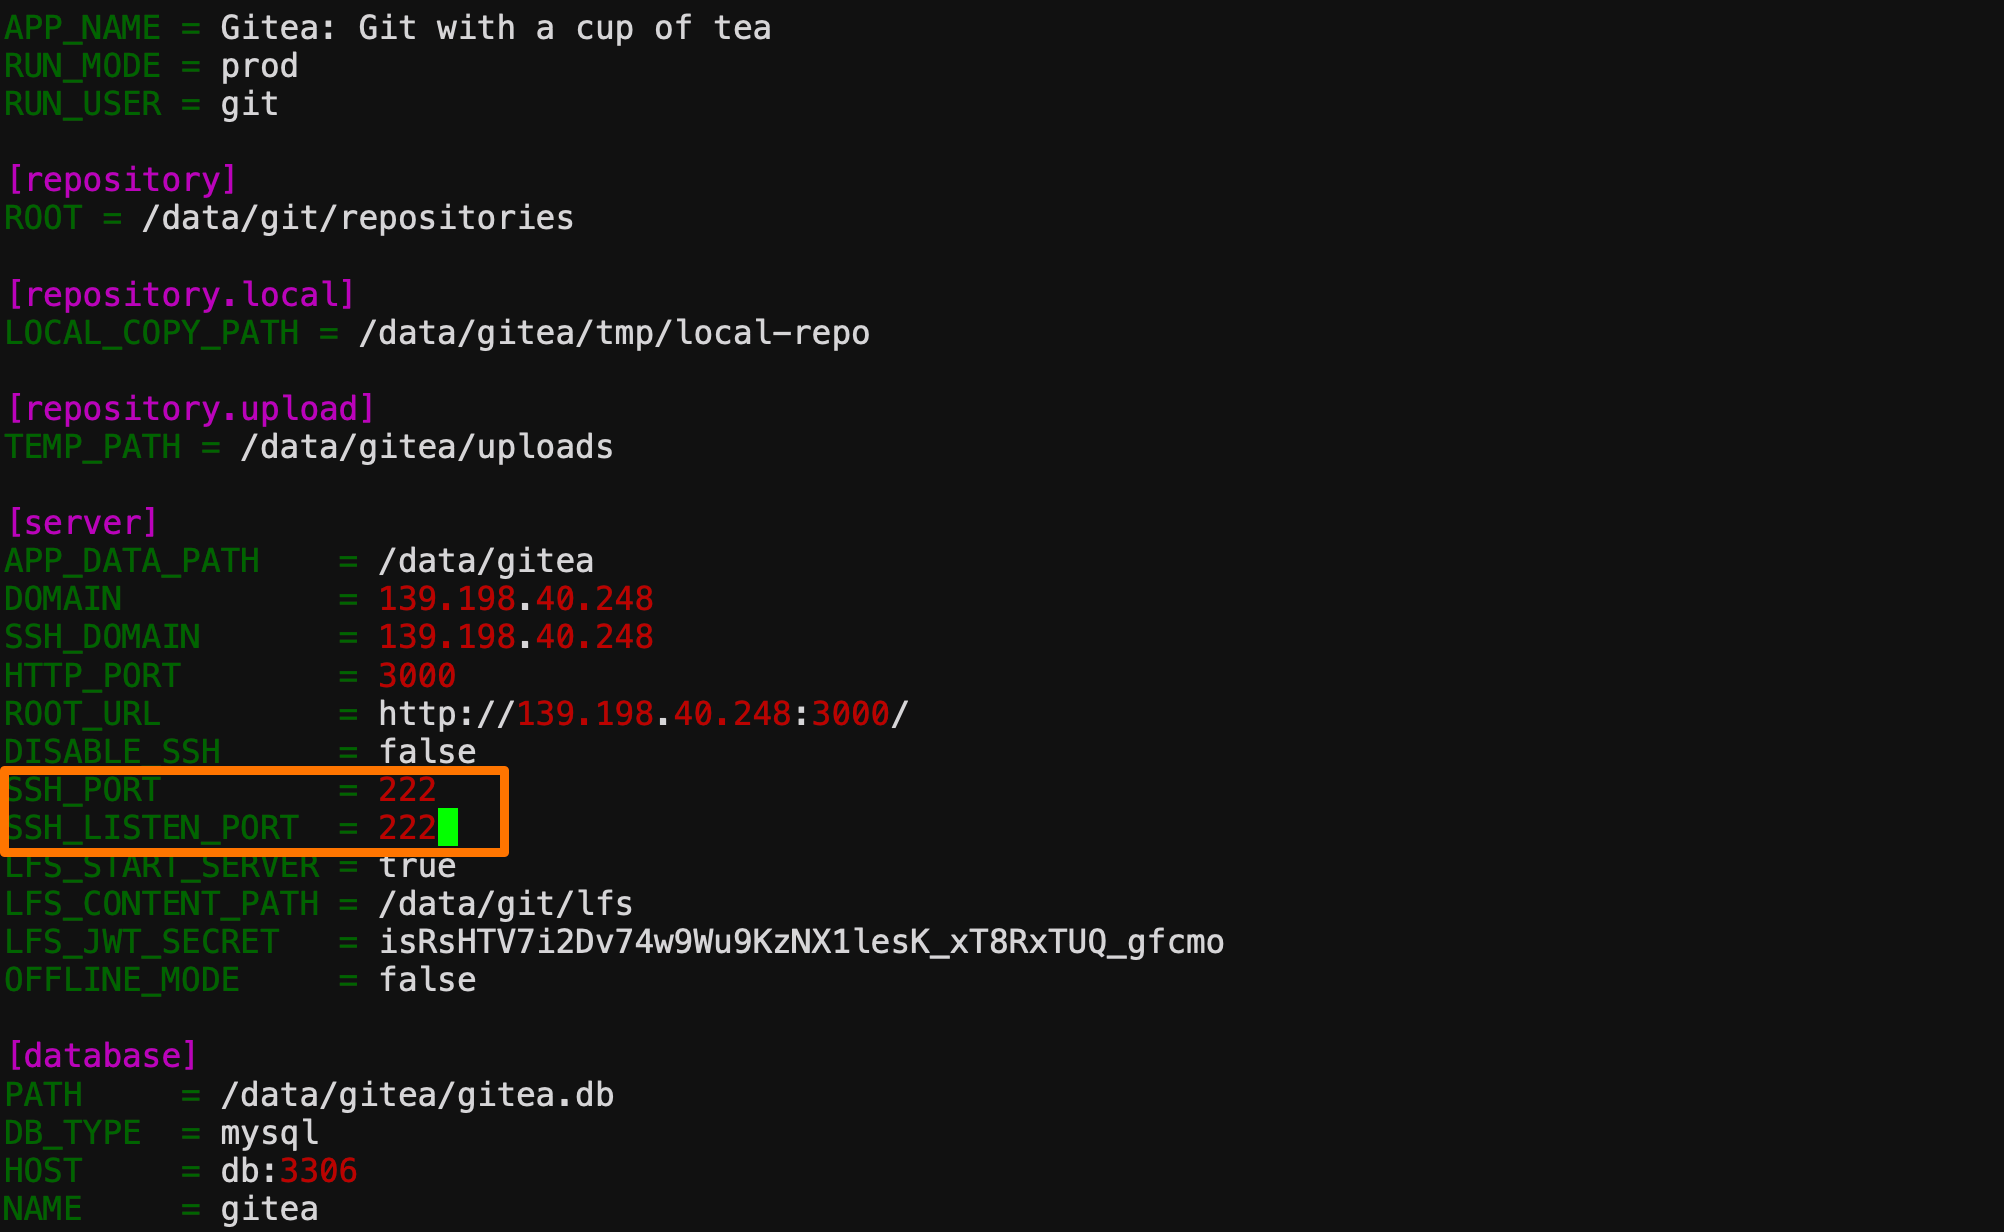
在docker-compose.yml文件中,由于我们将gitea的data目录挂在到本季的gitea目录中,因此我们需要进入该目录中来修改相关配置,需要修改
/gitea/gitea/conf/app.ini
文件

由于我们将主机的222端口映射到gitea容器中的22端口,因此我们将app.ini中的
ssh_port
和
ssh_listen_port
修改为222端口
修改完成后我们通过
docker-compose restart
命令重启一下gitea容器

然后再次访问web界面,可以看到ssh地址已经变更,在服务器的公网ip后接了222端口(注意服务器安全组要放行222端口),也就相当于访问服务器内部gitea容器的22端口

此时我们再通过ssh进行克隆,然后修改文件再推送回去
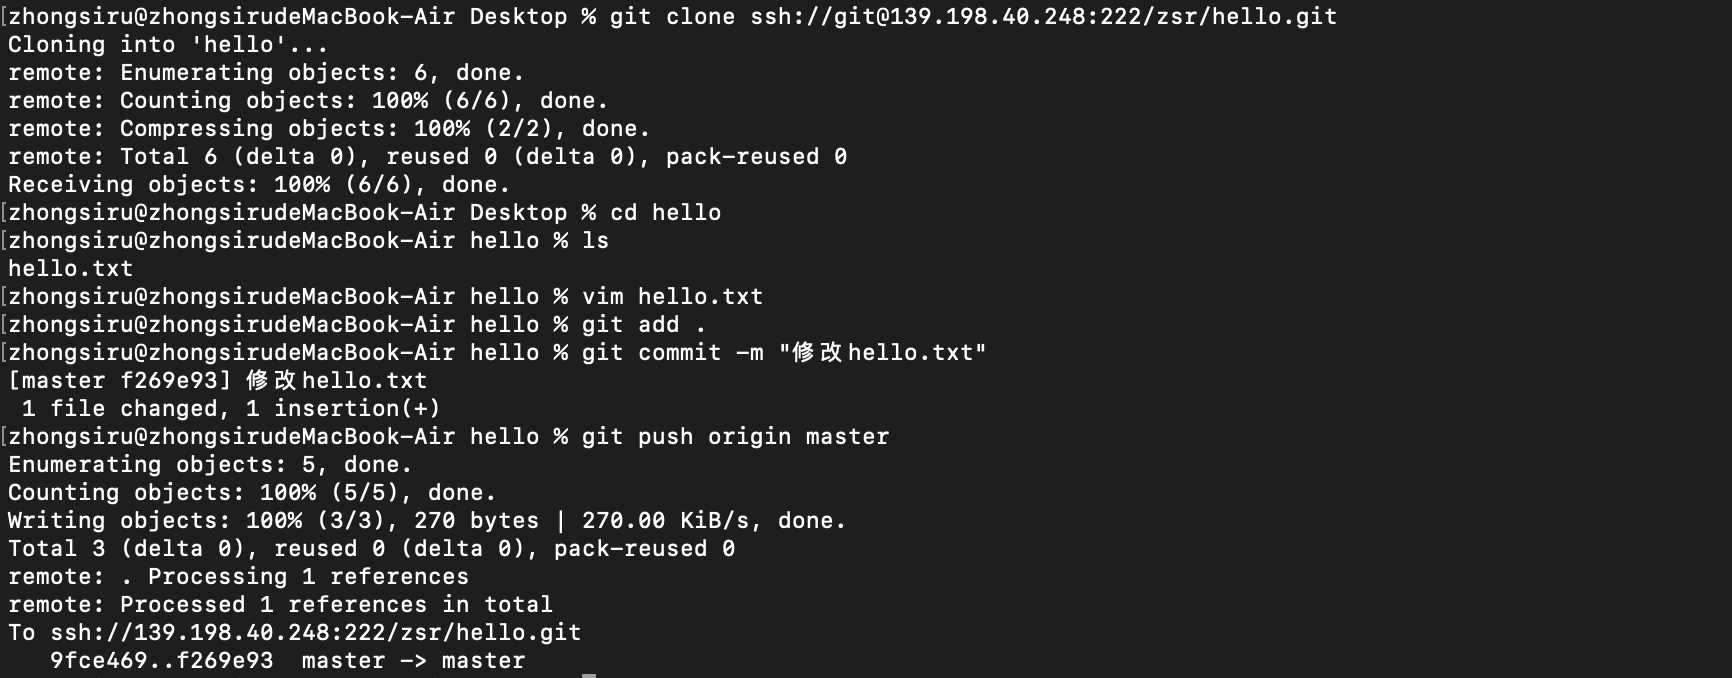
这次期间任何流程无需再需要输入密码进行验证,到此ssh配置已经完毕。
版权归原作者 Baret-H 所有, 如有侵权,请联系我们删除。
