轻松掌握异常
异常的背景
初始异常
除以 0
代码如下:
publicstaticvoidmain(String[] args){System.out.println(10/0);}
因为 0 不能做除数,所以会报异常:
数组下标越界
代码如下:
publicstaticvoidmain(String[] args){int[] arr ={1,2,3};System.out.println(arr[9]);}
因为数组的下标最大是 2 ,这里是访问下标 9 ,所以会越界。
上面这些都是运行时异常,我们之前还遇到过编译时异常
编译时异常
使用类克隆的时候,如果不抛出异常的话,就会报错导致出现无法完成编译:
classPersonimplementsCloneable{publicint id;}publicclassMain{publicstaticvoidmain(String[] args){Person person =newPerson();Person person1 =(Person) person.clone();}}
报异常如下:
如果重写克隆方法,并且抛出异常的话,程序就可以运行了。
classPersonimplementsCloneable{publicint id;@OverrideprotectedObjectclone()throwsCloneNotSupportedException{returnsuper.clone();}}publicclassMain{publicstaticvoidmain(String[] args)throwsCloneNotSupportedException{Person person =newPerson();Person person1 =(Person) person.clone();}}
这样程序就能运行了。
异常的基本用法
捕获异常
通过 try catch 来捕获并且处理异常,代码如下:
try{
    有可能出现异常的语句 ;}[catch(异常类型 异常对象){}...][finally{
    异常的出口
}]
- try 代码块中放的是可能出现异常的代码.
- catch 代码块中放的是出现异常后的处理行为.
- finally 代码块中的代码用于处理善后工作, 会在最后执行.
- 其中 catch 和 finally 都可以根据情况选择加或者不加.
异常程序的执行过程
在代码抛出异常之后,异常之后的代码就不执行了。代码如下:
publicstaticvoidmain(String[] args){int[] arr =newint[]{1,2,3};System.out.println(arr[5]);System.out.println("哈喽!!!");}
运行结果如下:
在运行到异常的代码之后,报出异常之后下面的代码就不执行了。
使用 try catch 处理异常的代码运行过程
代码如下:
publicstaticvoidmain(String[] args){int[] arr =newint[]{1,2,3};try{System.out.println(arr[5]);System.out.println("haha");}catch(ArrayIndexOutOfBoundsException e){System.out.println("捕捉到一个数组越界异常");}System.out.println("哈喽!!!");}
运行结果如下:
通过 try 来捕捉异常,然后通过 catch 来处理异常。try 捕捉到异常之后,异常下面的代码就不执行了。然后就是 catch 来执行,catch 执行完毕之后才可以继续往下执行。当然在 catch 当中也可以添加如下代码:
e.printStackTrace();
这里就是打印异常信息栈,输出异常的位置在哪里。交给 JVM 来处理异常,JVM 来处理的话,就会直接终止程序。
出现多个异常
如果出现多个异常的话,就可以使用多个 catch 来捕捉异常。代码如下:
publicstaticvoidmain(String[] args){int[] arr =newint[]{1,2,3};try{
        arr =null;System.out.println(arr[5]);System.out.println("haha");}catch(ArrayIndexOutOfBoundsException e){System.out.println("捕捉到一个数组越界异常");}catch(NullPointerException e){System.out.println("捕捉到了空指针异常");}System.out.println("哈喽!!!");}
运行结果如下:
当然代码也能这样简写:
publicstaticvoidmain(String[] args){int[] arr =newint[]{1,2,3};try{
        arr =null;System.out.println(arr[5]);System.out.println("haha");}catch(ArrayIndexOutOfBoundsException|NullPointerException e){System.out.println("捕捉到一个数组越界 或者 空指针异常");}System.out.println("哈喽!!!");}
运行结果如下:
Java 的异常体系
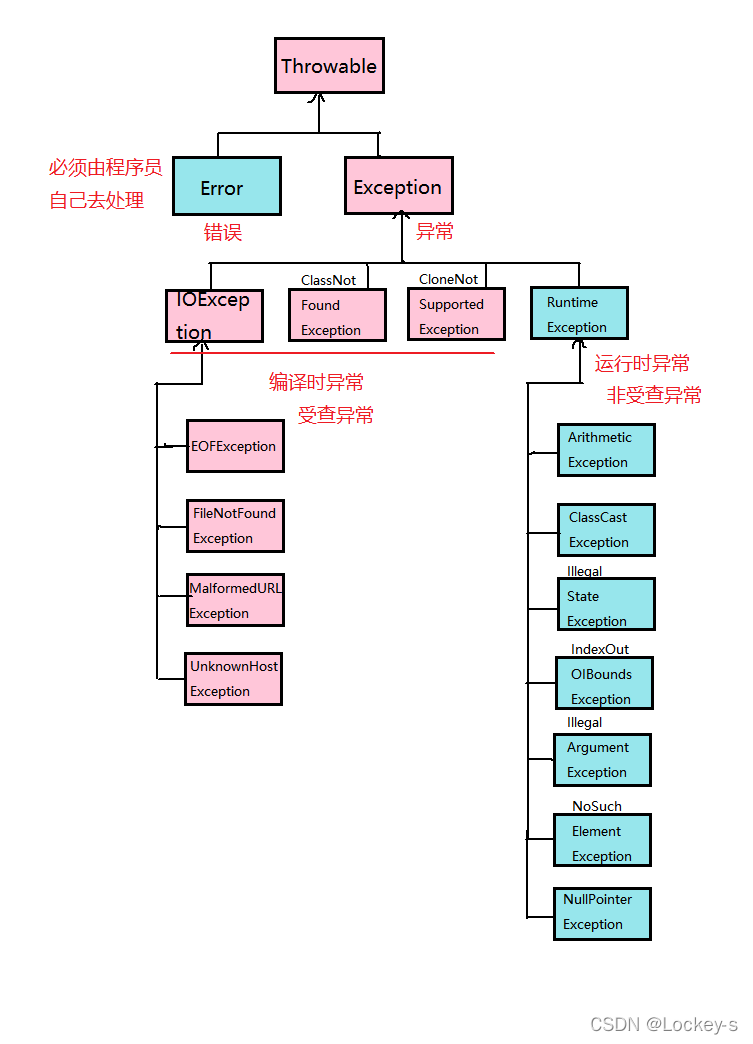
所有的异常都来自一个 throwable :
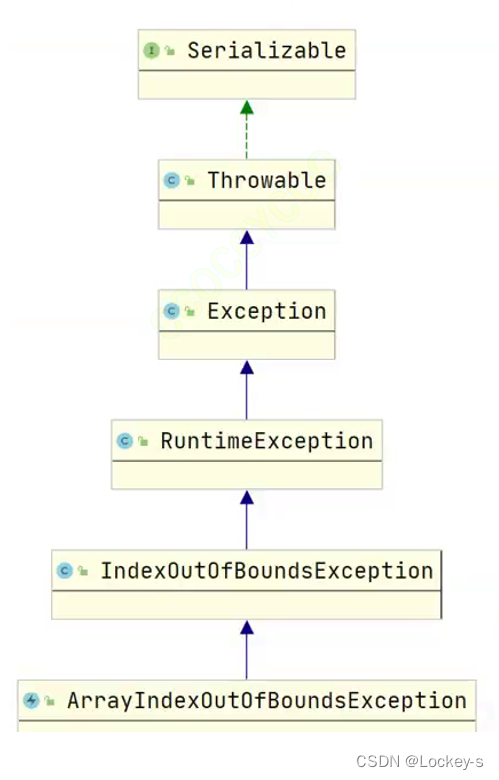
如果在 IDEA 当中查看异常的父子类关系时,就有如下关系图:
父类 Exception
所有的异常都来自父类 Exception ,当然也可以在 catch 的时候直接写 Exception 。但是不建议这样做,因为这样就不知道是什么异常了。
注意:catch 在捕捉异常的时候,最好是先子类,再父类。这样就可以一阶一阶的处理异常。如果是先父类再子类的话,就会报错。
finally
finally 一般用作资源的关闭。比如关闭 Scanner :
publicstaticvoidmain(String[] args){Scanner scanner =newScanner(System.in);int n = scanner.nextInt();try{System.out.println(10/ n);}catch(InputMismatchException e){
        e.printStackTrace();System.out.println("输入有误");}catch(ArithmeticException e){
        e.printStackTrace();System.out.println("算术异常,可能 0 做了除数");}finally{
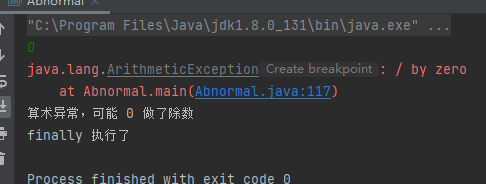
        scanner.close();System.out.println("finally 执行了");}}
不论是否发生异常,finally 都会执行:
就算交给 JVM 处理,还是会执行 finally 代码如下:
publicstaticvoidmain(String[] args){Scanner scanner =newScanner(System.in);int n = scanner.nextInt();try{System.out.println(10/ n);}catch(InputMismatchException e){
        e.printStackTrace();System.out.println("输入有误");}finally{
        scanner.close();System.out.println("finally 执行了");}}

try catch finally的返回值
当 try 和 finally 当中都有返回的时候,结果是什么?
publicstaticintfunc3(){int a =10;try{return a;}catch(ArithmeticException e){
        e.printStackTrace();}finally{return20;}}publicstaticvoidmain(String[] args){int n =func3();System.out.println(n);}
运行结果如下:
因为 finally 的特点是:不管抛没抛异常,finally 都会被执行。所以本来应该返回 a 的地方,就返回了 20 。所以:** 尽量避免在 finally 当中使用 return** 。
异常处理流程
- 程序先执行 try 中的代码
- 如果 try 中的代码出现异常, 就会结束 try 中的代码, 看和 catch 中的异常类型是否匹配.
- 如果找到匹配的异常类型, 就会执行 catch 中的代码
- 如果没有找到匹配的异常类型, 就会将异常向上传递到上层调用者.
- 无论是否找到匹配的异常类型, finally 中的代码都会被执行到(在该方法结束之前执行).
- 如果上层调用者也没有处理的了异常, 就继续向上传递.
- 一直到 main 方法也没有合适的代码处理异常, 就会交给 JVM 来进行处理, 此时程序就会异常终止.
自定义异常
在自定义抛出异常的时候,用 throw 来抛出异常。
publicstaticvoidfunc4(int x)throwsRuntimeException{if(x ==10){System.out.println(10/ x);thrownewRuntimeException("x == 10");}}publicstaticvoidmain(String[] args){try{func4(10);}catch(ArithmeticException e){
        e.printStackTrace();}}
运行结果如下:
利用异常实现恢复模型
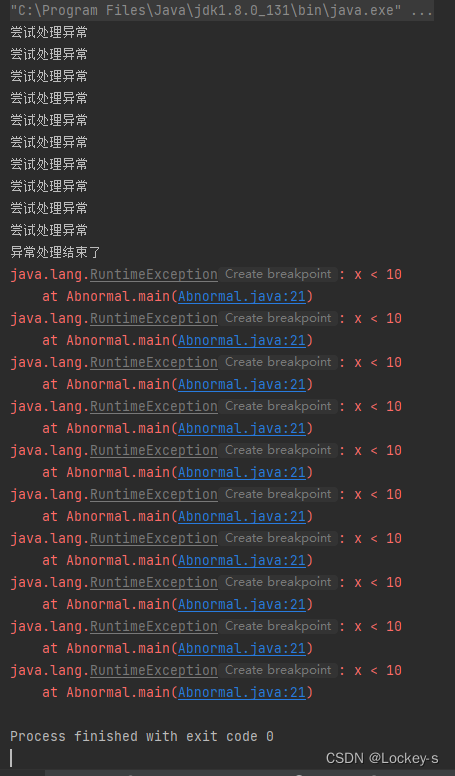
使用 while 循环建立类似 ”恢复模型“ 的异常处理行为,它将不断重复,直到异常不再抛出。
publicstaticvoidmain13(String[] args){int i =0;while(i <10){try{if(i <10){thrownewRuntimeException("x < 10");}}catch(RuntimeException e){
            e.printStackTrace();System.out.println("尝试处理异常");
            i++;}}System.out.println("异常处理结束了");}
运行结果如下:
版权归原作者 Lockey-s 所有, 如有侵权,请联系我们删除。