
一、创建新窗体
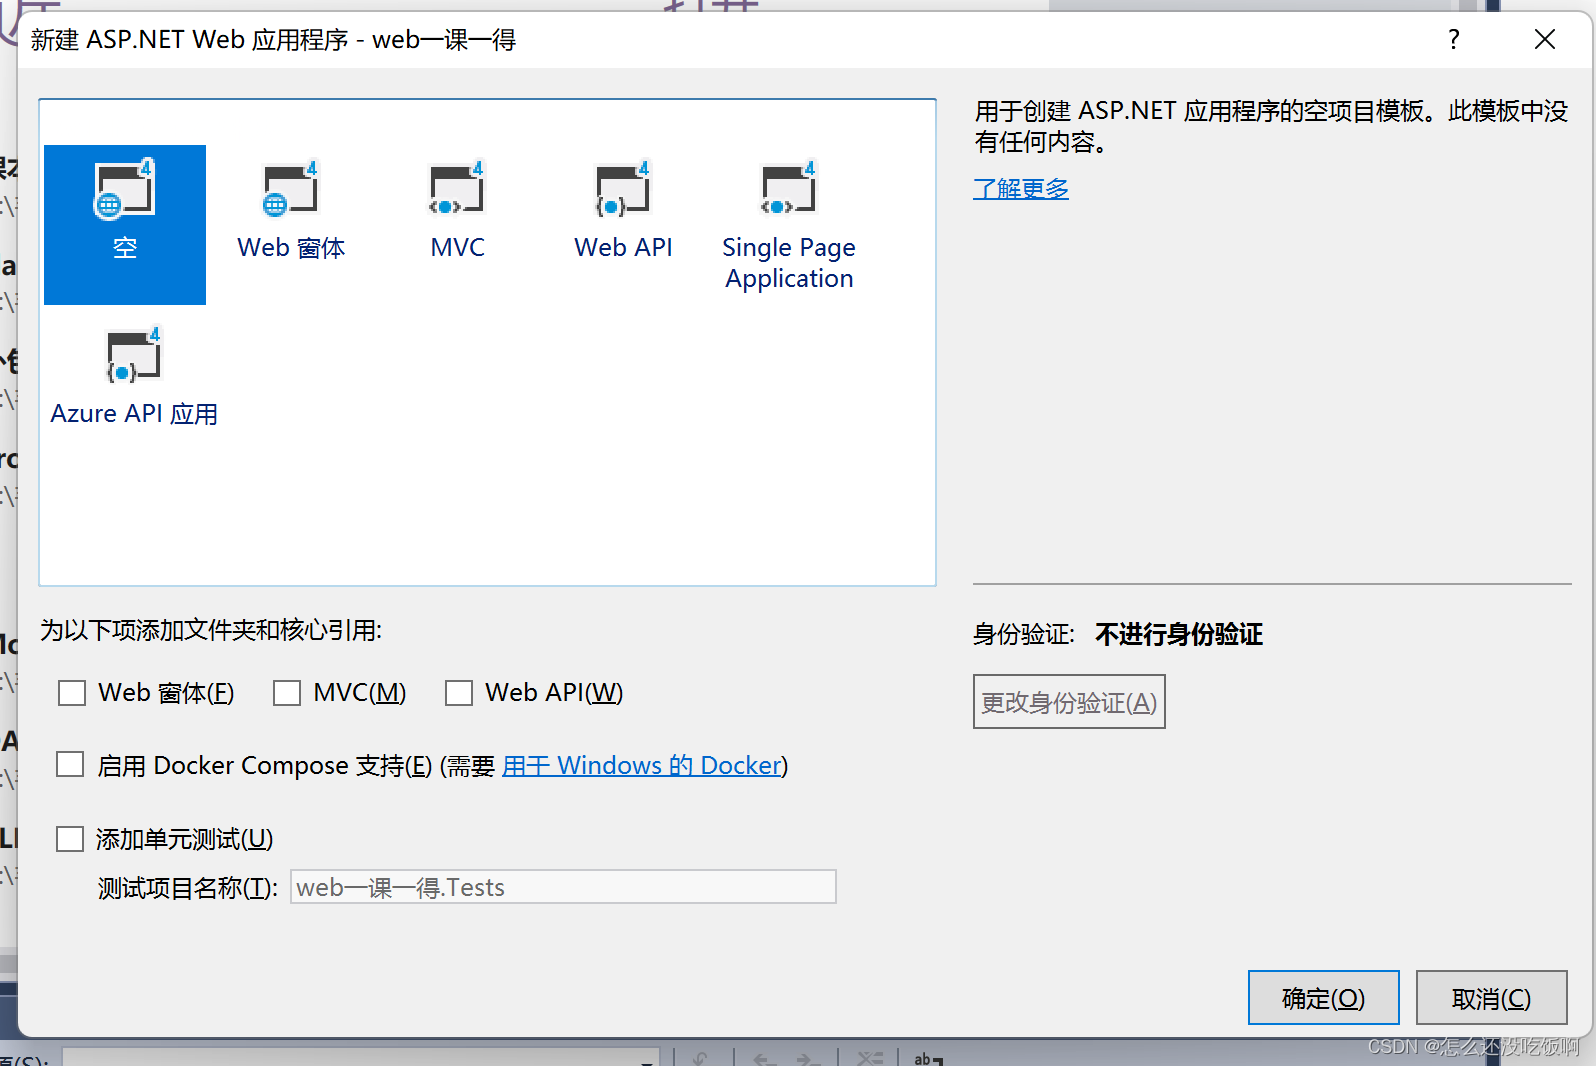
1.创建一个普通的ASP.NET空web网站
新窗体自己命名为自己想要建立的名字,我就命名为一课一得了
一定注意的是要选择一个空的应用程序用于创建ASP.NET应用程序的空项目模版
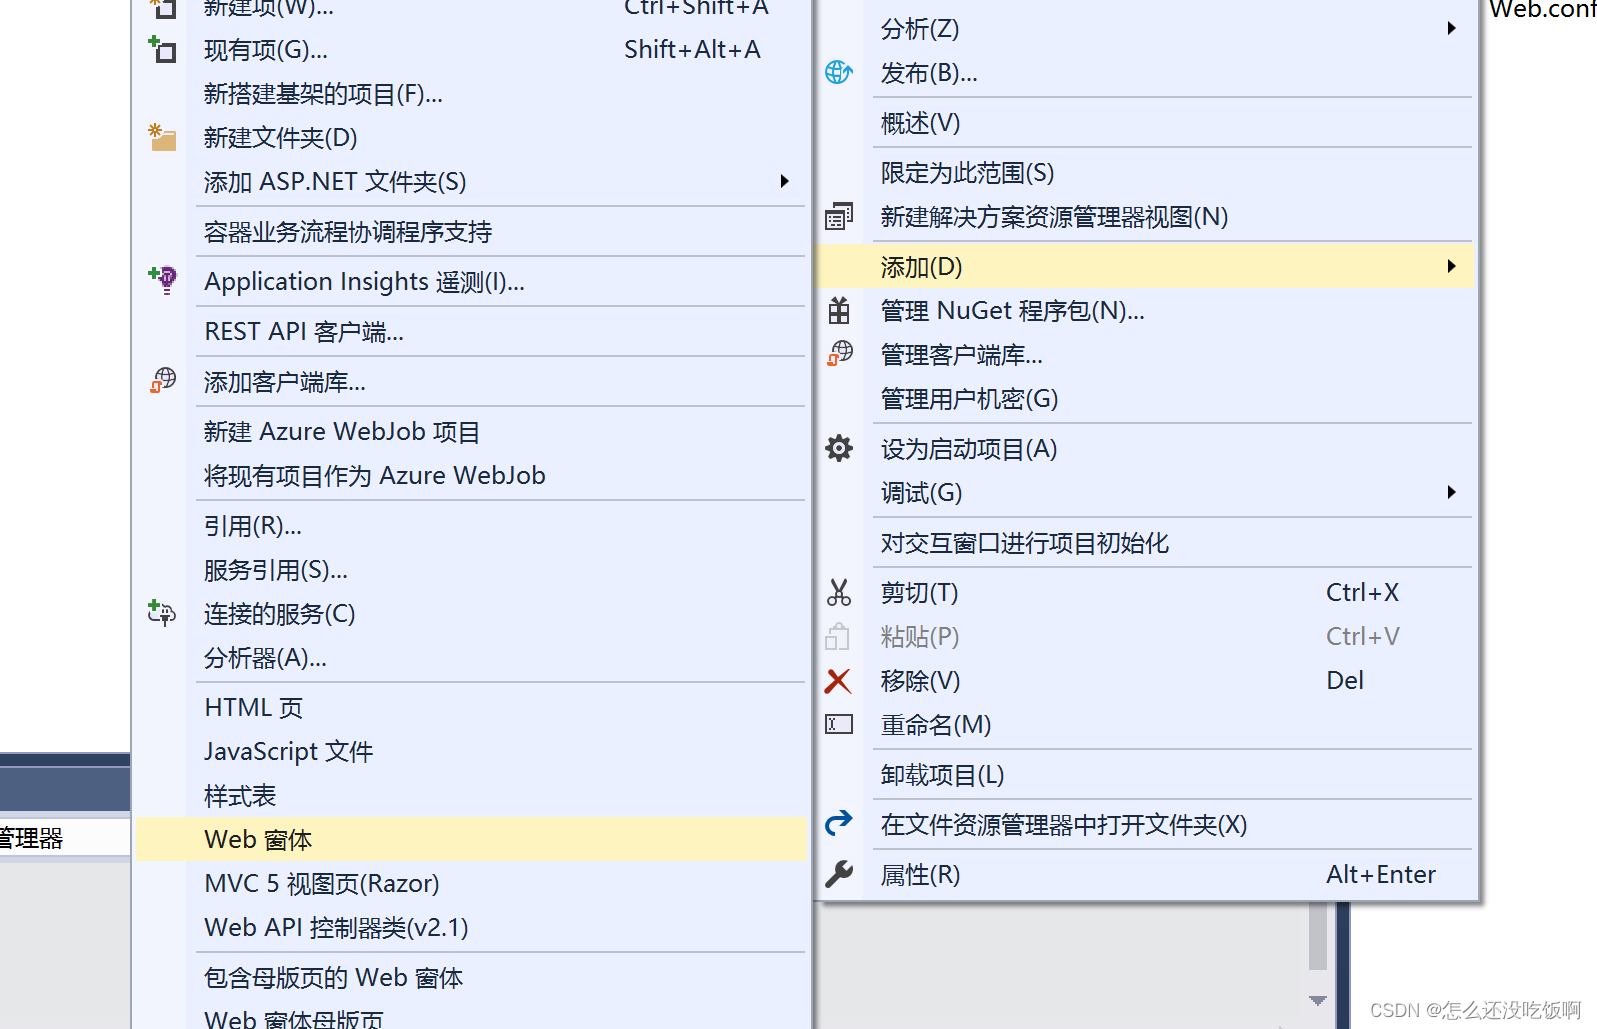
2.创建login.aspx
“解决方案资源管理器”中,添加新项目,选择Web窗体,命名为“login.aspx”,记得注意选择,不要选错了
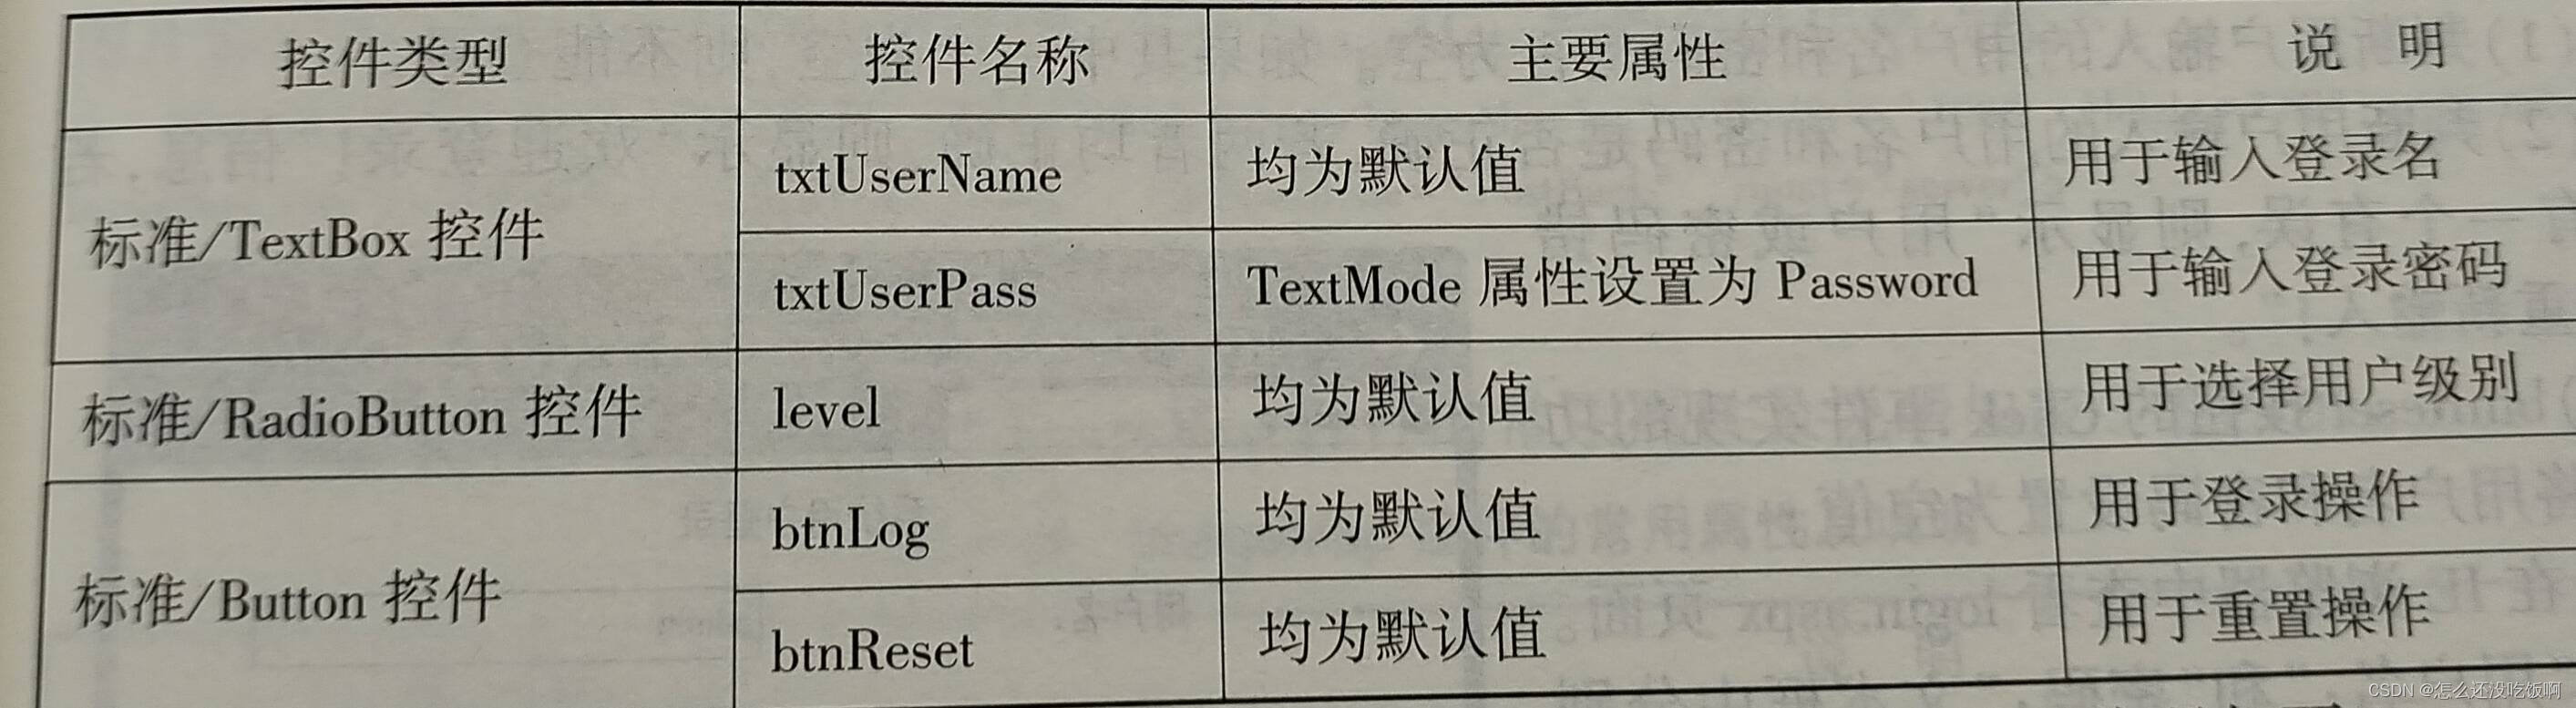
二、添加控件
login.aspx窗体中添加控件,所添加的控件类型,控件名称,添加这些控件,textbox:用于输入登录名;用于输入登录密码,RadioButton:用于选择用户级别
三、login.aspx页面中
这个是使用
<%@ Page Language="C#" AutoEventWireup="true" CodeBehind="login.aspx.cs" Inherits="课本自己打.login" %>
<!DOCTYPE html>
<html xmlns="http://www.w3.org/1999/xhtml">
<head runat="server">
<meta http-equiv="Content-Type" content="text/html; charset=utf-8"/>
<title></title>
<style type="text/css">
.auto-style2 {
width: 450px;
height: 47px;
}
.auto-style3 {
width: 180px;
}
.auto-style8 {
height: 25px;
width: 296px;
}
.auto-style9 {
width: 296px;
}
.auto-style11 {
height: 41px;
width: 180px;
}
.auto-style12 {
height: 25px;
width: 180px;
}
</style>
</head>
<body style="margin-bottom: 57px">
<form id="form1" runat="server">
<div>
<table style="align-content" >
<tr><td colspan="2" class="auto-style2">
系统用户登录</td>
</tr>
<tr>
<td class="auto-style3">
<asp:Label ID="Label2" runat="server" Width="167px" Height="31px" Text="用户名:"></asp:Label>
</td>
<td class="auto-style9">
<asp:TextBox ID="txtUserName" runat="server" Width="261px" Height="16px"></asp:TextBox>
</td>
</tr>
<tr>
<td class="auto-style3">
<asp:Label ID="Label3" runat="server" Text="密码:"></asp:Label>
</td>
<td class="auto-style9">
<asp:TextBox ID="txtUserPass" runat="server" Width="260px" Height="16px"></asp:TextBox>
</td>
</tr>
<tr>
<td class="auto-style12">
<asp:Label ID="Label4" runat="server" Text="用户级别:"></asp:Label>
</td>
<td class="auto-style8">
<asp:RadioButton ID="RadioButton1" runat="server" Text="管理员" GroupName="level" />
<asp:RadioButton ID="RadioButton2" runat="server" Text="会员" GroupName="level"/>
<asp:RadioButton ID="RadioButton3" runat="server" Text="用户" GroupName="level"/>
</td>
</tr>
<tr>
<td class="auto-style11" >
<asp:Button ID="btnLog" runat="server" Text="登录" OnClick="btnLog_Click" Width="141px" />
</td>
<td class="auto-style11">
<asp:Button ID="btnReset" runat="server" Text="重置" OnClick="btnReset_Click" />
</tr>
</table>
</div>
</form>
</body>
</html>
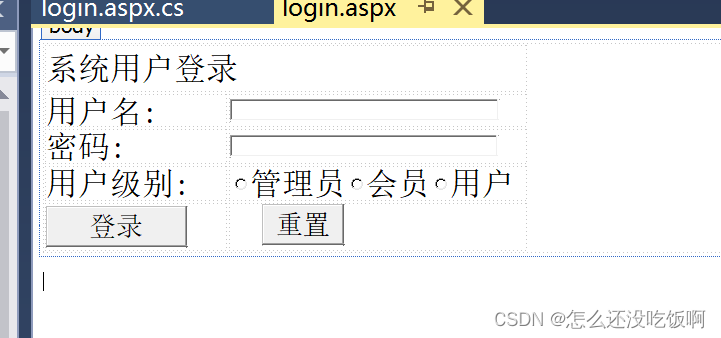
这个布局是在源这里写,设计是直接拖控件,控件可以直接拖过来就好,拆分是可以拖控件,又可以写代码,这样就可以一边看控件,一边写代码进行修改。

这里是可以设计的 ,直接拖控件用户登录系统,用户名,密码,用户级别,用户可以通过选择来进行自己的身份,利用C#写if语句判断用户名和密码在进行是否可以登陆成功。
四、添加点击控件
1.打开login.aspx页面源
打开login.aspx页面源里面加入两个点击控件分别是登录页面和重置,
1.判断用户输入的用户名和密码是否为空,如果为空,则不能登录
2.判断用户输入的用户名和密码是否正确
3.如果登录成功就显示信息
4.如果错误,会显示用户名或密码错误的提示信息
5.将用户名和密码设置为空值
6.运行页面看是否出错,如没有出错一个完整的页面就写好了
以上是需要C#进行判断语句编写,可以去网上进行搜查,里面可以连接数据库,这样可以获取的大家的信息密码,用户名和密码唯一的。
这样就可以得到一个简单的登录页面,先是进行css样式进行编写,直接拉控件也是可以。
五、web总结
登录页面其实在web中还是非常常见的,所以大家一定要掌握它,web是写接口的,利用三层架构,然后就可以根据自己的需求进行代码编写,主要是要面向后端多一点,就像上面的例子利用web进行数据库的连接,然后前端在进行渲染到页面上,web是一个很大库,然后进行整理,让用户更清晰的看出当中的信息,然后在传到前端进行页面上的编辑,一般来说后端好像更为复杂一些,编写接口一般是ajax,前端再通过AJAX进行传值,不过大家通过学习也可以领会其中的乐趣。
版权归原作者 怎么还没吃饭啊 所有, 如有侵权,请联系我们删除。