这是机器未来的第38篇文章
原文首发地址:https://blog.csdn.net/RobotFutures/article/details/126034110
文章目录
1. 概述
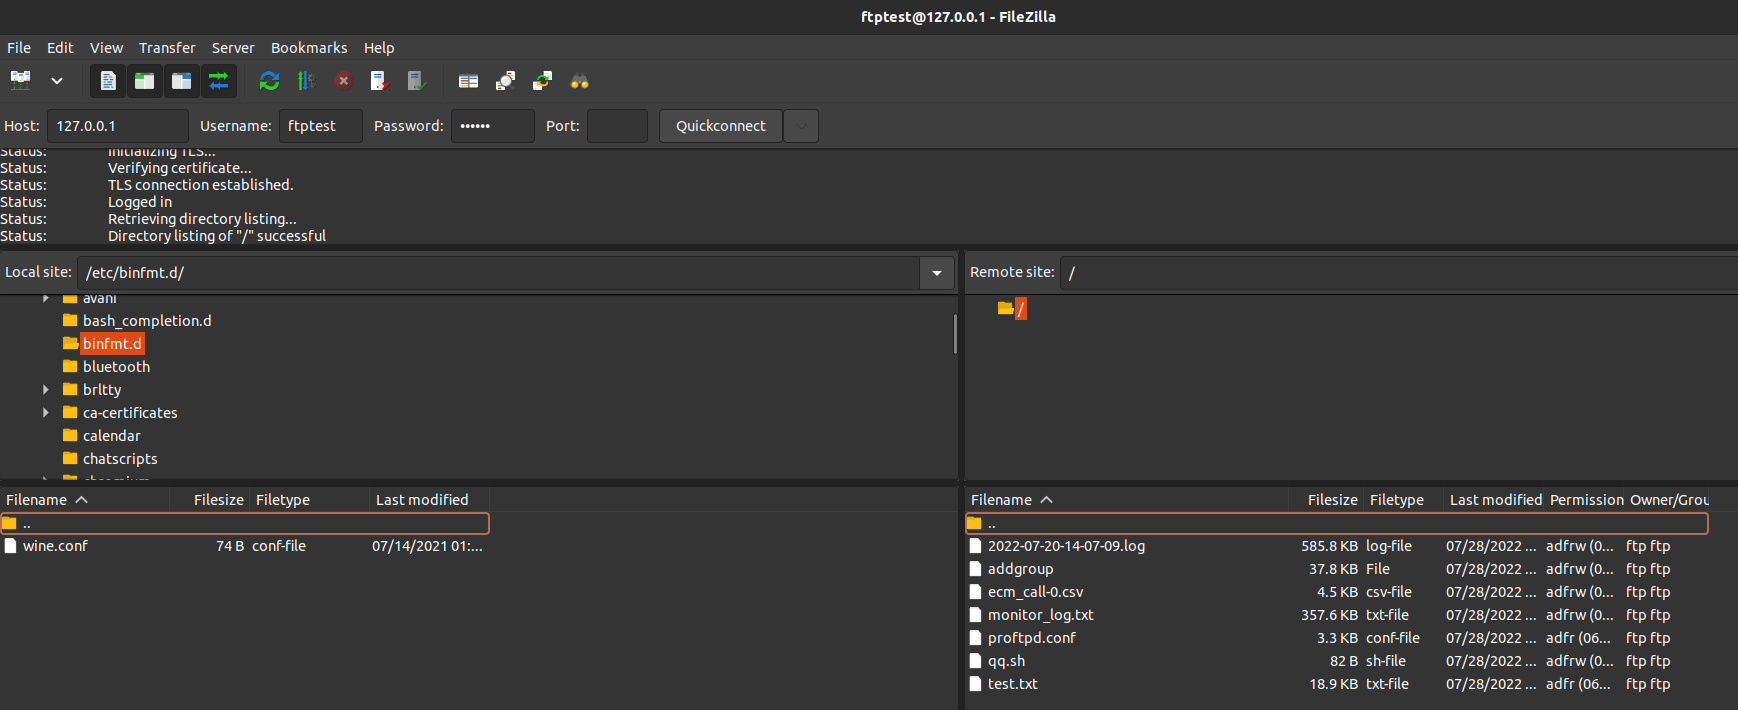
本文描述了,在Ubuntu操作系统下,安装开启TLS加密的安全FTP服务器的安装配置指南。
环境描述:
- 操作系统:Ubuntu-20.04
2. 安装OpenSSL
2.1 下载
在安装之前先查看系统的openssl版本,防止运行时出现编译版本和运行版本不一致的问题。
openssl version
- 查看当前openssl路径
which openssl
- 下载
wget -c https://github.com/openssl/openssl/archive/refs/tags/openssl_1_1_1f.tar.gz
2.2 编译
编译参考文档:https://github.com/openssl/openssl/blob/master/NOTES-UNIX.md
tar zxvf OpenSSL_1_1_1f.tar.gz
cd openssl-OpenSSL_1_1_1q
$ ./config --prefix=/usr/local/ssl --openssldir=/usr/local/ssl   '-Wl,-rpath,$(LIBRPATH)'
make
sudo make install
执行完毕后,openssl被安装到/usr/local/ssl目录下。
3. 安装proftpd
3.1. 下载
github仓库:https://github.com/proftpd
下载地址:https://github.com/proftpd/proftpd/archive/refs/tags/v1.3.8rc4.tar.gz
3.2. 编译安装
编译参考文档:http://www.proftpd.org/docs/howto/Compiling.html
tar zxvf v1.3.8rc4.tar.gz
cd proftpd-1.3.8rc4
./configure --prefix=/usr/local/proftpd --sysconfdir=/etc --enable-autoshadow --localstatedir=/var/run --enable-ctrls --with-modules=mod_tls -enable-nls     --with-includes=/usr/local/ssl/include   --with-libraries=/usr/local/ssl/lib
make
sudo make install
注意事项:如果出错,编译时记得先make clean再make
3.3. 添加虚拟用户
- 创建虚拟用户根目录
mkdir /home/ftproot/
# 配置根目录权限
chown 2001:200 /home/ftproot/
- 创建虚拟用户ftptest
# 创建ftp虚拟用户
/usr/local/proftpd/bin/ftpasswd --file=/etc/proftpd/ftpd.passwd --home=/home/ftproot --shell=/bin/false --name=ftptest --uid=2001 --gid=200 --passwd

# 配置ftp用户组,配置里会仅限组用户登录
/usr/local/proftpd/bin/ftpasswd --group --file=/etc/proftpd/ftpd.group --gid=200 --name=ftpman --member=ftptest
3.4 生成证书
cd /usr/local/proftpd/
cp /usr/local/ssl/openssl.cnf .
# 仅Common Name需要输入,且应该与访问地址一致
openssl req -new -x509 -nodes -config openssl.cnf -out proftpd.crt -keyout proftpd.key
获得proftpd.crt 、proftpd.key两个秘钥文件,放到/etc/proftpd/目录下
mkdir /etc/proftpd
cp proftpd.crt proftpd.key /etc/proftpd/
3.5. 配置
# This is a basic ProFTPD configuration file (rename it to
# 'proftpd.conf' for actual use.  It establishes a single server
# and a single anonymous login.  It assumes that you have a user/group
# "nobody" and "ftp" for normal operation and anon.

ServerName            "ProFTPD Default Installation"
ServerType            standalone
DefaultServer            on

# Port 21 is the standard FTP port.
Port                21

# Don't use IPv6 support by default.
UseIPv6                off

# Umask 022 is a good standard umask to prevent new dirs and files
# from being group and world writable.
Umask                022

# To prevent DoS attacks, set the maximum number of child processes
# to 30.  If you need to allow more than 30 concurrent connections
# at once, simply increase this value.  Note that this ONLY works
# in standalone mode, in inetd mode you should use an inetd server
# that allows you to limit maximum number of processes per service
# (such as xinetd).
MaxInstances            30

# Set the user and group under which the server will run.
User                nobody
Group                nogroup

# To cause every FTP user to be "jailed" (chrooted) into their home
# directory, uncomment this line.
DefaultRoot ~

# 必须打开,将用户限定在自己的目录中
DefaultRoot                     ~

# 因为虚拟用户是没有 shell 的,所以要打开这个设定
RequireValidShell               off

# 用 mod_auth_file.c 验证登录用户名和密码
AuthOrder                       mod_auth_file.c

# 存放用户名和密码的文件
AuthUserFile                    /etc/proftpd/ftpd.passwd
AuthGroupFile             /etc/proftpd/ftpd.group

# 允许下载时断点续传
AllowRetrieveRestart on

# 允许上传时断点续传
AllowStoreRestart on

# 客户端登录时不显示服务器信息
ServerIdent off

# Normally, we want files to be overwriteable.
AllowOverwrite        on

TimeoutLogin 120
TimeoutNoTransfer    900

MaxClientsPerHost 5
PassivePorts 55000 56000

#关闭DNS反向查询,节省连接时间
UseReverseDNS        off
TransferLog          /var/log/xferlog
SystemLog /var/log/proftpd.log

MaxClients 100
#IdentLookups off
UseReverseDNS off
DeleteAbortedStores on
DirFakeGroup on
DirFakeUser on
DirFakeMode 0600
RequireValidShell off
LangOptions PreferServerEncoding    #在编译时加入 --enable-nls才能用
UseEncoding utf8 gbk                #在编译时加入 --enable-nls才能用

# Normally, we want files to be overwriteable.
<Directory />
AllowOverwrite on
</Directory>

<Limit LOGIN>
AllowGroup ftpman
DenyAll
</Limit>

#########################ssl/tls############################
# MOD_TLS SETTING
<IfModule mod_tls.c>
TLSEngine on
TLSLog /var/log/proftpd-tls.log
TLSProtocol SSLv23
# Are clients required to use FTP over TLS when talking to this server?
TLSRequired ctrl
# Server's certificate
TLSRSACertificateFile /etc/proftpd/proftpd.crt
TLSRSACertificateKeyFile /etc/proftpd/proftpd.key
# Authenticate clients that want to use FTP over TLS
TLSVerifyClient off
#########################ssl/tls############################

<Directory /home/ftproot/down>
    <Limit WRITE>
        DenyGroup ftpman
    </Limit>
#    TransferRate RETR 150 group ftpman
</Directory>

<Directory /home/ftproot/upload>
    <Limit RMD RNFR DELE RETR>
        DenyGroup ftpman
    </Limit>
#    TransferRate STOR 150 group ftpman
</Directory>

# Bar use of SITE CHMOD by default
<Limit SITE_CHMOD>
  DenyAll
</Limit>
3.6 启动proftpd测试
sudo /usr/local/proftpd/sbin/proftpd

4. 配置开机启动
Ubuntu20.04已经将systemctrl作为首选的配置项启动工具,这里也采用推荐的方式。
proftpd的源代码目录下已经包含了启动脚本,打开proftpd-1.3.8rc4/contrib/dist/rpm/proftpd.service文件,修改后的信息如下:
[Unit]
Description = ProFTPD FTP Server
Wants=network-online.target
After=network-online.target nss-lookup.target local-fs.target remote-fs.target

[Service]
Type = simple
Environment = PROFTPD_OPTIONS=
EnvironmentFile = /etc/proftpd.conf
ExecStartPre = /usr/local/proftpd/sbin/proftpd --configtest
ExecStart = /usr/local/proftpd/sbin/proftpd --nodaemon $PROFTPD_OPTIONS
ExecReload = /bin/kill -HUP $MAINPID
PIDFile = /run/proftpd/proftpd.pid

[Install]
WantedBy = multi-user.target
将启动脚本放到系统启动脚本目录下
sudo cp proftpd.service /etc/systemd/system/.
注册启动脚本
cd /etc/systemd/system/
zhoushimin@zsm:system$ sudo systemctl enable  proftpd.service
Created symlink /etc/systemd/system/multi-user.target.wants/proftpd.service → /etc/systemd/system/proftpd.service.
启动服务:
sudo systemctl start proftpd.service
停止服务:
sudo systemctl stop proftpd.service
查看服务运行日志:
zhoushimin@zsm:rpm$ systemctl status proftpd.service
● proftpd.service - ProFTPD FTP Server
     Loaded: loaded (/etc/systemd/system/proftpd.service; enabled; vendor preset: enabled)
     Active: active (running) since Mon 2022-08-01 17:03:12 CST; 6min ago
    Process: 418310 ExecStartPre=/usr/local/proftpd/sbin/proftpd --configtest (code=exited, status=0/SUCCESS)
   Main PID: 418311 (proftpd)
      Tasks: 2 (limit: 18967)
     Memory: 2.3M
     CGroup: /system.slice/proftpd.service
             ├─418311 proftpd: (accepting connections)
             └─421778 proftpd: ftptest - 127.0.0.1: IDLE

8月 01 17:03:12 zsm systemd[1]: Starting ProFTPD FTP Server...
8月 01 17:03:12 zsm proftpd[418310]: Checking syntax of configuration file
8月 01 17:03:12 zsm systemd[1]: Started ProFTPD FTP Server.
8月 01 17:03:12 zsm proftpd[418311]: 2022-08-01 17:03:12,569 zsm proftpd[418311] 127.0.1.1: ProFTPD 1.3.8rc4 (devel) (built Thu Jul 28 2022 20:03:21 CST) standalone mode STARTUP
8月 01 17:05:43 zsm proftpd[421778]: 2022-08-01 17:05:43,613 zsm proftpd[421778] 127.0.1.1 (127.0.0.1[127.0.0.1]): FTP session opened.
8月 01 17:05:43 zsm proftpd[421778]: 2022-08-01 17:05:43,628 zsm proftpd[421778] 127.0.1.1 (127.0.0.1[127.0.0.1]): USER ftptest: Login successful.
5 总结
基本上把建立安全FTP服务器的流程都跑了一遍,将来扩展的事项有:
- 进一步配置证书秘钥,使客户端需要证书才能访问FTP服务器。
- 将来还会配置selinux权限,进一步实现最小权限原则。
- 在嵌入式Linux上实现安全proftpd
参考文献:
版权归原作者 机器未来 所有, 如有侵权,请联系我们删除。