
在上一个章节《[3] Flink大数据流式处理利剑: Flink的部署架构》 笔者提到了Flink的基本部署架构,这一个章节笔者就带领大家来安装一个最新的Flink集群。兵马未动粮草先行,所以首先要去Flink的官方网站上去下载Flink的安装包。Flink当前的最新版本是 1.14.3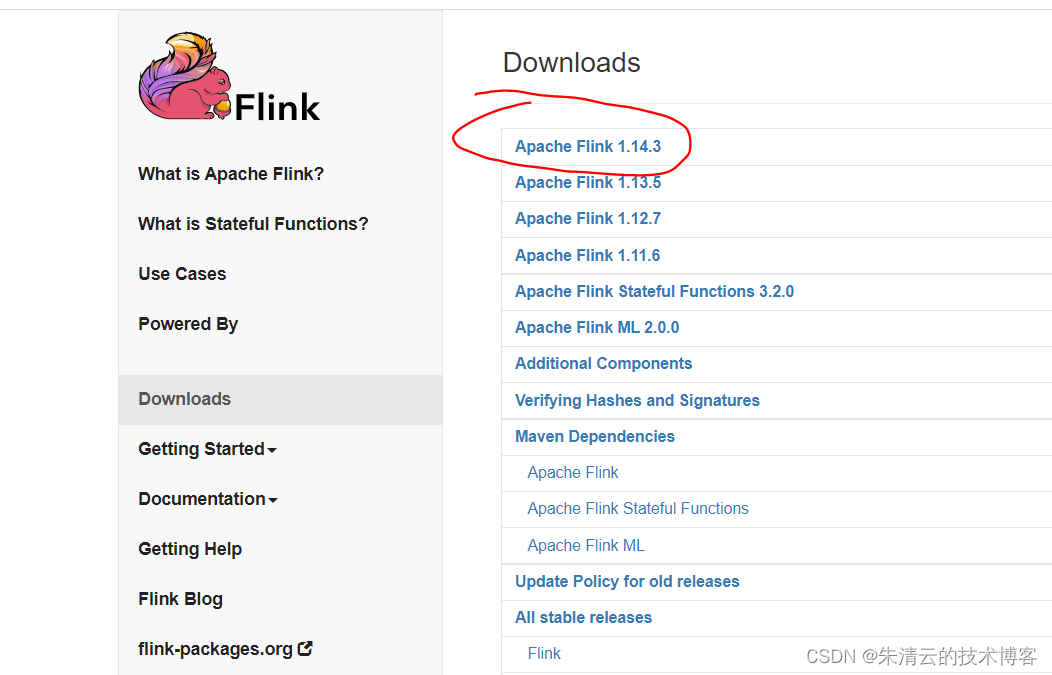
可以看到1.14.3 有两个版本,一个是运行在Scala2.11上面,一个是运行在Scala2.12上面;笔者就安装一个Scala2.12版本吧!下载地址:https://dlcdn.apache.org/flink/flink-1.14.3/flink-1.14.3-bin-scala_2.12.tgz。笔者在Linux CentOs 机器上运行下面的命令:
wget https://dlcdn.apache.org/flink/flink-1.14.3/flink-1.14.3-bin-scala_2.12.tgz --no-check-certificate

tar -vxf  flink-1.14.3-bin-scala_2.12.tgzls

cd flink-1.14.3

执行tree命令后,其目录文件结构如下:
.
├── bin
│   ├── bash-java-utils.jar
│   ├── config.sh
│   ├── find-flink-home.sh
│   ├── flink
│   ├── flink-console.sh
│   ├── flink-daemon.sh
│   ├── historyserver.sh
│   ├── jobmanager.sh
│   ├── kubernetes-jobmanager.sh
│   ├── kubernetes-session.sh
│   ├── kubernetes-taskmanager.sh
│   ├── pyflink-shell.sh
│   ├── sql-client.sh
│   ├── standalone-job.sh
│   ├── start-cluster.sh
│   ├── start-zookeeper-quorum.sh
│   ├── stop-cluster.sh
│   ├── stop-zookeeper-quorum.sh
│   ├── taskmanager.sh
│   ├── yarn-session.sh
│   └── zookeeper.sh
├── conf
│   ├── flink-conf.yaml
│   ├── log4j-cli.properties
│   ├── log4j-console.properties
│   ├── log4j.properties
│   ├── log4j-session.properties
│   ├── logback-console.xml
│   ├── logback-session.xml
│   ├── logback.xml
│   ├── masters
│   ├── workers
│   └── zoo.cfg
├── examples
│   ├── batch
│   │   ├── ConnectedComponents.jar
│   │   ├── DistCp.jar
│   │   ├── EnumTriangles.jar
│   │   ├── KMeans.jar
│   │   ├── PageRank.jar
│   │   ├── TransitiveClosure.jar
│   │   ├── WebLogAnalysis.jar
│   │   └── WordCount.jar
│   ├── gelly
│   │   └── flink-gelly-examples_2.12-1.14.3.jar
│   ├── python
│   │   ├── datastream
│   │   │   ├── event_time_timer.py
│   │   │   ├── __init__.py
│   │   │   ├── process_json_data.py
│   │   │   ├── state_access.py
│   │   │   └── word_count.py
│   │   └── table
│   │       ├── __init__.py
│   │       ├── mixing_use_of_datastream_and_table.py
│   │       ├── multi_sink.py
│   │       ├── pandas
│   │       │   ├── conversion_from_dataframe.py
│   │       │   ├── __init__.py
│   │       │   └── pandas_udaf.py
│   │       ├── process_json_data.py
│   │       ├── process_json_data_with_udf.py
│   │       ├── windowing
│   │       │   ├── __init__.py
│   │       │   ├── over_window.py
│   │       │   ├── session_window.py
│   │       │   ├── sliding_window.py
│   │       │   └── tumble_window.py
│   │       └── word_count.py
│   ├── streaming
│   │   ├── Iteration.jar
│   │   ├── SessionWindowing.jar
│   │   ├── SocketWindowWordCount.jar
│   │   ├── StateMachineExample.jar
│   │   ├── TopSpeedWindowing.jar
│   │   ├── Twitter.jar
│   │   ├── WindowJoin.jar
│   │   └── WordCount.jar
│   └── table
│       ├── AdvancedFunctionsExample.jar
│       ├── ChangelogSocketExample.jar
│       ├── GettingStartedExample.jar
│       ├── StreamSQLExample.jar
│       ├── StreamWindowSQLExample.jar
│       ├── UpdatingTopCityExample.jar
│       └── WordCountSQLExample.jar
├── lib
│   ├── flink-csv-1.14.3.jar
│   ├── flink-dist_2.12-1.14.3.jar
│   ├── flink-json-1.14.3.jar
│   ├── flink-shaded-zookeeper-3.4.14.jar
│   ├── flink-table_2.12-1.14.3.jar
│   ├── log4j-1.2-api-2.17.1.jar
│   ├── log4j-api-2.17.1.jar
│   ├── log4j-core-2.17.1.jar
│   └── log4j-slf4j-impl-2.17.1.jar
├── LICENSE
├── licenses
│   ├── LICENSE.antlr-java-grammar-files
│   ├── LICENSE.antlr-runtime
│   ├── LICENSE-aopalliance
│   ├── LICENSE.asm
│   ├── LICENSE.automaton
│   ├── LICENSE.base64
│   ├── LICENSE.bouncycastle
│   ├── LICENSE.google-auth-library-credentials
│   ├── LICENSE.grizzled-slf4j
│   ├── LICENSE-hdrhistogram
│   ├── LICENSE.icu4j
│   ├── LICENSE.influx
│   ├── LICENSE.janino
│   ├── LICENSE.javax.activation
│   ├── LICENSE.jaxb
│   ├── LICENSE.jdom
│   ├── LICENSE.jline
│   ├── LICENSE.jsr166y
│   ├── LICENSE.jzlib
│   ├── LICENSE.kryo
│   ├── LICENSE.minlog
│   ├── LICENSE.protobuf
│   ├── LICENSE.py4j
│   ├── LICENSE.pyrolite
│   ├── LICENSE-re2j
│   ├── LICENSE.reflections
│   ├── LICENSE.scala
│   ├── LICENSE.scopt
│   ├── LICENSE.slf4j-api
│   ├── LICENSE-stax2api
│   └── LICENSE.webbit
├── log
├── NOTICE
├── opt
│   ├── flink-azure-fs-hadoop-1.14.3.jar
│   ├── flink-cep_2.12-1.14.3.jar
│   ├── flink-cep-scala_2.12-1.14.3.jar
│   ├── flink-gelly_2.12-1.14.3.jar
│   ├── flink-gelly-scala_2.12-1.14.3.jar
│   ├── flink-oss-fs-hadoop-1.14.3.jar
│   ├── flink-python_2.12-1.14.3.jar
│   ├── flink-queryable-state-runtime-1.14.3.jar
│   ├── flink-s3-fs-hadoop-1.14.3.jar
│   ├── flink-s3-fs-presto-1.14.3.jar
│   ├── flink-shaded-netty-tcnative-dynamic-2.0.39.Final-14.0.jar
│   ├── flink-shaded-zookeeper-3.5.9.jar
│   ├── flink-sql-client_2.12-1.14.3.jar
│   ├── flink-state-processor-api_2.12-1.14.3.jar
│   └── python
│       ├── cloudpickle-1.2.2-src.zip
│       ├── py4j-0.10.8.1-src.zip
│       └── pyflink.zip
├── plugins
│   ├── external-resource-gpu
│   │   ├── flink-external-resource-gpu-1.14.3.jar
│   │   ├── gpu-discovery-common.sh
│   │   └── nvidia-gpu-discovery.sh
│   ├── metrics-datadog
│   │   └── flink-metrics-datadog-1.14.3.jar
│   ├── metrics-graphite
│   │   └── flink-metrics-graphite-1.14.3.jar
│   ├── metrics-influx
│   │   └── flink-metrics-influxdb-1.14.3.jar
│   ├── metrics-jmx
│   │   └── flink-metrics-jmx-1.14.3.jar
│   ├── metrics-prometheus
│   │   └── flink-metrics-prometheus-1.14.3.jar
│   ├── metrics-slf4j
│   │   └── flink-metrics-slf4j-1.14.3.jar
│   ├── metrics-statsd
│   │   └── flink-metrics-statsd-1.14.3.jar
│   └── README.txt
└── README.txt

26 directories, 146 files
其目录结构如下:
[root@localhost flink-1.14.3]# tree . -d.
├── bin
├── conf
├── examples
│   ├── batch
│   ├── gelly
│   ├── python
│   │   ├── datastream
│   │   └── table
│   │       ├── pandas
│   │       └── windowing
│   ├── streaming
│   └── table
├── lib
├── licenses
├── log
├── opt
│   └── python
└── plugins
    ├── external-resource-gpu
    ├── metrics-datadog
    ├── metrics-graphite
    ├── metrics-influx
    ├── metrics-jmx
    ├── metrics-prometheus
    ├── metrics-slf4j
    └── metrics-statsd

26 directories
然后执行,启动集群的命令:
[flink@localhost bin]# ./start-cluster.sh
Starting cluster.
Starting standalonesession daemon on host localhost.localdomain.
Starting taskexecutor daemon on host localhost.localdomain.
同一台机器上启动集群
默认情况,其会在本地启动1一个Job manager节点,三个task manager节点。验证的方式是用浏览器打开 http://127.0.0.1:8081/#/overview[如果没有安装在本机,请把127.0.0.1替换成相应的IP地址]
由此可以看到:
#1)只有 1个Job Manager(IP地址为127.0.0.1)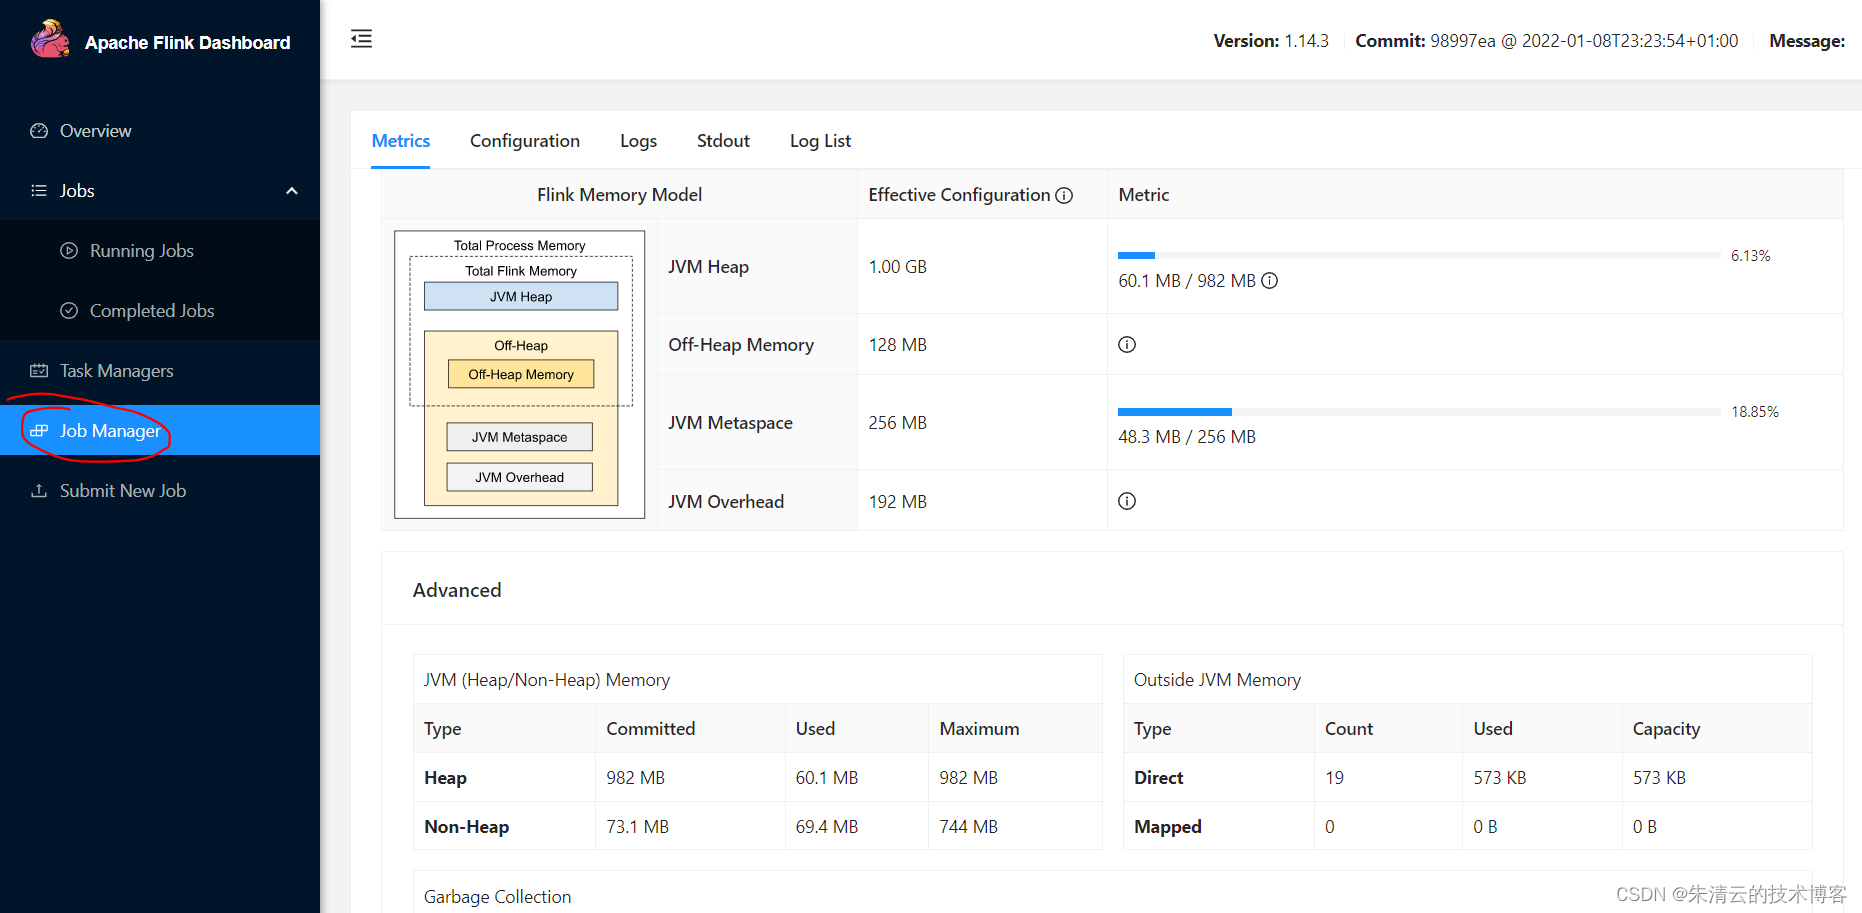
#2) 3个Task Manager(在同一台机器上,使用不同的端口)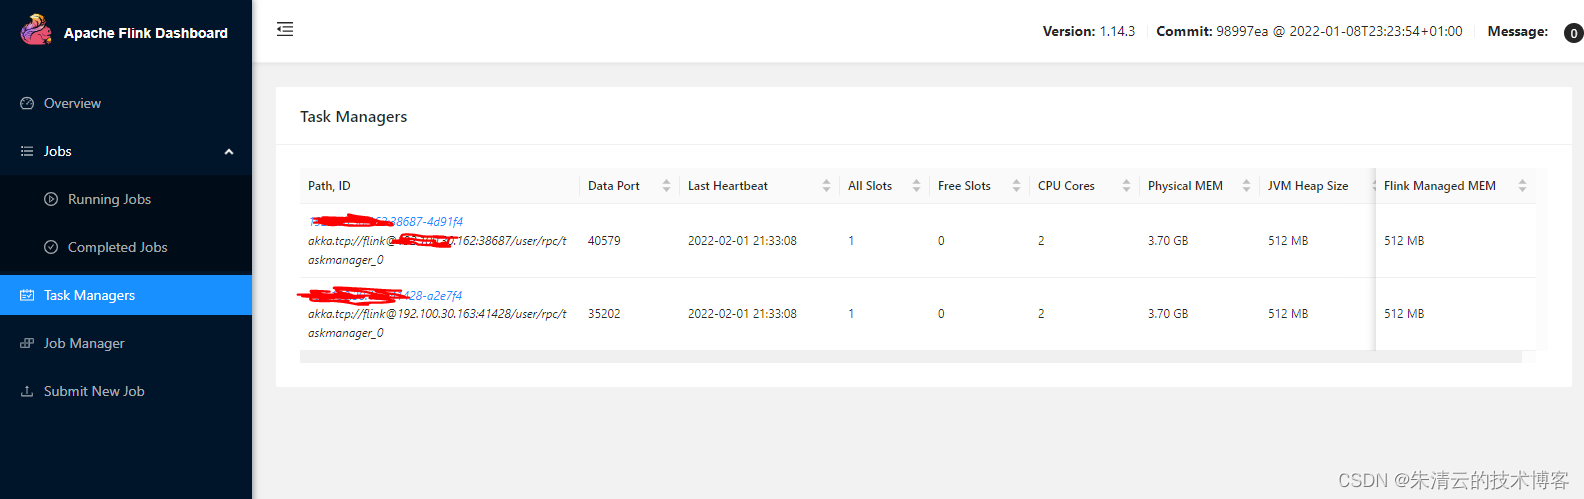
我们看到其有3个Task Manager节点和1个Job Manager节点在同一台服务器上(127.0.0.1,本机)
如果我们不想在同一台机器上安装这三台Flink的应用服务,那么我们应该怎么办?
不同台机器上启动集群
如果我们不想在同一台机器上安装这三台Flink的应用服务,假设我们有三台虚拟机,其IP地址如下:
- 192.168.1.100
- 192.168.1.101
- 192.168.1.101;
我们现在以192.168.1.100为Job manager(master)节点;192.168.1.101,192.168.1.102为Task Manager节点(Slave)节点;则其架构如下: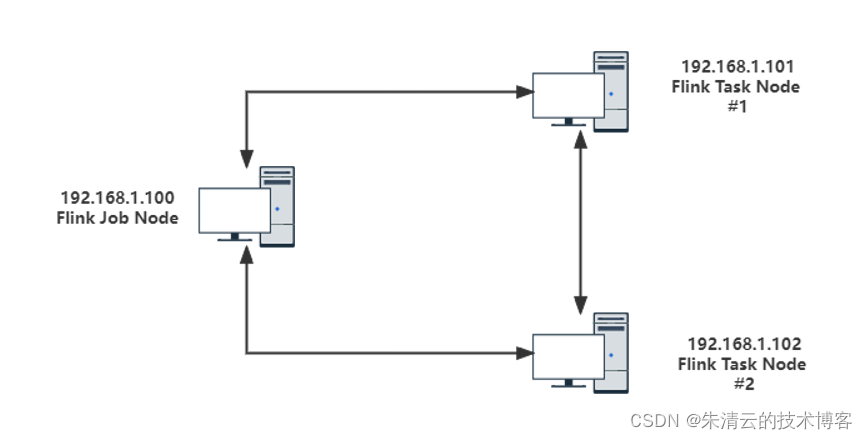
具体的配置步骤如下:
步骤1:修改<flink_home>\conf\flink-conf.yaml 文件
打开flink-conf.yaml文件,修改 jobmanager.rpc.address的地址为192.168.1.100,也就是192.168.1.100为master节点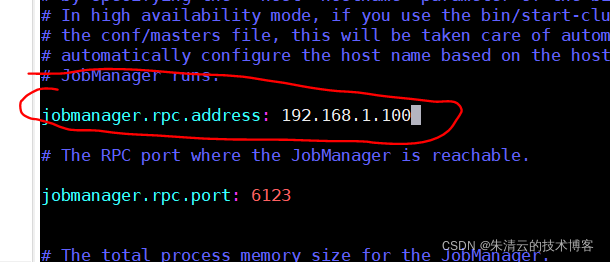
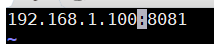
步骤2:修改<flink_home>\conf\master文件,把其地址修改为192.168.1.100:8081
步骤3:修改<flink_home>\conf\slave文件,在其里面添加2行TaskManager(Slave)的IP地址:
192.168.1.101
192.168.1.102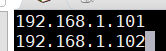
步骤4: 把上面的flink软件使用scp同步到192.168.1.101和192.168.1.102目录下
scp flink-1.14.3-bin-scala_2.12.tgz [email protected]:/opt/flink
scp flink-1.14.3-bin-scala_2.12.tgz [email protected]:/opt/flink
步骤5. 在各自的三个节点上的bin目录下面执行:start-cluster.sh
start-cluster.sh
注意在执行的过程中需要输入其他节点的密码。
步骤6:打开主节点的地址,可以看到安装集群安装成功。

如何保证Job Manager节点的高可用
上面的配置,能够保证Task Manager节点(Slave)节点高可用,但是Job Manager(Master)节点只有一个,如果Job Manager(Master)节点挂了,则整个集群都挂了;那么如何保证Job Manager(Master)节点的高可用呢?Flink给我们提供了两种不同的方式:
- 一种是ZooKeeper的方式 : Job Manager(Master)节点可以不用部署在K8S上
- 一种是直接借助K8S的特性:Job Manager(Master)节点必须部署在K8S上
 具体方式,请参考Flink HA
通过命令行在集群上运行一个例子
上面已经把Flink的集群搭建好了,下面来看如何运行一个例子。比如在Flink的安装包路径的examples文件夹下,有很多例子,咱们以SocketWindowWordCount.jar为例子,试跑一个。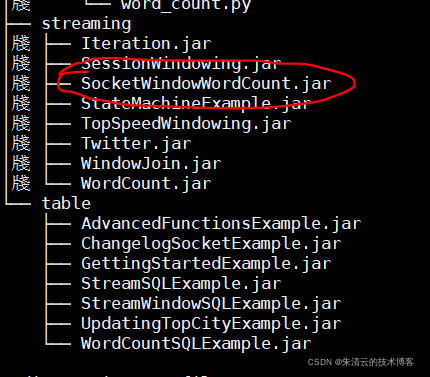
SocketWindowWordCount.jar的代码如下:
packageorg.apache.flink.streaming.examples.socket;importjava.lang.invoke.SerializedLambda;importorg.apache.flink.api.common.functions.FlatMapFunction;importorg.apache.flink.api.common.functions.ReduceFunction;importorg.apache.flink.api.java.utils.ParameterTool;importorg.apache.flink.streaming.api.datastream.DataStreamSource;importorg.apache.flink.streaming.api.datastream.SingleOutputStreamOperator;importorg.apache.flink.streaming.api.environment.StreamExecutionEnvironment;importorg.apache.flink.streaming.api.windowing.assigners.TumblingProcessingTimeWindows;importorg.apache.flink.streaming.api.windowing.assigners.WindowAssigner;importorg.apache.flink.streaming.api.windowing.time.Time;importorg.apache.flink.util.Collector;publicclassSocketWindowWordCount{publicstaticvoidmain(String[] args)throwsException{String hostname;int port;try{ParameterTool params =ParameterTool.fromArgs(args);
      hostname = params.has("hostname")? params.get("hostname"):"localhost";
      port = params.getInt("port");}catch(Exception e){System.err.println("No port specified. Please run 'SocketWindowWordCount --hostname <hostname> --port <port>', where hostname (localhost by default) and port is the address of the text server");System.err.println("To start a simple text server, run 'netcat -l <port>' and type the input text into the command line");return;}StreamExecutionEnvironment env =StreamExecutionEnvironment.getExecutionEnvironment();DataStreamSource dataStreamSource = env.socketTextStream(hostname, port,"\n");SingleOutputStreamOperator singleOutputStreamOperator = dataStreamSource.flatMap(newFlatMapFunction<String,WordWithCount>(){publicvoidflatMap(String value,Collector<SocketWindowWordCount.WordWithCount> out){for(String word : value.split("\\s"))
              out.collect(newSocketWindowWordCount.WordWithCount(word,1L));}}).keyBy(value -> value.word).window((WindowAssigner)TumblingProcessingTimeWindows.of(Time.seconds(5L))).reduce(newReduceFunction<WordWithCount>(){publicSocketWindowWordCount.WordWithCountreduce(SocketWindowWordCount.WordWithCount a,SocketWindowWordCount.WordWithCount b){returnnewSocketWindowWordCount.WordWithCount(a.word, a.count + b.count);}});
    singleOutputStreamOperator.print().setParallelism(1);
    env.execute("Socket Window WordCount");}publicstaticclassWordWithCount{publicString word;publiclong count;publicWordWithCount(){}publicWordWithCount(String word,long count){this.word = word;this.count = count;}publicStringtoString(){returnthis.word +" : "+this.count;}}}
- 步骤1
由上面的代码可知,其需要指定一个端口(我们假定是9999)去读取需要处理的数据流。
我们通过nc命令模拟一个Socker数据流:
yum installncnc -lk 9999
- 步骤2: 所以我们在192.168.1.100(master节点)的bin目录下,找到flink的客户端,然后执行下面的命令
./flink run -c org.apache.flink.streaming.examples.socket.SocketWindowWordCount ../examples/streaming/SocketWindowWordCount.jar --hostname 192.100.30.131 --port 9999

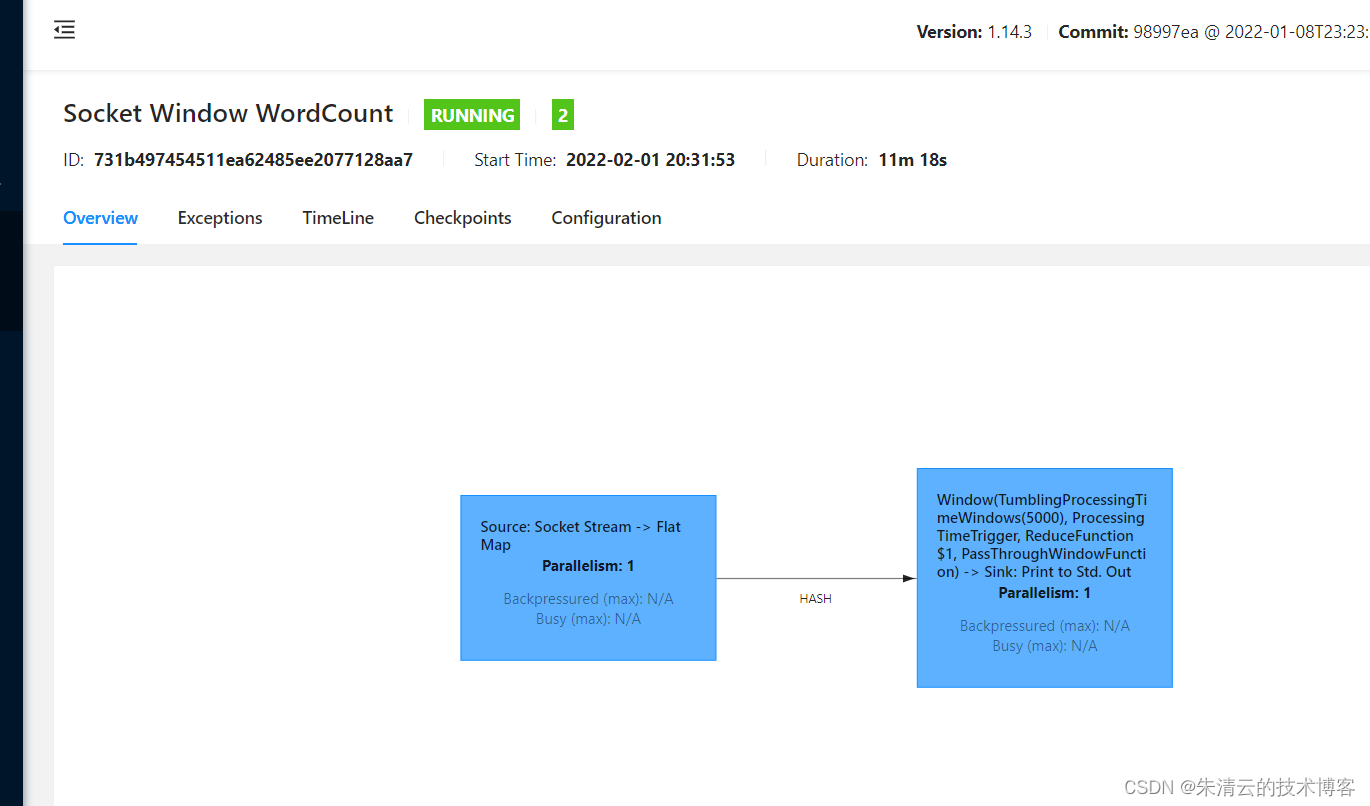
- 步骤3:登录到Web UI控制台 登录Web UI控制台后,我们将会看到已经部署的任务
- 步骤4:在nc控制台输入字符串,如下图:
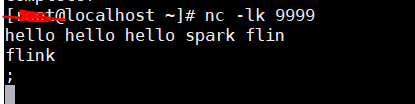 注意,其字符串以空格为区分。
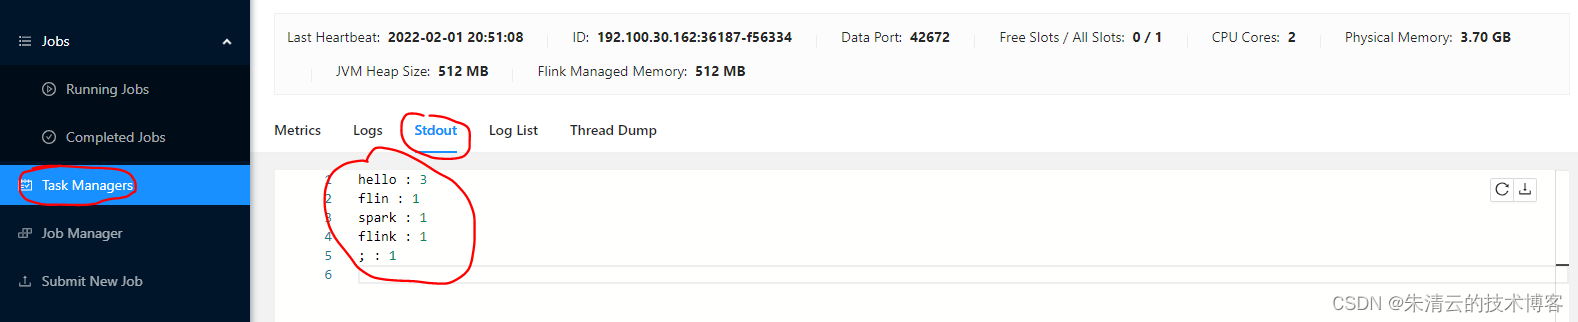
 - 步骤5:回到Flink UI控制台,查看结果 在Flink的UI控制台,点击Task Manger,找到 Free Slot值为0的节点,然后在stdout tab下可以看到其输出,如下:
- 步骤6 取消job 上面的测试完成后,我们可以取消当前job,可以点击Running Jobs --> Cancel Job
 这样在完成的Job列表里面就会有Cancel状态的Job
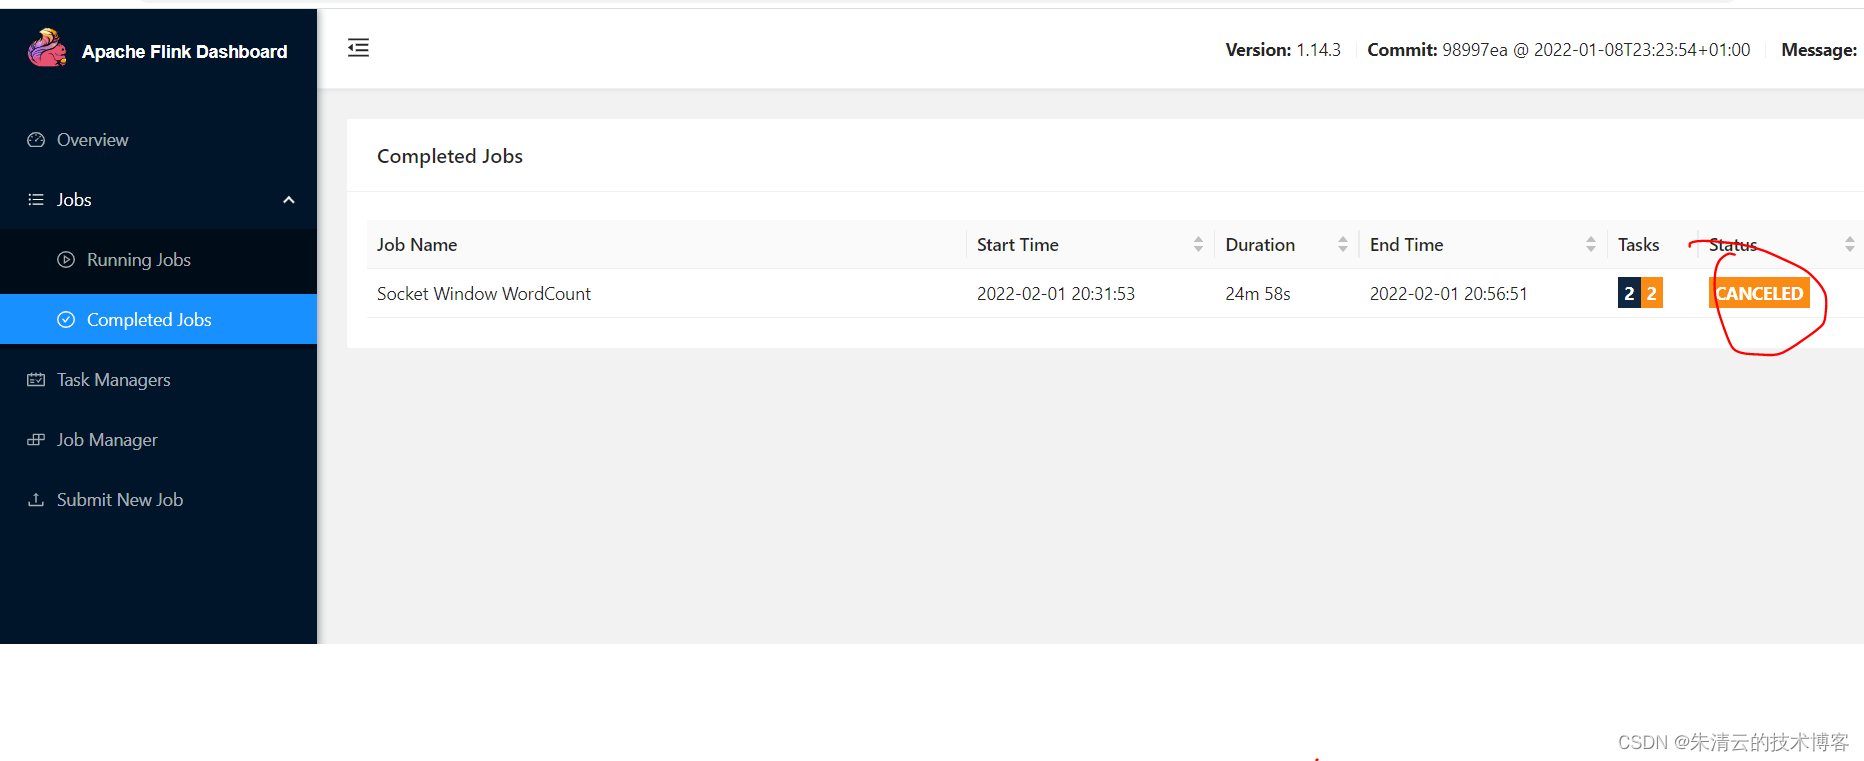
通过Flink Web管理界面在集群上运行一个例子
通过浏览器打开Flink的Web管理界面,在左边点击“Submit New Job”按钮,则可以看到一个可以直接上传Flink应用程序的按钮;输入响应的参数,就可以点击提交了,其效果和通过命令行的方式一模一样,笔者就不在赘述。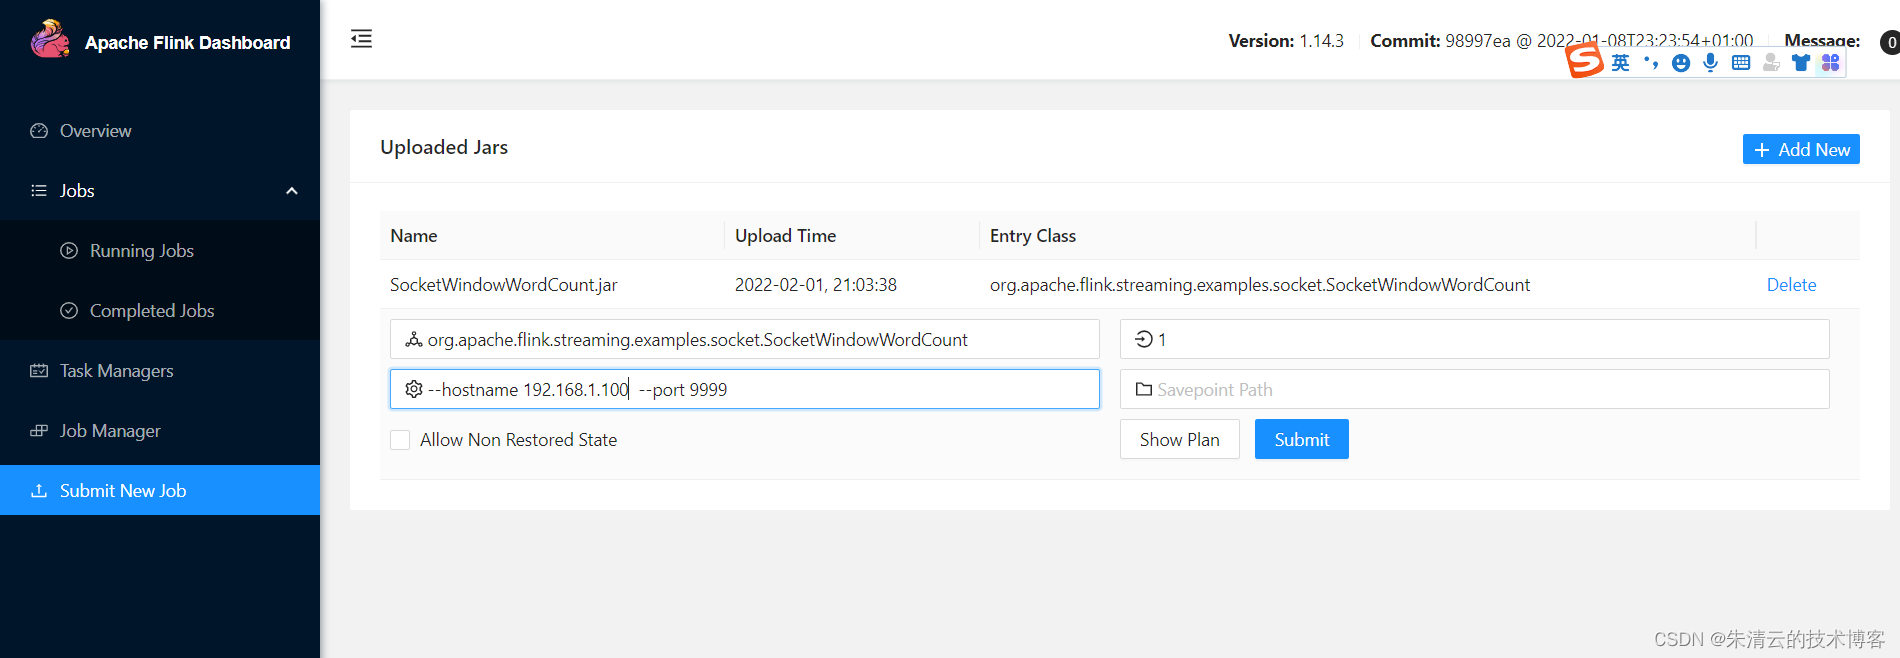
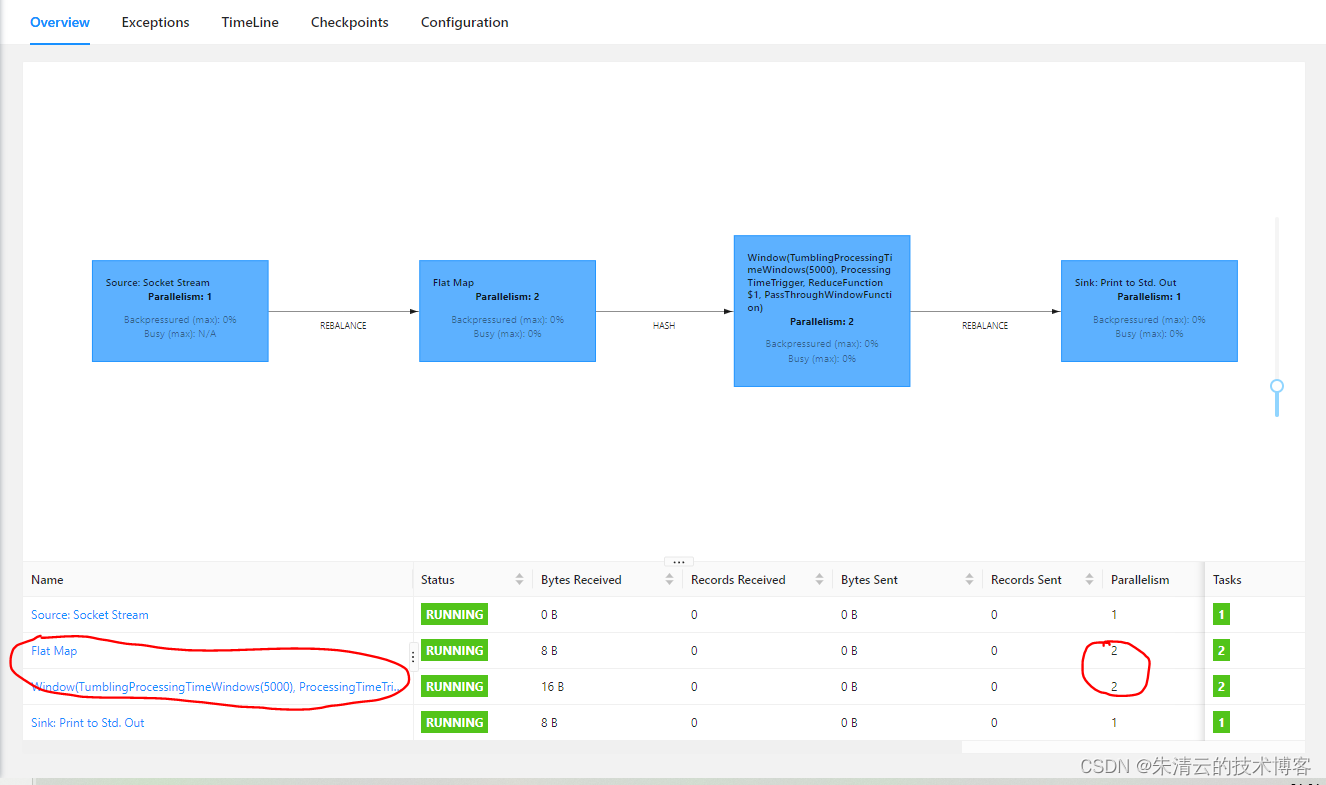
值得一提的是,其有一个并行度的参数(Parallelism),如果输入2个话,其将会有两个并发:
- FlatMap的处理
- Window窗口处理
总结
上面笔者总结了如何在一个机器上安装集群,以及在多个机器上安装集群;并提到了通过zookeeper可以让Flink集群的Master节点也保持高可用;最后演示了如何部署一个SocketWindowWordCount.jar的例子,并在Flink的Web UI上面观察其job的执行情况和输出,下一个章节笔者将会带领大家今日其具体的Flink的用法。
版权归原作者 朱清云的技术博客 所有, 如有侵权,请联系我们删除。