
2.8日学习打卡
目录:
一.springboot整合RabbitMQ

之前我们使用原生JAVA操作RabbitMQ较为繁琐,接下来我们使用
SpringBoot整合RabbitMQ,简化代码编写
创建SpringBoot项目,引入RabbitMQ起步依赖
<!-- RabbitMQ起步依赖 --><dependency><groupId>org.springframework.boot</groupId><artifactId>spring-boot-starteramqp</artifactId></dependency>
编写配置文件
spring:rabbitmq:host: 192.168.66.100
   port:5672username: jjy
   password: jjy
   virtual-host: /
# 日志格式logging:pattern:console:'%d{HH:mm:ss.SSS} %clr(%-5level) ---  [%-15thread] %cyan(%-50logger{50}):%msg%n'
SpringBoot整合RabbitMQ时,需要在配置类创建队列和交换机,
写法如下:
packagecom.jjy.springrabbitmqdemo;importorg.springframework.amqp.core.*;importorg.springframework.beans.factory.annotation.Qualifier;importorg.springframework.context.annotation.Bean;importorg.springframework.context.annotation.Configuration;@ConfigurationpublicclassRabbitConfig{privatefinalStringEXCHANGE_NAME="boot_topic_exchange";privatefinalStringQUEUE_NAME="boot_queue";//创建交换机@Bean("bootExchange")publicExchangegetExchange(){returnExchangeBuilder.topicExchange(EXCHANGE_NAME)//交换机类型.durable(true)//是否持久化.build();}//创建队列@Bean("bootQueue")publicQueuegetMessageQueue(){returnnewQueue(QUEUE_NAME);// 队列名}//交换机绑定队列@BeanpublicBindingbindMessageQueue(@Qualifier("bootExchange")Exchange exchange,@Qualifier("bootQueue")Queue queue){returnBindingBuilder.bind(queue).to(exchange).with("#.message.#").noargs();}}
SpringBoot整合RabbitMQ_编写生产者
SpringBoot整合RabbitMQ时,提供了工具类RabbitTemplate发送
消息,编写生产者时只需要注入RabbitTemplate即可发送消息。
packagecom.jjy.springrabbitmqdemo;importorg.junit.jupiter.api.Test;importorg.springframework.amqp.rabbit.core.RabbitTemplate;importorg.springframework.beans.factory.annotation.Autowired;importorg.springframework.boot.test.context.SpringBootTest;@SpringBootTestpublicclassTestProducer{//注入RabbitTemplate工具类@AutowiredprivateRabbitTemplate rabbitTemplate;@Test/**
     * 发送消息
     * 参数1:交换机
     * 参数2:路由key
     * 参数3:要发送的消息
     */publicvoidtestSendMessage(){
        rabbitTemplate.convertAndSend("boot_topic_exchange","message","双十一开始了!");}}
SpringBoot整合RabbitMQ_编写消费者
消费者
packagecom.jjy.rabbitmqcosspring.consumer;importorg.springframework.amqp.rabbit.annotation.RabbitListener;importorg.springframework.stereotype.Component;//消费者@ComponentpublicclassConsumer{//监听队列@RabbitListener(queues ="boot_queue")publicvoidlistenMessage(String message){System.out.println("监听的消息: "+message);}}
整合后的代码,就是不用自己去实例化(创建连接工厂,连接,信道);让spring容器来控制实例的创建到销毁。
代码的实现有生产者和消费者、还有配置类(创建交换机跟队列及其绑定操作),都独立为一个类(共3个类),yml文件中配置rabbitmq的一些属性。
Direct类型(默认,匹配发送)
它会把消息路由到那些binding key与routing key完全匹配的Queue中。
它是一个一对一的模型,一条消息一定会被发到指定的一个队列(完全匹配)。
配置代码
importorg.springframework.amqp.core.Binding;importorg.springframework.amqp.core.BindingBuilder;importorg.springframework.amqp.core.TopicExchange;importorg.springframework.amqp.core.Queue;importorg.springframework.context.annotation.Bean;importorg.springframework.context.annotation.Configuration;@ConfigurationpublicclassRabbitDirectConfig{@BeanpublicQueuedirectQueue(){//参数介绍//1.队列名 2.是否持久化 3.是否独占 4.自动删除 5.其他参数returnnewQueue("directQueue-One",false,false,false,null);}@BeanpublicQueuedirectQueue2(){//参数介绍//1.队列名 2.是否持久化 3.是否独占 4.自动删除 5.其他参数returnnewQueue("directQueue-Two",false,false,false,null);}@BeanpublicDirectExchangedirectExchange(){//参数介绍//1.交换器名 2.是否持久化 3.自动删除 4.其他参数returnnewDirectExchange("MqSendService-One",false,false,null);}@BeanpublicBindingbingExchange(){returnBindingBuilder.bind(directQueue())//绑定队列.to(directExchange())//队列绑定到哪个交换器.with("One");//绑定路由key,必须指定}@BeanpublicBindingbingExchange2(){returnBindingBuilder.bind(directQueue2())//绑定队列.to(directExchange())//队列绑定到哪个交换器.with("Two");//绑定路由key,必须指定}}
Topic类型(拓展匹配发送)
它是Direct类型的一种扩展,提供灵活的匹配规则。
- routing key为一个句点号 " . " 分隔的字符串(我们将被句点号“. ”分隔开的每一段独立的字符串称为一个单词),如"One.Two"
- binding key与routing key一样也是句点号 " . " 分隔的字符串
- binding key中可以存在两种特殊字符 " * " 与 " # " ,用于做模糊匹配,其中“*”用于匹配一个单词,“#”用于匹配多个单词(可以是零个)
importorg.springframework.amqp.core.Binding;importorg.springframework.amqp.core.BindingBuilder;importorg.springframework.amqp.core.TopicExchange;importorg.springframework.amqp.core.Queue;importorg.springframework.context.annotation.Bean;importorg.springframework.context.annotation.Configuration;@ConfigurationpublicclassRabbitTopicConfig{@BeanpublicQueuetopicQueue(){//参数介绍//1.队列名 2.是否持久化 3.是否独占 4.自动删除 5.其他参数returnnewQueue("topicQueue-One",false,false,false,null);}@BeanpublicQueuetopicQueue2(){//参数介绍//1.队列名 2.是否持久化 3.是否独占 4.自动删除 5.其他参数returnnewQueue("topicQueue-Two",false,false,false,null);}@BeanpublicTopicExchangetopicExchange(){//参数介绍//1.交换器名 2.是否持久化 3.自动删除 4.其他参数returnnewTopicExchange("Topic-Ex",false,false,null);}@BeanpublicBindingbingExchange(){returnBindingBuilder.bind(topicQueue())//绑定队列.to(topicExchange())//队列绑定到哪个交换器.with("*.Two.*");//路由key,必须指定}@BeanpublicBindingbingExchange2(){returnBindingBuilder.bind(topicQueue2())//绑定队列.to(topicExchange())//队列绑定到哪个交换器.with("#");//路由key,必须指定}}
Fanout 类型(广播发送)
它会把所有发送到该Exchange的消息路由到所有与它绑定的Queue中。
它是一种一对多的类型,无法指定Binding Key,发送的一条消息会被发到绑定的所有队列。
配置代码
importorg.springframework.amqp.core.*;importorg.springframework.context.annotation.Bean;importorg.springframework.context.annotation.Configuration;@ConfigurationpublicclassRabbitFanoutConfig{@BeanpublicQueuefanoutQueue(){//参数介绍//1.队列名 2.是否持久化 3.是否独占 4.自动删除 5.其他参数returnnewQueue("fanoutQueue-One",false,false,false,null);}@BeanpublicQueuefanoutQueue2(){//参数介绍//1.队列名 2.是否持久化 3.是否独占 4.自动删除 5.其他参数returnnewQueue("fanoutQueue-Two",false,false,false,null);}@BeanpublicFanoutExchangefanoutExchange(){//参数介绍//1.交换器名 2.是否持久化 3.自动删除 4.其他参数returnnewFanoutExchange("Fanout-Ex",false,false,null);}@BeanpublicBindingbingExchange(){returnBindingBuilder.bind(fanoutQueue())//绑定队列.to(fanoutExchange());//队列绑定到哪个交换器}@BeanpublicBindingbingExchange2(){returnBindingBuilder.bind(fanoutQueue())//绑定队列.to(fanoutExchange());//队列绑定到哪个交换器}}
Headers(键值对匹配,不常用)
headers类型的Exchange不依赖于routing key与binding key的匹配规则来路由消息,而是根据发送的消息内容中的headers属性进行匹配。
在绑定Queue与Exchange时指定一组键值对;当消息发送到ExchangeRabbitMQ会取到该消息的headers(也是一个键值对的形式),对比其中的键值对是否完全匹配Queue与Exchange绑定时指定的键值对;如果完全匹配则消息会路由到该Queue,否则不会路由到该Queue。
该类型不常用,暂不提供代码。
Message(消息)
当执行诸如 basicPublish() 之类的操作时,内容作为字节数组参数传递,而其他属性作为单独的参数传入。
publicclassMessage{privatefinalMessageProperties messageProperties;privatefinalbyte[] body;publicMessage(byte[] body,MessageProperties messageProperties){this.body = body;this.messageProperties = messageProperties;}publicbyte[]getBody(){returnthis.body;}publicMessagePropertiesgetMessageProperties(){returnthis.messageProperties;}...}
MessageProperties 接口定义了几个常见的属性,例如“messageId”“timestamp”、“contentType”等等。 还可以通过调用 setHeader(String key, Object value) 方法扩展这些属性
二. 消息的可靠性投递

RabbitMQ消息投递的路径为:
生产者 —> 交换机 —> 队列 —> 消费者
在RabbitMQ工作的过程中,每个环节消息都可能传递失败,那么RabbitMQ是如何监听消息是否成功投递的呢?
- 确认模式(confirm)可以监听消息是否从生产者成功传递到交换机。
- 退回模式(return)可以监听消息是否从交换机成功传递到队列。
- 消费者消息确认(Consumer Ack)可以监听消费者是否成功处理消息。
三种模式刚好监听完RabbitMQ的一整套流程。即我们能够由这三种模式得到消息的传递及处理的结果。
确认模式(confirm)

确认模式(confirm)可以监听消息是否从生产者成功传递到交换机
生产者配置文件开启确认模式
rabbitmq:host: 192.168.66.100
   port:5672username: jjy
   password: jjy
   virtual-host: /
    # 开启确认模式publisher-confirm-type: correlated
packagecom.jjy.rabbitproducer;importorg.springframework.amqp.core.*;importorg.springframework.beans.factory.annotation.Qualifier;importorg.springframework.context.annotation.Bean;importorg.springframework.context.annotation.Configuration;@ConfigurationpublicclassRabbitmqConfig{privatefinalStringEXCHNAGE_NAME="my_topic_exchange";privatefinalStringQUEUE_NAME="my_queue";@Bean("bootExchange")publicExchangegetExchange(){returnExchangeBuilder.topicExchange(EXCHNAGE_NAME)//交换机类型.durable(true).build();}// 2.创建队列@Bean("bootQueue")publicQueuegetMessageQueue(){returnQueueBuilder.durable(QUEUE_NAME)// 队列持久化.build();}@BeanpublicBindingbindMessageQueue(@Qualifier("bootExchange")Exchange exchange,@Qualifier("bootQueue")Queue queue){returnBindingBuilder.bind(queue).to(exchange).with("my_routing").noargs();}}
@SpringBootTestpublicclassProduceTest{@AutowiredprivateRabbitTemplate rabbitTemplate;@TestpublicvoidsendMessage(){// 定义确认模式的回调方法,消息向交换机发送后会调用confirm方法
        rabbitTemplate.setConfirmCallback(newRabbitTemplate.ConfirmCallback(){/**
             * 被调用的回调方法
             * @param correlationData 相关配置信息
             * @param ack 交换机是否成功收到了消息
             * @param cause 失败原因
             */@Overridepublicvoidconfirm(CorrelationData correlationData,boolean ack,String cause){if(ack){System.out.println("confirm接受成功!");}else{System.out.println("confirm接受失败,原因为:"+cause);// 做一些处理。}}});

        rabbitTemplate.convertAndSend("my_topic_exchange","my_routing","send message...");}}
退回模式(return)
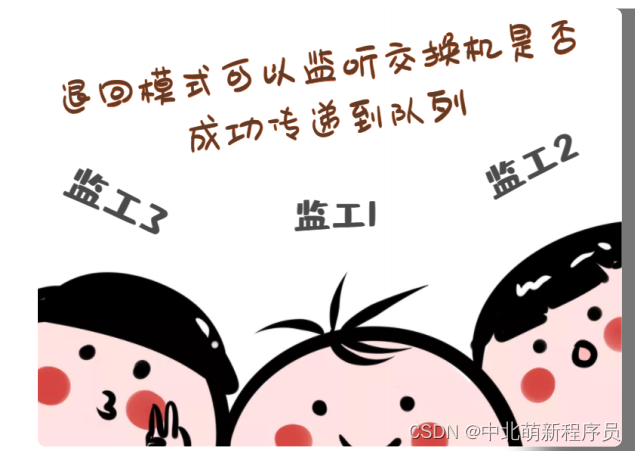
退回模式(return)可以监听消息是否从交换机成功传递到队列,
使用方法如下:
生产者配置文件开启退回模式
spring:
 rabbitmq:
   host:192.168.66.100
   port:5672
   username: jjy
   password: jjy
   virtual-host:/
    # 开启确认模式
   publisher-confirm-type: correlated
    # 开启回退模式
   publisher-returns:true
packagecom.jjy.rabbitproducer;importorg.springframework.amqp.core.*;importorg.springframework.beans.factory.annotation.Qualifier;importorg.springframework.context.annotation.Bean;importorg.springframework.context.annotation.Configuration;@ConfigurationpublicclassRabbitmqConfig{privatefinalStringEXCHNAGE_NAME="my_topic_exchange";privatefinalStringQUEUE_NAME="my_queue";@Bean("bootExchange")publicExchangegetExchange(){returnExchangeBuilder.topicExchange(EXCHNAGE_NAME)//交换机类型.durable(true).build();}// 2.创建队列@Bean("bootQueue")publicQueuegetMessageQueue(){returnQueueBuilder.durable(QUEUE_NAME)// 队列持久化.build();}@BeanpublicBindingbindMessageQueue(@Qualifier("bootExchange")Exchange exchange,@Qualifier("bootQueue")Queue queue){returnBindingBuilder.bind(queue).to(exchange).with("my_routing").noargs();}}
@TestpublicvoidtestReturn(){// 定义退回模式的回调方法。交换机发送到队列失败后才会执行returnedMessage方法
        rabbitTemplate.setReturnsCallback(newRabbitTemplate.ReturnsCallback(){/**
             * @param returned 失败后将失败信息封装到参数中
             */@OverridepublicvoidreturnedMessage(ReturnedMessage returned){System.out.println("消息对象:"+returned.getMessage());System.out.println("错误码:"+returned.getReplyCode());System.out.println("错误信息:"+returned.getReplyText());System.out.println("交换机:"+returned.getExchange());System.out.println("路由键:"+returned.getRoutingKey());}});
        rabbitTemplate.convertAndSend("my_topic_exchange","my_routing1","send message...");}
消费者消息确认(Ack)

在RabbitMQ中,消费者接收到消息后会向队列发送确认签收的消息,只有确认签收的消息才会被移除队列。这种机制称为消费者消息确认(Consumer Acknowledge,简称Ack)。类似快递员派送快递也需要我们签收,否则一直存在于快递公司的系统中。
消息分为自动确认和手动确认。自动确认指消息只要被消费者接收到,无论是否成功处理消息,则自动签收,并将消息从队列中移除。但是在实际开发中,收到消息后可能业务处理出现异常,那么消息就会丢失。此时需要设置手动签收,即在业务处理成功再通知签收消息,如果出现异常,则拒签消息,让消息依然保留在队列当
中。
- 自动确认:spring.rabbitmq.listener.simple.acknowledge=“none”
- 手动确认:spring.rabbitmq.listener.simple.acknowledge=“manual”
消费者配置开启手动签收
spring:rabbitmq:host: 192.168.0.162
   port:5672username: itbaizhan
   password: itbaizhan
   virtual-host: /
    # 开启手动签收listener:simple:acknowledge-mode: manual
packagecom.jjy.rabbitconsumer;importcom.rabbitmq.client.Channel;importorg.springframework.amqp.core.Message;importorg.springframework.amqp.rabbit.annotation.RabbitListener;importorg.springframework.stereotype.Component;importjava.io.IOException;@ComponentpublicclassAckConsumer{//    @RabbitListener(queues = "my_queue")//    public void listenMessage(String Mesage){//        int i=1/0;//        System.out.println("成功接收到消息:"+Mesage);//    }//@RabbitListener(queues = "my_queue")publicvoidlistenMessage(Message message,Channel channel)throwsInterruptedException,IOException{//消息投递序号,消息每次投递该值都会+1long deliveryTag = message.getMessageProperties().getDeliveryTag();try{int i=1/0;System.out.println("成功接收到消息:"+message);// 签收消息/**
         * 参数1:消息投递序号
         * 参数2:是否一次可以签收多条消息
         */
        channel.basicAck(deliveryTag,true);}catch(Exception e){System.out.println("消息消费失败!");Thread.sleep(2000);// 拒签消息/**
         * 参数1:消息投递序号
         * 参数2:是否一次可以拒签多条消息
         * 参数3:拒签后消息是否重回队列
         */
        channel.basicNack(deliveryTag,true,true);}}}
三.RabbitMQ高级特性
消费端限流
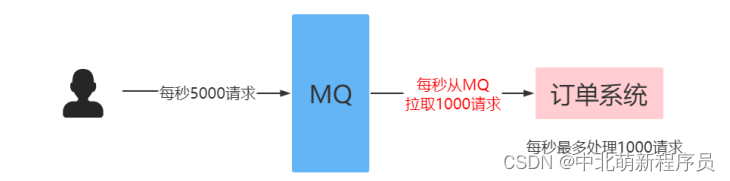
之前我们讲过MQ可以对请求进行“削峰填谷”,即通过消费端限流的方式限制消息的拉取速度,达到保护消费端的目的。
消费端限流的写法如下:
1 生产者批量发送消息
@TestpublicvoidtestSendBatch(){// 发送十条消息for(int i =0; i <10; i++){

rabbitTemplate.convertAndSend("my_topic_e
xchange", "my_routing", "send
message..."+i);}}
2 消费端配置限流机制
spring:rabbitmq:host: 192.168.66.100
   port:5672username: jjy
   password: jjy
   virtual-host: /
   listener:simple:# 限流机制必须开启手动签收acknowledge-mode: manual
        # 消费端最多拉取5条消息消费,签收后不满5
条才会继续拉取消息。
       prefetch:5
3.消费者监听队列
@ComponentpublicclassOosConsimer{//@RabbitListener(queues ="my_queue")publicvoidlistenMessage(Message message,Channel channel)throwsIOException,InterruptedException{// 1.获取消息System.out.println(newString(message.getBody()));// 2.业务处理Thread.sleep(3000);//3.签收long deliveryTag = message.getMessageProperties().getDeliveryTag();
       channel.basicAck(deliveryTag,true);}}
就是说从生产端发送过来的消息,在队列等待消费端接收,如果消费端处理消息业务的速度相对较慢,积累的消息过多从而处理不过来(资源耗尽),会导致系统性能降低或瘫痪。
因为消费端每秒处理消息的条数有限,所以我们需要在消费端进行一个限流,故而限制了队列消息的投递。
即消费端限流也就是限制队列投递到消费端的流,也可以说是在队列与消费端之间进行一个限流。
利用限流实现不公平分发

在RabbitMQ中,多个消费者监听同一条队列,则队列默认采用的轮询分发。但在某种场景下这种策略并不是很好,例如消费者1处理任务的速度非常快,而其他消费者处理速度却很慢。此时如果采用公平分发,则消费者1有很大一部分时间处于空闲状态。此时可以采用不公平分发,即谁处理的快,谁处理的消息多。
公平分发则不能在yml文件中设置限流(prefetch),公平分发即给多个消费者平分消息进行消费。这样会导致处理快的消费者在等待,故而浪费资源,降低性能。
不公平分发则需要在yml文件中设置限流(prefetch),并且prefetch: 1(即设置为1);不公平分发即每次拉取一条消息,谁处理得快就继续处理,这样可以极大的节约资源,从而提高性能。
1 生产者批量发送消息
@TestpublicvoidtestSendBatch(){// 发送十条消息for(int i =0; i <10; i++){

rabbitTemplate.convertAndSend("my_topic_e
xchange", "my_routing", "send
message..."+i);}}
2 消费端配置不公平分发
spring:rabbitmq:host: 192.168.66.100
   port:5672username: jjy
   password: jjy
   virtual-host: /
   listener:simple:# 限流机制必须开启手动签收acknowledge-mode: manual
        # 消费端最多拉取1条消息消费,这样谁处理
的快谁拉取下一条消息,实现了不公平分发
       prefetch:1
3 编写两个消费者
@ComponentpublicclassUnfairConsumer{// 消费者1@RabbitListener(queues ="my_queue")publicvoidlistenMessage1(Message message,Channel channel)throwsException{//1.获取消息System.out.println("消费者1:"+newString(message.getBody(),"UTF-8"));//2. 处理业务逻辑Thread.sleep(500);// 消费者1处理快//3. 手动签收
        channel.basicAck(message.getMessageProperties().getDeliveryTag(),true);// 消费者2@RabbitListener(queues ="my_queue")publicvoidlistenMessage2(Message
        message,Channel channel)throwsException{//1.获取消息System.out.println("消费者2:"+newString(message.getBody(),"UTF-8"));//2. 处理业务逻辑Thread.sleep(3000);// 消费者2处理慢//3. 手动签收

            channel.basicAck(message.getMessageProper
                    ties().getDeliveryTag(),true);}}
消息存活时间

RabbitMQ可以设置消息的存活时间(Time To Live,简称TTL),当消息到达存活时间后还没有被消费,会被移出队列。RabbitMQ可以对队列的所有消息设置存活时间,也可以对某条消息设置存活时间
设置队列所有消息存活时间
就是说需要在配置类(RabbitConfig)中设置队列所有消息的存活时间;
returnQueueBuilder.durable(QUEUE_NAME)//队列持久化.ttl(10000)//设置队列的所有消息存活10s.build();
即在创建bean队列时,就要设置队列所有消息的存活时间。
**设置某条消息的存活时间 **
就是说只需要在发送的时候指定它的存活时间即可。
实现比较稍微麻烦一点,创建消息属性并设置存活时间,然后创建消息对象,消息对象 将消息属性作为参数,并且传入发送的消息,最后再将消息对象作为参数传给交换机,即可实现对单条消息设置存活时间。
//发送消息,并设置该消息的存活时间@TestpublicvoidtestSendMessage(){//1.创建消息属性MessageProperties messageProperties =newMessageProperties();//2.设置存活时间
        messageProperties.setExpiration("10000");//3.创建消息对象Message message =newMessage("sendMessage...".getBytes(),messageProperties);//4.发送消息
        rabbitTemplate.convertAndSend("my_topic_exchange1","my_routing",message);}
若设置中间的消息的存活时间,当过期时,该消息不会被移除,但是该消息已经不会被消费了,需要等到该消息到队里顶端才会被移除。
因为队列是头出,尾进,故而要移除它需要等到它在顶端时才可以。
在队列设置存活时间,也在单条消息设置存活时间,则以时间短的为准。
消息过期后,并不会马上移除消息,只有消息消费到队列顶
端时,才会移除该消息。
@TestpublicvoidtestSendMessage2(){for(int i =0; i <10; i++){if(i ==5){// 1.创建消息属性MessageProperties messageProperties =newMessageProperties();// 2.设置存活时间

                messageProperties.setExpiration("10000 ");// 3.创建消息对象Message message =newMessage(("send message..."+ i).getBytes(), messageProperties);// 4.发送消息

                rabbitTemplate.convertAndSend("my_topi c_exchange","my_routing", message);}else{
                rabbitTemplate.convertAndSend("my_topi c_exchange","my_routing","send message..."+ i);}}}
在以上案例中,i=5的消息才有过期时间,10s后消息并没有马上被移除,但该消息已经不会被消费了,当它到达队列顶端时会被移除。
优先级队列
假设在电商系统中有一个订单催付的场景,即客户在一段时间内未付款会给用户推送一条短信提醒,但是系统中分为大型商家和小型商家。比如像苹果,小米这样大商家一年能给我们创造很大的利润,所以在订单量大时,他们的订单必须得到优先处理,此时就需要为不同的消息设置不同的优先级,此时我们要使用优先级队列
优先级队列用法如下:
1 创建队列和交换机
@ConfigurationpublicclassRabbitmqConfig3{privatefinalStringEXCHANGE_NAME="priority_exchange";privatefinalStringQUEUE_NAME="priority_queue";@Bean(EXCHANGE_NAME)publicExchangepriorityExchange(){returnExchangeBuilder.topicExchange(EXCHANGE_NAME)//交换机类型.durable(true)//是否持久化.build();}@Bean(QUEUE_NAME)publicQueueproducerQueue(){returnQueueBuilder.durable(QUEUE_NAME)//队列持久化//设置队列的最大优先级,最大可以设置到255,官网推荐不要超过10,,如果设置太高比较浪费资源.maxPriority(10).build();}@BeanpublicBindingbindPriority(@Qualifier(EXCHANGE_NAME)Exchange exchange,@Qualifier(QUEUE_NAME)Queue queue){returnBindingBuilder.bind(queue).to(exchange).with("my_routing").noargs();}}
2 编写生产者
@TestpublicvoidtestPriority(){for(int i =0; i <10; i++){if(i ==5){// i为5时消息的优先级较高MessageProperties messageProperties =newMessageProperties();
                messageProperties.setPriority(9);Message message =newMessage(("send message..."+ i).getBytes(StandardCharsets.UTF_8), messageProperties);
                rabbitTemplate.convertAndSend("priority_exchange","my_routing", message);}else{
                rabbitTemplate.convertAndSend("priority_exchange","my_routing","send message..."+ i);}}}
3 编写消费者
@ComponentpublicclassPriorityConsumer{@RabbitListener(queues ="priority_queue")publicvoidlistenMessage(Message message,Channel channel)throwsIOException{System.out.println(newString(message.getBody(),"utf-8"));//手动签收
        channel.basicAck(message.getMessageProperties().getDeliveryTag(),true);}}
如果我的内容对你有帮助,请点赞,评论,收藏。创作不易,大家的支持就是我坚持下去的动力!
版权归原作者 中北萌新程序员 所有, 如有侵权,请联系我们删除。