为通道部署智能合约Hyperledger Fabric教程–部署Fabric智能合约
在HyperledgerFabric中,智能合约部署在称为链码的包中。想要验证交易或查询分类账的组织需要在其peer节点上安装链码。在加入通道的peer节点上安装链码后,通道成员可以将链码部署到通道,并使用链码中的智能合约在通道分类账上创建或更新资产。
链码使用一个称为Fabric chaincode lifecycle的过程部署到通道。Fabric链码生命周期允许多个组织在链码可用之前就其操作方式达成一致。本教程学习如何使用peer lifecycle chaincode命令将链码部署到Fabric测试网络的通道上。一旦理解了这些命令,就可以使用本教程中的步骤将自己的链码部署到测试网络,或将链码部署到生产网络。
(1)启动网络
在
~/github.com/hyperledger/fabric-samples/test-network
目录下执行命令:
./network.sh up createChannel
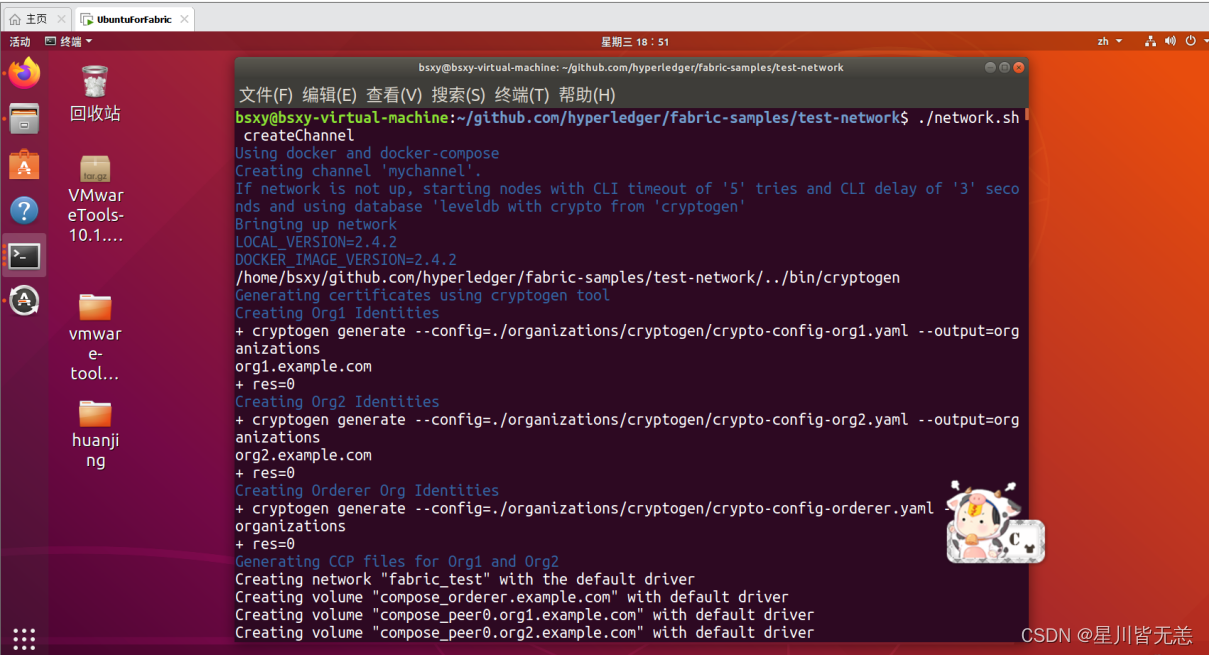
(2)打包智能合约(JavaScript)
我们需要对链码进行打包,然后才能将其安装到我们的peer节点上。如果要安装用Go、Java或JavaScript编写的智能合约,则步骤不同。
在打包链码之前,我们需要安装链码依赖项,另打开一个终端,进入:
~/github.com/hyperledger/fabric-samples/chaincode/fabcar/javascript/
执行:
source /etc/profile #这一步骤将node命令放入环境变量中
依赖项列在package.json文件中,可以找到下面显示的依赖项部分:
package.json文件将Fabric Contract类导入。你可以打开lib/fabcar,在文本编辑器中查看
fabcar.js
文件。
要安装智能合约依赖项,请从fabcar/javascript目录运行以下命令:
npminstall
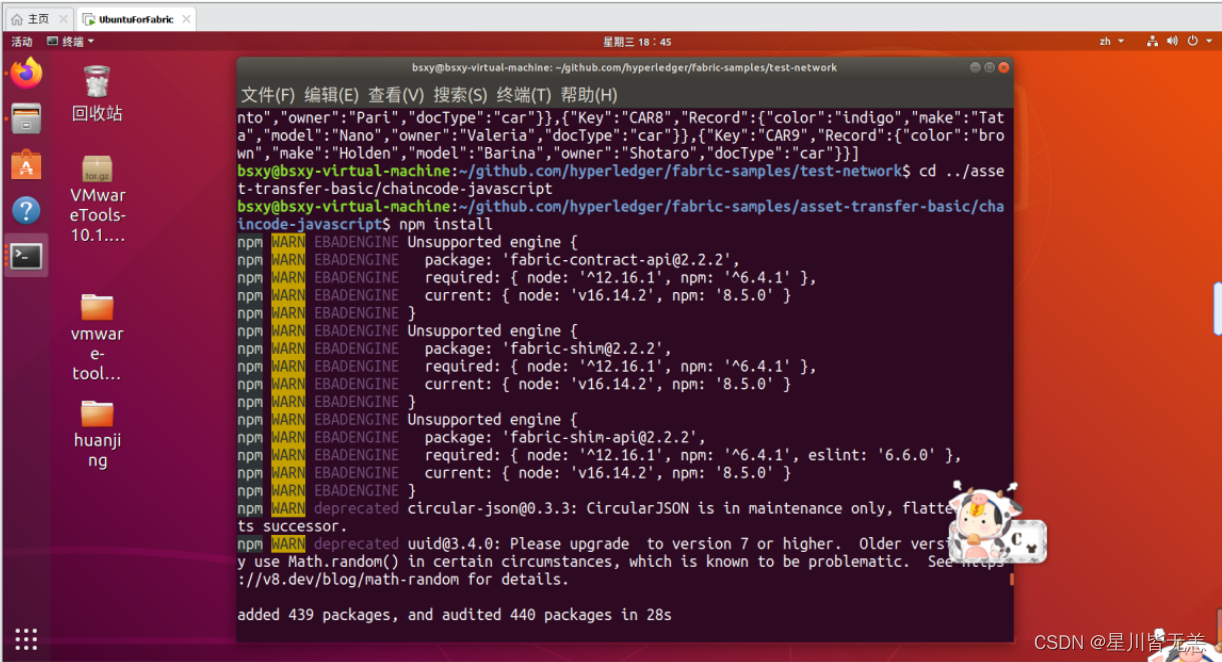
如果命令成功执行,JavaScript包将安装在node_modules文件夹中。
有了依赖项,就可以创建chaincode包了,回到另一个终端,执行:
exportPATH=${PWD}/../bin:$PATHexportFABRIC_CFG_PATH=$PWD/../config/   #这个环境变量指定配置文件的位置
peer lifecycle chaincode package fabcar.tar.gz --path../chaincode/fabcar/javascript/ --langnode--label fabcar_1
-lang标志用于指定链码语言,-path标志提供智能合约代码的位置。–label标志用于指定链码标签,该标签将在安装链码后标识链码。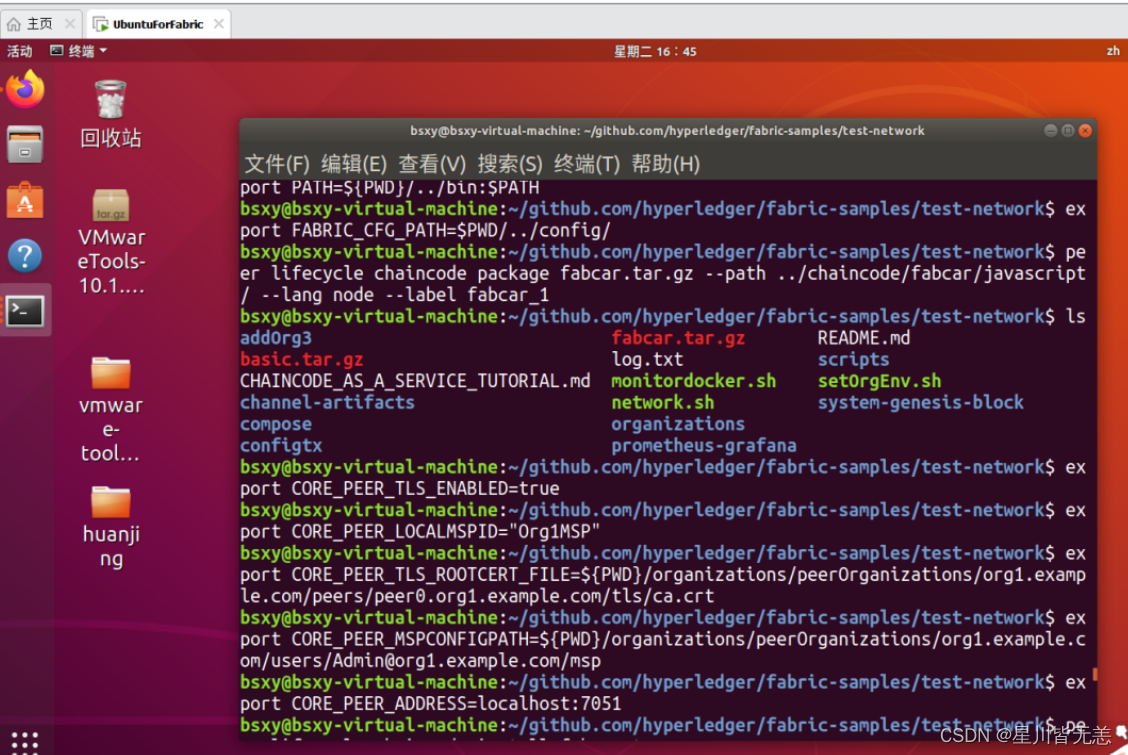
(3)安装链码包
链码需要安装在每个将背书交易的peer上。因为我们将设置背书策略,要求Org1和Org2都进行背书,所以我们需要在这两个组织运营的peer上安装链码。
先在Org1 peer上安装链码。设置以下环境变量将作为Org1 admin用户操作peer CLI,CORE_PEER_ADDRESS将设置为指向peer0.org1.example.com。
exportCORE_PEER_TLS_ENABLED=true
exportCORE_PEER_LOCALMSPID="Org1MSP"exportCORE_PEER_TLS_ROOTCERT_FILE=${PWD}/organizations/peerOrganizations/org1.example.com/peers/peer0.org1.example.com/tls/ca.crt
exportCORE_PEER_MSPCONFIGPATH=${PWD}/organizations/peerOrganizations/org1.example.com/users/[email protected]/msp
exportCORE_PEER_ADDRESS=localhost:7051
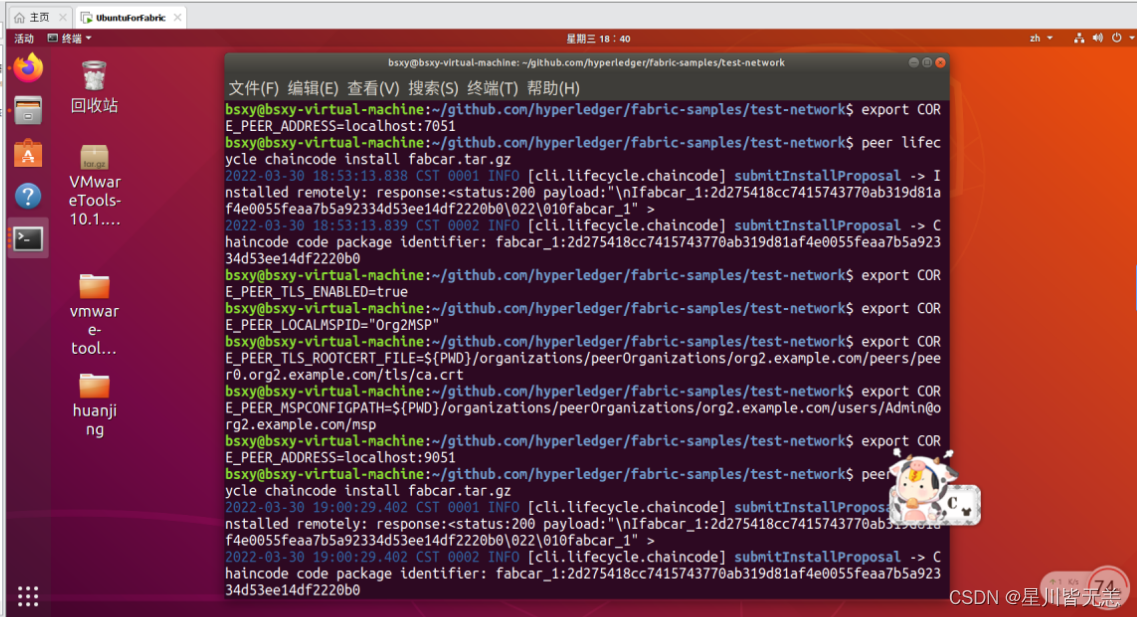
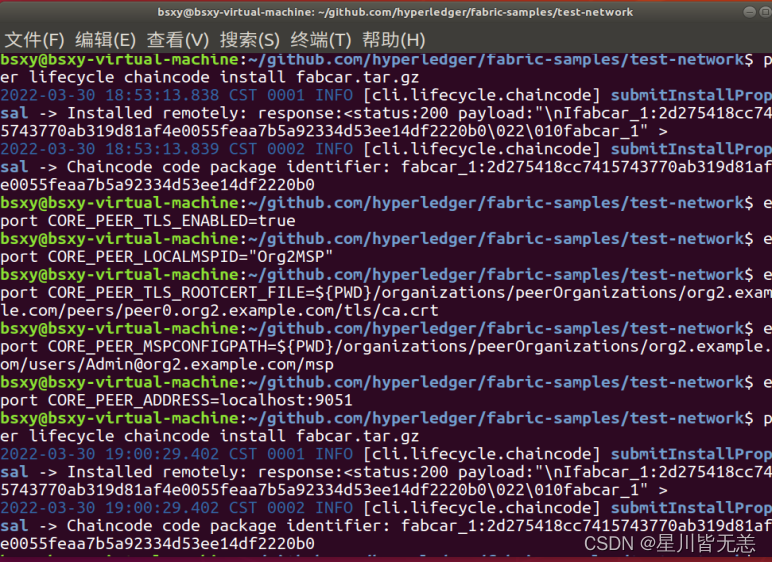
发出“peer lifecycle chaincode install”命令,在peer上安装链码:
peer lifecycle chaincode install fabcar.tar.gz
在Org2 peer上安装链码:
exportCORE_PEER_TLS_ENABLED=true
exportCORE_PEER_LOCALMSPID="Org2MSP"
exportCORE_PEER_TLS_ROOTCERT_FILE=${PWD}/organizations/peerOrganizations/org2.example.com/peers/peer0.org2.example.com/tls/ca.crt
exportCORE_PEER_MSPCONFIGPATH=${PWD}/organizations/peerOrganizations/org2.example.com/users/[email protected]/msp
exportCORE_PEER_ADDRESS=localhost:9051
发出“peer lifecycle chaincode install”命令,在peer上安装链码:
peer lifecycle chaincode install fabcar.tar.gz
(4)批准链码定义
安装chaincode包后,需要组织批准chaincode定义。该定义包括链码的参数,如名称、版本和链码背书策略。
默认情况下,大多数通道成员批准的链码才能在通道上使用。因为我们在通道上只有两个组织,因此Org1和Org2都需要批准Fabcar的链码定义。
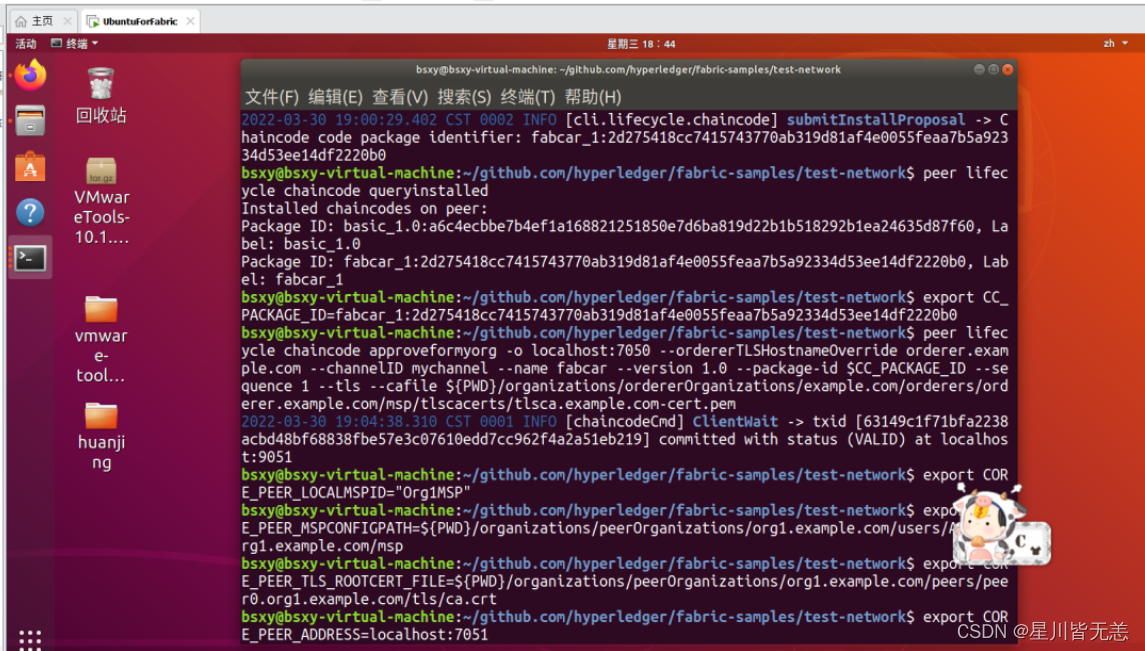
查询已安装的链码:
peer lifecycle chaincode queryinstalled

Package ID是链码标签和链码二进制文件哈希的组合。每个peer将生成相同的Package ID,不同机器的
Package ID
不同。
把Package ID放进环境变量里:
exportCC_PACKAGE_ID=fabcar_1:2d275418cc7415743770ab319d81af4e0055feaa7b5a92334d53ee14df2220b0
注意:这里的CC_PACKAGE_ID,以你
实际ID为准
!
批准链码定义:
peer lifecycle chaincode approveformyorg -o localhost:7050 --ordererTLSHostnameOverride orderer.example.com --channelID mychannel --name fabcar --version1.0 --package-id $CC_PACKAGE_ID--sequence1--tls--cafile${PWD}/organizations/ordererOrganizations/example.com/orderers/orderer.example.com/msp/tlscacerts/tlsca.example.com-cert.pem
–package id标志将包标识符包含在链码定义中。–sequence参数是一个整数,用于跟踪定义或更新链码的次数。因为链码是第一次部署到通道,所以序列号是1,升级Fabcar链码时,序列号将增加到2。
转变为Org1用户:
exportCORE_PEER_LOCALMSPID="Org1MSP"
exportCORE_PEER_MSPCONFIGPATH=${PWD}/organizations/peerOrganizations/org1.example.com/users/[email protected]/msp
exportCORE_PEER_TLS_ROOTCERT_FILE=${PWD}/organizations/peerOrganizations/org1.example.com/peers/peer0.org1.example.com/tls/ca.crt
exportCORE_PEER_ADDRESS=localhost:7051
peer lifecycle chaincode approveformyorg -o localhost:7050 --ordererTLSHostnameOverride orderer.example.com --channelID mychannel --name fabcar --version1.0 --package-id $CC_PACKAGE_ID--sequence1--tls--cafile${PWD}/organizations/ordererOrganizations/example.com/orderers/orderer.example.com/msp/tlscacerts/tlsca.example.com-cert.pem
(5)将链码定义提交到通道
在部署链码之前需要批准链码的通道成员集受策略控制。默认情况下,此策略要求大多数通道成员需要先批准链码,然后才能在通道上使用链码。因为我们在频道上只有两个组织,而 2 个组织中的大多数是 2 个,所以我们需要批准 Fabcar 的链码定义为 Org1 和 Org2。
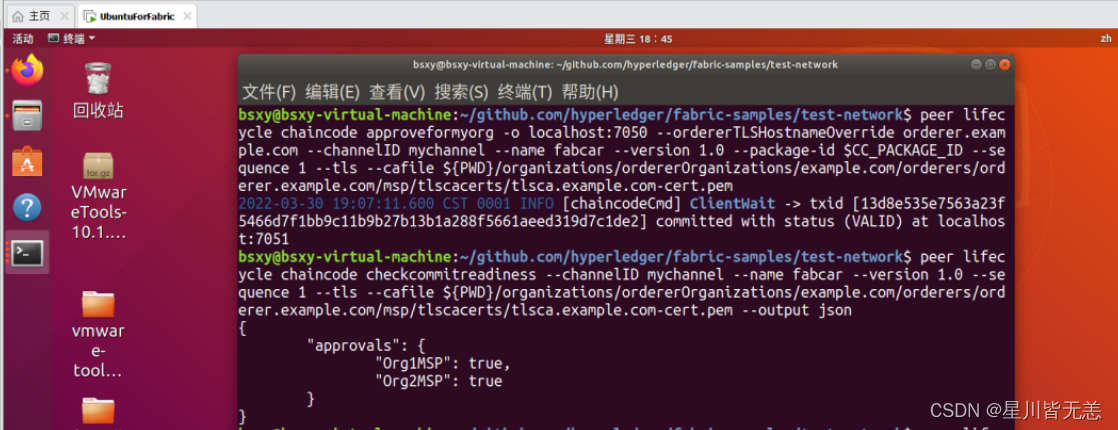
使用“
peer lifecycle chaincode checkcommitreadiness
”命令来检查通道成员是否批准了相同的链码定义。
peer lifecycle chaincode checkcommitreadiness --channelID mychannel --name fabcar --version1.0--sequence1--tls--cafile${PWD}/organizations/ordererOrganizations/example.com/orderers/orderer.example.com/msp/tlscacerts/tlsca.example.com-cert.pem --output json
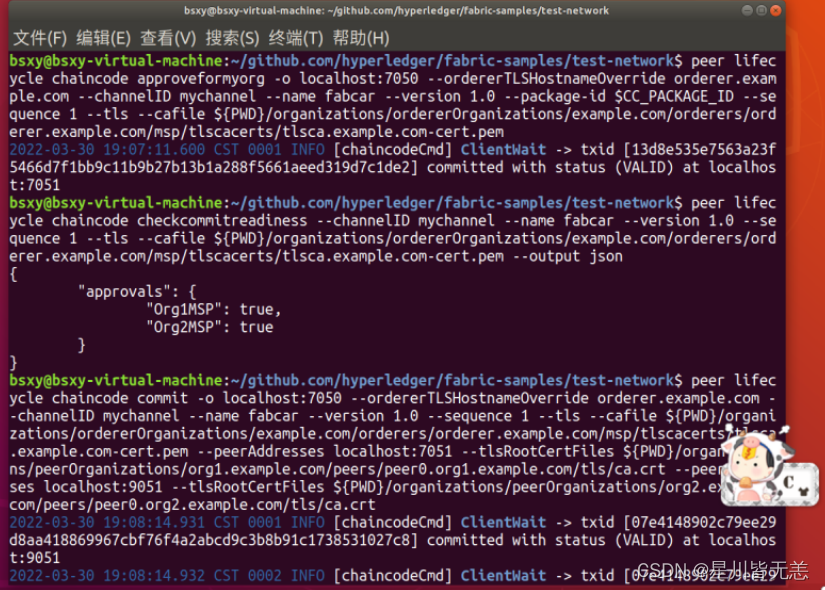
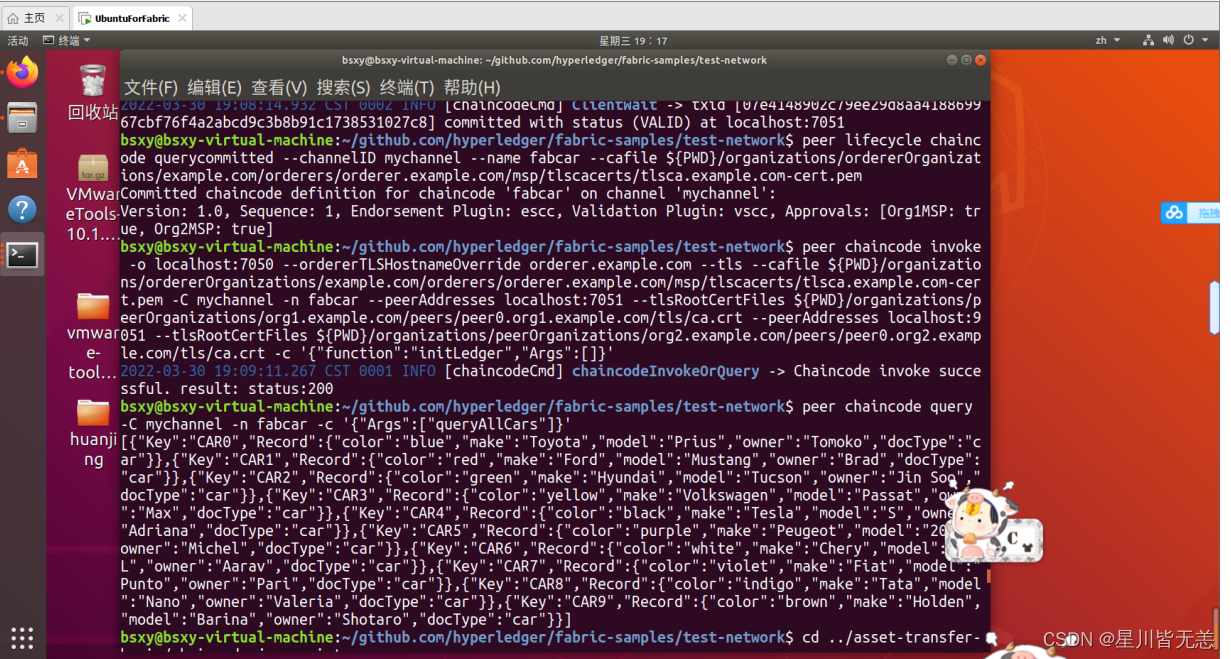
使用“对等生命周期链码提交”命令将链码定义提交到通道。
peer lifecycle chaincode commit -o localhost:7050 --ordererTLSHostnameOverride orderer.example.com --channelID mychannel --name fabcar --version1.0--sequence1--tls--cafile${PWD}/organizations/ordererOrganizations/example.com/orderers/orderer.example.com/msp/tlscacerts/tlsca.example.com-cert.pem --peerAddresses localhost:7051 --tlsRootCertFiles${PWD}/organizations/peerOrganizations/org1.example.com/peers/peer0.org1.example.com/tls/ca.crt --peerAddresses localhost:9051 --tlsRootCertFiles${PWD}/organizations/peerOrganizations/org2.example.com/peers/peer0.org2.example.com/tls/ca.crt
使用“
peer lifecycle chaincode querycommitted
”命令确认链码定义已提交到通道。
peer lifecycle chaincode querycommitted --channelID mychannel --name fabmakeup--cafile ${PWD}/organizations/ordererOrganizations/example.com/orderers/orderer.example.com/msp/tlscacerts/tlsca.example.com-cert.pem

(6)调用链码
peer chaincode invoke -o localhost:7050 --ordererTLSHostnameOverride orderer.example.com --tls--cafile${PWD}/organizations/ordererOrganizations/example.com/orderers/orderer.example.com/msp/tlscacerts/tlsca.example.com-cert.pem -C mychannel -n fabmakeup --peerAddresses localhost:7051 --tlsRootCertFiles${PWD}/organizations/peerOrganizations/org1.example.com/peers/peer0.org1.example.com/tls/ca.crt --peerAddresses localhost:9051 --tlsRootCertFiles${PWD}/organizations/peerOrganizations/org2.example.com/peers/peer0.org2.example.com/tls/ca.crt -c'{"function":"queryMakeup","Args":[]}'
peer chaincode query -C mychannel -n fabcar -c'{"Args":["queryAllCars"]}'
这次的Hyperledger Fabric教程–部署Fabric智能合约分享就到此结束了,后面也会继续更新。
欢迎各位小伙伴讨论,如有问题请在评论区评论或发私聊消息,欢迎各位的留言!
版权归原作者 星川皆无恙 所有, 如有侵权,请联系我们删除。