
portal认证
商务&技术咨询:68617572@qq.com
一、简介
以若依后台管理框架V4.6.0做为基础框架,实现了ToughRADIUS大部分功能,支持标准RADIUS协议(RFC 2865, RFC 2866),提供完整的AAA实现。可运用于酒店WIFI认证,公司局域网权限认证,商场WIFI认证,其它公共场所等等。
二、主要功能
- 套餐管理
- 设备管理
- 用户管理
- 订单管理
- 在线管理
- 微信、支付宝H5支付
- 实现用户上线请求认证、动态授权、限速、强制下线
- 实现上网时间到期后自动下线
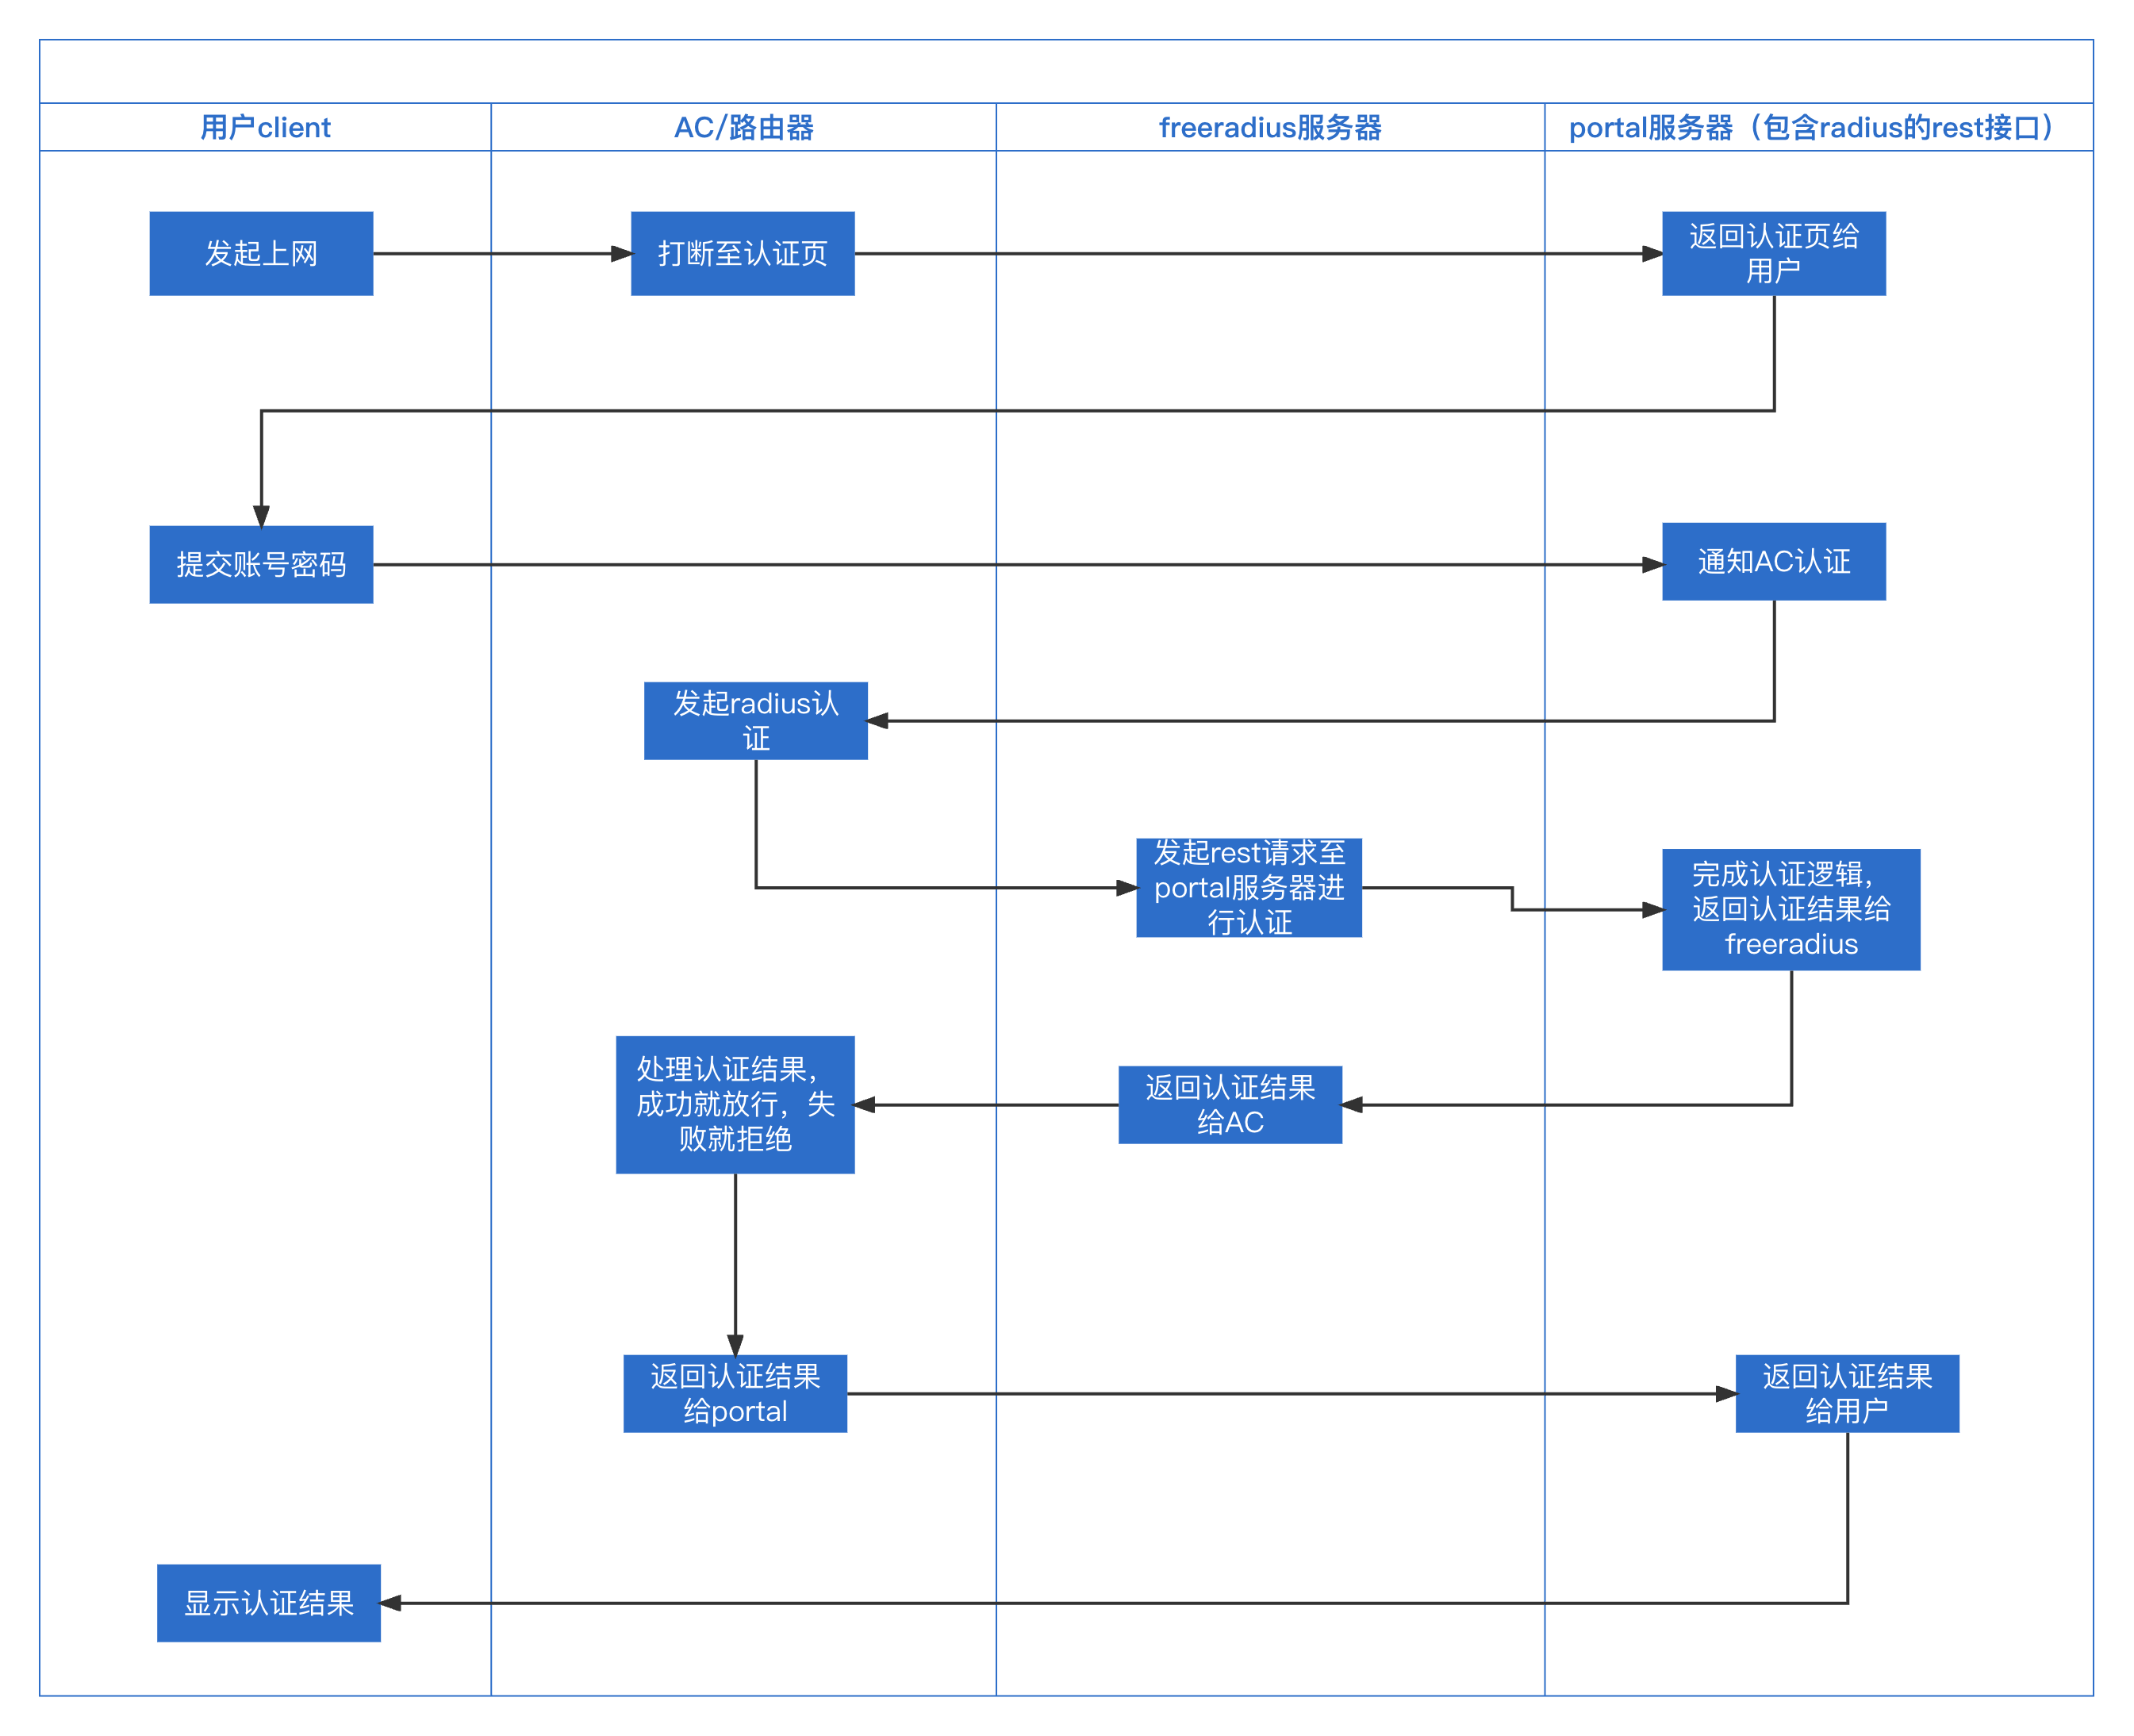
三、认证流程
四、搭建步骤
系统环境:JDK1.8 ,centos8,mysql5.7
注意:centos7的yum源没有freeradius-rest安装包,安装过程中会带来不少麻烦,建议centos8安装,省不少事情。
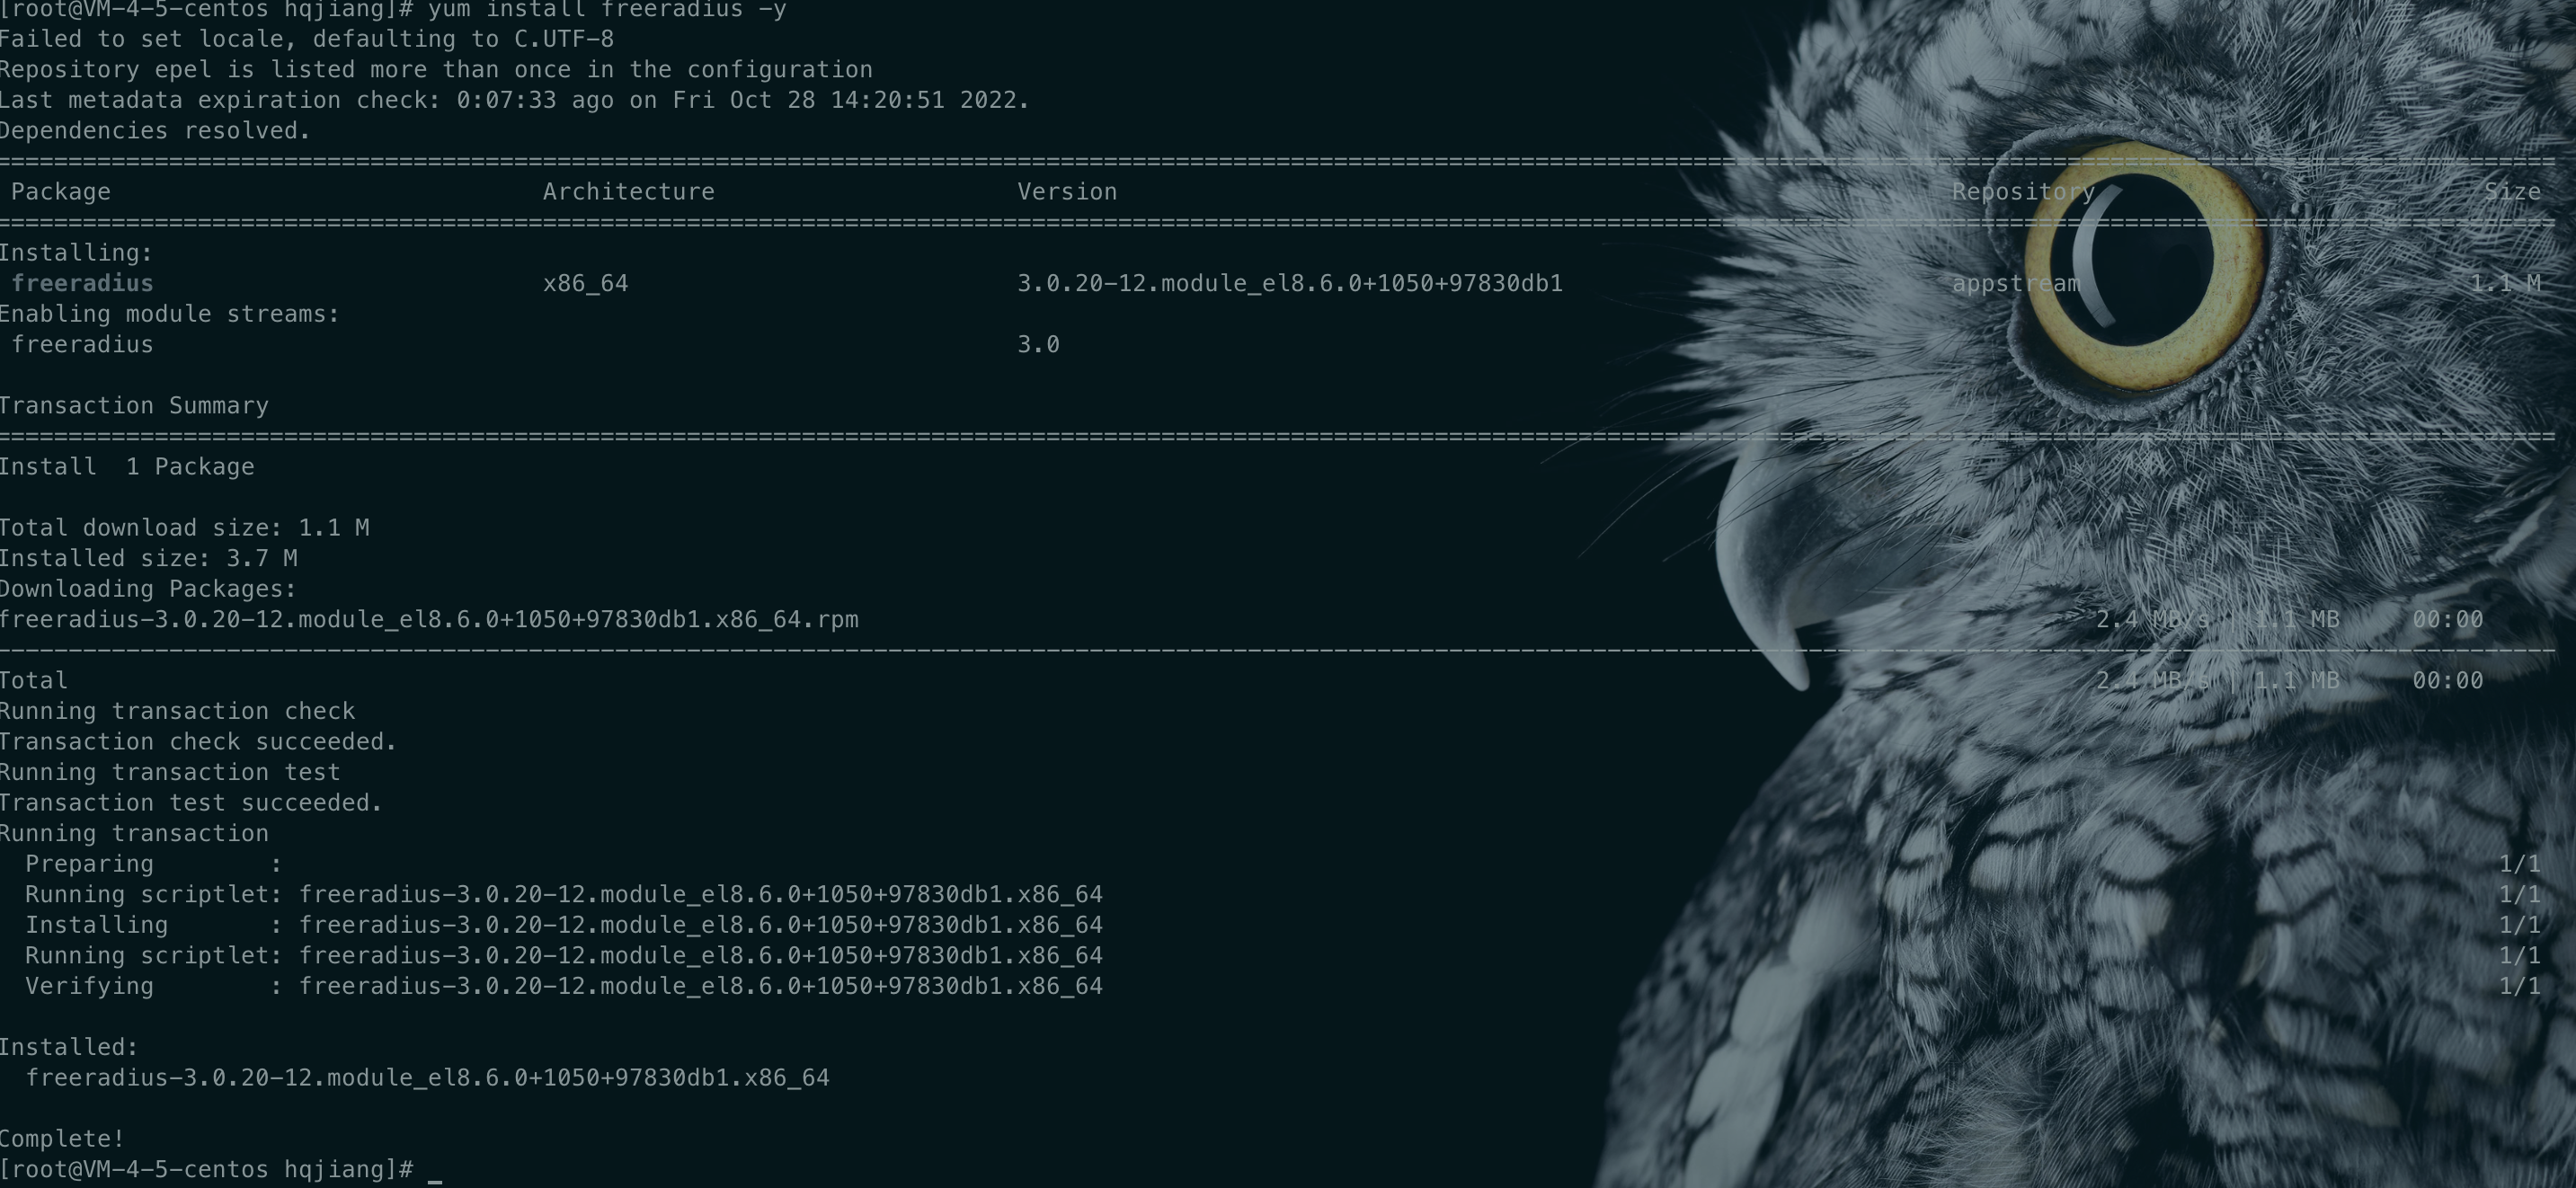
1.freeradius安装
yum install freeradius -y
yum install freeradius-rest -y

yum install freeradius-utils -y
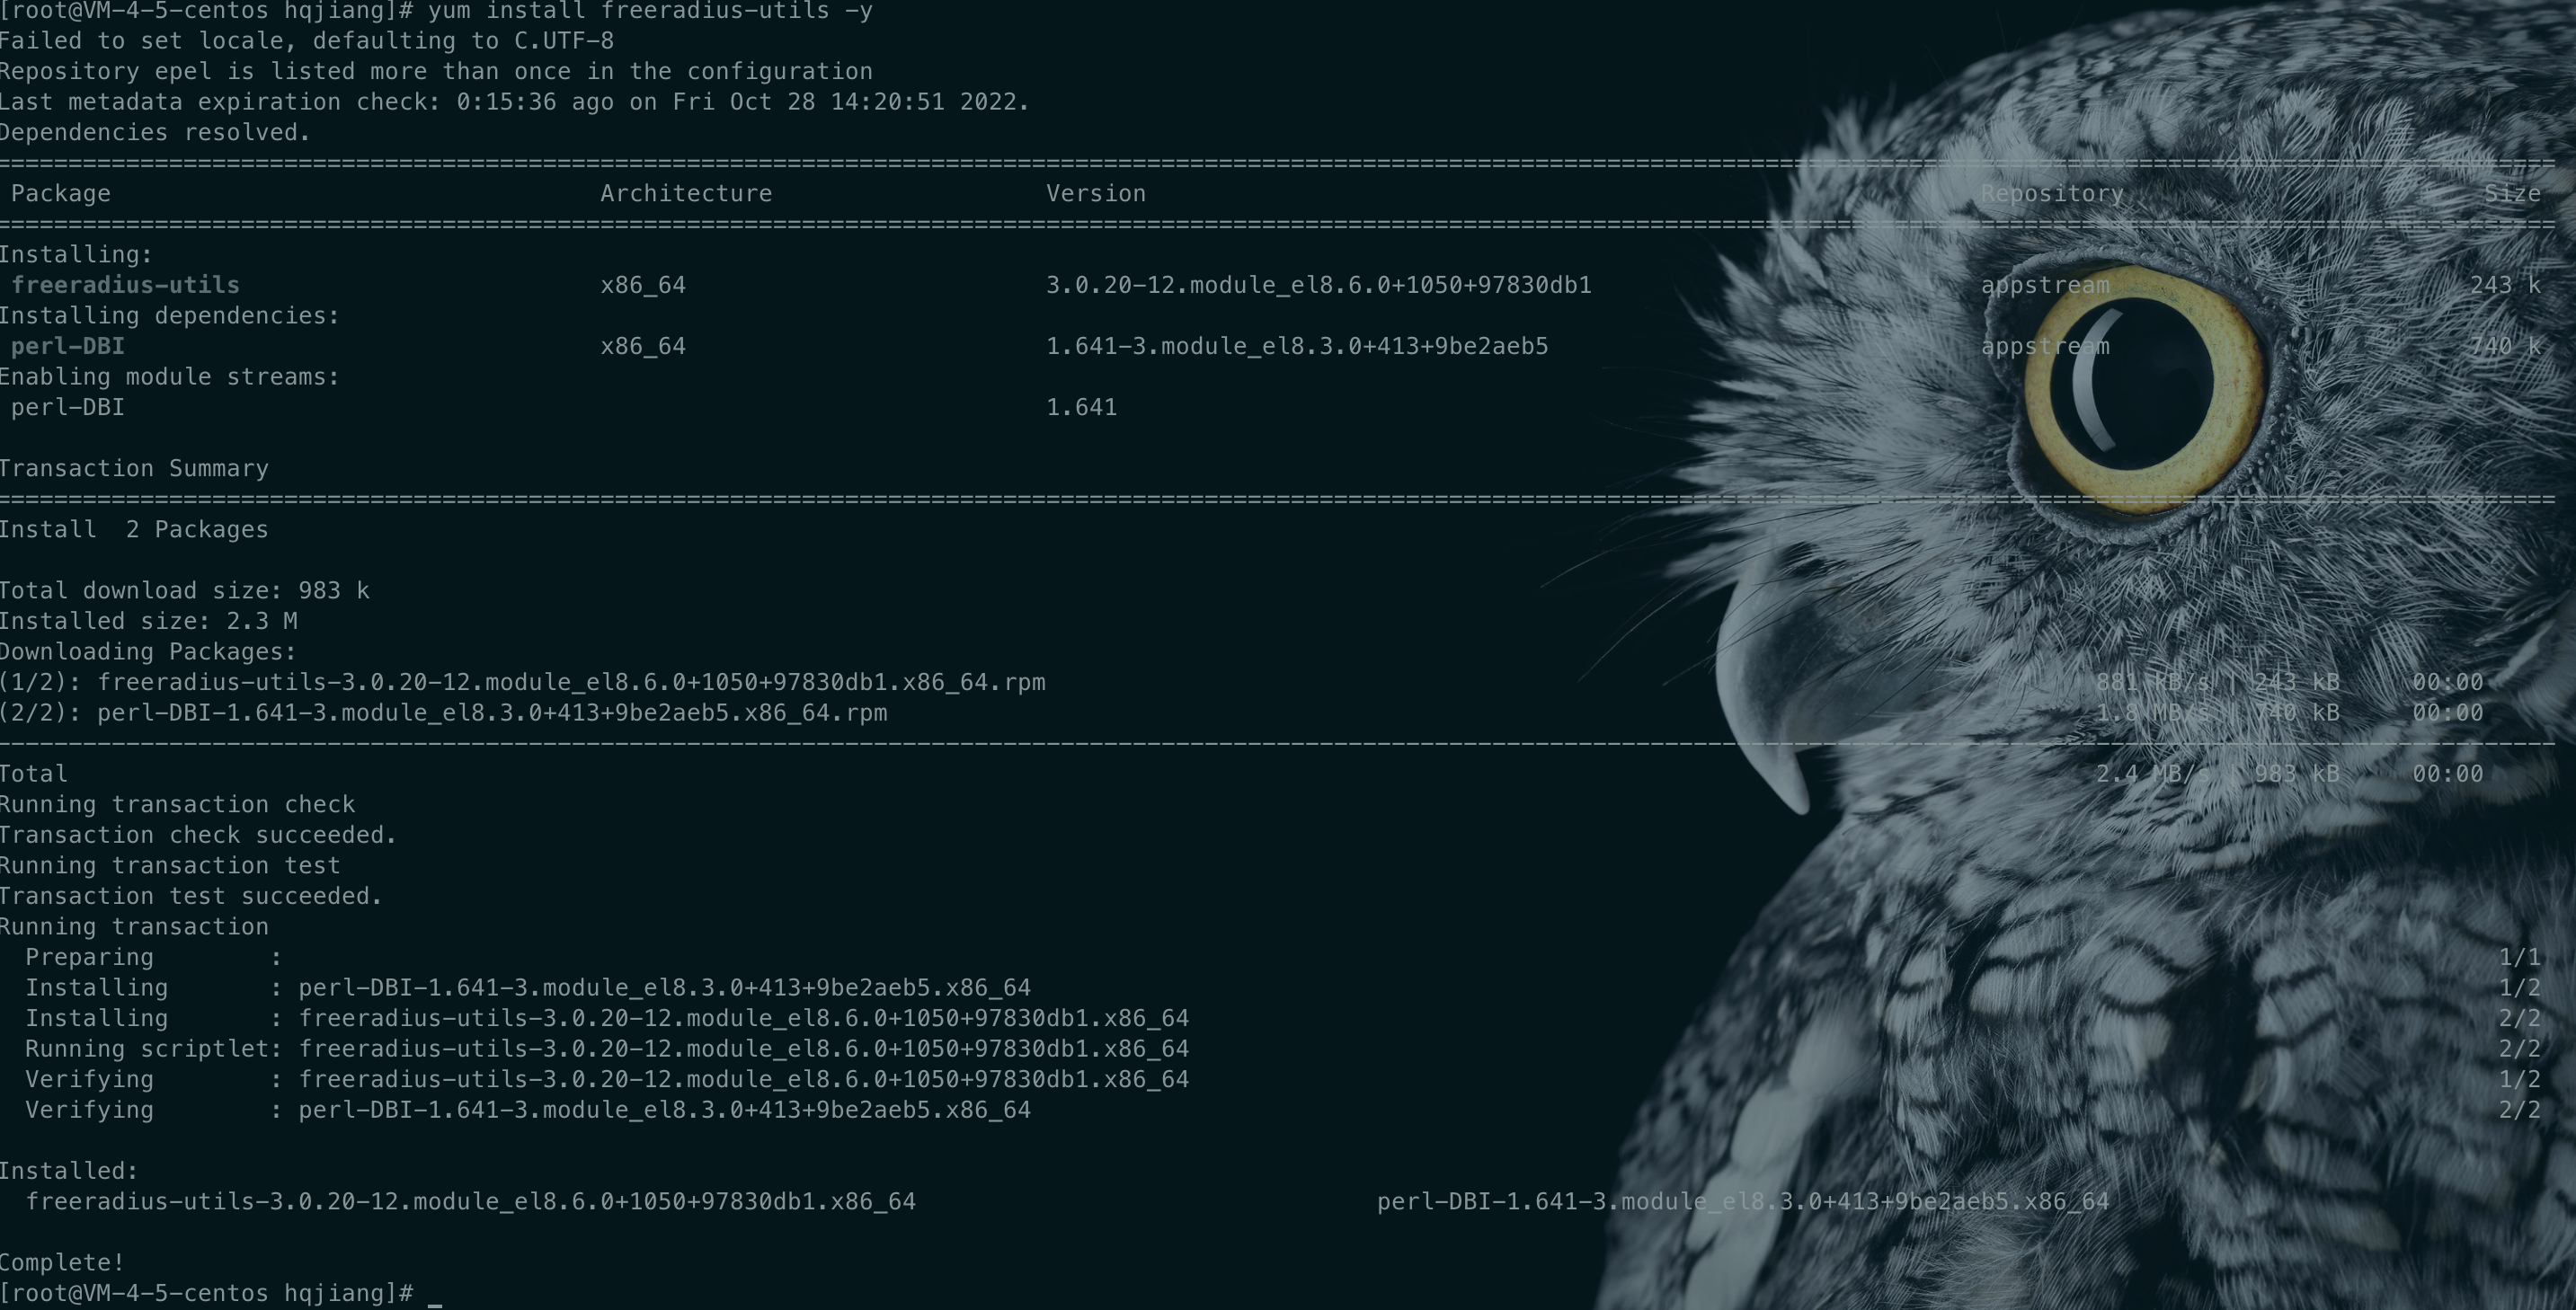
至此,我们已安装完成freeradius,下面我们要对freeradius进行配置,支持rest认证
2.freeradius配置
- 通过软连接方式启动rest模块
ln -s /etc/raddb/mods-available/rest /etc/raddb/mods-enabled/rest
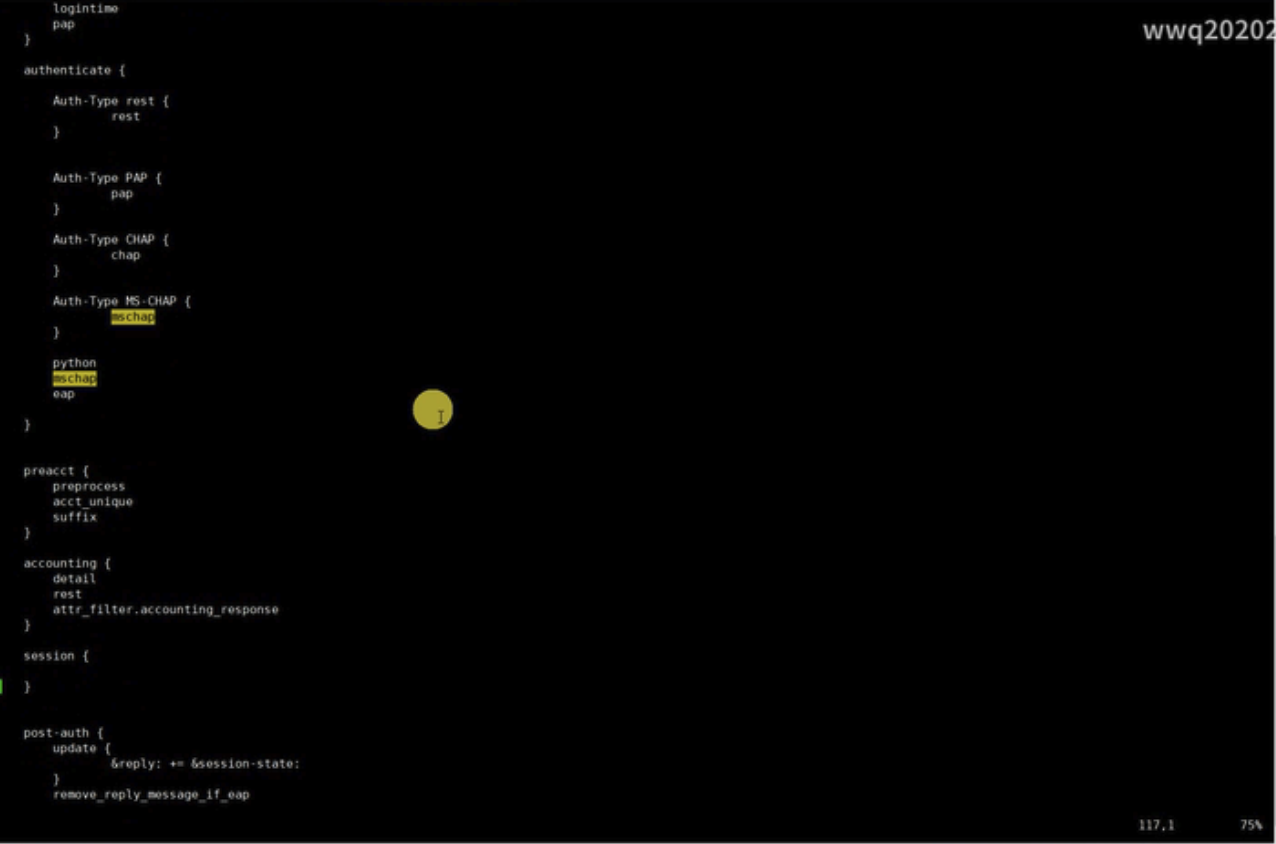
- 修改/etc/raddb/sites-enabled/default
vim /etc/raddb/sites-enabled/default
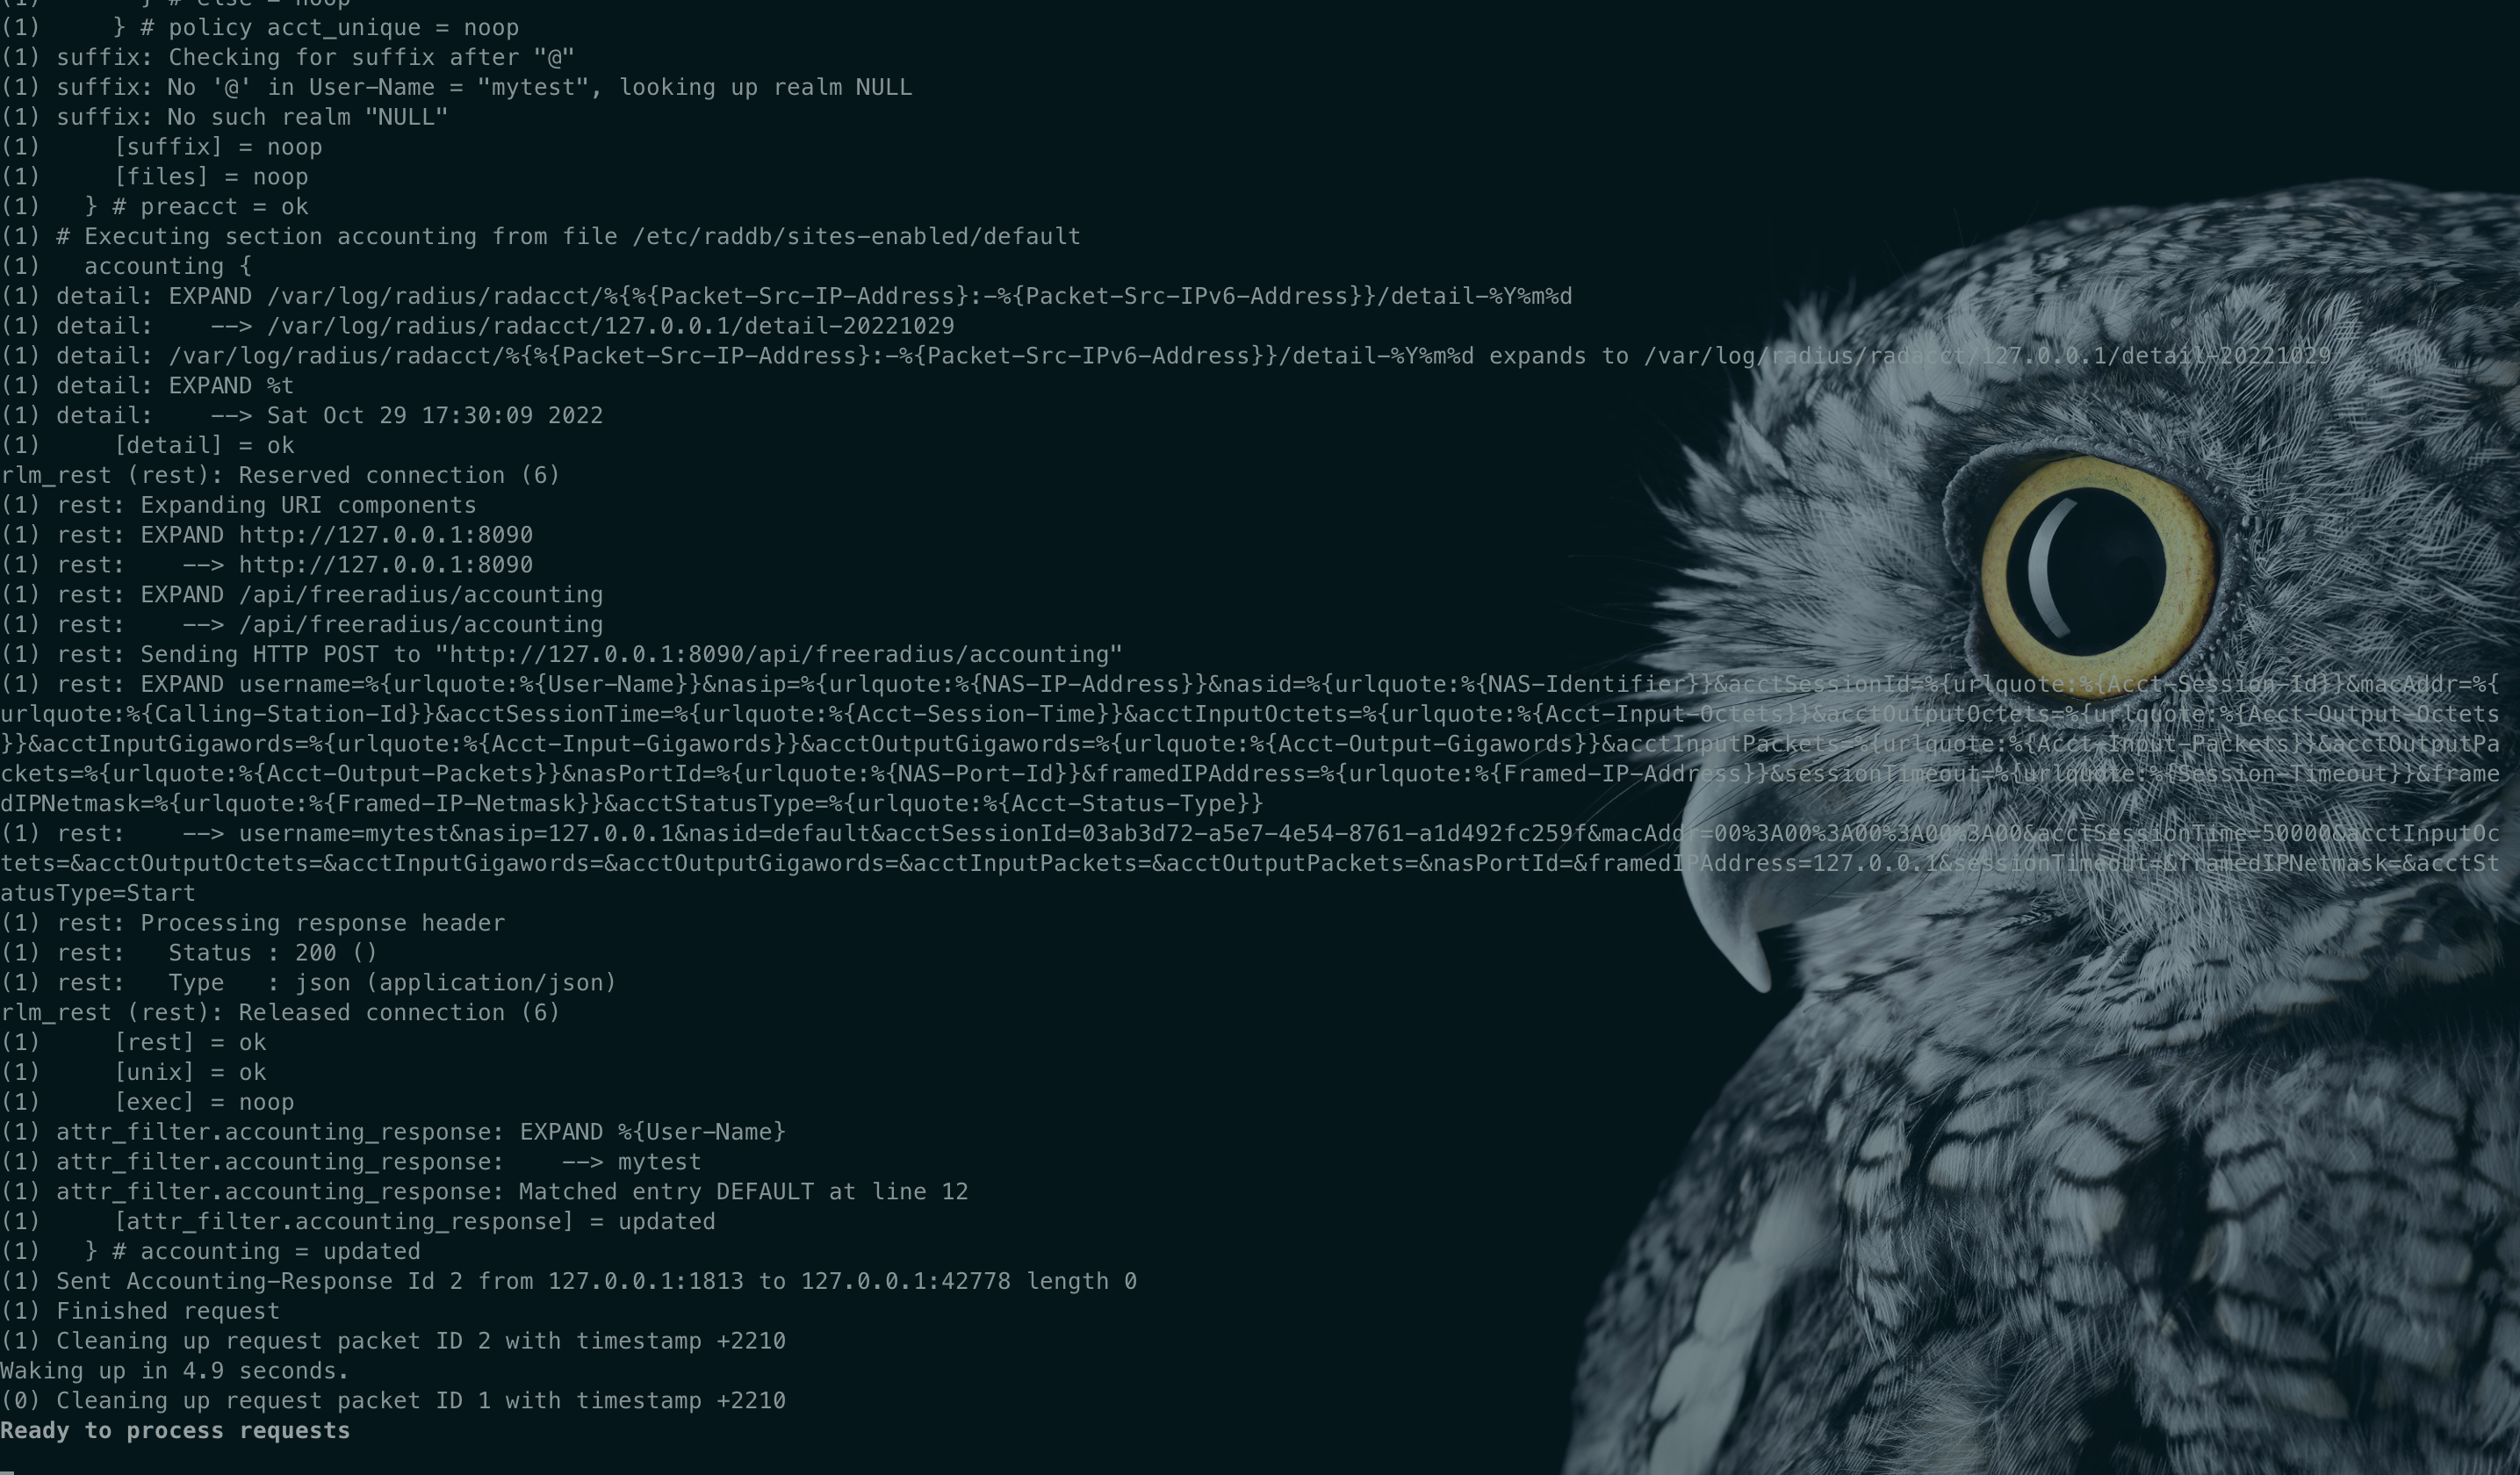
分别在authorize,authenticate,accounting3个模块中插入rest配置,如下图所示:
- 修改/etc/raddb/users
vim /etc/raddb/users
把freeradius的默认认证方式改为rest(DEFAULT Auth-Type := rest)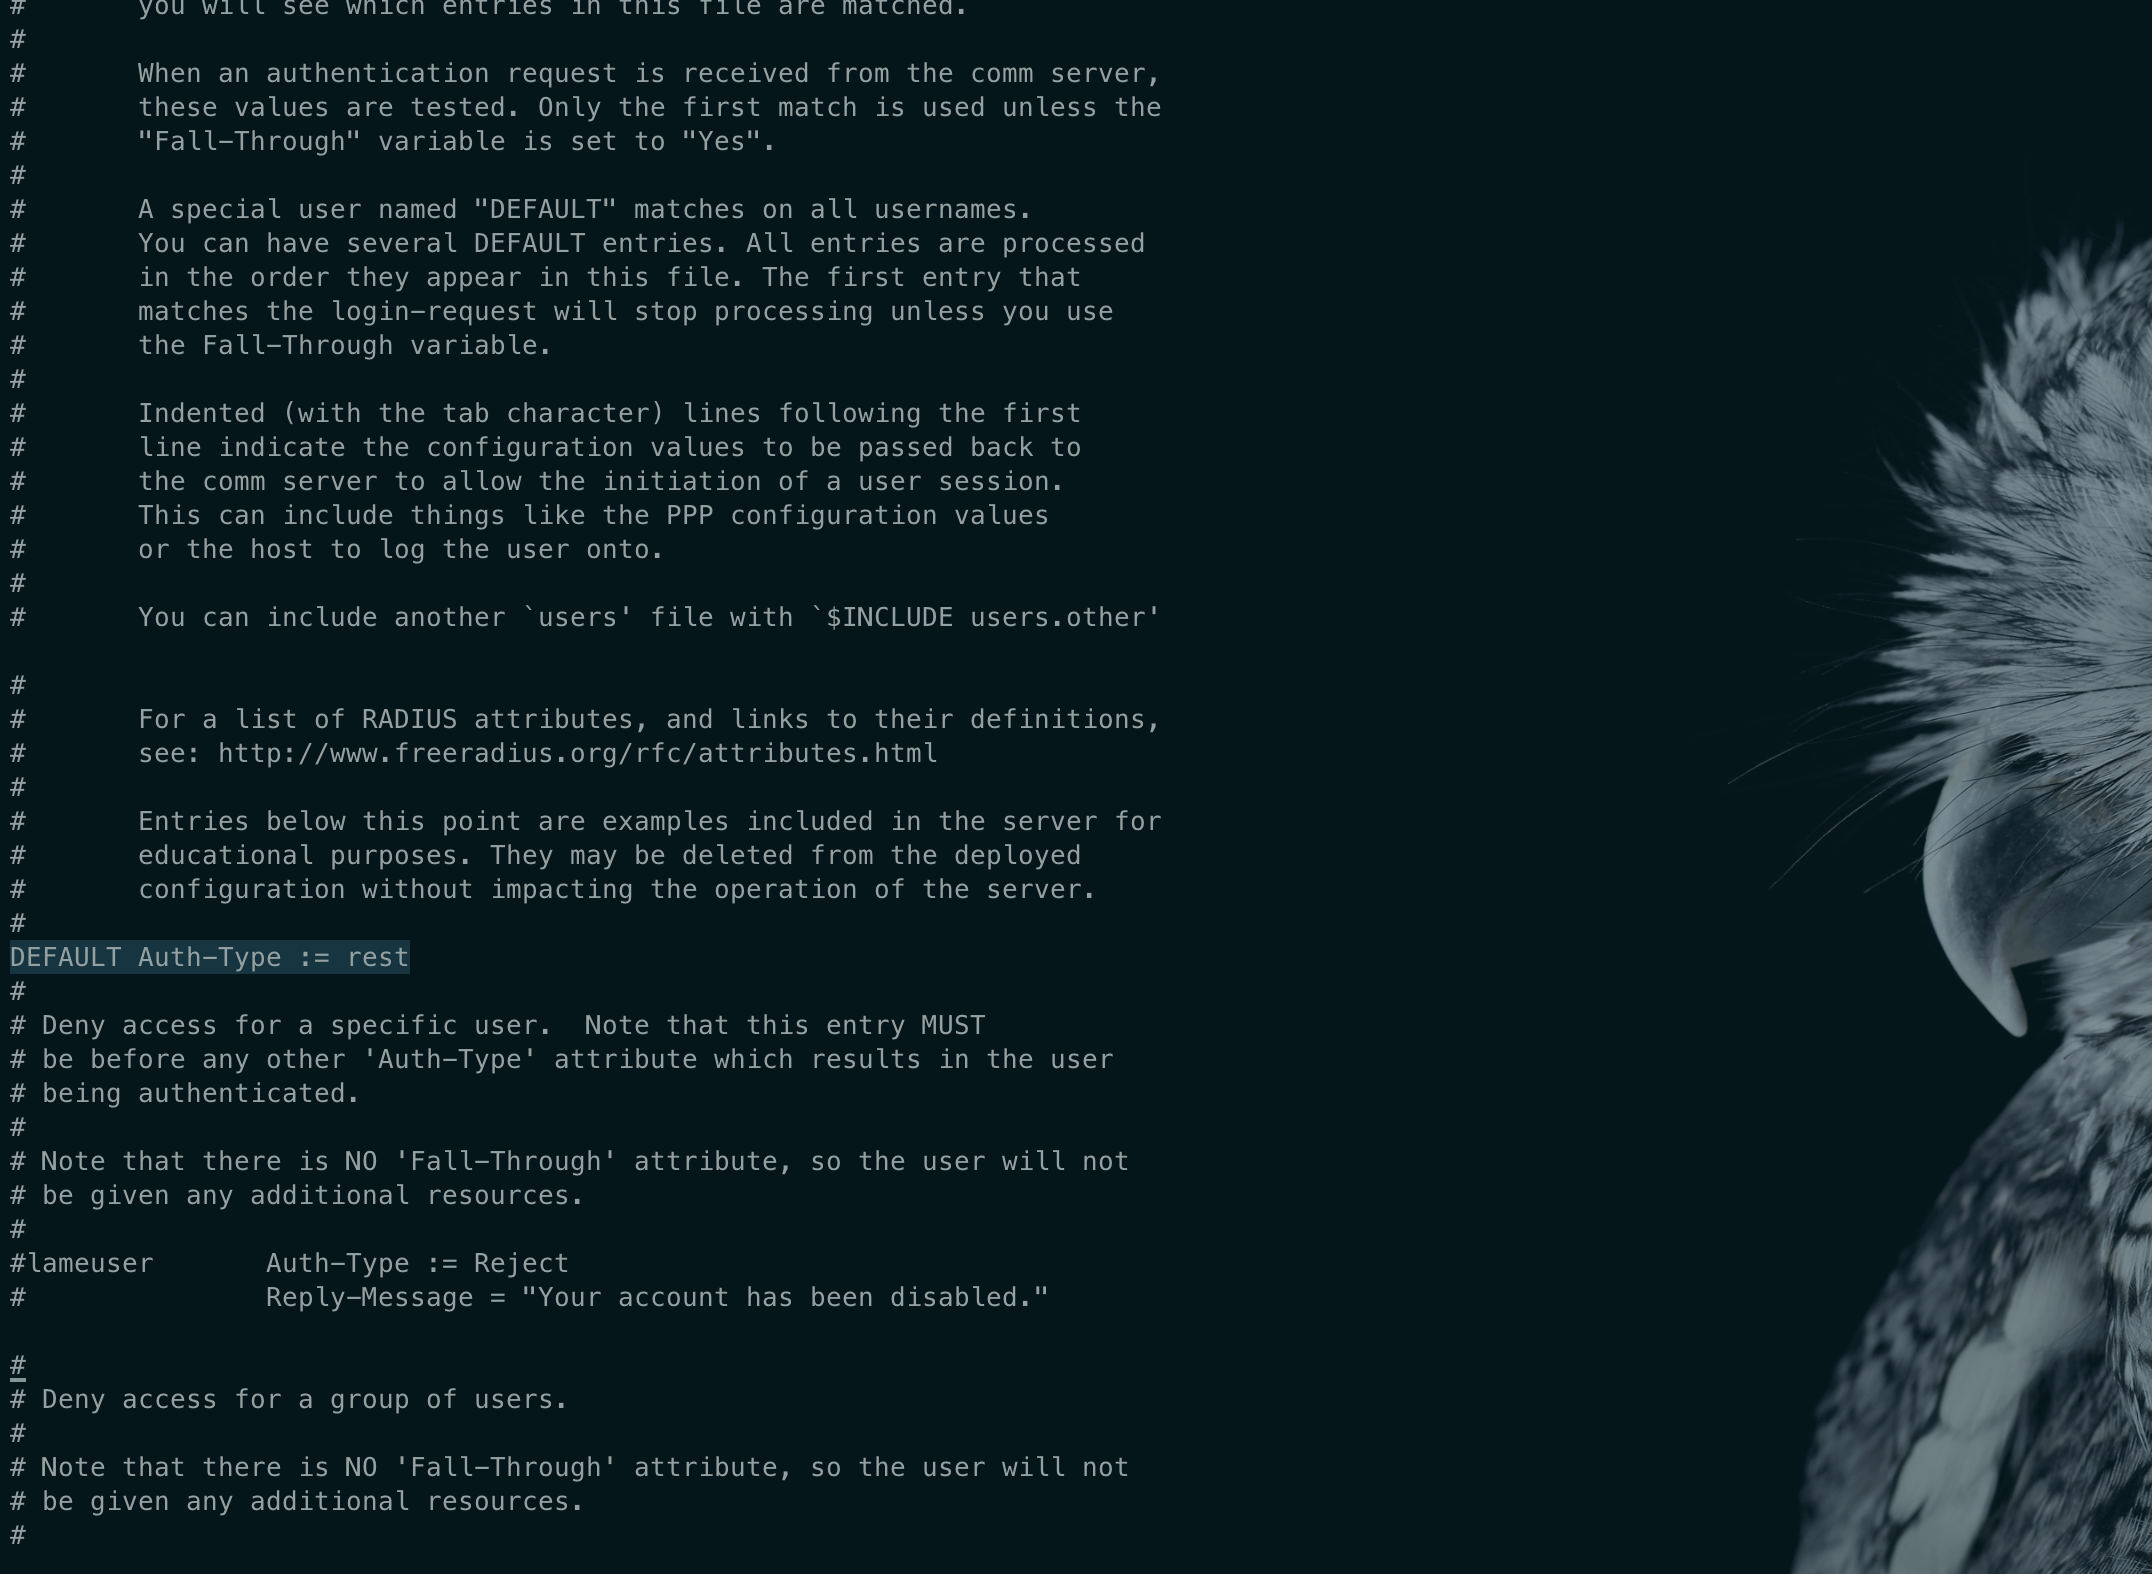
- 修改/etc/raddb/mods-enabled/rest文件内容如下:
rest {

    tls {
#        ca_file    = ${certdir}/cacert.pem
#        ca_path    = ${certdir}
#        certificate_file        = /path/to/radius.crt
#        private_key_file    = /path/to/radius.key
#        private_key_password    = "supersecret"
#        random_file        = /dev/urandom
#        check_cert = yes
#        check_cert_cn = yes
    }

    connect_uri = "http://127.0.0.1:8090"
    connect_timeout = 5.0

    authorize {
            uri = "${..connect_uri}/api/freeradius/authorize"
            method = 'post'
            body = 'post'
            data = "username=%{urlquote:%{User-Name}}&nasip=%{urlquote:%{NAS-IP-Address}}&nasid=%{urlquote:%{NAS-Identifier}}"
    }

    authenticate {
            uri = "${..connect_uri}/api/freeradius/authenticate"
            method = 'post'
            body = 'post'
            data = "username=%{urlquote:%{User-Name}}&nasip=%{urlquote:%{NAS-IP-Address}}&nasid=%{urlquote:%{NAS-Identifier}}"
    }

    accounting {
            uri = "${..connect_uri}/api/freeradius/accounting"
            method = 'post'
            body = 'post'
            data = "username=%{urlquote:%{User-Name}}&nasip=%{urlquote:%{NAS-IP-Address}}&nasid=%{urlquote:%{NAS-Identifier}}\
&acctSessionId=%{urlquote:%{Acct-Session-Id}}&macAddr=%{urlquote:%{Calling-Station-Id}}&acctSessionTime=%{urlquote:%{Acct-Session-Time}}\
&acctInputOctets=%{urlquote:%{Acct-Input-Octets}}&acctOutputOctets=%{urlquote:%{Acct-Output-Octets}}\
&acctInputGigawords=%{urlquote:%{Acct-Input-Gigawords}}&acctOutputGigawords=%{urlquote:%{Acct-Output-Gigawords}}\
&acctInputPackets=%{urlquote:%{Acct-Input-Packets}}&acctOutputPackets=%{urlquote:%{Acct-Output-Packets}}\
&nasPortId=%{urlquote:%{NAS-Port-Id}}&framedIPAddress=%{urlquote:%{Framed-IP-Address}}\
&sessionTimeout=%{urlquote:%{Session-Timeout}}&framedIPNetmask=%{urlquote:%{Framed-IP-Netmask}}\
&acctStatusType=%{urlquote:%{Acct-Status-Type}}"
    }

    post-auth {
            uri = "${..connect_uri}/api/freeradius/postauth"
            method = 'post'
            body = 'post'
    }

    pool {
        start = ${thread[pool].start_servers}
        min = ${thread[pool].min_spare_servers}
        max = ${thread[pool].max_servers}
        spare = ${thread[pool].max_spare_servers}
        uses = 0
        retry_delay = 30
        lifetime = 0
        idle_timeout = 60
    }
}
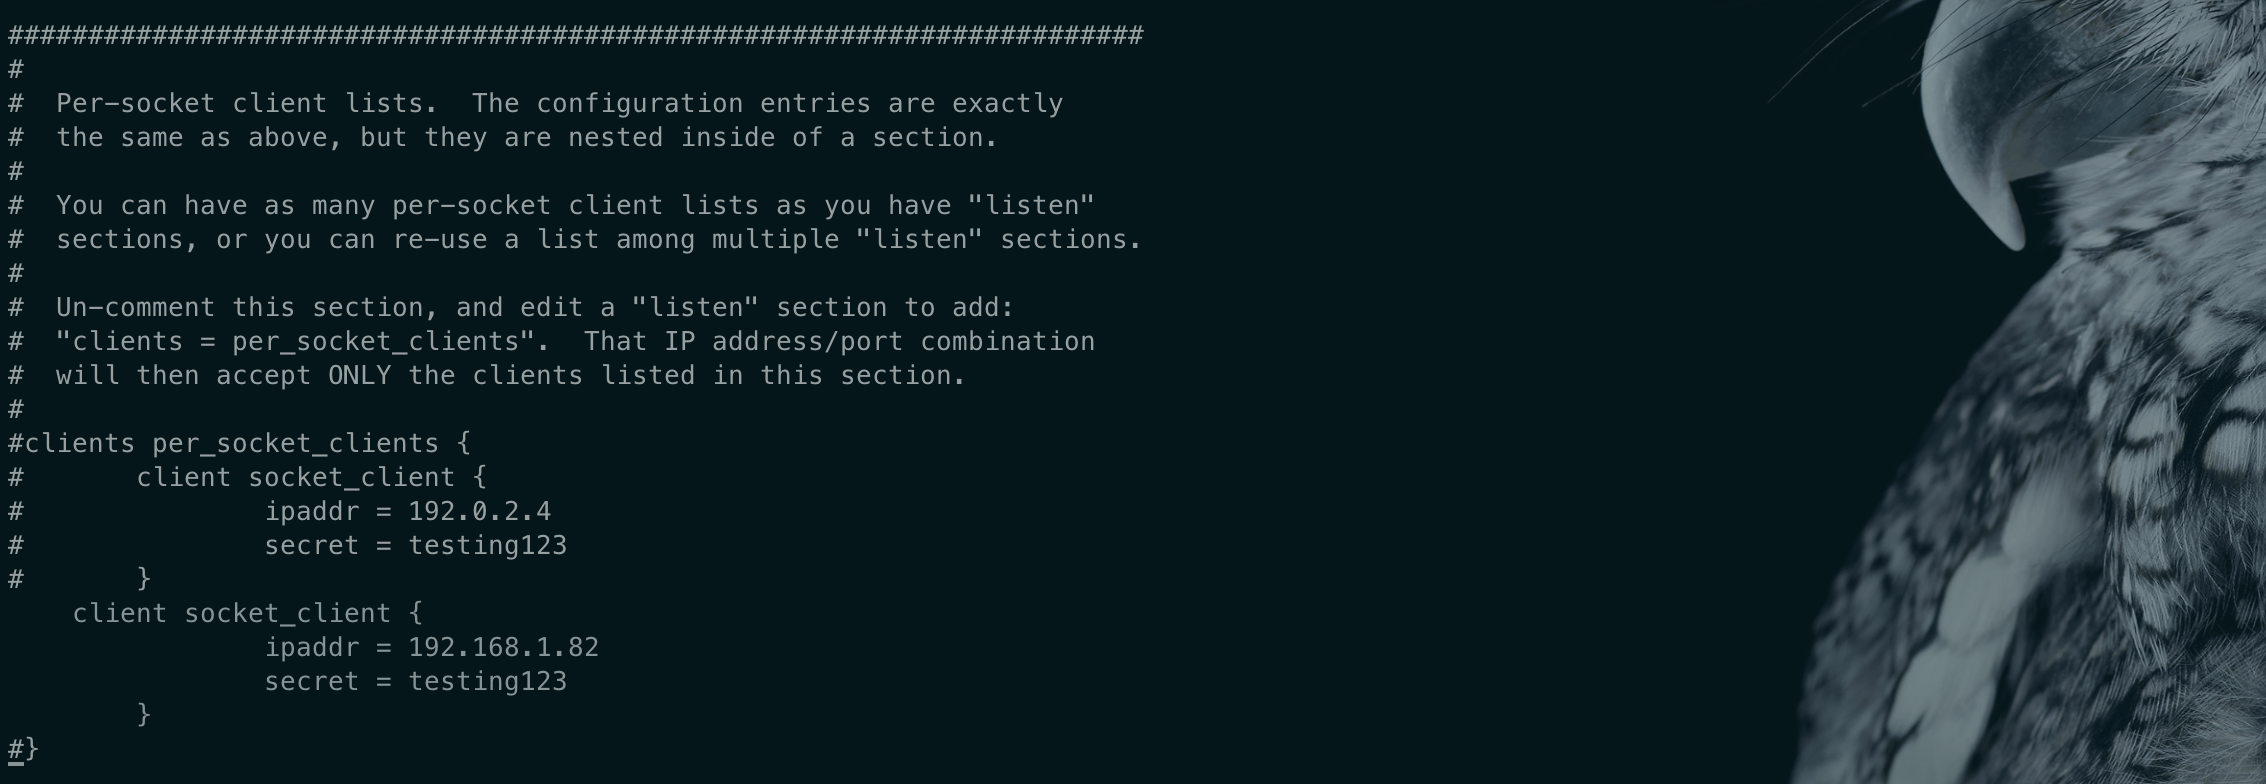
- 修改/etc/raddb/clients.conf
vim /etc/raddb/clients.conf
改成自己的ip
cd /etc/raddb/certs/
./bootstrap
到这里我们对freeradius的配置也就完成了,下面我们安装nuoyi-radius。
3.ruoyi-radius安装
- 下载源码
gitee:https://gitee.com/panweilei/ruoyi-radius.git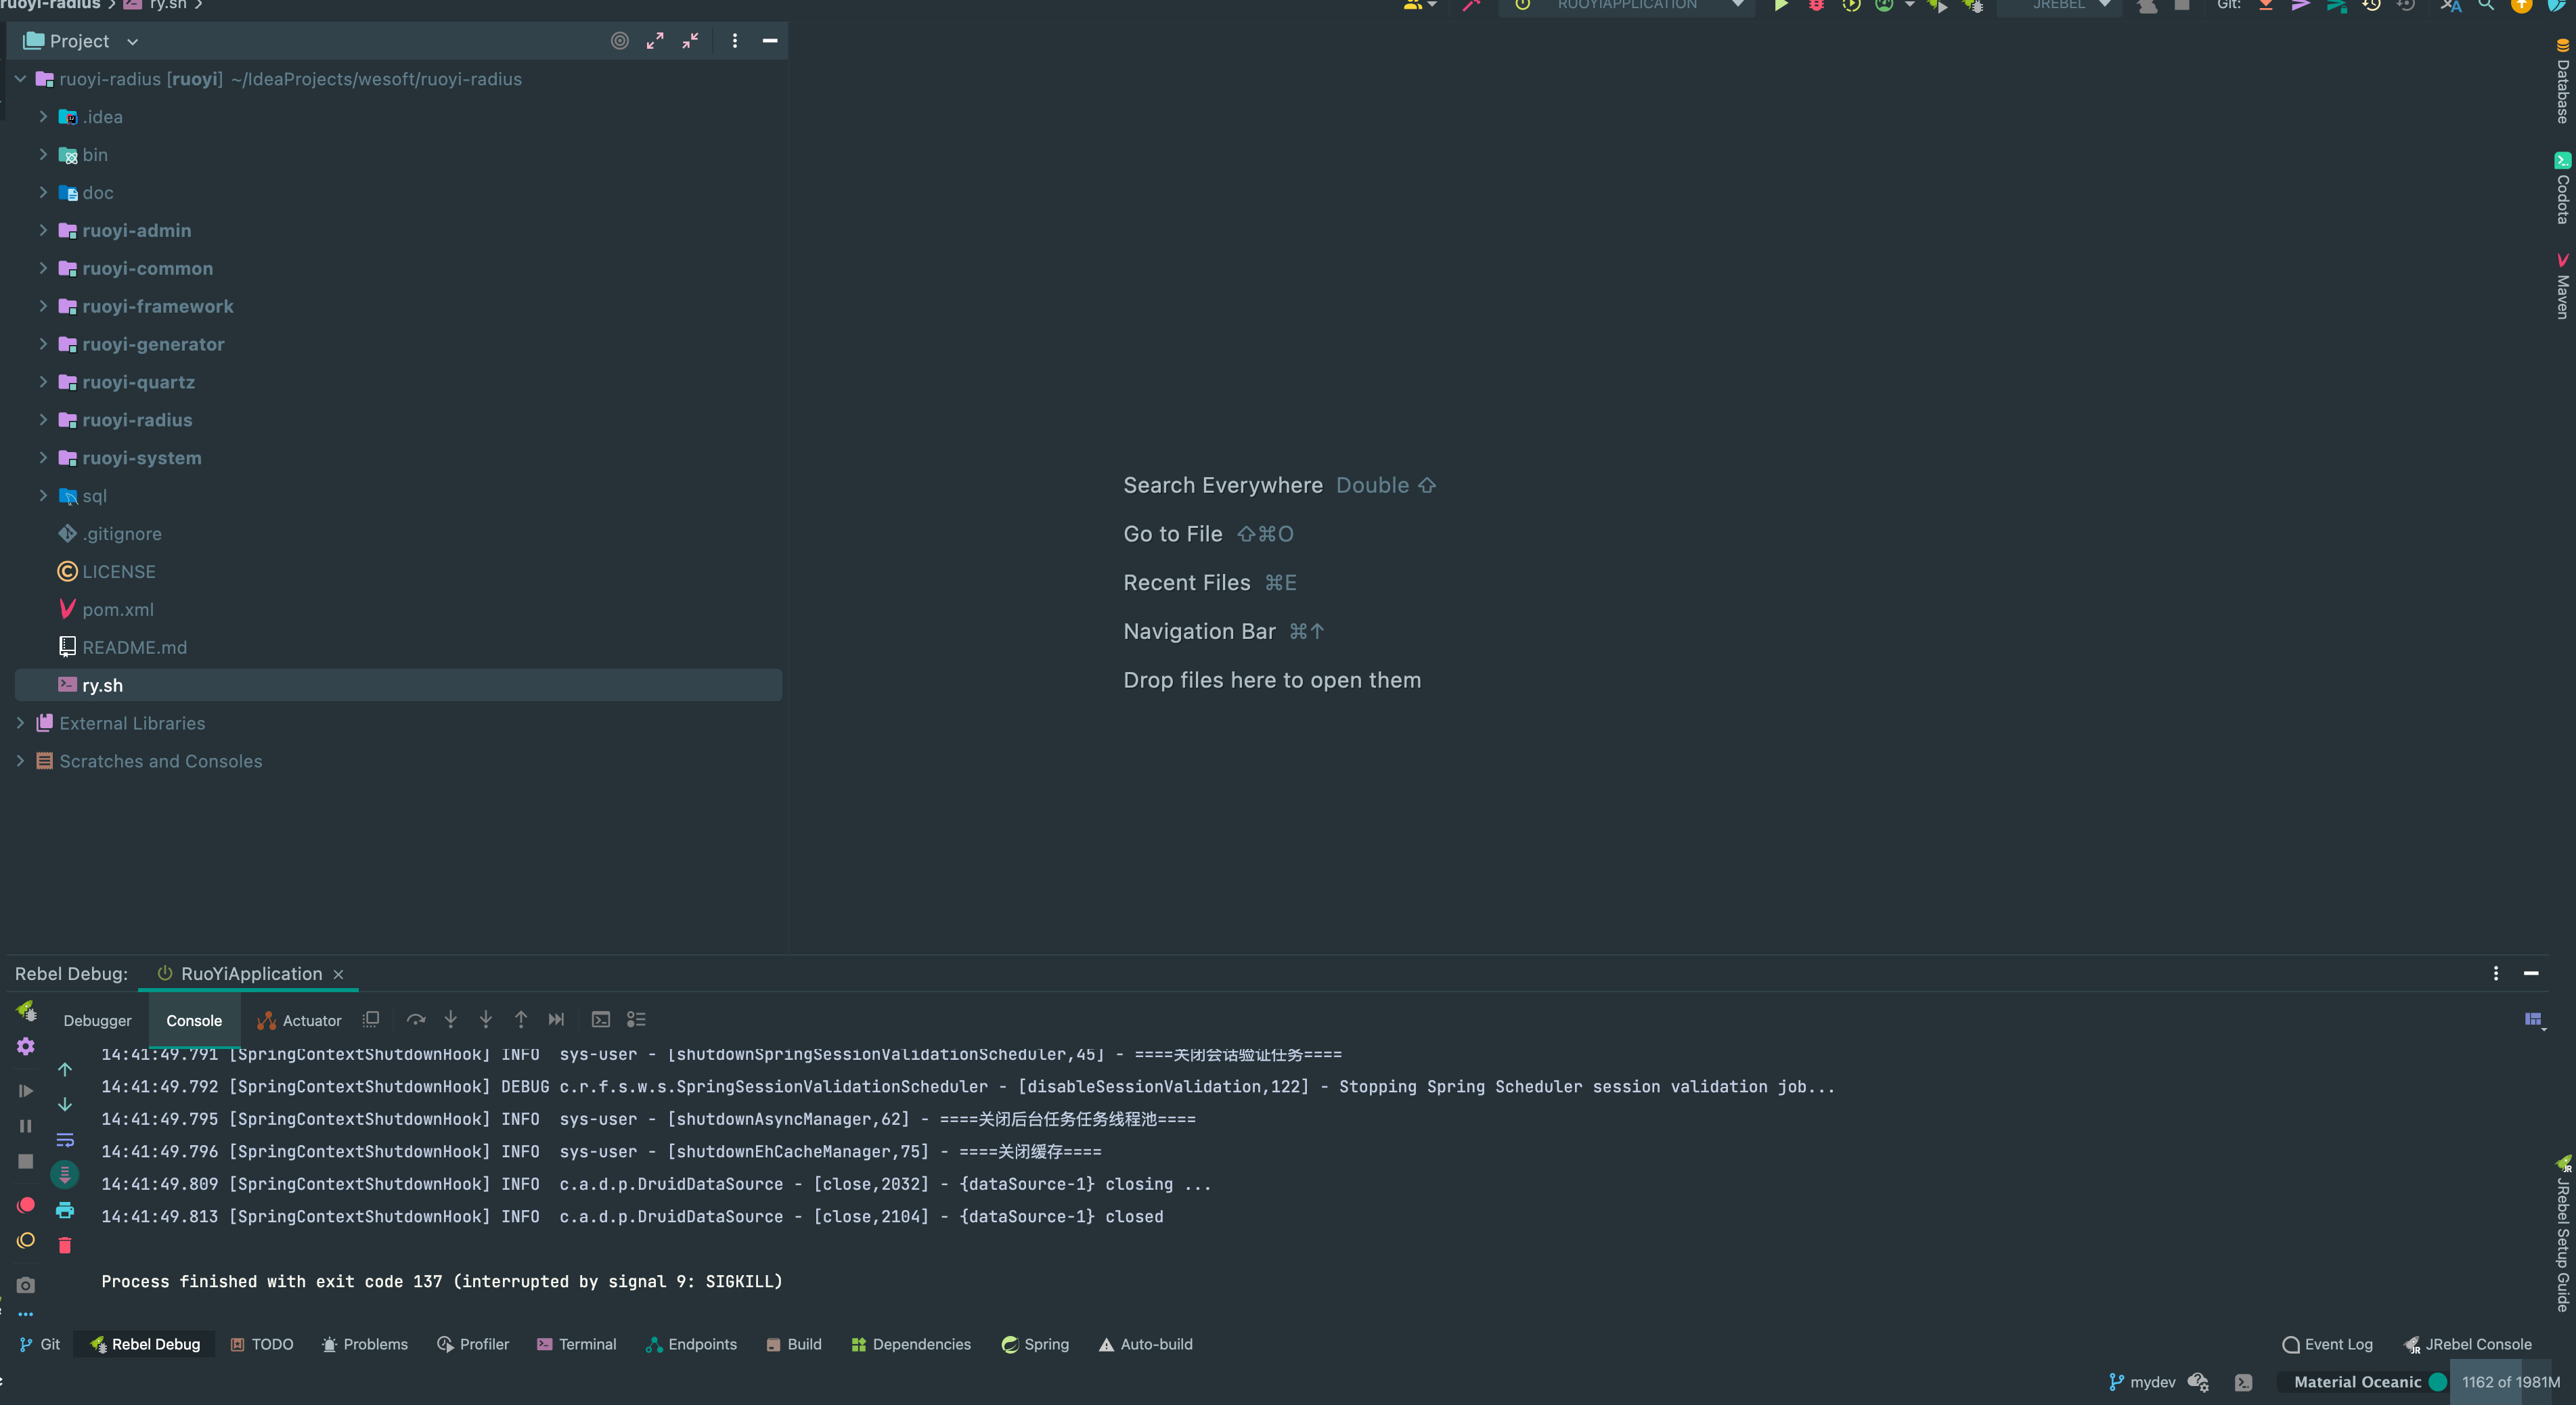
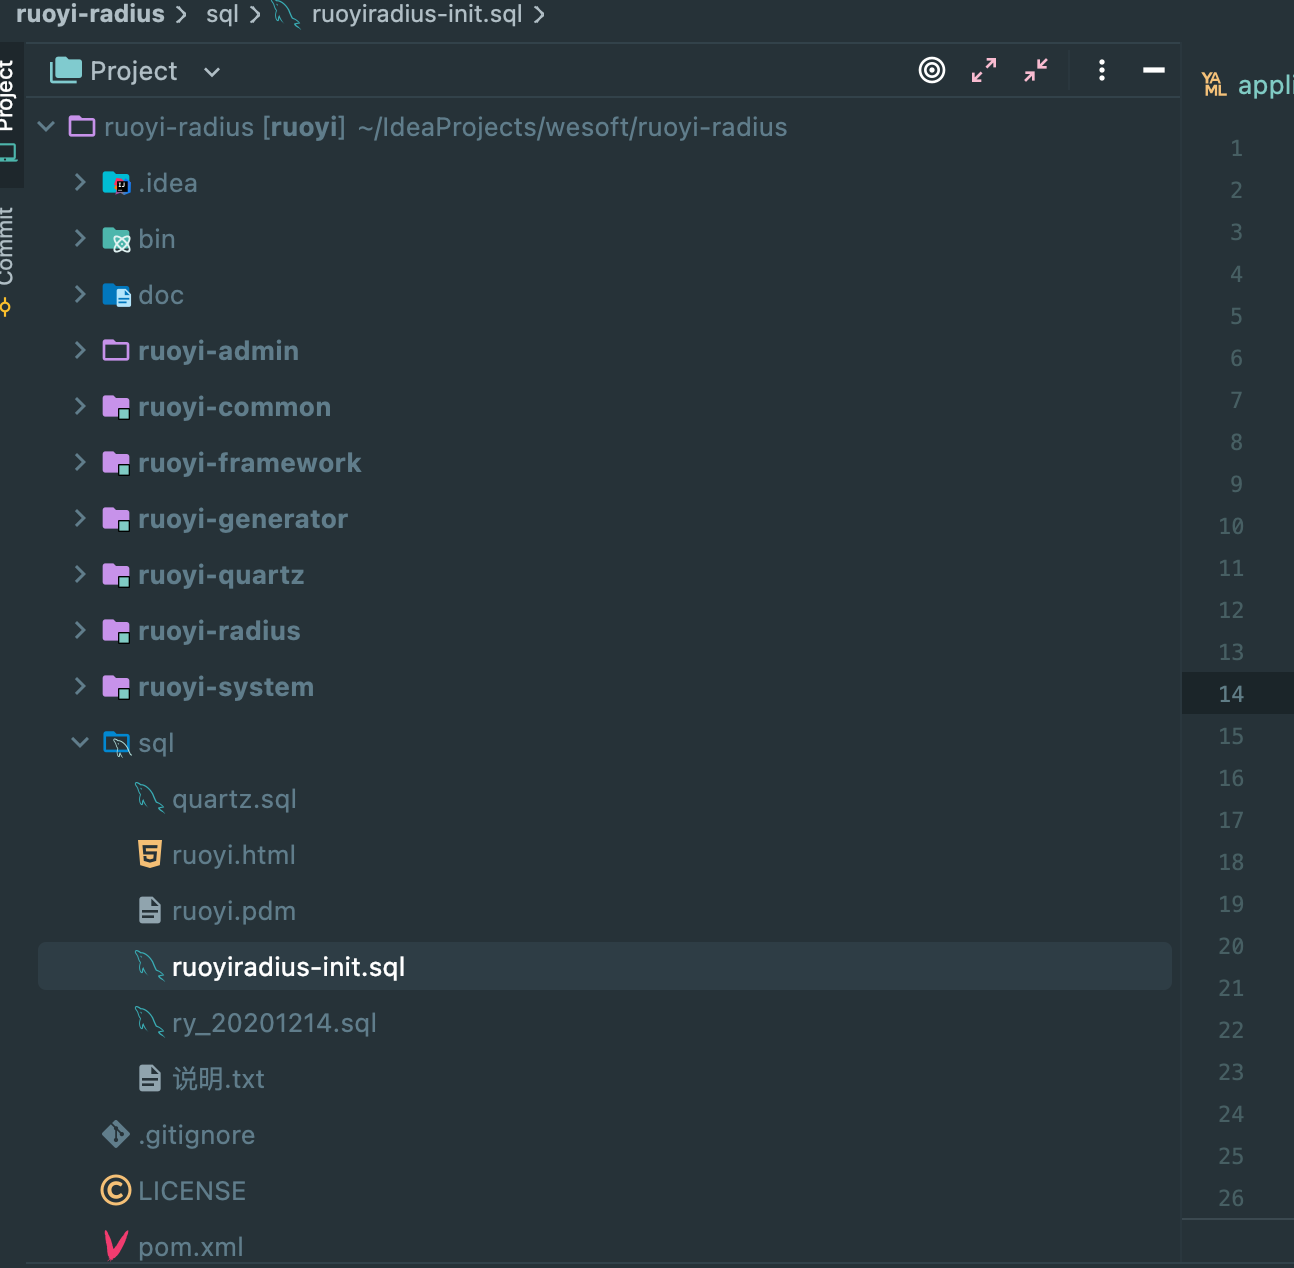
- 初始化数据库
执行ruoyiradius-init.sql

- 修改radius-application.properties,避免和freeradius端口冲突
org.toughradius.authport=${RADIUSD_AUTH_PORT:2812}
org.toughradius.acctport=${RADIUSD_ACCT_PORT:2813}

修改为false
org.toughradius.portal.portalEnabled=${PORTAL_ENABLED:false}
- 创建
/opt/server/ruoyiradius/logs
在主机上创建日志输出目录
- 启动ruoyi-radius
maven打包,修改ry.sh(Appname的修改,jar路径的修改)
启动项目 ./ry.sh start
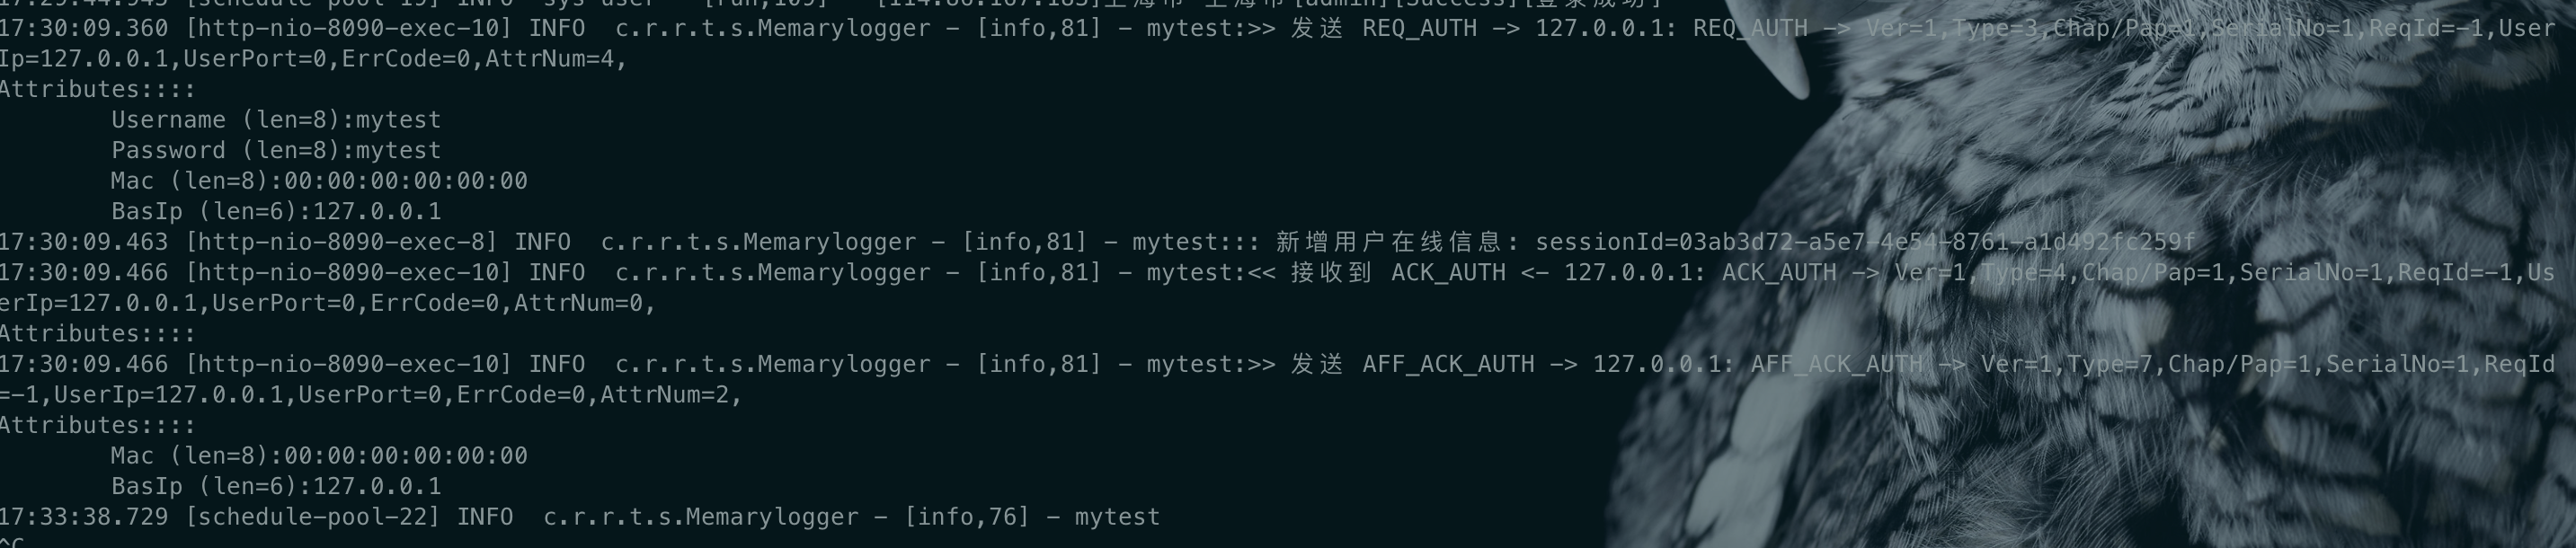
4.调试&验证
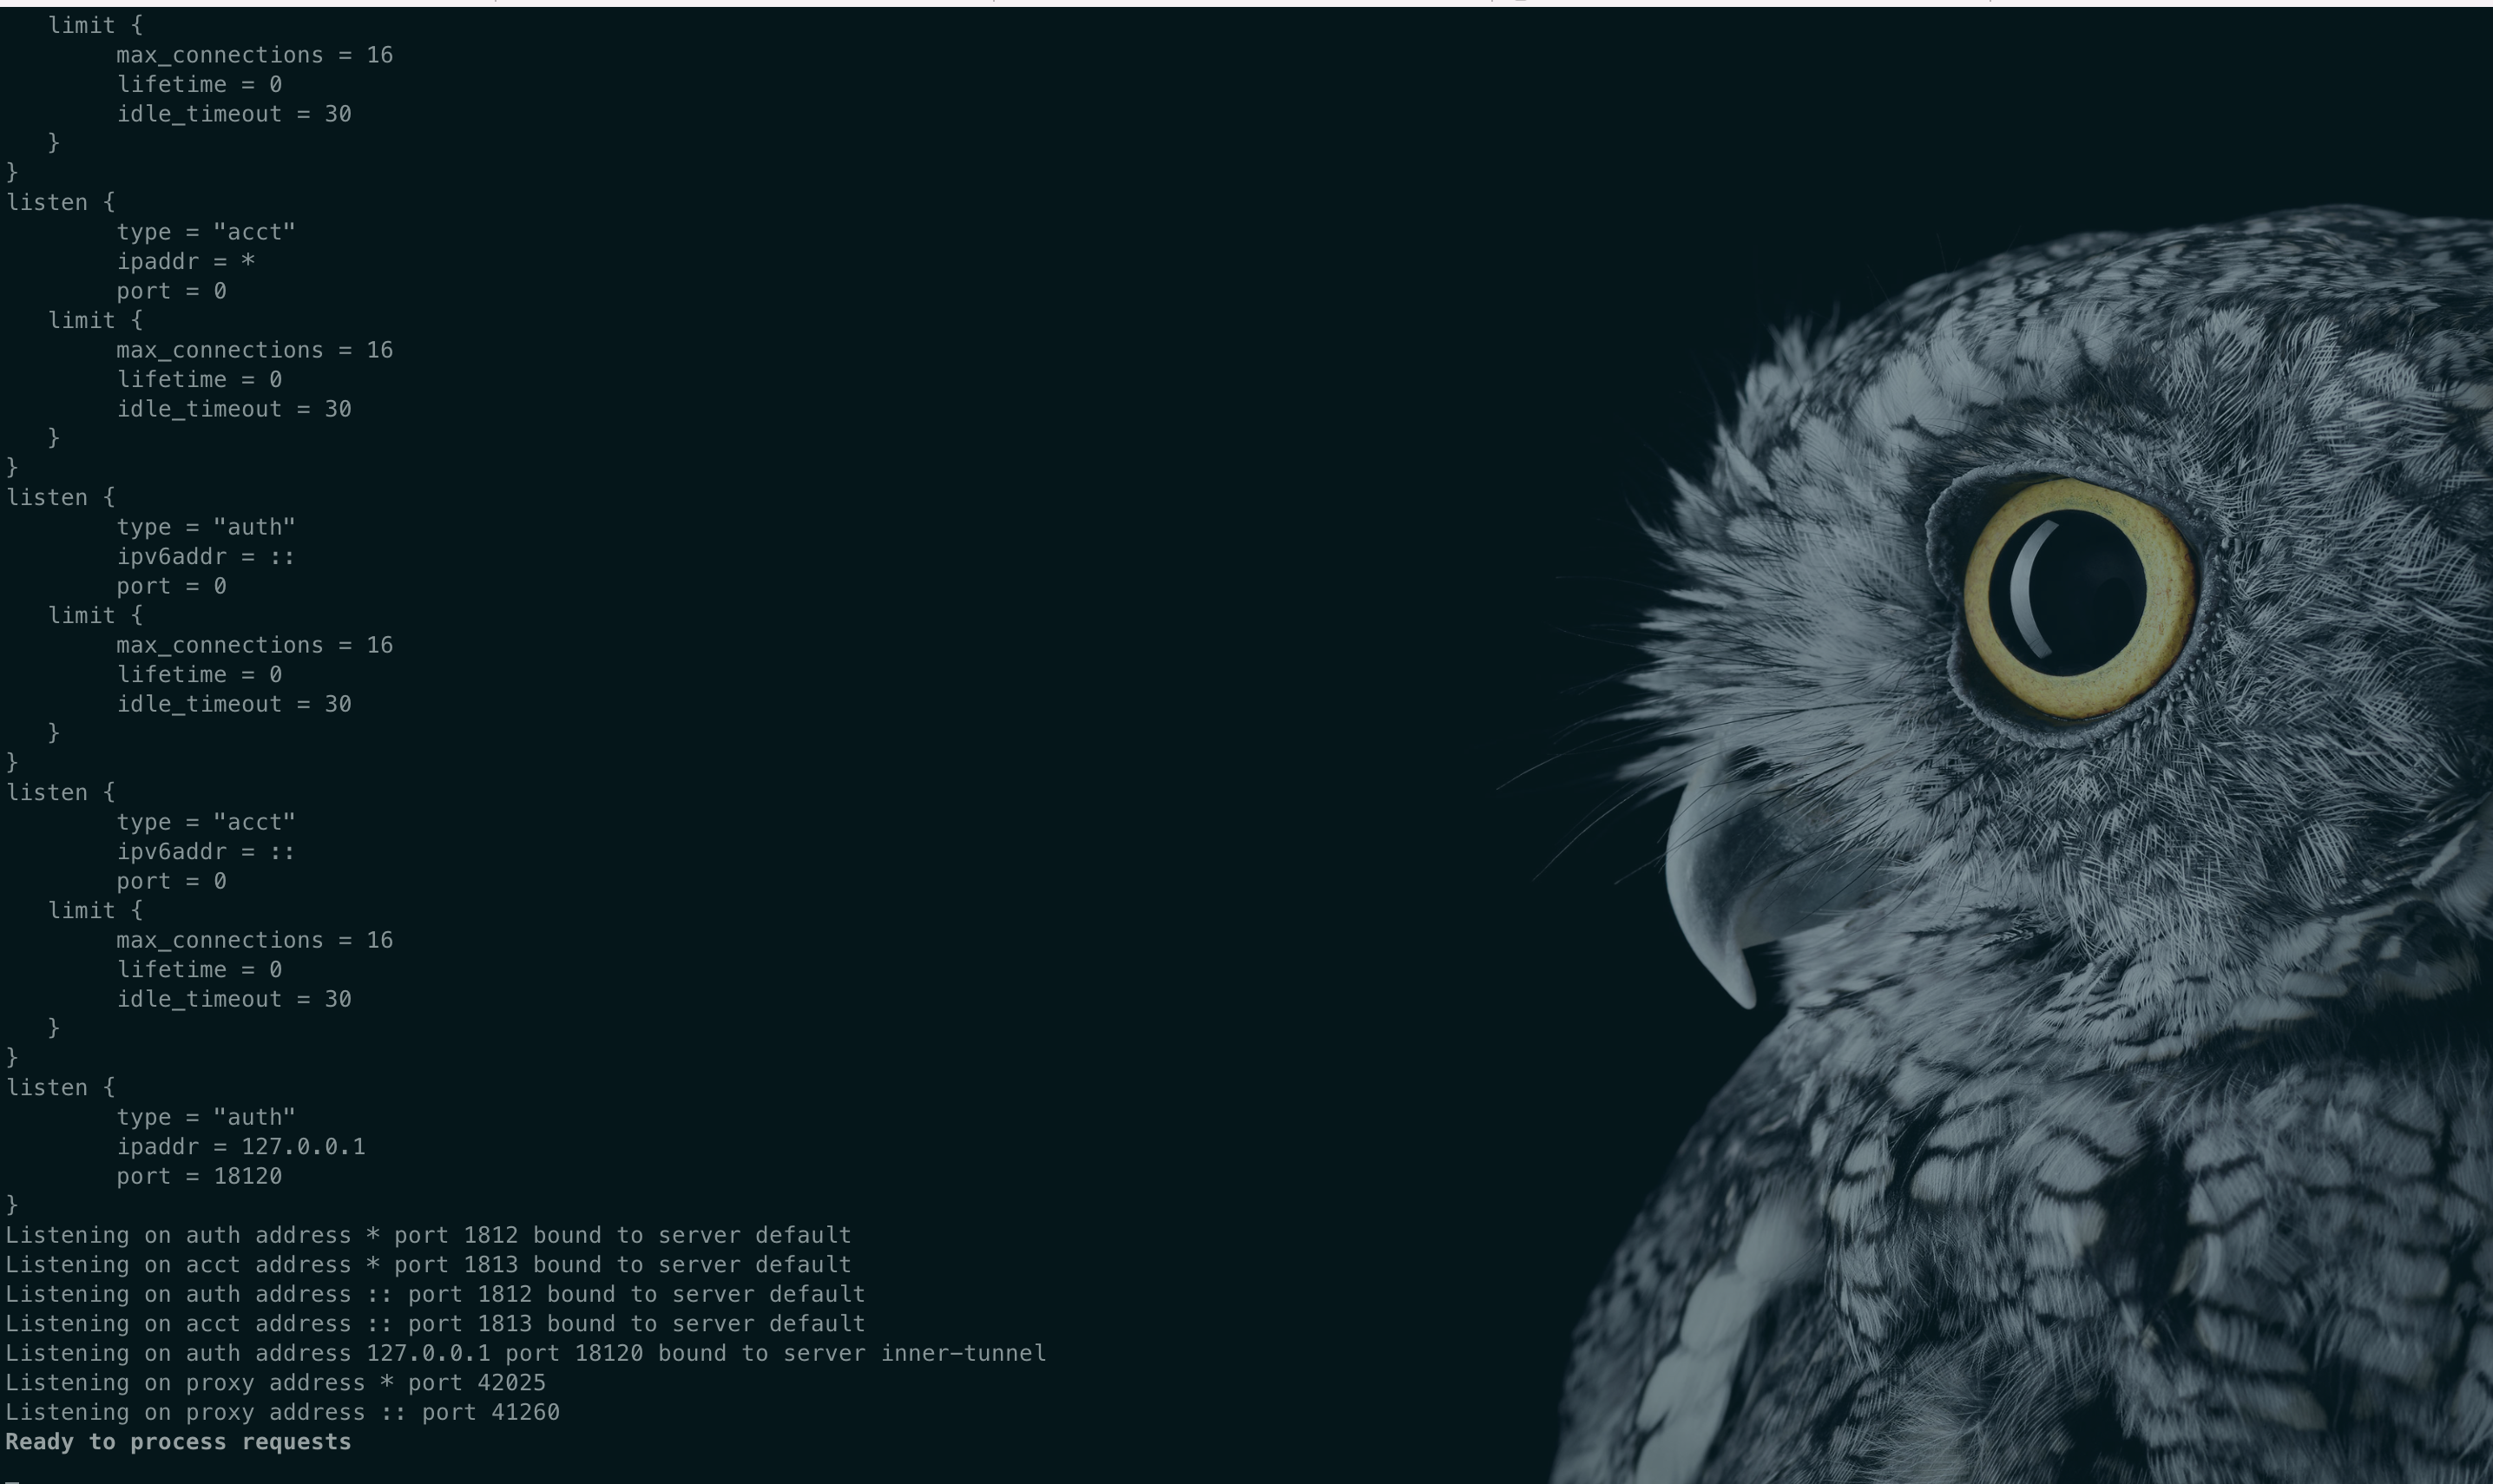
- 调试模式启动freeradius
radiusd -X
- 启动(AC模拟器)ACUDP.jarjar包下载:http://150.158.153.233:9876/ACUDP.jar源码下载:私信我发你邮箱
./acudp.sh

- 打开管理后台:http://127.0.0.1:8090/
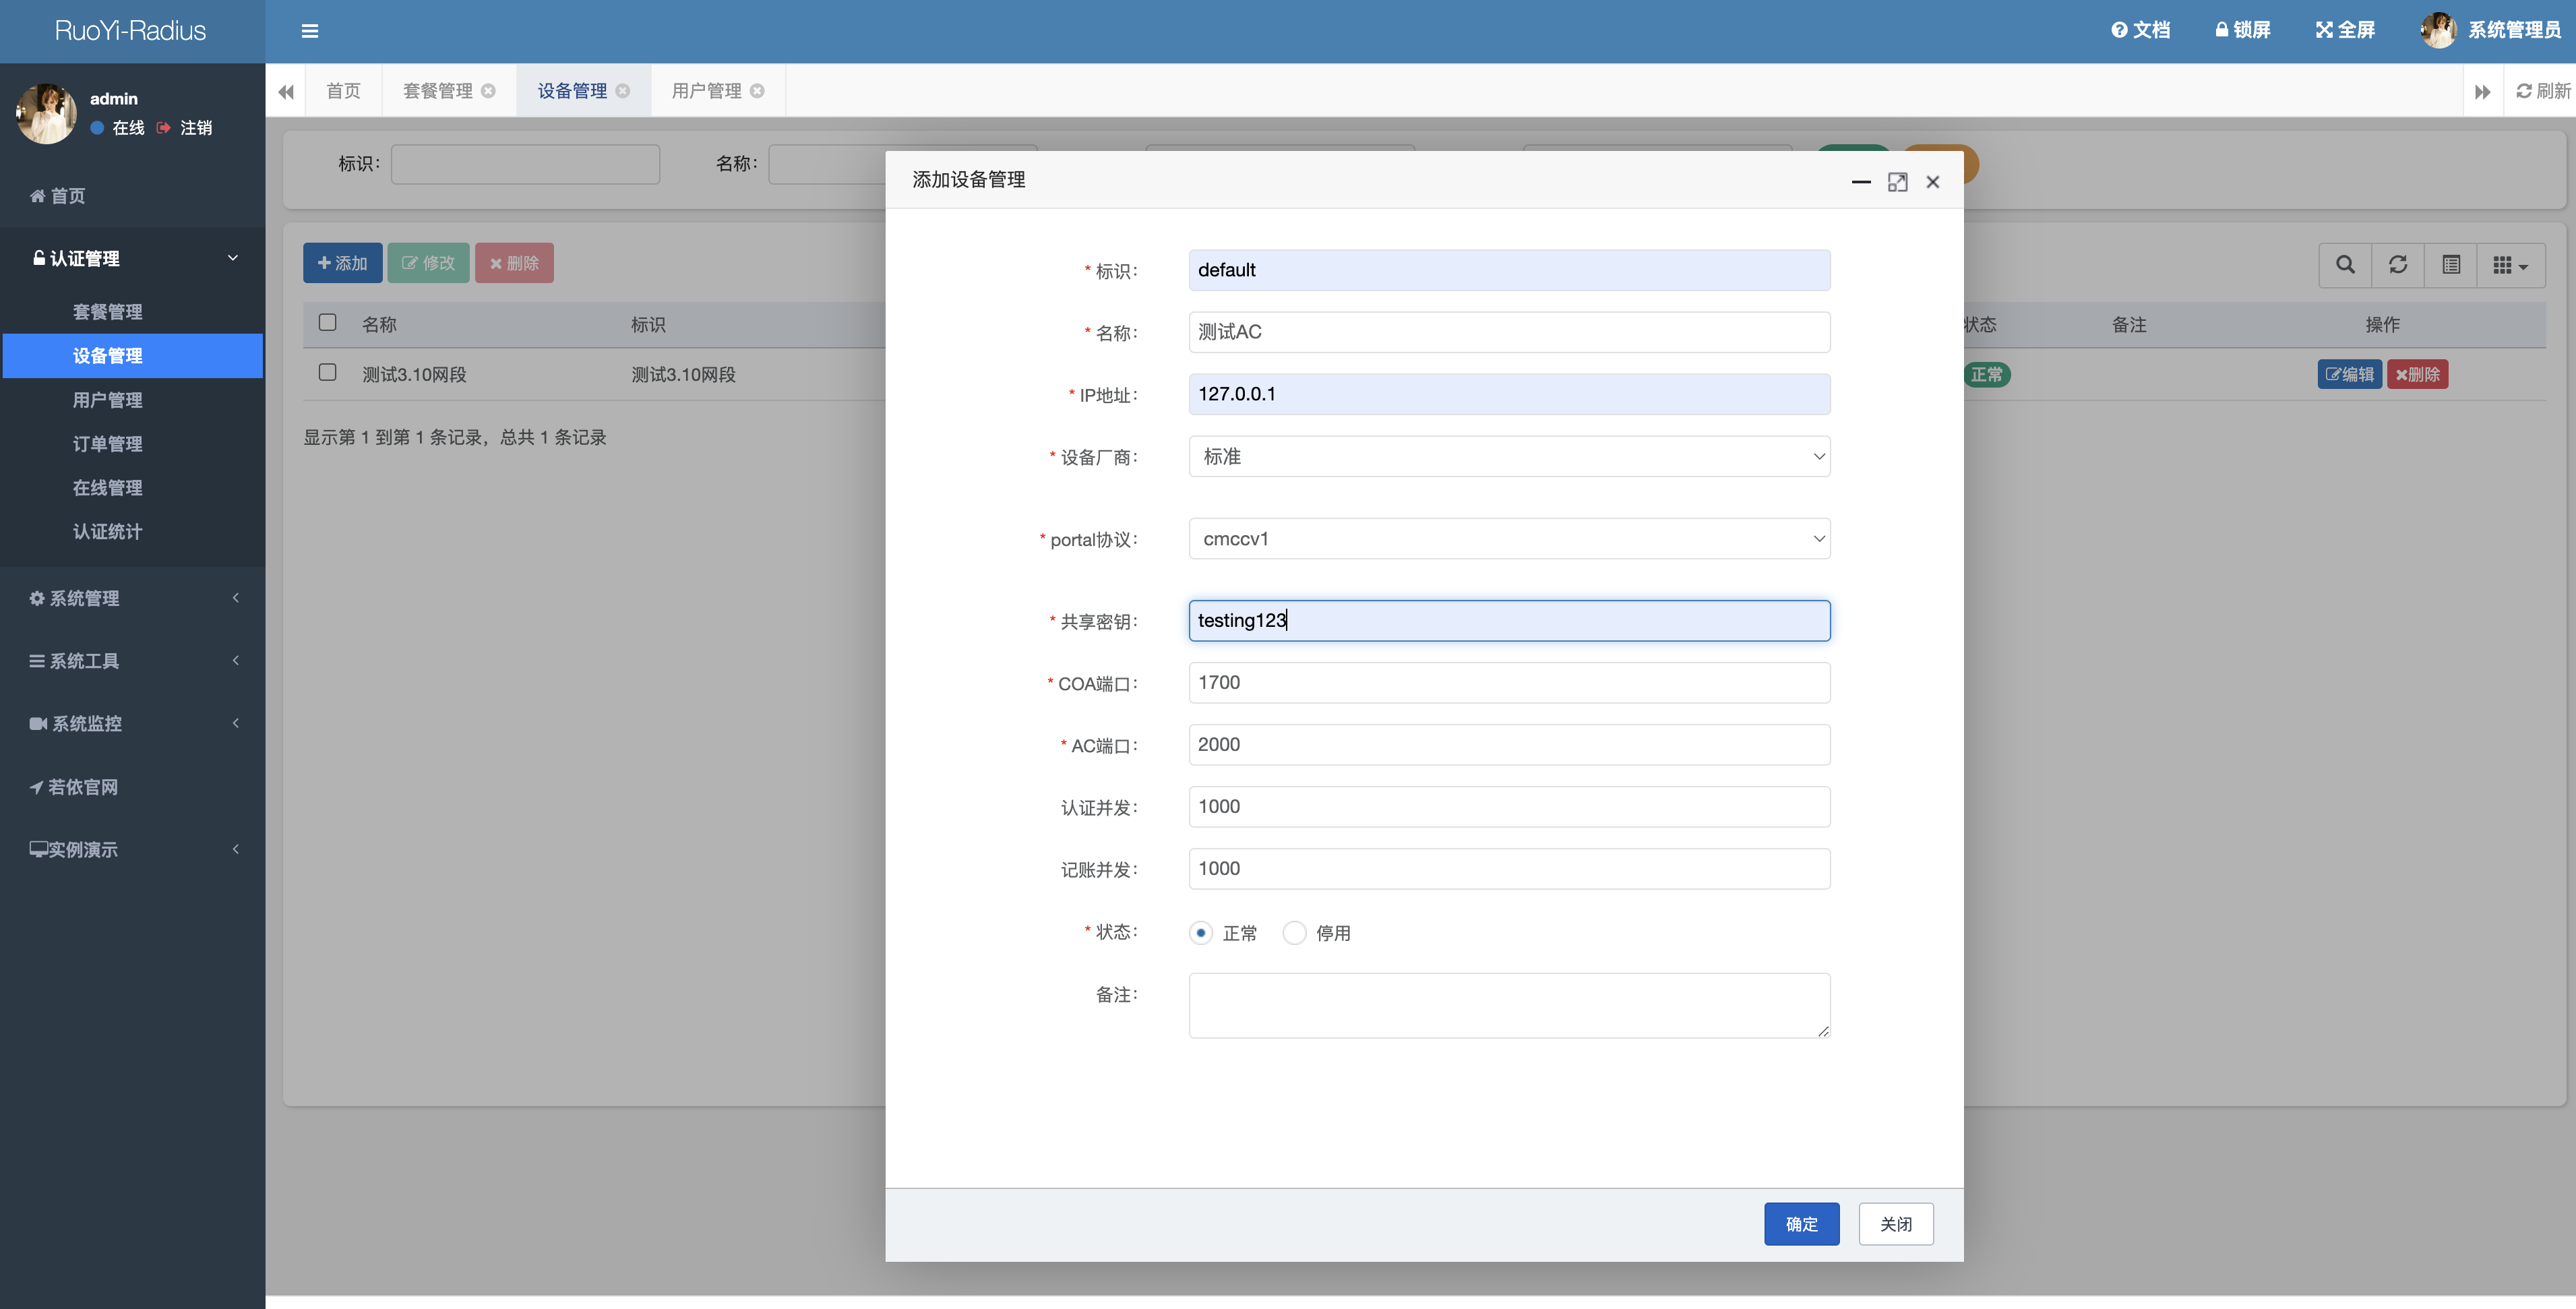
- 添加设备
3.添加用户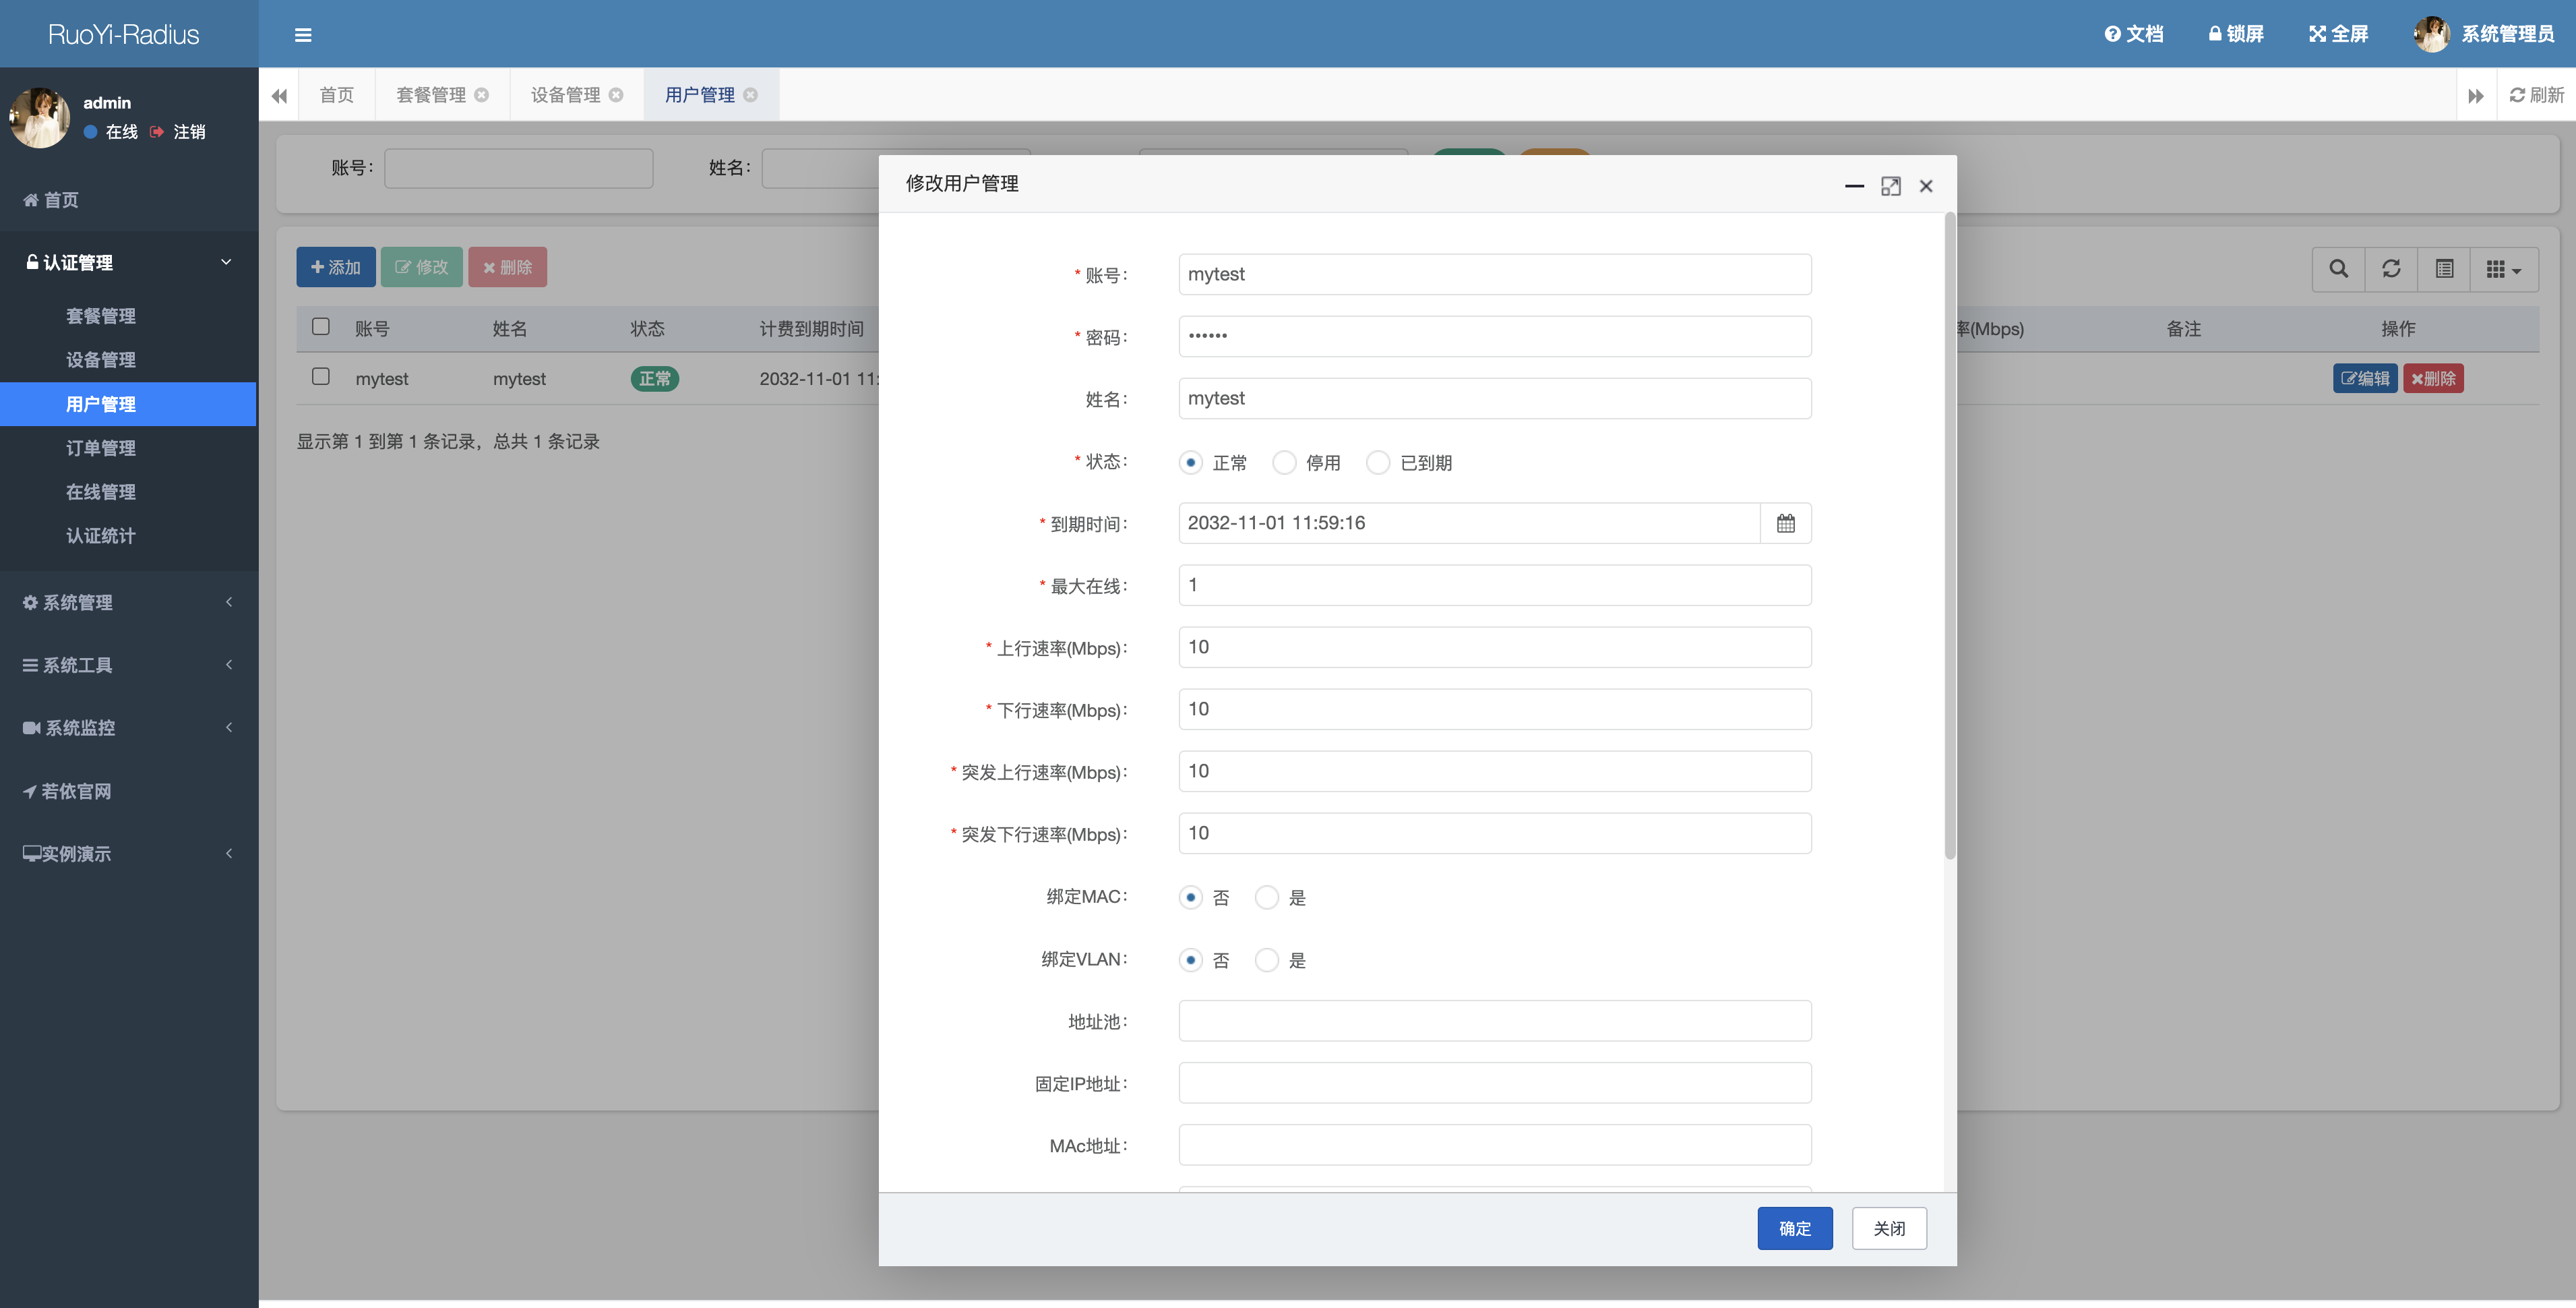


本文转载自: https://blog.csdn.net/orangerPie/article/details/127605523
版权归原作者 java山猫 所有, 如有侵权,请联系我们删除。
版权归原作者 java山猫 所有, 如有侵权,请联系我们删除。