
目录
前言
上一篇简单了解了一下 Elasticsearch 的发展史,特性和使用场景,为了方便接下来的数据测试,本篇内容先开始安装 Elasticsearch。
官网下载
一、Linux 安装
1、下载安装包
⑴、选择需要的安装包
进入 官网 选择自己需要版本,我这里选择
Linux x86_64
:
登录服务器查看系 Linux 内核版本:
a[root@VM-0-12-centos ~]# arch
x86_64
[root@VM-0-12-centos ~]# uname -a
Linux VM-0-12-centos 3.10.0-1160.71.1.el7.x86_64 #1 SMP Tue Jun 2815:37:28 UTC 2022 x86_64 x86_64 x86_64 GNU/Linux
⑵、下载解压到安装目录
进入
/usr/local/
目录,这个目录是我的安装目录,根据自己的习惯选择,下载安装包并解压:
[root@VM-0-12-centos ~]# cd /usr/local/[root@VM-0-12-centos local]# wget https://artifacts.elastic.co/downloads/elasticsearch/elasticsearch-8.6.1-linux-x86_64.tar.gz--2023-02-1409:45:52--  https://artifacts.elastic.co/downloads/elasticsearch/elasticsearch-8.6.1-linux-x86_64.tar.gz
Resolving artifacts.elastic.co(artifacts.elastic.co)...34.120.127.130,2600:1901:0:1d7::
Connecting to artifacts.elastic.co(artifacts.elastic.co)|34.120.127.130|:443... connected.
HTTP request sent, awaiting response...200 OK
Length:581763080(555M)[application/x-gzip]
Saving to: ‘elasticsearch-8.6.1-linux-x86_64.tar.gz’

100%[=====================================================================>]581,763,08012.2MB/s   in 46s

2023-02-1409:46:38(12.2 MB/s)- ‘elasticsearch-8.6.1-linux-x86_64.tar.gz’ saved [581763080/581763080][root@VM-0-12-centos local]# tar -zvxf elasticsearch-8.6.1-linux-x86_64.tar.gz
[root@VM-0-12-centos local]# rm -f elasticsearch-8.6.1-linux-x86_64.tar.gz
[root@VM-0-12-centos local]# ll -a
total 80
drwxr-xr-x.20 root  root  4096 Feb 1414:11.
drwxr-xr-x.13 root  root  4096 Aug  82018..
drwxr-xr-x.2 root  root  4096 Dec 2116:33 bin
drwxr-xr-x   9 root  root  4096 Jan 2505:47 elasticsearch-8.6.1
drwxr-xr-x.2 root  root  4096 Apr 112018 etc
drwxr-xr-x   6 root  root  4096 Dec 2116:21 freetype
drwxr-xr-x.2 root  root  4096 Apr 112018 games
drwxr-xr-x.3 root  root  4096 Dec 2116:23 include
drwxr-xr-x.4 root  root  4096 Dec 2116:23 lib
drwxr-xr-x.2 root  root  4096 Apr 112018 lib64
drwxr-xr-x.2 root  root  4096 Apr 112018 libexec
drwxr-xr-x   3 root  root  4096 Dec 2116:20 man
drwxr-xr-x  10 mysql mysql 4096 Dec 2116:22 mysql
drwxr-xr-x  11 root  root  4096 Dec 2210:40 mysql-master-slave
drwxr-xr-x  11 root  root  4096 Dec 2116:37 nginx
drwxr-xr-x  10 root  root  4096 Dec 2116:33 php
drwxr-xr-x  17 root  root  4096 Dec 2116:07 qcloud
drwxr-xr-x.2 root  root  4096 Apr 112018 sbin
drwxr-xr-x.8 root  root  4096 Dec 2116:20 share
drwxr-xr-x.2 root  root  4096 Apr 112018 src
[root@VM-0-12-centos local]#
2、查看解压后目录结构
[root@VM-0-12-centos local]# cd elasticsearch-8.6.1/[root@VM-0-12-centos elasticsearch-8.6.1]# ll -X
total 2224
drwxr-xr-x  2 root root    4096 Jan 2505:47 bin
drwxr-xr-x  3 root root    4096 Feb 1414:06 config
drwxr-xr-x  8 root root    4096 Jan 2505:47 jdk
drwxr-xr-x  5 root root    4096 Jan 2505:47 lib
drwxr-xr-x  2 root root    4096 Jan 2505:43 logs
drwxr-xr-x 69 root root    4096 Jan 2505:47 modules
drwxr-xr-x  2 root root    4096 Jan 2505:43 plugins
-rw-r--r--1 root root    8106 Jan 2505:34 README.asciidoc
-rw-r--r--1 root root    3860 Jan 2505:34 LICENSE.txt
-rw-r--r--1 root root 2235851 Jan 2505:43 NOTICE.txt
以下为 Elasticsearch 目录及主要配置文件介绍:
目录|文件描述
bin/
二进制脚本包含启动节点的elasticsearch |-- elasticsearchelasticsearch的启动命令,Linux下加”-d”参数以服务的形式后台运行。 |-- …
config/
配置文件目录(elasticsearch、log、jvm、role、user) |-- elasticsearch.yml配置文件中可进行端口、是否允许外部访问、端口等的设置。 |-- jvm.optionsjvm 配置文件 |-- log4j2.properties日志配置文件 |-- …
data/
在节点上申请的每个index/shard的数据文件的位置,可容纳多个位置
jdk/
jdk包(7.0版本以后自带jdk环境,如果已经配置了jdk,会优先使用外部 jdk 环境)
lib/
引用的相关类库的存放目录,elasticsearch.jar本身也放于该目录
logs/
日志文件位置
modules/
功能模块的存放目录,如aggs、reindex、geoip、xpack、eval。。。
plugins/
插件文件位置。每个插件将包含在一个子目录中README.asciidocreadme文档LICENSE.txt证书NOTICE.txt通知
注意事项:
- es依赖jdk环境,现在7.0以后的es压缩包中自带有jdk。
- 若已提前安装了jdk环境,则es启动时,会优先找linux中的jdk。若此时jdk的版本不一致,就会造成jdk不能正常运行。
- 所以,若Linux服务本来没有配置jdk,则会直接使用es目录下默认的jdk,反而不会报错。
3、启动 Elasticsearch
⑴、正常启动流程
- 1、创建用户
elastic,专门用于管理 Elasticsearch。[root@VM-0-12-centos elasticsearch-8.6.1]# useradd elastic[root@VM-0-12-centos elasticsearch-8.6.1]# chown -R elastic:elastic /usr/local/elasticsearch-8.6.1/ - 2、修改配置文件
elasticsearch.yml,这里为了验证是否安装成功,关闭安全认证:xpack.security.enabled和xpack.security.http.ssl: enabled都改为false,否则无法直接通过浏览器访问 9200端口,后正式应用的时候在启用。#Enable security featuresxpack.security.enabled: false#Enable encryption for HTTP API client connections, such as Kibana, Logstash, and Agentsxpack.security.http.ssl: enabled: false keystore.path: certs/http.p12 - 3、切换到
elastic用户,后台启动 Elasticsearch,浏览器访问 9200端口:http://你的IP:9200/;Linux 记得在安全组配置9200端口允许访问。[root@VM-0-12-centos elasticsearch-8.6.1]# su elastic[elastic@VM-0-12-centos elasticsearch-8.6.1]$ ./bin/elasticsearch -d - 4、第一次启动成功,有些信息需要保存 - 如下代码中蓝色提示行下的生成的密码和密钥: - ES为 用户elastic 生成的密码可以通过
bin/elasticsearch-reset-password -u elastic重置,例:kT62lzIOXGu6NRWwNw0Q- CA证书的密钥信息,保存即可:e879957d366063beb27b20852f7bcf403801213732e9ccfcfefae06a6f1053fe- 为 Kibana 生成一个注册令牌━━━━━━━━━━━━━━━━━━━━━━━━━━━━━━━━━━━━━━━━━━━━━━━━━━━━━━━━━━━━━━━━━━━━━━━━━━━━━━━━━━━━━━━━━━━━━━━━━━━━━━━━━━━━━━━━━━━━━━━━━━━━━━━━━━━━━━━━━━━━━━━━━━━━━━━━━━━━━━━━━━━━━━━━━━━━━━━━━━━━━━━━━━━━━━━━━━━━━━━━━━━━━━━━━━━━━━━━━━━━━━━━━━✅ Elasticsearch security features have been automatically configured!✅ Authentication is enabled and cluster connections are encrypted.ℹ️ Password for the elastic user(reset with `bin/elasticsearch-reset-password -u elastic`): kT62lzIOXGu6NRWwNw0Qℹ️ HTTP CA certificate SHA-256 fingerprint: e879957d366063beb27b20852f7bcf403801213732e9ccfcfefae06a6f1053feℹ️ Configure Kibana to use this cluster:• Run Kibana and click the configuration link in the terminal when Kibana starts.• Copy the following enrollment token and paste it into Kibana in your browser(valid for the next 30 minutes): eyJ2ZXIiOiI4LjYuMSIsImFkciI6WyIxNzIuMTcuMC4xMjo5MjAwIl0sImZnciI6ImU4Nzk5NTdkMzY2MDYzYmViMjdiMjA4NTJmN2JjZjQwMzgwMTIxMzczMmU5Y2NmY2ZlZmFlMDZhNmYxMDUzZmUiLCJrZXkiOiJxQ2pLV0lZQjRtVFF3ZXU1a2RiWDowZFdqY1BwYVJfT1U5VUxKSGFpNmFRIn0=ℹ️ Configure other nodes to join this cluster:• On this node: ⁃ Create an enrollment token with `bin/elasticsearch-create-enrollment-token -s node`. ⁃ Uncomment the transport.host setting at the end of config/elasticsearch.yml. ⁃ Restart Elasticsearch.• On other nodes: ⁃ Start Elasticsearch with `bin/elasticsearch --enrollment-token <token>`, using the enrollment token that you generated.━━━━━━━━━━━━━━━━━━━━━━━━━━━━━━━━━━━━━━━━━━━━━━━━━━━━━━━━━━━━━━━━━━━━━━━━━━━━━━━━━━━━━━━━━━━━━━━━━━━━━━━━━━━━━━━━━━━━━━━━━━━━━━━━━━━━━━━━━━━━━━━━━━━━━━━━━━━━━━━━━━━━━━━━━━━━━━━━━━━━━━━━━━━━━━━━━━━━━━━━━━━━━━━━━━━━━━━━━━━━━━━━━━
⑵、启动过程遇到的问题
①、启动报错
运行
bin/
目录下的
elasticsearch 脚本
,启动 elasticsearch:
[root@VM-0-12-centos elasticsearch-8.6.1]# ./bin/elasticsearch
[2023-02-14T17:44:22,531][ERROR][o.e.b.Elasticsearch      ][VM-0-12-centos] fatal exception while booting Elasticsearchjava.lang.RuntimeException: can not run elasticsearch as root
        at [email protected]/org.elasticsearch.bootstrap.Elasticsearch.initializeNatives(Elasticsearch.java:260)
        at [email protected]/org.elasticsearch.bootstrap.Elasticsearch.initPhase2(Elasticsearch.java:166)
        at [email protected]/org.elasticsearch.bootstrap.Elasticsearch.main(Elasticsearch.java:66)

See logs for more details.

ERROR: Elasticsearch did not exit normally - check the logs at /usr/local/elasticsearch-8.6.1/logs/elasticsearch.log

ERROR: Elasticsearch exited unexpectedly
[root@VM-0-12-centos elasticsearch-8.6.1]#
报错了,提示
can not run elasticsearch as root
,不能使用root用户启动会报错。
②、创建运行 Elasticsearch 的用户,启动成功,但无法访问
[root@VM-0-12-centos elasticsearch-8.6.1]# useradd elastic
[root@VM-0-12-centos elasticsearch-8.6.1]# chown -R elastic:elastic /usr/local/elasticsearch-8.6.1/[root@VM-0-12-centos elasticsearch-8.6.1]# su elastic
[elastic@VM-0-12-centos elasticsearch-8.6.1]$ ./bin/elasticsearch
启动成功,这时候我们试着访问你的 9200端口 :
http://你的IP:9200/
,失败。
并且启动台那边也报错了
http client did not trust this server's certificate
,如下:
[2023-02-14T18:04:06,931][WARN ][o.e.x.s.t.n.SecurityNetty4HttpServerTransport][VM-0-12-centos] received plaintext http traffic on an https channel, closing connection Netty4HttpChannel{localAddress=/172.17.0.12:9200, remoteAddress=/218.81.82.139:2348}[2023-02-14T18:06:25,213][WARN ][o.e.x.s.t.n.SecurityNetty4HttpServerTransport][VM-0-12-centos] http client did not trust this server's certificate, closing connection Netty4HttpChannel{localAddress=/172.17.0.12:9200, remoteAddress=/218.81.82.139:2349}[2023-02-14T18:06:25,214][WARN ][o.e.x.s.t.n.SecurityNetty4HttpServerTransport][VM-0-12-centos] http client did not trust this server's certificate, closing connection Netty4HttpChannel{localAddress=/172.17.0.12:9200, remoteAddress=/218.81.82.139:2350}
原因是因为 Elasticsearch 默认开启了安全认证,虽然启动台启动成功,但访问 9200 端口失败。
解决办法:找到config/目录下面的elasticsearch.yml配置文件,把安全认证开关从原先的true都改成false,实现免密登录访问即可,修改这两处都为false后,重新启动:
③、停止Elasticsearch,修改配置文件重新启动
新开一个SSH连接,停止Elasticsearch:
[root@VM-0-12-centos ~]# ps -ef | grep elastic
root     2613224103018:23 pts/400:00:00 su elastic
elastic  2613326132018:23 pts/400:00:00 bash
elastic  2617826133218:23 pts/400:00:02/usr/local/elasticsearch-8.6.1/jdk/bin/java -Xms4m -Xmx64m -XX:+UseSerialGC -Dcli.name=server -Dcli.script=./bin/elasticsearch -Dcli.libs=lib/tools/server-cli -Des.path.home=/usr/local/elasticsearch-8.6.1-Des.path.conf=/usr/local/elasticsearch-8.6.1/config -Des.distribution.type=tar -cp /usr/local/elasticsearch-8.6.1/lib/*:/usr/local/elasticsearch-8.6.1/lib/cli-launcher/* org.elasticsearch.launcher.CliToolLauncher
elastic  26246261783118:23 pts/400:00:31/usr/local/elasticsearch-8.6.1/jdk/bin/java -Des.networkaddress.cache.ttl=60-Des.networkaddress.cache.negative.ttl=10-Djava.security.manager=allow -XX:+AlwaysPreTouch -Xss1m -Djava.awt.headless=true -Dfile.encoding=UTF-8-Djna.nosys=true -XX:-OmitStackTraceInFastThrow -Dio.netty.noUnsafe=true -Dio.netty.noKeySetOptimization=true -Dio.netty.recycler.maxCapacityPerThread=0-Dlog4j.shutdownHookEnabled=false -Dlog4j2.disable.jmx=true -Dlog4j2.formatMsgNoLookups=true -Djava.locale.providers=SPI,COMPAT --add-opens=java.base/java.io=ALL-UNNAMED -XX:+UseG1GC -Djava.io.tmpdir=/tmp/elasticsearch-2471405775610397709-XX:+HeapDumpOnOutOfMemoryError -XX:+ExitOnOutOfMemoryError -XX:HeapDumpPath=data -XX:ErrorFile=logs/hs_err_pid%p.log -Xlog:gc*,gc+age=trace,safepoint:file=logs/gc.log:utctime,pid,tags:filecount=32,filesize=64m -Xms999m -Xmx999m -XX:MaxDirectMemorySize=524288000-XX:G1HeapRegionSize=4m -XX:InitiatingHeapOccupancyPercent=30-XX:G1ReservePercent=15-Des.distribution.type=tar --module-path /usr/local/elasticsearch-8.6.1/lib --add-modules=jdk.net -m org.elasticsearch.server/org.elasticsearch.bootstrap.Elasticsearch
elastic  2627526246018:23 pts/400:00:00/usr/local/elasticsearch-8.6.1/modules/x-pack-ml/platform/linux-x86_64/bin/controller
root     2668126605018:24 pts/500:00:00 grep --color=auto elastic
[root@VM-0-12-centos ~]# kill -926133[root@VM-0-12-centos ~]# kill -926178
修改配置文件
elasticsearch.yml
,把这两处改为
false
:
# Enable security features
xpack.security.enabled: false

xpack.security.enrollment.enabled: true# Enable encryption for HTTP API client connections, such as Kibana, Logstash, and Agents
xpack.security.http.ssl:
  enabled: false
  keystore.path: certs/http.p12
重新启动 Elasticsearch,访问 9200 端口成功。
或者curl 访问:
[root@VM-0-12-centos ~]# curl localhost:9200/{"name":"VM-0-12-centos","cluster_name":"elasticsearch","cluster_uuid":"3e6bNn6dS_G7bEfl7YhXcA","version":{"number":"8.6.1","build_flavor":"default","build_type":"tar","build_hash":"180c9830da956993e59e2cd70eb32b5e383ea42c","build_date":"2023-01-24T21:35:11.506992272Z","build_snapshot": false,"lucene_version":"9.4.2","minimum_wire_compatibility_version":"7.17.0","minimum_index_compatibility_version":"7.0.0"},"tagline":"You Know, for Search"}[root@VM-0-12-centos ~]#
④、JDK 问题
这里安装了一下 JDK,但是
Elasticsearch8.6
仍会自动选择自己内置的JDK。如果其他版本优先选择系统环境变量中的JDK可以参考这篇博客 Elasticsearch JDK选择。
[elastic@VM-0-12-centos elasticsearch-8.6.1]$ ps -ef | grep elastic
root     2069517356013:40 pts/300:00:00 su elastic
elastic  2069720695013:40 pts/300:00:00 bash
elastic  2125219313:41 pts/300:00:30/usr/local/elasticsearch-8.6.1/jdk/bin/java -Des.networkaddress.cache.ttl=60-Des.networkaddress.cache.negative.ttl=10-Djava.security.manager=allow -XX:+AlwaysPreTouch -Xss1m -Djava.awt.headless=true -Dfile.encoding=UTF-8-Djna.nosys=true -XX:-OmitStackTraceInFastThrow -Dio.netty.noUnsafe=true -Dio.netty.noKeySetOptimization=true -Dio.netty.recycler.maxCapacityPerThread=0-Dlog4j.shutdownHookEnabled=false -Dlog4j2.disable.jmx=true -Dlog4j2.formatMsgNoLookups=true -Djava.locale.providers=SPI,COMPAT --add-opens=java.base/java.io=ALL-UNNAMED -XX:+UseG1GC -Djava.io.tmpdir=/tmp/elasticsearch-16881426132015000451-XX:+HeapDumpOnOutOfMemoryError -XX:+ExitOnOutOfMemoryError -XX:HeapDumpPath=data -XX:ErrorFile=logs/hs_err_pid%p.log -Xlog:gc*,gc+age=trace,safepoint:file=logs/gc.log:utctime,pid,tags:filecount=32,filesize=64m -Xms999m -Xmx999m -XX:MaxDirectMemorySize=524288000-XX:G1HeapRegionSize=4m -XX:InitiatingHeapOccupancyPercent=30-XX:G1ReservePercent=15-Des.distribution.type=tar --module-path /usr/local/elasticsearch-8.6.1/lib --add-modules=jdk.net -m org.elasticsearch.server/org.elasticsearch.bootstrap.Elasticsearch
elastic  2128021252013:41 pts/300:00:00/usr/local/elasticsearch-8.6.1/modules/x-pack-ml/platform/linux-x86_64/bin/controller
elastic  2143420697013:42 pts/300:00:00 ps -ef
elastic  2143520697013:42 pts/300:00:00 grep --color=auto elastic
[elastic@VM-0-12-centos elasticsearch-8.6.1]$ java -version
java version "17.0.6"2023-01-17 LTS
Java(TM) SE Runtime Environment(build 17.0.6+9-LTS-190)
Java HotSpot(TM)64-Bit Server VM(build 17.0.6+9-LTS-190, mixed mode, sharing)[elastic@VM-0-12-centos elasticsearch-8.6.1]$
二、Windows 安装
1、下载安装包

下载后解压:
2、启动 Elasticsearch
⑴、正常启动流程
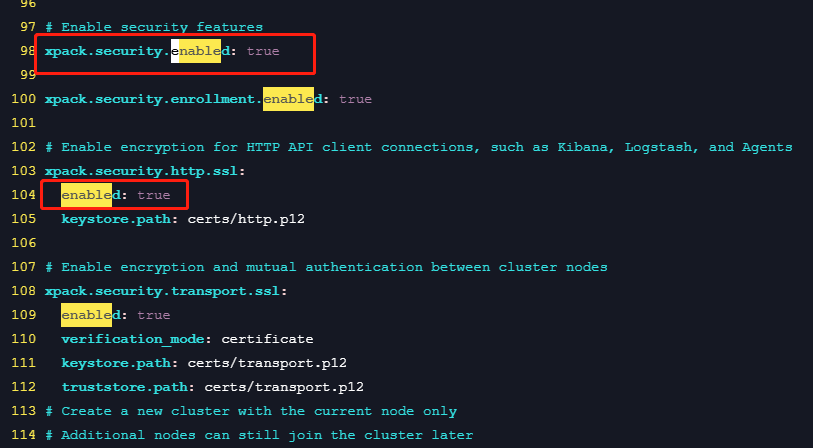
由于 Elasticsearch 默认开启安全认证所以无法直接通过端口访问成功,先修改
config
目录下的配置文件
elasticsearch.yml
,把这两处改为
false
。:
进入
bin
目录下,双击
elasticsearch.bat
文件启动 ES,访问 http://localhost:9200/: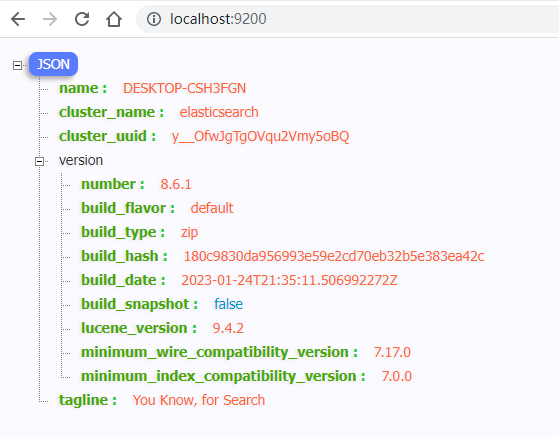
⑵、启动过程遇到的问题
①、同Linux 默认开启安全认证,启动后无法直接访问
和Linux 一样启动后无法访问,进入
logs/
查看
elasticsearch.log
日志文件信息看到提示
received plaintext http traffic on an https channel
,所以找到原因了:同上,默认开启了安全认证,不允许直接访问。
解决办法:修改配置文件
elasticsearch.yml
,把这两处改为
false
。
再次启动,访问9200端口成功:
三、配置文件
1、基础配置
- Cluster-
cluster.name:集群名。 - Node-
node.name:节点名,同一集群下节点名唯一。-node.attr.[rack]:向节点添加自定义属性。 - Paths (这里的两个路径生产环境必须要修改) -
path.data:存储数据的目录路径(用逗号分隔多个位置)。-path.logs:日志文件的路径。 - Memory-
bootstrap.memory_lock:启动时锁定内存。 - Network-
network.host:默认情况下,Elasticsearch只能在本地主机上访问。在此处设置其他地址以在网络上公开此节点,设置内网地址。-http.port:默认情况下,Elasticsearch从9200开始侦听第一个空闲端口上的HTTP流量。在此处设置特定的HTTP端口。 - Discovery-
discovery.seed_hosts:传递初始主机列表以在启动此节点时执行发现:默认主机列表为[“127.0.0.1”,“[::1]”]。-cluster.initial_master_nodes:使用主合格节点的初始集合引导群集:[“node-1”, “node-2”]。 - Readiness-
readiness.port:在本地主机上启用未经验证的TCP就绪端点。 - Various-
action.destructive_requires_name:允许通配符删除索引,true或false。 - Security-
xpack.security.enabled:启用安全功能,默认true。-xpack.security.enrollment.enabled:默认true。-xpack.security.http.ssl:为HTTP API客户端连接(如Kibana、Logstash和代理)启用加密。 -enabled: true-keystore.path: certs/http.p12-xpack.security.transport.ssl:启用群集节点之间的加密和相互身份验证。 -enabled: true-verification_mode: certificate-keystore.path: certs/transport.p12-truststore.path: certs/transport.p12-cluster.initial_master_nodes: 仅使用当前节点创建新群集,其他节点稍后仍可以加入群集:[“DESKTOP-CSH3FGN”]。-http.host:允许从任何位置进行HTTP API连接,连接已加密,需要用户身份验证,默认:http.host: 0.0.0.0。
以下是 elasticsearch.yml 文件的内容:
# ======================== Elasticsearch Configuration =========================## 注意:Elasticsearch为大多数设置提供了合理的默认值。#       在您开始调整和调整配置之前,请确保您了解您试图实现的目标及其后果。### 配置节点的主要方式是通过此文件。此模板列表您可能希望为生产集群配置的最重要的设置。## 有关配置选项的更多信息,请参阅文档:# https://www.elastic.co/guide/en/elasticsearch/reference/index.html## ---------------------------------- Cluster -----------------------------------## 设置集群名:##cluster.name: my-application## ------------------------------------ Node ------------------------------------## 设置节点名:##node.name: node-1## 向节点添加自定义属性:##node.attr.rack: r1## ----------------------------------- Paths ------------------------------------#
这里的两个路径生产环境必须要修改
## 存储数据的目录路径(用逗号分隔多个位置):##path.data: /path/to/data## 日志文件的路径:##path.logs: /path/to/logs## ----------------------------------- Memory -----------------------------------## 启动时锁定内存:##bootstrap.memory_lock: true## 确保堆大小设置为系统上可用内存的一半左右,并且允许进程的所有者使用此限制。## Elasticsearch在系统交换内存时表现不佳。## ---------------------------------- Network -----------------------------------## 默认情况下,Elasticsearch只能在本地主机上访问。在此处设置其他地址以在网络上公开此节点:##network.host: 192.168.0.1## 默认情况下,Elasticsearch从9200开始侦听第一个空闲端口上的HTTP流量。在此处设置特定的HTTP端口:##http.port: 9200## 有关更多信息,请参阅网络模块文档。## --------------------------------- Discovery ----------------------------------## 传递初始主机列表以在启动此节点时执行发现:默认主机列表为[“127.0.0.1”,“[::1]”]##discovery.seed_hosts: ["host1", "host2"]## 使用主合格节点的初始集合引导群集:##cluster.initial_master_nodes: ["node-1", "node-2"]## 有关更多信息,请参阅发现和集群形成模块文档。## --------------------------------- Readiness ----------------------------------## 在本地主机上启用未经验证的TCP就绪端点##readiness.port: 9399## ---------------------------------- Various -----------------------------------## 允许通配符删除索引:##action.destructive_requires_name: false#----------------------- BEGIN SECURITY AUTO CONFIGURATION -----------------------## 已自动生成以下设置、TLS证书和密钥,以在15-02-2023 01:25:15配置Elasticsearch安全功能## --------------------------------------------------------------------------------# 启用安全功能
xpack.security.enabled: true

xpack.security.enrollment.enabled: true# 为HTTP API客户端连接(如Kibana、Logstash和代理)启用加密
xpack.security.http.ssl:
  enabled: true
  keystore.path: certs/http.p12

# 启用群集节点之间的加密和相互身份验证
xpack.security.transport.ssl:
  enabled: true
  verification_mode: certificate
  keystore.path: certs/transport.p12
  truststore.path: certs/transport.p12
# 仅使用当前节点创建新群集# 其他节点稍后仍可以加入群集
cluster.initial_master_nodes: ["DESKTOP-CSH3FGN"]# 允许从任何位置进行HTTP API连接# 连接已加密,需要用户身份验证
http.host: 0.0.0.0

# 允许其他节点从任何位置加入群集# 连接经过加密和相互认证#transport.host: 0.0.0.0#----------------------- END SECURITY AUTO CONFIGURATION -------------------------
2、认证访问
从上面安装过程我们知道 Elasticsearch 是默认开启 Security安全认证,所以无法直接通过ip加端口号访问ES,浏览器提示
该网页无法正常运作
,那么既然是认证只要通过认证就可以访问成功。
在第一次启动 Elasticsearch 成功的时候会显示以下这些信息,保存下来,接下来会用到。
━━━━━━━━━━━━━━━━━━━━━━━━━━━━━━━━━━━━━━━━━━━━━━━━━━━━━━━━━━━━━━━━━━━━━━━━━━━━━━━━━━━━━━━━━━━━━━━━━━━━━━━━━━━━━━━━━━━━━━━━━━━━━━━━━━━━━━━━━━━━━━━━━━━━━━━━━━━━━━━━━━━━━━━━━━━━━━━━━━━━━━━━━━━━━━━━━━━━━━━━━━━━━━━━━━━━━━━━━━━━━━━━━━
✅ Elasticsearch security features have been automatically configured!
✅ Authentication is enabled and cluster connections are encrypted.
ℹ️ Password for the elastic user (reset with `bin/elasticsearch-reset-password -u elastic`):
kT62lzIOXGu6NRWwNw0Q
ℹ️ HTTP CA certificate SHA-256 fingerprint:
e879957d366063beb27b20852f7bcf403801213732e9ccfcfefae06a6f1053fe
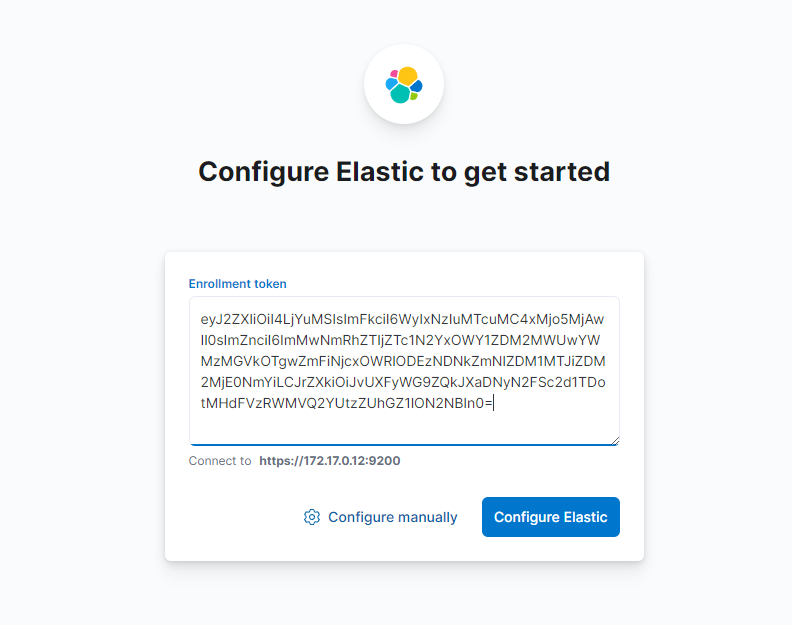
ℹ️ Configure Kibana to use this cluster:
• Run Kibana and click the configuration link in the terminal when Kibana starts.
• Copy the following enrollment token and paste it into Kibana in your browser (valid for the next 30 minutes):
eyJ2ZXIiOiI4LjYuMSIsImFkciI6WyIxNzIuMTcuMC4xMjo5MjAwIl0sImZnciI6ImU4Nzk5NTdkMzY2MDYzYmViMjdiMjA4NTJmN2JjZjQwMzgwMTIxMzczMmU5Y2NmY2ZlZmFlMDZhNmYxMDUzZmUiLCJrZXkiOiJxQ2pLV0lZQjRtVFF3ZXU1a2RiWDowZFdqY1BwYVJfT1U5VUxKSGFpNmFRIn0=
ℹ️ Configure other nodes to join this cluster:
• On this node:
⁃ Create an enrollment token with `bin/elasticsearch-create-enrollment-token -s node`.
⁃ Uncomment the transport.host setting at the end of config/elasticsearch.yml.
⁃ Restart Elasticsearch.
• On other nodes:
⁃ Start Elasticsearch with `bin/elasticsearch --enrollment-token <token>`, using the enrollment token that you generated.
━━━━━━━━━━━━━━━━━━━━━━━━━━━━━━━━━━━━━━━━━━━━━━━━━━━━━━━━━━━━━━━━━━━━━━━━━━━━━━━━━━━━━━━━━━━━━━━━━━━━━━━━━━━━━━━━━━━━━━━━━━━━━━━━━━━━━━━━━━━━━━━━━━━━━━━━━━━━━━━━━━━━━━━━━━━━━━━━━━━━━━━━━━━━━━━━━━━━━━━━━━━━━━━━━━━━━━━━━━━━━━━━━━
由于开启了ssl 认证,现在的访问地址是:
https://localhost:9200/
,访问结果如下: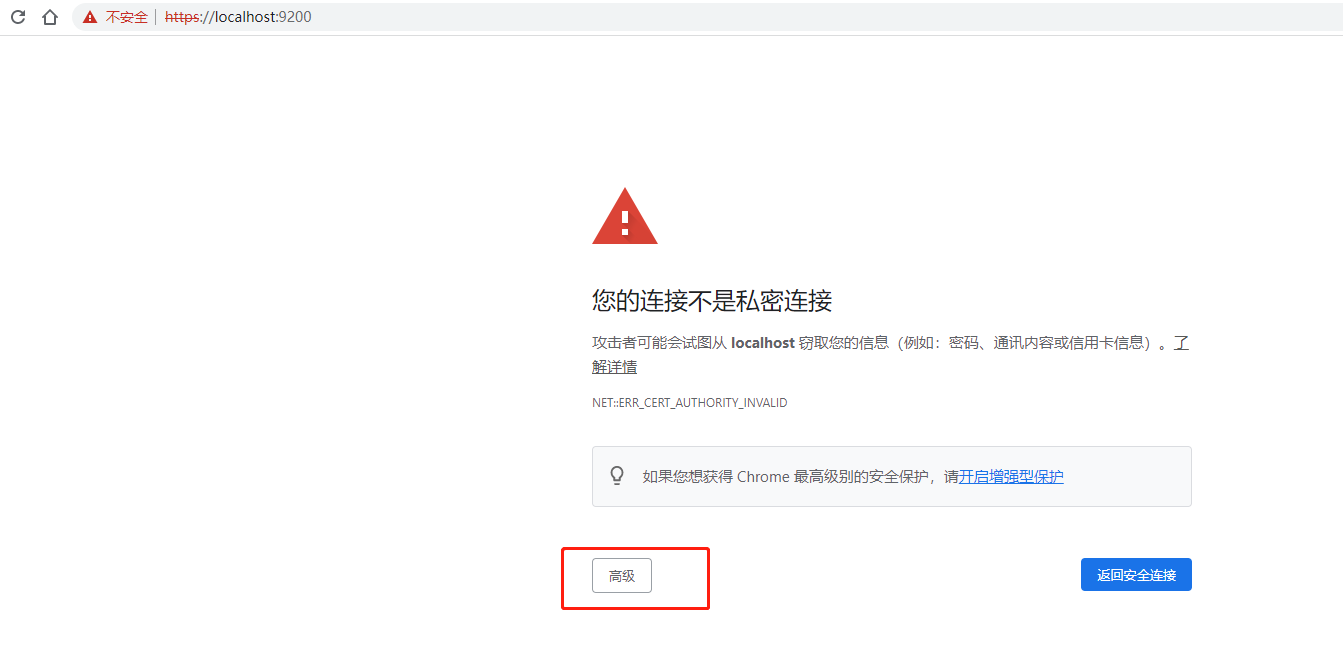
继续点击高级继续前往,然后会提示输入账号密码。

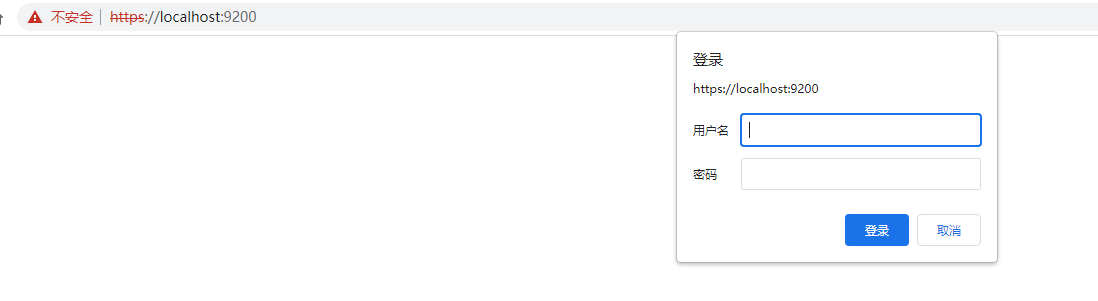
这里的用户名密码就是上面保存信息中:
elastic
和
kT62lzIOXGu6NRWwNw0Q
。
四、配置本地集群
配置集群在提一次启动 Elasticsearch时,第四个提示告诉我们如何去配置集群:
ℹ️  Configure other nodes to join this cluster:
• On this node:
  ⁃ Create an enrollment token with `bin/elasticsearch-create-enrollment-token -s node`.
  ⁃ Uncomment the transport.host setting at the end of config/elasticsearch.yml.
  ⁃ Restart Elasticsearch.
• On other nodes:
  ⁃ Start Elasticsearch with `bin/elasticsearch --enrollment-token <token>`, using the enrollment token that you generated.
- 在当前节点操作: - 执行
bin/elasticsearch-create-enrollment-token -s node生成一个注册令牌;- elasticsearch.yml 中 打开transport.host的注释,设置IP(如果都没有配置 network的话,就不用修改);- 重启ES(不重启也行)。 - 其他节点操作: - 启动时命令
bin/elasticsearch --enrollment-token <token>,使用之前生成的令牌加入集群。
1、搭建三节点集群
⑴、再准备两个节点
因为我只有一个节点
elasticsearch-8.6.1
,现在把这个改为
node1
。
- 把elasticsearch-8.6.1改名为node1
- 再创建elasticsearch-8.6.1文件夹
- 把node1 移动到 elasticsearch-8.6.1
[root@VM-0-12-centos local]# mv elasticsearch-8.6.1 node1
[root@VM-0-12-centos local]# mkdir elasticsearch-8.6.1[root@VM-0-12-centos local]# mv node1/ elasticsearch-8.6.1/[root@VM-0-12-centos local]# cd elasticsearch-8.6.1/[root@VM-0-12-centos elasticsearch-8.6.1]# ls
node1
在
elasticsearch-8.6.1
内继续新建两个节点:
node2
,
node3
,并启动
node1
。注意这里新增的两个node 节点是从安装包中解压出来的没有启动过的节点,我试着直接用node1复制为node2却一直报错,只有使用全新节点才能启动成功。
[root@VM-0-12-centos ~]# ls
elasticsearch-8.6.1  elasticsearch-8.6.1-linux-x86_64.tar.gz  lnmp1.9  lnmp1.9.tar.gz  lnmp-install.log  mysql  reset_mysql_root_password.sh
[root@VM-0-12-centos ~]# cd /usr/local/elasticsearch-8.6.1/[root@VM-0-12-centos elasticsearch-8.6.1]# cp -rf /root/elasticsearch-8.6.1./node2/[root@VM-0-12-centos elasticsearch-8.6.1]# cp -rf /root/elasticsearch-8.6.1./node3/[root@VM-0-12-centos elasticsearch-8.6.1]# ls
data  logs  node1  node2  node3
[root@VM-0-12-centos elasticsearch-8.6.1]# chown -R elastic:elastic ./node2/[root@VM-0-12-centos elasticsearch-8.6.1]# chown -R elastic:elastic ./node3/[root@VM-0-12-centos elasticsearch-8.6.1]# su elastic
[elastic@VM-0-12-centos elasticsearch-8.6.1]$ ./node1/bin/elasticsearch -d
...
如果开启集群了,则必须开启Security,否则启动失败。
⑵、生成注册令牌,并试node2、node3加入集群
生成注册令牌并保存,用于后续节点接入。
[elastic@VM-0-12-centos elasticsearch-8.6.1]$ ./node1/bin/elasticsearch-create-enrollment-token -s node
warning: ignoring JAVA_HOME=/usr/local/java; using bundled JDK
eyJ2ZXIiOiI4LjYuMSIsImFkciI6WyIxNzIuMTcuMC4xMjo5MjAwIl0sImZnciI6ImYxMjRhMDkzOGQxMDM1OGIyZjU4ODZhYTdkYzExZjMxMzQwMGE1YjM0YTg3ZGQxYmRlOWNlNTgzNTE5OWVmNzYiLCJrZXkiOiJxTE1nWG9ZQmgwQ1VranhDTWNpbjpuS1dVZHRmclQ2aWtCMmRnNnZhUzVRIn0=[elastic@VM-0-12-centos elasticsearch-8.6.1]$
[elastic@VM-0-12-centos elasticsearch-8.6.1]$ ./node2/bin/elasticsearch -d --enrollment-token eyJ2ZXIiOiI4LjYuMSIsImFkciI6WyIxNzIuMTcuMC4xMjo5MjAwIl0sImZnciI6ImYxMjRhMDkzOGQxMDM1OGIyZjU4ODZhYTdkYzExZjMxMzQwMGE1YjM0YTg3ZGQxYmRlOWNlNTgzNTE5OWVmNzYiLCJrZXkiOiJxTE1nWG9ZQmgwQ1VranhDTWNpbjpuS1dVZHRmclQ2aWtCMmRnNnZhUzVRIn0=...[elastic@VM-0-12-centos elasticsearch-8.6.1]$ ./node3/bin/elasticsearch -d --enrollment-token eyJ2ZXIiOiI4LjYuMSIsImFkciI6WyIxNzIuMTcuMC4xMjo5MjAwIl0sImZnciI6ImYxMjRhMDkzOGQxMDM1OGIyZjU4ODZhYTdkYzExZjMxMzQwMGE1YjM0YTg3ZGQxYmRlOWNlNTgzNTE5OWVmNzYiLCJrZXkiOiJxTE1nWG9ZQmgwQ1VranhDTWNpbjpuS1dVZHRmclQ2aWtCMmRnNnZhUzVRIn0=...
###### 第三个节点因为服务器内存不够没有启动成功,不过应该是没问题的
通过路由
_cat/nodes?v
访问节点信息搭建成功。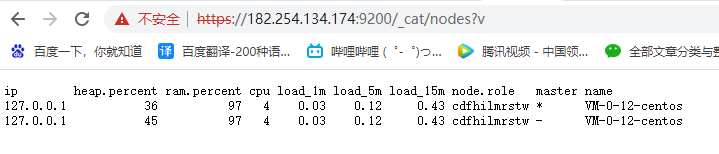
2、搭建集群时遇到的问题
注意:新节点加入集群,不要直接从老节点复制,重新从下载的压缩包中解压出来作为新节点,否则加入集群报错。
以下是我遇到的错误,我的解决办法就是解压新节点加入集群,不过对于配置文件的修改和 ES重启我还在不了解,后面熟悉后再补充。
⑴、从 node1 复制 node2 加入集群,报错
[elastic@VM-0-12-centos elasticsearch-8.6.1]$ ./node2/bin/elasticsearch -d --enrollment-token eyJ2ZXIiOiI4LjYuMSIsImFkciI6WyIxNzIuMTcuMC4xMjo5MjAwIl0sImZnciI6ImYxMjRhMDkzOGQxMDM1OGIyZjU4ODZhYTdkYzExZjMxMzQwMGE1YjM0YTg3ZGQxYmRlOWNlNTgzNTE5OWVmNzYiLCJrZXkiOiJjT1k1WG9ZQnh4RS1fTGNxX05ISzpoSHVSbTZla1Q1MmRtTDFKS2lHc21RIn0=
warning: ignoring JAVA_HOME=/usr/local/java; using bundled JDK

ERROR: Skipping security auto configuration because it appears that the node is not starting up for the first time. The node might already be part of a cluster and this auto setup utility is designed to configure Security for new clusters only.[elastic@VM-0-12-centos elasticsearch-8.6.1]$
后面我又重新生成证书,修改配置文件还是不行:
cannot read configured [PKCS12] keystore (as a truststore)
,node1节点都没有启动成功。
[elastic@VM-0-12-centos elasticsearch-8.6.1]$./elasticsearch-certutil ca
[elastic@VM-0-12-centos elasticsearch-8.6.1]$./elasticsearch-certutil cert --ca elastic-stack-ca.p12
然后把证书放到所有节点的 config/cert 目录下,并授权777(有的博客说是权限问题,还是不行)
[elastic@VM-0-12-centos elasticsearch-8.6.1]$ vim ./node1/config/elasticsearch.yml
修改配置文件:
 Enable encryption and mutual authentication between cluster nodes
xpack.security.transport.ssl:
  enabled: true
  verification_mode: certificate
  keystore.path:/usr/local/elasticsearch-8.6.1/node1/config/elastic-certificates.p12
  truststore.path:/usr/local/elasticsearch-8.6.1/node1/config/certs/elastic-certificates.p12

#node1 节点启动就报错[elastic@VM-0-12-centos elasticsearch-8.6.1]$ ./node1/bin/elasticsearch -d
...[2023-02-17T15:52:10,522][ERROR][o.e.b.Elasticsearch      ][VM-0-12-centos] fatal exception while booting Elasticsearchorg.elasticsearch.ElasticsearchSecurityException: failed to load SSL configuration [xpack.security.transport.ssl]- cannot read configured [PKCS12]keystore(as a truststore)[/usr/local/elasticsearch-8.6.1/node1/config/certs/elastic-certificates.p12]- this is usually caused by an incorrect password;(a keystore password was provided)
        at [email protected]/org.elasticsearch.xpack.core.ssl.SSLService.lambda$loadSslConfigurations$11(SSLService.java:605)
        at java.base/java.util.HashMap.forEach(HashMap.java:1429)
        at java.base/java.util.Collections$UnmodifiableMap.forEach(Collections.java:1553)
        at [email protected]/org.elasticsearch.xpack.core.ssl.SSLService.loadSslConfigurations(SSLService.java:601)
        at [email protected]/org.elasticsearch.xpack.core.ssl.SSLService.<init>(SSLService.java:156)

See logs for more details.

ERROR: Elasticsearch did not exit normally - check the logs at /usr/local/elasticsearch-8.6.1/node1/logs/elasticsearch.log
当前node1启动成功,然后从node1 复制出node2,删除 data文件夹和config下的cert,还原压缩包中最初始的 elasticsearch.yml文件,再加入集群还是报错已设置密码。
[elastic@VM-0-12-centos elasticsearch-8.6.1]$ ./node2/bin/elasticsearch -d --enrollment-token eyJ2ZXIiOiI4LjYuMSIsImFkciI6WyIxNzIuMTcuMC4xMjo5MjAwIl0sImZnciI6ImYxMjRhMDkzOGQxMDM1OGIyZjU4ODZhYTdkYzExZjMxMzQwMGE1YjM0YTg3ZGQxYmRlOWNlNTgzNTE5OWVmNzYiLCJrZXkiOiJfZ253WFlZQjNVQ09sbVI3TDRaajpKYWthYU5kZVFmV0J5VldmcVhEd0ZRIn0=
warning: ignoring JAVA_HOME=/usr/local/java; using bundled JDK

ERROR: Aborting auto configuration because the node keystore contains password settings already
五、Kibana安装
这里就只操作linux环境的Kibana安装。
1、下载Kibana
选择与上面ES 相同版本的Kibana: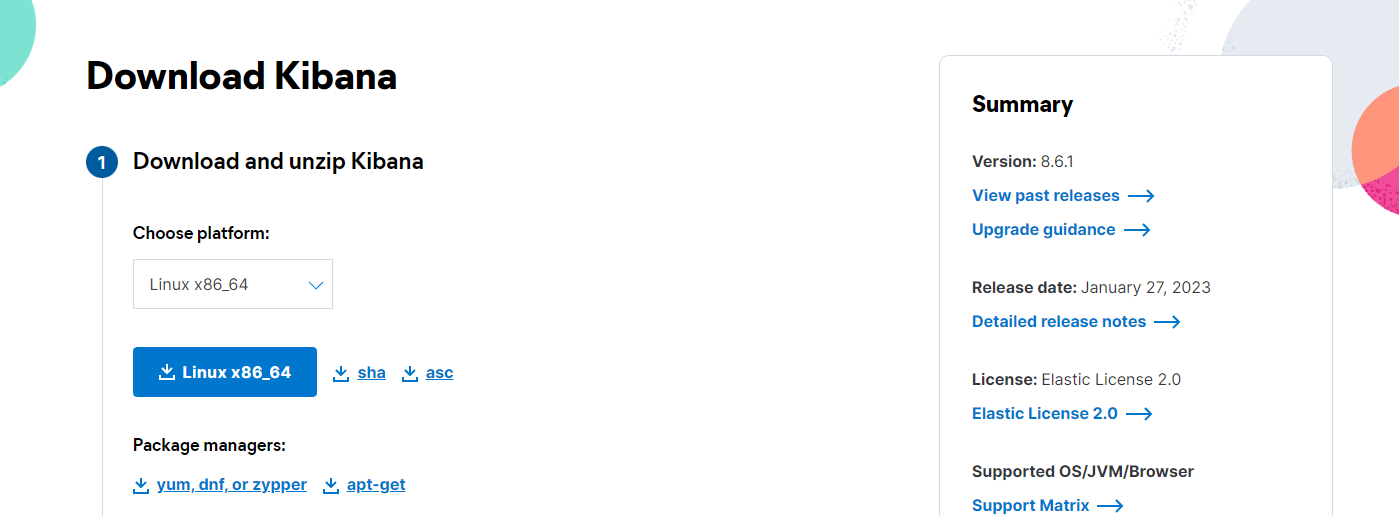
我把ES和kibana都放在了elk 这个文件夹中:
[elastic@VM-0-12-centos elk]$ ls
elasticsearch-8.6.1[elastic@VM-0-12-centos elk]$ wget https://artifacts.elastic.co/downloads/kibana/kibana-8.6.1-linux-x86_64.tar.gz[elastic@VM-0-12-centos elk]$ tar -zxvf kibana-8.6.1-linux-x86_64.tar.gz
[elastic@VM-0-12-centos elk]$ rm-f kibana-8.6.1-linux-x86_64.tar.gz
[elastic@VM-0-12-centos elk]$ ls
elasticsearch-8.6.1  kibana-8.6.1
2、启动kibana
首先前去服务器云平台上的安全组中配置 5601 端口对外开放。kibana的目录结构和es的基本一样,先去修改配置文件 kibana-8.6.1/config/kibana.yml :
#  取消这两行注释
server.port:5601
server.host:"0.0.0.0" # 配置成0.0.0.0,允许所有人访问
启动 kibana:
[elastic@VM-0-12-centos elk]$ ./kibana-8.6.1/bin/kibana &[1]6166[elastic@VM-0-12-centos elk]$ [2023-02-17T17:13:54.672+08:00][INFO ][node] Kibana process configured with roles:[background_tasks, ui][2023-02-17T17:14:06.325+08:00][INFO ][plugins-service] Plugin "cloudChat" is disabled.[2023-02-17T17:14:06.339+08:00][INFO ][plugins-service] Plugin "cloudExperiments" is disabled.[2023-02-17T17:14:06.339+08:00][INFO ][plugins-service] Plugin "cloudFullStory" is disabled.[2023-02-17T17:14:06.339+08:00][INFO ][plugins-service] Plugin "cloudGainsight" is disabled.[2023-02-17T17:14:06.345+08:00][INFO ][plugins-service] Plugin "profiling" is disabled.[2023-02-17T17:14:06.425+08:00][INFO ][http.server.Preboot] http server running at http://0.0.0.0:5601[2023-02-17T17:14:06.466+08:00][INFO ][plugins-system.preboot] Setting up [1] plugins:[interactiveSetup][2023-02-17T17:14:06.472+08:00][INFO ][preboot]"interactiveSetup" plugin is holding setup: Validating Elasticsearch connection configuration…
[2023-02-17T17:14:06.518+08:00][INFO ][root] Holding setup until preboot stage is completed.
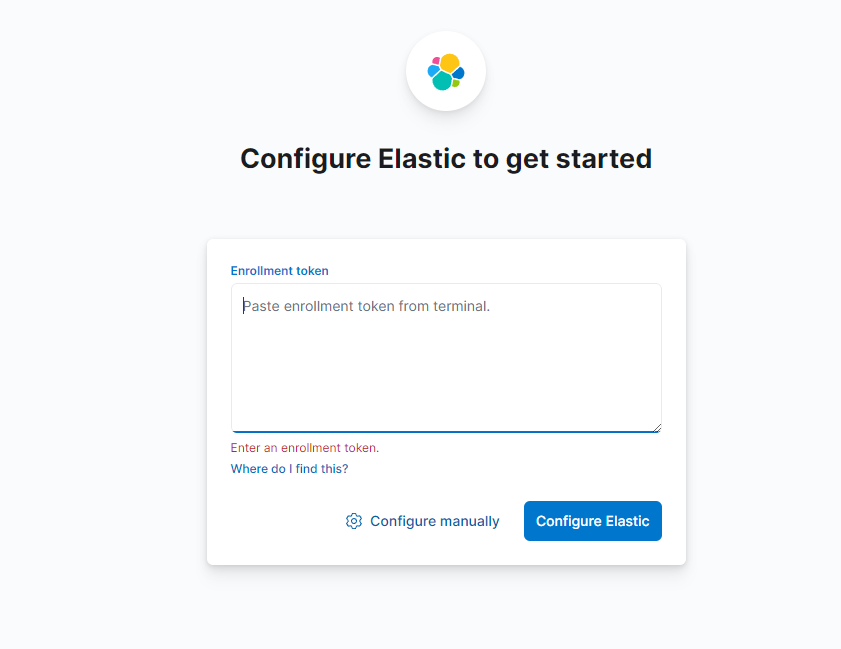
i Kibana has not been configured.
Go to http://0.0.0.0:5601/?code=097060 to get started.[elastic@VM-0-12-centos elk]$
我这里执行
./kibana-8.6.1/bin/kibana &
后,会随着连接超时断掉,总是需要不断的启动,后来我使用这个命令
./kibana-8.6.2/bin/kibana >/dev/null &
,就没有自动停止了。
关键在于最后的 >/dev/null 2>&1 部分,/dev/null是一个虚拟的空设备(类似物理中的黑洞),任何输出信息被重定向到该设备后,将会石沉大海
- /dev/null 表示将标准输出信息重定向到"黑洞"
- 2>&1 表示将标准错误重定向到标准输出(由于标准输出已经定向到“黑洞”了,即:标准输出此时也是"黑洞",再将标准错误输出定向到标准输出,相当于错误输出也被定向至“黑洞”)
参考:Linux中Kibana部署。
3、使用kibana操作ES
node1 创建 token:
[elastic@VM-0-12-centos elk]$ ./elasticsearch-8.6.1/node1/bin/elasticsearch-create-enrollment-token -s kibana
warning: ignoring JAVA_HOME=/usr/local/java; using bundled JDK
eyJ2ZXIiOiI4LjYuMSIsImFkciI6WyIxNzIuMTcuMC4xMjo5MjAwIl0sImZnciI6ImMwNmRhZTljZTc1N2YxOWY1ZDM2MWUwYWMzMGVkOTgwZmFiNjcxOWRlODEzNDNkZmNlZDM1MTJiZDM2MjE0NmYiLCJrZXkiOiJvUXFyWG9ZQkJXaDNyN2FSc2d1TDotMHdFVzRWMVQ2YUtzZUhGZ1lON2NBIn0=[elastic@VM-0-12-centos elk]$ ls
确认,下一步开始登录就是之前启动的,elastic的用户名密码: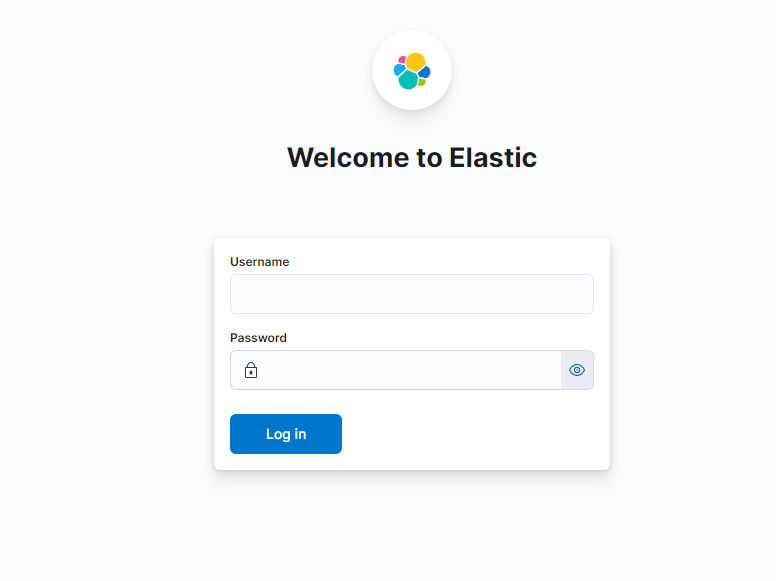
登录成功:
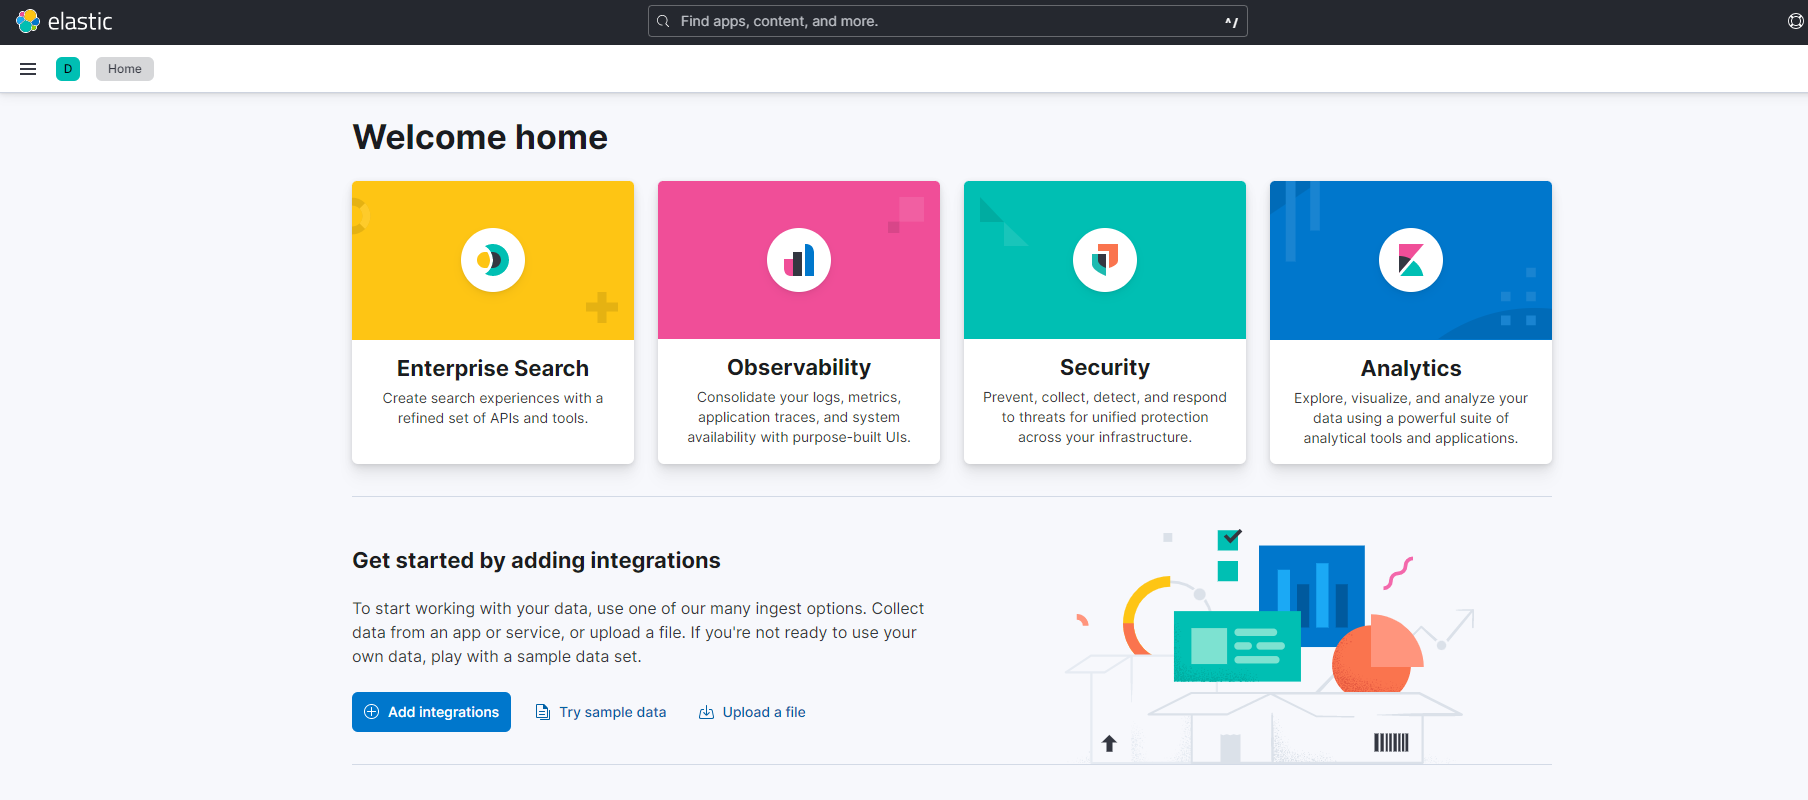
打开
Dev Tools
开发工具,开始测试:

Kibana 汉化,修改配置文件:
i18n.locale: "zh-CN"
。
#Specifies locale to be used for all localizable strings, dates and number formats.#Supported languages are the following:English(default)"en", Chinese "zh-CN", Japanese "ja-JP", French "fr-FR".
i18n.locale:"zh-CN"  # 这一行默认是注释的改成 zh-CN
参考:
linux环境下安装 Elasticsearch 8
Elasticsearch基础1——搜索引擎发展史和工作流程、es/es-head/kibana的基础安装
版权归原作者 云三木 所有, 如有侵权,请联系我们删除。