目录
前言
在使用Qt框架开发软件时,为了美观和更好的用户体验,需要为各种控件设置样式。一些通用且简单的样式如背景色、边框、字体字号等,基本上写过Qt样式的猿们都能记住,但是像日历、树形控件、Tab页控件等复合控件的样式则很难凭记忆写出来。所以本篇除了总结Qt设置样式的几种方式之外,还总结了几个复合控件的样式设置。
1、Qt设置样式的几种方式
- 在代码中设置控件的样式(最不推荐)
- 在ui文件中设置样式
- 将所有样式写到一个或几个qss文件中,根据需要通过setStyleSheet函数加载(推荐)
2、几种复合控件的样式设置
QTableWidget
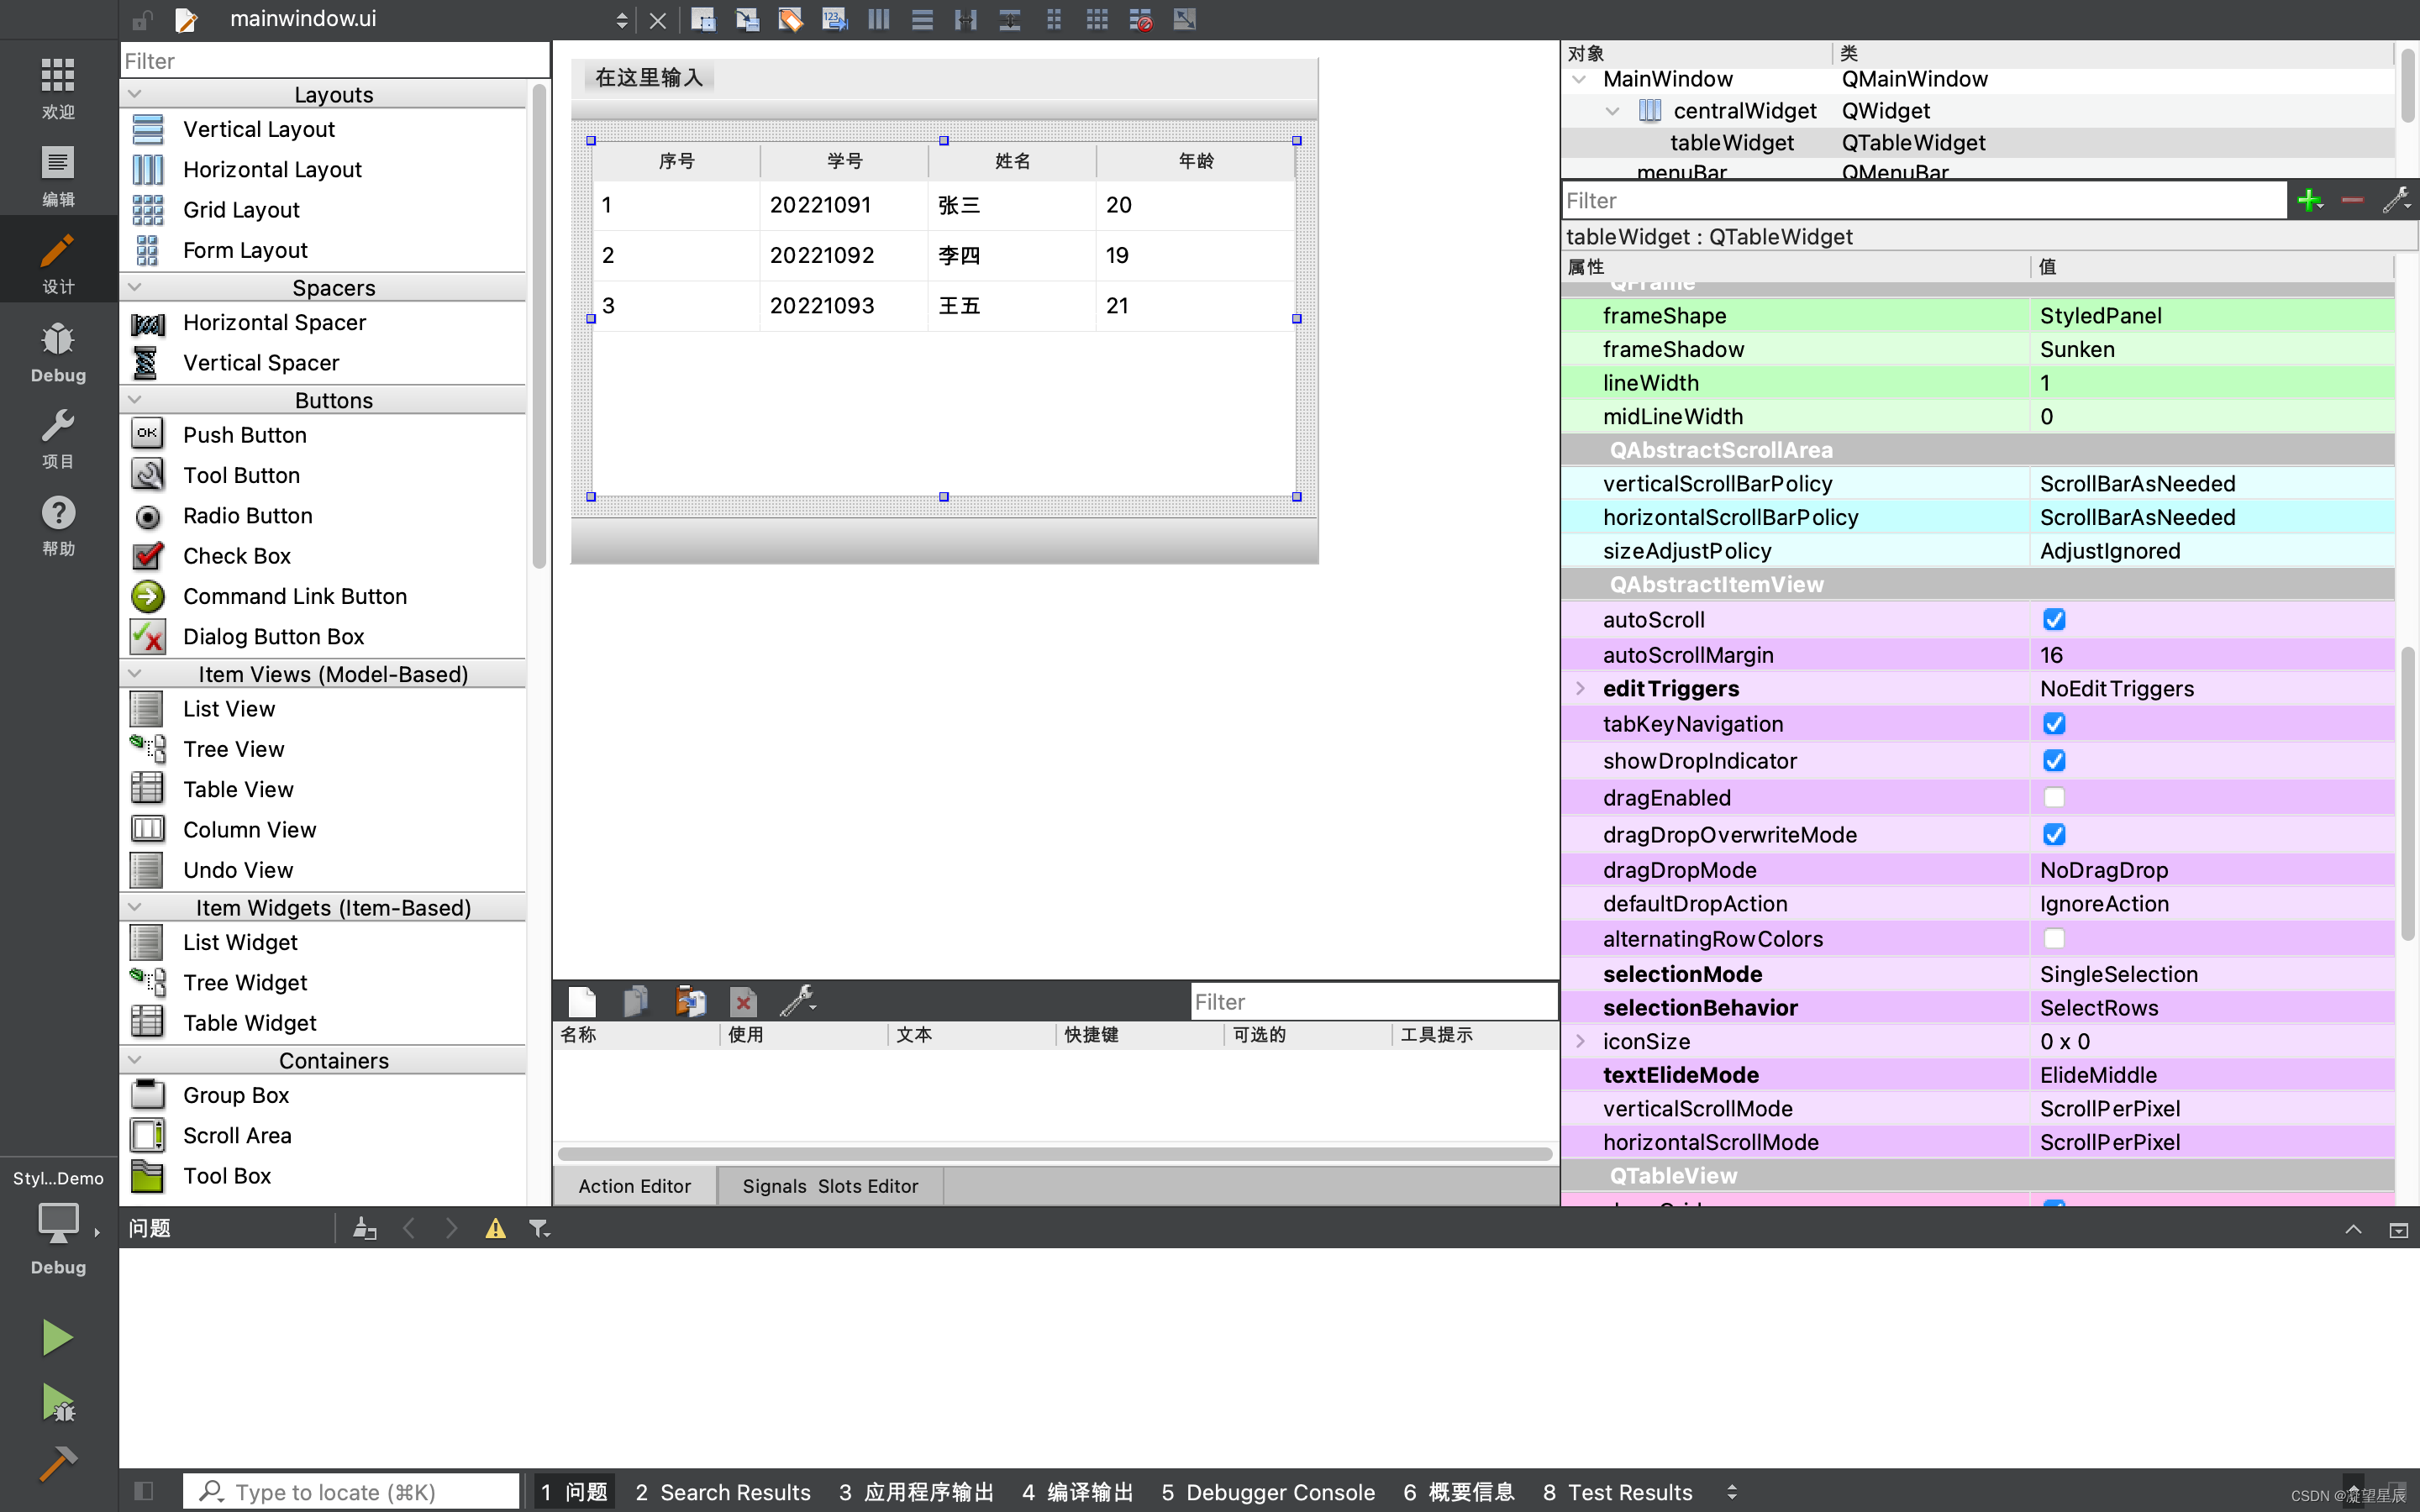
当用到QTableWidget时,我们可以在UI文件中拖入一个,其基本的显示属性可以在UI中设置,也可以写代码设置。在下图中可以看到一个QTableWidget,添加了表头和3条数据,右侧是基本属性,黑色粗体部分是已经设置过的,非粗体是默认设置。
在qss文件中添加样式如下
/*设置表头样式*/QHeaderView::section{background-color:rgb(50,200,255);color: white;padding-left: 4px;border: 1px solid #6ce0ff;}QHeaderView::section:checked{background-color:rgb(0,200,255);}/*设置表格样式*/QTableView{show-decoration-selected: 1;}QTableView::item{height: 30px;text-align:center;}QTableView::item:selected{border: 1px solid #6a6ea9;color:white;}QTableView::item:selected:!active{background:qlineargradient(x1: 0,y1: 0,x2: 0,y2: 1,stop: 0 #ABAFE5,stop: 1 #8588B2);}QTableView::item:selected:active{background:qlineargradient(x1: 0,y1: 0,x2: 0,y2: 1,stop: 0 #6a6ea9,stop: 1 #888dd9);}QTableView::item:hover{background:rgb(50,100,200);color:white;}
运行效果如下图所示。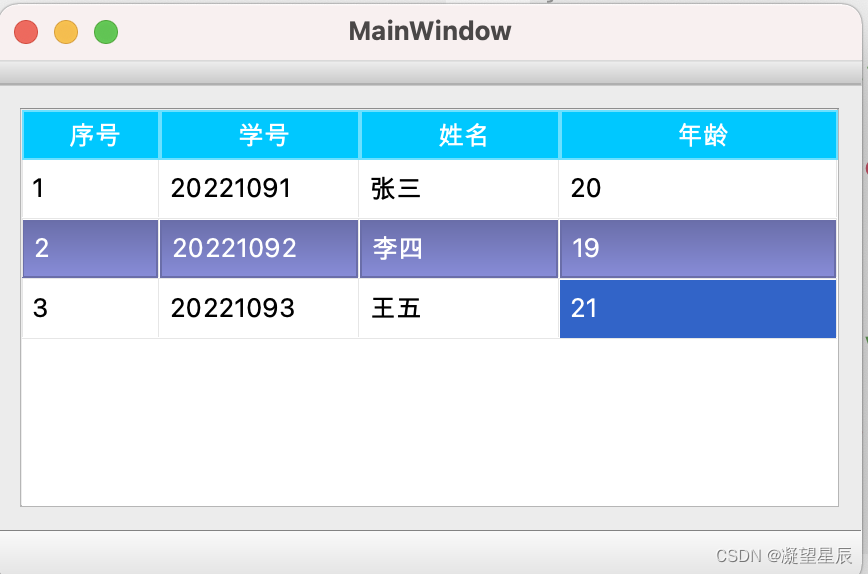
QCalendarWidget
QCalendarWidget 控件一般与QDateEdit 或 QDateTimeEdit 控件配合使用,在UI中拖入一个QDateEdit控件,勾选 calendarPopup,这样在点击日期控件右侧按钮时就会弹出日历控件。UI图如下所示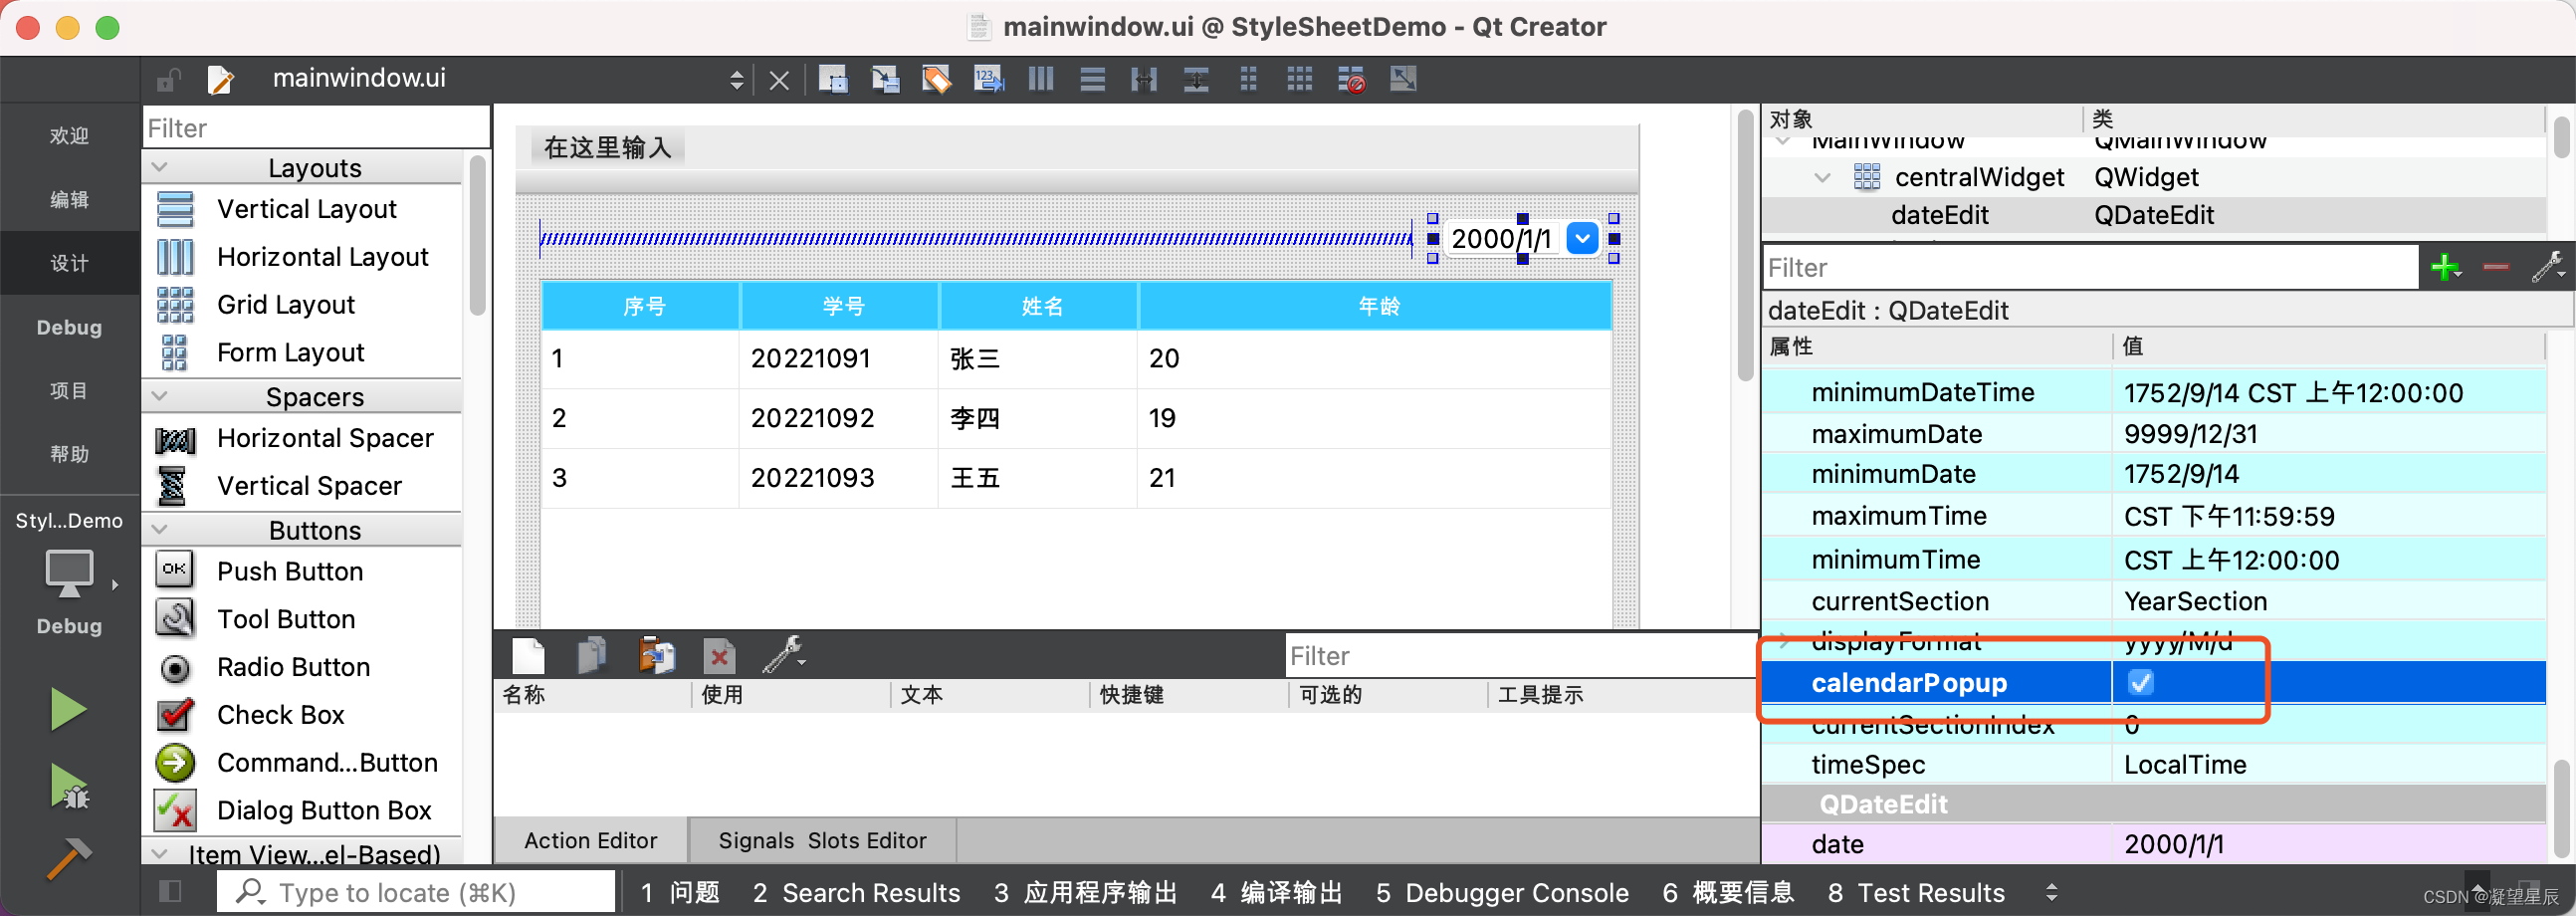
设置QDateEdit 和 QCalendarWidget 的样式
/*设置QDateEdit样式*/QDateEdit{min-height:45px;border: 1px solid rgba(0,200,255);}QDateEdit::drop-down{background-color: transparent;image:url(:/images/rili.png);min-width: 40px;min-height:40px;}/*设置QCalendarWidget样式*/QCalendarWidget QWidget#qt_calendar_navigationbar{background-color: #2F5F8E;}QCalendarWidget QToolButton{background-color:transparent;min-width:23px;max-width:23px;min-height:23px;max-height:23px;}QCalendarWidget QToolButton:hover{background-color:rgb(134,193,251);color:black;}QCalendarWidget QToolButton#qt_calendar_monthbutton{background-color:transparent;min-width:50px;max-width:50px;min-height:23px;max-height:23px;}QCalendarWidget QToolButton#qt_calendar_monthbutton:hover ,#qt_calendar_yearbutton:hover{background-color:rgb(134,193,251, 100);color:black;}QCalendarWidget QToolButton#qt_calendar_prevmonth{background-color:transparent;min-width: 30px;min-height: 30px;qproperty-icon:url(:/images/zuojiantou.png)}QCalendarWidget QToolButton#qt_calendar_nextmonth{background-color:transparent;min-width: 30px;min-height: 30px;qproperty-icon:url(:/images/youjiantou.png);}QCalendarWidget QToolButton#qt_calendar_monthbutton,#qt_calendar_yearbutton{min-width: 70px;color:rgb(134,193,251);font: 14px;}
运行效果如下图所示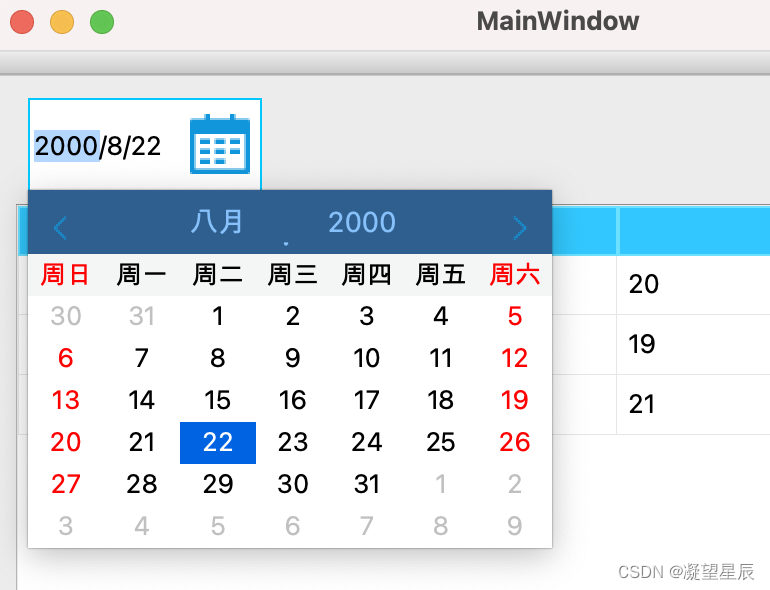
QTreeWidget
设置QTreeWidget样式
QTreeView::branch:has-siblings:!adjoins-item{border-image:url(:/images/stylesheet-vline.png) 0;}QTreeView::branch:has-siblings:adjoins-item{border-image:url(:/images/stylesheet-branch-more.png) 0;}QTreeView::branch:!has-children:!has-siblings:adjoins-item{border-image:url(:/images/stylesheet-branch-end.png) 0;}QTreeView::branch:has-children:!has-siblings:closed,
QTreeView::branch:closed:has-children:has-siblings{border-image: none;image:url(:/images/stylesheet-branch-closed.png);}QTreeView::branch:open:has-children:!has-siblings,
QTreeView::branch:open:has-children:has-siblings{border-image: none;image:url(:/images/stylesheet-branch-open.png);}
运行效果: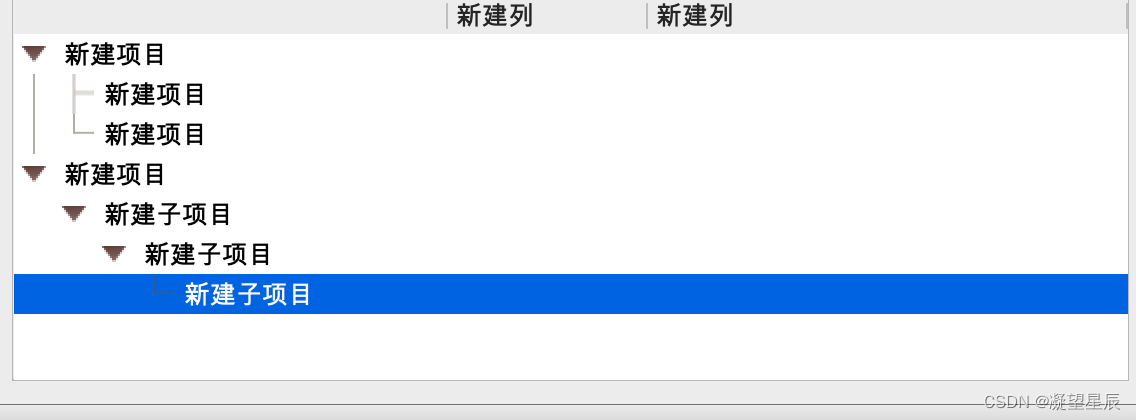

样式表中的图片名称与对应的图片如下图所示,实际应用时按照下图所示的效果切图,替换样式表中对应的图片即可。
QSpinBox
设置QSpinBox样式
QSpinBox{min-height: 40px;min-width: 80px;padding-right: 5px;background-color:rgb(255, 159, 94);border-width: 3;font-size: 14px;color: blue;}QSpinBox::up-button{subcontrol-origin: border;subcontrol-position: top right;/* position at the top right corner */width: 20px;/* 16 + 2*1px border-width = 15px padding + 3px parent border */border-image:url(:/images/shangjiantou.png) 1;border-width: 1px;}QSpinBox::down-button{subcontrol-origin: border;subcontrol-position: bottom right;/* position at bottom right corner */width: 20px;border-image:url(:/images/xiajiantou.png) 1;border-width: 1px;border-top-width: 0;}
运行效果:
QComboBox
设置QComboBox样式如下
QComboBox{border: 1px solid rgb(131, 255, 0);border-radius: 3px;padding: 1px 18px 1px 3px;min-width: 200px;min-height: 40px;border-image:url(:/images/comboxbg.png);}QComboBox:editable{background: yellow;}QComboBox:!editable, QComboBox::drop-down:editable{background:qlineargradient(x1: 0,y1: 0,x2: 0,y2: 1,stop: 0 #E1E1E1,stop: 0.4 #DDDDDD,stop: 0.5 #D8D8D8,stop: 1.0 #D3D3D3);}/* QComboBox gets the "on" state when the popup is open */QComboBox:!editable:on, QComboBox::drop-down:editable:on{background:qlineargradient(x1: 0,y1: 0,x2: 0,y2: 1,stop: 0 #D3D3D3,stop: 0.4 #D8D8D8,stop: 0.5 #DDDDDD,stop: 1.0 #E1E1E1);}QComboBox:on{/* shift the text when the popup opens */padding-top: 3px;padding-left: 4px;}QComboBox::drop-down{min-width: 40px;min-height:40px;subcontrol-origin: padding;subcontrol-position: top right;width: 15px;border-left-width: 1px;border-left-color: darkgray;border-left-style: solid;/* just a single line */border-top-right-radius: 3px;/* same radius as the QComboBox */border-bottom-right-radius: 3px;}QComboBox::down-arrow{min-height: 20px;min-width: 20px;image:url(:/images/xiajiantou.png);}QComboBox::down-arrow:on{/* shift the arrow when popup is open */top: 1px;left: 1px;}QComboBox QAbstractItemView{border: 2px solid darkgray;selection-background-color: lightgray;}
运行效果
以上就是本篇的所有内容了,有疑问的朋友欢迎评论区留言讨论!
版权归原作者 凝望星辰 所有, 如有侵权,请联系我们删除。