
提示:文章写完后,目录可以自动生成,如何生成可参考右边的帮助文档
文章目录
前言
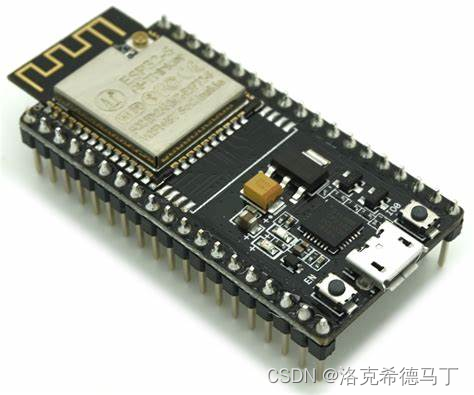
之前用了很多注入STM32、树莓派Pico和Arduino nano等板子,但是都不带Wifi和蓝牙功能。蓝牙我用的不多,倒是开发的程序中网络程序蛮多的,所以就购买了一个。经过一下午的琢磨终于把功能跑通了。
我买的板子有两个版本ESP32-WROOM-32D和ESP32-WROOM-32U,32U比32D多一个天线插槽。
一、下载Arduino IDE
应该来说Arduino IDE是一个相当易用的IDE了,支持的MCU也多,个人觉得如果你习惯使用C开发那么Arduino IDE无疑更适合你。如果你是Python开发者,那么Thonny也是可以的。
Arduino IDE还有一个非常好的功能,那就是它为很多MCU都提供了示例程序,对新手非常友好,一会教你怎么使用。
官方下载链接
选择适合自己系统的版本: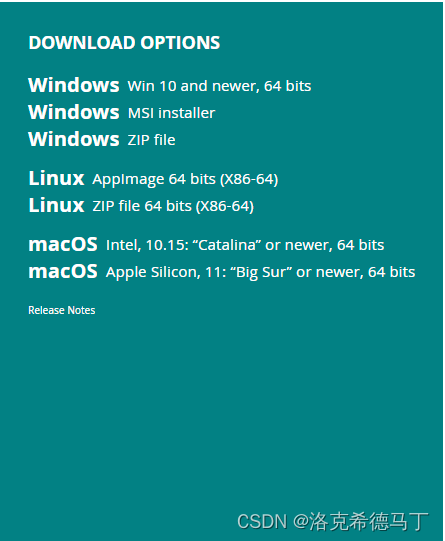
安装就不多说了,很简单。
二、安装工具集
打开Arduino IDE并在侧边栏找到开发板管理器,在搜索框输入esp32并选择跟我一样的选项并点击安装,会有点慢,耐心等待完成。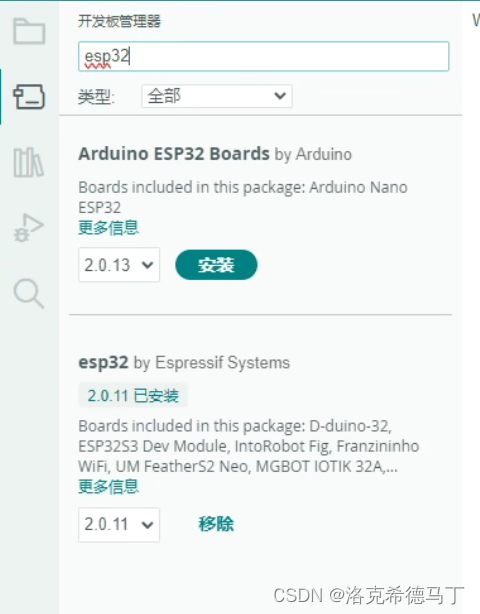
三、测试样例
这里直接就以WIFI为例了,确保你和我的板子是同一块板子。
1.选则开发板
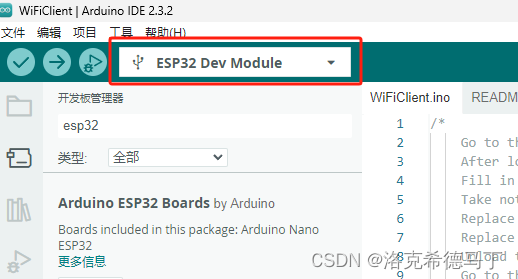
首先在工具里面找到开发板选项: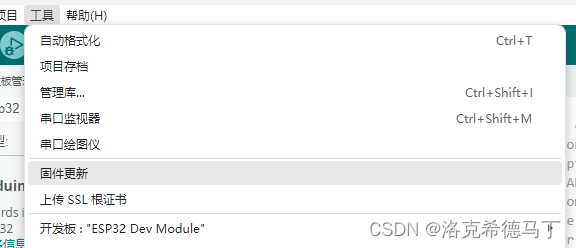
展开并找到ESP32 Dev Module:
注意:千万型号别选错!
2.连接开发板
找一根USB数据线,一头是USB-A,另一头是Micro-USB的将开发板接到电脑上。这里默认你已经安装了串口驱动了。如果你成功了,你和我的配置应该是一样的。
开发板型号:
串口连接状态:
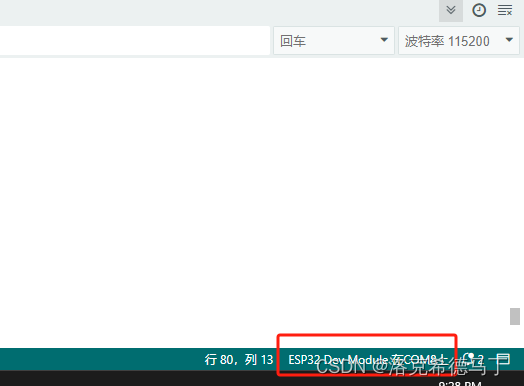
注意:你的串口不一定是COM8,实际的串口和你的系统有关系,总之能连接就对了,打感叹号就是硬件不识别,检查下是不是驱动没装好。
3.示例程序
创建一个新项目将下面的代码复制到新项目中:
注意:一定要2.4G,这个板子不支持5G的无线网!
/*
    Go to thingspeak.com and create an account if you don't have one already.
    After logging in, click on the "New Channel" button to create a new channel for your data. This is where your data will be stored and displayed.
    Fill in the Name, Description, and other fields for your channel as desired, then click the "Save Channel" button.
    Take note of the "Write API Key" located in the "API keys" tab, this is the key you will use to send data to your channel.
    Replace the channelID from tab "Channel Settings" and privateKey with "Read API Keys" from "API Keys" tab.
    Replace the host variable with the thingspeak server hostname "api.thingspeak.com"
    Upload the sketch to your ESP32 board and make sure that the board is connected to the internet. The ESP32 should now send data to your Thingspeak channel at the intervals specified by the loop function.
    Go to the channel view page on thingspeak and check the "Field1" for the new incoming data.
    You can use the data visualization and analysis tools provided by Thingspeak to display and process your data in various ways.
    Please note, that Thingspeak accepts only integer values.

    You can later check the values at https://thingspeak.com/channels/2005329
    Please note that this public channel can be accessed by anyone and it is possible that more people will write their values.
 */#include<WiFi.h>constchar* ssid     ="这里改成你的无线网名称";// Change this to your WiFi SSIDconstchar* password ="这里改成你的无线网密码";// Change this to your WiFi passwordconstchar* host ="api.thingspeak.com";// This should not be changedconstint httpPort =80;// This should not be changedconst String channelID   ="2005329";// Change this to your channel IDconst String writeApiKey ="V6YOTILH9I7D51F9";// Change this to your Write API keyconst String readApiKey ="34W6LGLIFXD56MPM";// Change this to your Read API key// The default example accepts one data filed named "field1"// For your own server you can ofcourse create more of them.int field1 =0;int numberOfResults =3;// Number of results to be readint fieldNumber =1;// Field number which will be read outvoidsetup(){
    Serial.begin(115200);while(!Serial){delay(100);}// We start by connecting to a WiFi network

    Serial.println();
    Serial.println("******************************************************");
    Serial.print("Connecting to ");
    Serial.println(ssid);

    WiFi.begin(ssid, password);while(WiFi.status()!= WL_CONNECTED){delay(500);
        Serial.print(".");}

    Serial.println("");
    Serial.println("WiFi connected");
    Serial.println("IP address: ");
    Serial.println(WiFi.localIP());}voidreadResponse(WiFiClient *client){unsignedlong timeout =millis();while(client->available()==0){if(millis()- timeout >5000){
      Serial.println(">>> Client Timeout !");
      client->stop();return;}}// Read all the lines of the reply from server and print them to Serialwhile(client->available()){
    String line = client->readStringUntil('\r');
    Serial.print(line);}

  Serial.printf("\nClosing connection\n\n");}voidloop(){
  WiFiClient client;
  String footer =String(" HTTP/1.1\r\n")+"Host: "+String(host)+"\r\n"+"Connection: close\r\n\r\n";// WRITE --------------------------------------------------------------------------------------------if(!client.connect(host, httpPort)){return;}

  client.print("GET /update?api_key="+ writeApiKey +"&field1="+ field1 + footer);readResponse(&client);// READ --------------------------------------------------------------------------------------------

  String readRequest ="GET /channels/"+ channelID +"/fields/"+ fieldNumber +".json?results="+ numberOfResults +" HTTP/1.1\r\n"+"Host: "+ host +"\r\n"+"Connection: close\r\n\r\n";if(!client.connect(host, httpPort)){return;}

  client.print(readRequest);readResponse(&client);// -------------------------------------------------------------------------------------------------++field1;delay(10000);}
编译并上传代码,设备会自动重启并执行代码。成功了就是下面的样子:
Status: 200 OK
Cache-Control: max-age=7, private
Access-Control-Allow-Origin: *
Access-Control-Max-Age: 1800
X-Request-Id: 9e90e7b7-8612-499e-a179-3e1bfcde272c
Access-Control-Allow-Headers: origin, content-type, X-Requested-With
Access-Control-Allow-Methods: GET, POST, PUT, OPTIONS, DELETE, PATCH
ETag: W/"1fdaff80268c18103424af2182ddf550"
X-Frame-Options: SAMEORIGIN

1e9
{"channel":{"id":2005329,"name":"WiFiCLient example","description":"Default setup for Arduino ESP32 WiFiClient example","latitude":"0.0","longitude":"0.0","field1":"data0","created_at":"2023-01-11T15:56:08Z","updated_at":"2023-01-13T08:13:58Z","last_entry_id":891510},"feeds":[{"created_at":"2024-05-09T13:32:01Z","entry_id":891508,"field1":"50"},{"created_at":"2024-05-09T13:32:22Z","entry_id":891509,"field1":"635"},{"created_at":"2024-05-09T13:32:41Z","entry_id":891510,"field1":"53"}]}0

Closing connection
注:这款设备带内置天线,不用额外装天线,但是也不要遮挡信号,尽量选空旷的地方!。
如果你的串口输出的是
乱码
就把
波特率
改成
115200
,我这块板子是115200。
四、使用官方示例程序
实话实说Arduino IDE和Thonny半斤八两,像一个半成品,比起Clion那样的程序就太小儿科了。但是架不住人家有示例程序,这点就很方便,对新手可以说太友好了!
首先选则你要在哪个开发板上开发,上面已经教过了,这一步很重要,因为Arduino IDE几乎为所有支持的开发板都准备了
示例程序
,而且每个开发板都是不一样的。
打开工具栏上的
文件
选项卡,找到
示例
,这里介绍下内置示例和ESP32 Dev Module示例的区别:内置示例是IDE内置的,几乎所有的开发板代码都是差不多的,但是内置示例不是所有的开发板都一定可以运行!而配套示例就是和我们开发板相关的示例了,我试了下很多是可以运行的,应该来说都能运行。
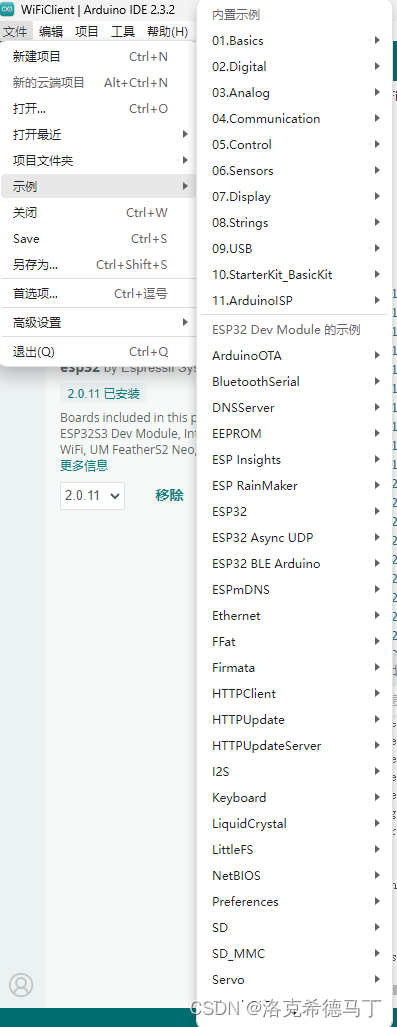
注意:有些示例可以直接运行,比如我发的WIFI示例,无线网卡是内置的,还有些需要外设配和,比如摄像头等等!
总结
1、蛮简单的,不过比树莓派Pico略微复杂
2、除了Arduino IDE可以开发,Clion(基于Arduino框架)也可以开发还有Thonny等等。
版权归原作者 洛克希德马丁 所有, 如有侵权,请联系我们删除。